Ready to draw a cute bunny heading off to school?
In this step-by-step guide, you’ll learn how to create an adorable school bunny with fun and simple instructions.
This drawing tutorial makes it easy to bring your own cute bunny character to life.
In this post today, I will share with you guy a step-by-step to draw a cute school cat.
Follow this simple steps below by Cutethingcorner.com that will help you draw a cute school bunny.
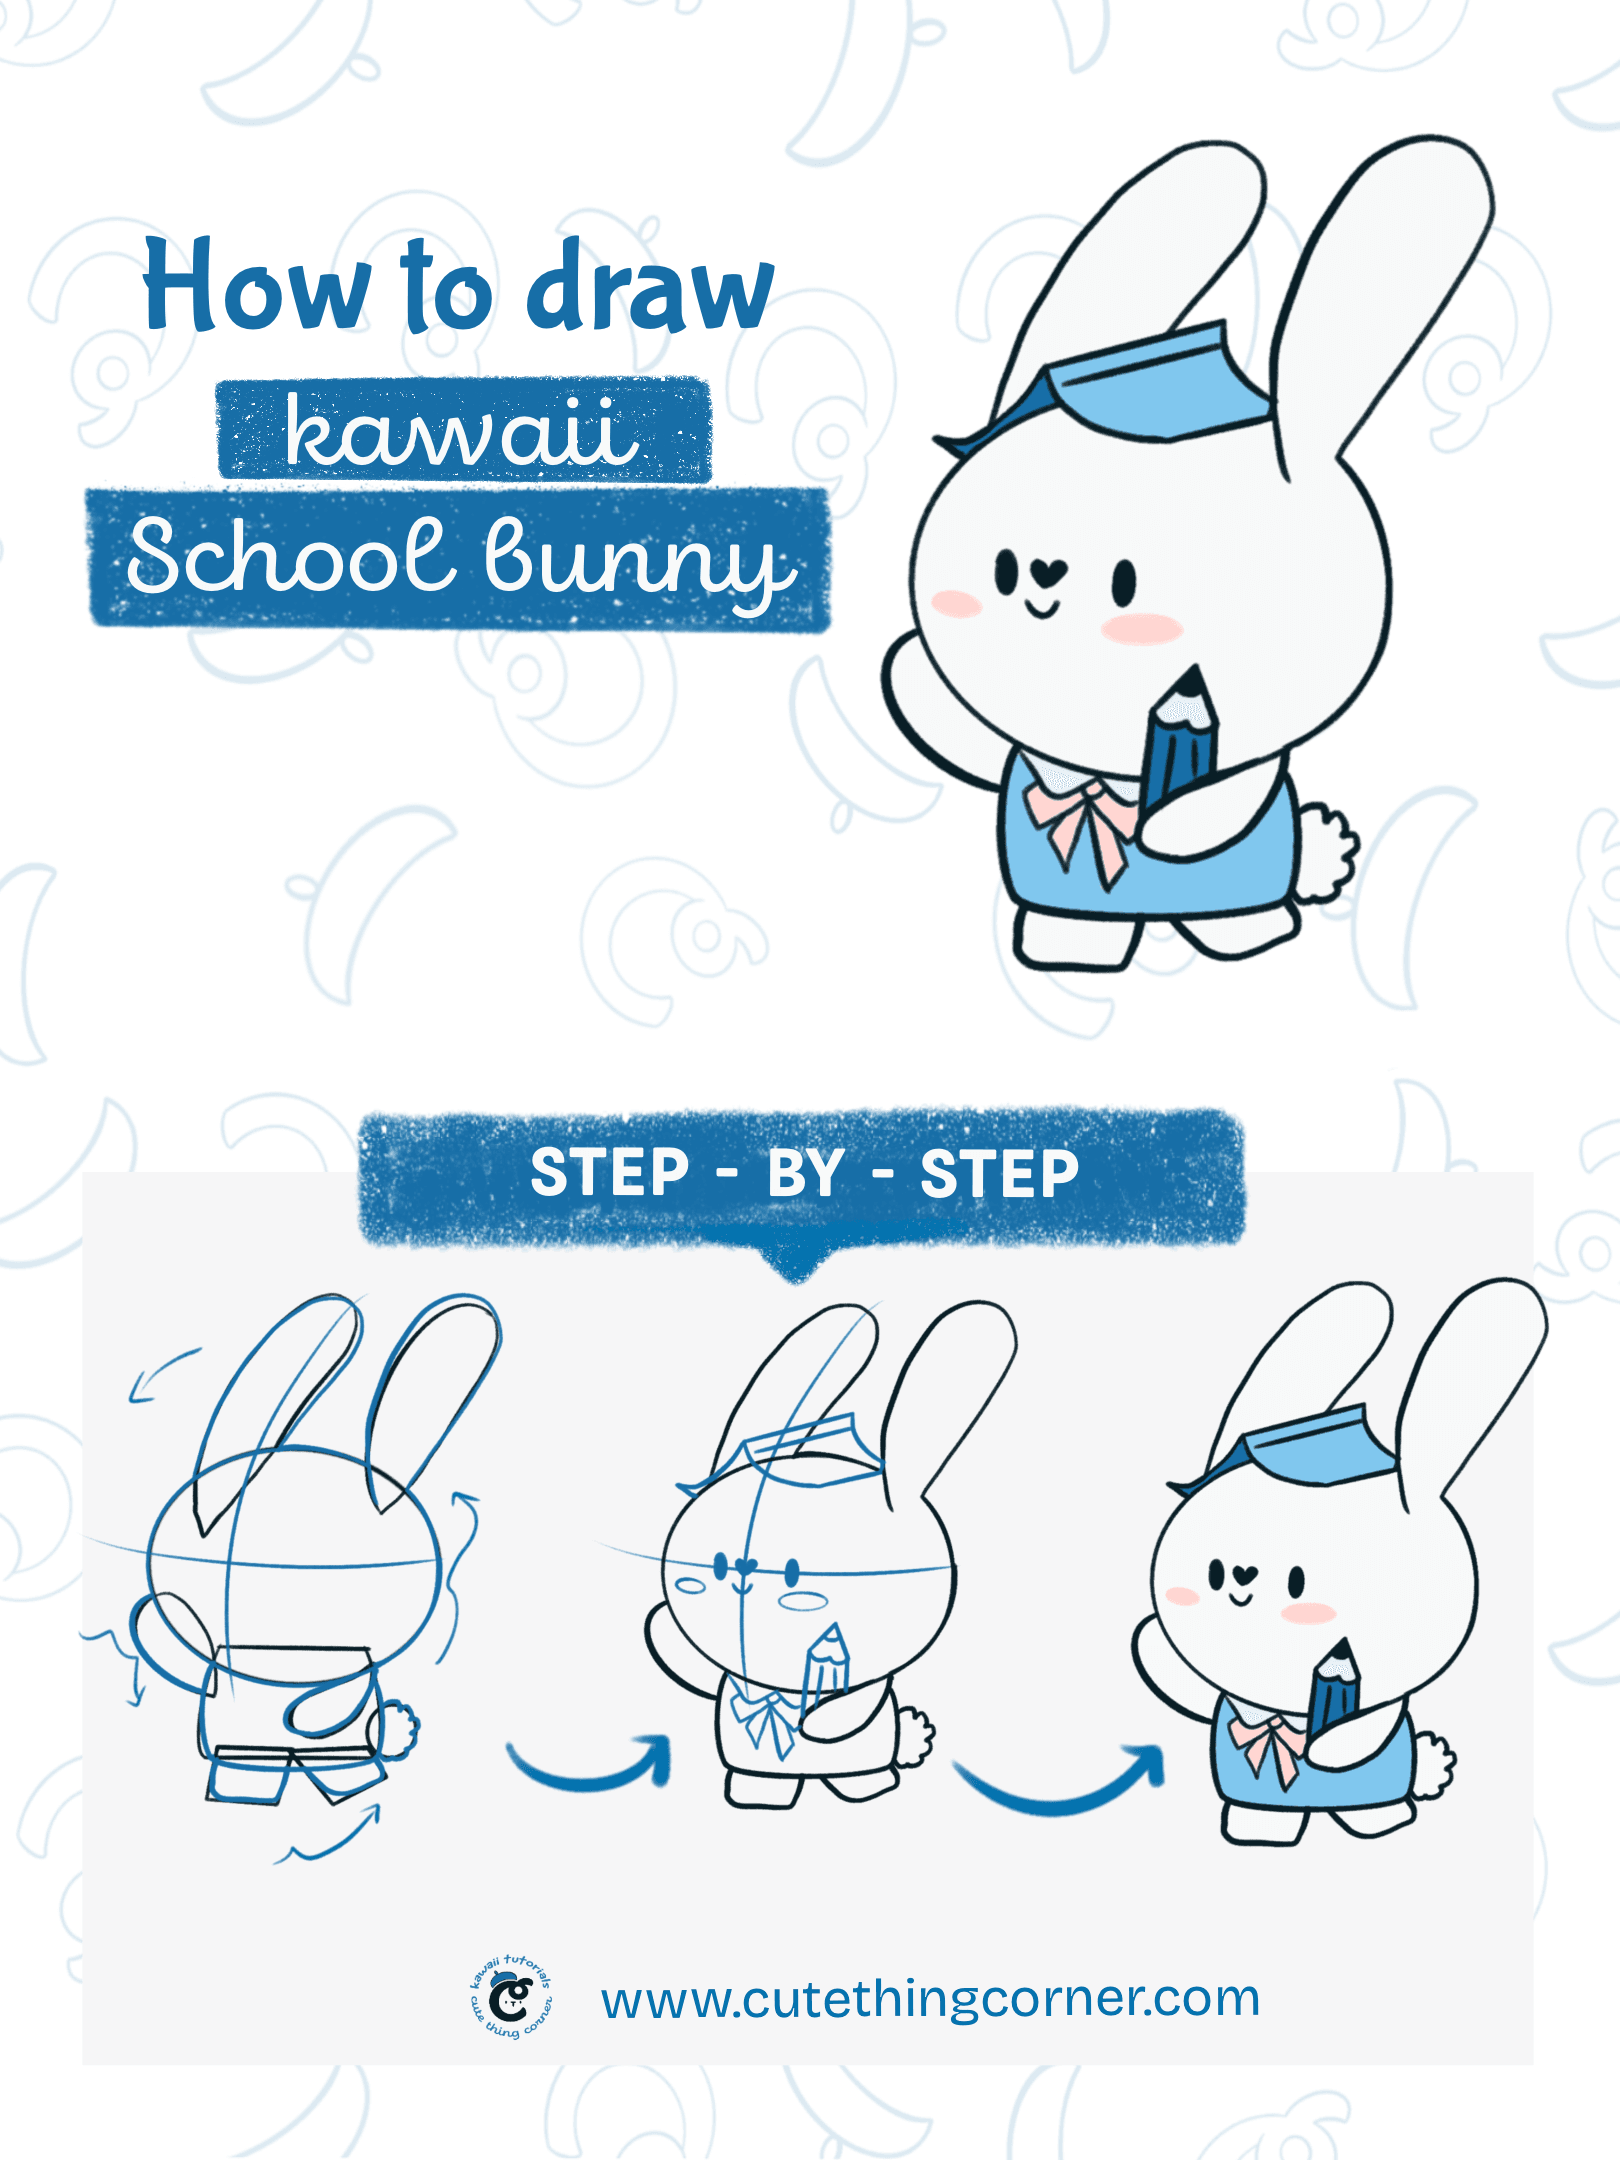
How to draw a kawaii school bunny
It’s easy to start. So let’s get started.
You just have paper and a pencil to start. Color will belong to your favorite or using an Ipad and pencil.
Whatever makes you comfortable to start.
Now jump into step-by-step to draw cute school bunny.
#Step 1: Draw a big ellipse shape for the bunny’s head.
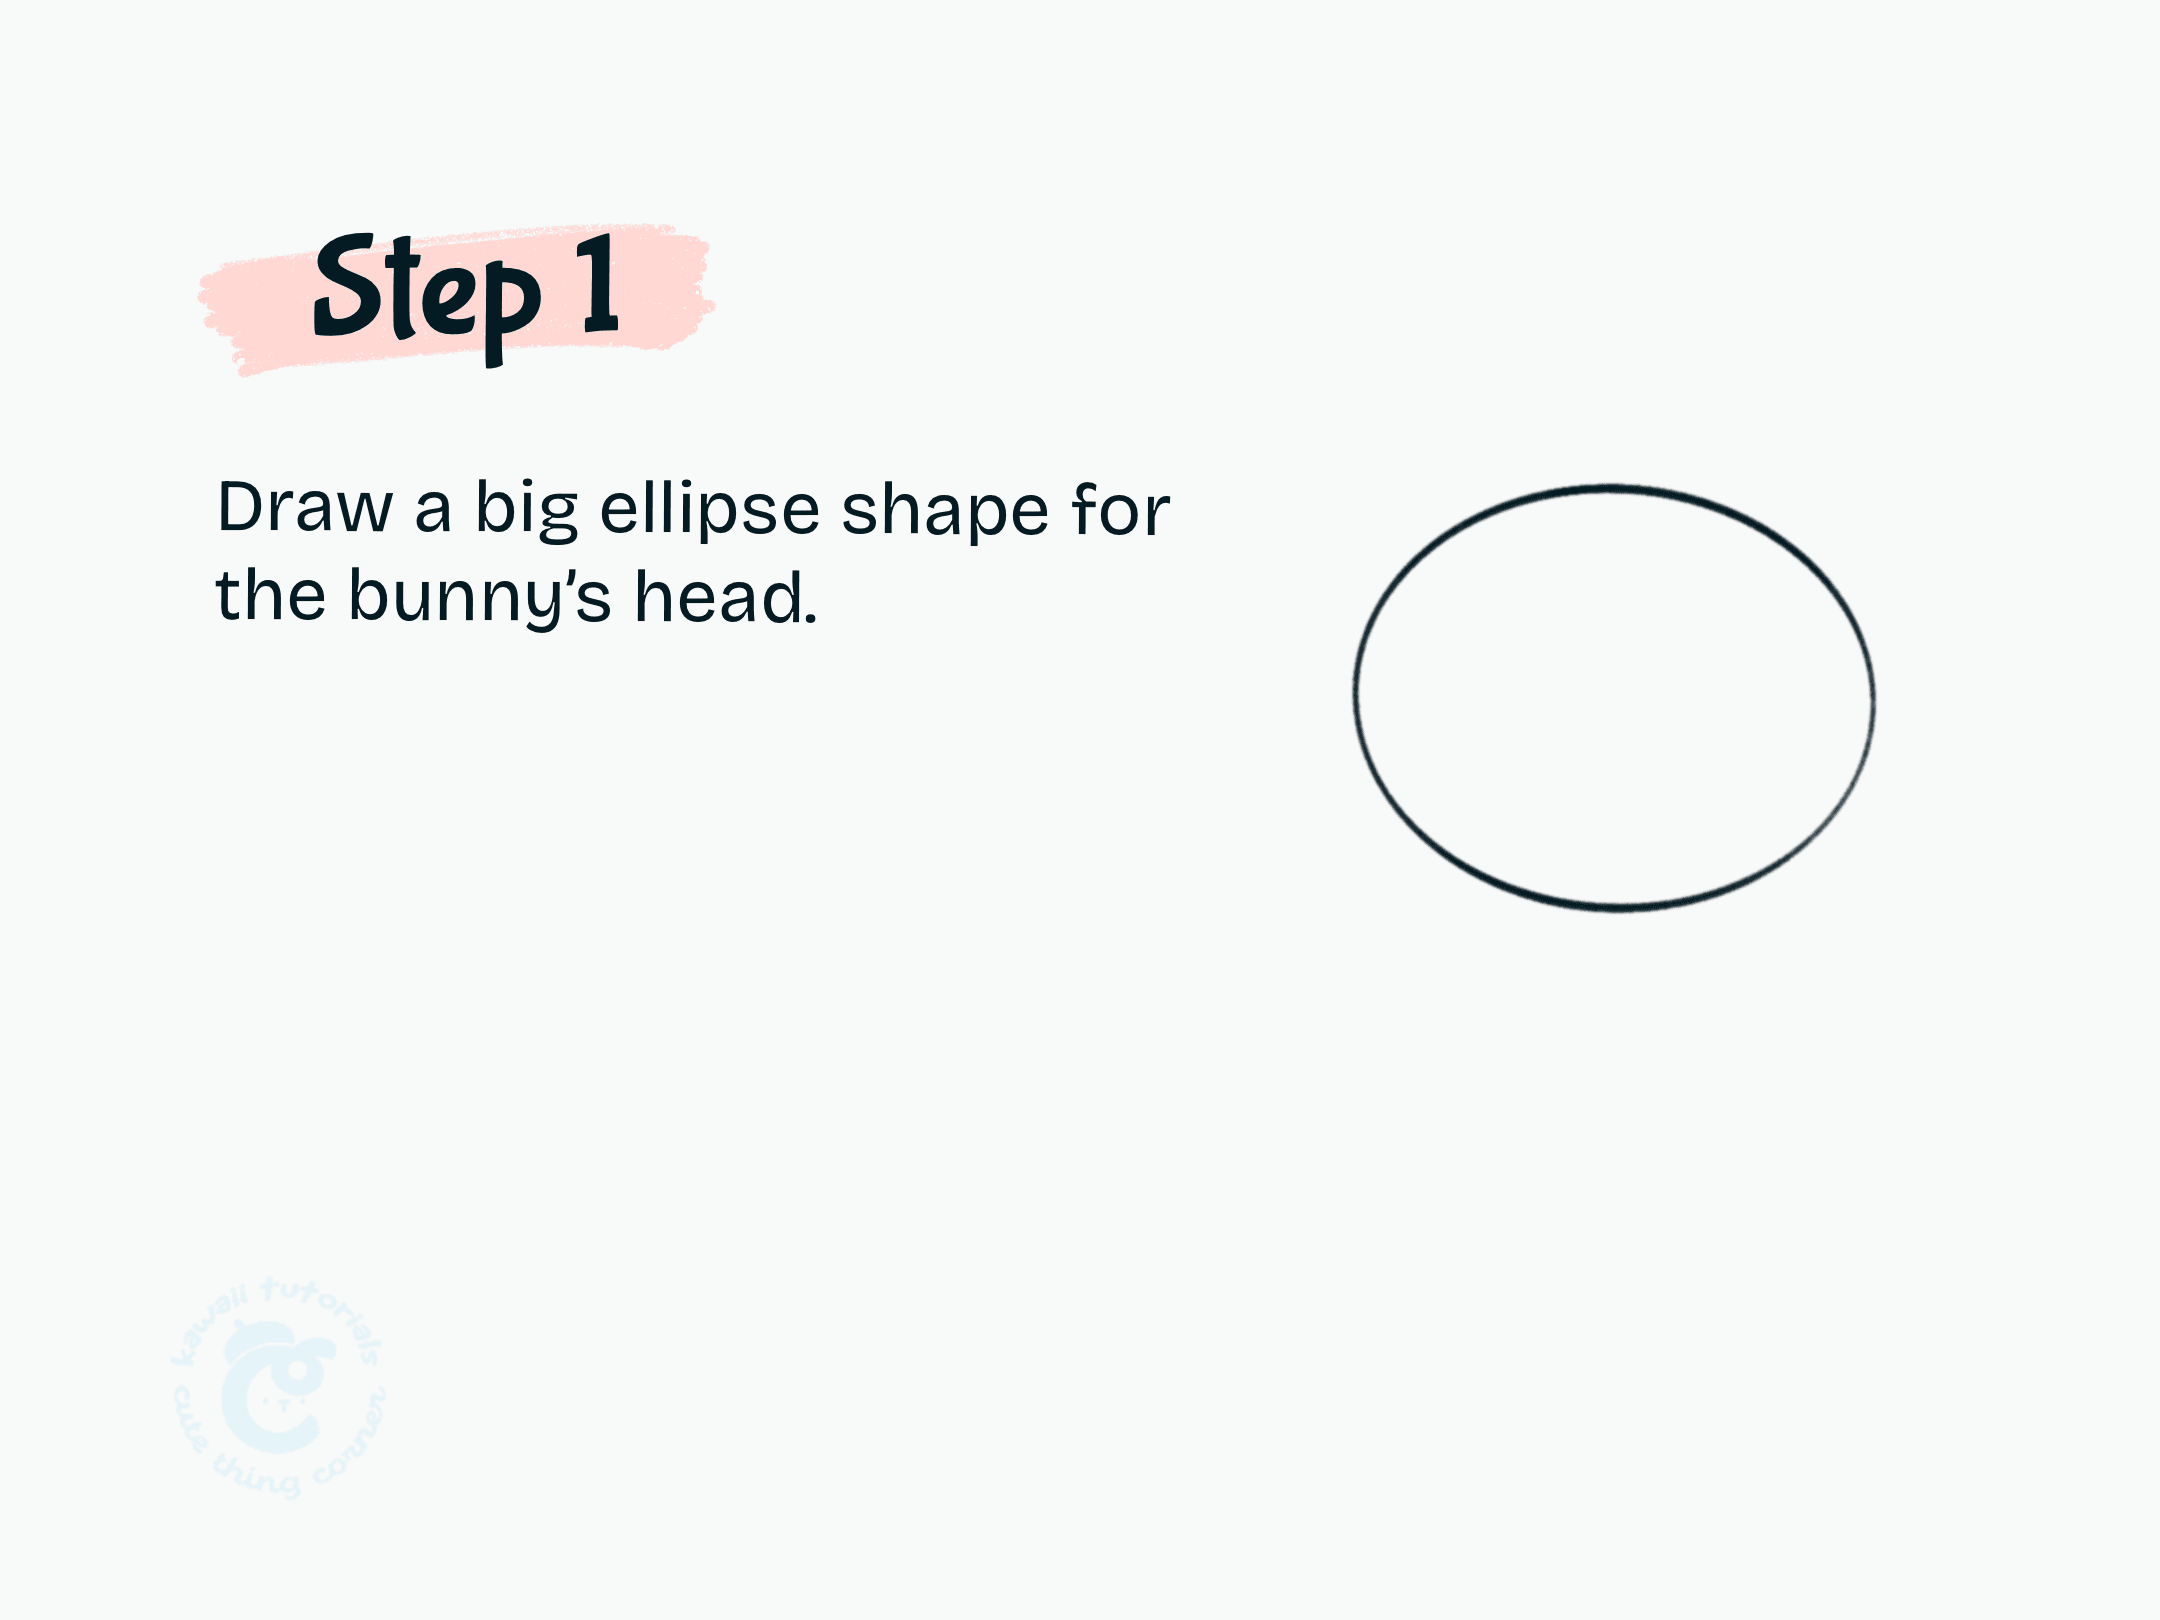
Step 1 Draw a big ellipse shape for the bunny’s head
#Step 2: Draw two teardrops shape for the ears, overlapping with the head
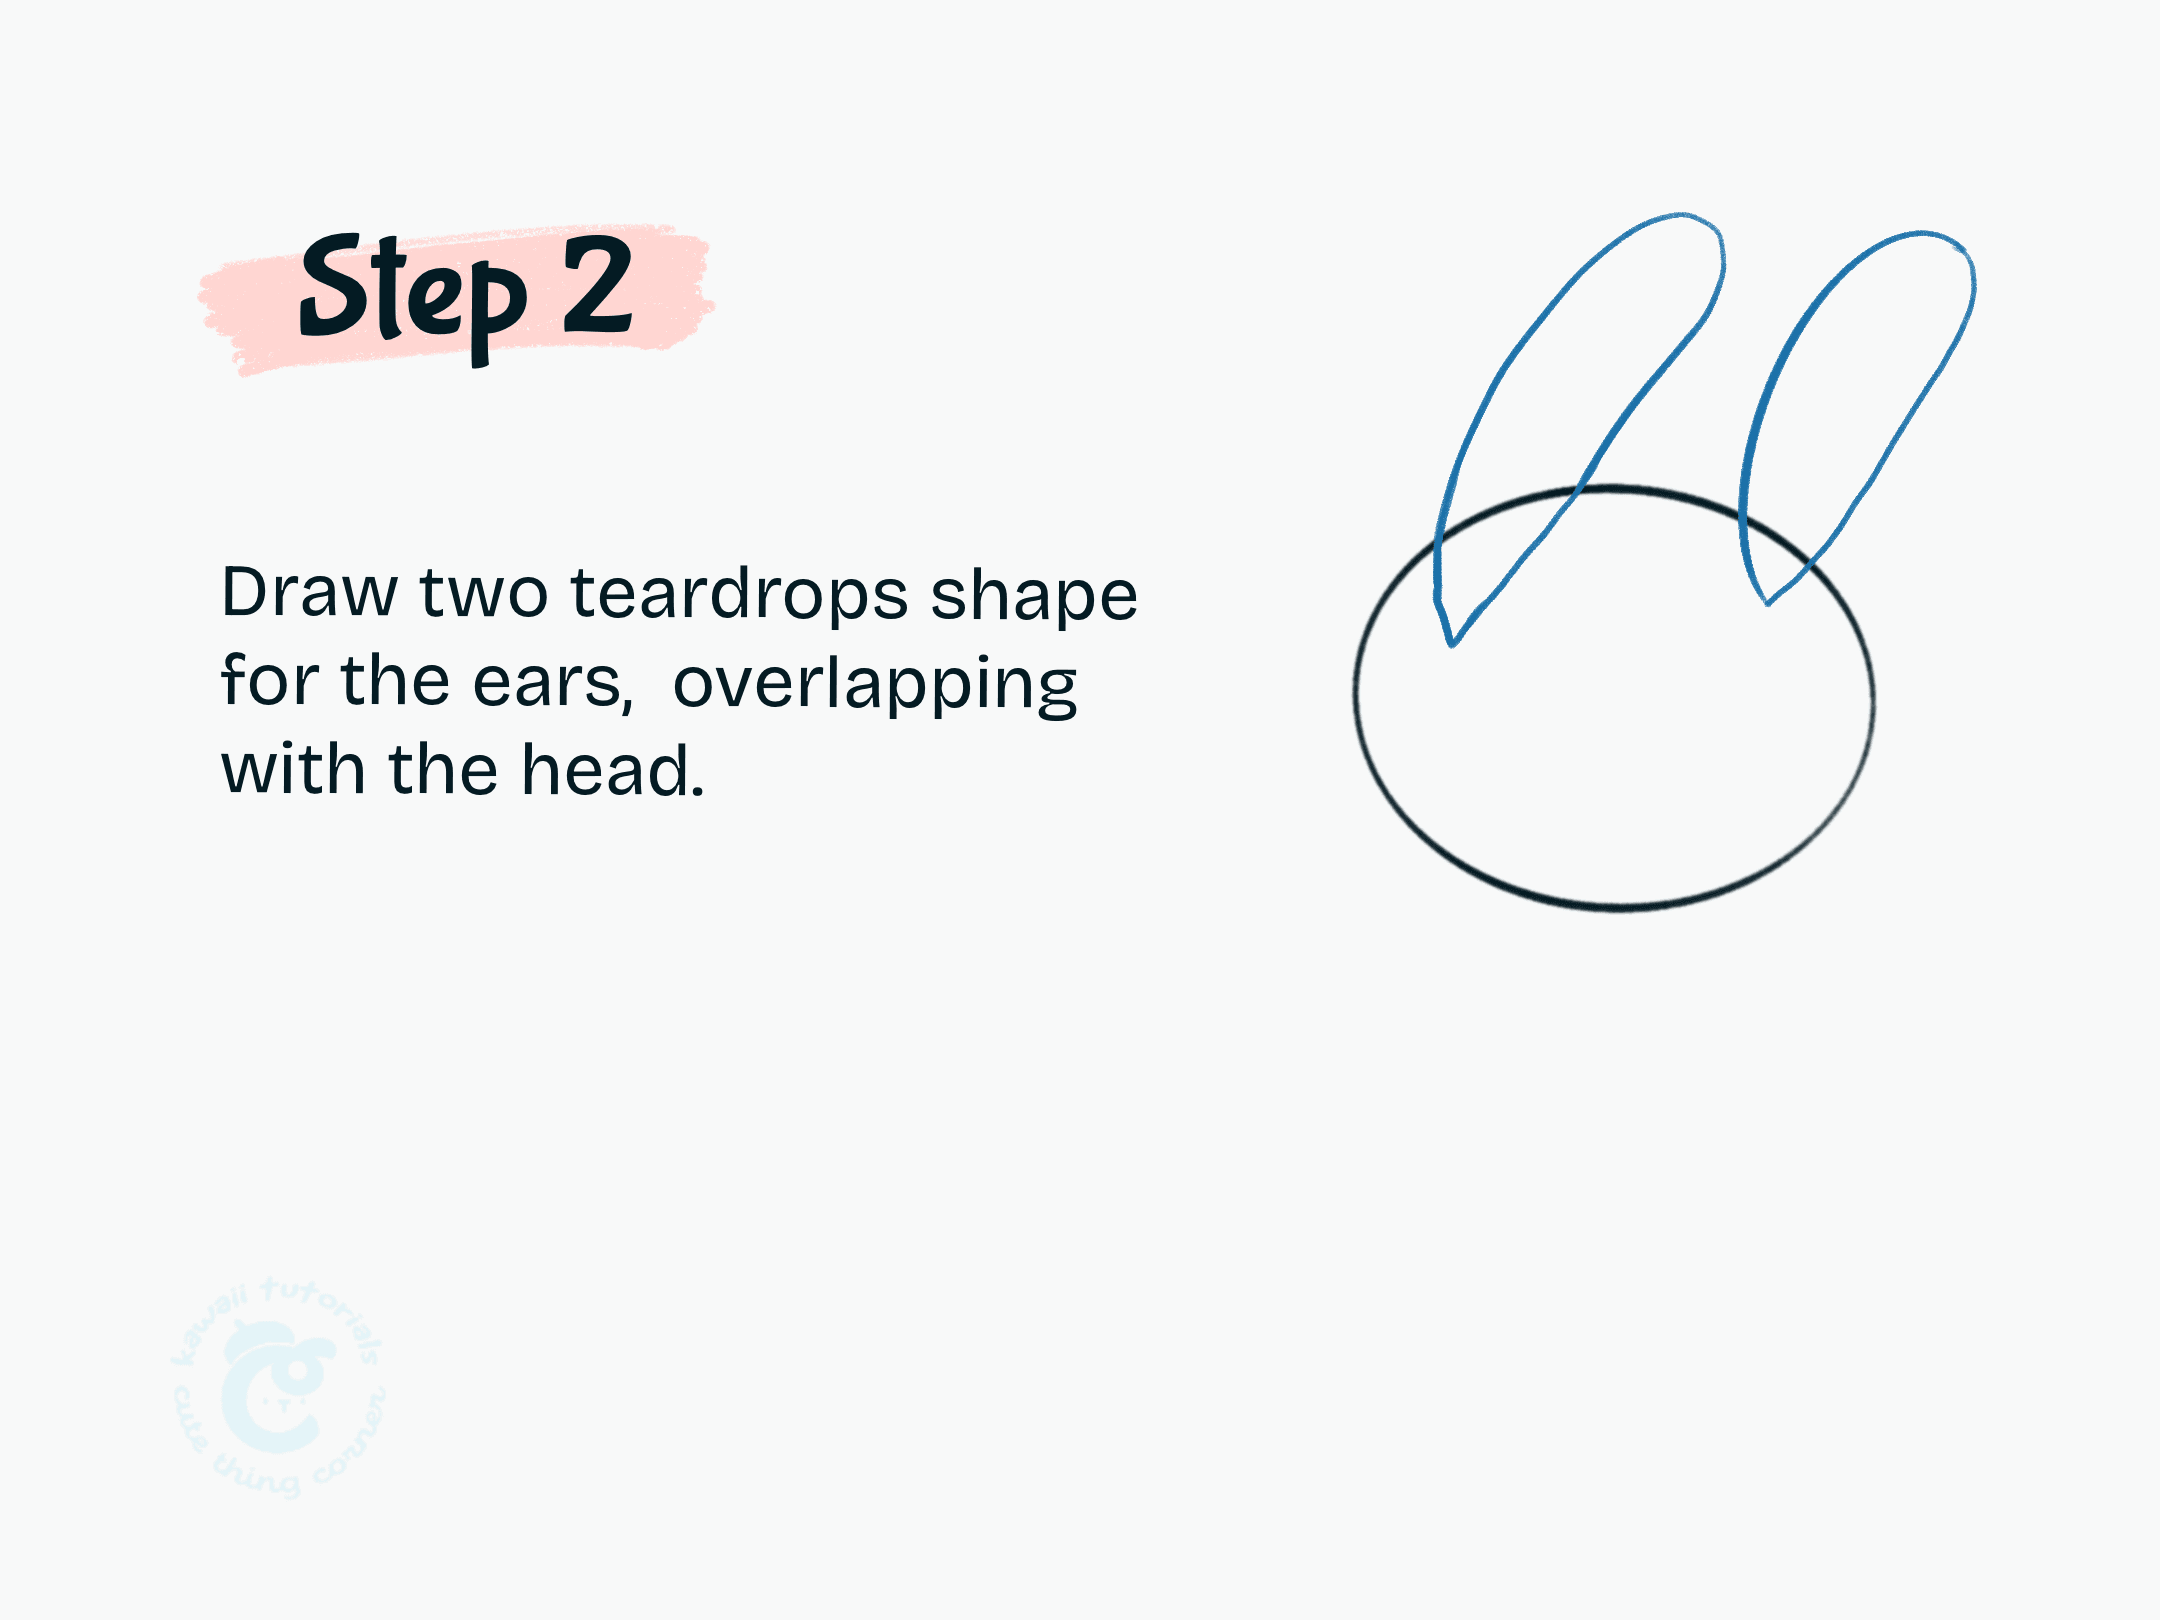
Step 2 Draw two teardrops shape for the ears, overlapping with the head
#Step 3: Draw a quadrilateral shape for the body, overlapping with the head.
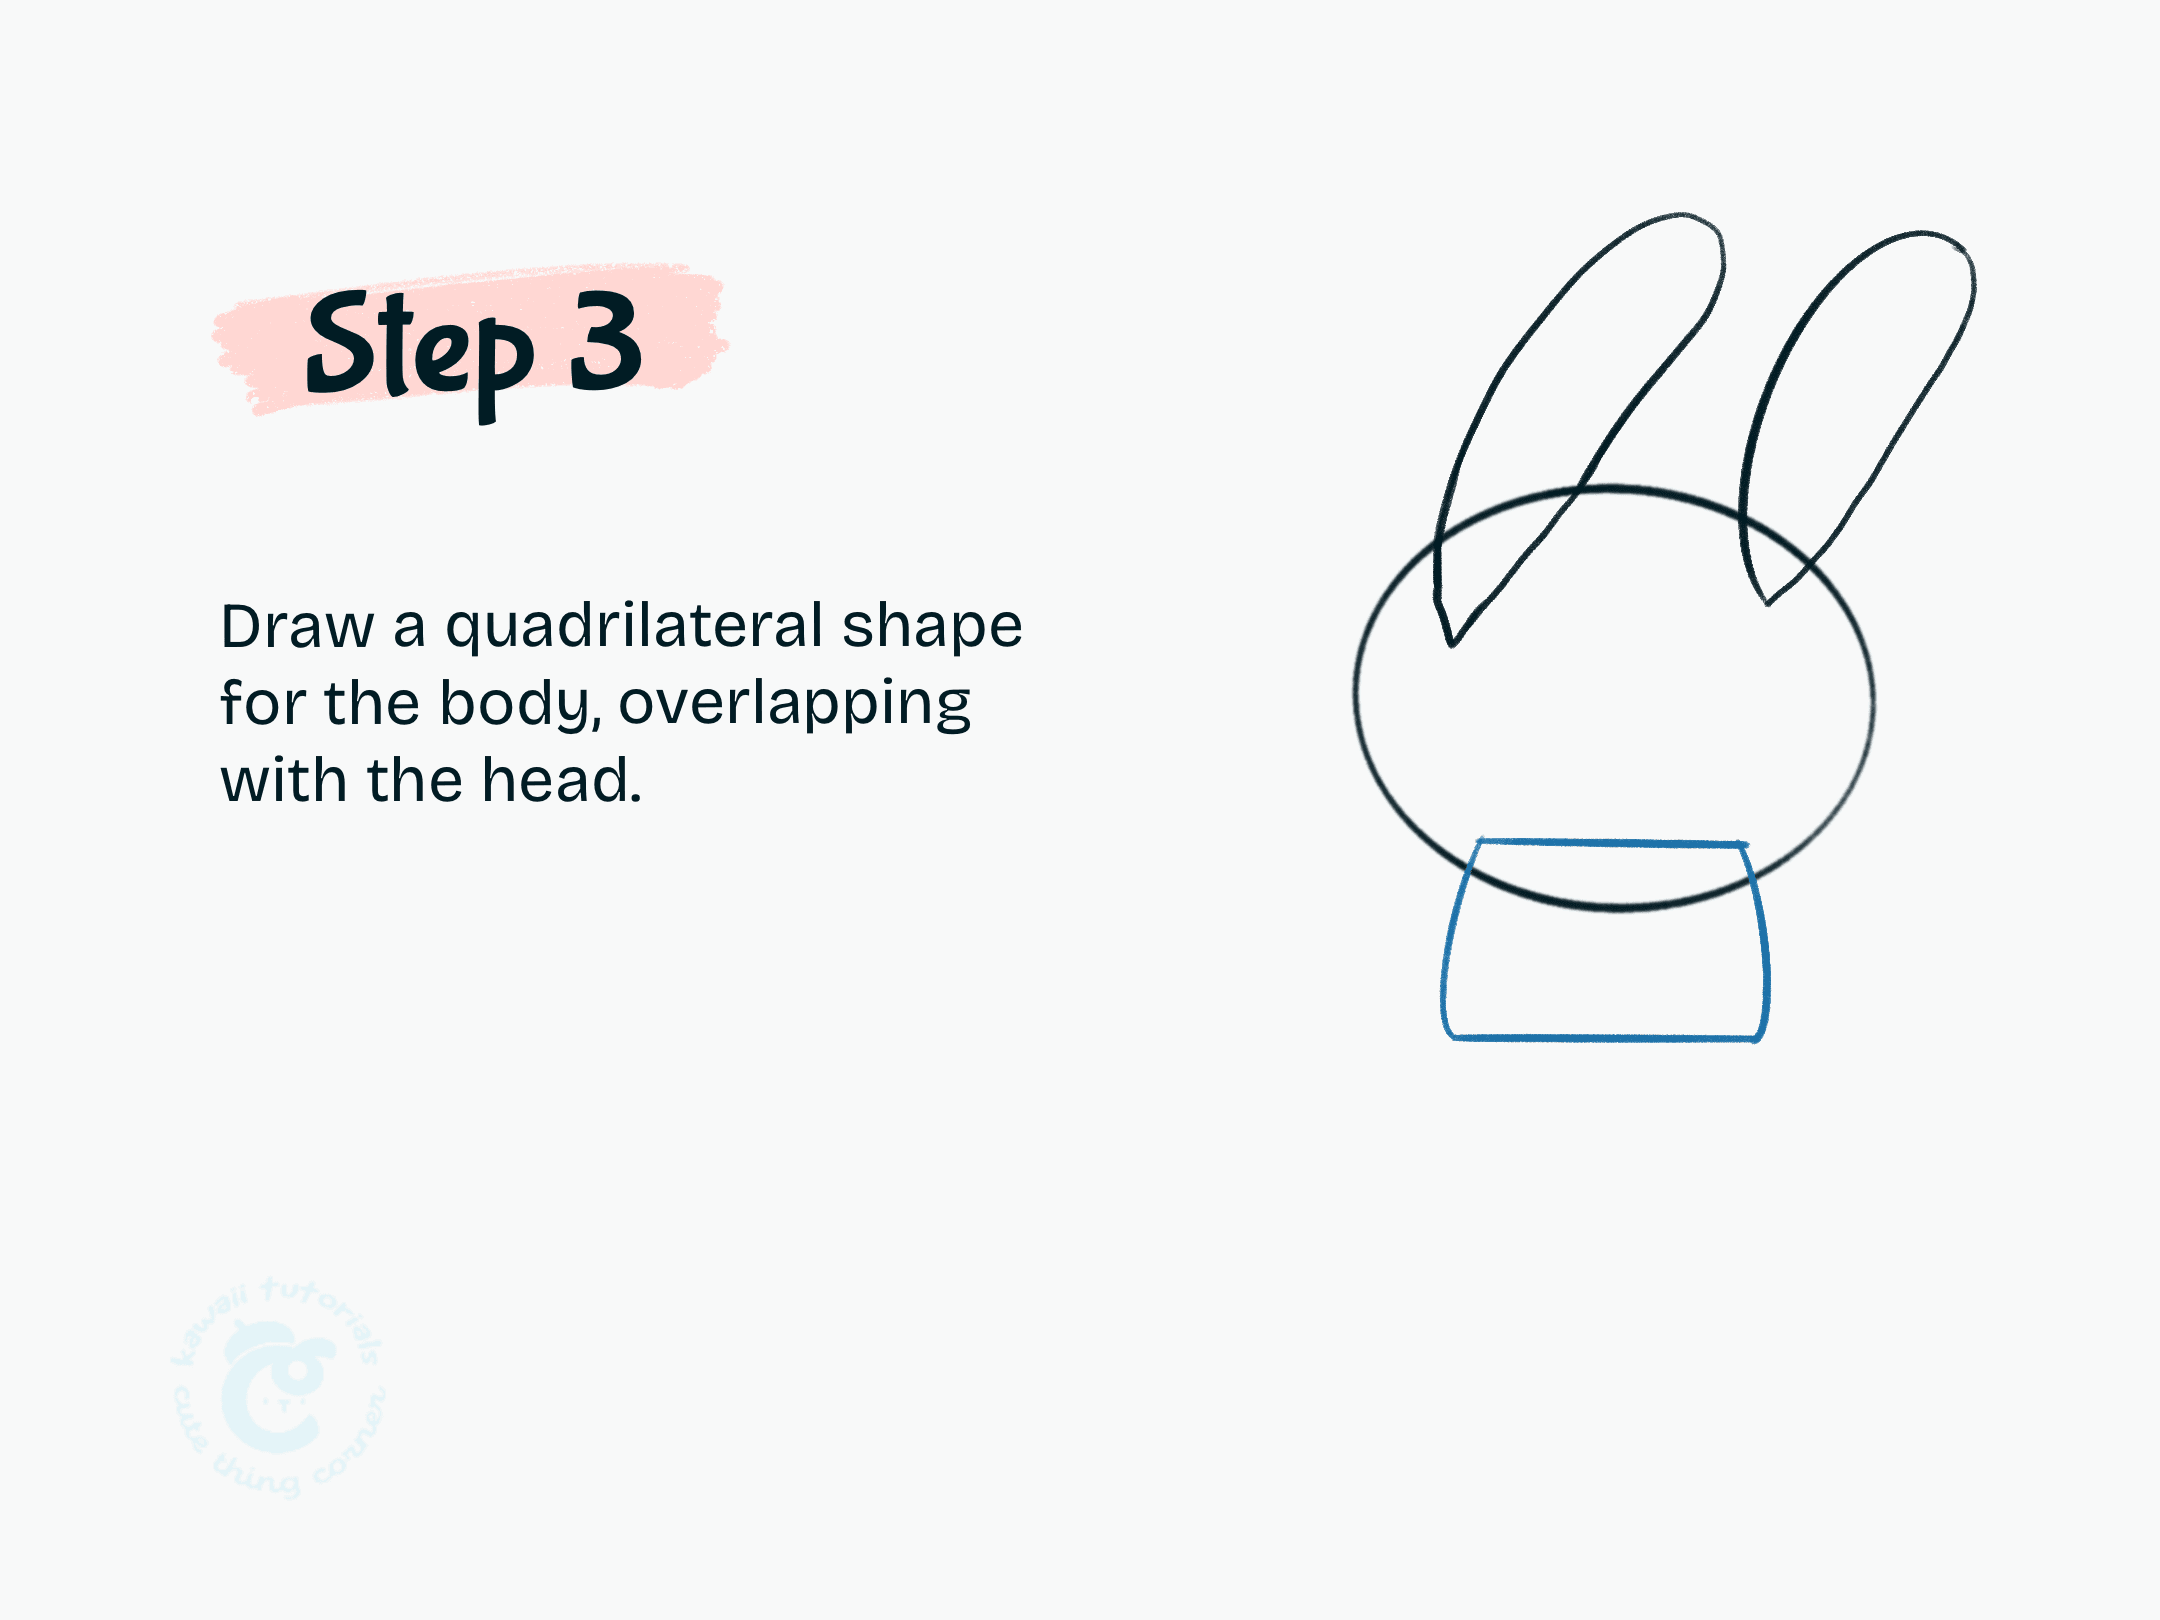
Step 3 Draw a quadrilateral shape for the body, overlapping with the head
#Step 4: Draw two quadrilateral shapes for the legs, overlapping with the body.
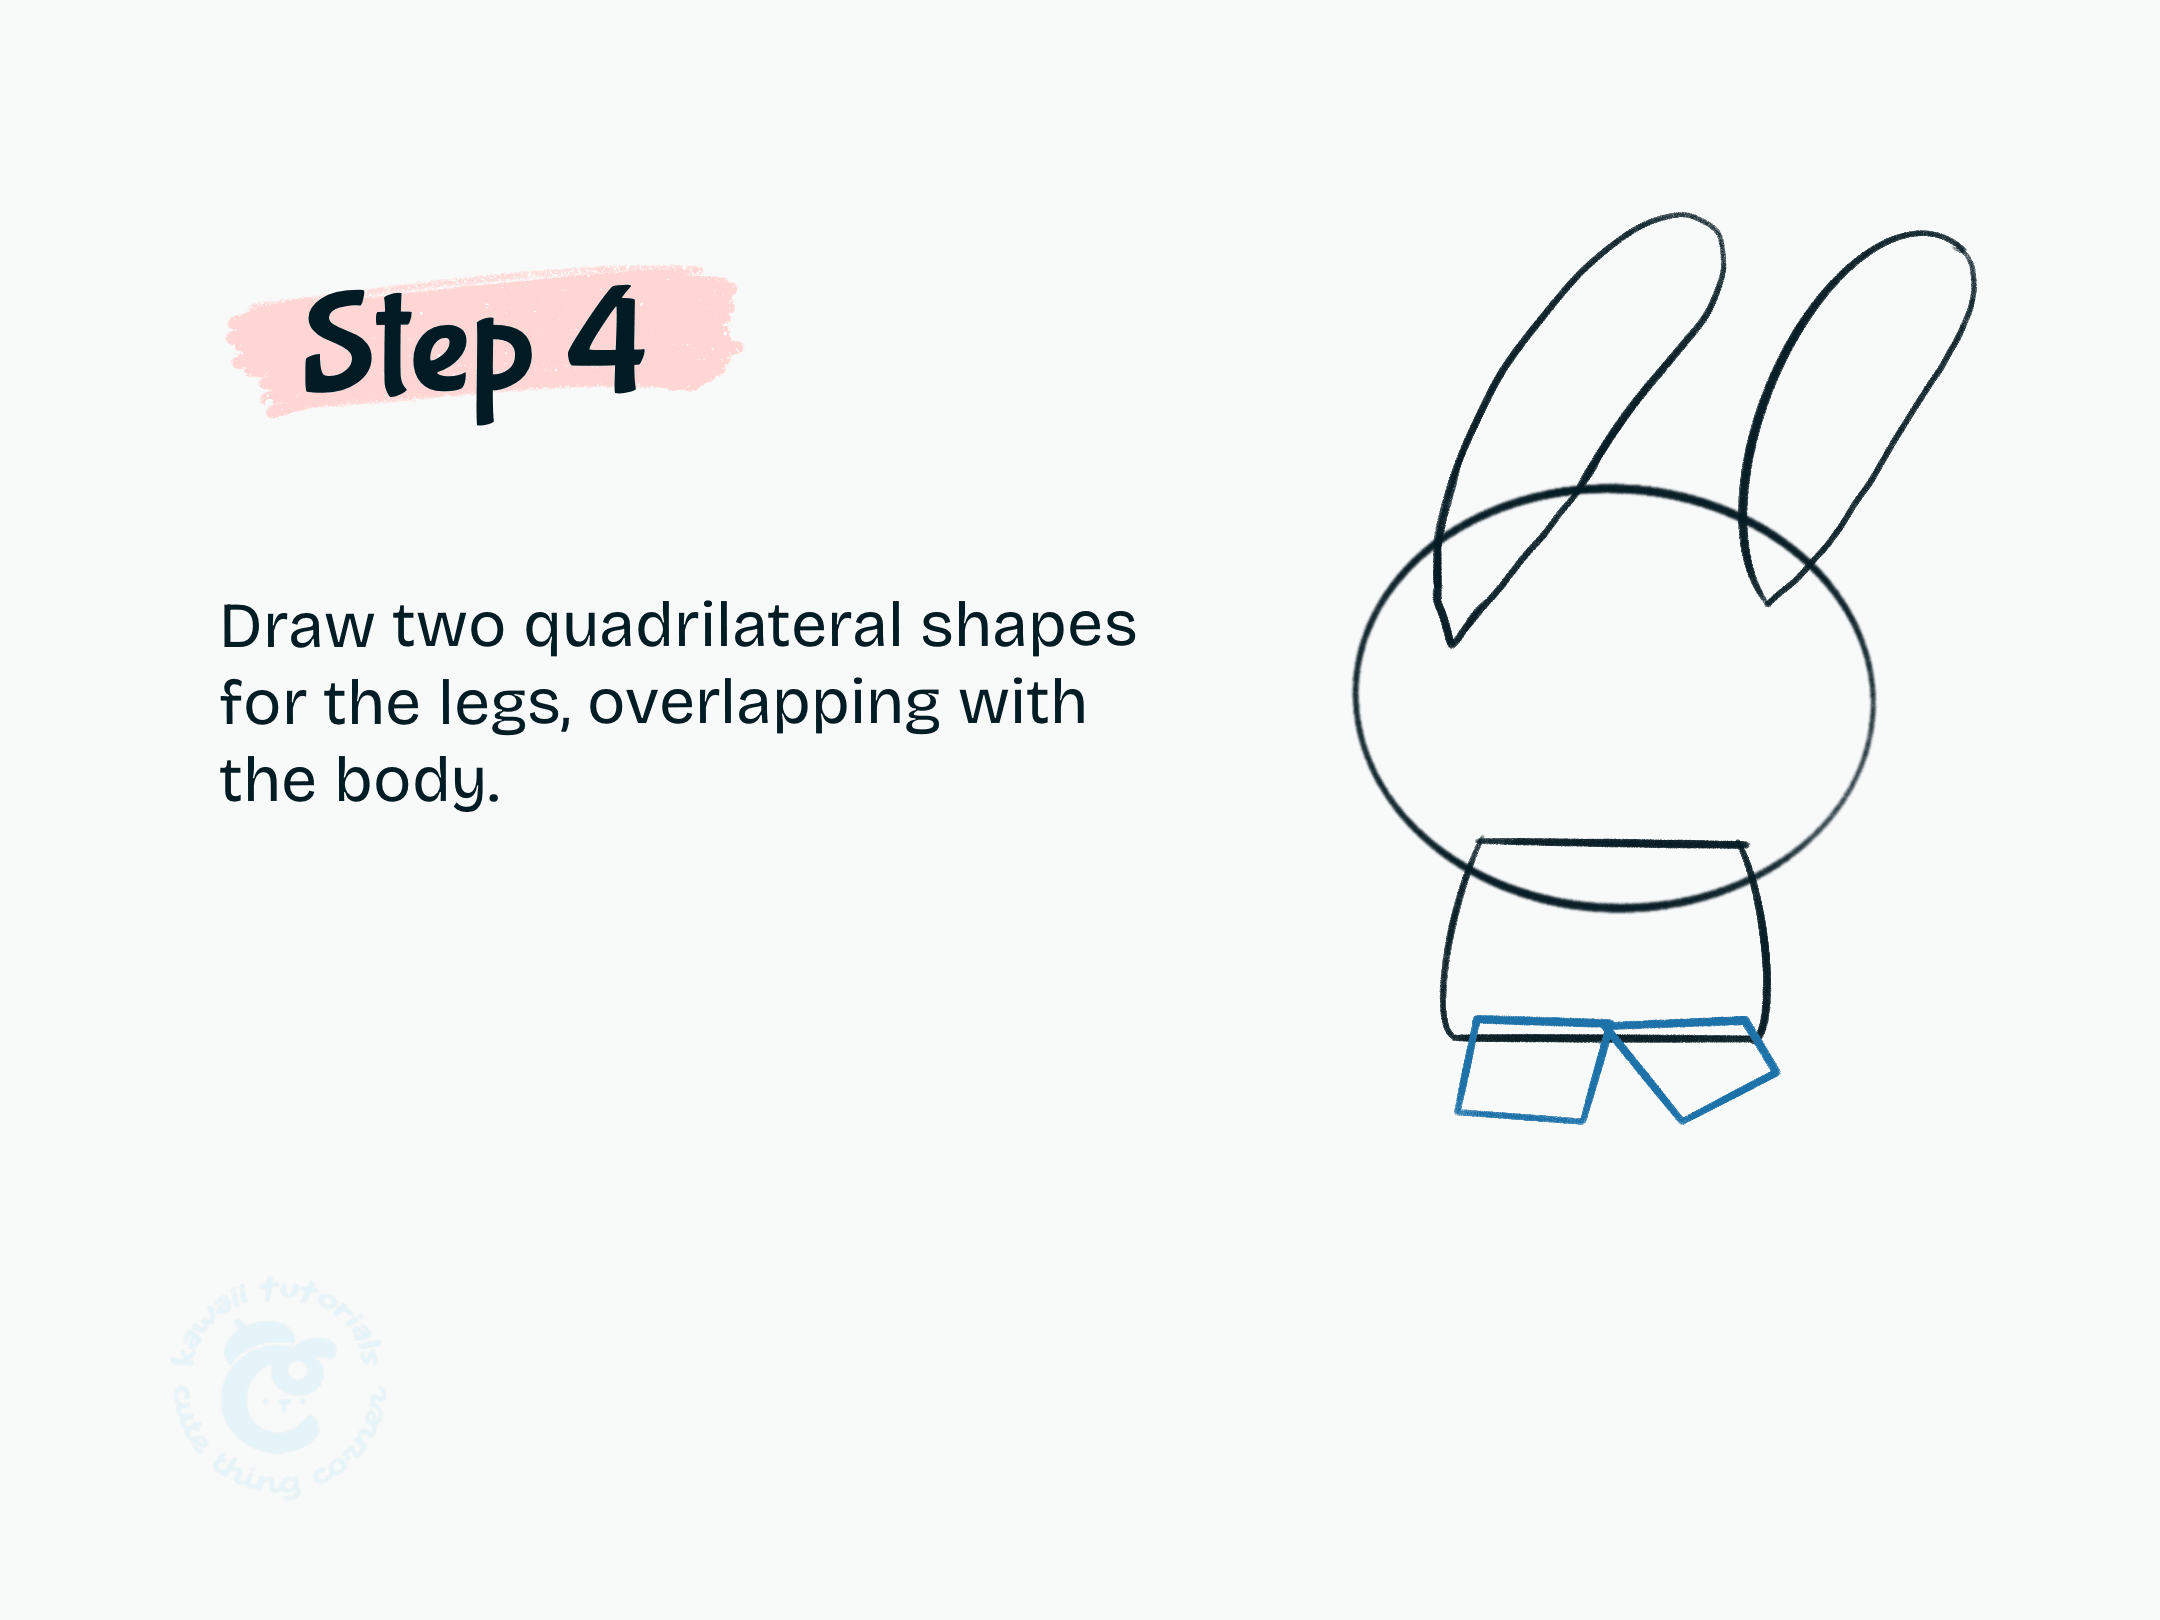
Step 4 Draw two quadrilateral shapes for the legs, overlapping with the body
#Step 5: Draw two teardrop shapes for the arms, overlapping with the body.
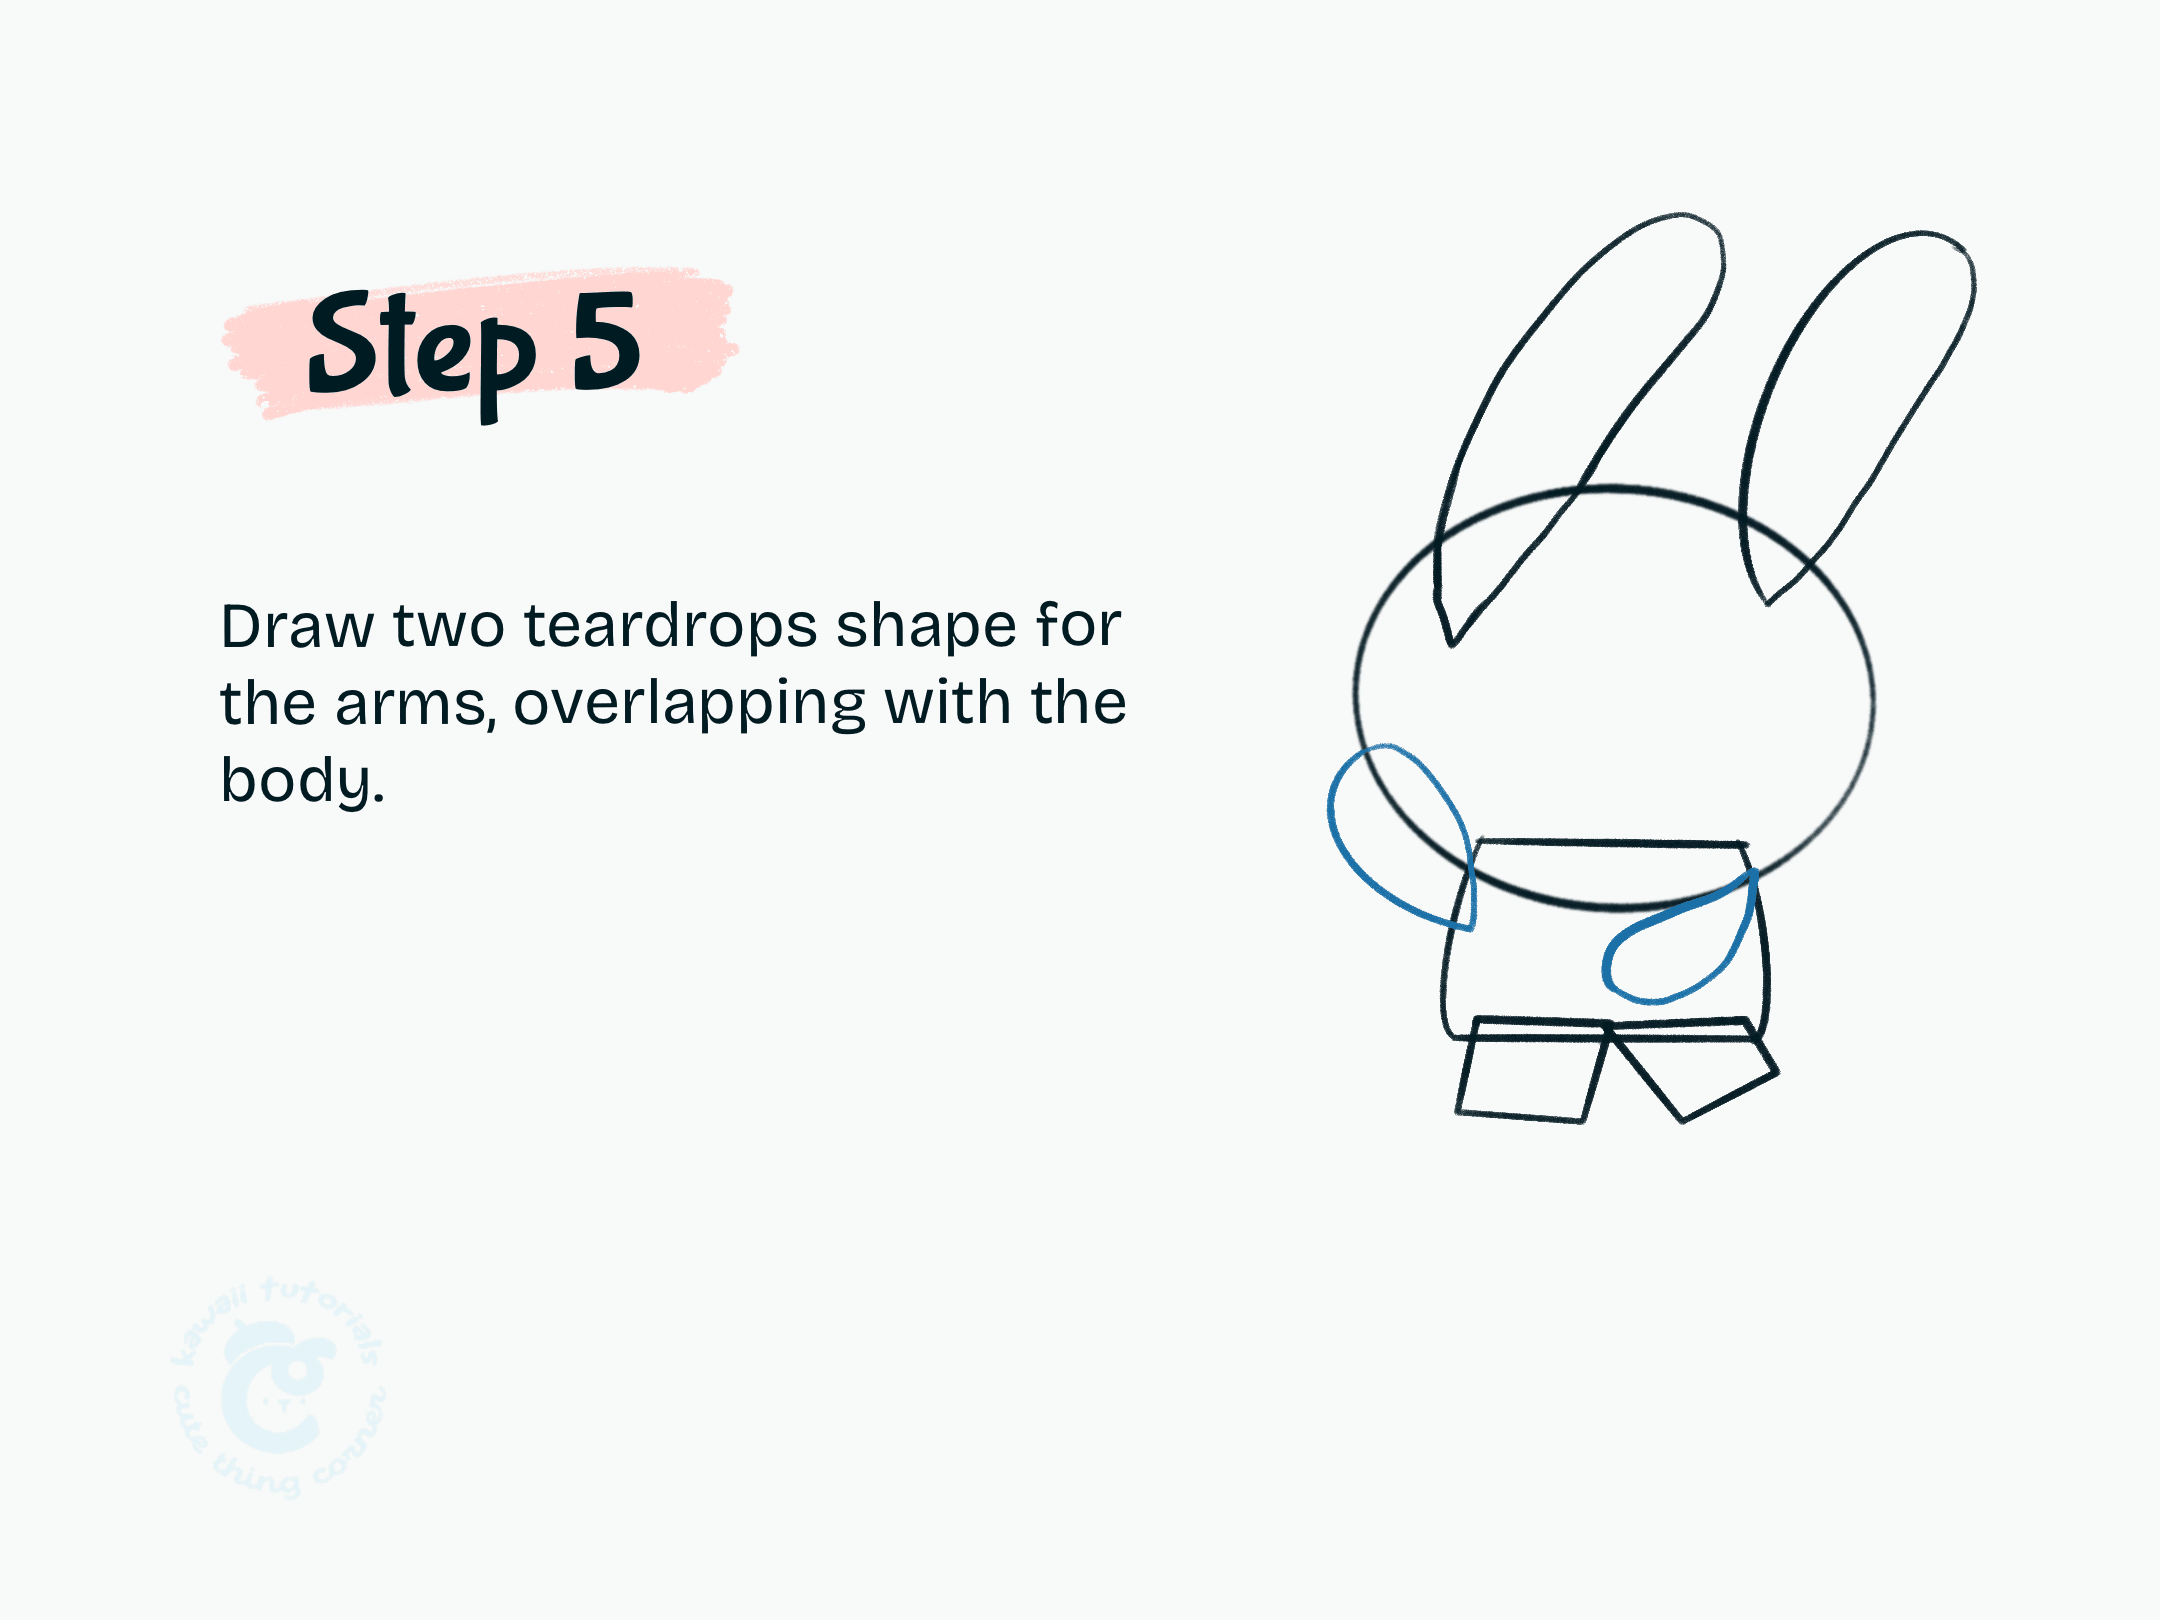
Step 5 Draw two teardrops shape for the arms, overlapping with the body
#Step 6: Draw an ellipse shape for the tail of school bunny
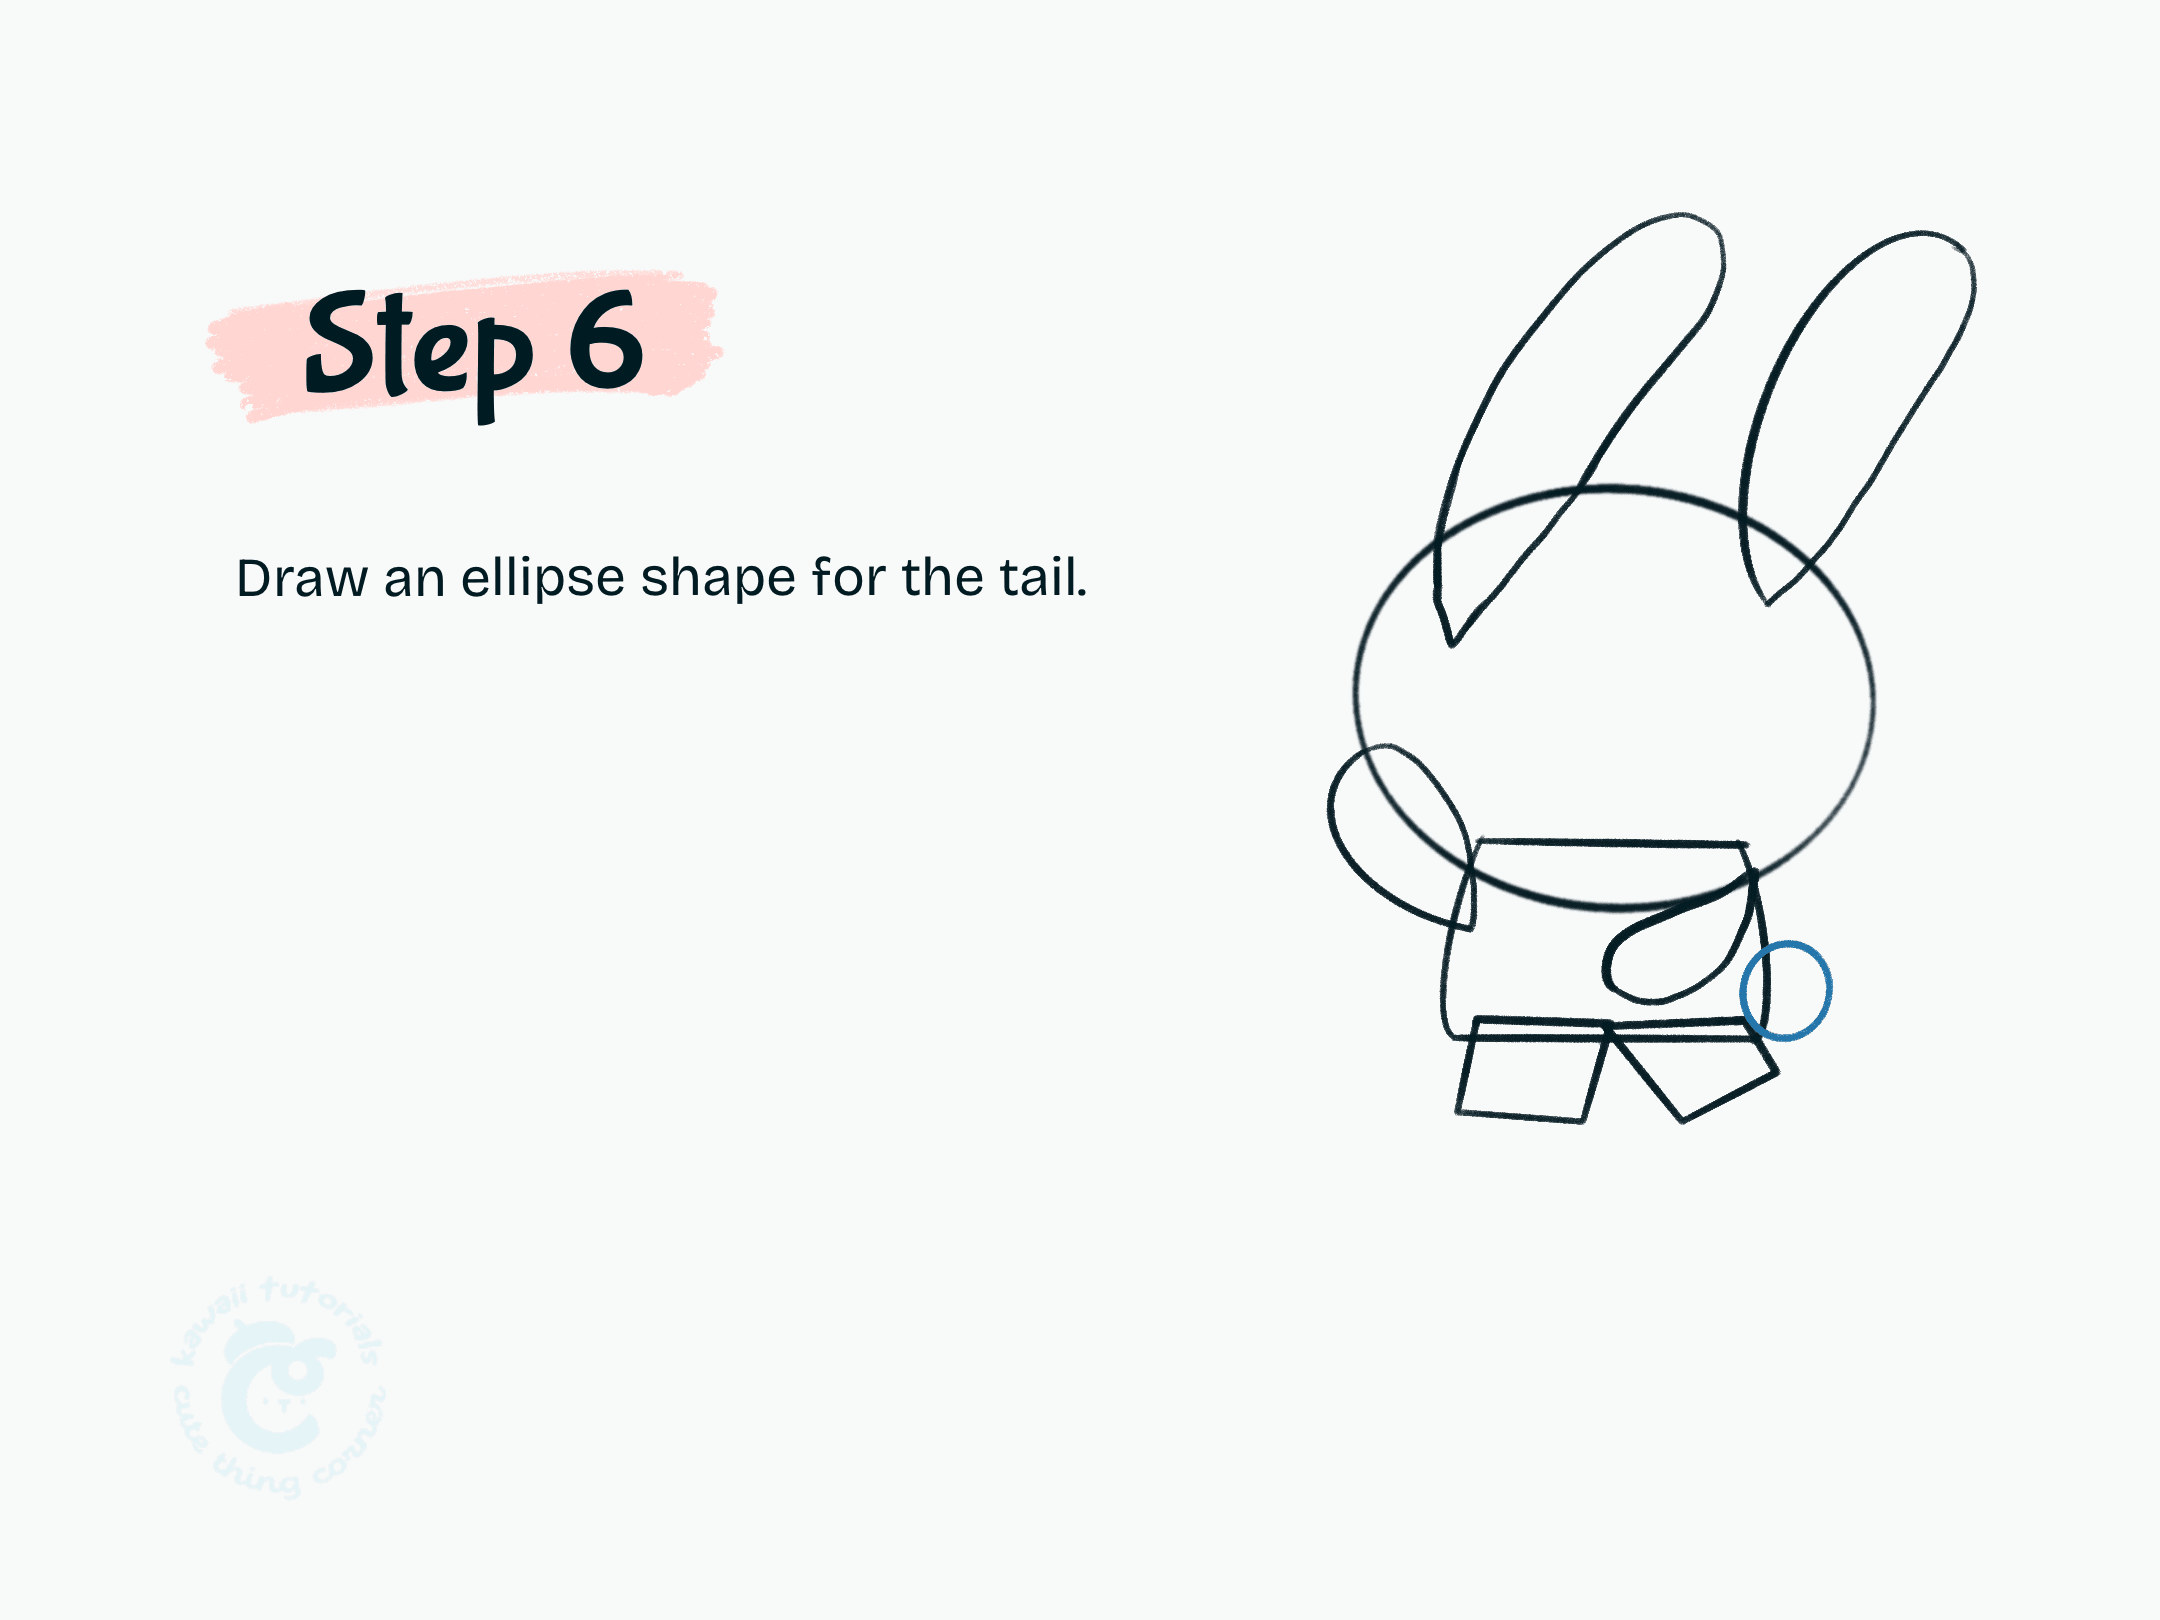
Step 6 Draw an ellipse shape for the tail
#Step 7: Follow the outer coutours of the shapes, noting the lines that need to kept and the skipped lines. Soften any corners to keep the shapes organic.
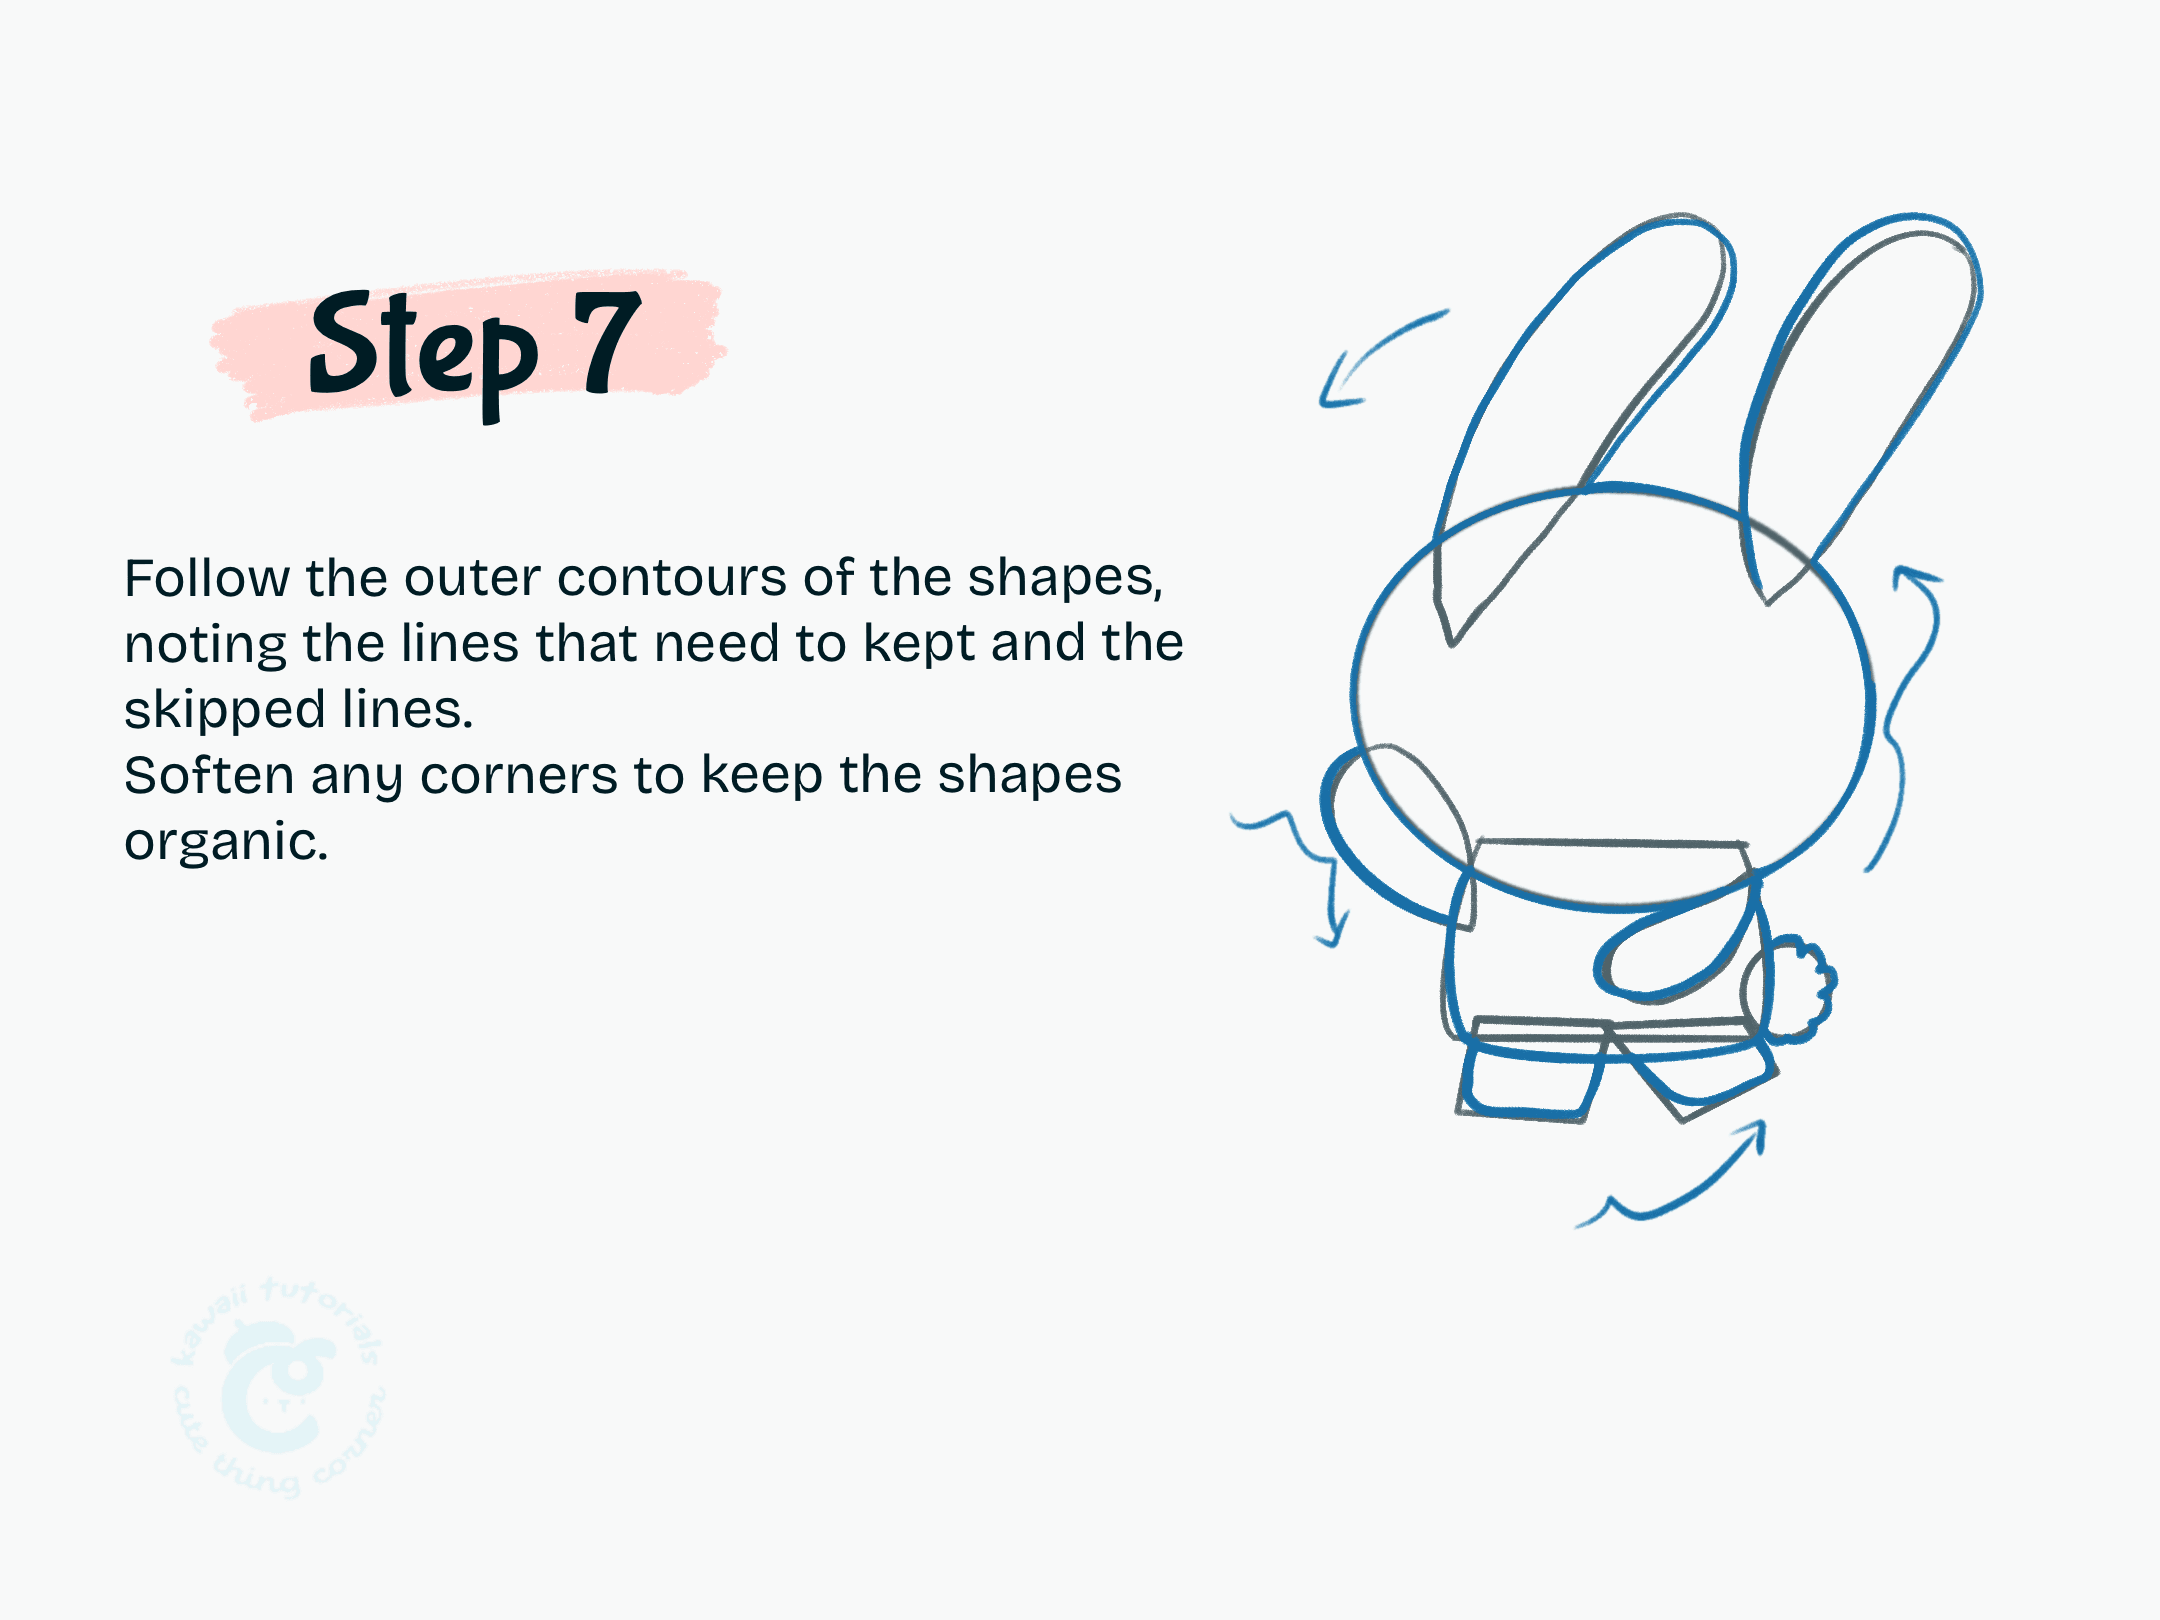
Step 7 Follow the outer contours of the shapes, noting the lines that need to kept and the skipped lines
#Step 8: Erase orginal lines and add happy facial feature. Add a book on the head, pencil and details clothes.
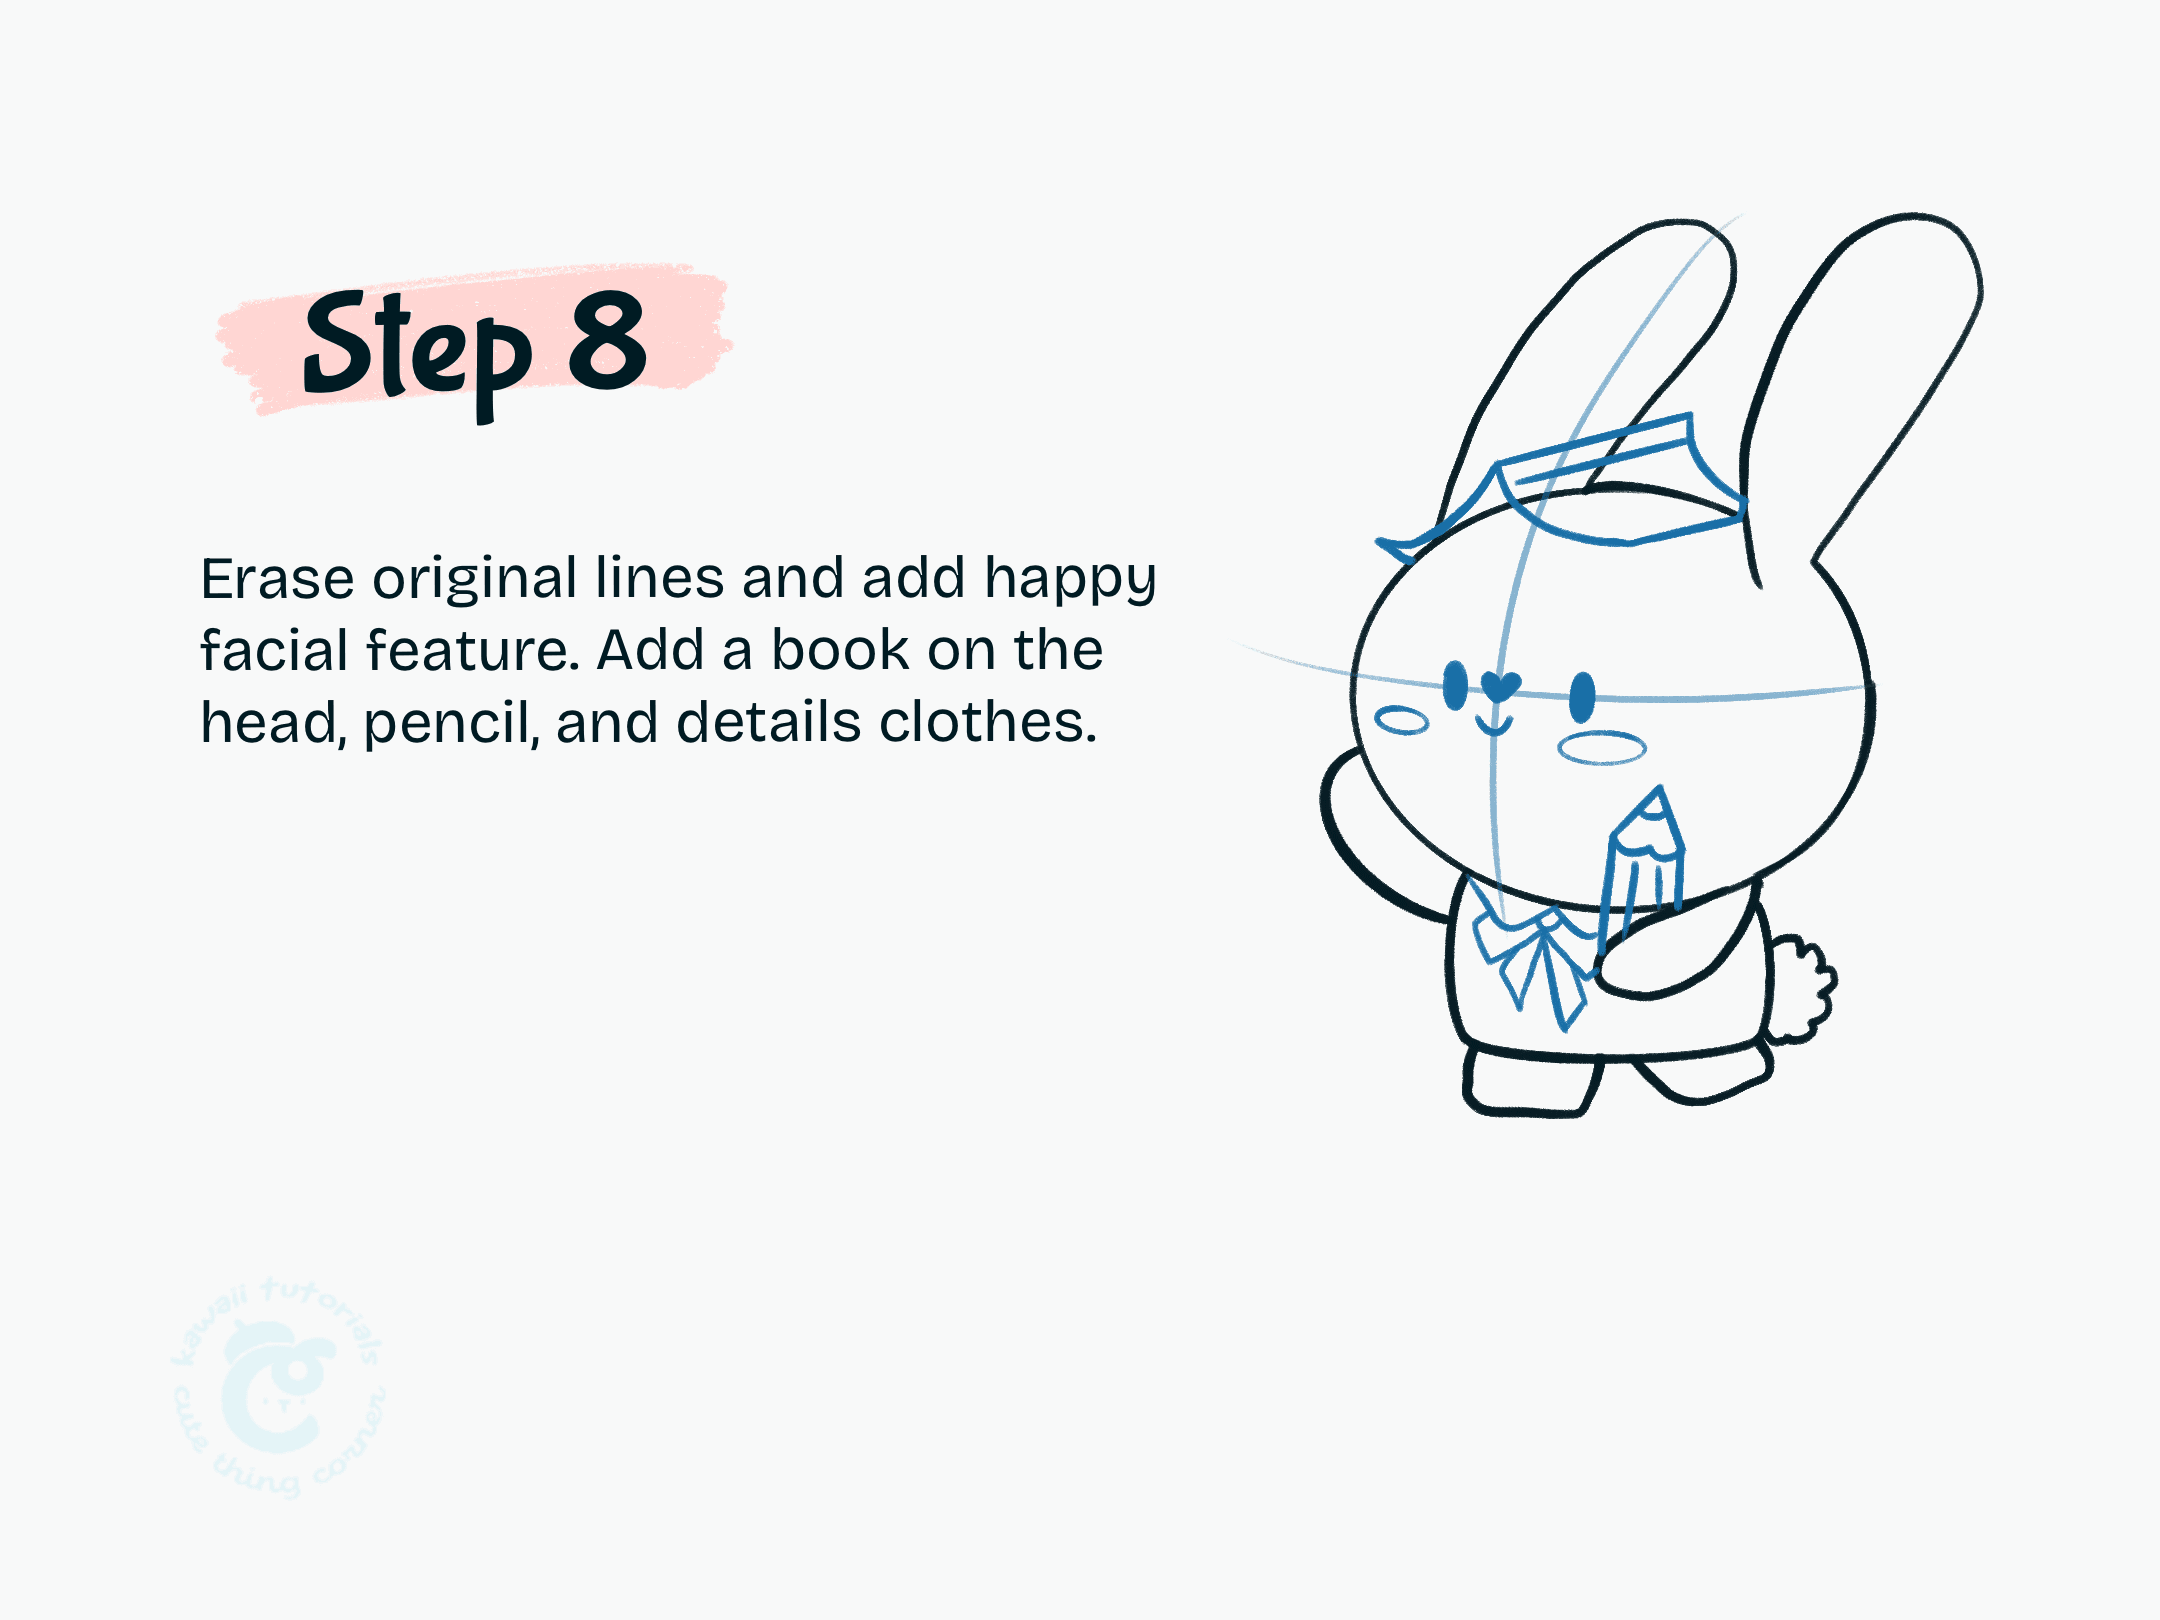
Step 8 Erase original lines and add happy facial feature. Add a book on the head, pencil, and details clothes
#Step 9: Erase the remaining lines to clean up the line art. Color your choice. Now you have a cute school bunny.

Step 9 Erase the remaining lines to clean up the line art
Hope you enjoyed your time drawing a cute school bunny.
If you love it, please comment below and tell me the animals you love for the next post.
Thanks for following this guide.
Goodbye and see you soon.
Follow full step-by-step drawing cute school bunny:
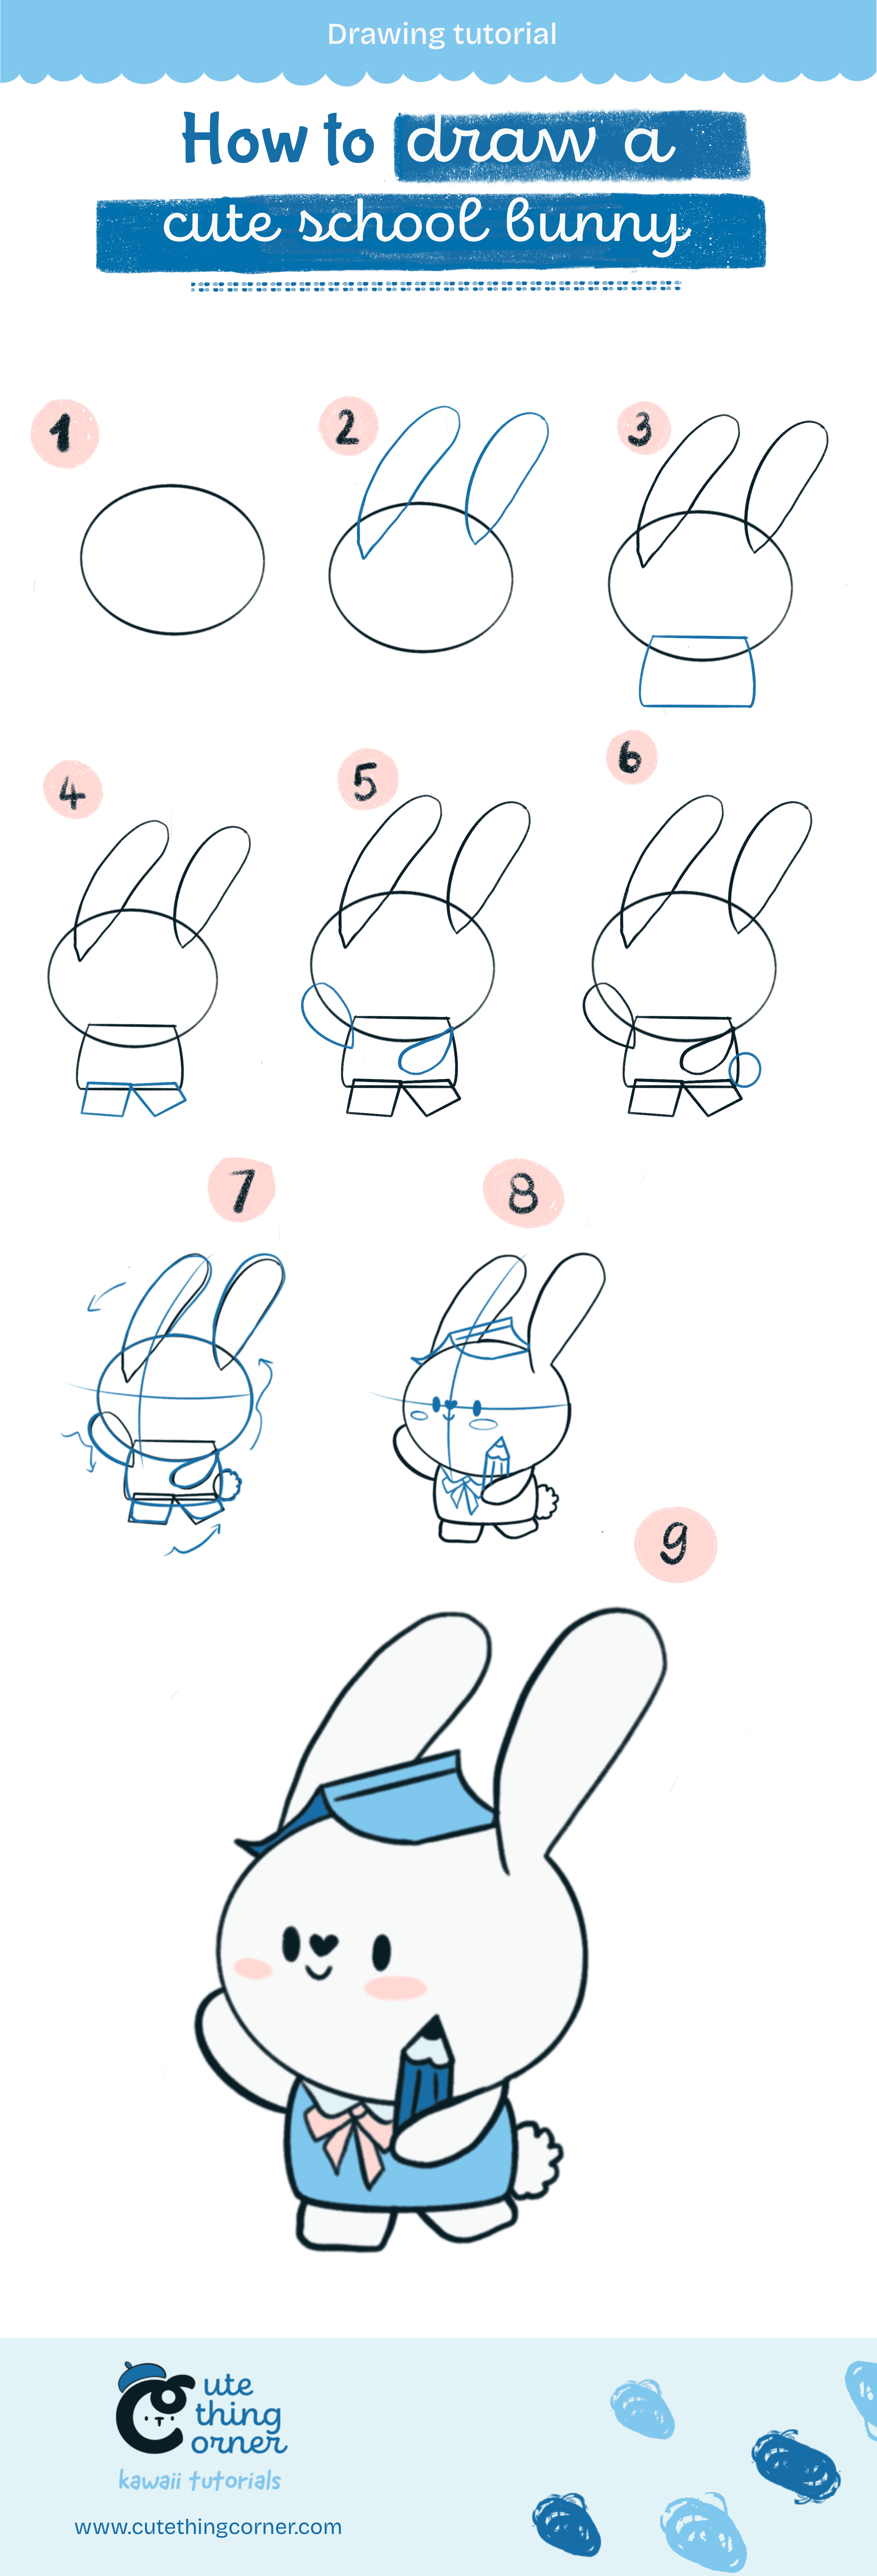
How to draw a cute school bunny

