Want to add a touch of winter magic to your drawings? In this tutorial from Cute Thing Corner, you’ll learn how to draw a cute snowglobe, complete with charming details and cozy vibes!
Perfect for holiday art projects and fans of kawaii designs, this step-by-step guide makes it easy and fun for all skill levels.
Grab your pencils, and let’s bring this magical winter scene to life! ⛄✨❄️
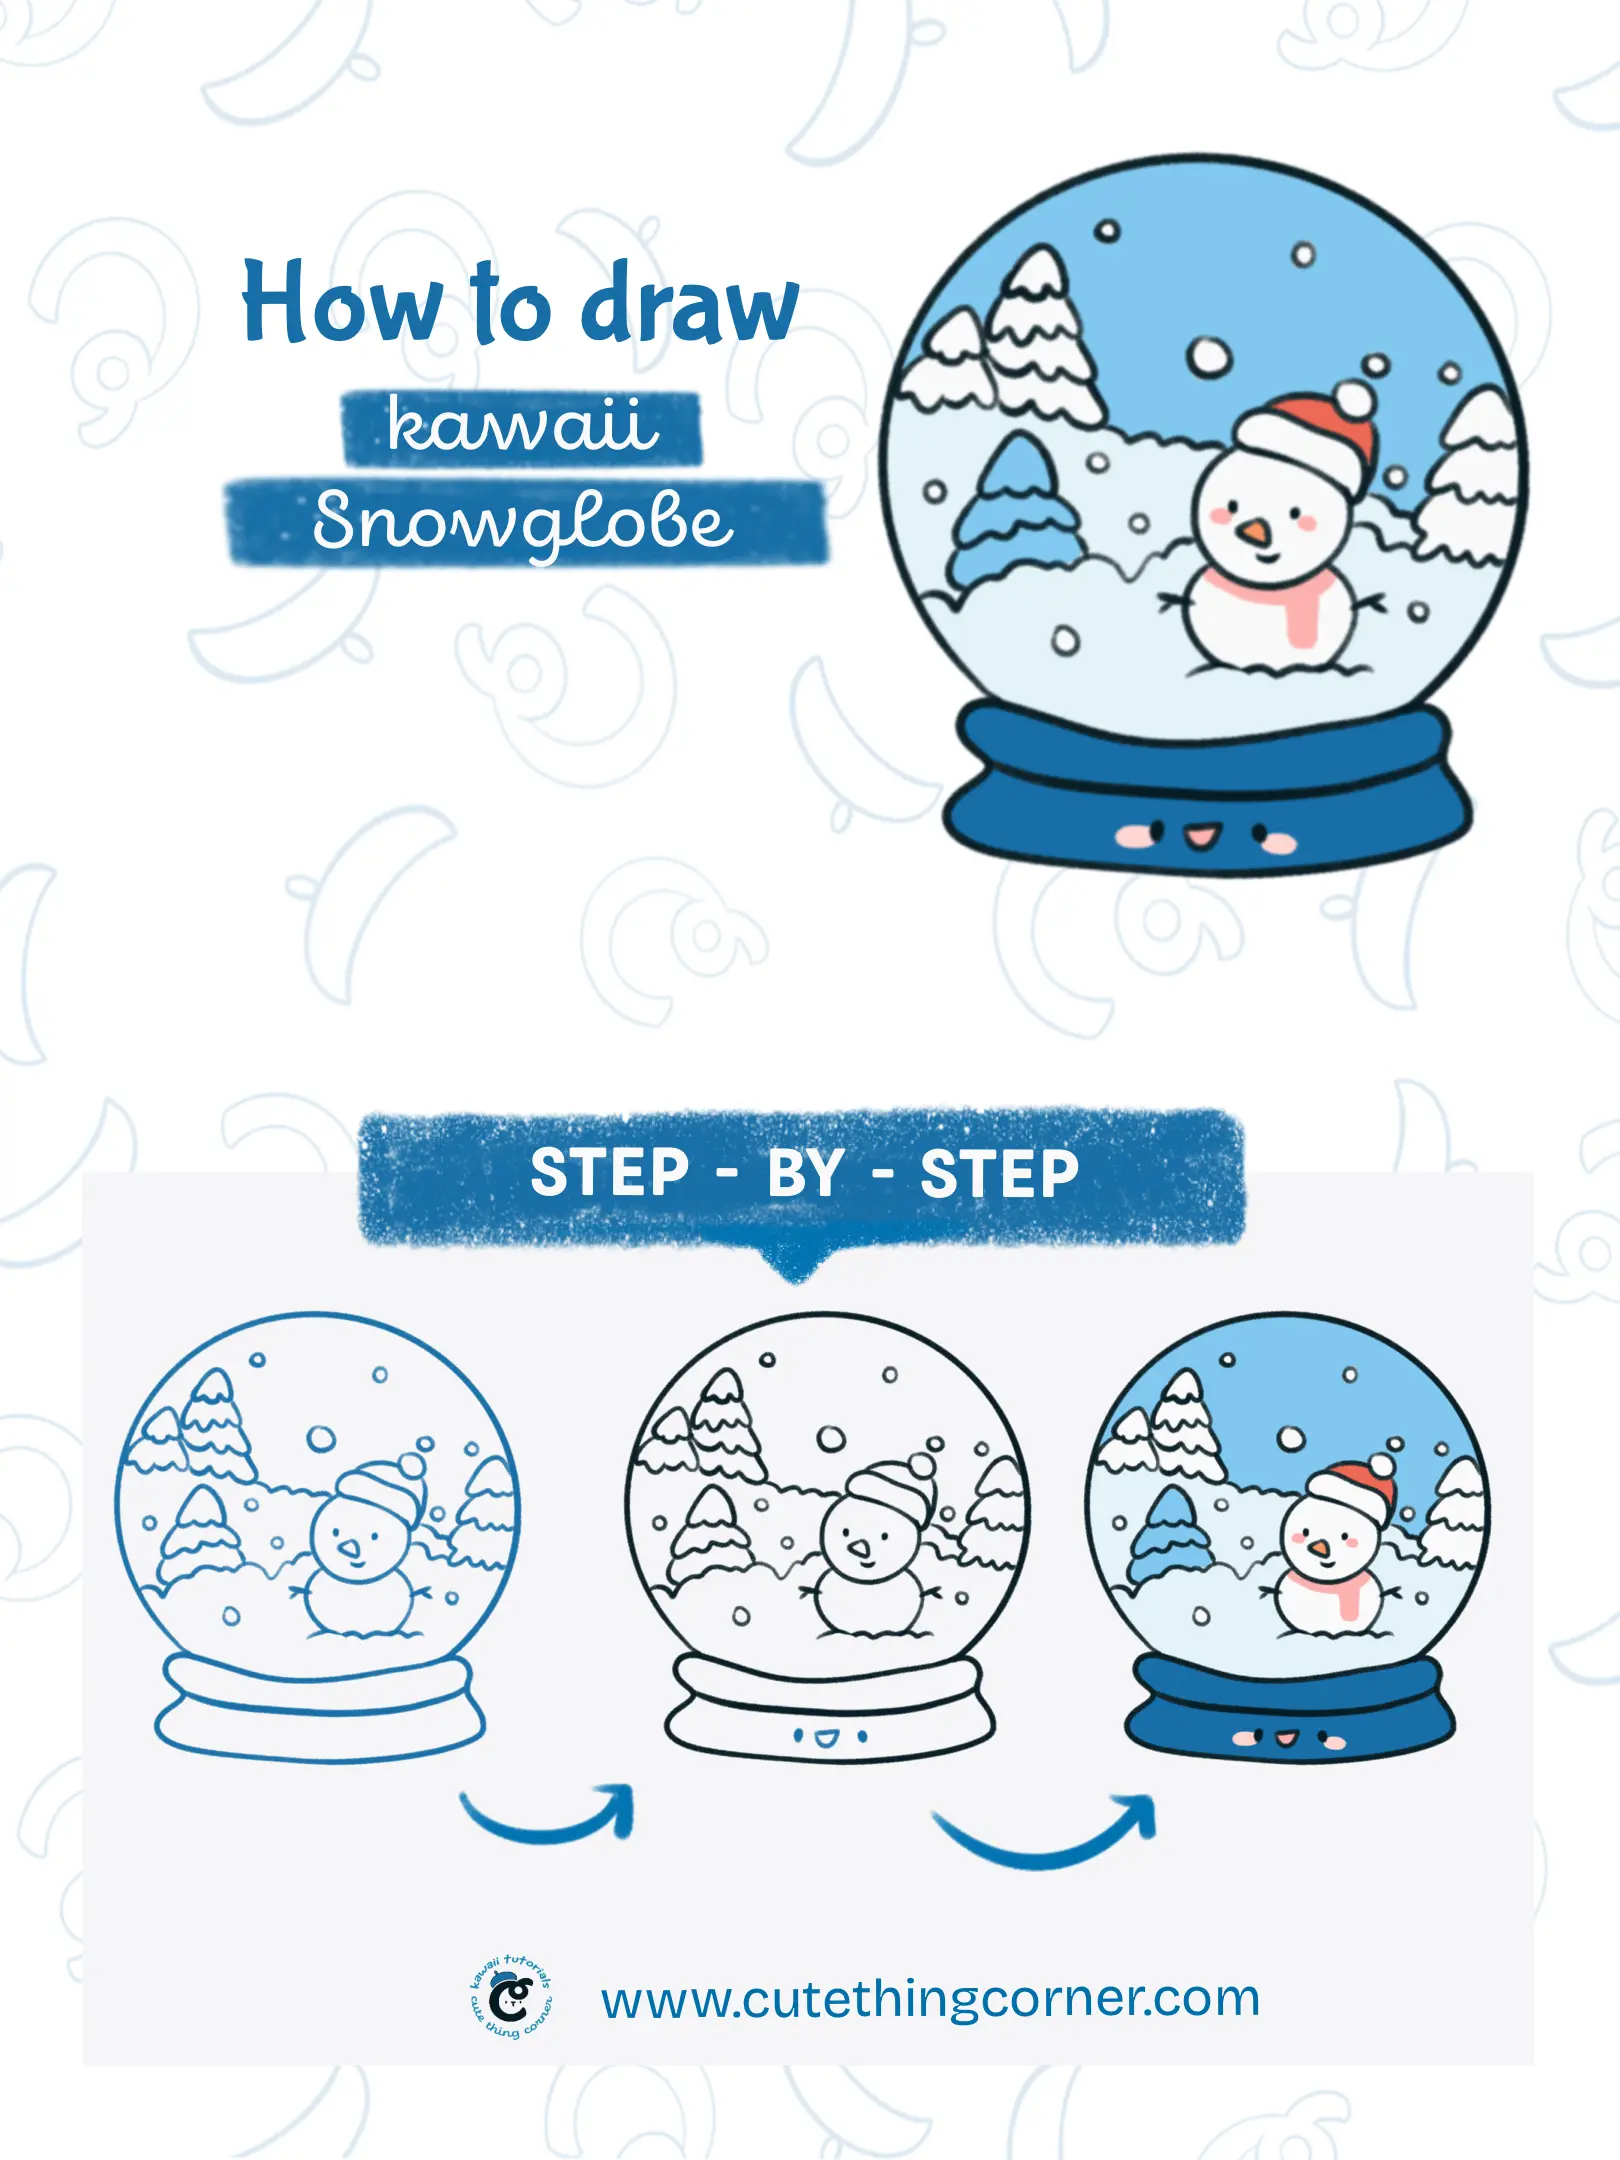
How to Draw a Cute Snowglobe
Now jump into step-by-step to draw a Cute Snowglobe:
#Step 1: Draw the base shape start with a large circle for the snow globe.
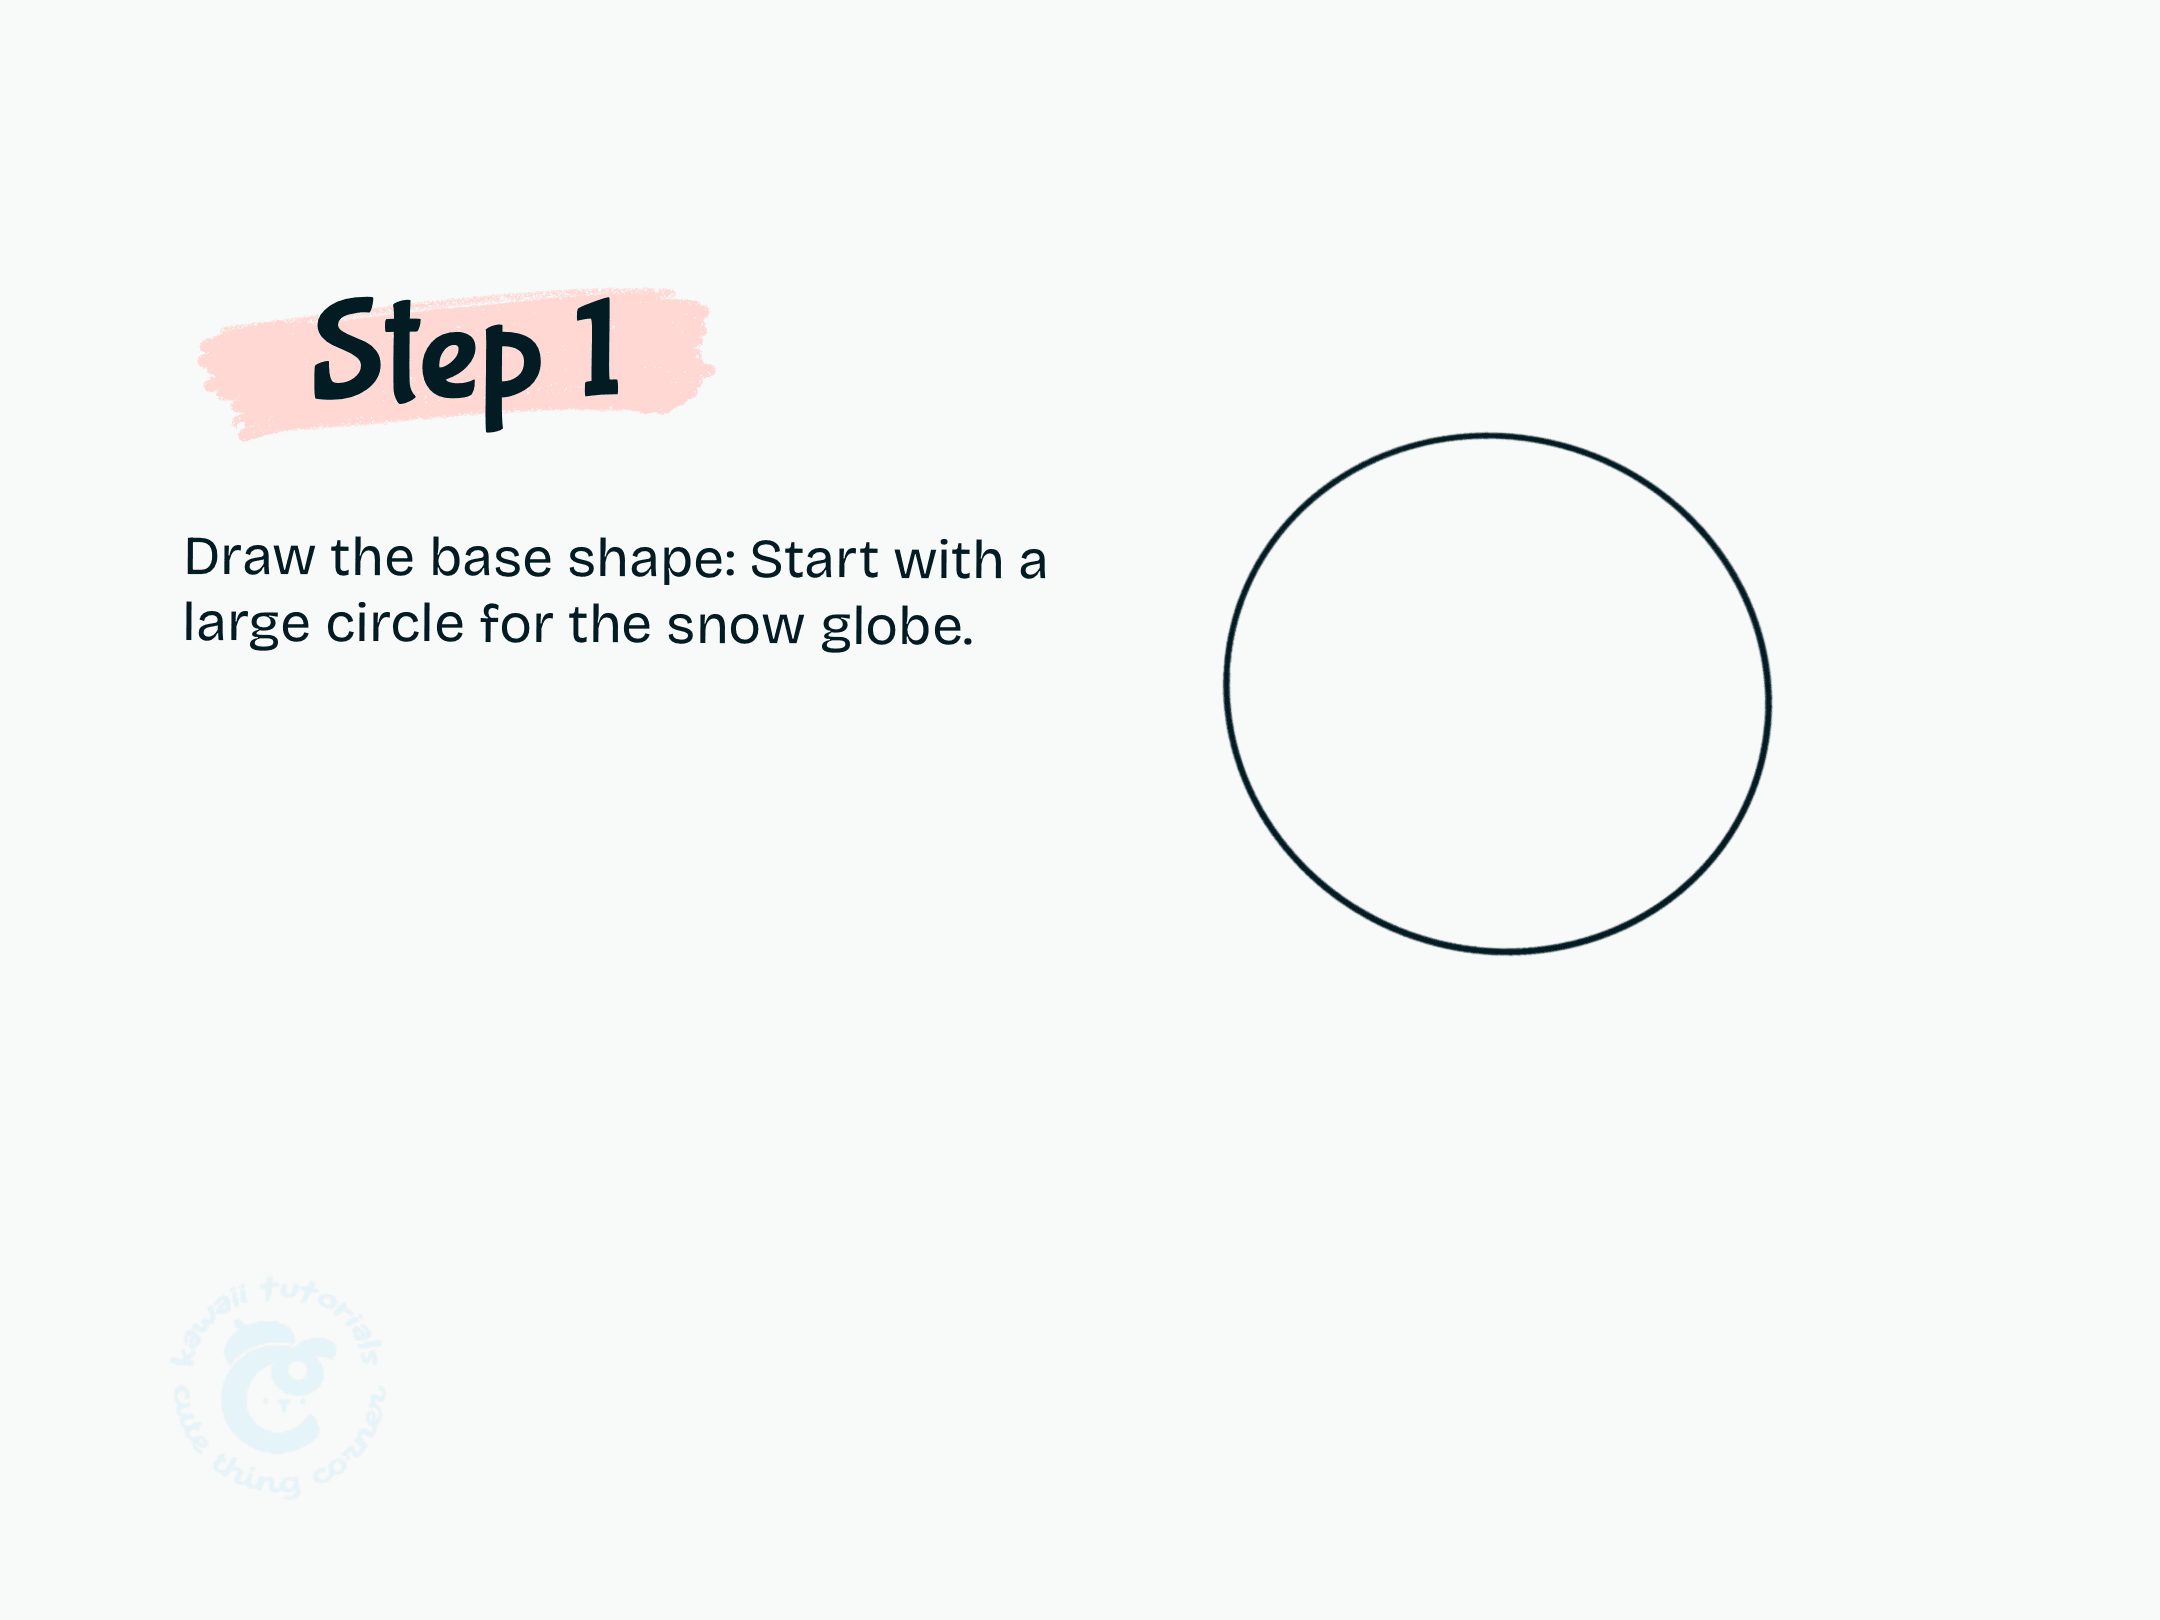
Step 1 Draw the base shape start with a large circle for the snow globe.
#Step 2: Add a small rectangle below for the base
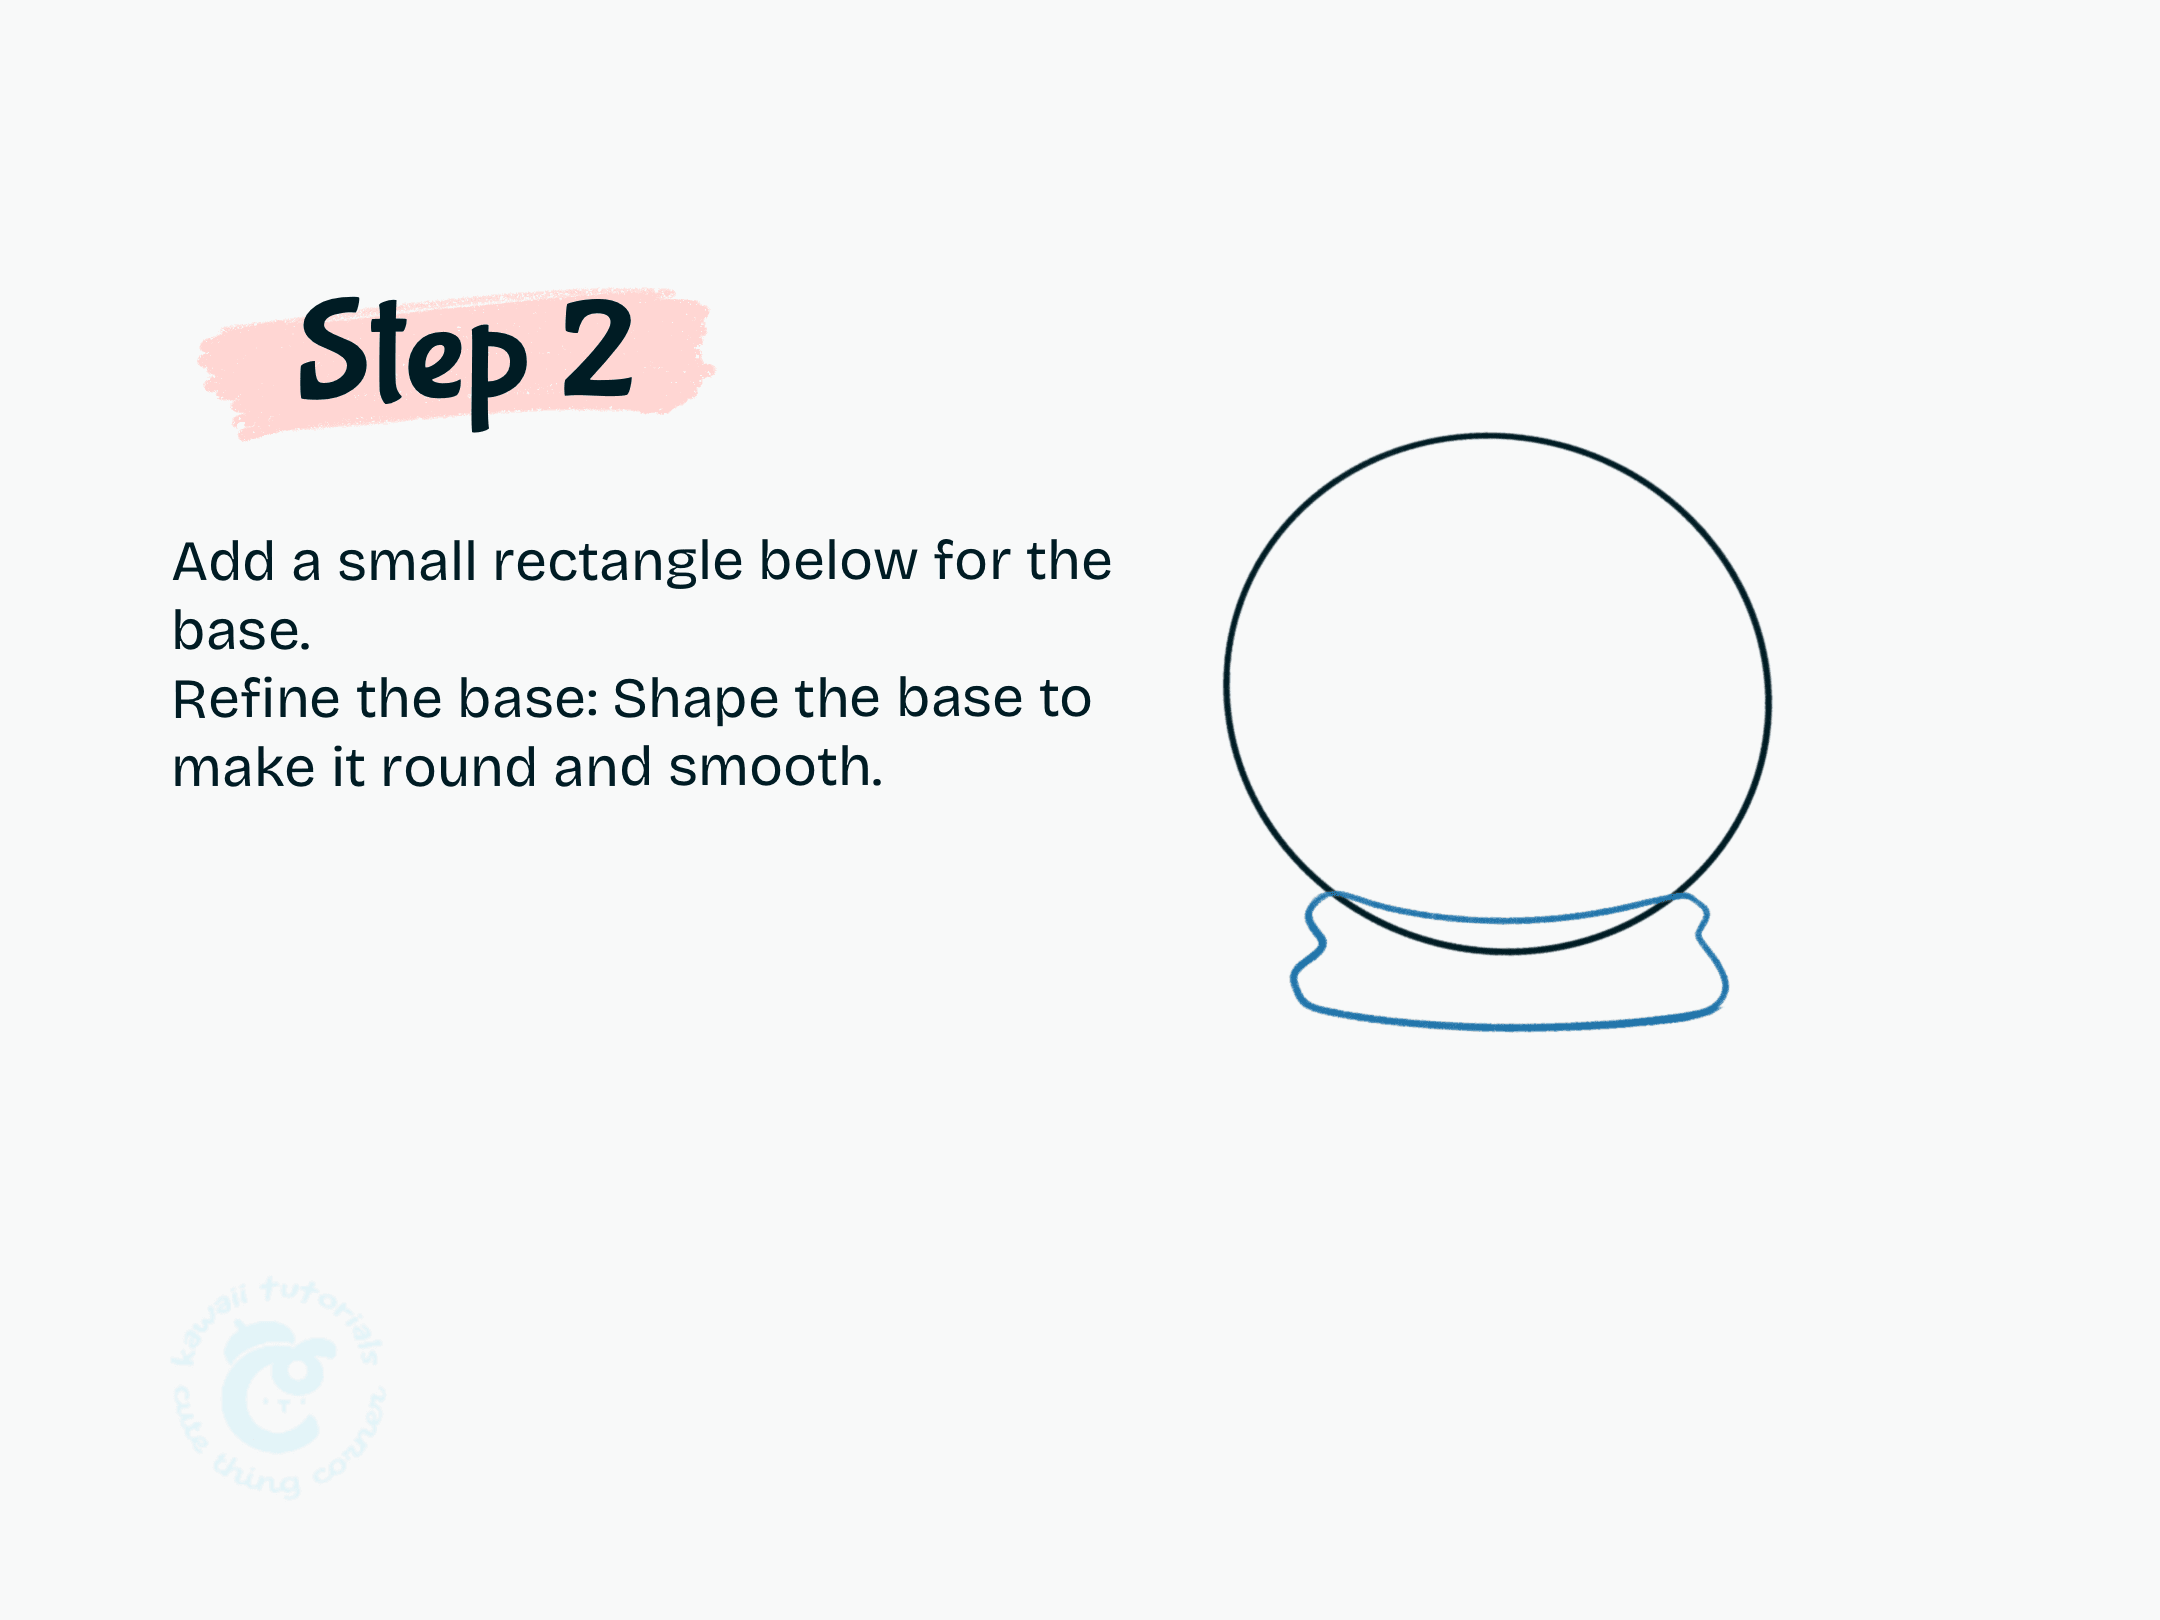
Step 2 Add a small rectangle below for the base
#Step 3: Add the background: Inside the globe, draw snowy hills and simple lines for a winter scene.
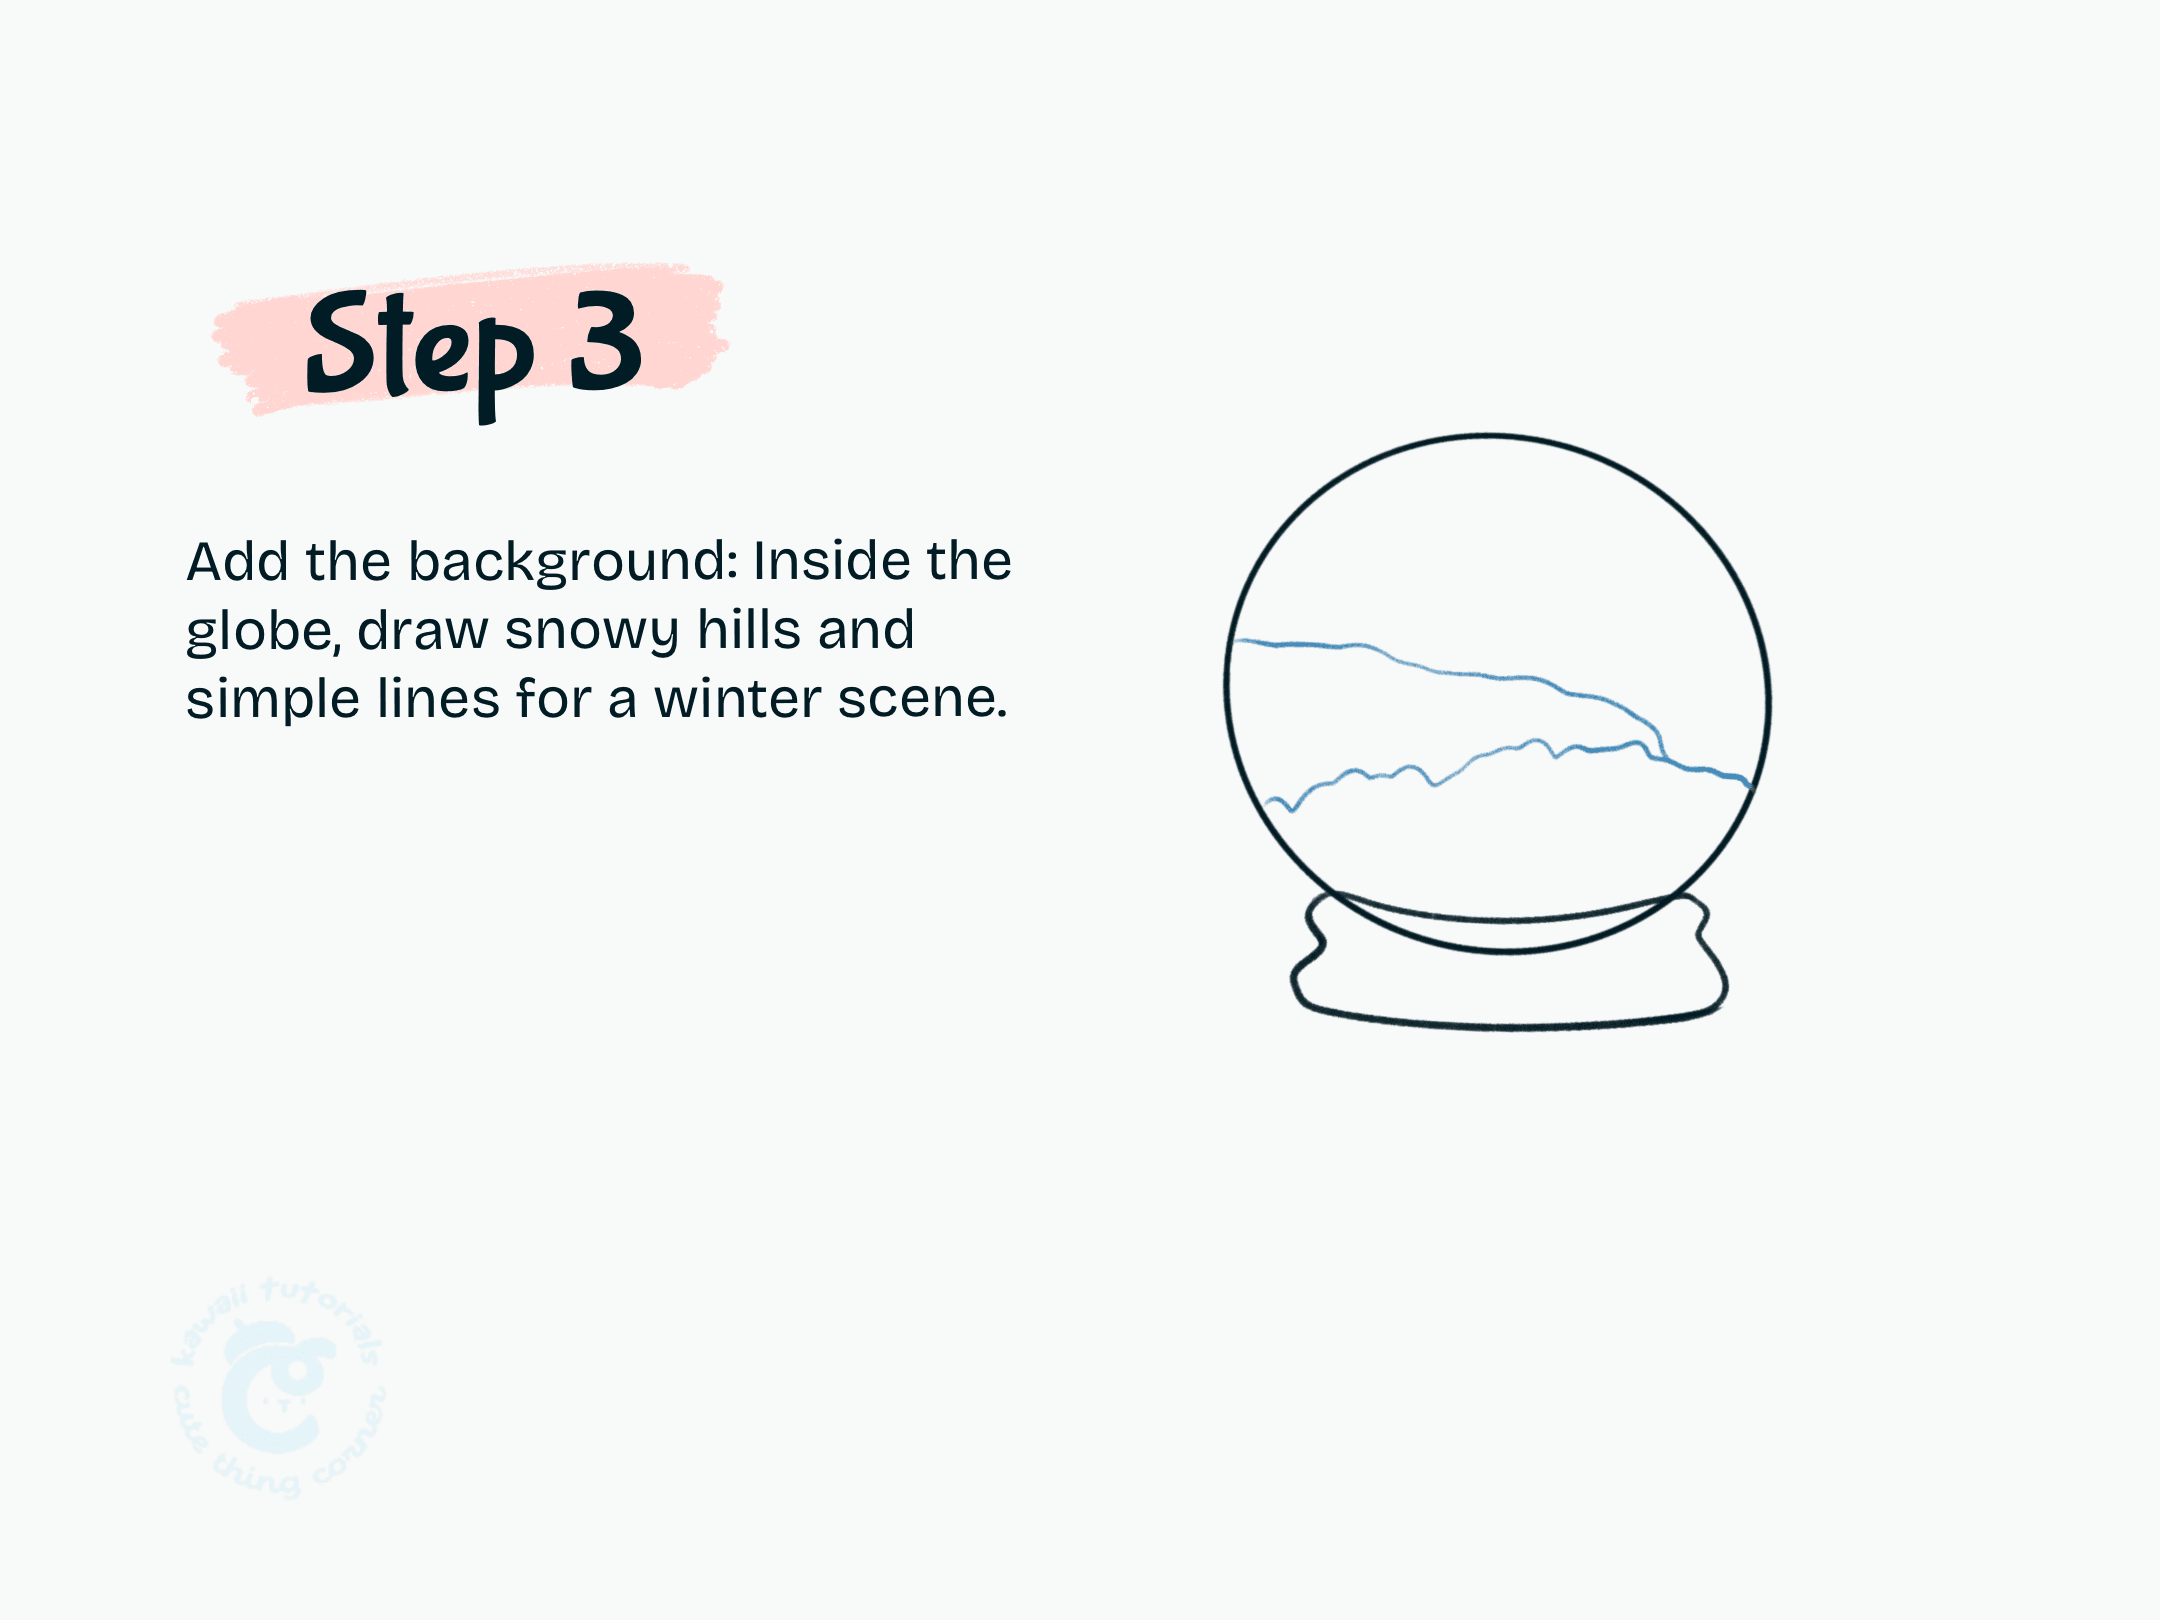
Step 3 Add the background Inside the globe, draw snowy hills and simple lines for a winter scene.
#Step 4: Draw Christmas trees: Add a few Christmas trees on the hills for a festive touch

Step 4 Draw Christmas trees
#Step 5: Sketch falling snowflakes and outline the snowman’s base shape in the center
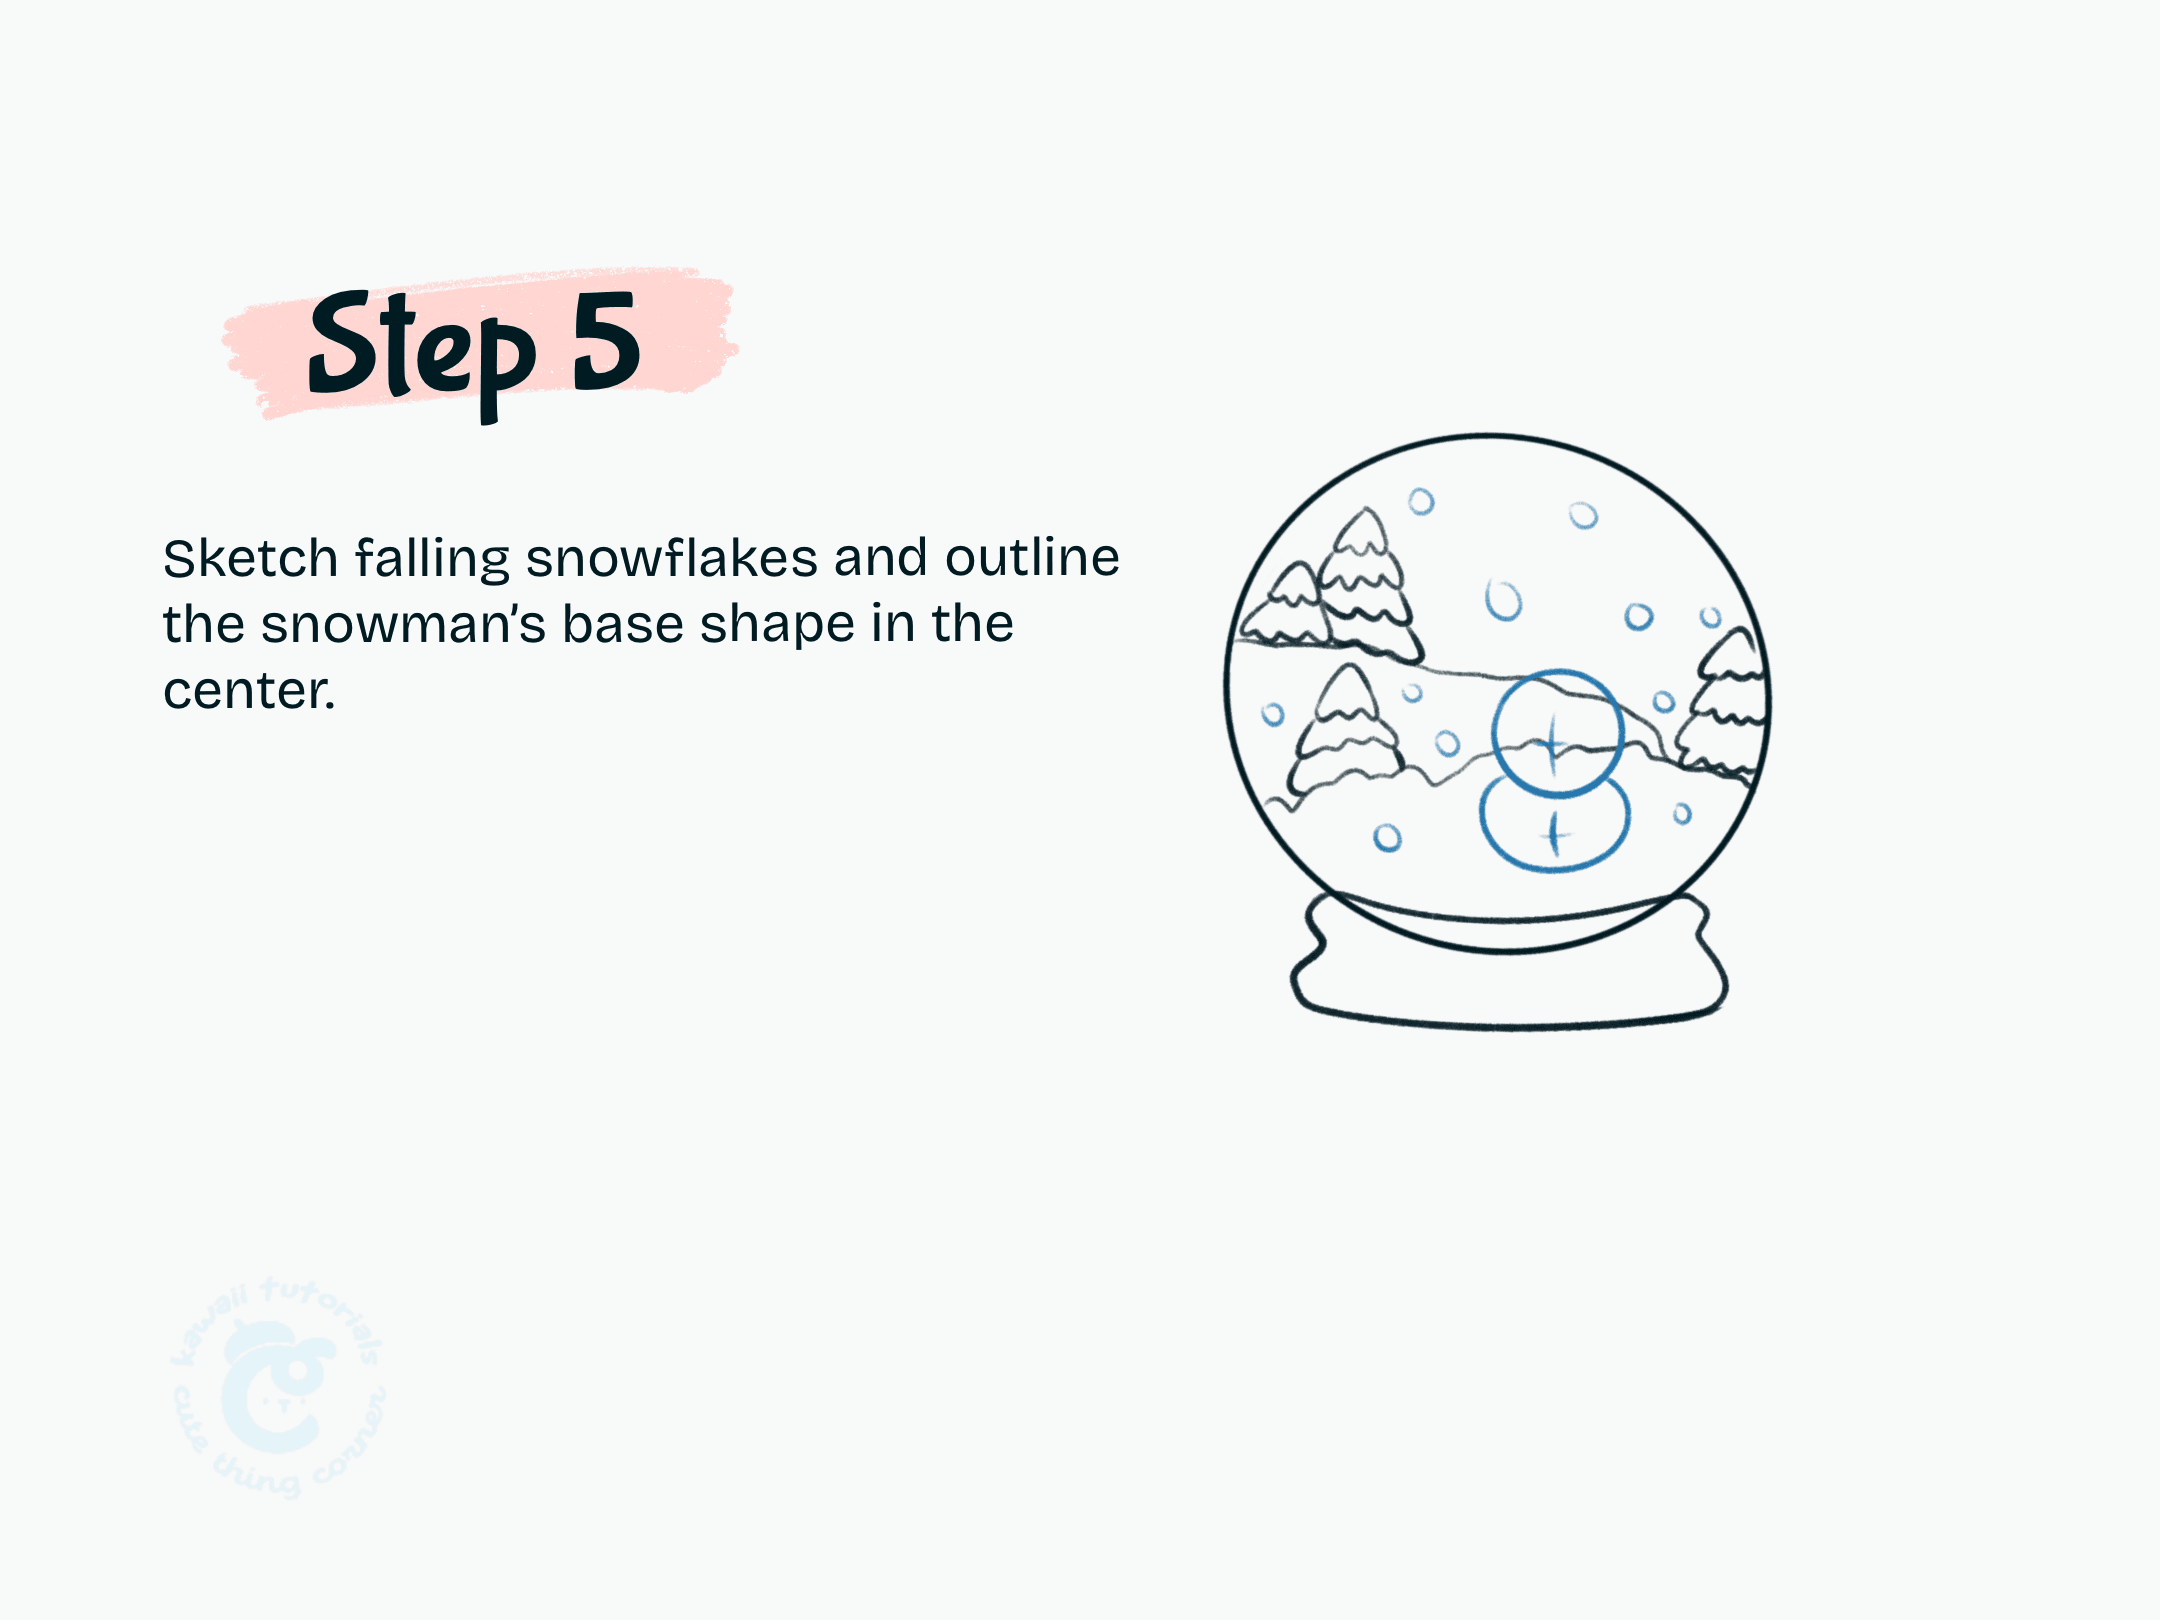
Step 5 Sketch falling snowflakes and outline the snowman’s base shape in the center
#Step 6: Add a cute snowman wearing a hat and scarf. Erase extra lines and refine all details.
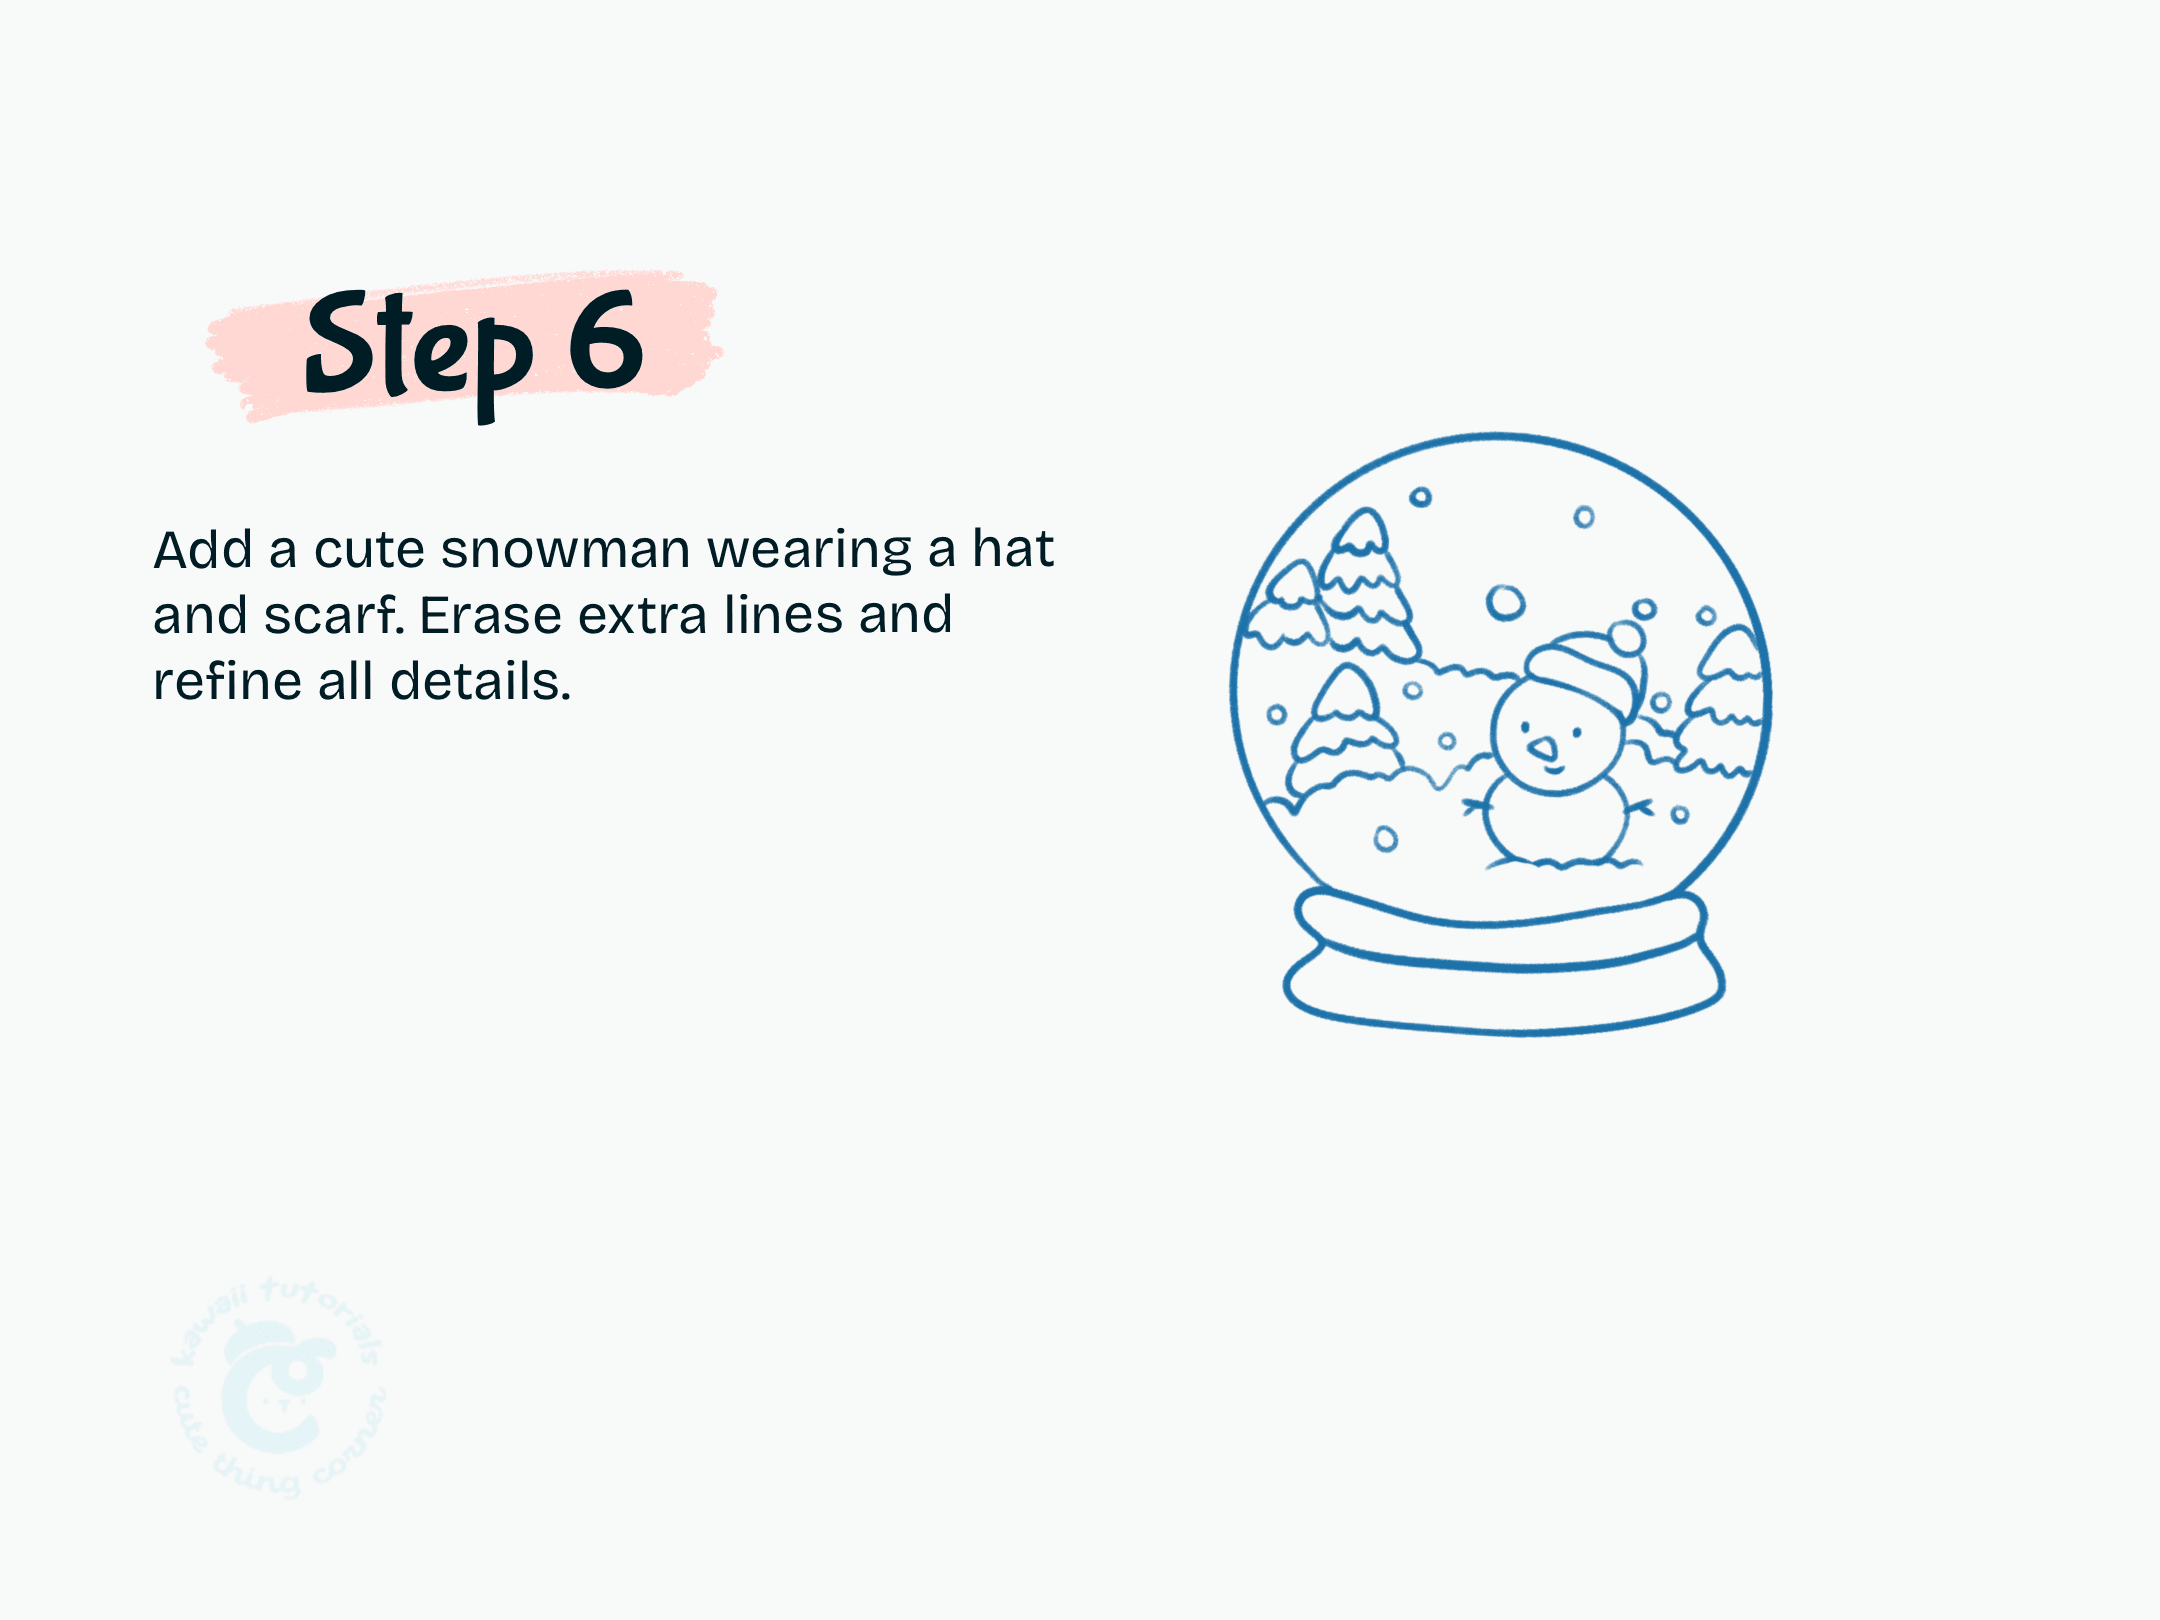
Step 6 Add a cute snowman wearing a hat and scarf
#Step 7: Draw a happy face on the snow globe to make it more kawaii
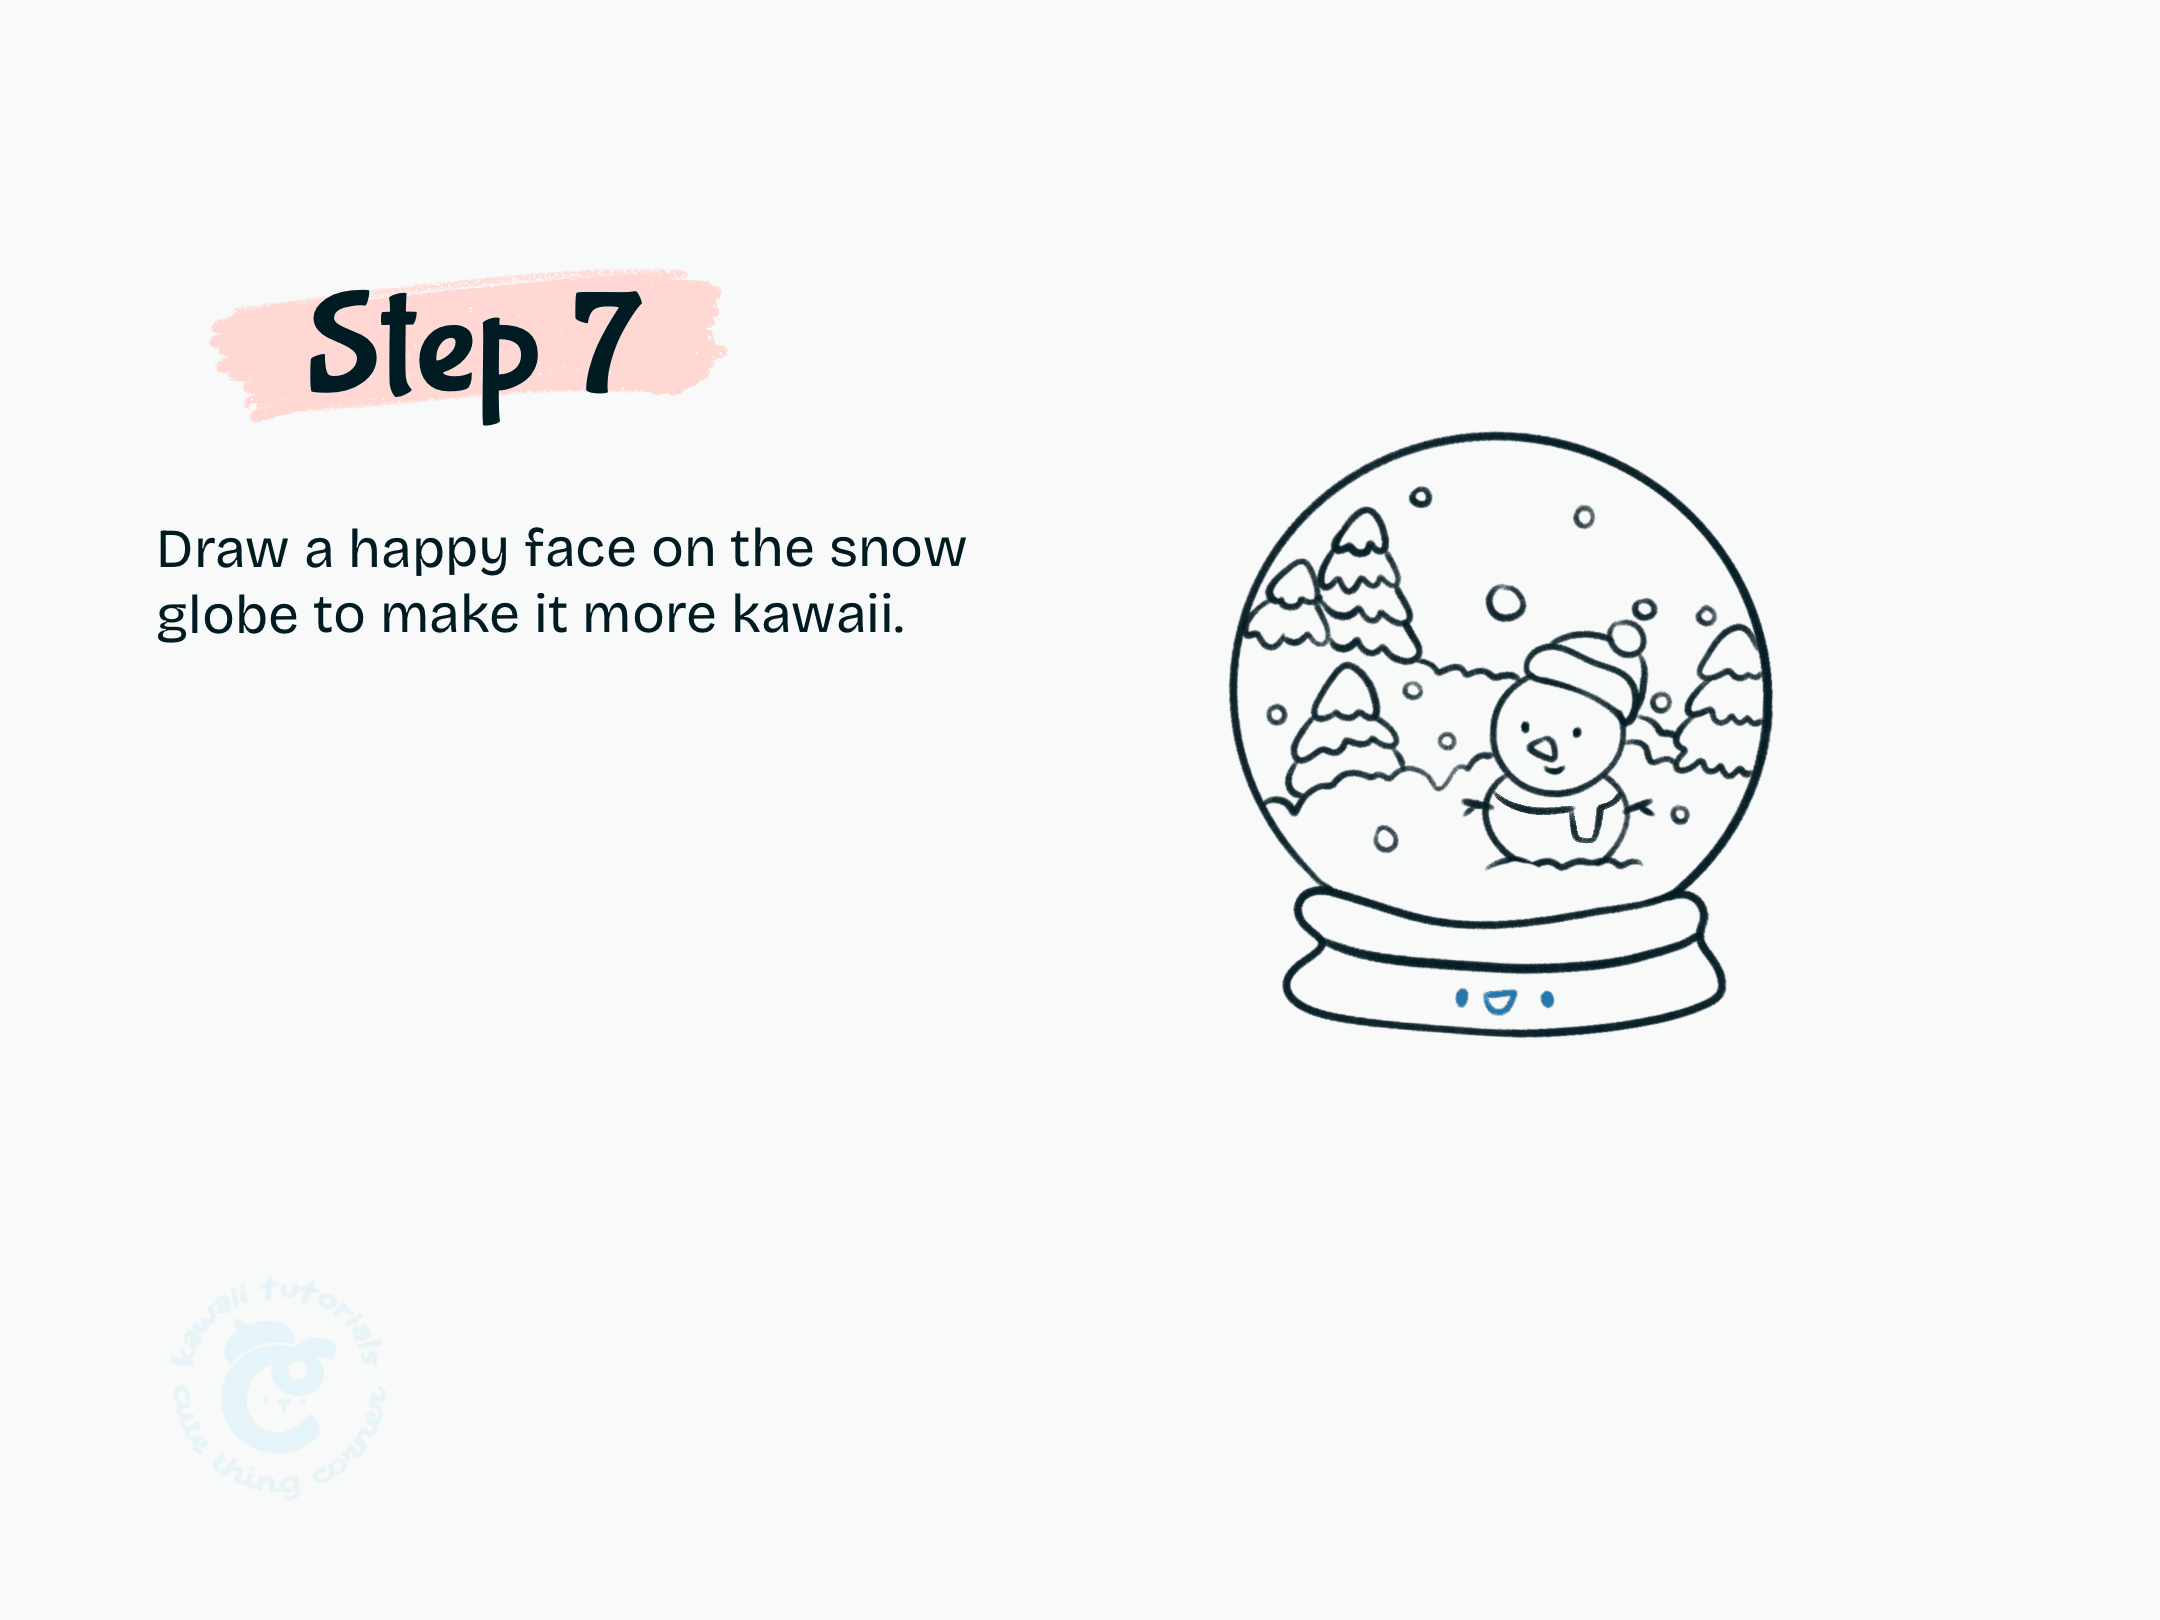
Step 7 Draw a happy face on the snow globe to make it more kawaii
#Step 8: Color Snowglobe: Use bright, festive colors to bring the snow globe to life. Your adorable snow globe is complete.
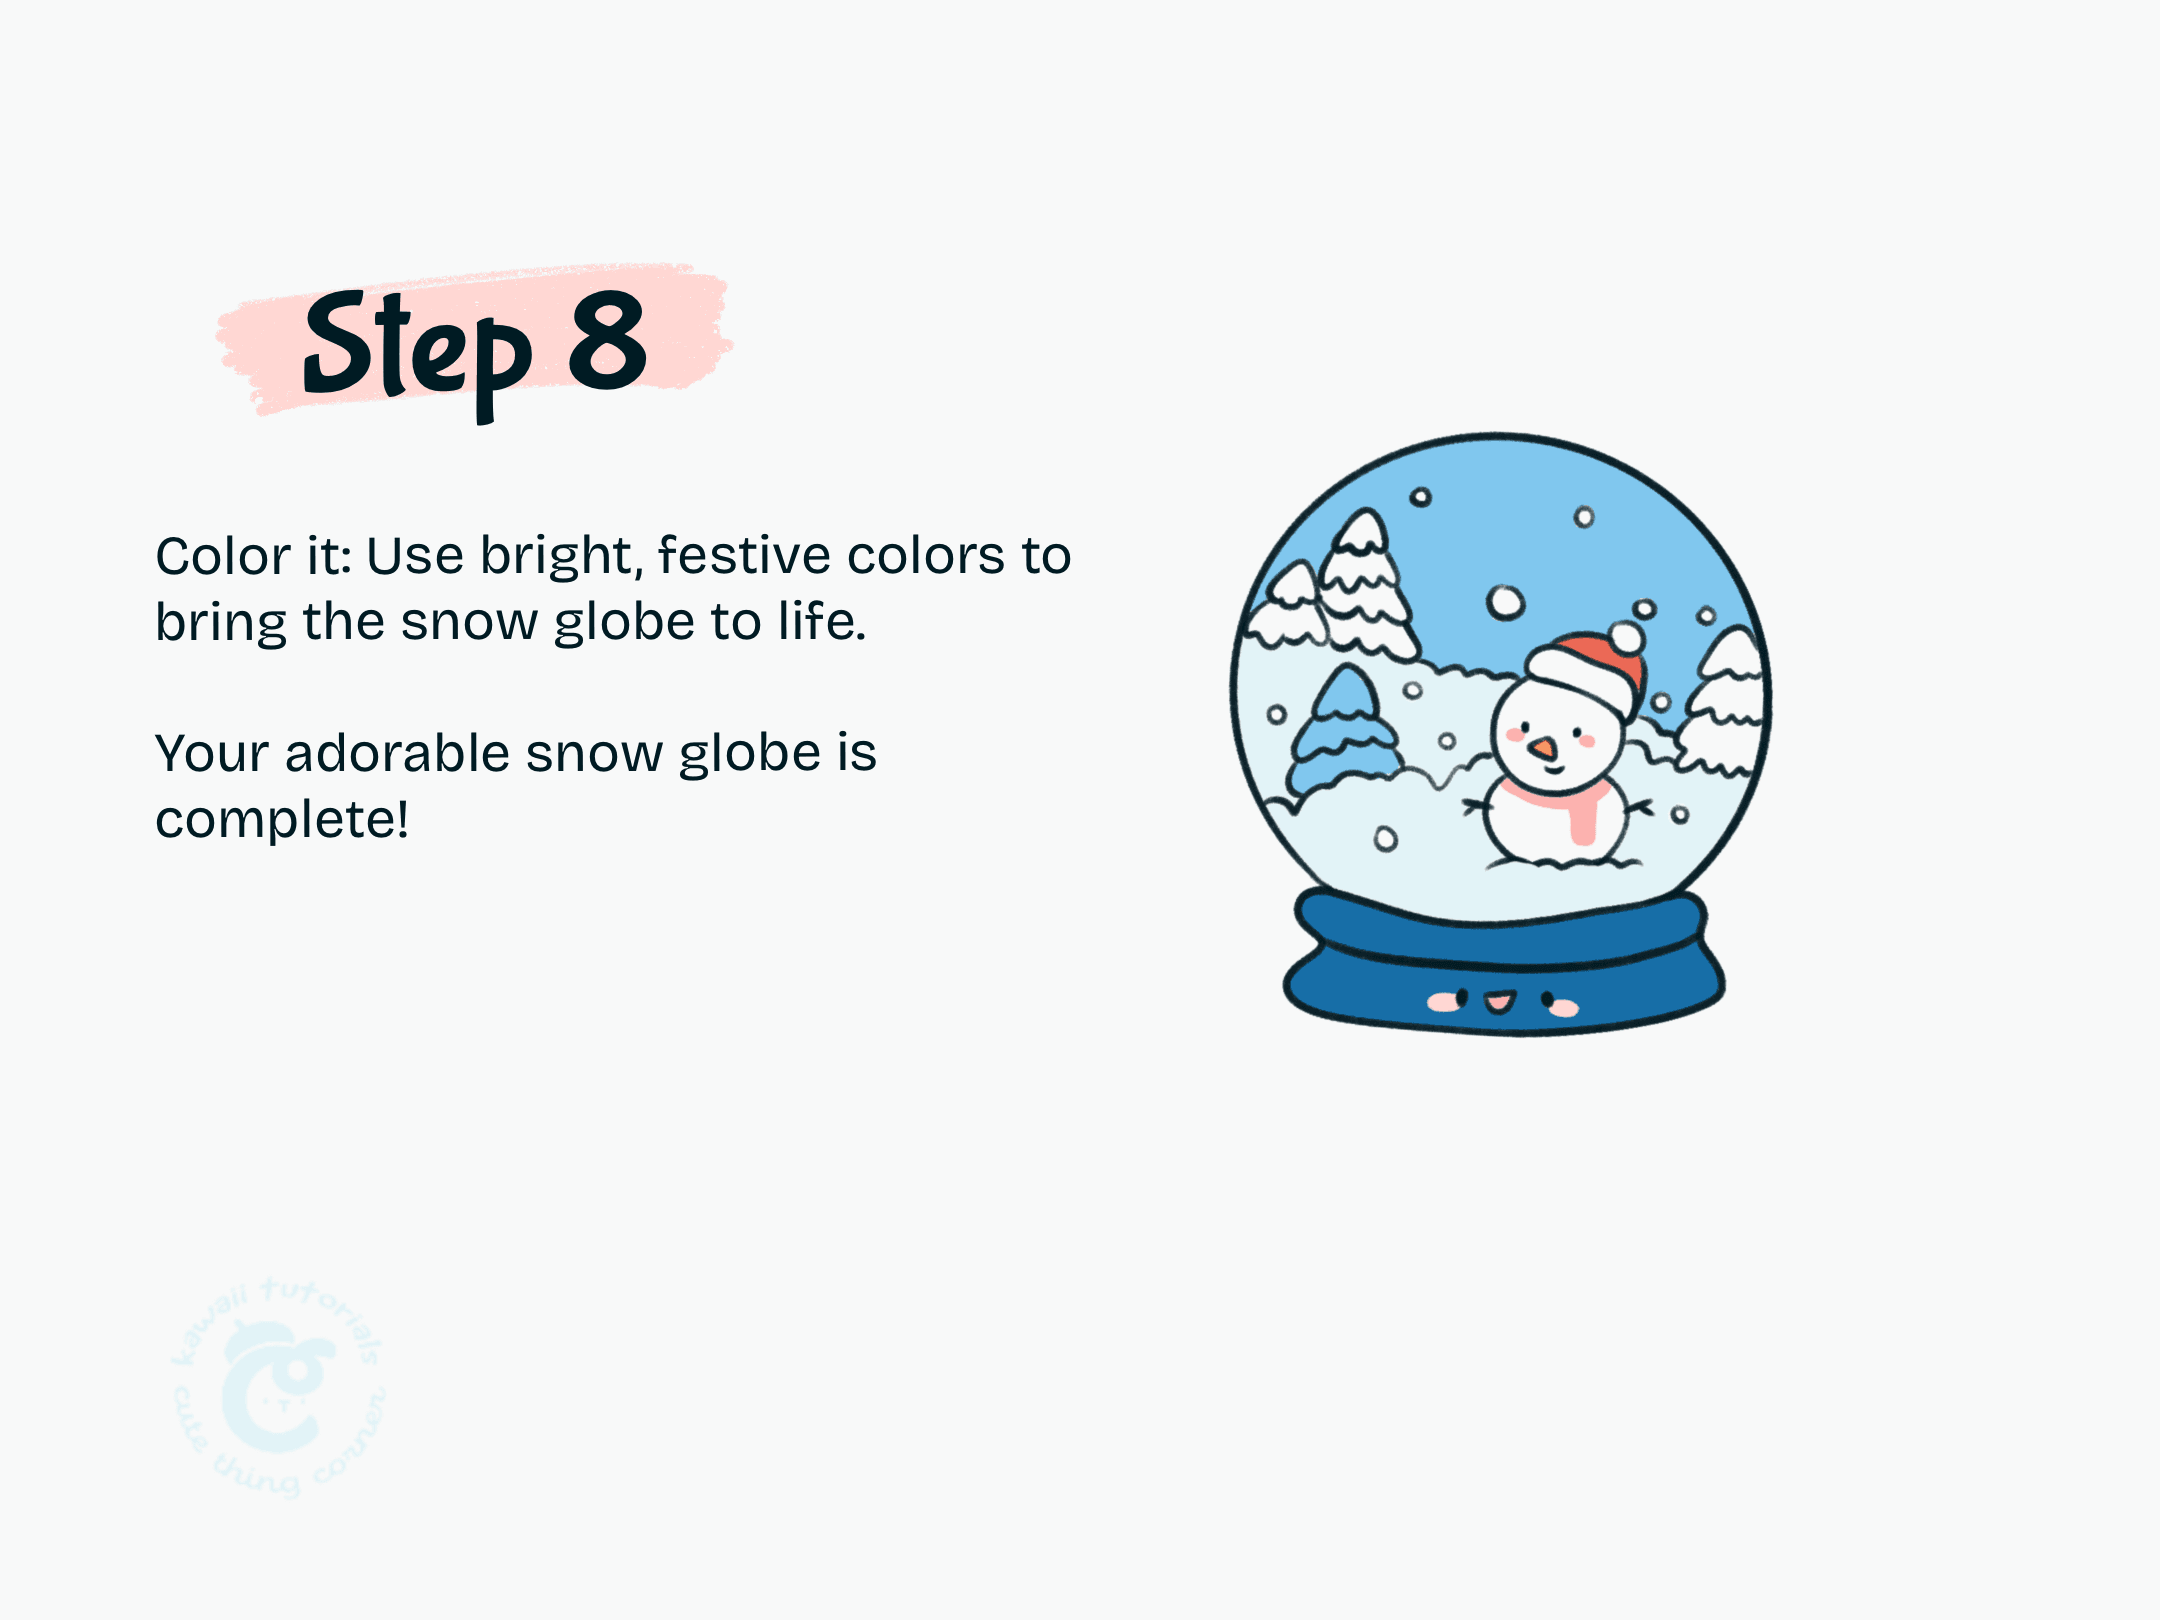
Step 8 Color Snowglobe Use bright, festive colors to bring the snow globe to life.
And there you have it—your adorable snowglobe is complete! ⛄✨
I hope you enjoyed this step-by-step tutorial and had fun creating this magical winter scene.
Don’t forget to share your artwork and let us know how it turned out!
For more cute and festive drawing ideas, check out our blog and explore even more creative tutorials.
Let’s keep the holiday spirit alive—see you in the next guide! 🎨❄️💕
Lear full steps to draw a cute Snowglobe:
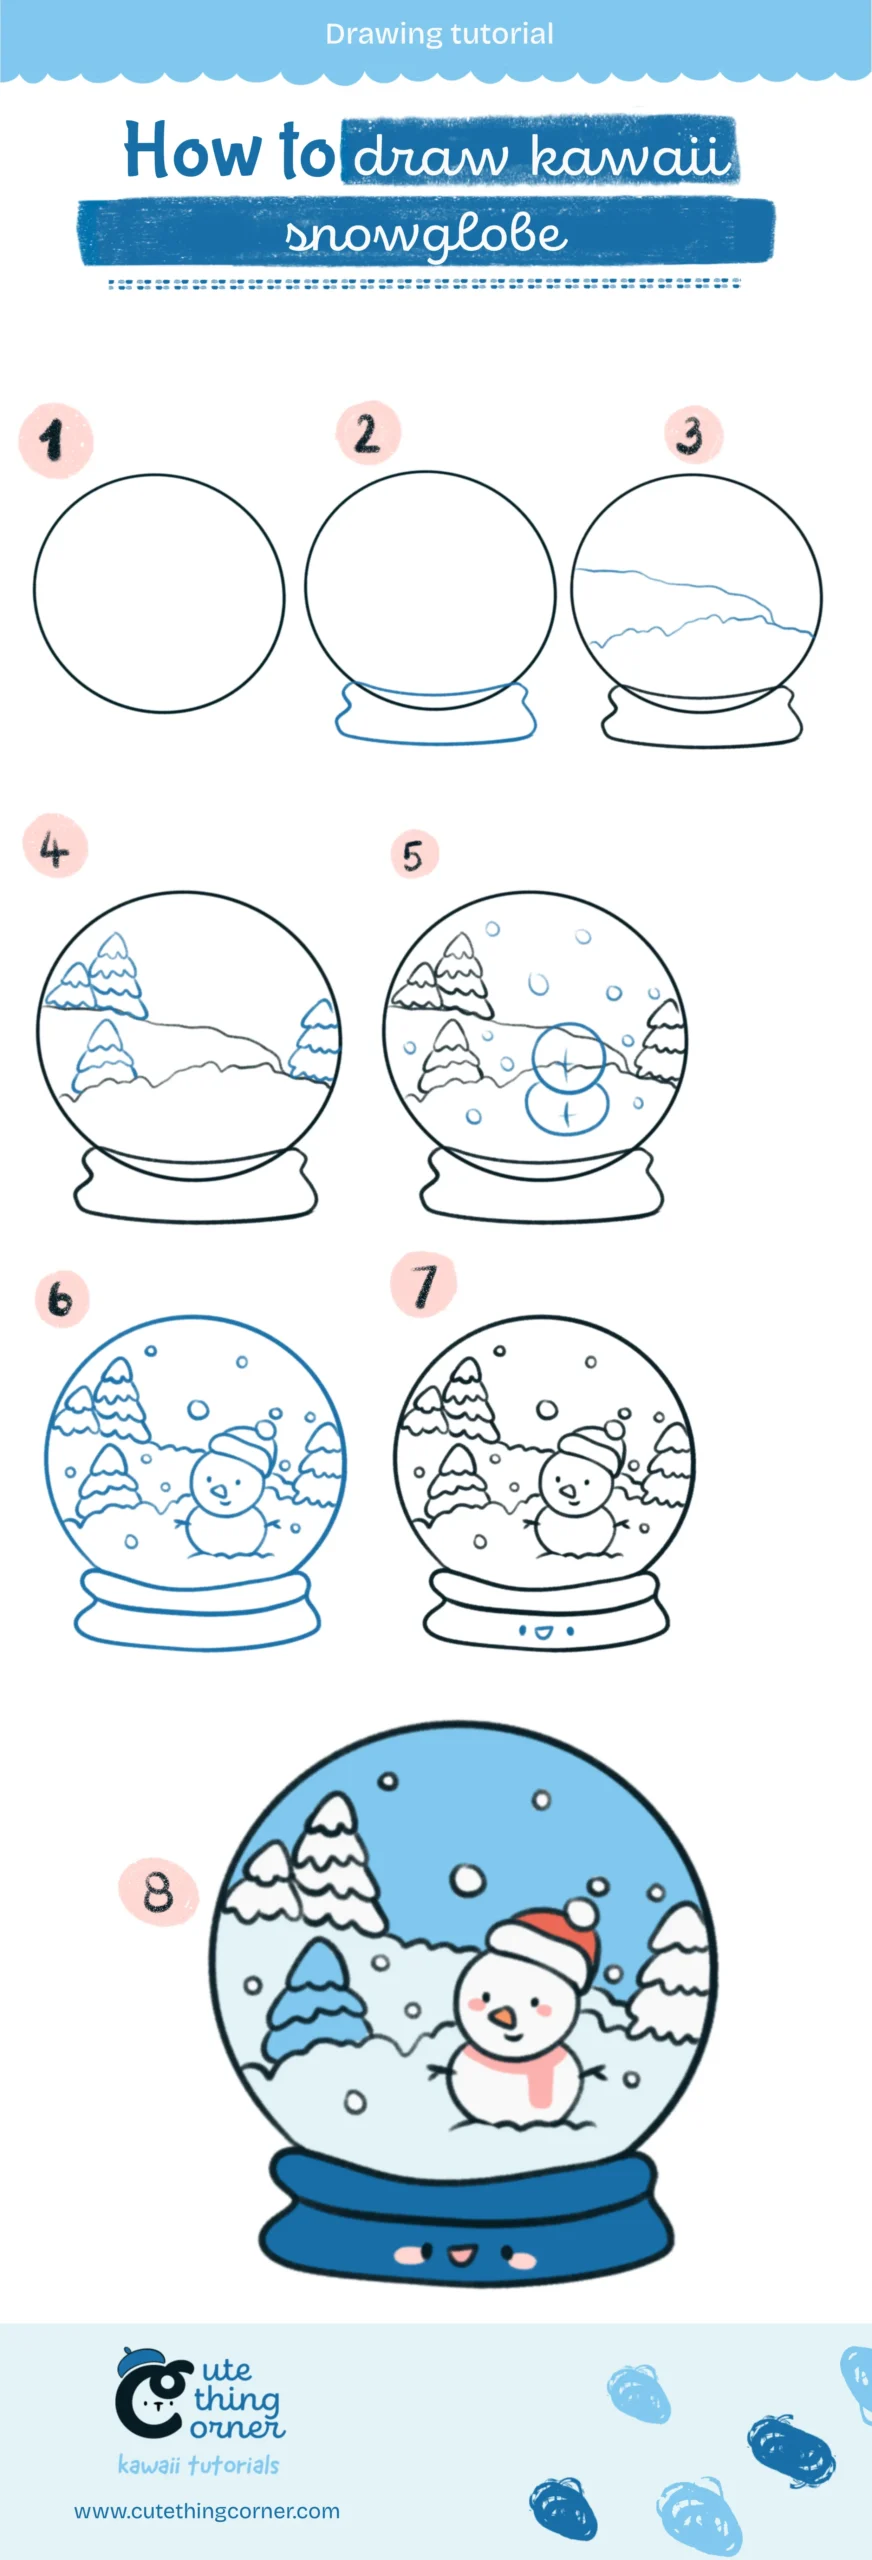
How to Draw a Kawaii Snowglobe

