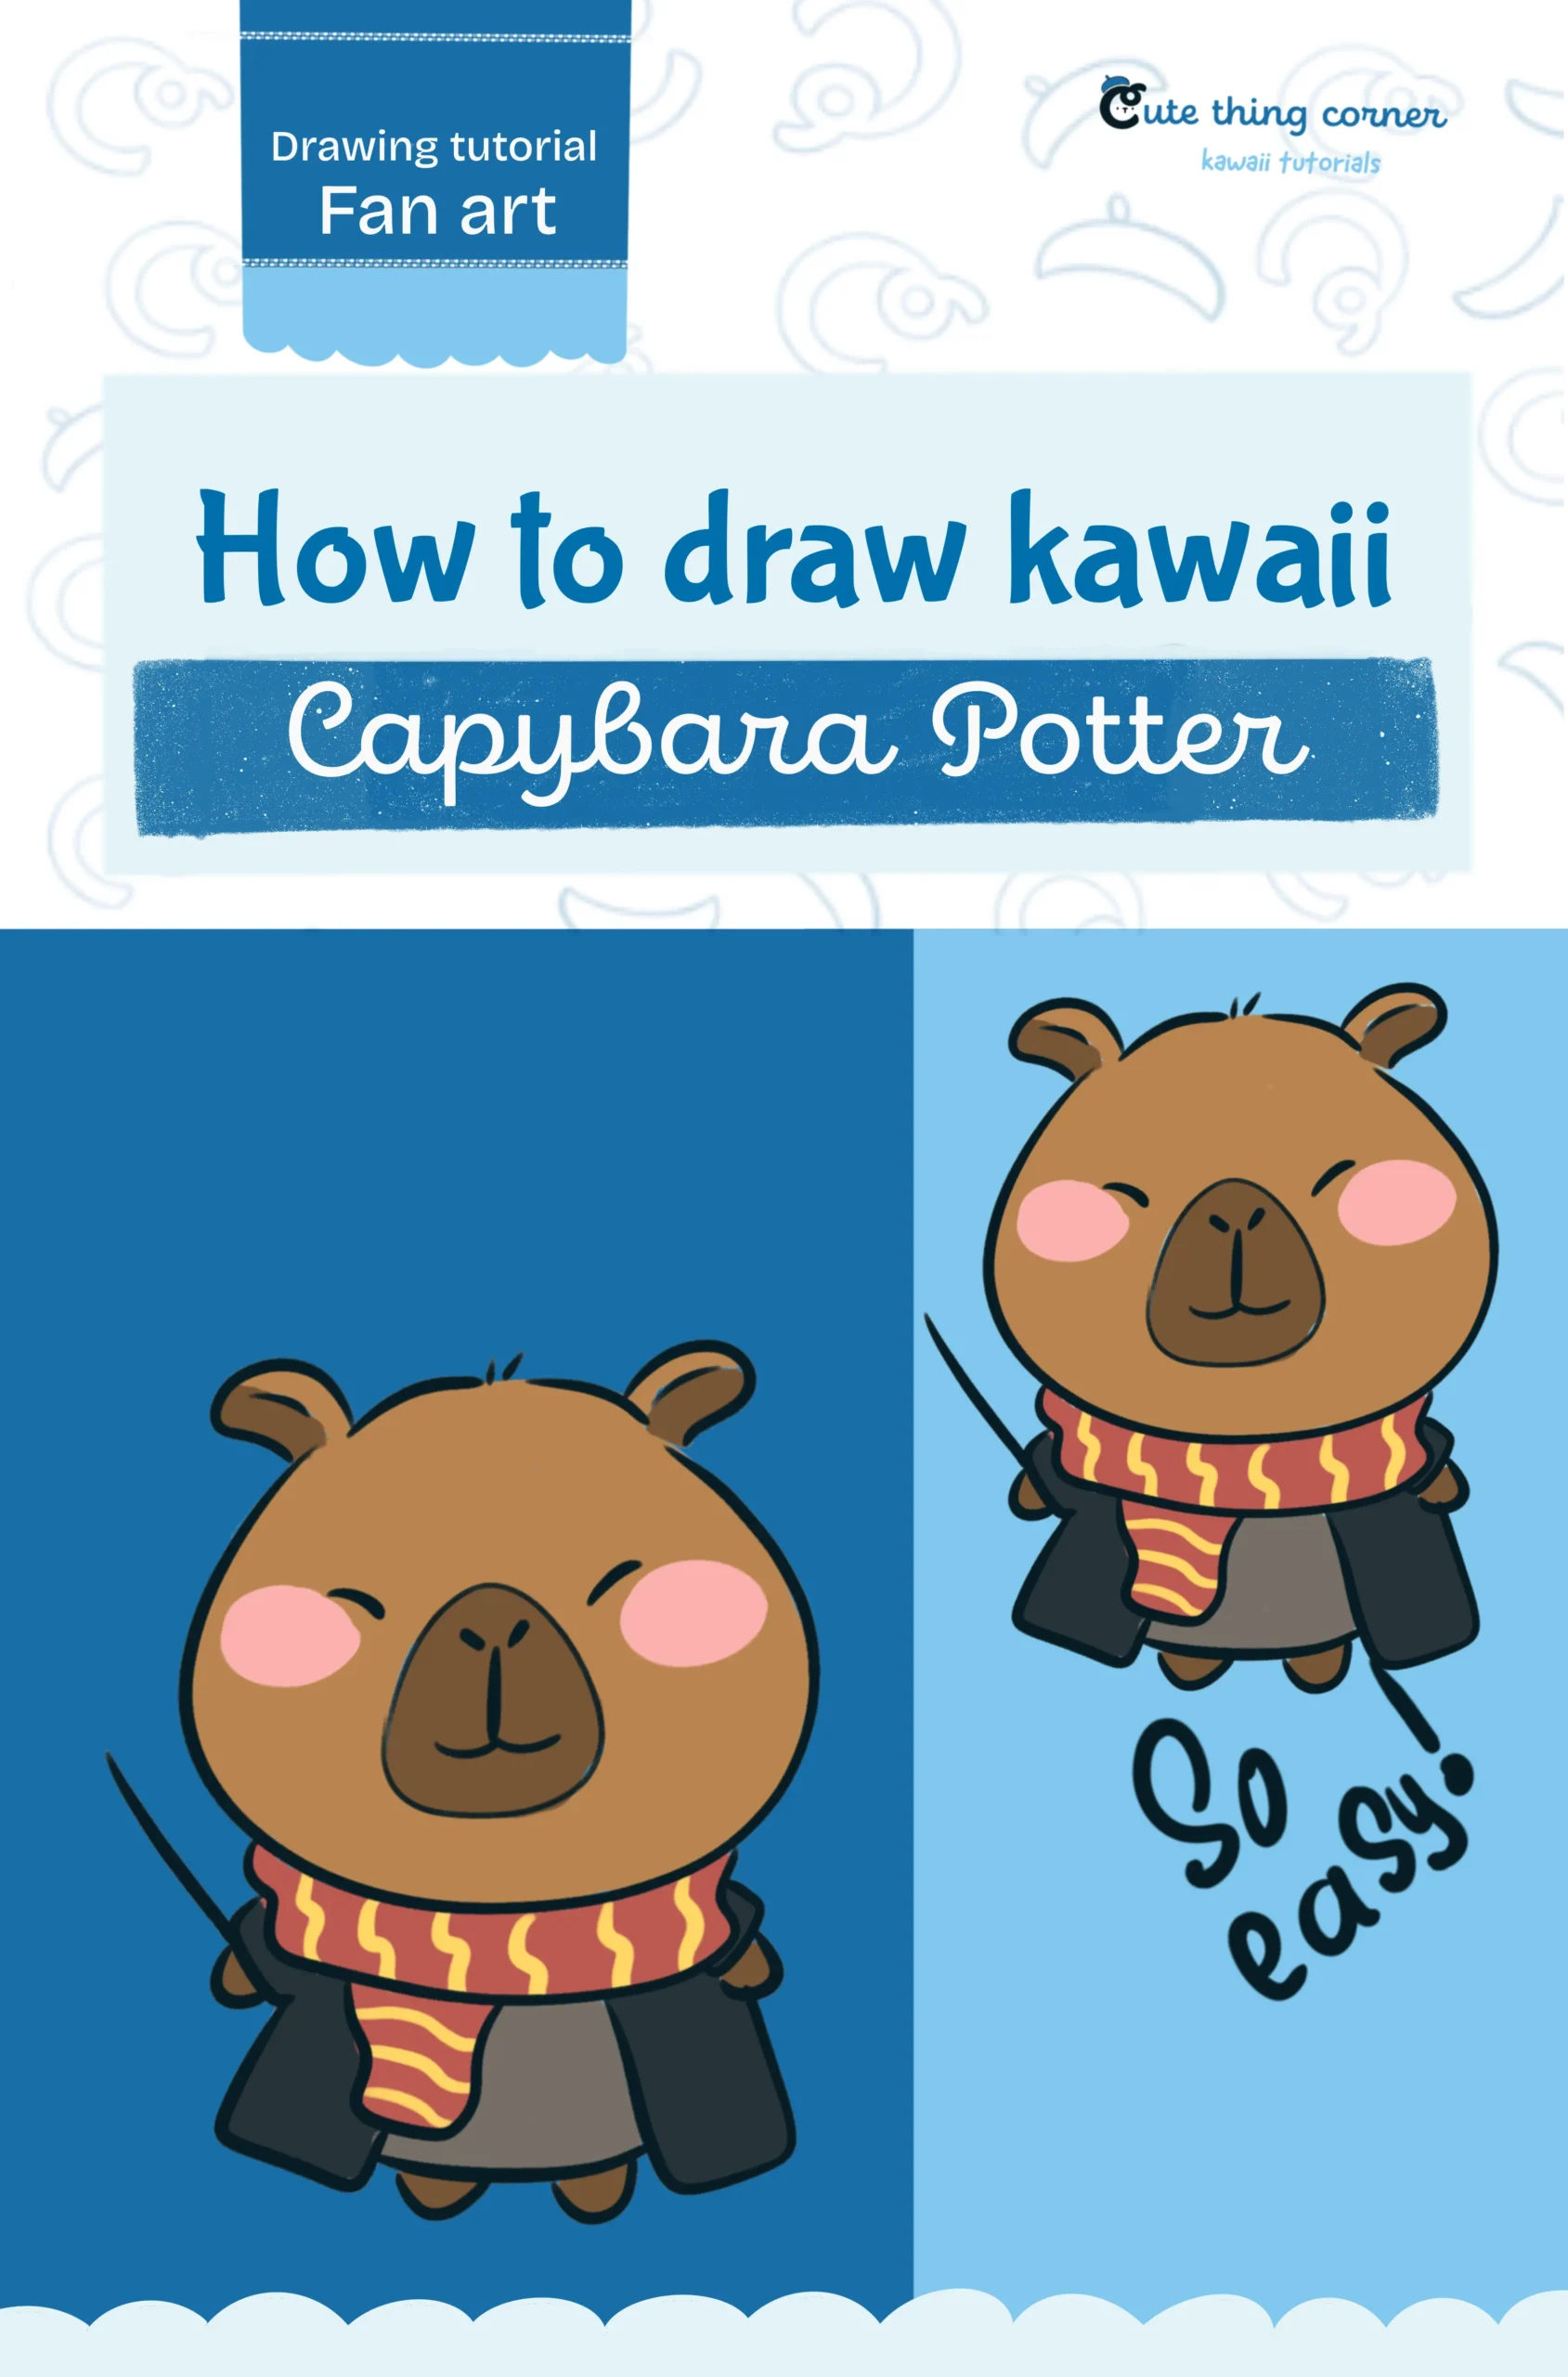
Say cheese! 📸
Today, we’re drawing a super cute Capybara Photographer from Cute Thing Corner— a calm little creature with a passion for capturing perfect moments. Whether you’re a fan of kawaii animals or you simply love drawing creative characters, this step-by-step guide will walk you through each part with ease.
All you need is your favorite drawing tool and a little imagination. Let’s bring this tiny photographer to life — one simple step at a time! 🐹🎞️
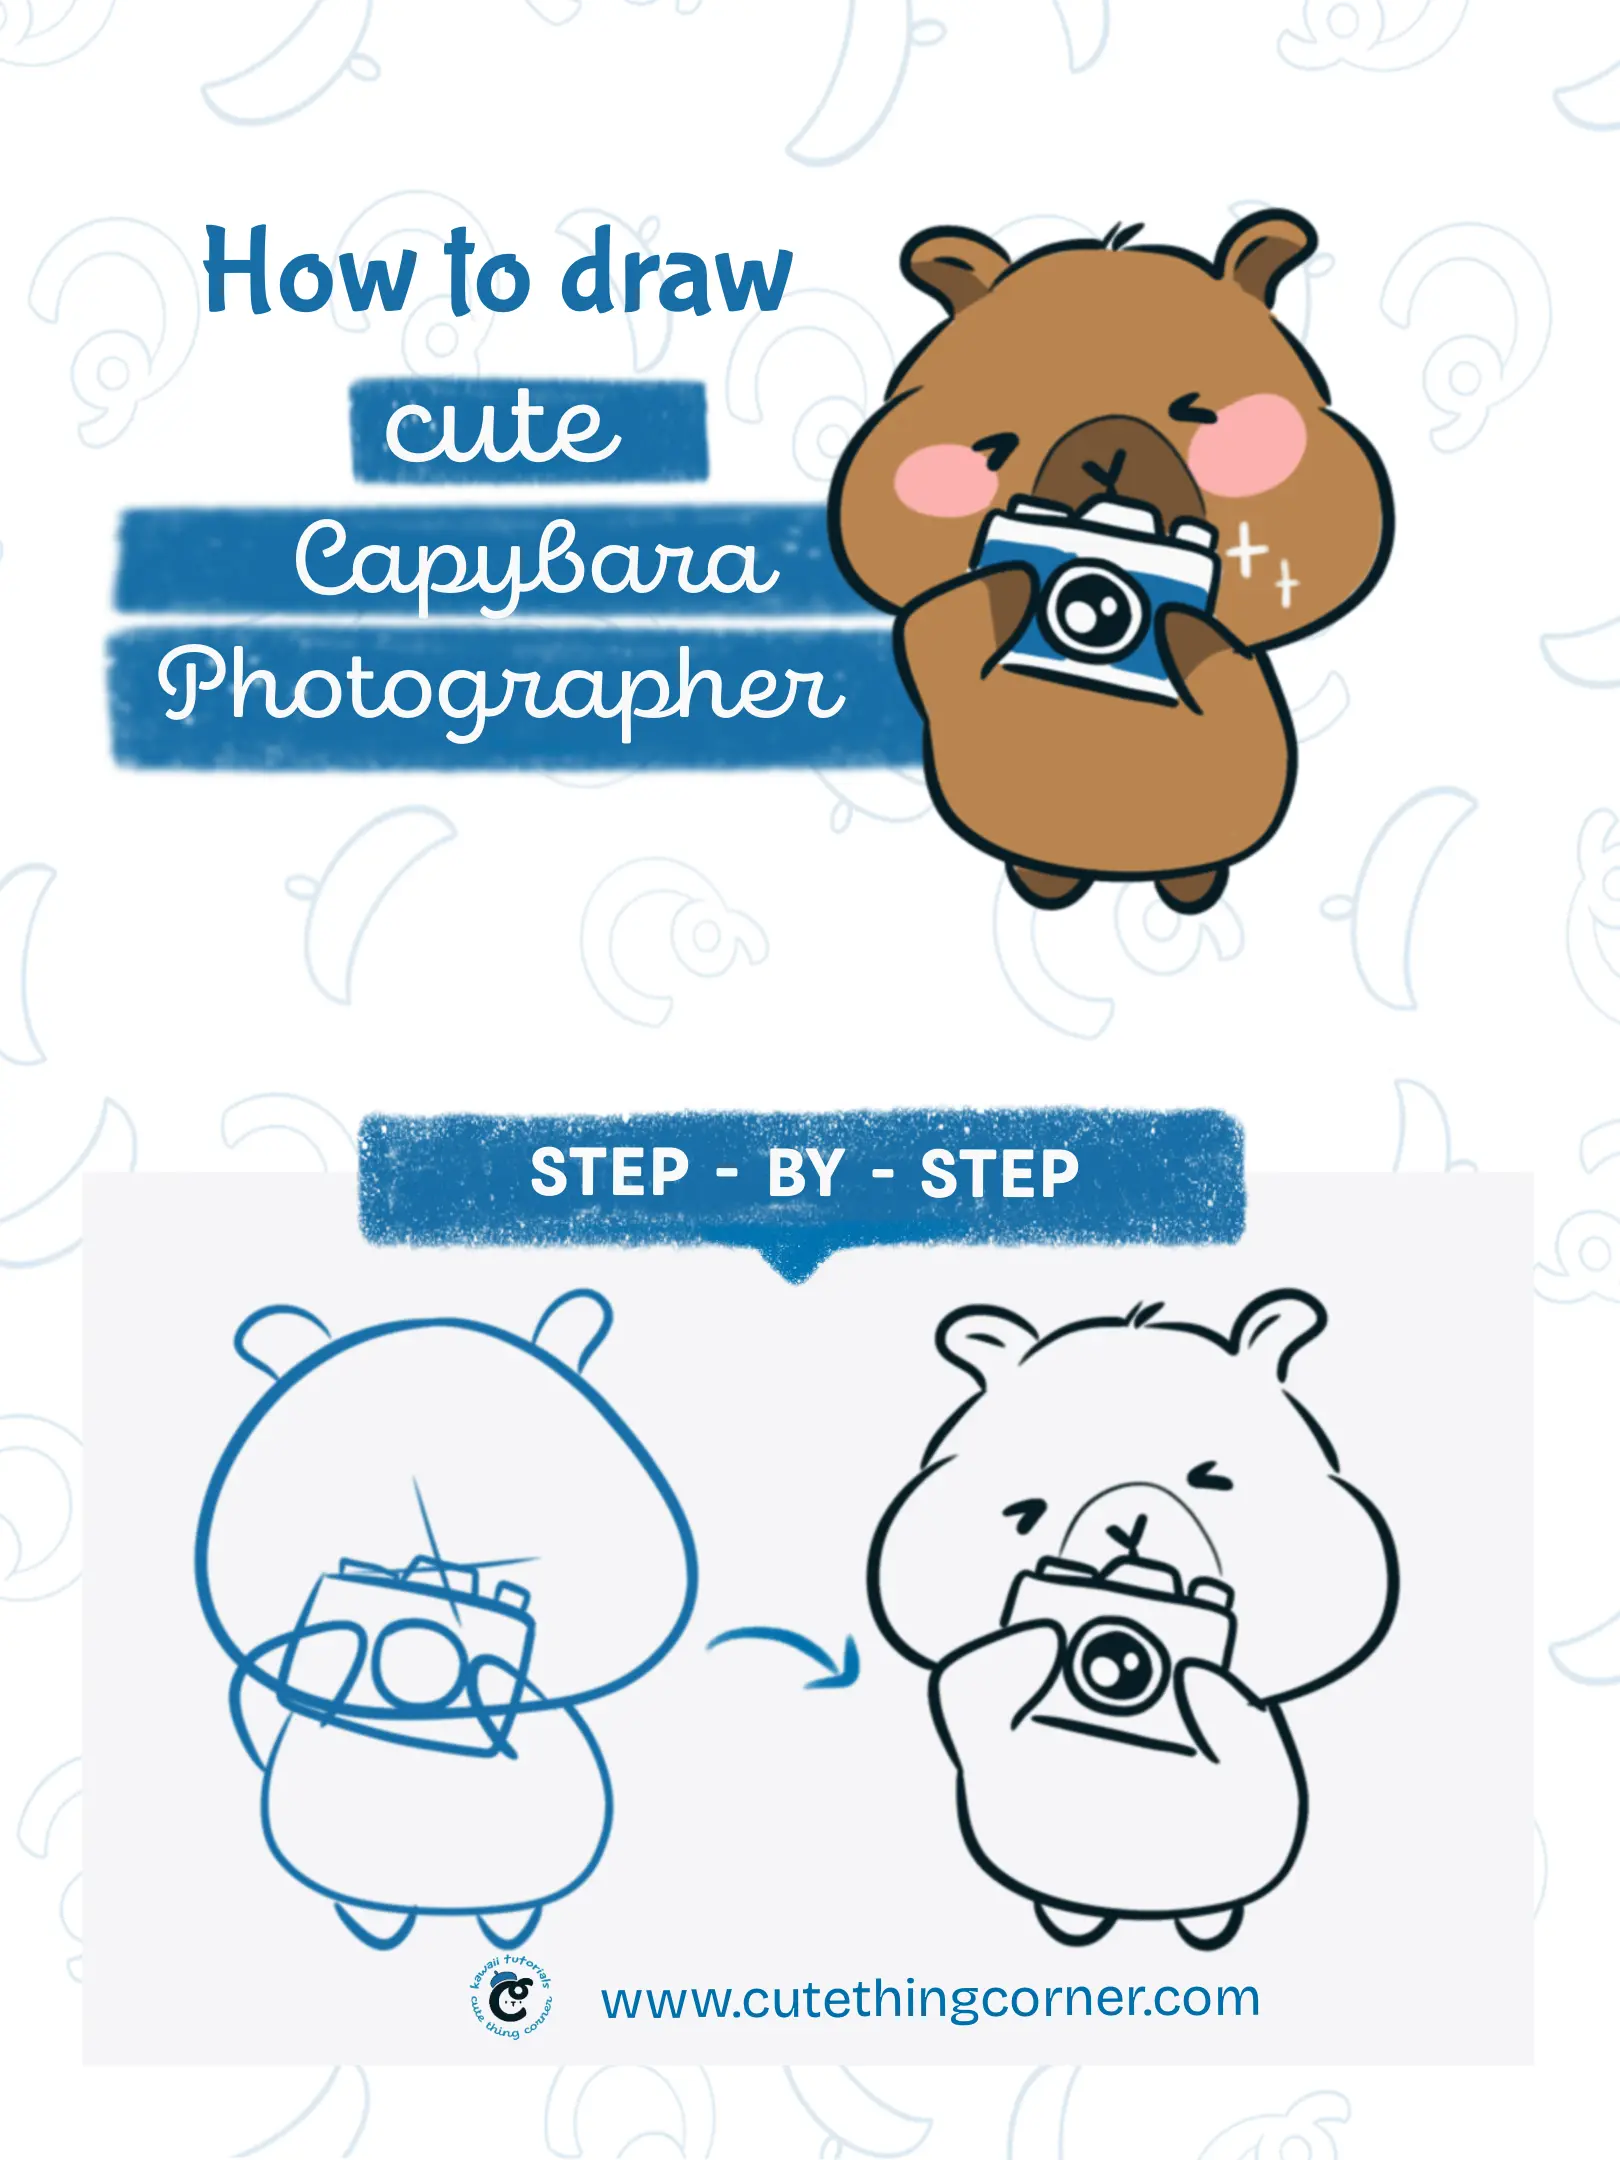
How to draw cute Capybara Photographer
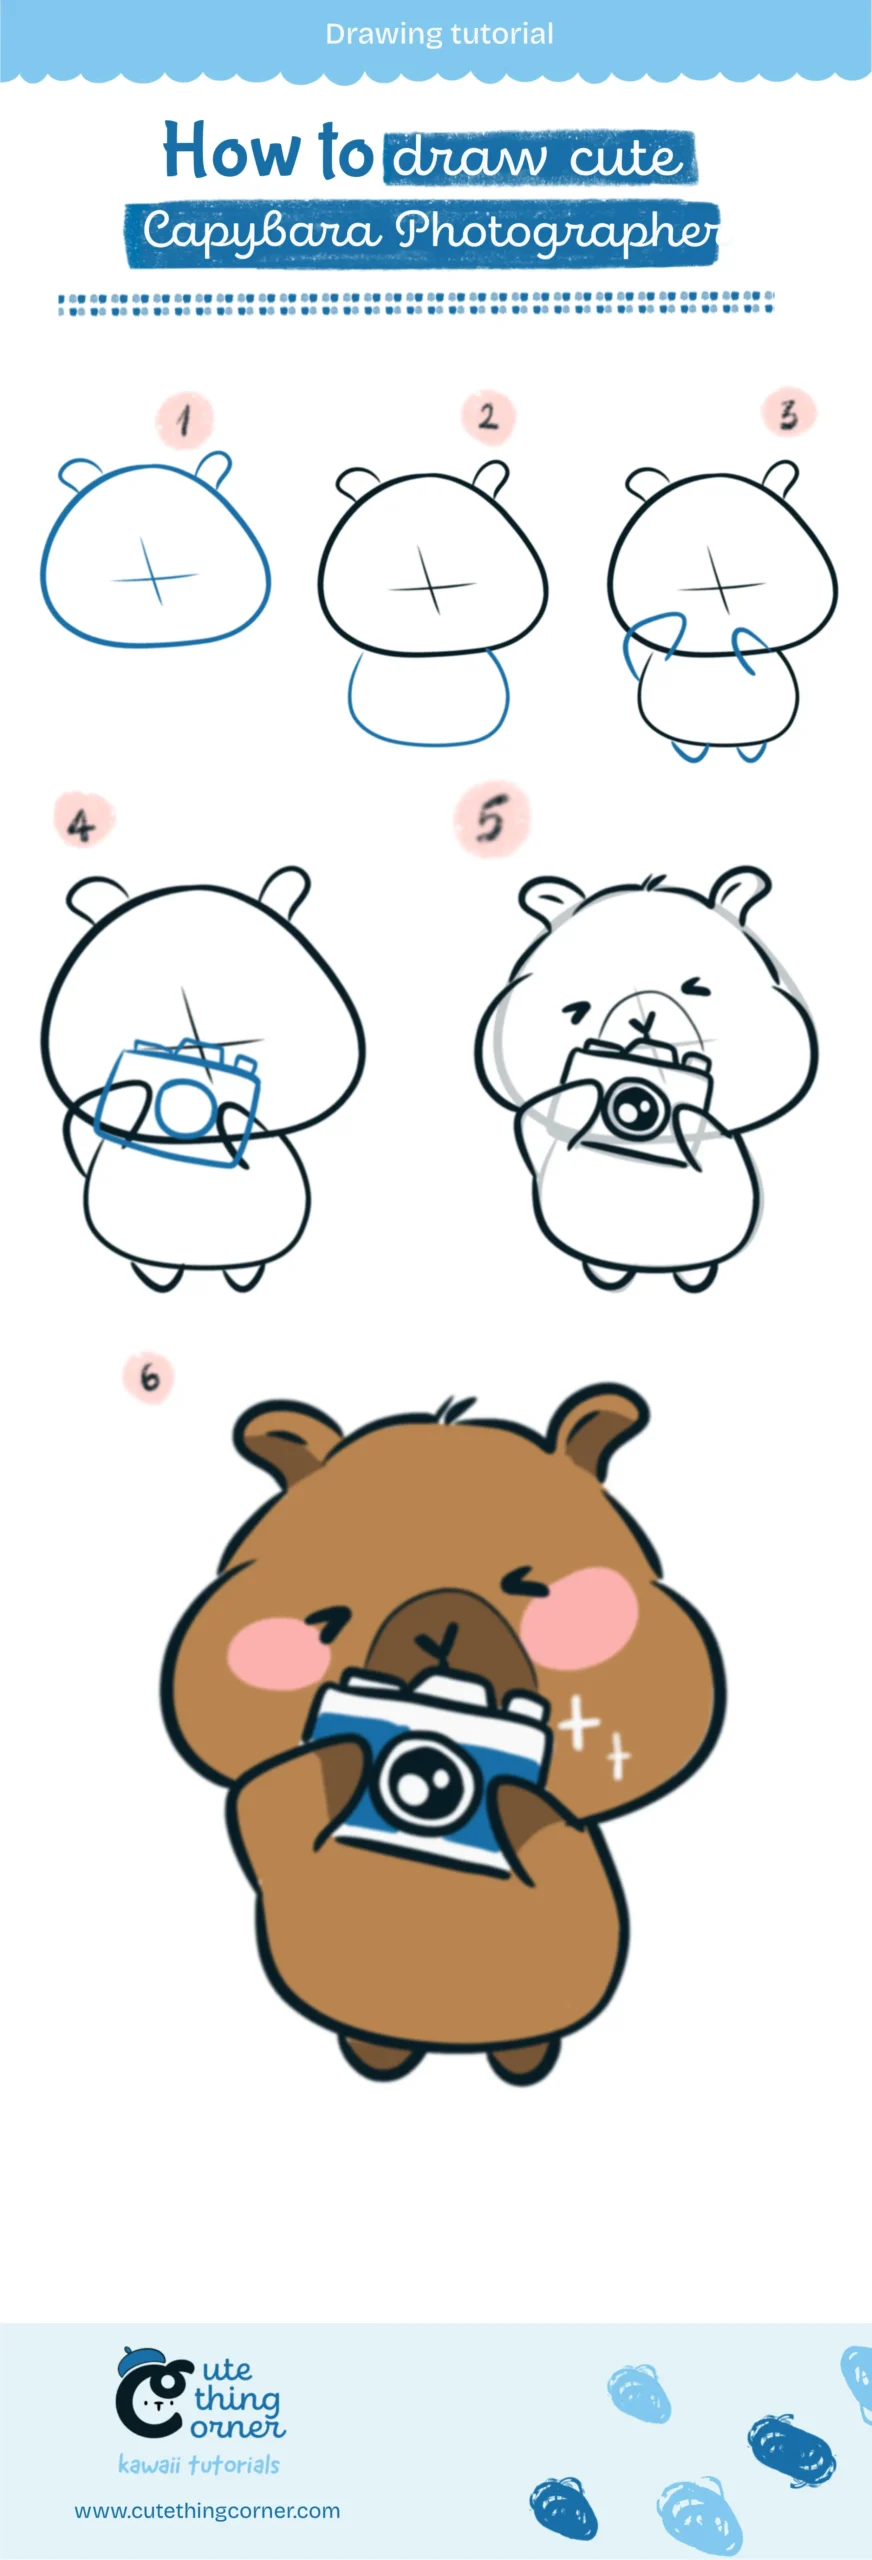
Step 1: Start with a round head and two little ears on top
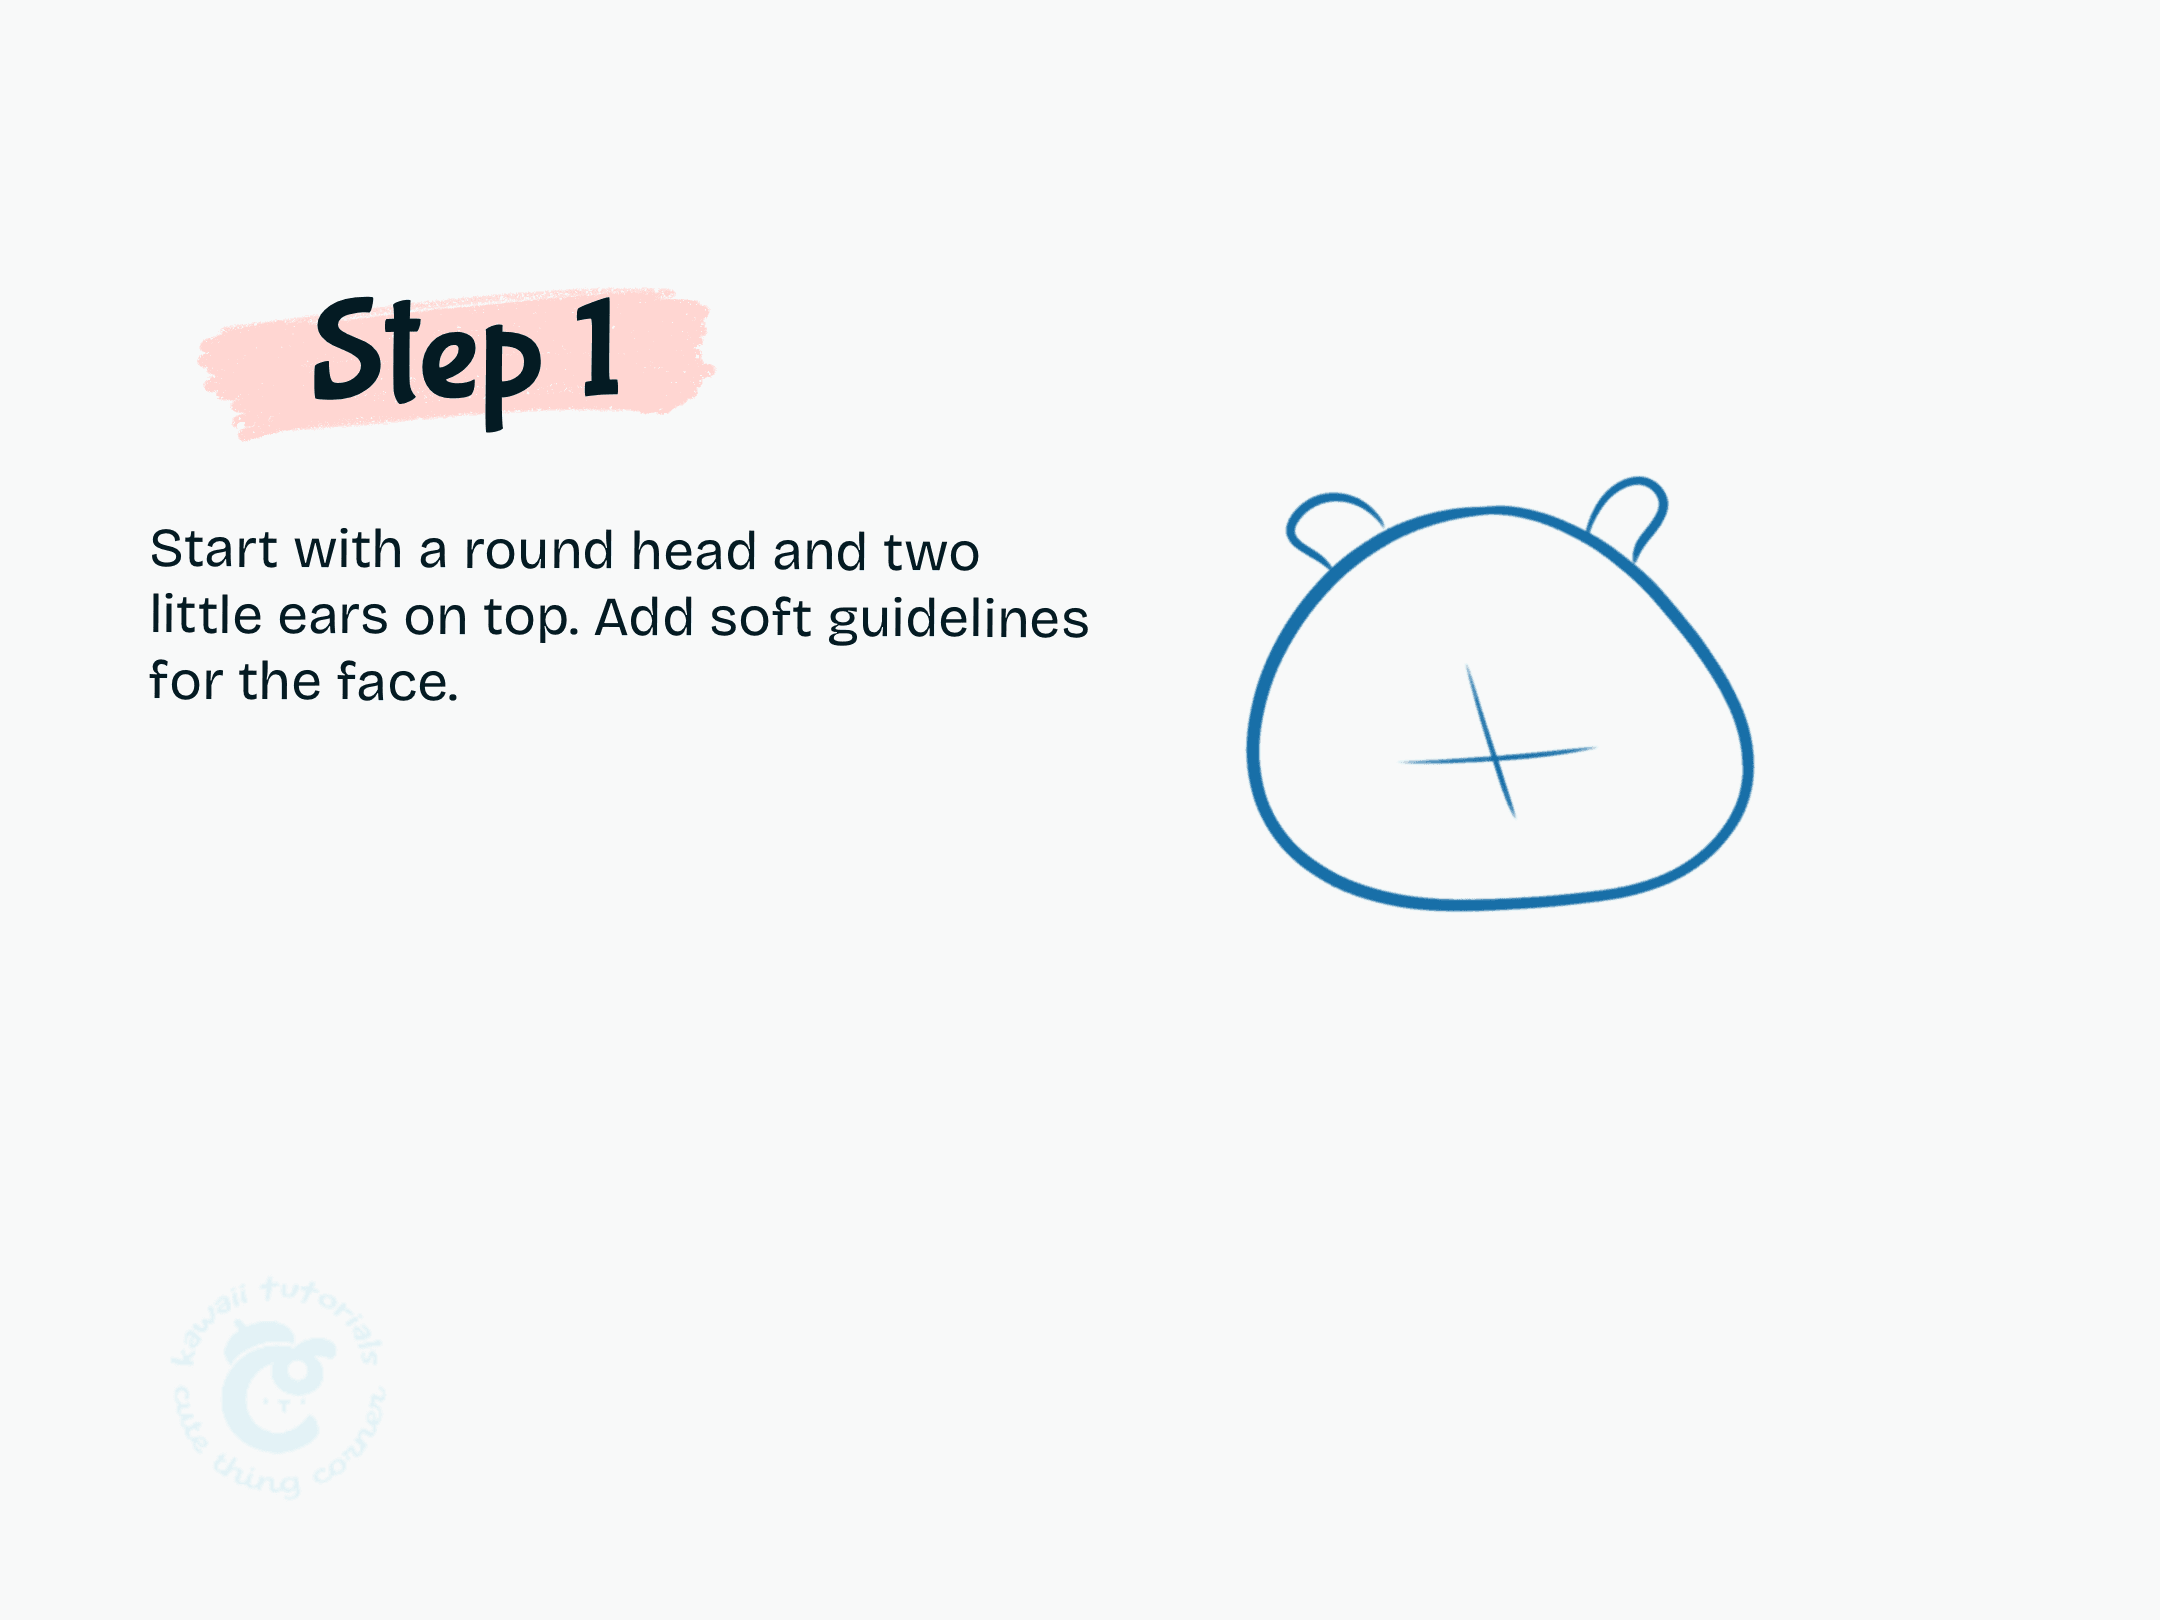
Step 1 Start with a round head and two little ears on top
Step 2: Draw the chubby body under the head. Keep it rounded and simple.
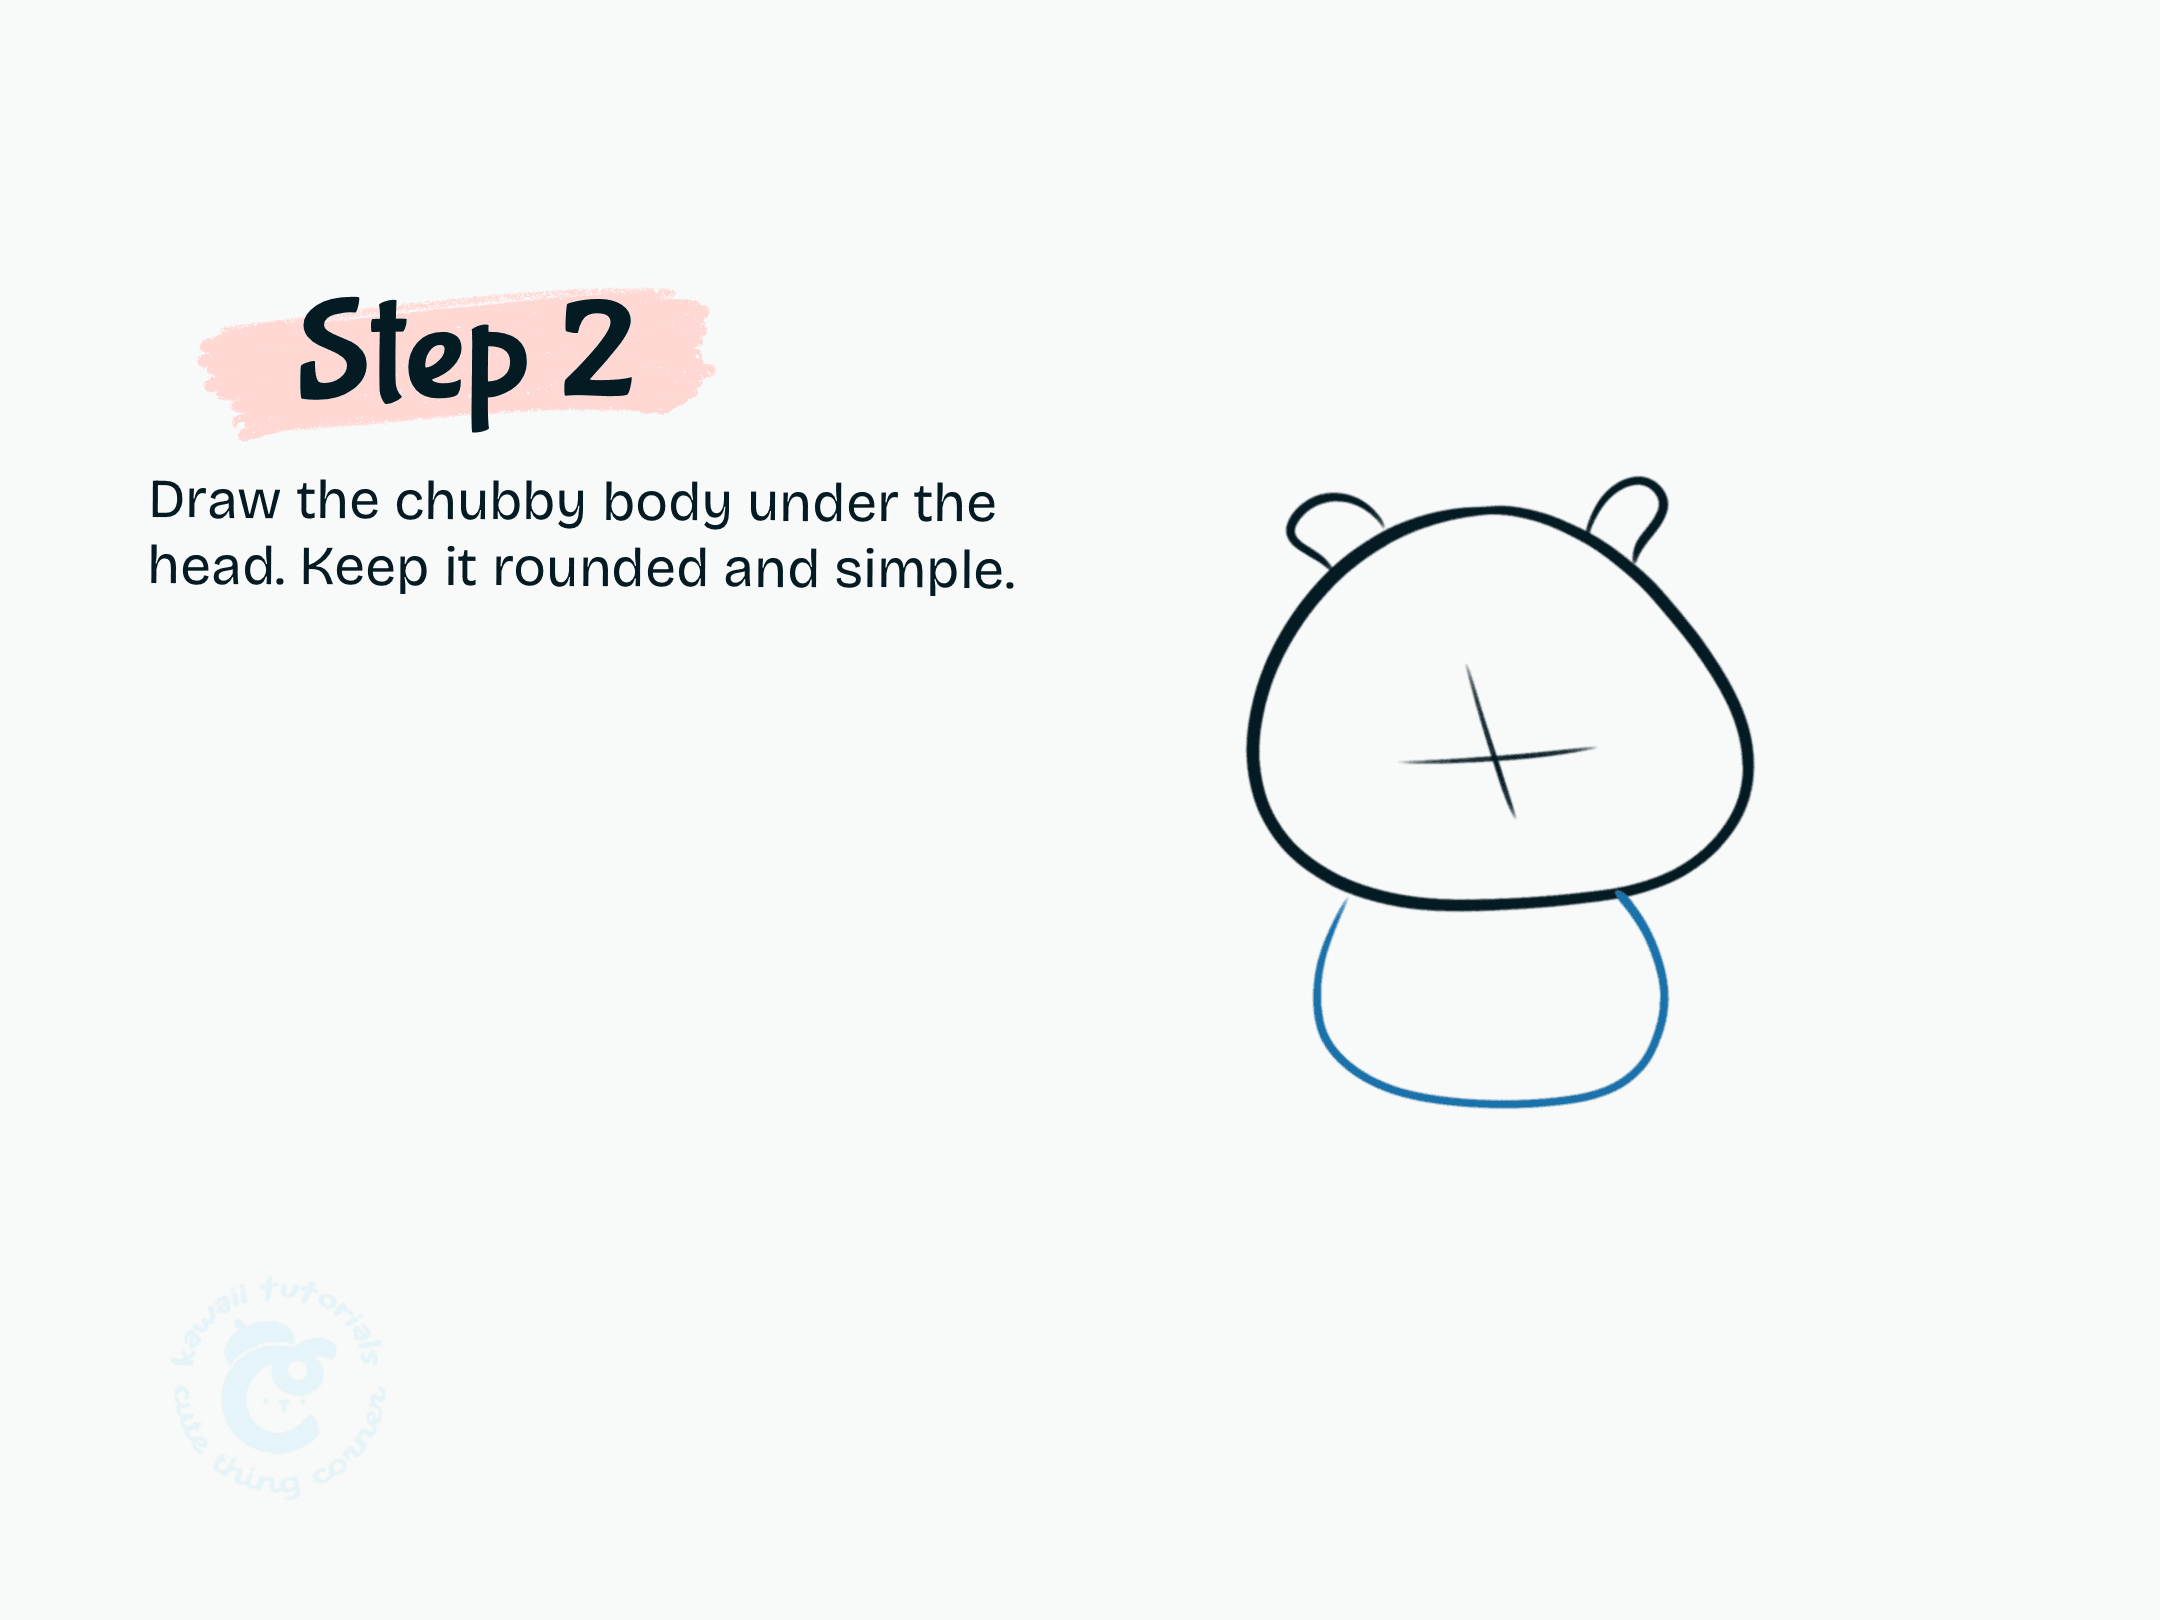
Step 2 Draw the chubby body under the head.
Step 3: Sketch the arms going up to hold a camera. Add tiny legs below the body
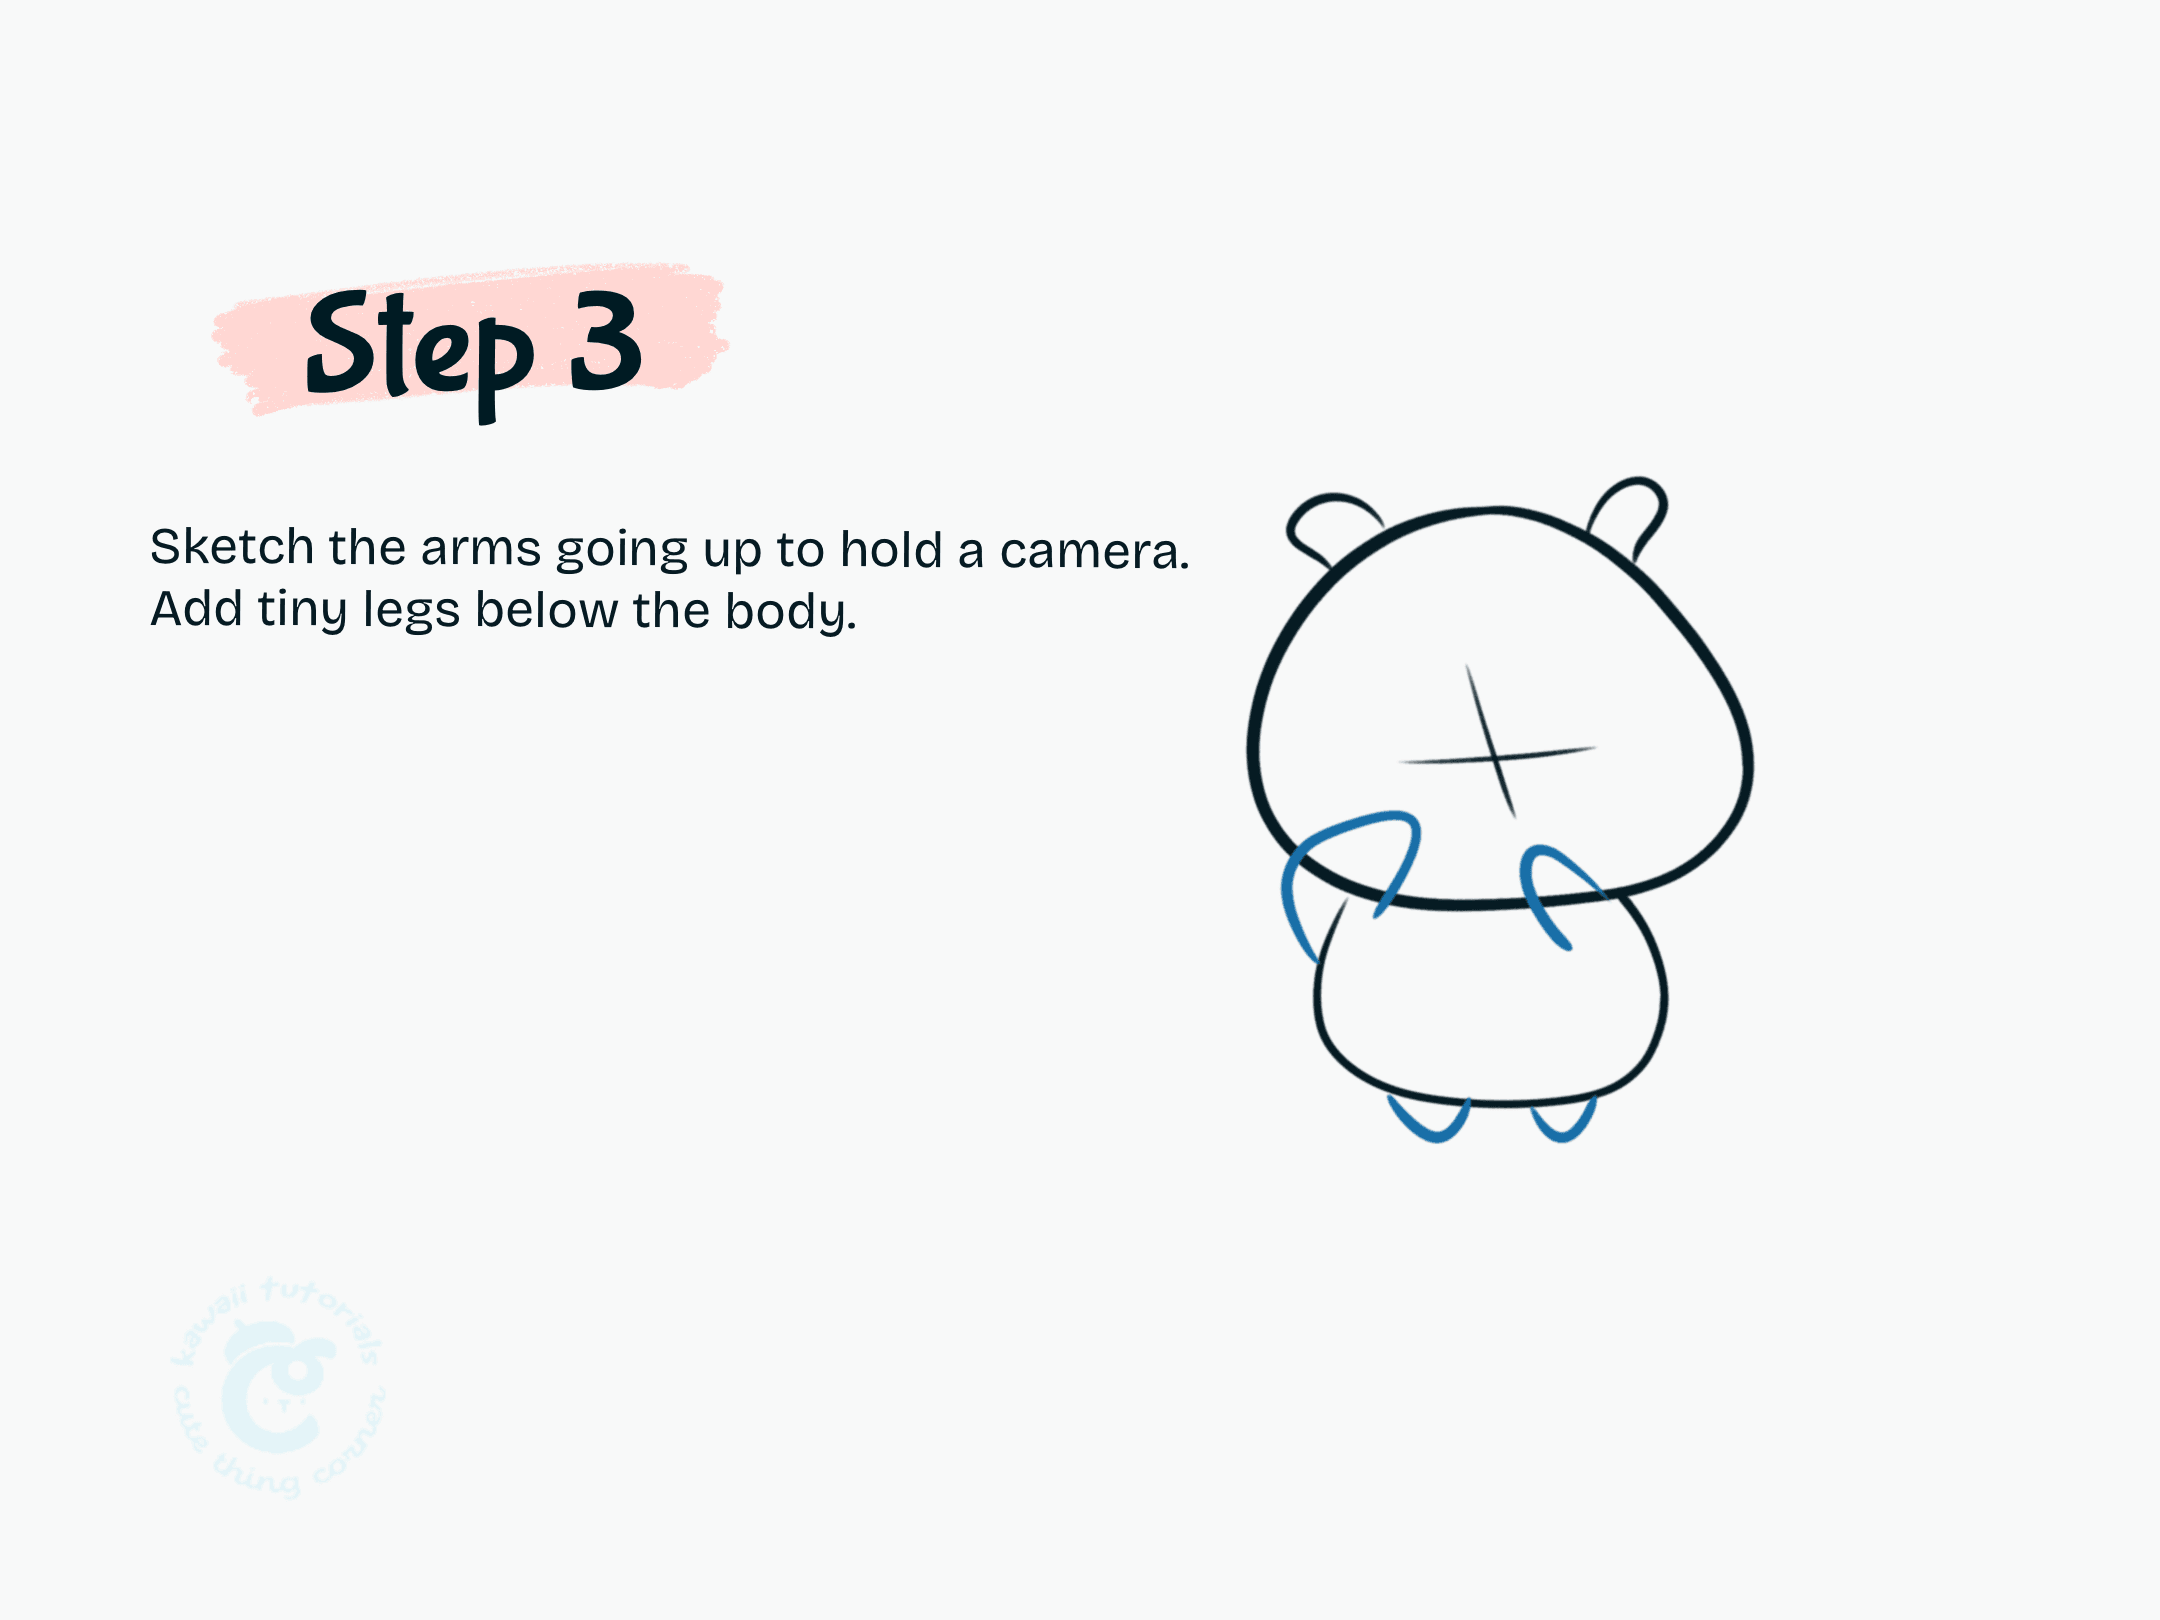
Step 3 Sketch the arms going up to hold a camera.
Step 4: Draw the camera between both paws. Use basic shapes: a rectangle and circle
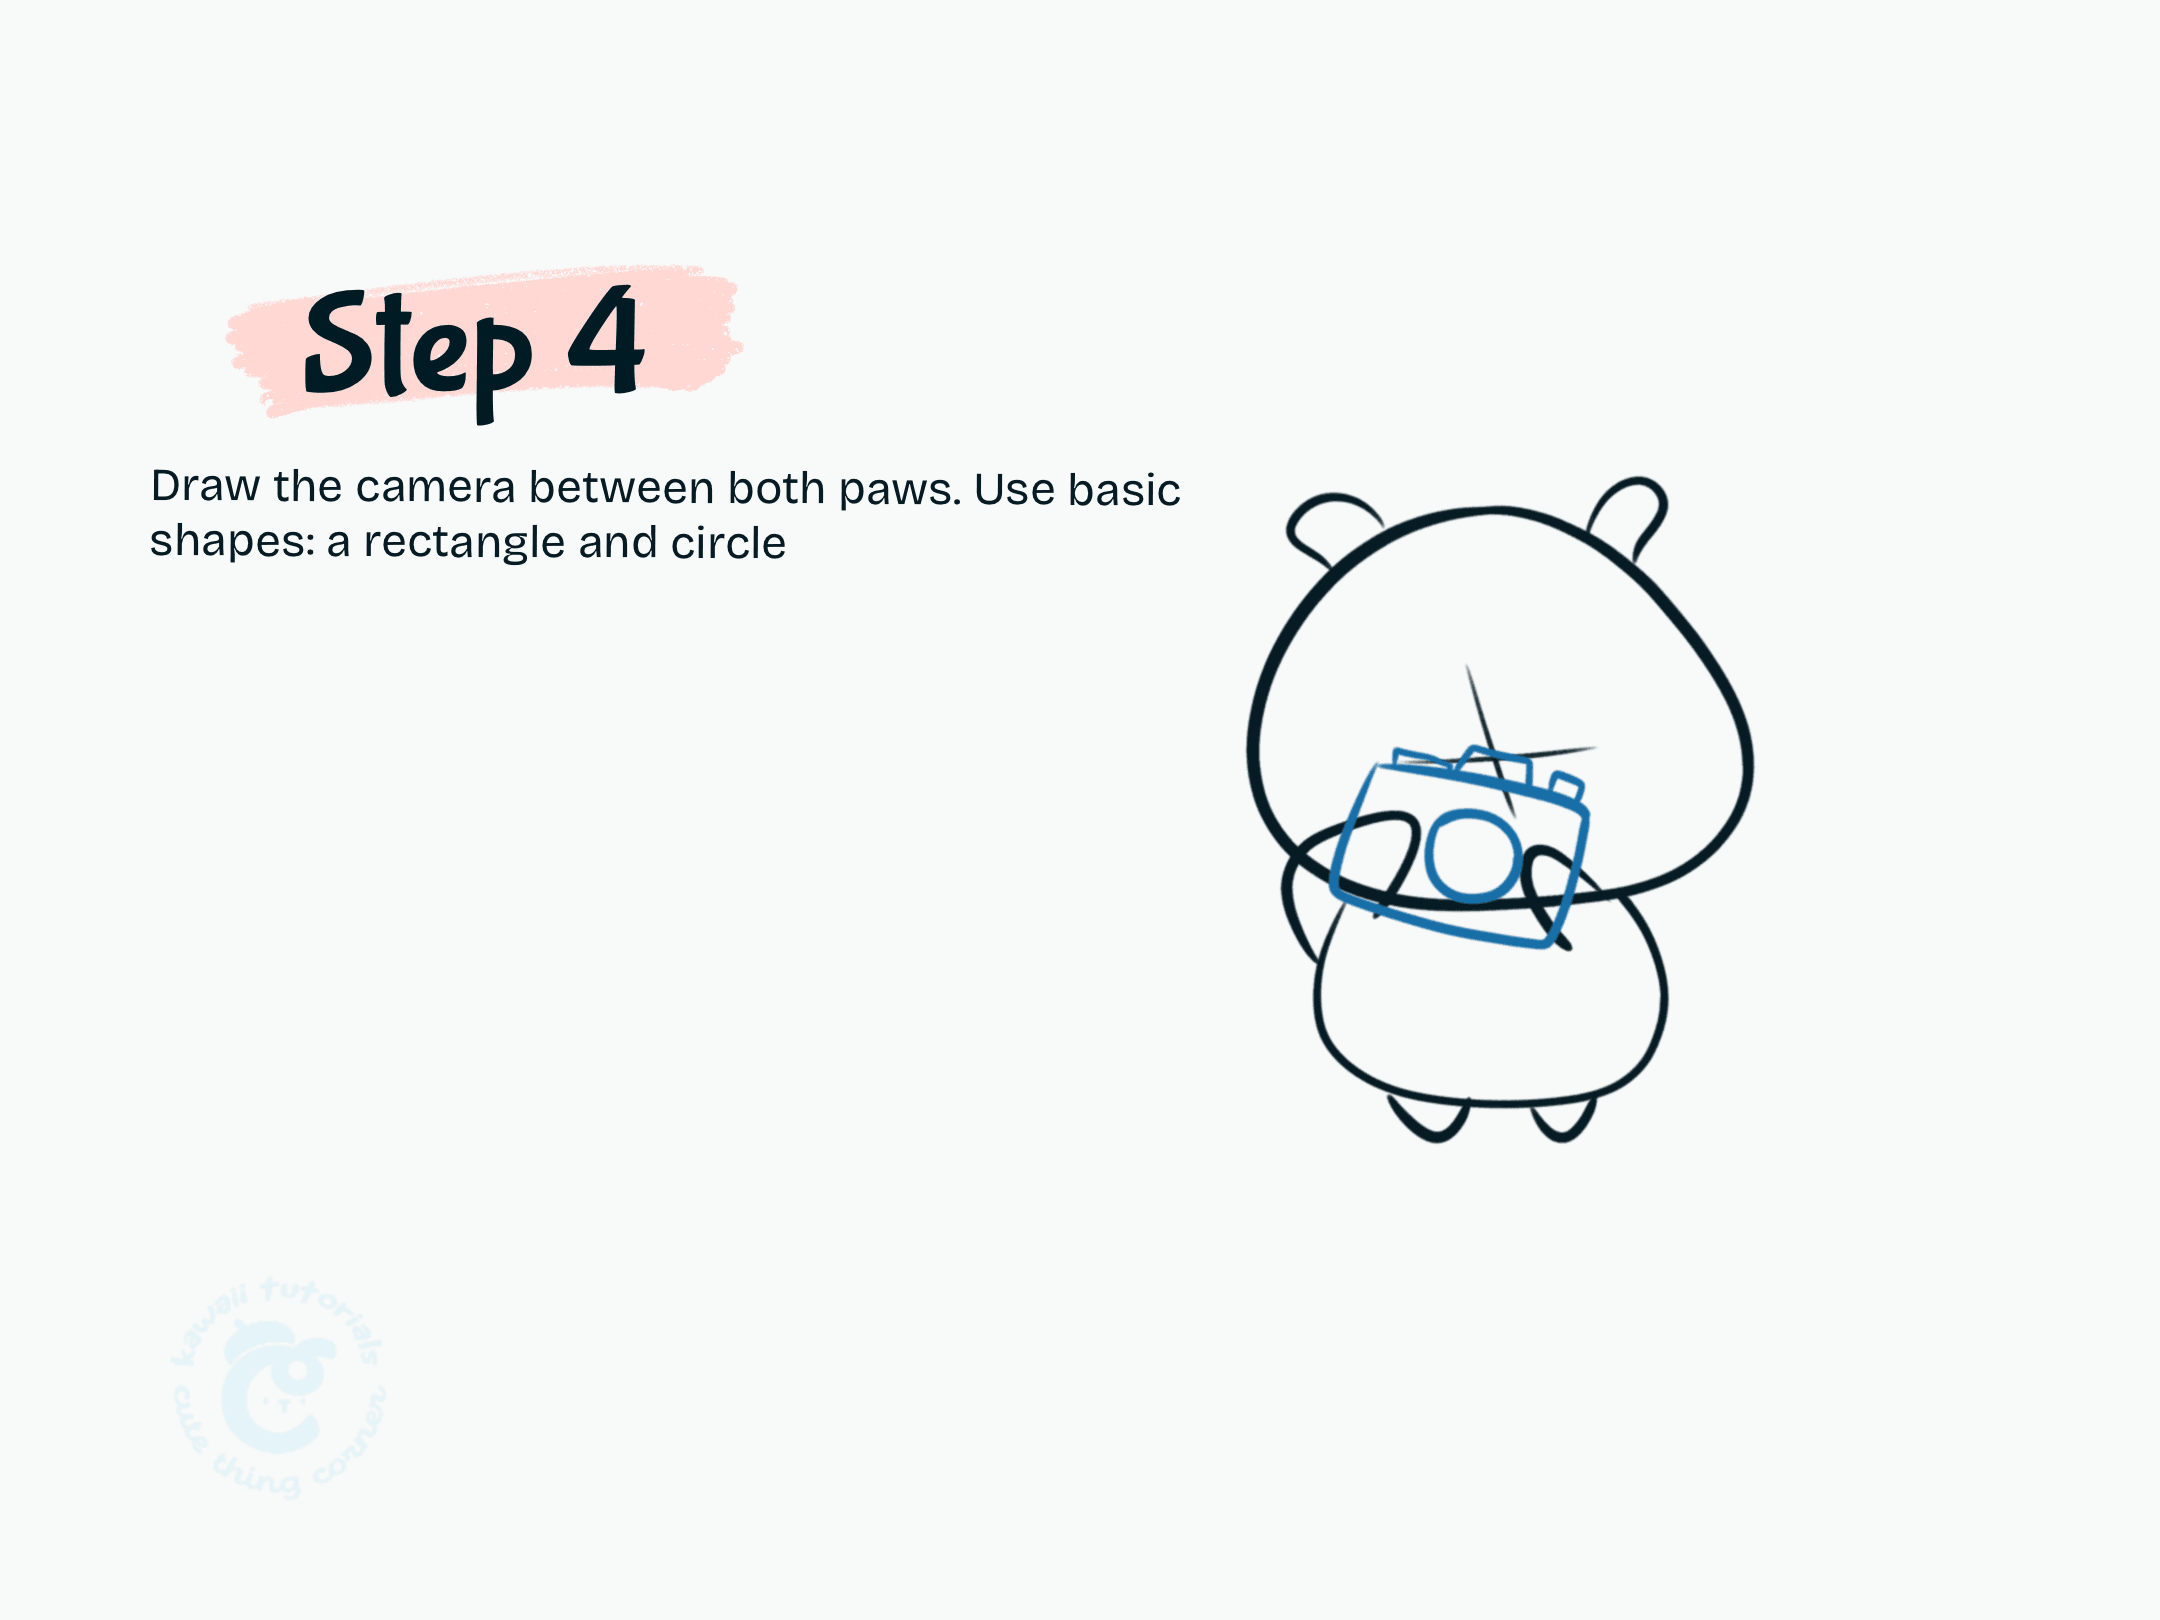
Step 4 Draw the camera between both paws. Use basic shapes
Step 5: Trace the lines to create a clean outline.
In this step we will try to add the cute face! Draw a big nose, closed eyes and happy smile. Then you outline the arms and camera details.
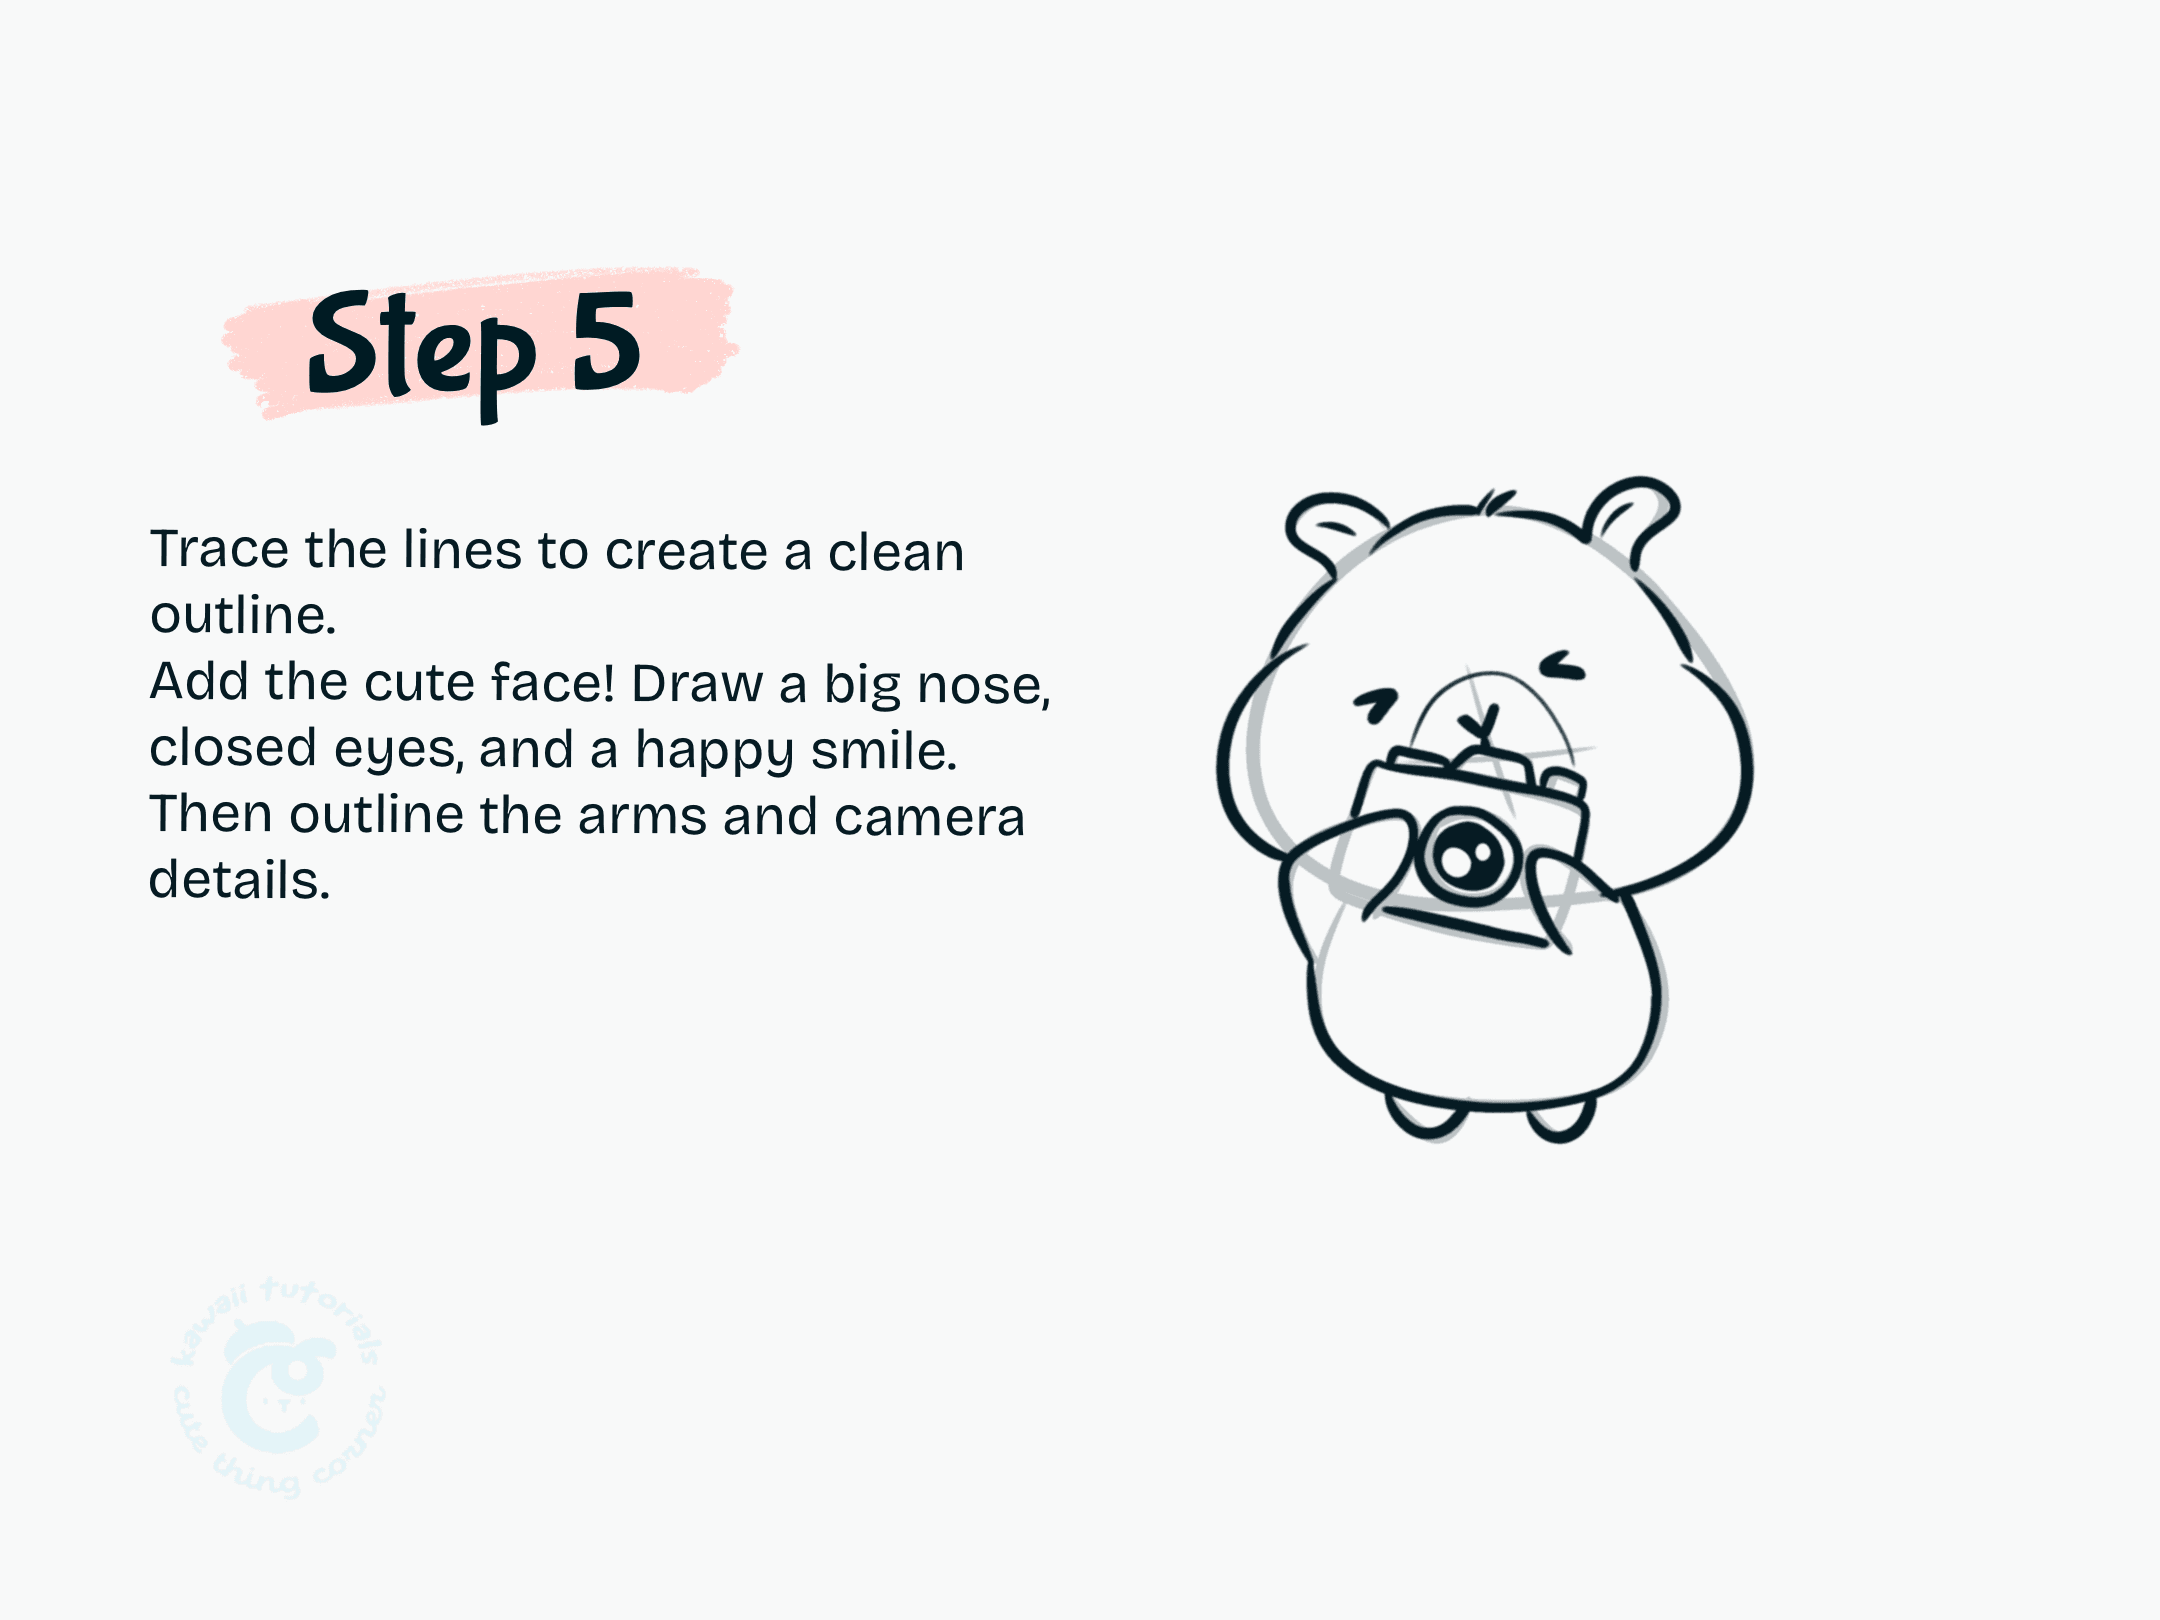
Step 5 Trace the lines to create a clean outline
Step 6: Coloring Capybara Photographer. Use warm brown for the body and soft blush on the cheeks
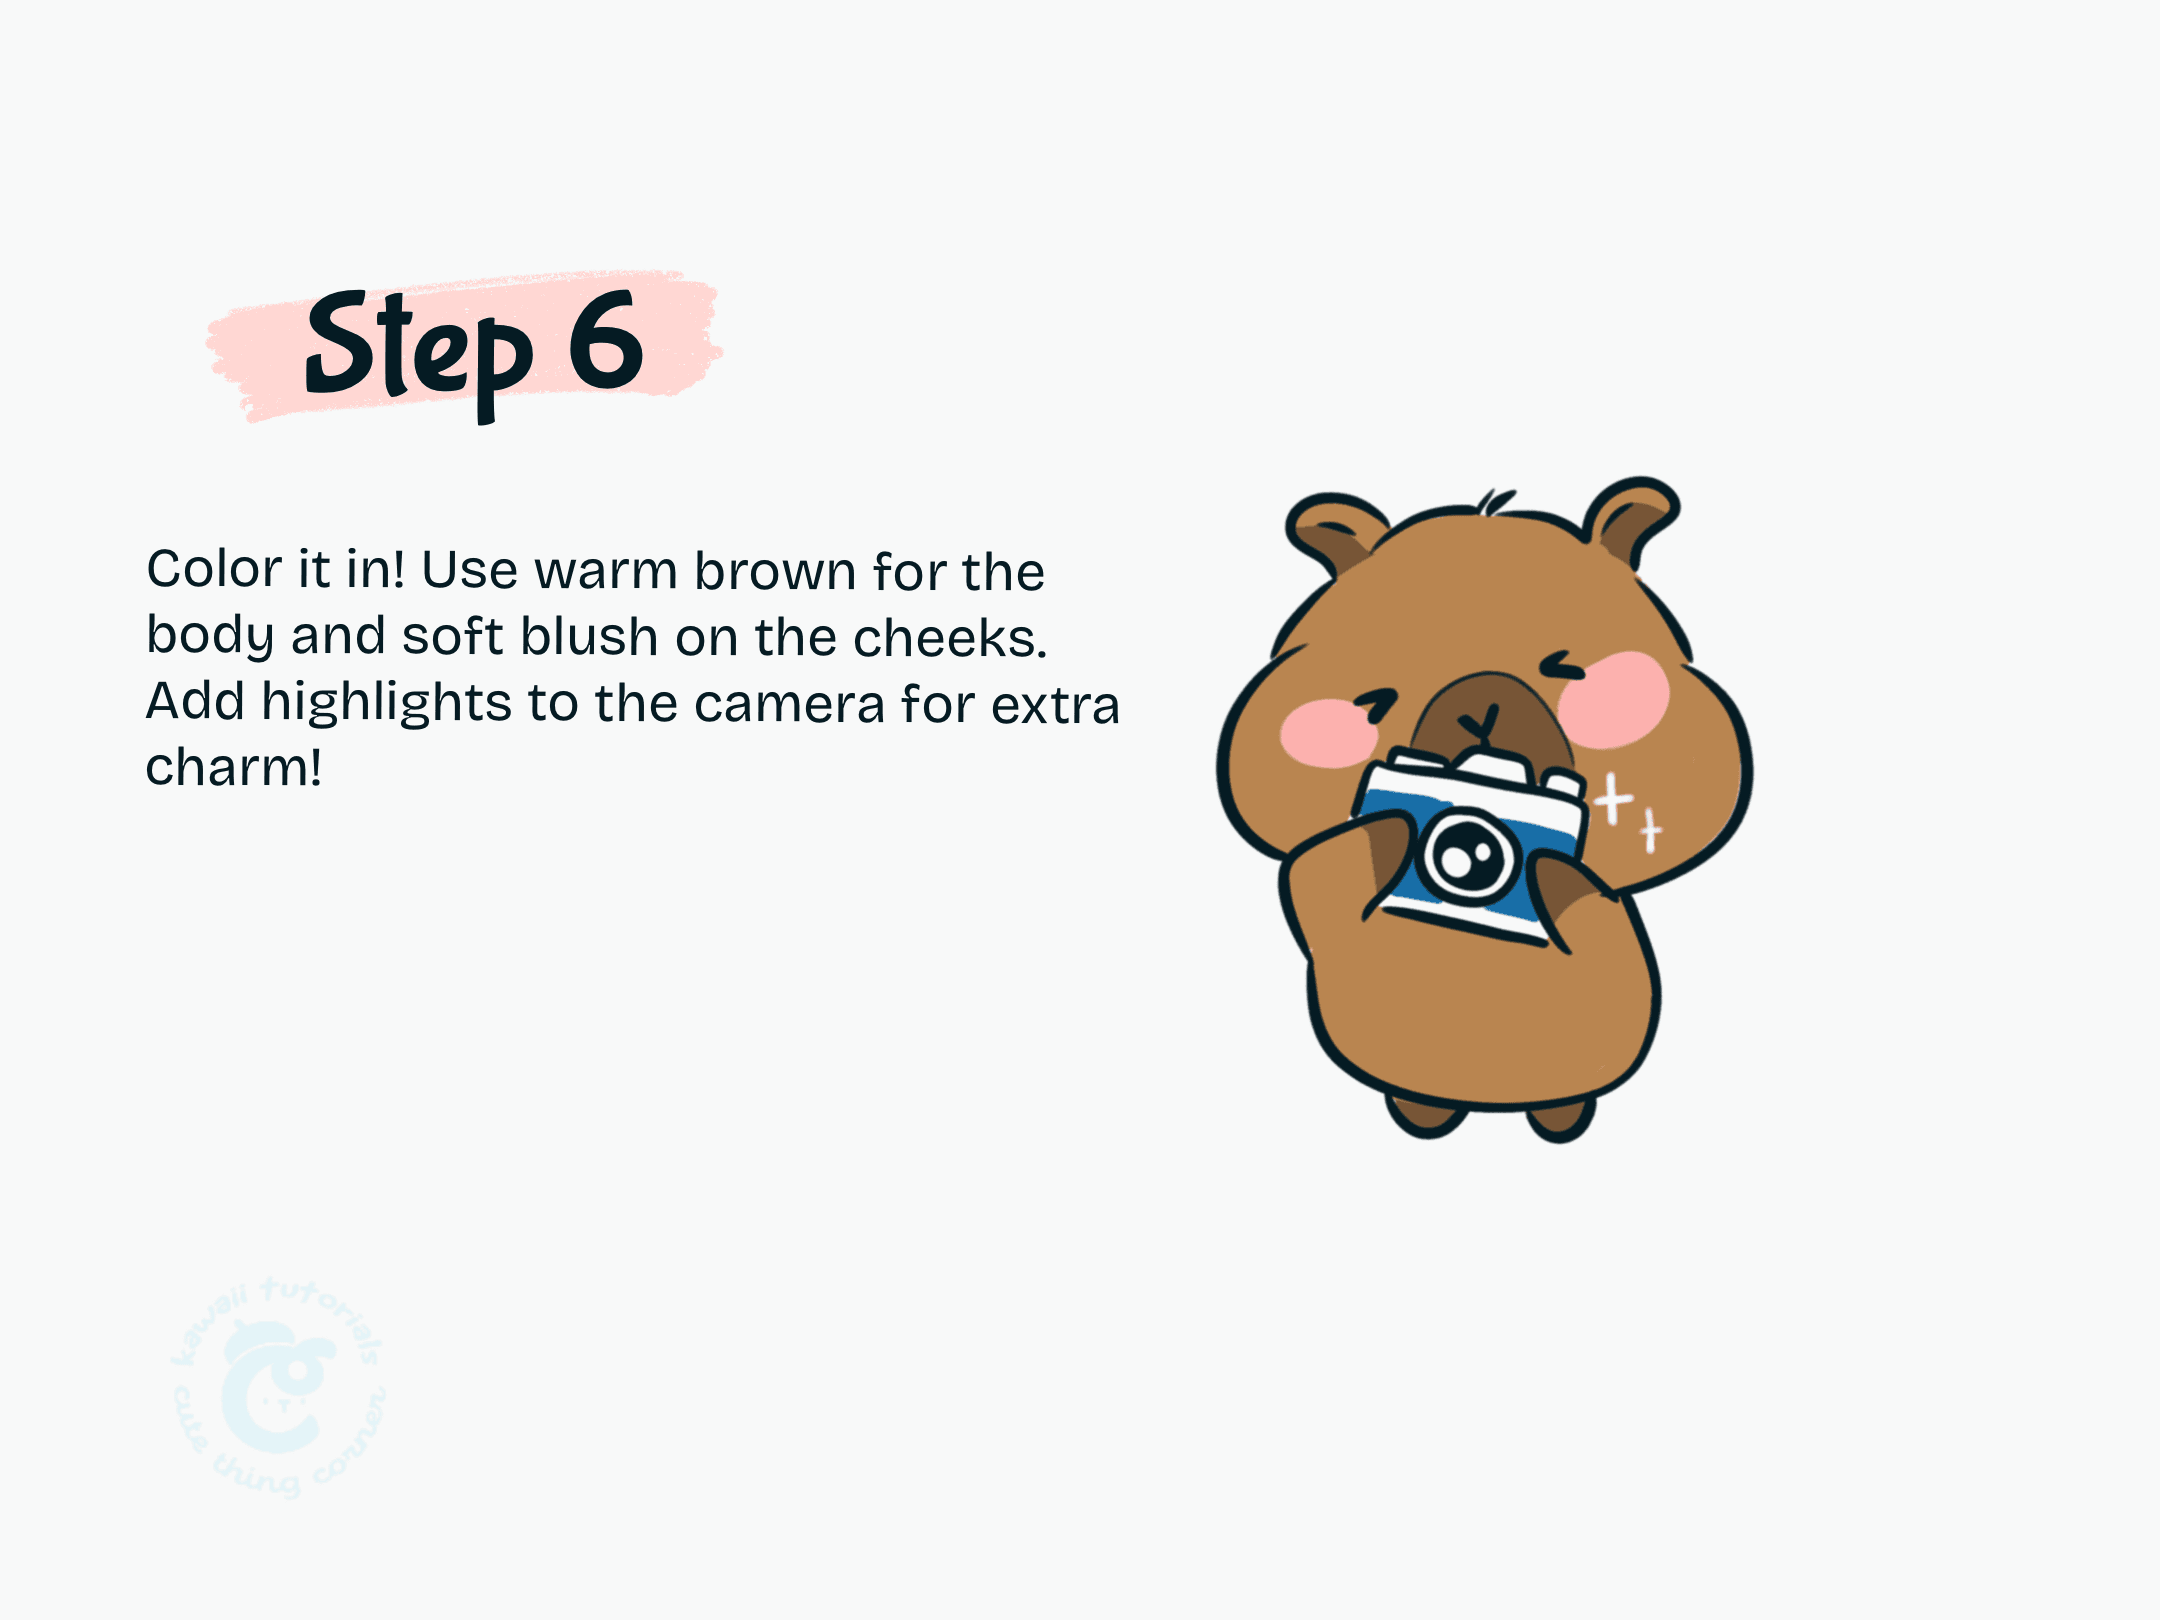
Step 6 Use warm brown for the body and soft blush on the cheeks
Amazing work, artist! 🎉
Your Capybara Photographer is all ready to snap some adorable memories. Doesn’t it look picture-perfect with its little camera and chill vibe?
We hope this tutorial brought a smile to your face. For more cute and easy characters, check out all our Drawing Tutorial— there’s always something fun to draw next!
📺 Watch the full video tutorial here:
👉 How to Draw Capybara Photographer
🧡 Stay creative and keep sketching your cute world!
Which kawaii job should Capybara try next? Let us know in the comments! 👇
Learn full steps to draw Capybara Photographer:
Step-by-step to draw Capybara Photographer