Thanksgiving drawing ideas! Cute Thing Corner brings you adorable inspiration and ideas to decorate for Thanksgiving.
Additionally, these ideas are perfect if you’re looking for inspiration for autumn or fall drawings.
Follow this step-by-step how to draw cute Harvest Cornucopia by Cute Thing Corner.
It’s just a few simple steps to draw easily! Just draw it.
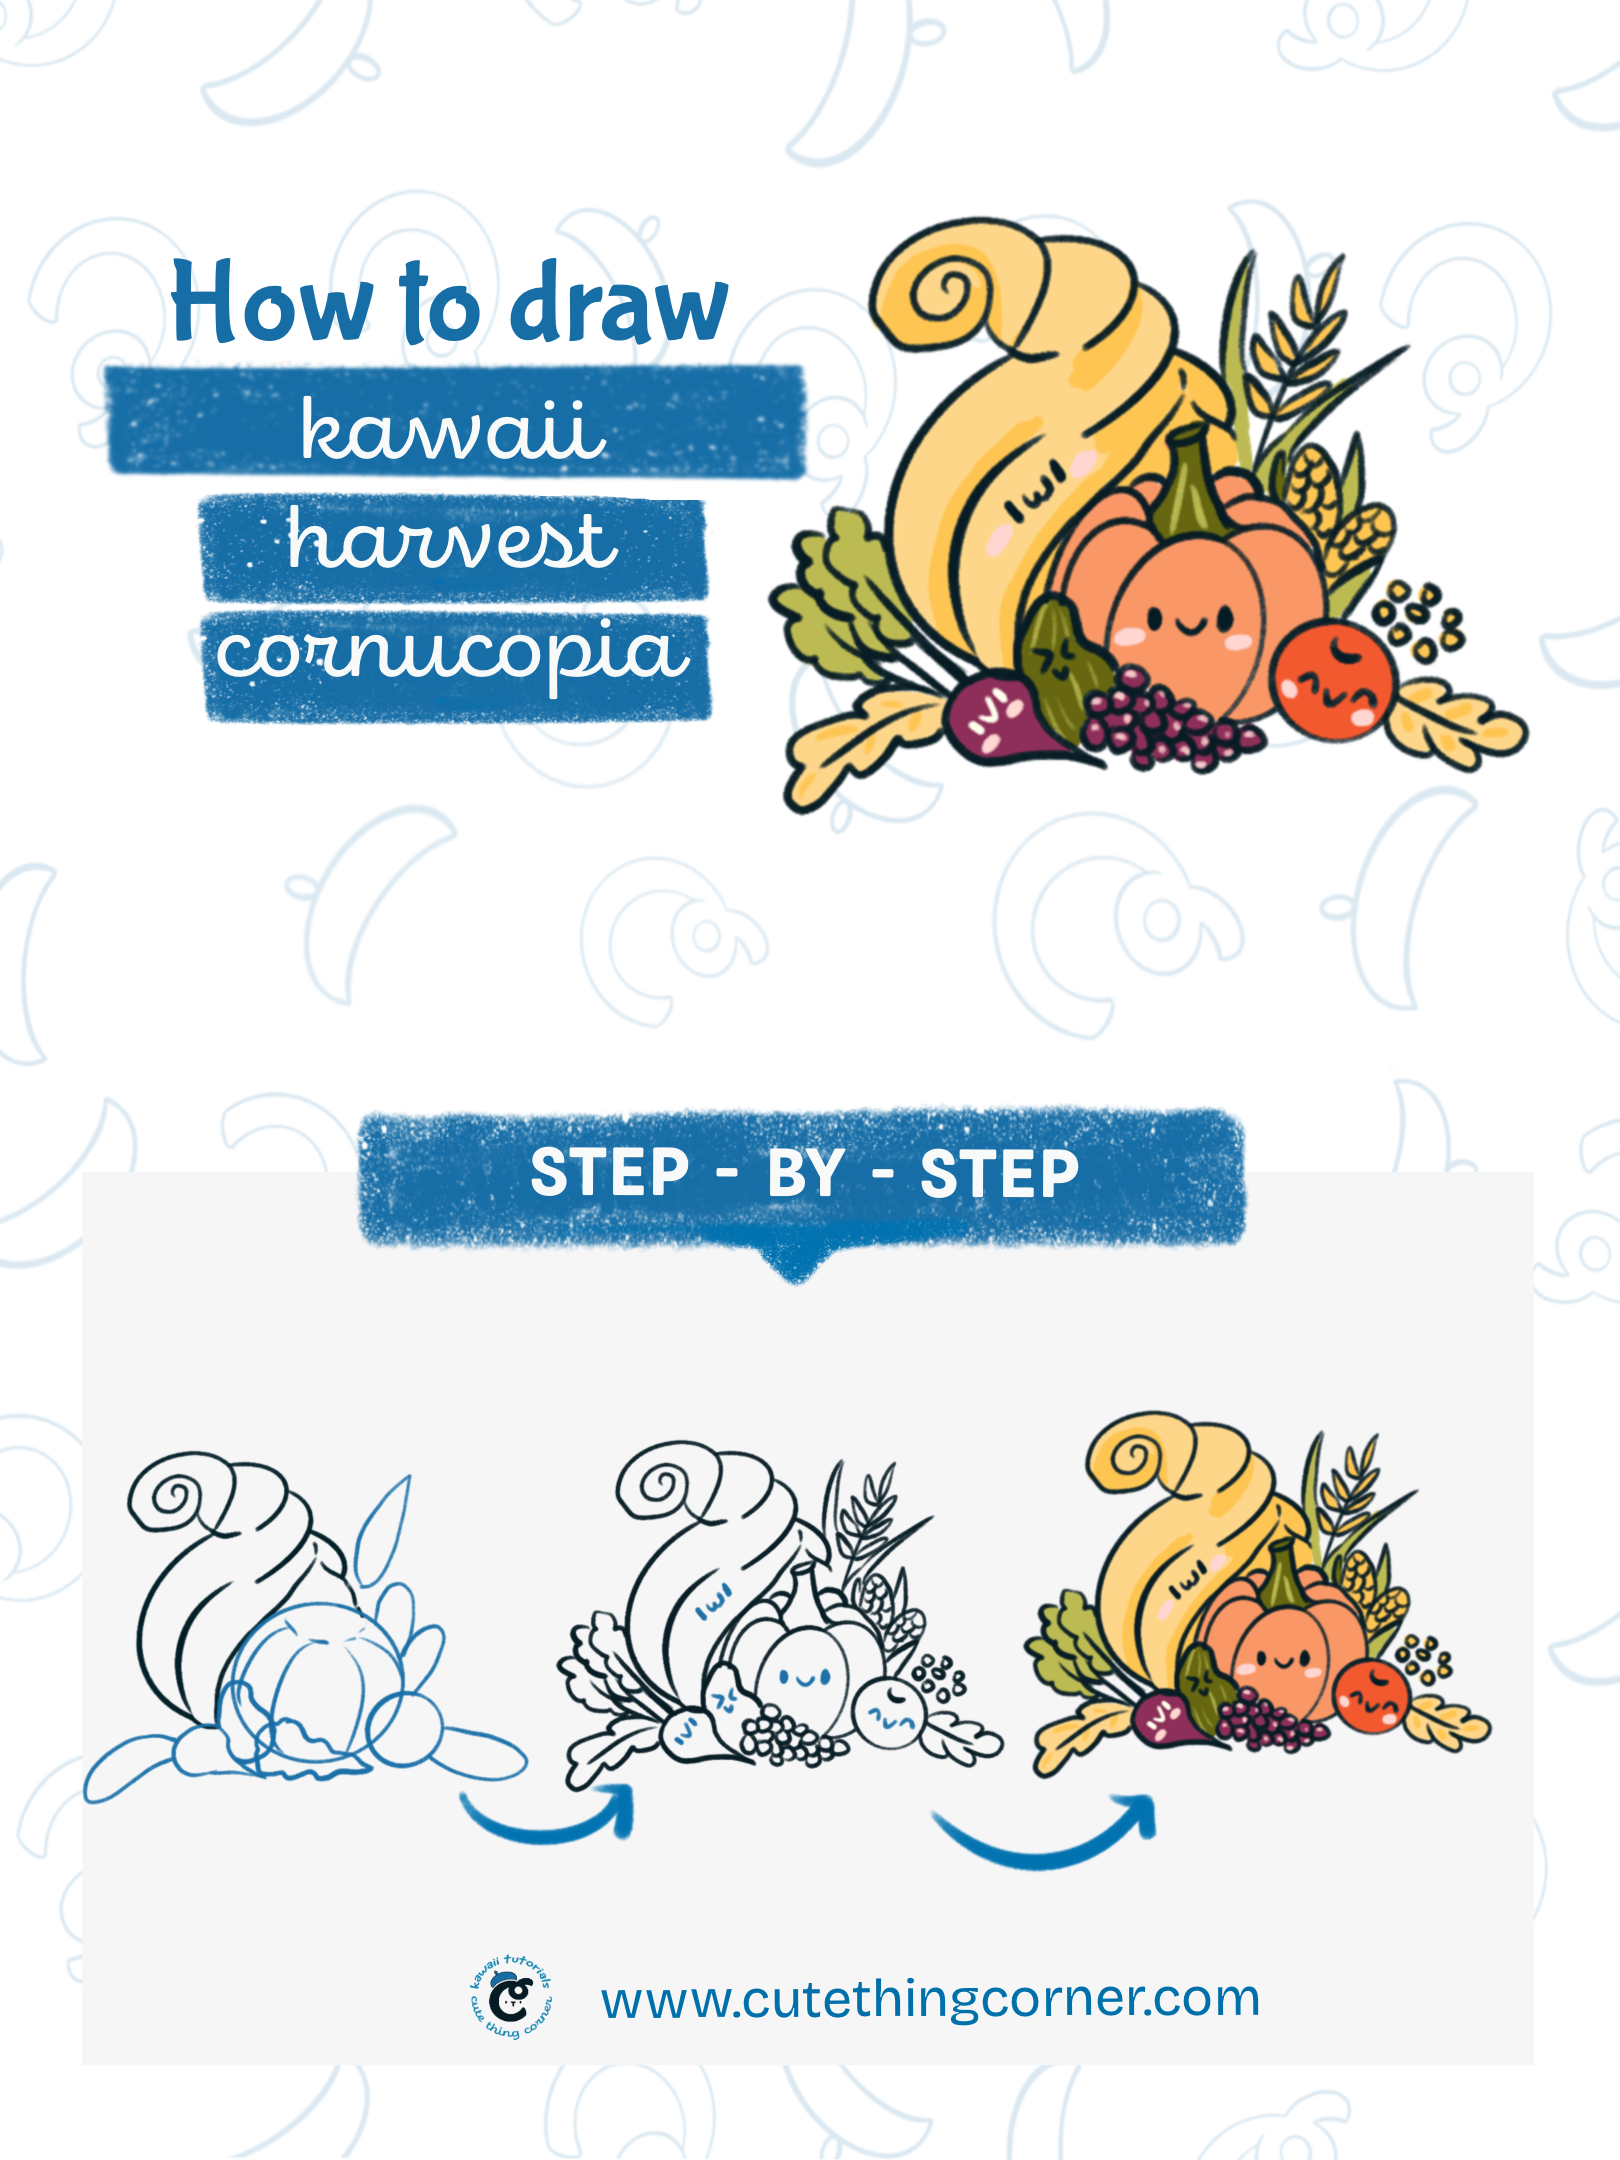
How to draw cute harvest cornucopia
You just have paper and a pencil to start. Color will belong to your favorite or using an Ipad and pencil.
Whatever makes you comfortable to start.
Now jump into step-by-step to draw cute Harvest Cornucopia.
#Step 1: Draw a large cornucopia with a spiral top for the horn.
Begin by drawing a large cornucopia shape that gradually narrows toward the top.
At the upper end, add a spiral to form the horn’s opening, curling it inward to create a classic cornucopia look.
Make the base of the cornucopia wide and slightly rounded to give it a sturdy appearance, and ensure the spiral top adds a whimsical touch to the design.
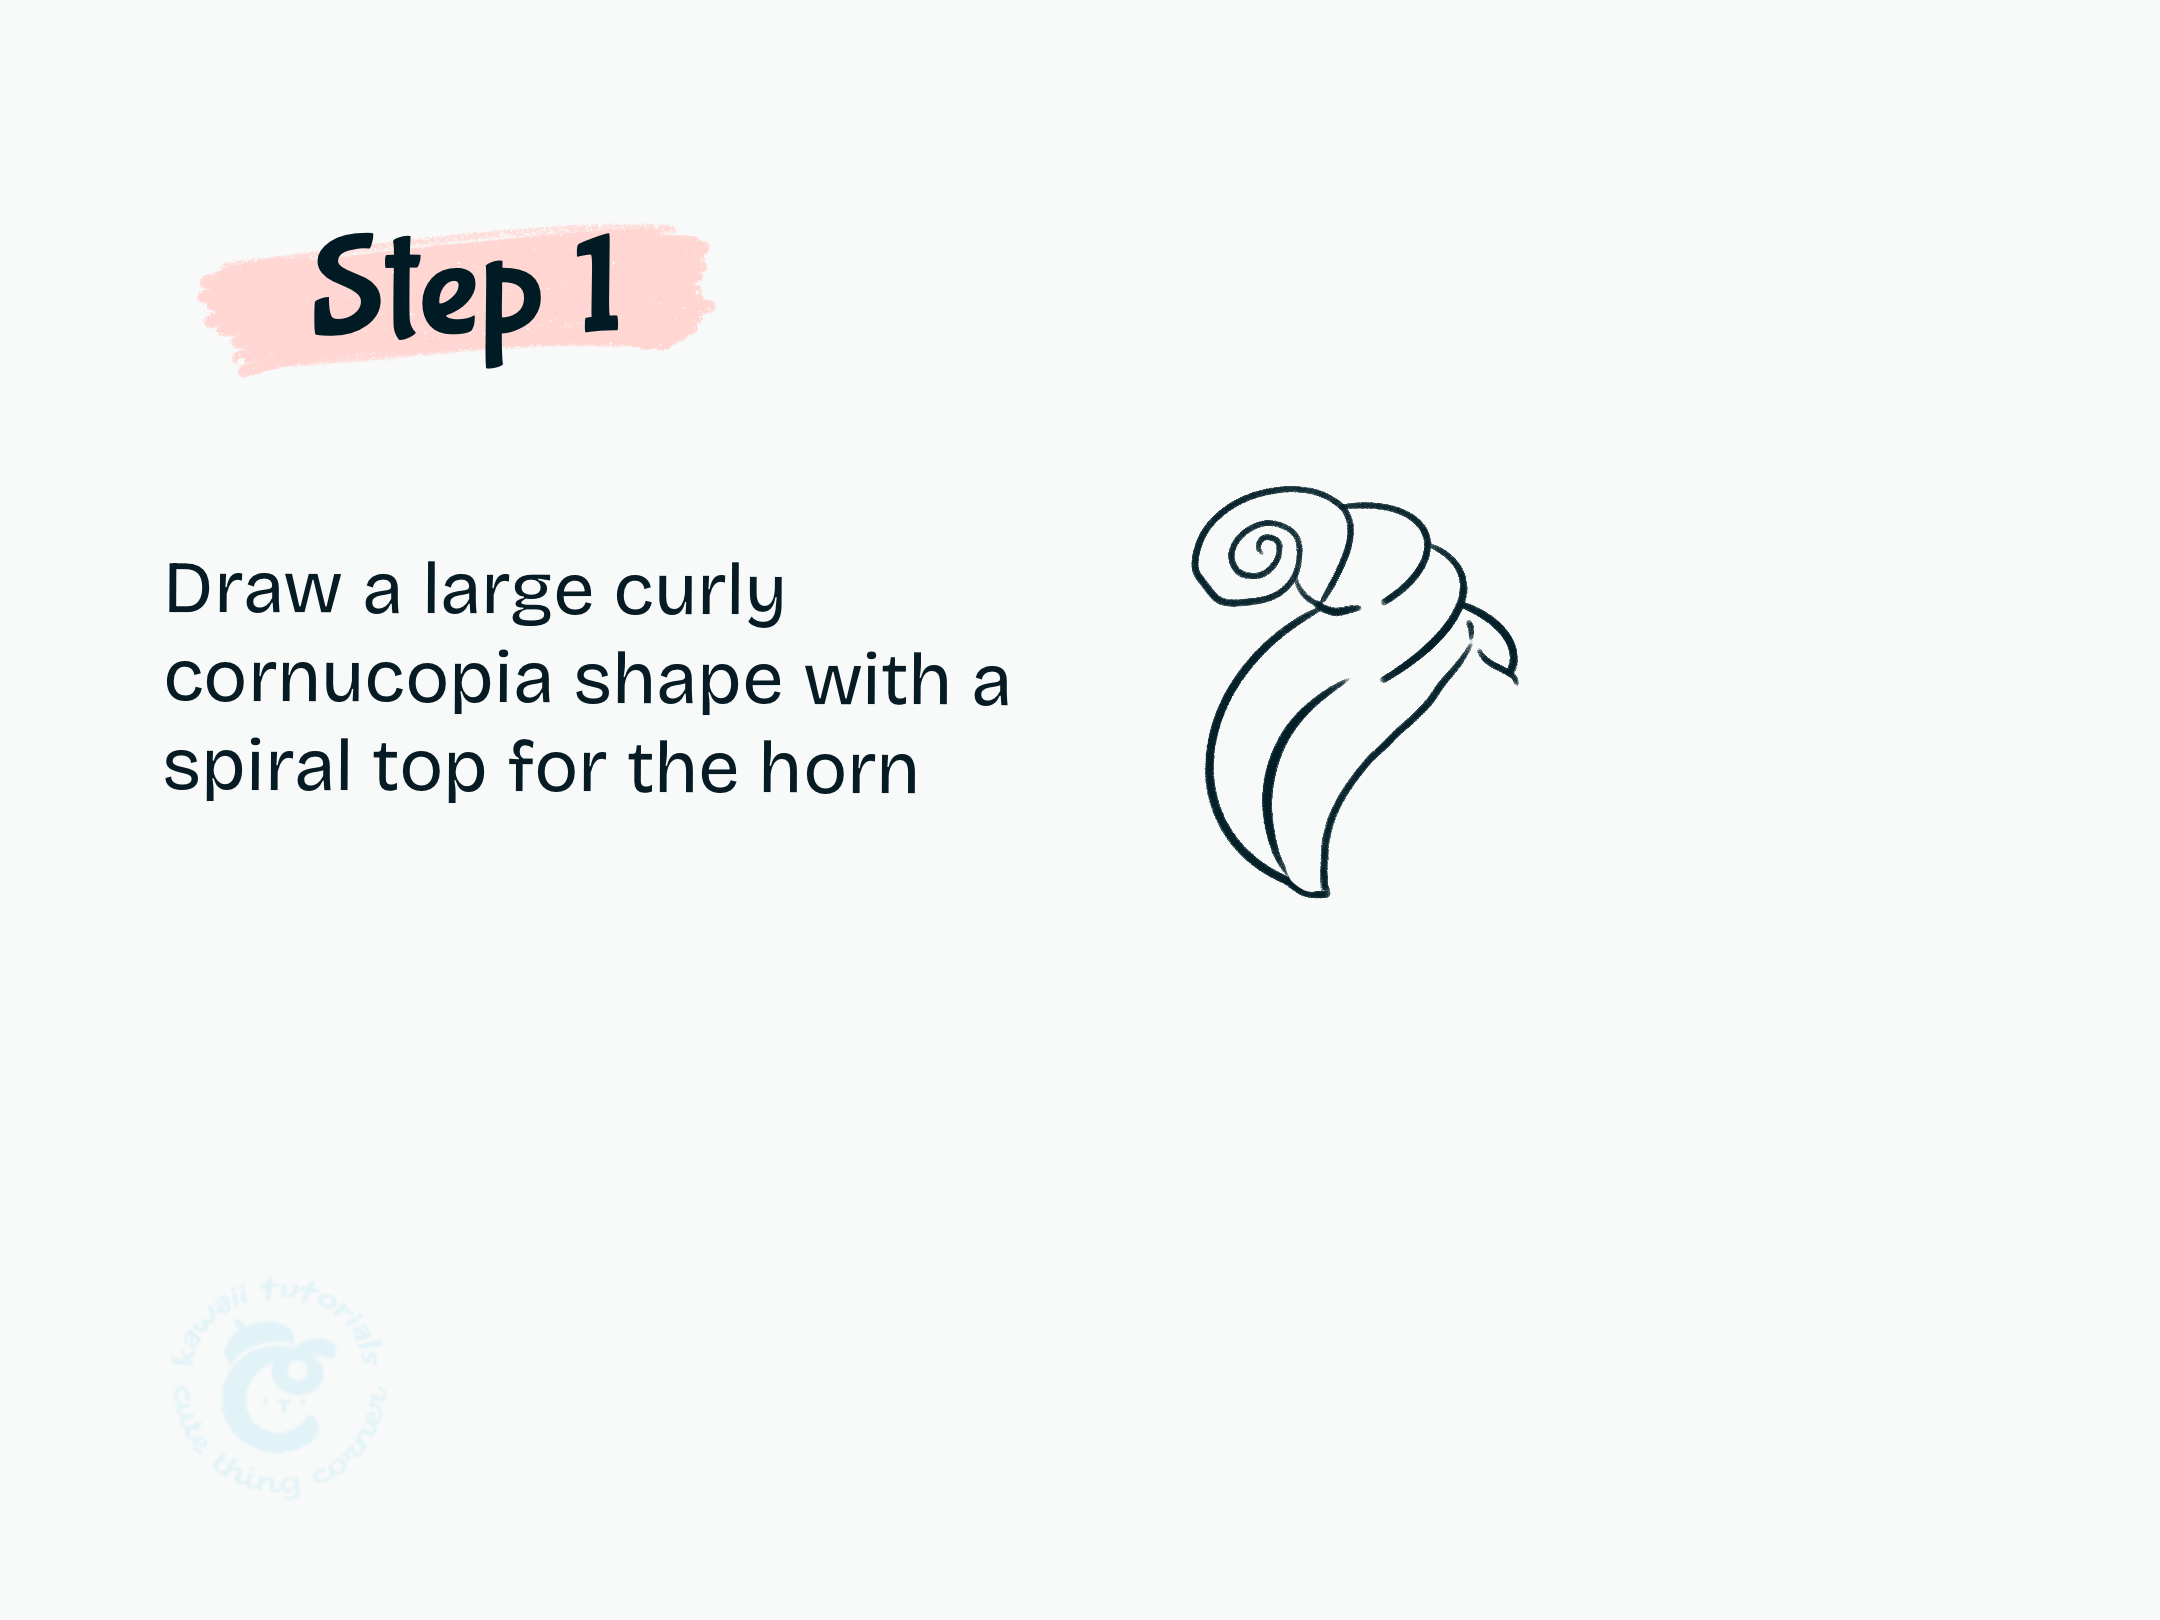
Step 1 Draw a large cornucopia with a spiral top for the horn.
#Step 2: Add simple shapes for fruits and vegetables like pumpkin leaves…body
To fill the cornucopia, start by adding simple shapes for the fruits and vegetables.
For example, draw round shapes for apples, curved ovals for pears, and a larger, slightly flattened circle for a pumpkin. Add leaves around the fruits, like simple pointed shapes for the pumpkin’s leaves, to give a natural look.
You can also include smaller details, like stems on the apples and little curves for added texture on each item’s surface.
These basic shapes will serve as the foundation for your fruit and vegetable assortment inside the cornucopia.
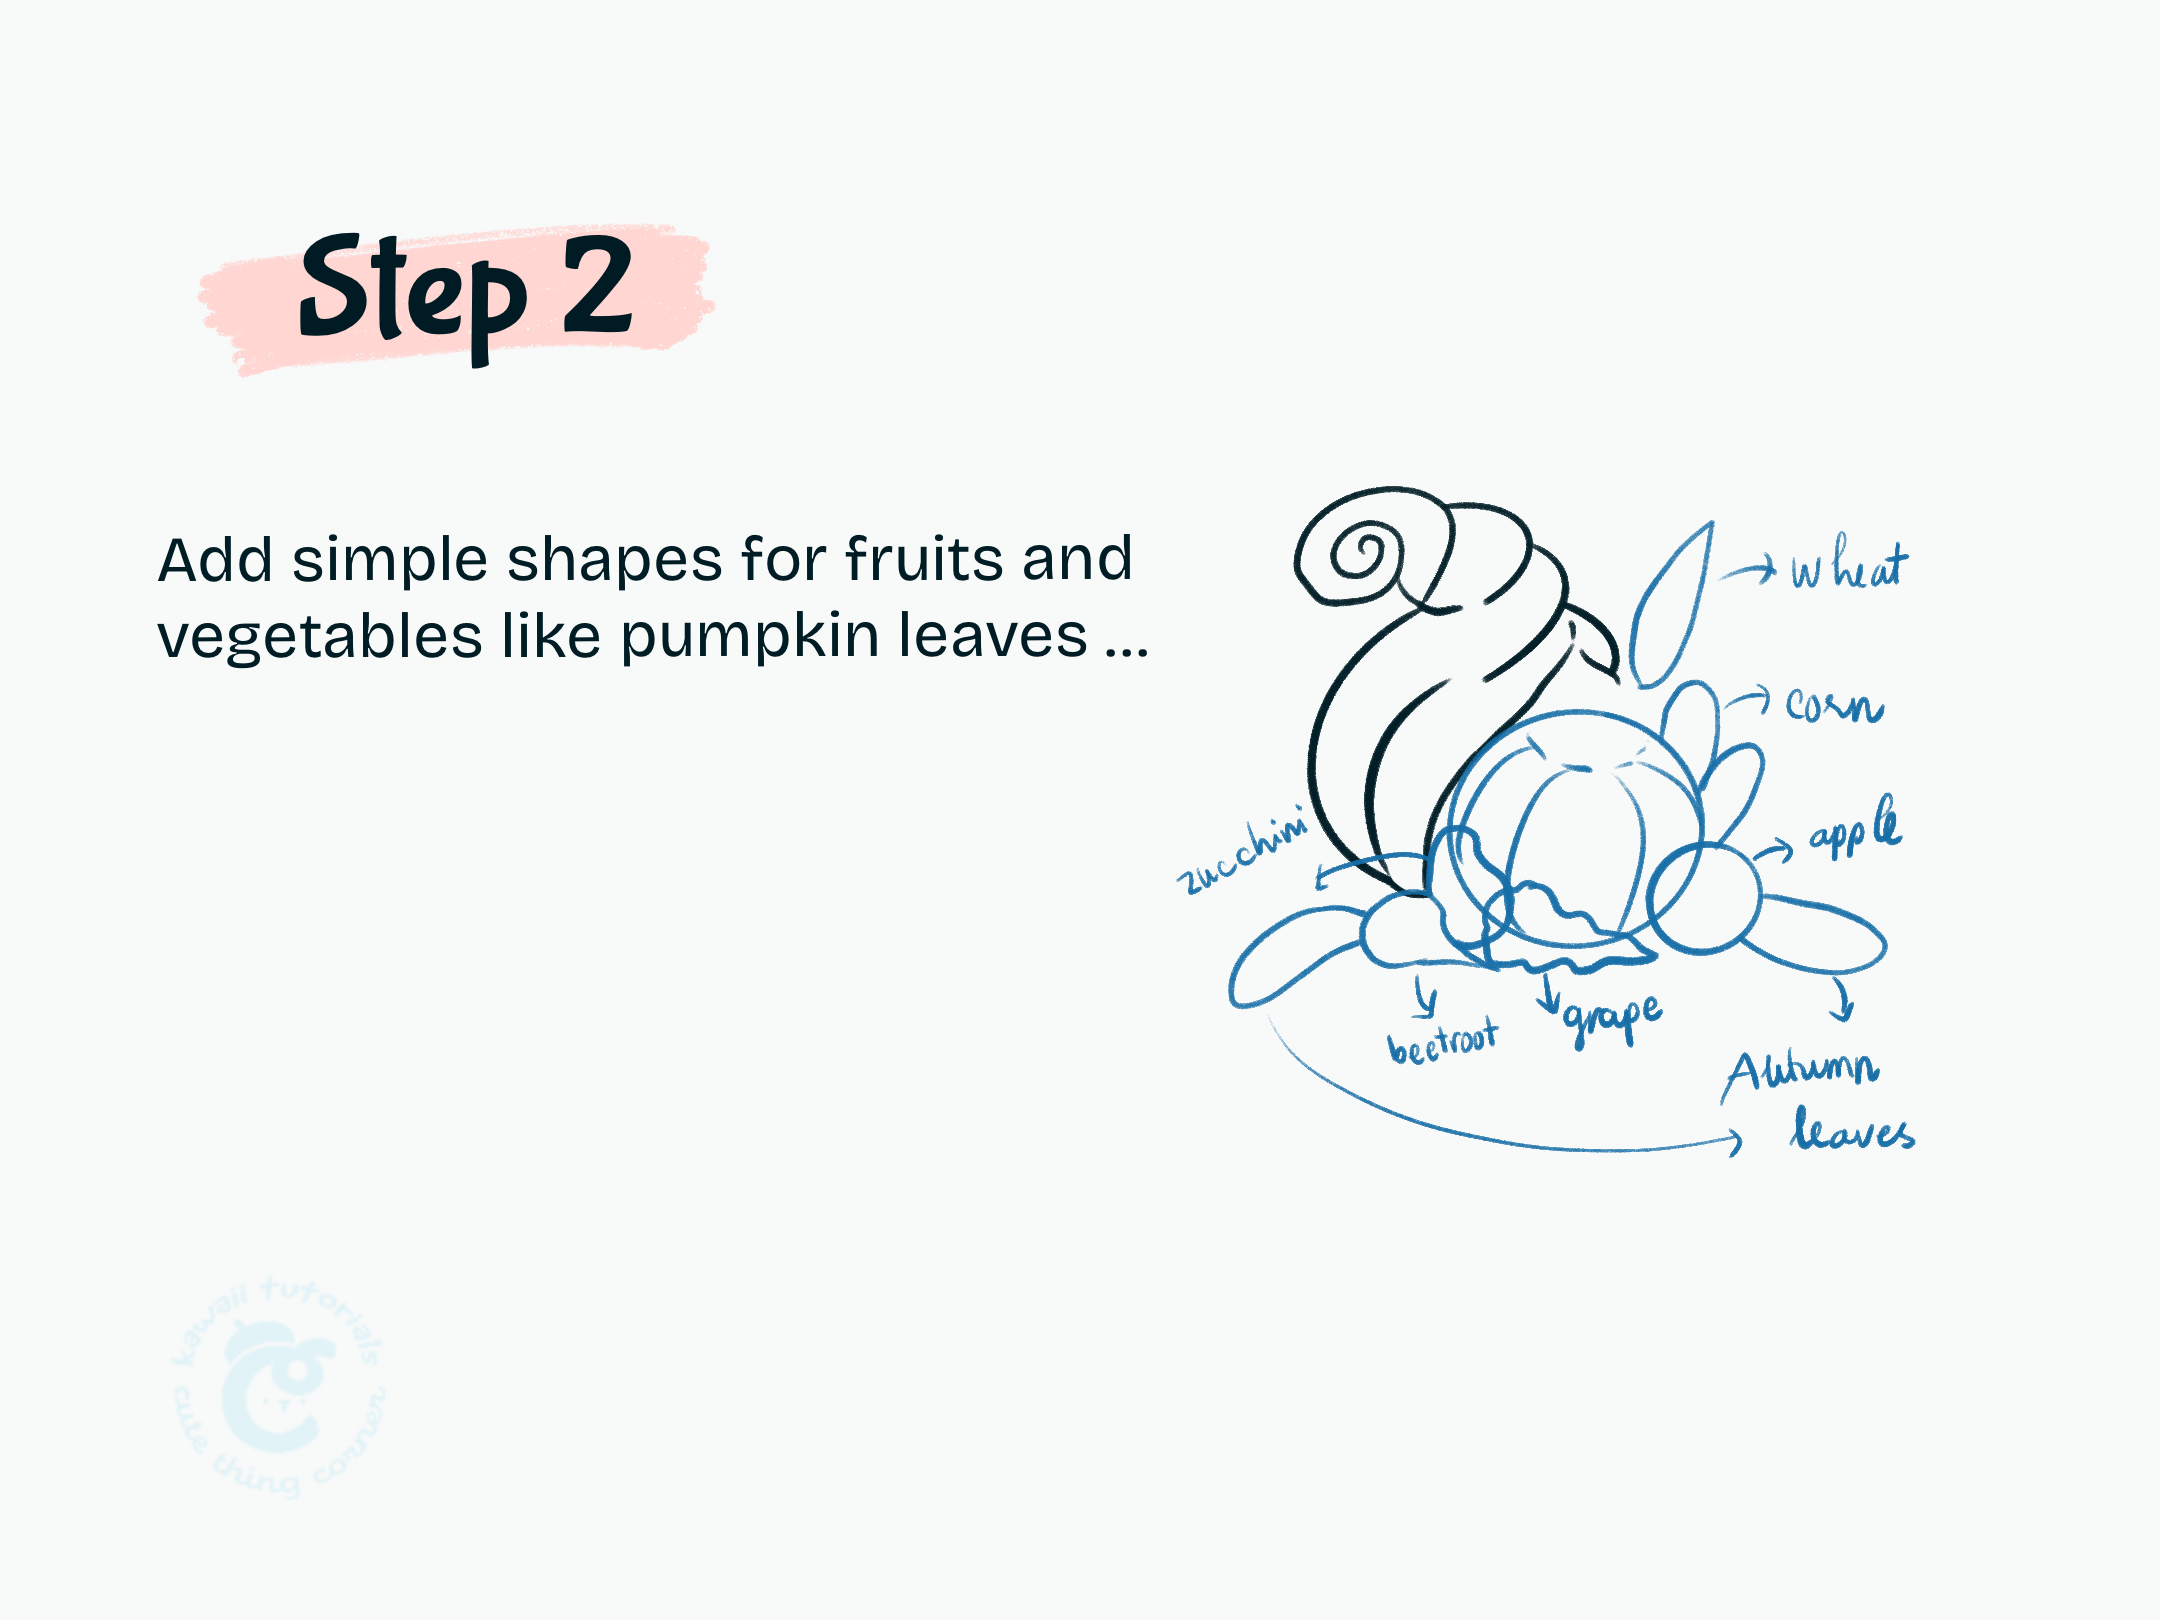
Step 2 Add simple shapes for fruits and vegetables like pumpkin leaves…
#Step 3: Add details to the fruits and veggies, like stems, leaves, and grains for texture.
To give the fruits and vegetables more texture and depth, add small details like stems, leaves, and grains.
For example, draw thin, slightly curved stems on apples and pears to make them look more realistic.
Add layered leaves around the pumpkin, with each leaf showing subtle veins to enhance the natural look.
For additional texture, include tiny grains or speckles on some surfaces, like the pumpkin or squash, to create a more lifelike appearance.
These added details will make the fruits and veggies look richer and give the whole drawing a vibrant, realistic touch.
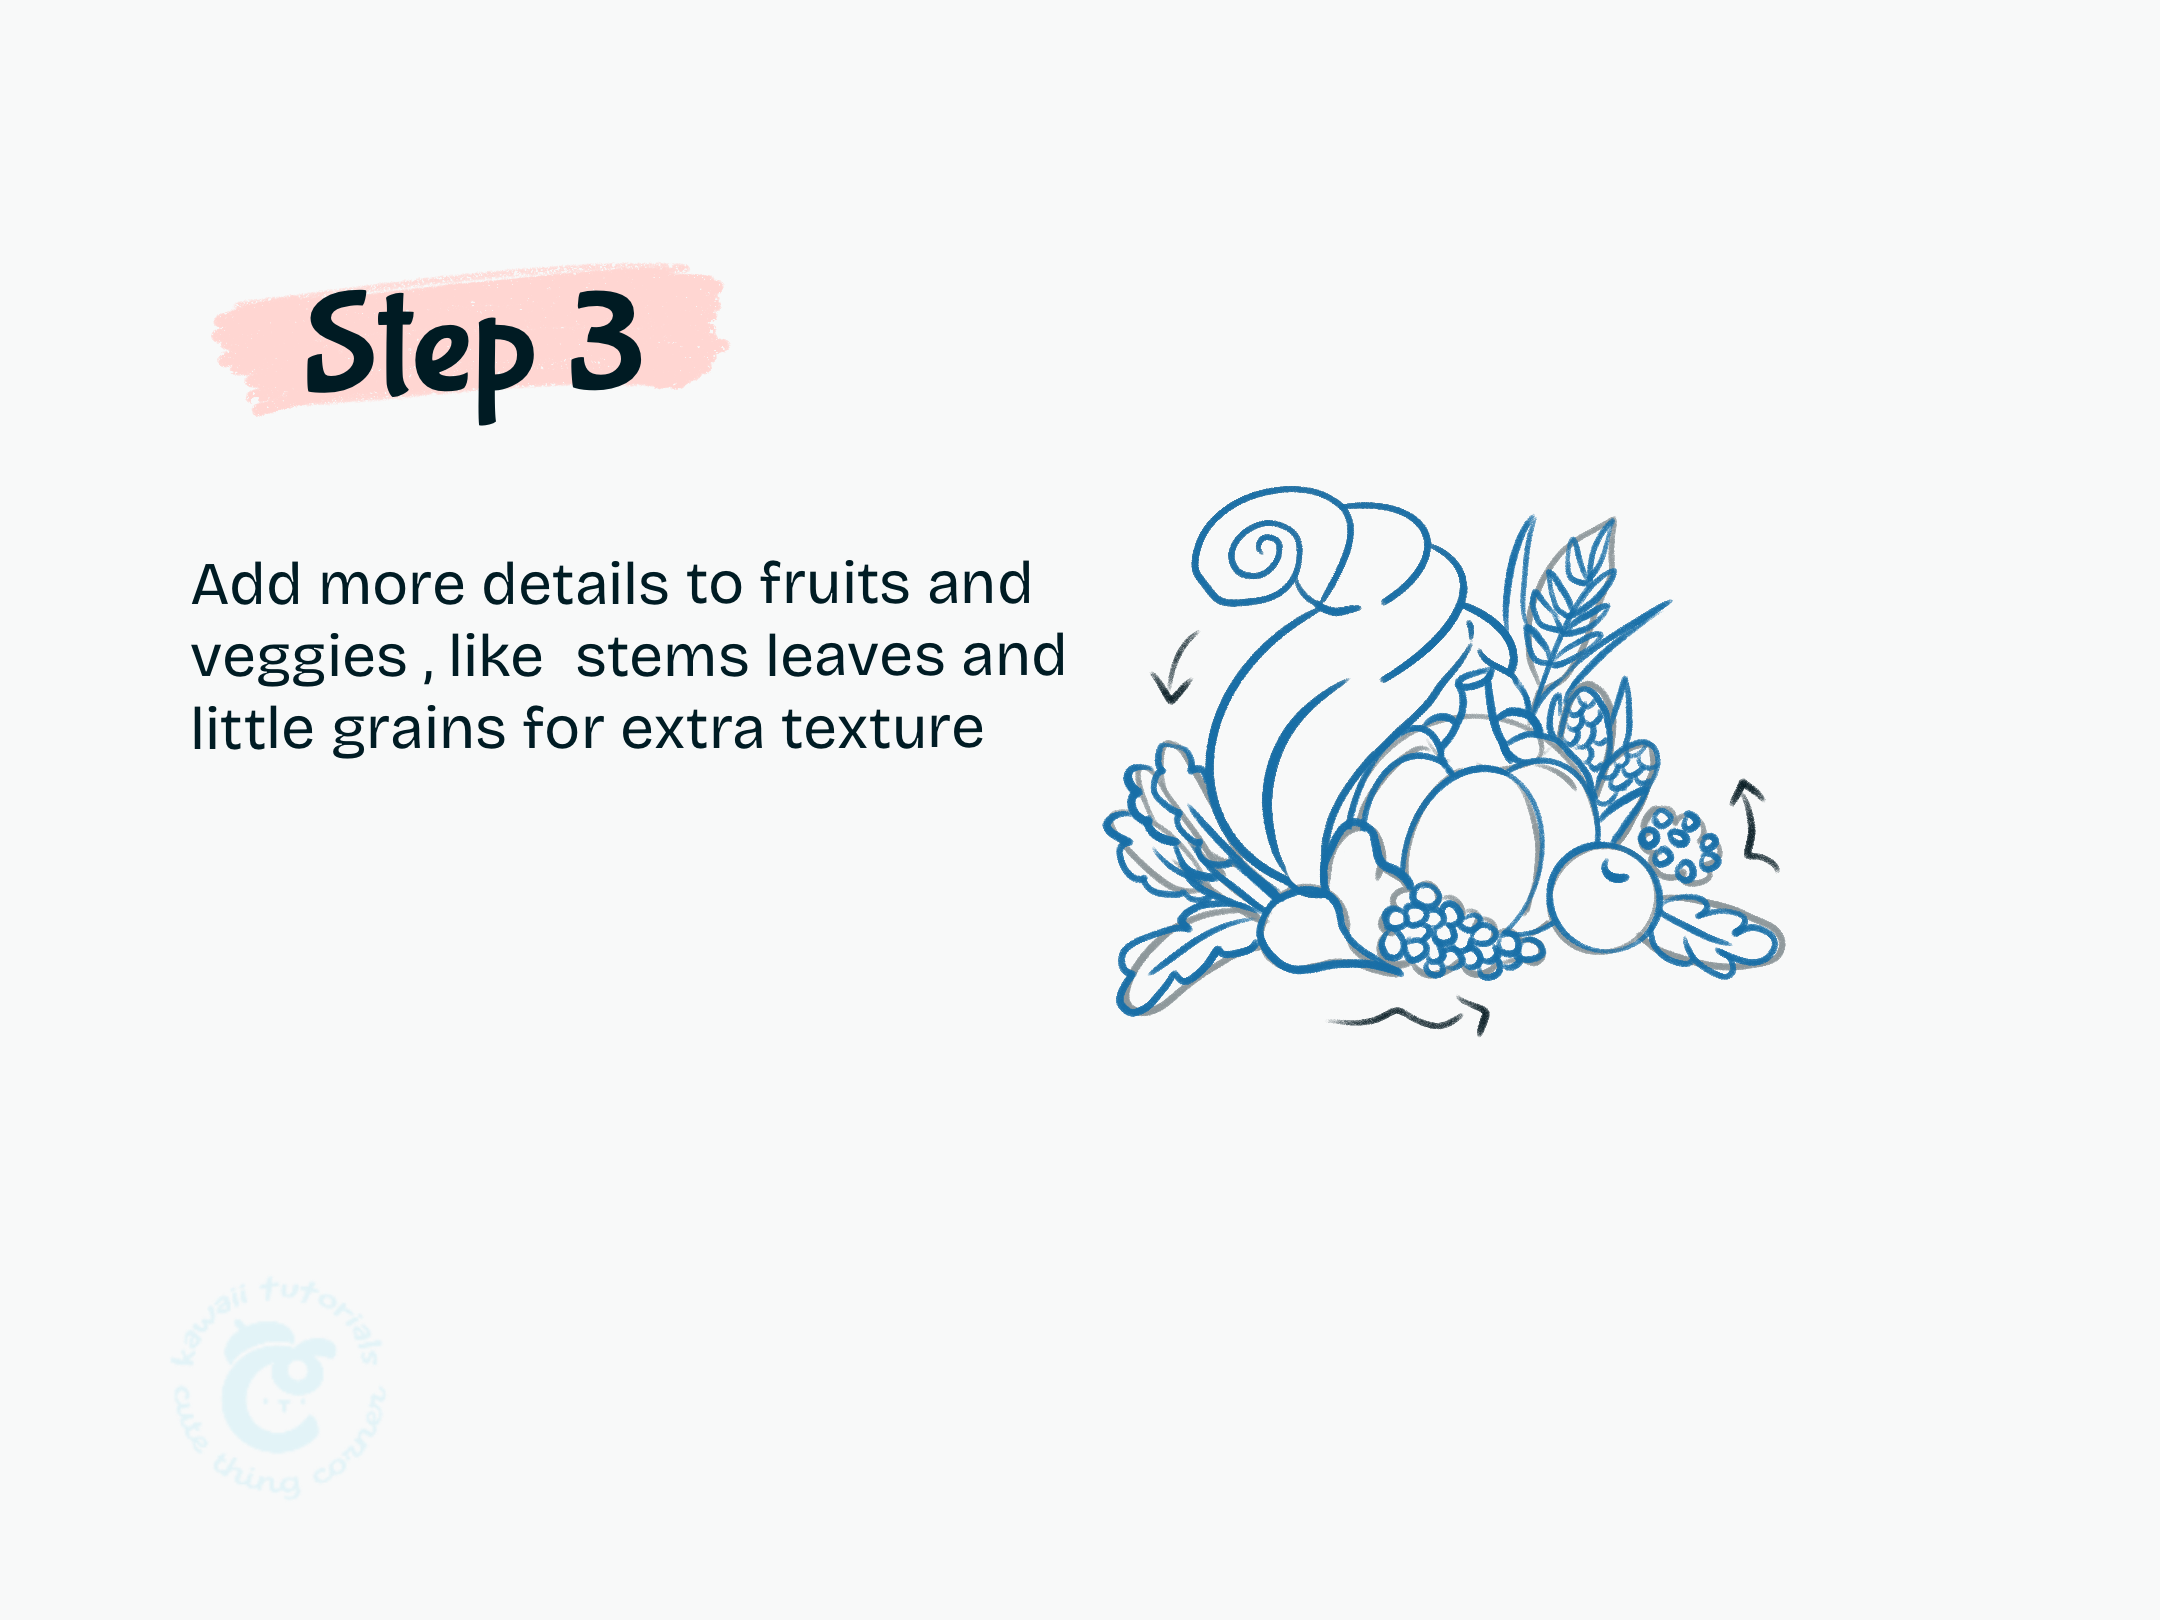
Step 3 Add details to the fruits and veggies, like stems, leaves, and grains for texture.
#Step 4: Finalize the horn and produce with outlines and add cute facial expressions.
To complete the look of the cornucopia and its contents, carefully outline the horn and each fruit and vegetable, refining their shapes to make them stand out.
Use clean, defined lines to give the horn a polished appearance, emphasizing the spiral and curved edges.
For each fruit and vegetable, add playful details like small, expressive eyes, smiling mouths, or tiny blush marks to give them a cute, character-like quality.
These facial expressions will bring charm and personality to the produce, transforming the cornucopia into a fun, inviting scene that feels lively and full of character.
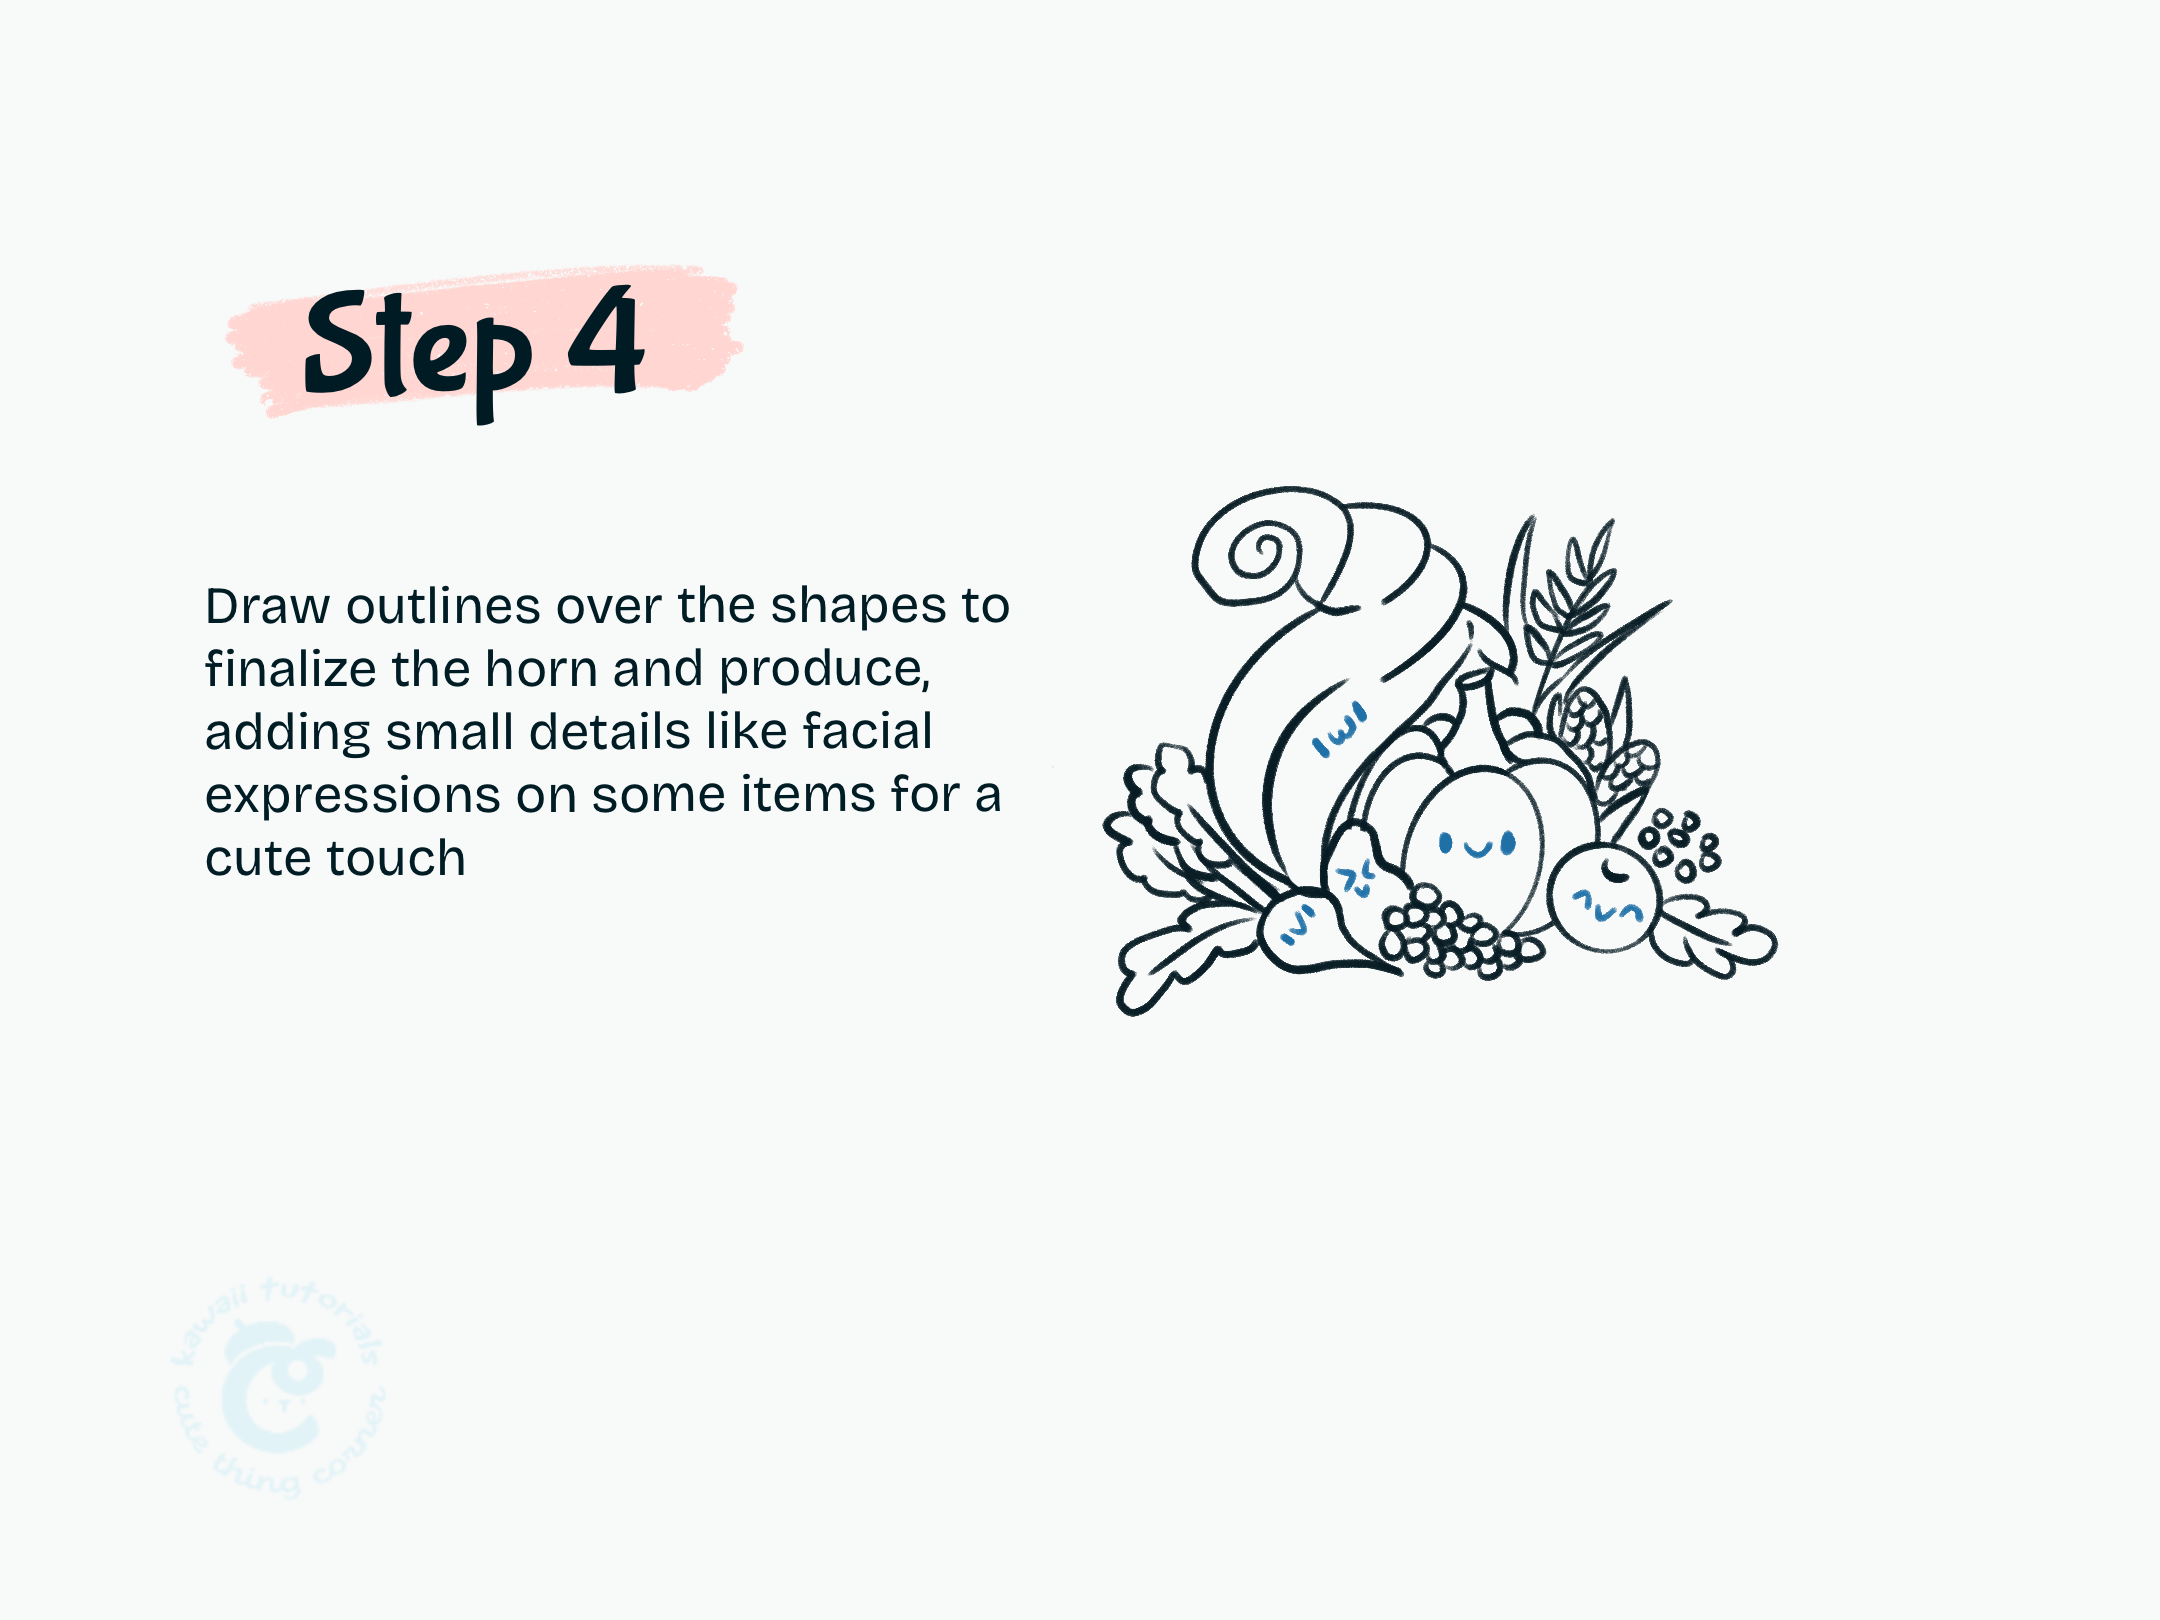
Step 4 Finalize the horn and produce with outlines and add cute facial expressions.
#Step 5: Color the cornucopia with warm harvest colors to complete the kawaii harvest cornucopia
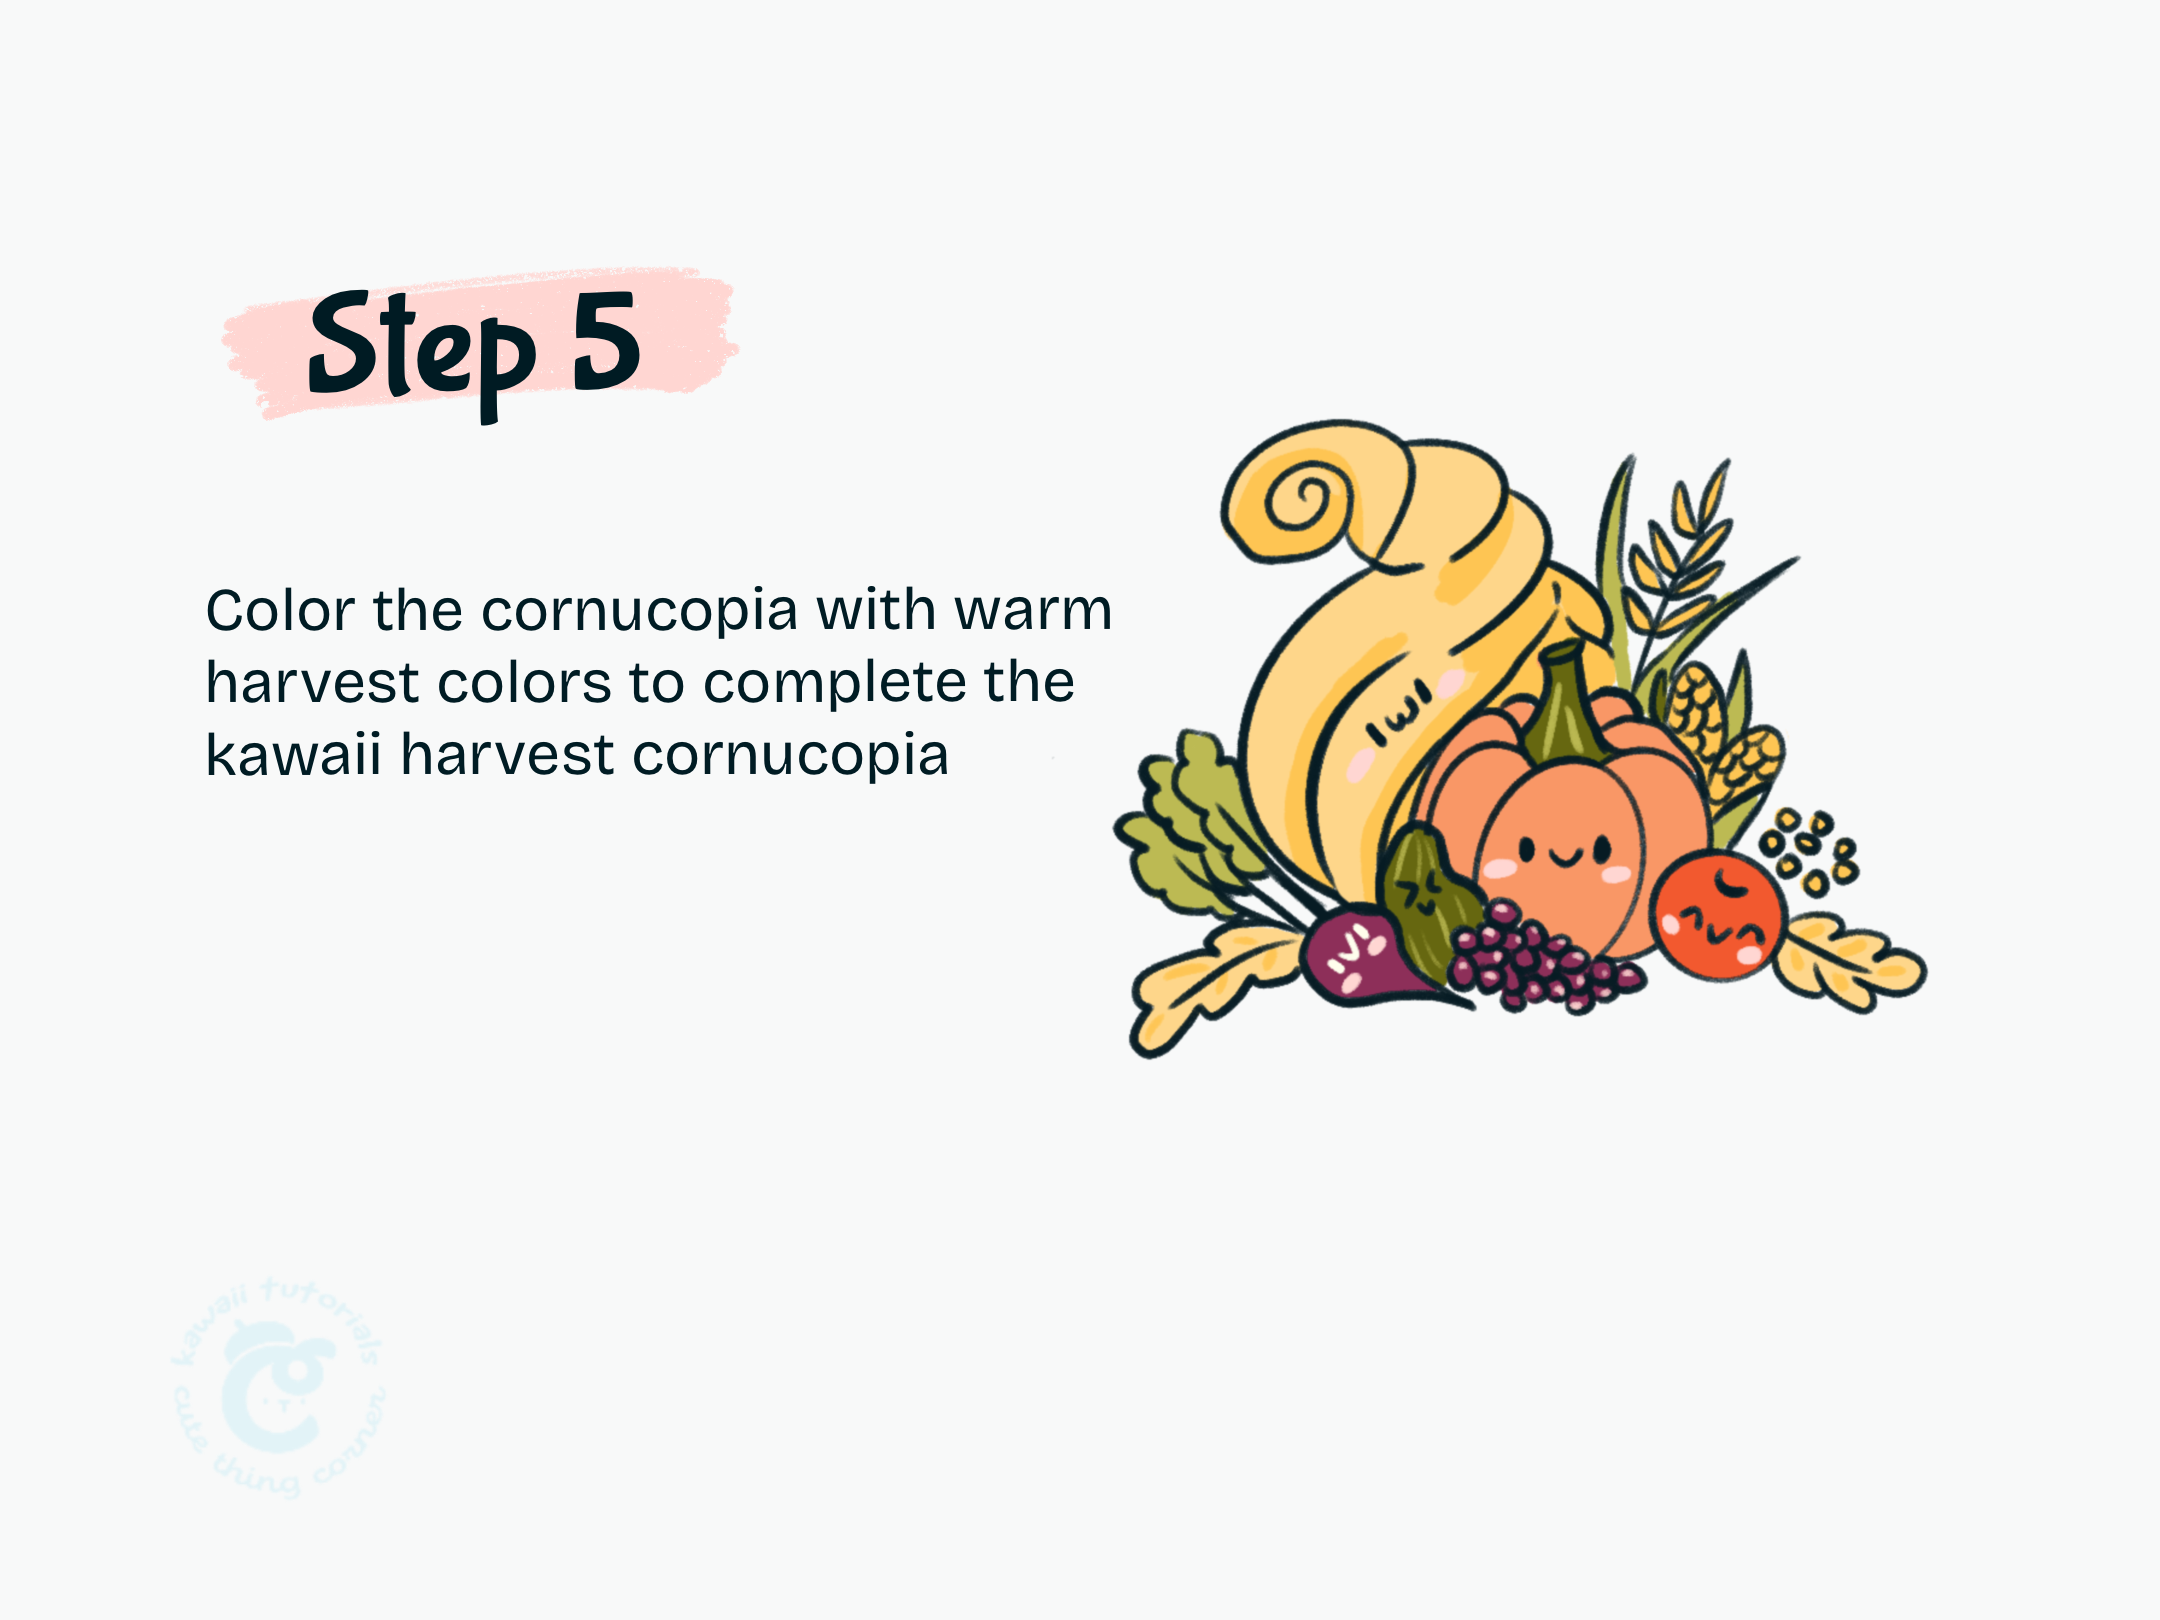
Step 5 Color the cornucopia
I hope you had fun drawing this cute harvest cornucopia! Thank you for following along with this guide.
Goodbye for now, and see you next time!
Don’t forget to check out the full step-by-step instructions for drawing cute harvest cornucopia!
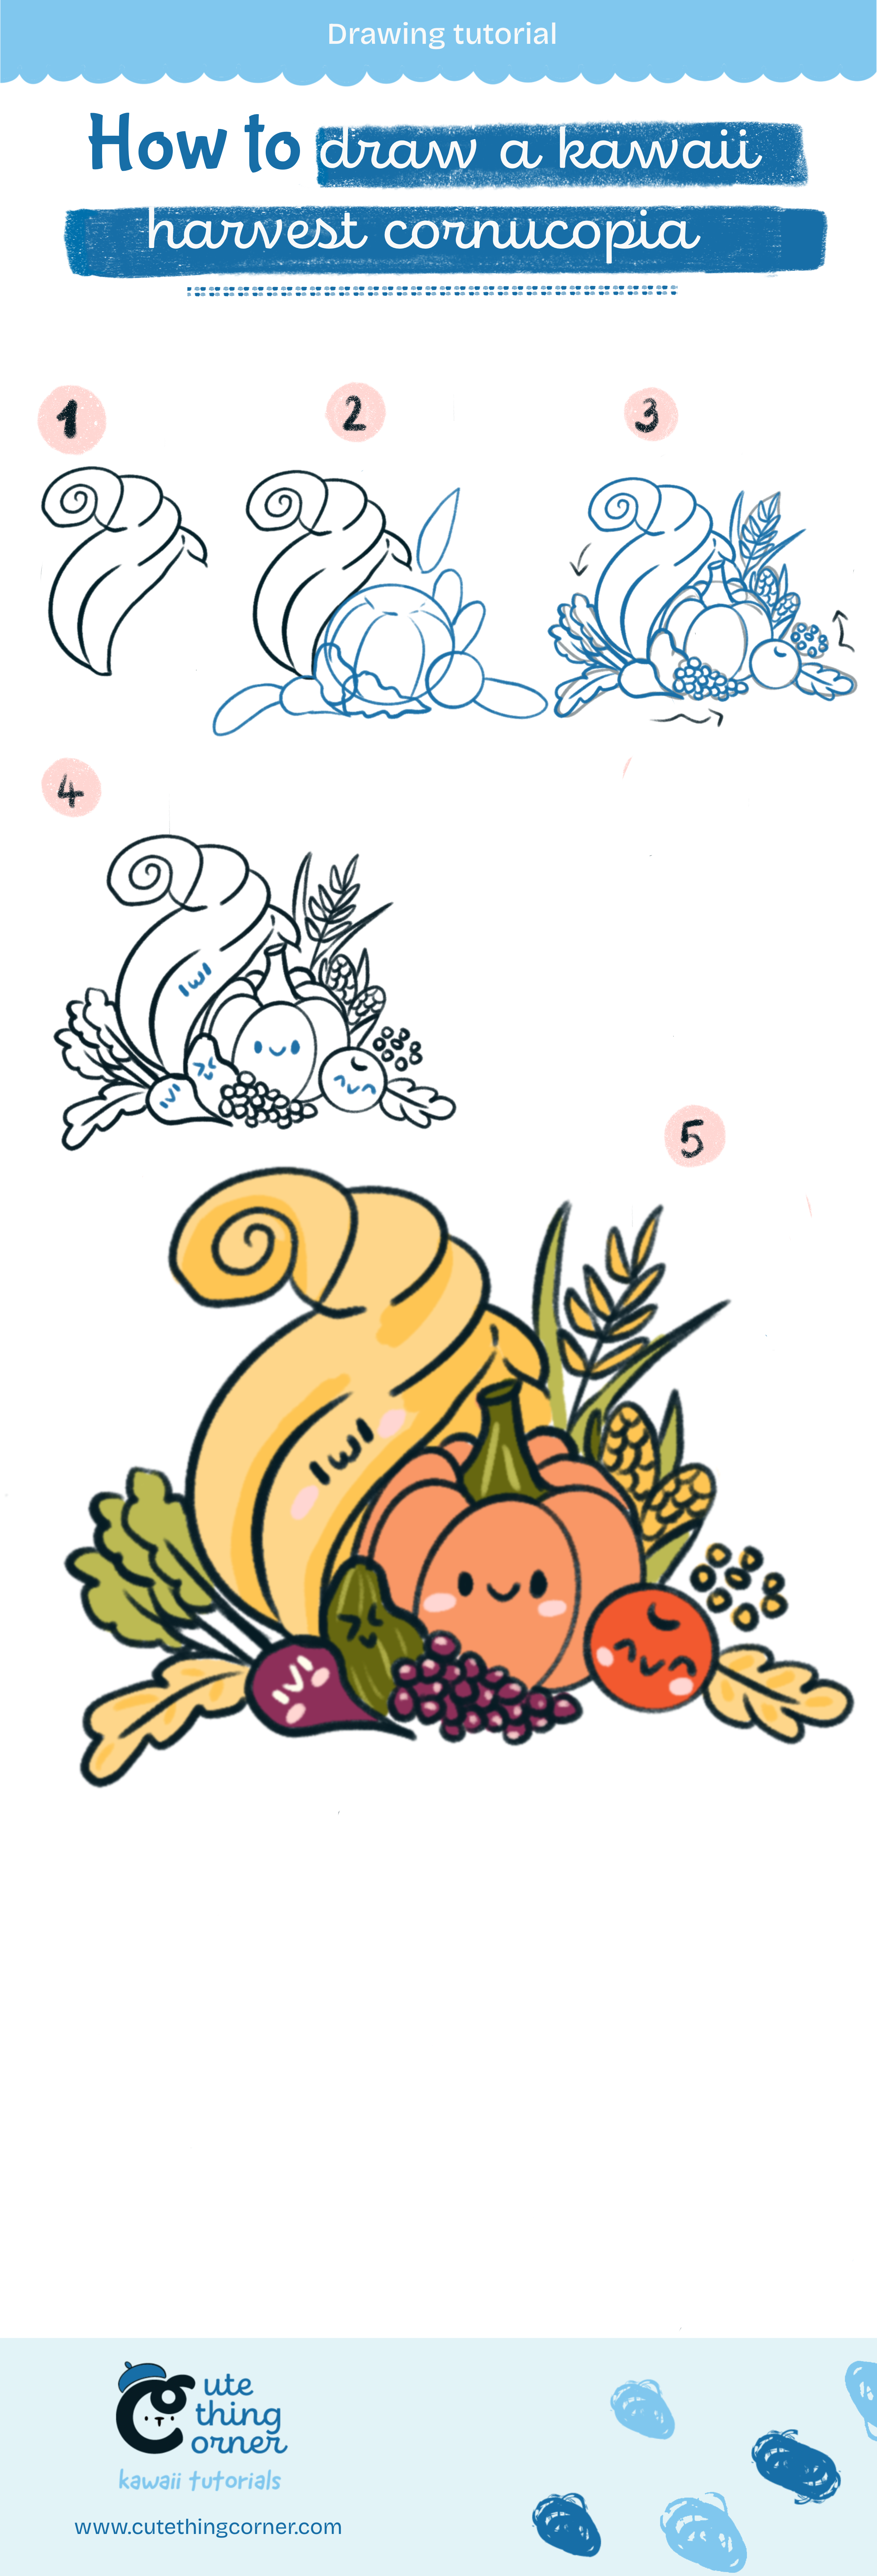
How to draw cute harvest cornucopia (Step-by-step)

