Looking for a fun and festive drawing idea?
In this tutorial from Cute Thing Corner, you’ll learn how to draw cute pumpkin stacks—perfect for Halloween or fall decorations!
These charming pumpkins are easy to create and add a playful touch to your seasonal art projects.
Grab your drawing supplies, and let’s bring these cute stacked pumpkins to life!
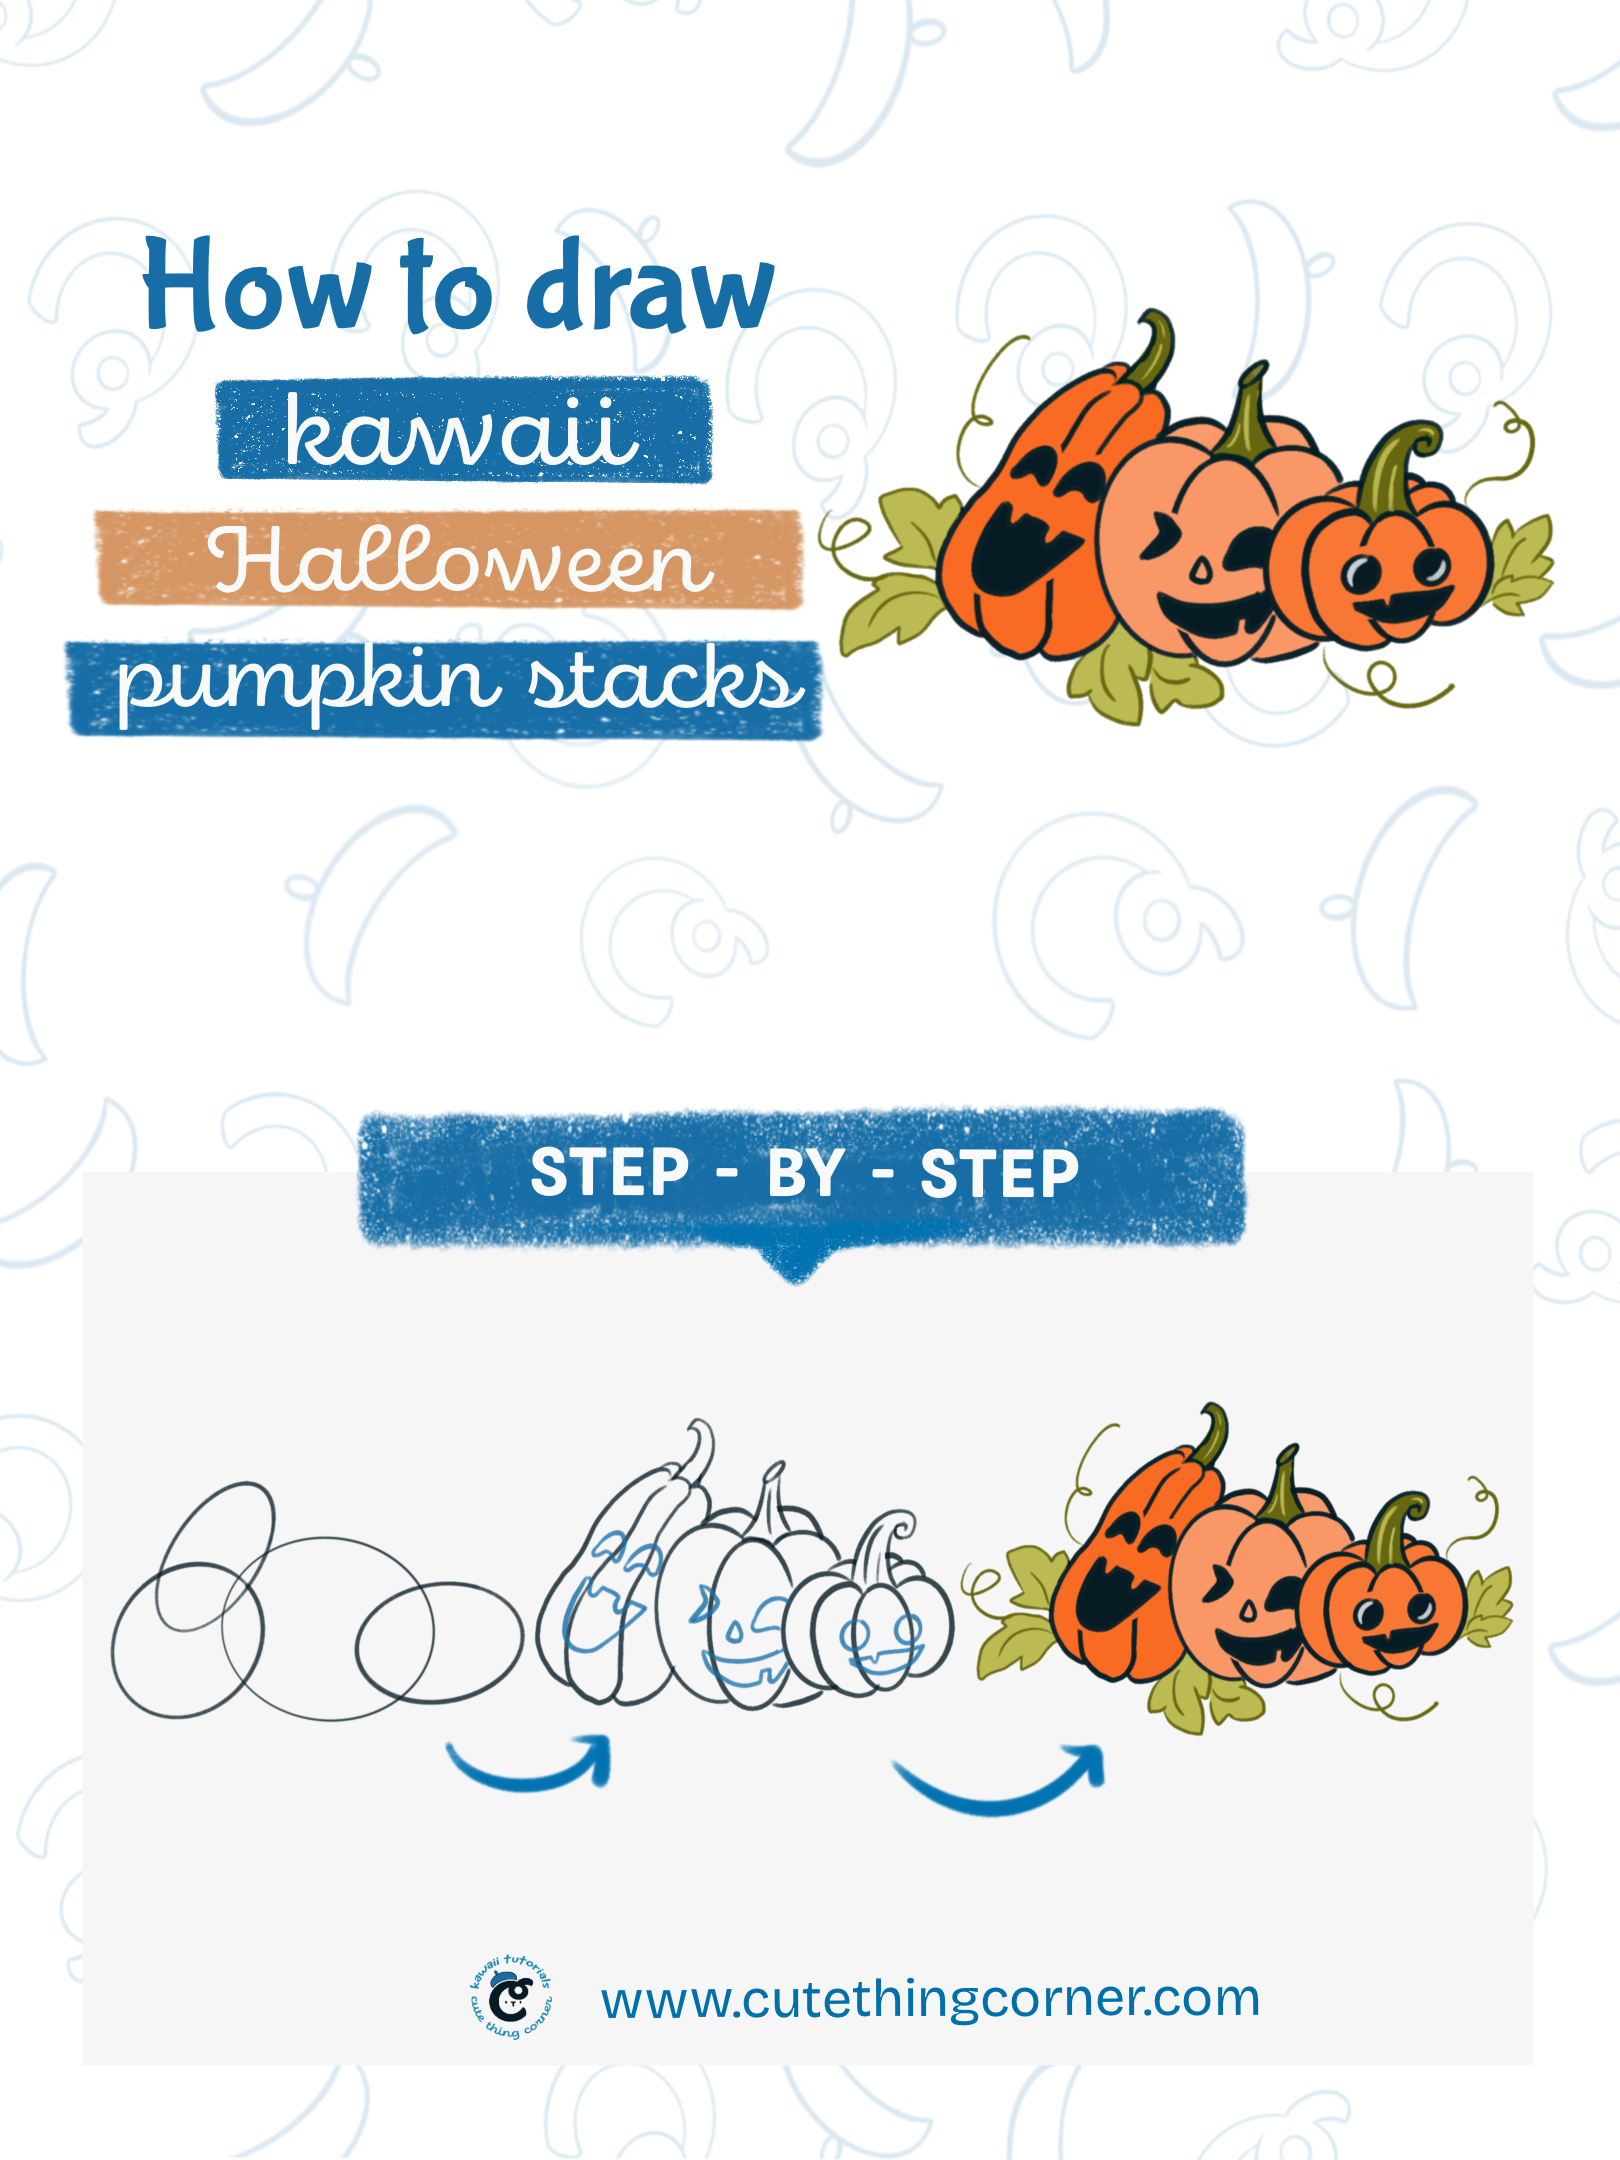
How to draw kawaii pumpkin stacks
You just have paper and a pencil to start. Color will belong to your favorite or using an Ipad and pencil.
Whatever makes you comfortable to start.
Now jump into step-by-step to draw cute pumpkin patch.
#Step 1: Draw overlapping ellipses shape for the main bodies of pumpkins
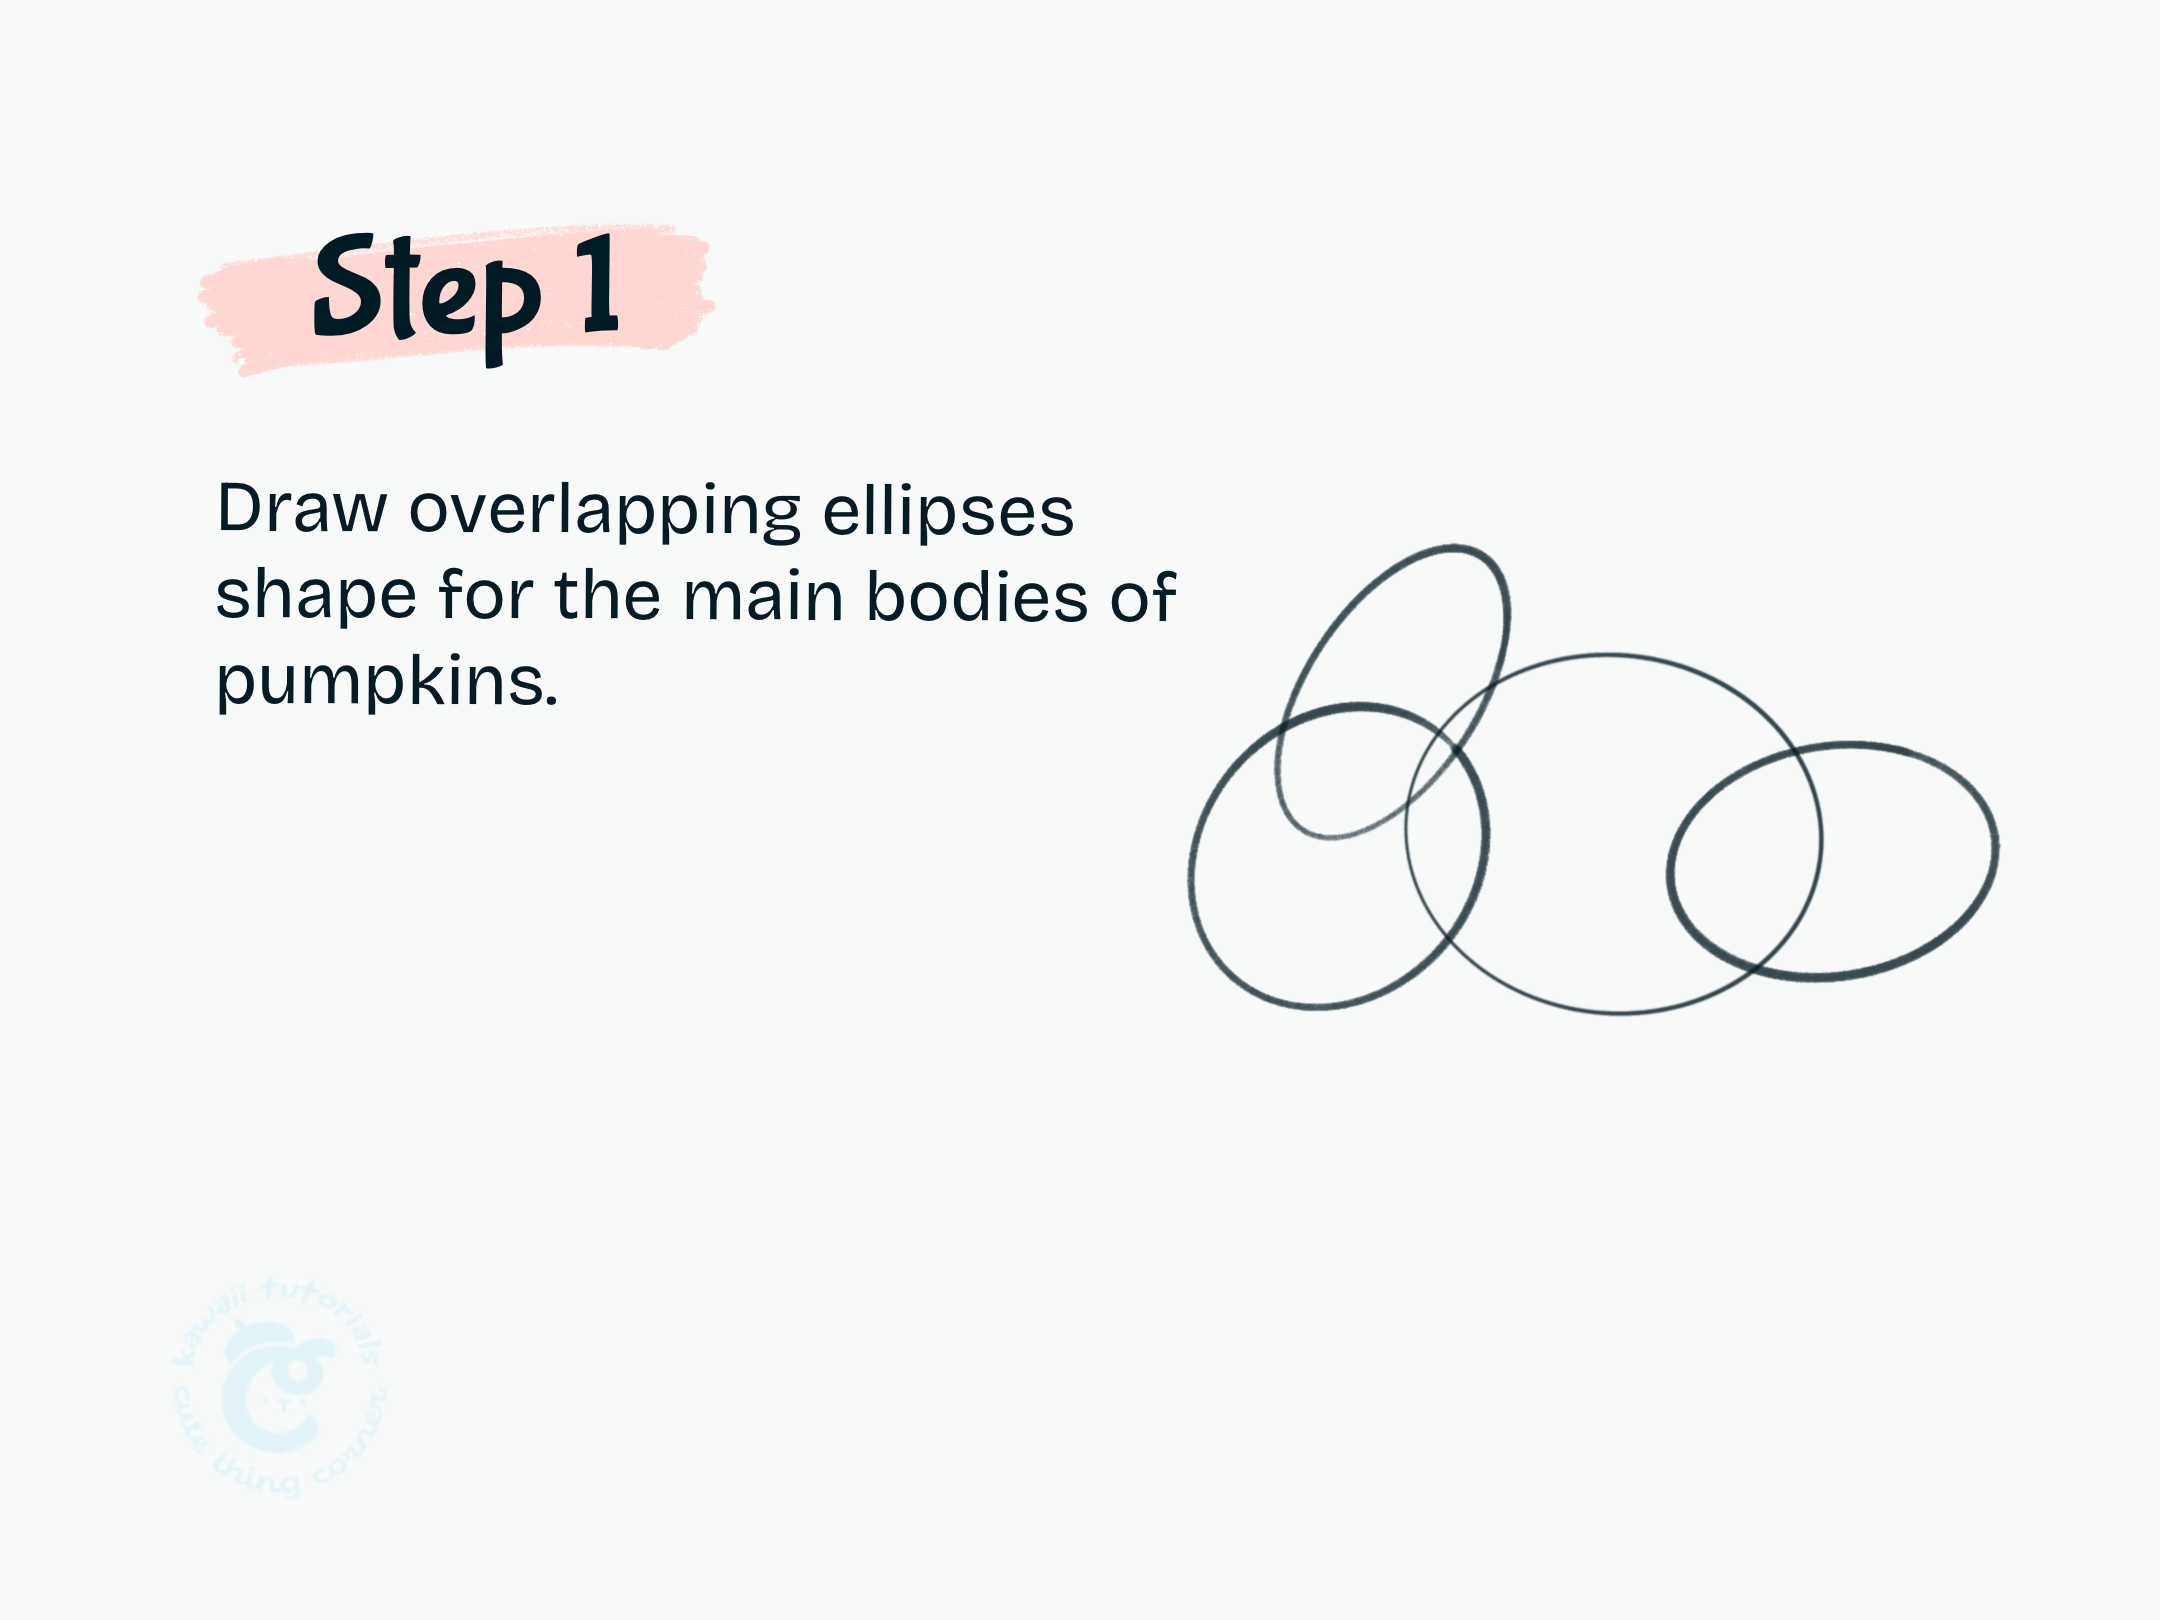
Step 1 Draw overlapping ellipses shape for the main bodies of pumpkins
#Step 2: Add more rounded oval shapes on the sides to give each pumpkin a three-dimensional look.
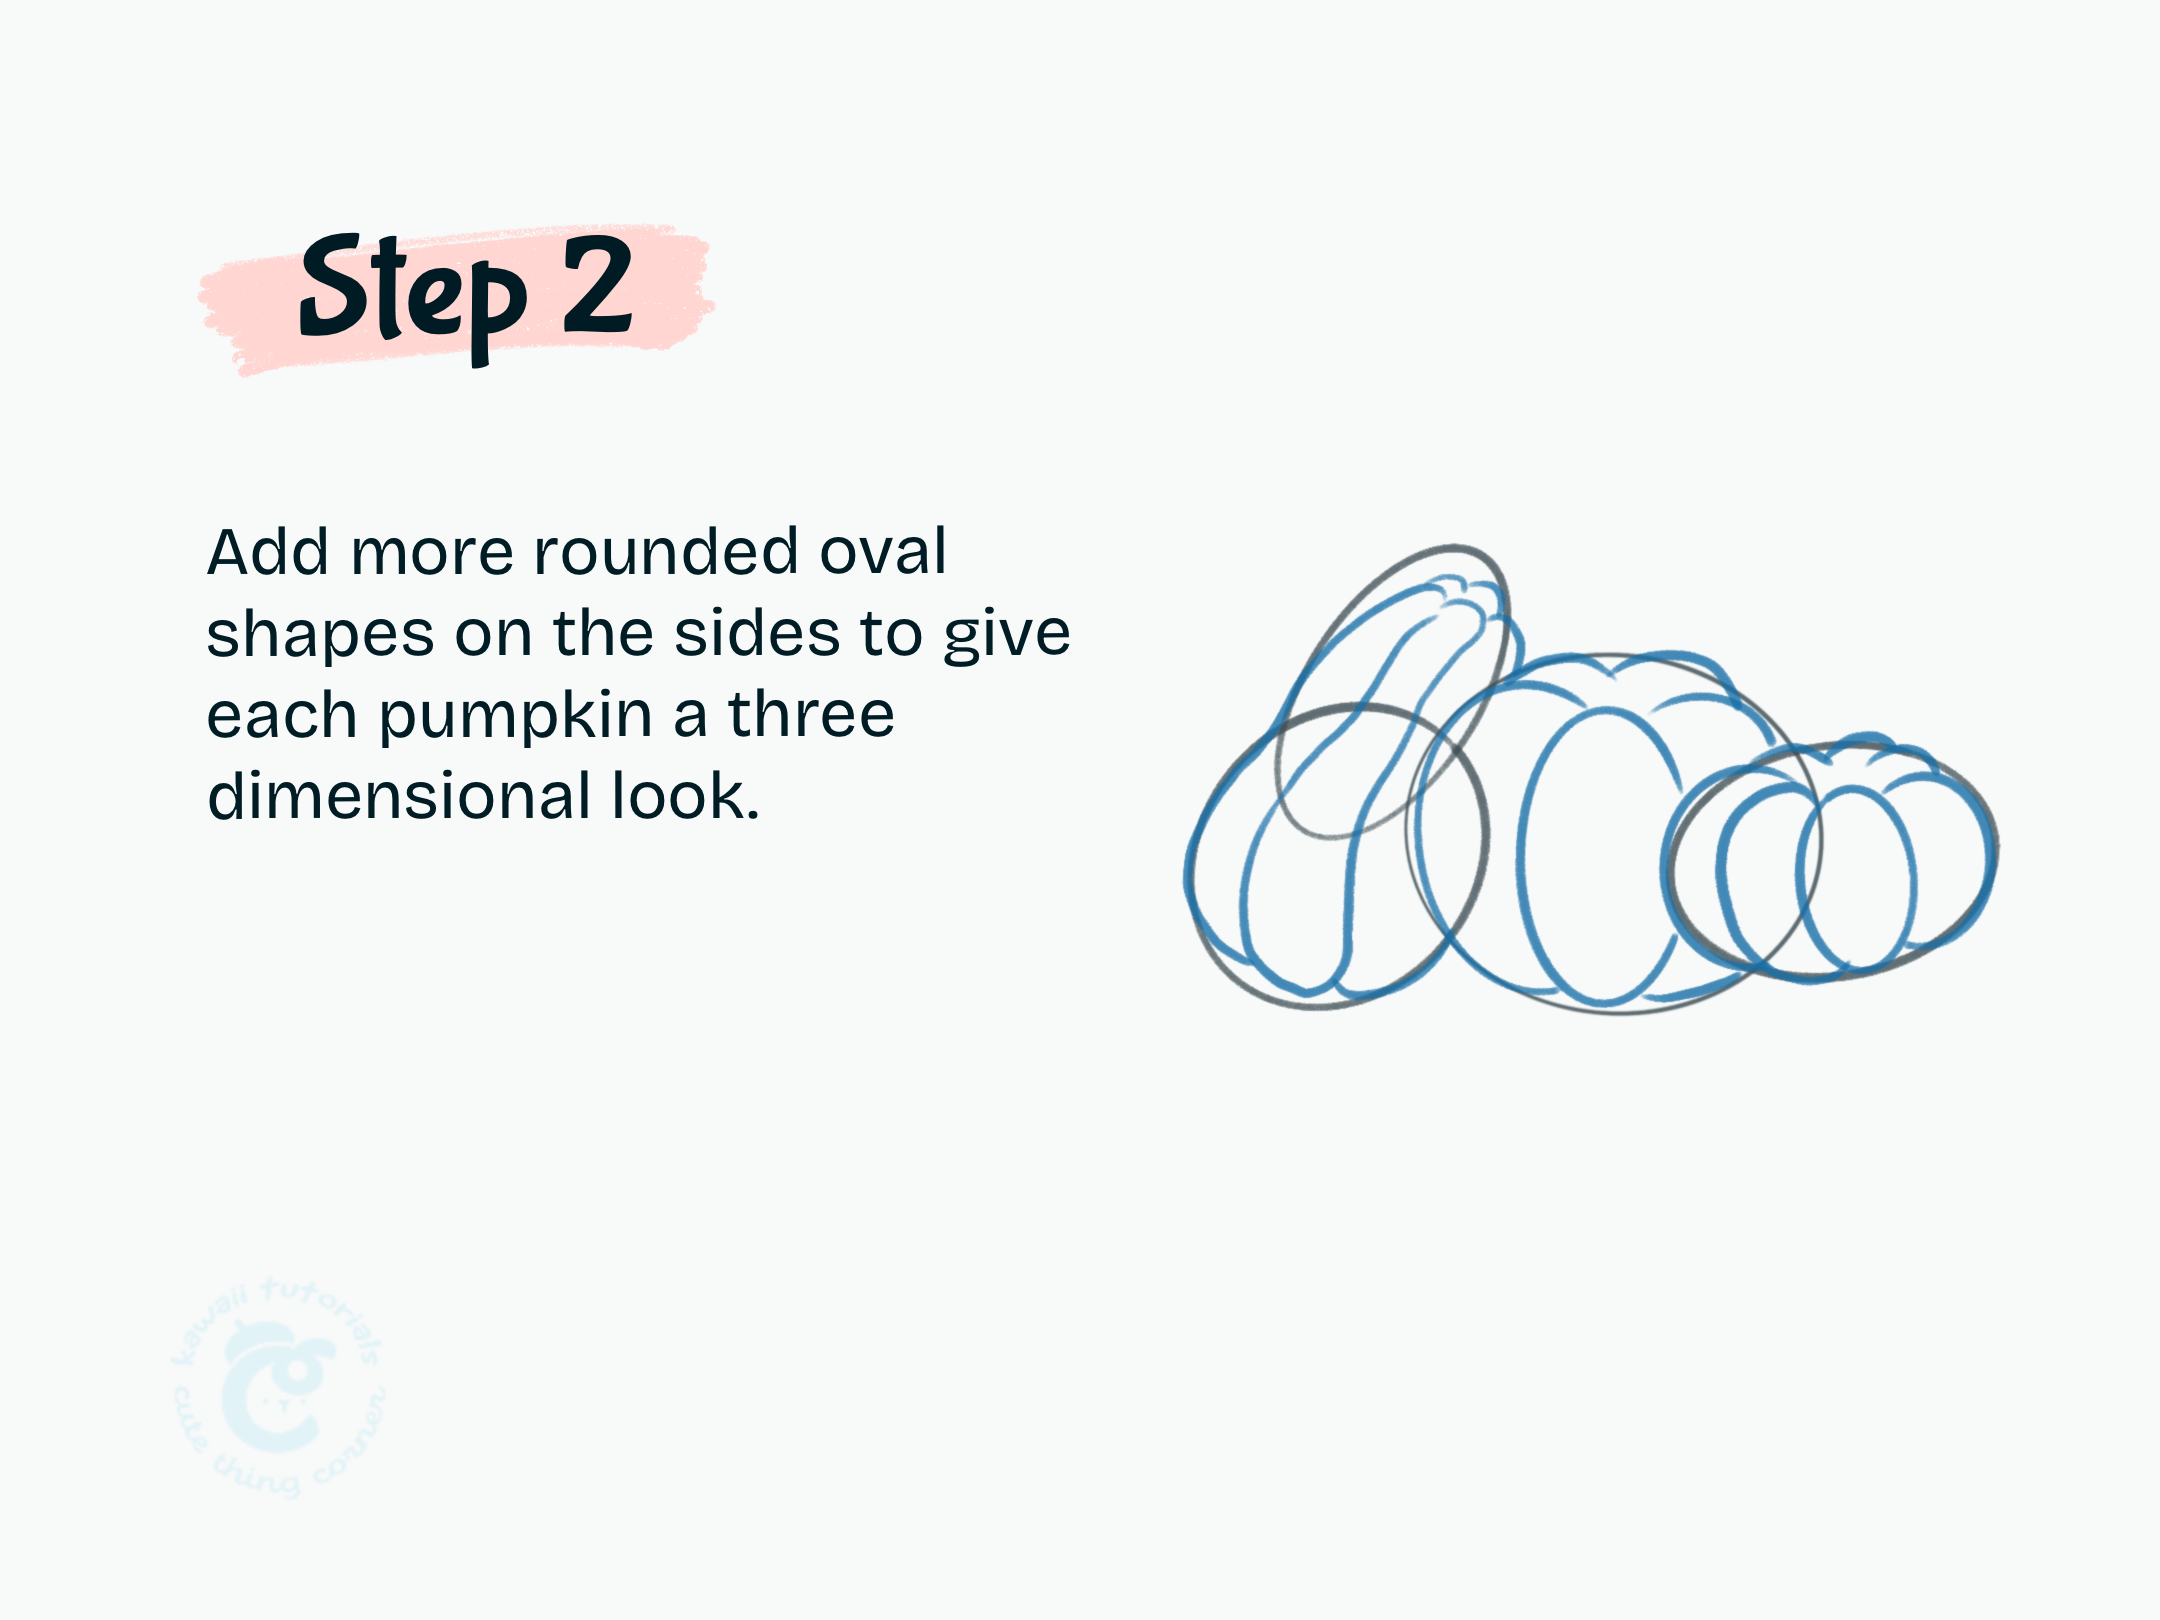
Step 2 Add more rounded oval shapes on the sides to give each pumpkin a three dimensional look
#Step 3: Draw stems for the each pumpkin
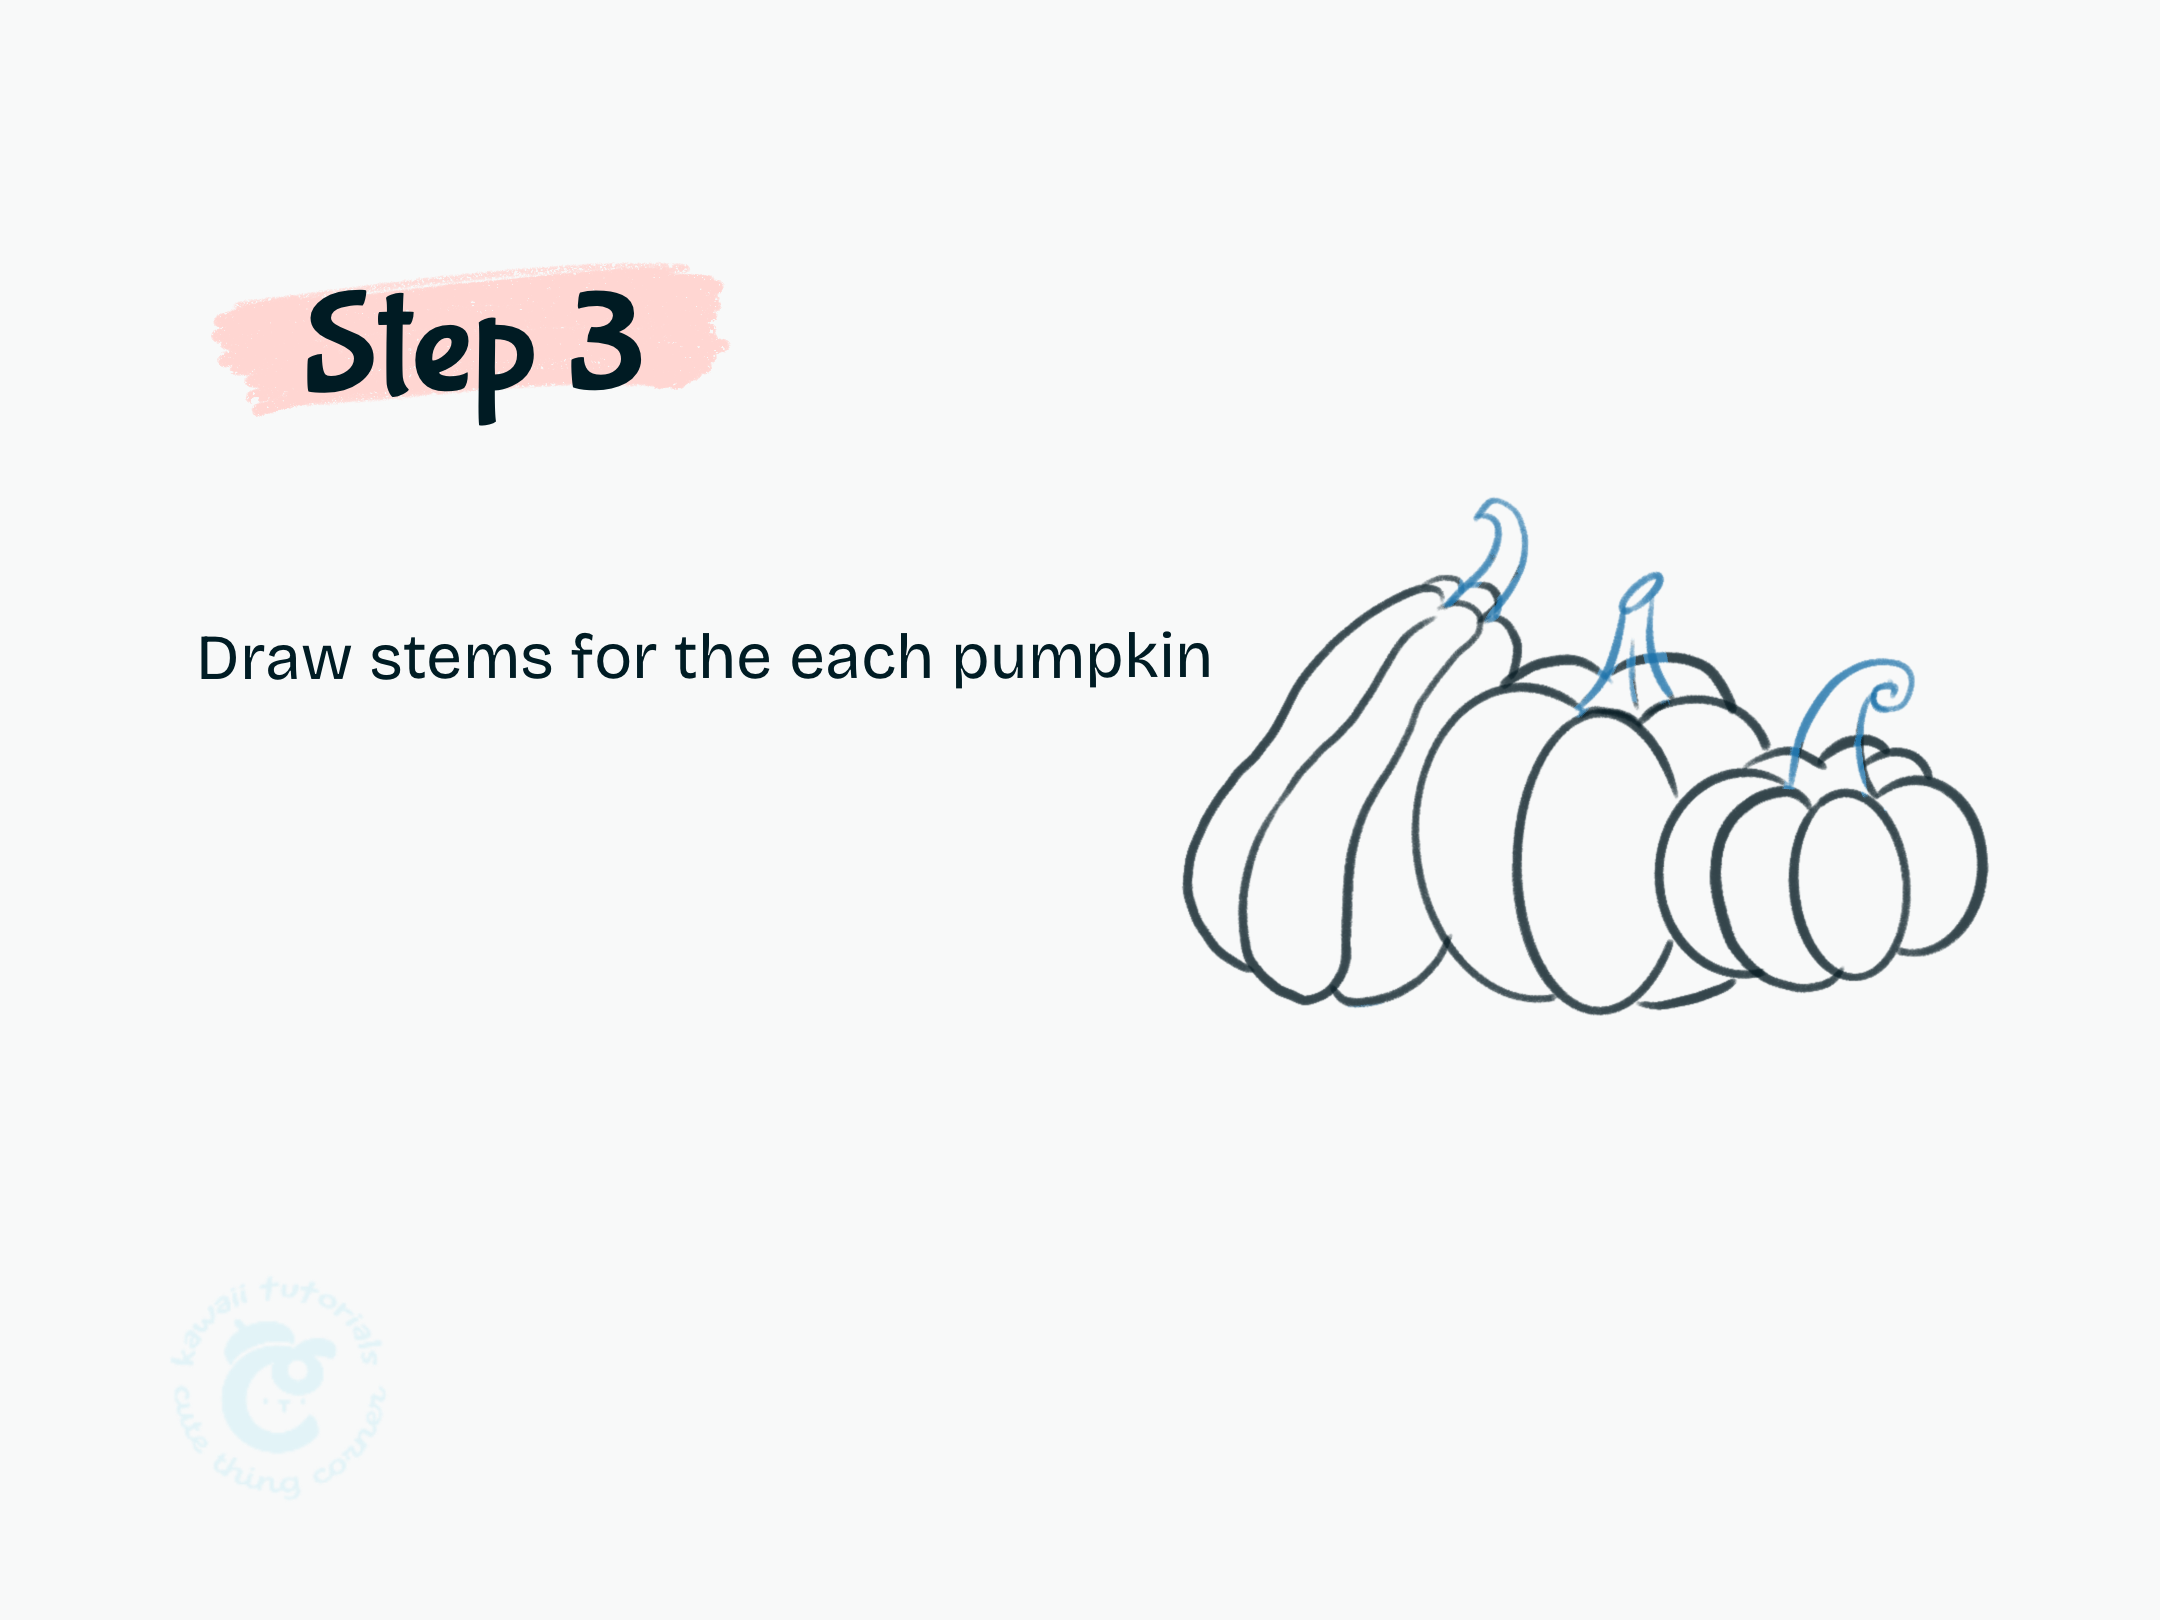
Step 3 Draw stems for the each pumpkin
#Step 4: Draw facial expressions.
Add simple and fun expressions to each pumpkin. The middle pumpkin has a winking face, the left one has a wide smile, and the right one has cute eyes and a small grin.
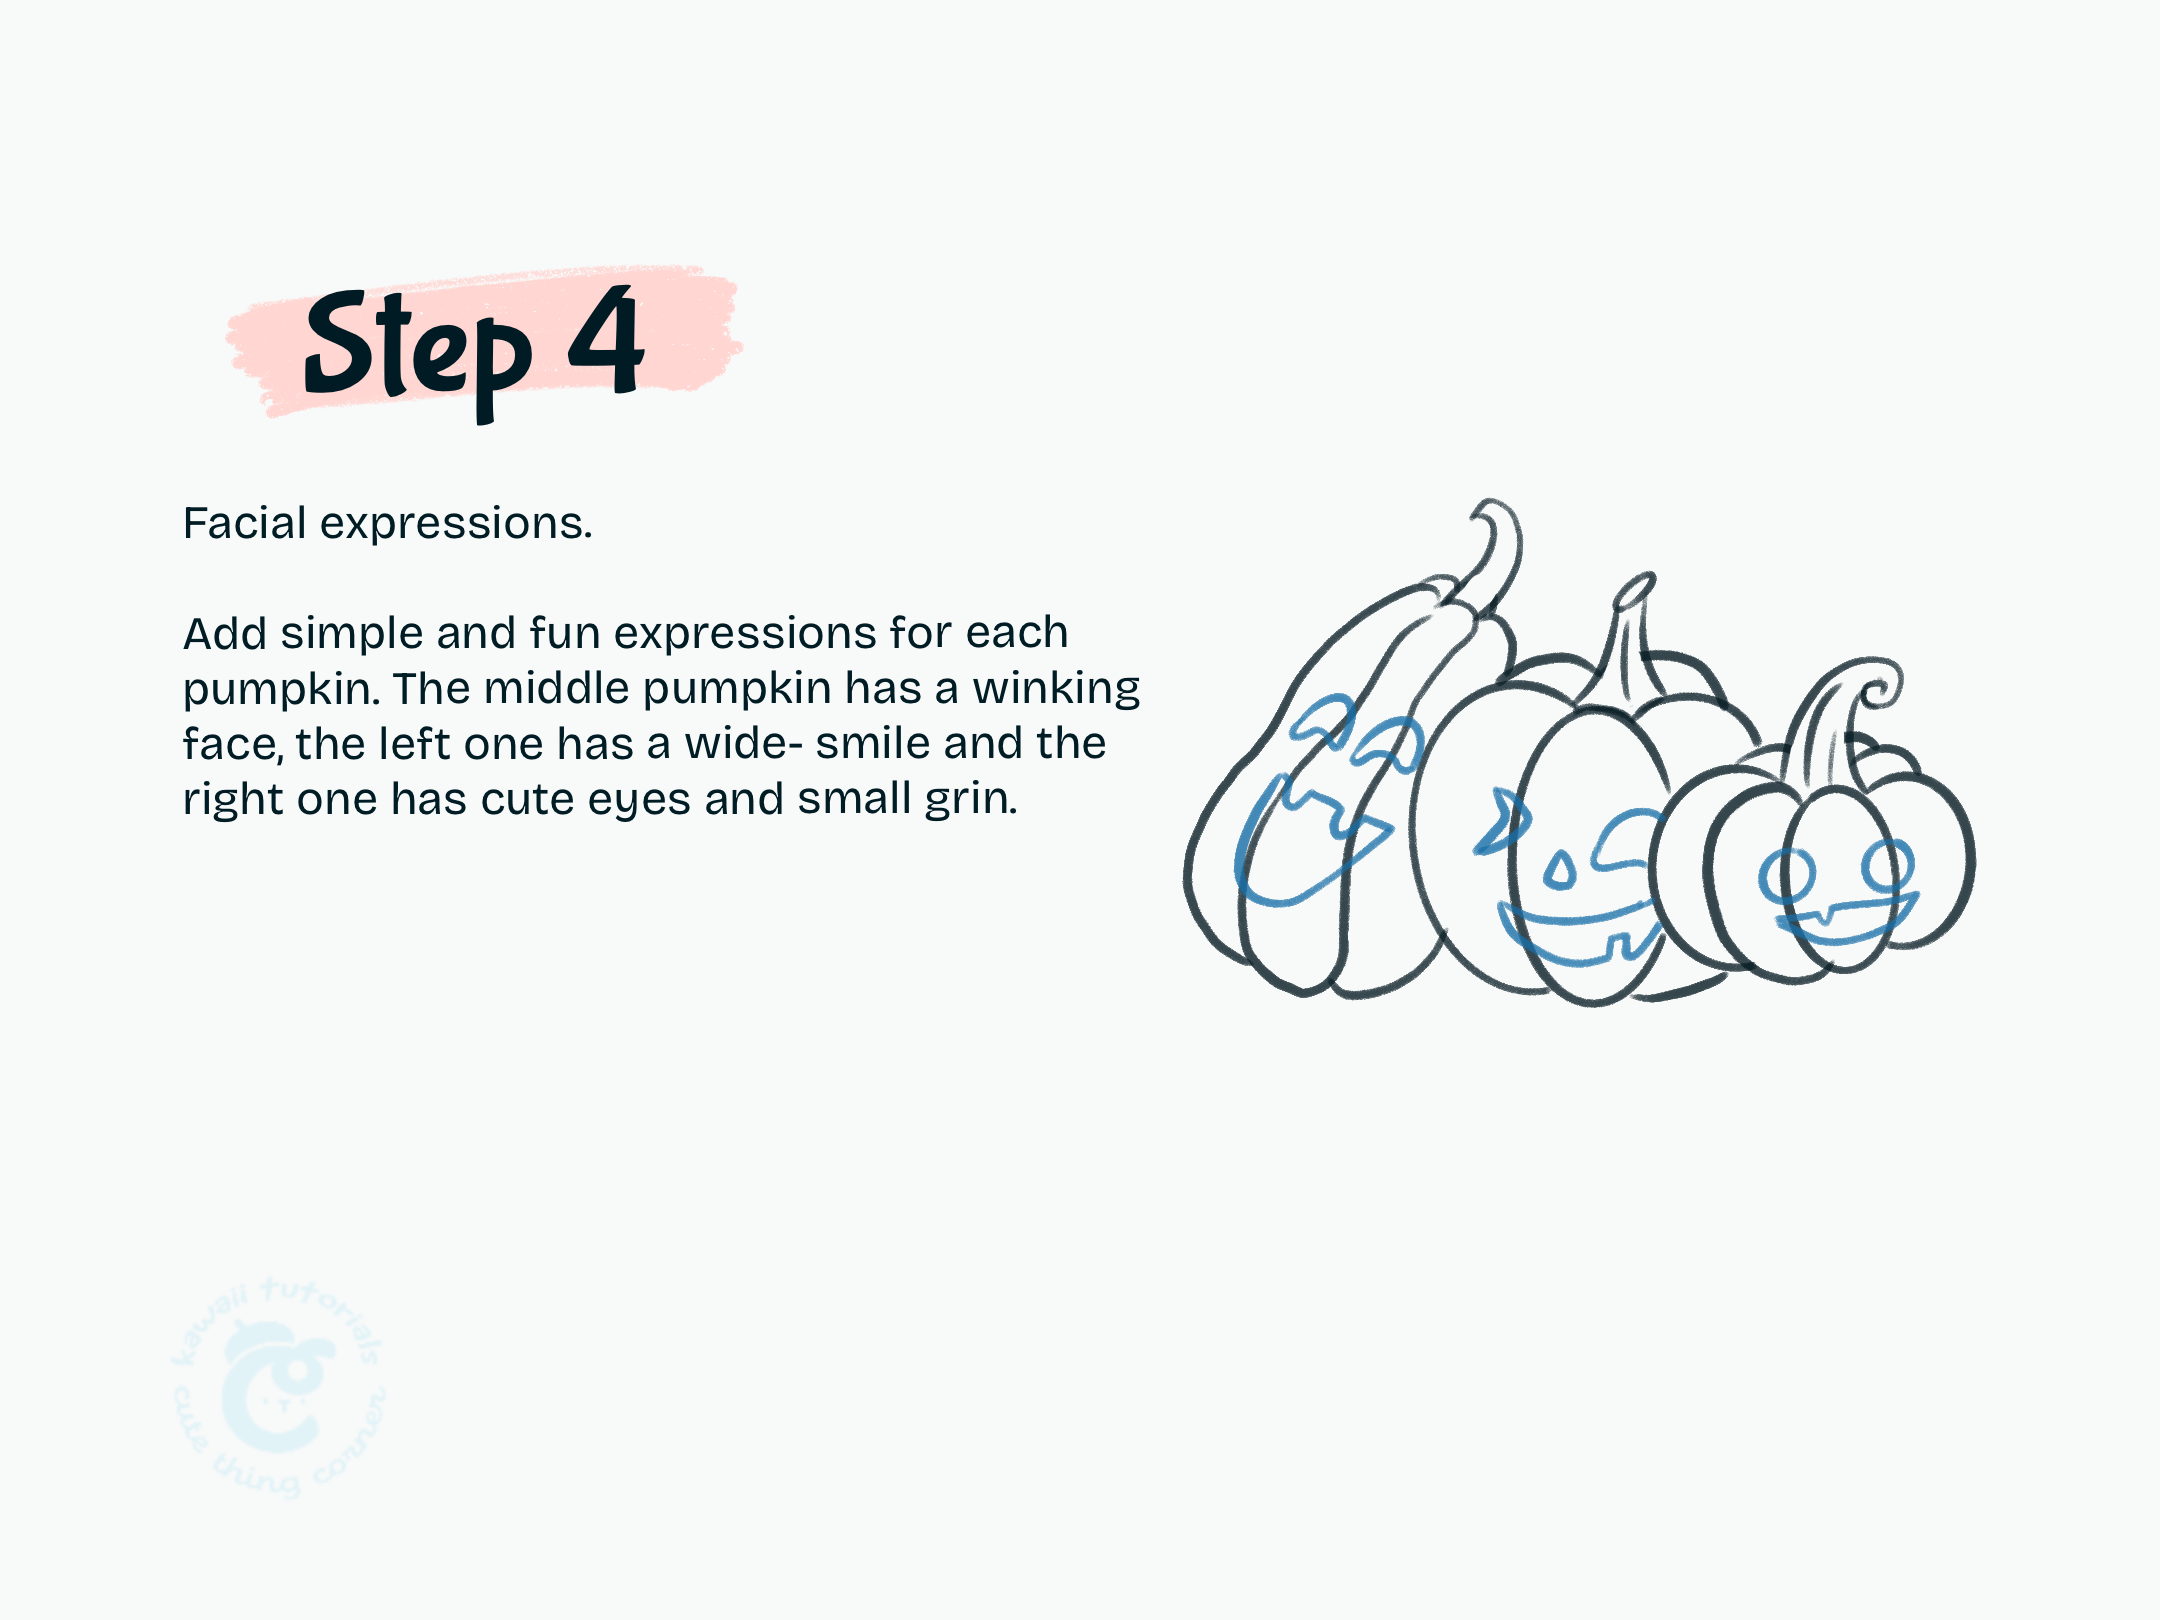
Step 4 Draw Facial expressions
#Step 5: Erase some original overlapping lines at the bodies with the each pumpkin’s face. Add some leaves to decoration.
Remove any overlapping lines around the pumpkin faces for a cleaner look. Add a few leaves for extra decoration.
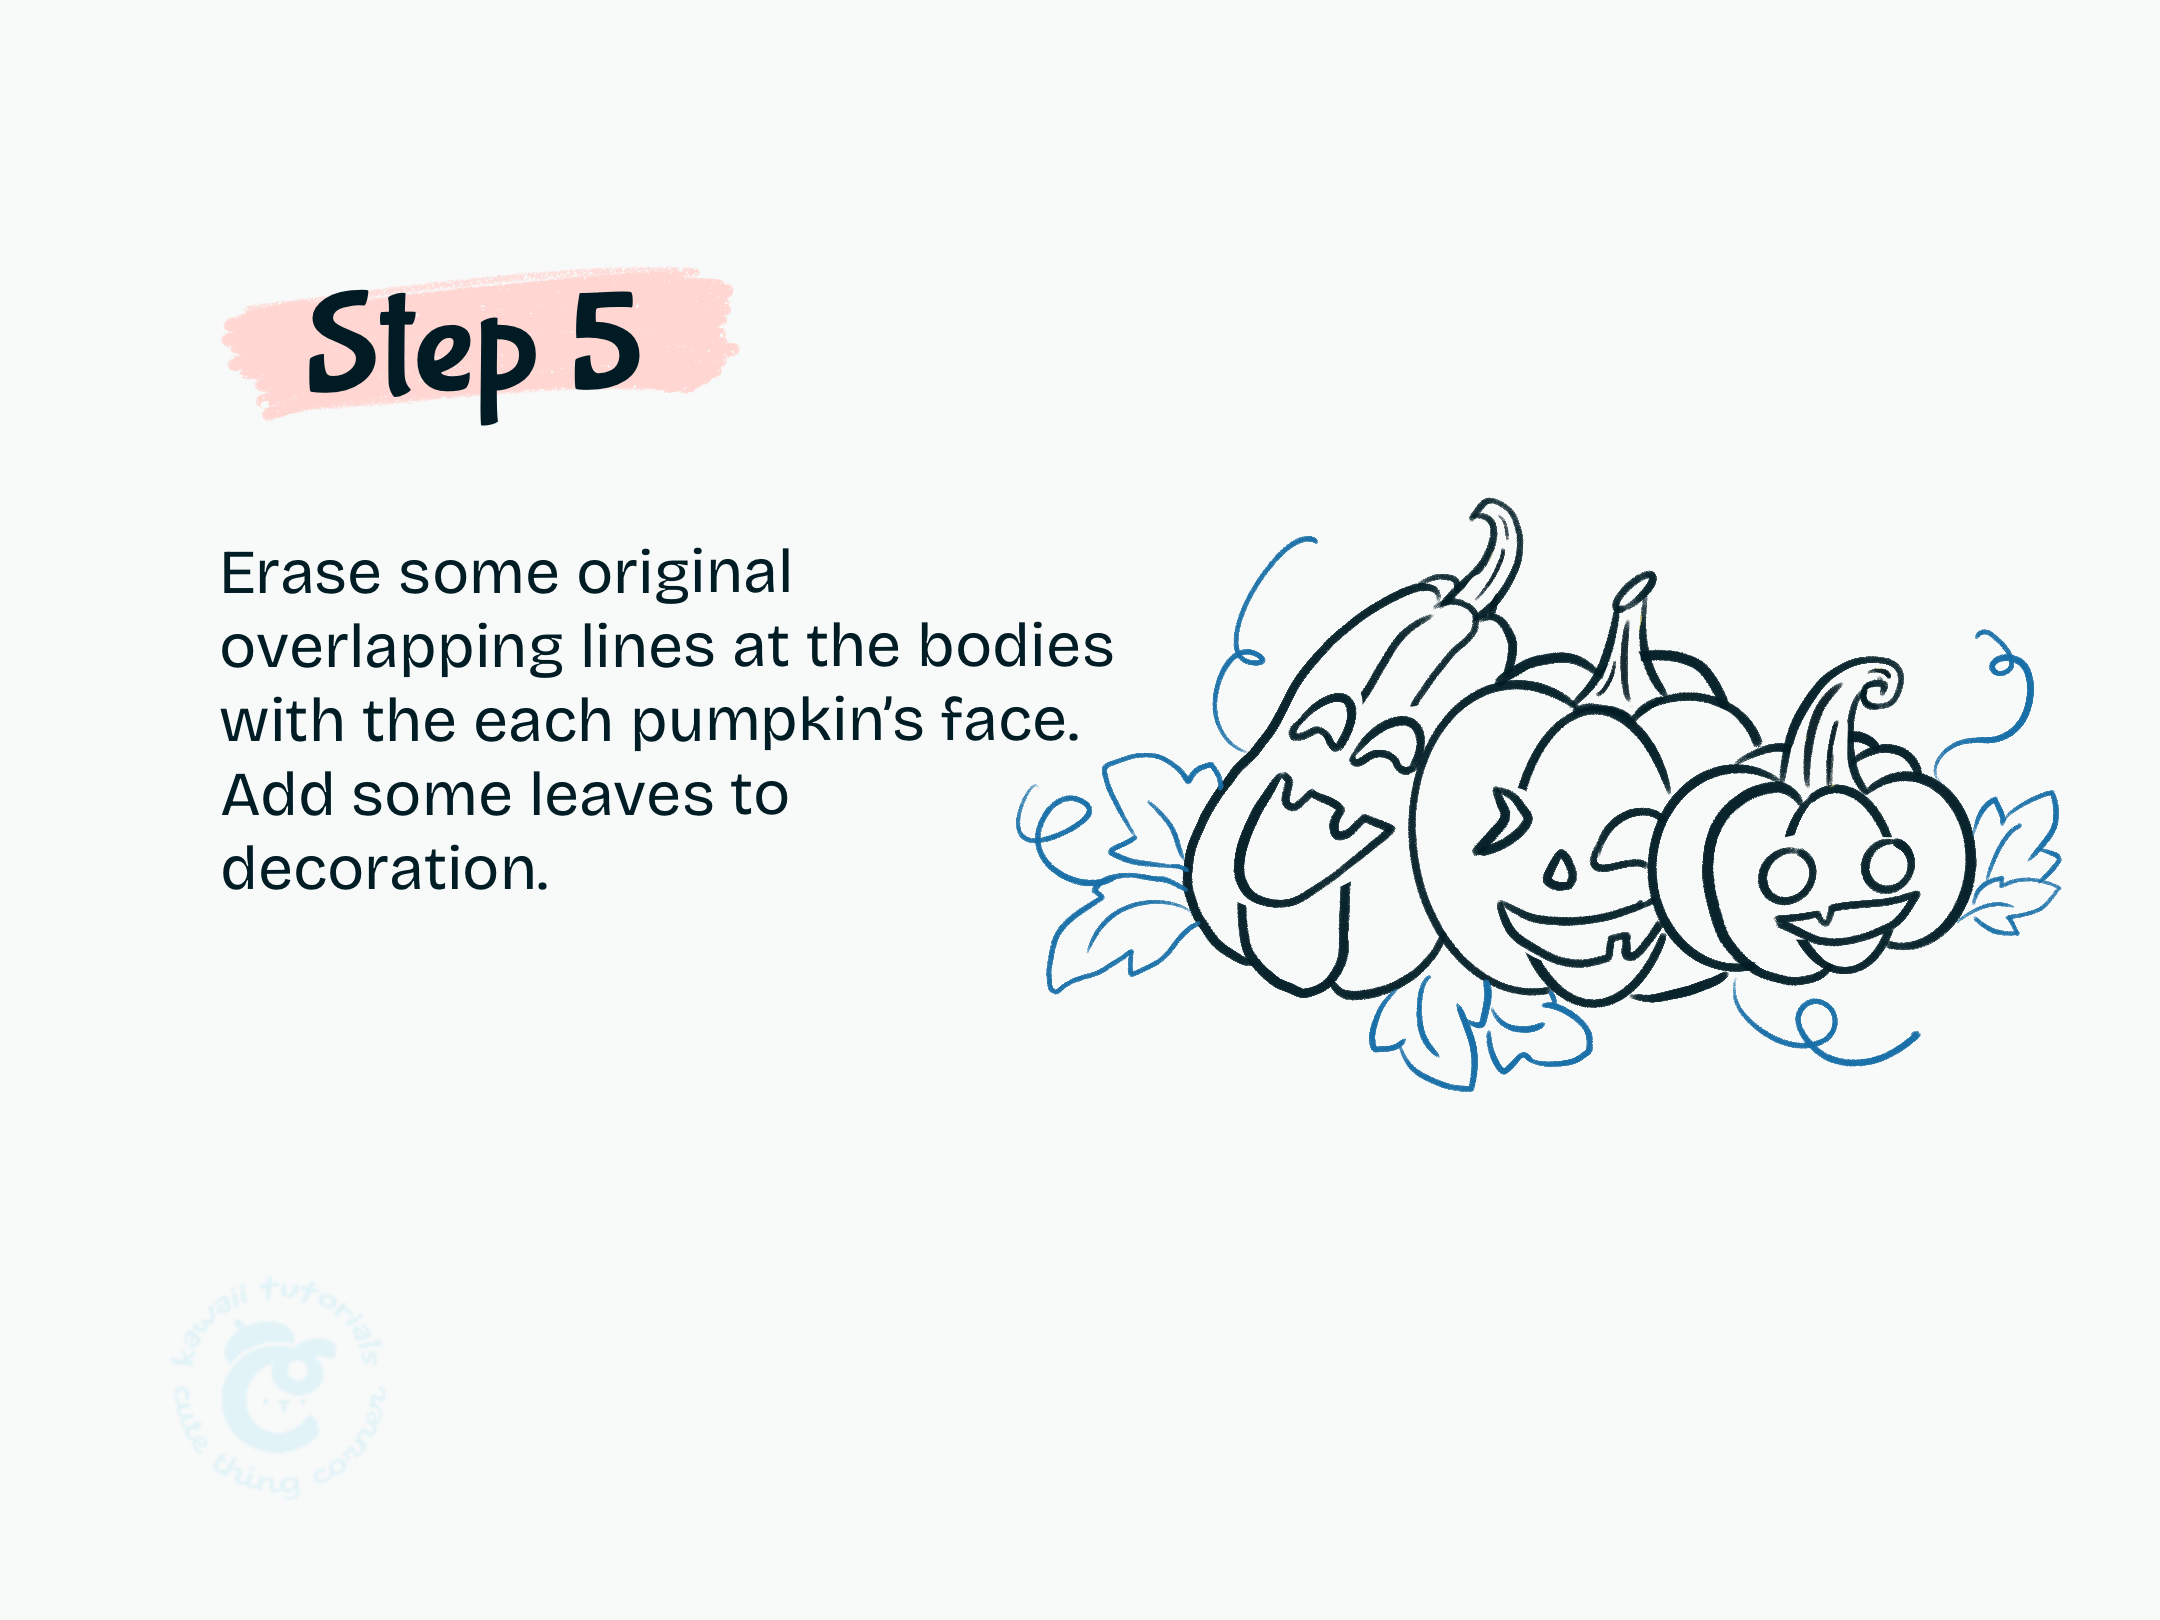
Step 5 Erase some original overlapping lines
#Step 6: Color your cute pumpkin stacks
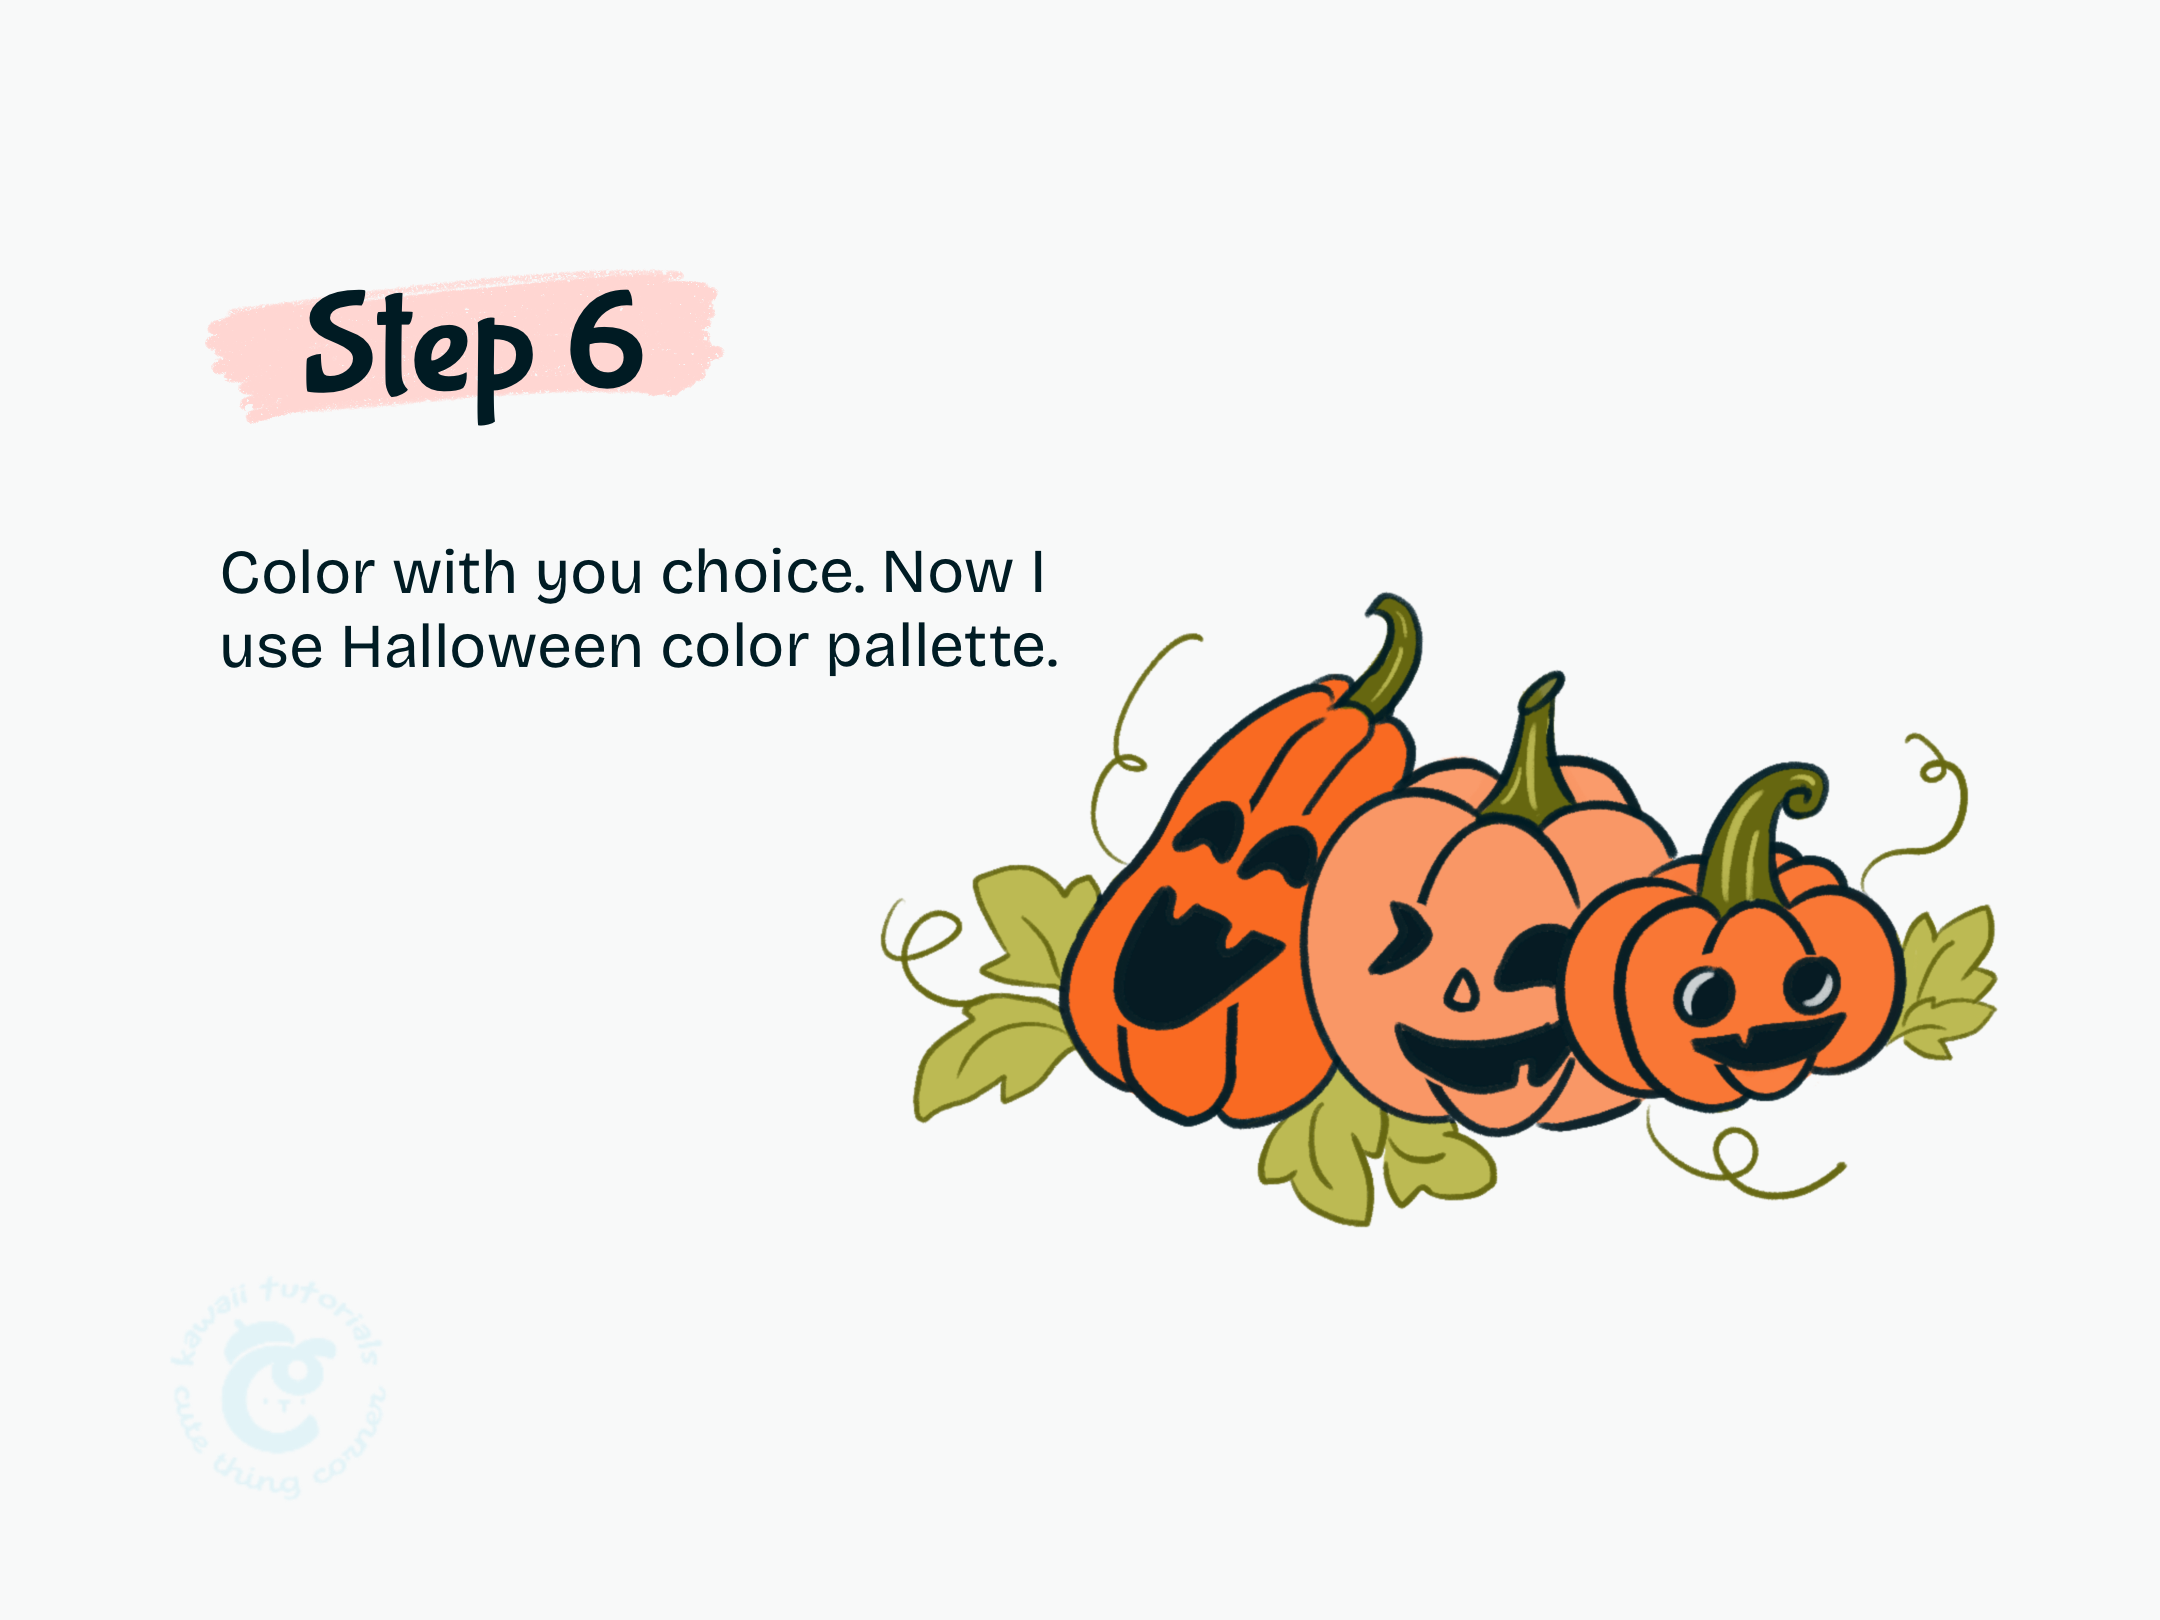
Step 6 Color pumpkin stacks
Hope you enjoyed your time drawing a cute pumpkin stacks
Thanks for following this guide.
Goodbye and see you soon.
Follow full step-by-step drawing cute pumpkin stacks:
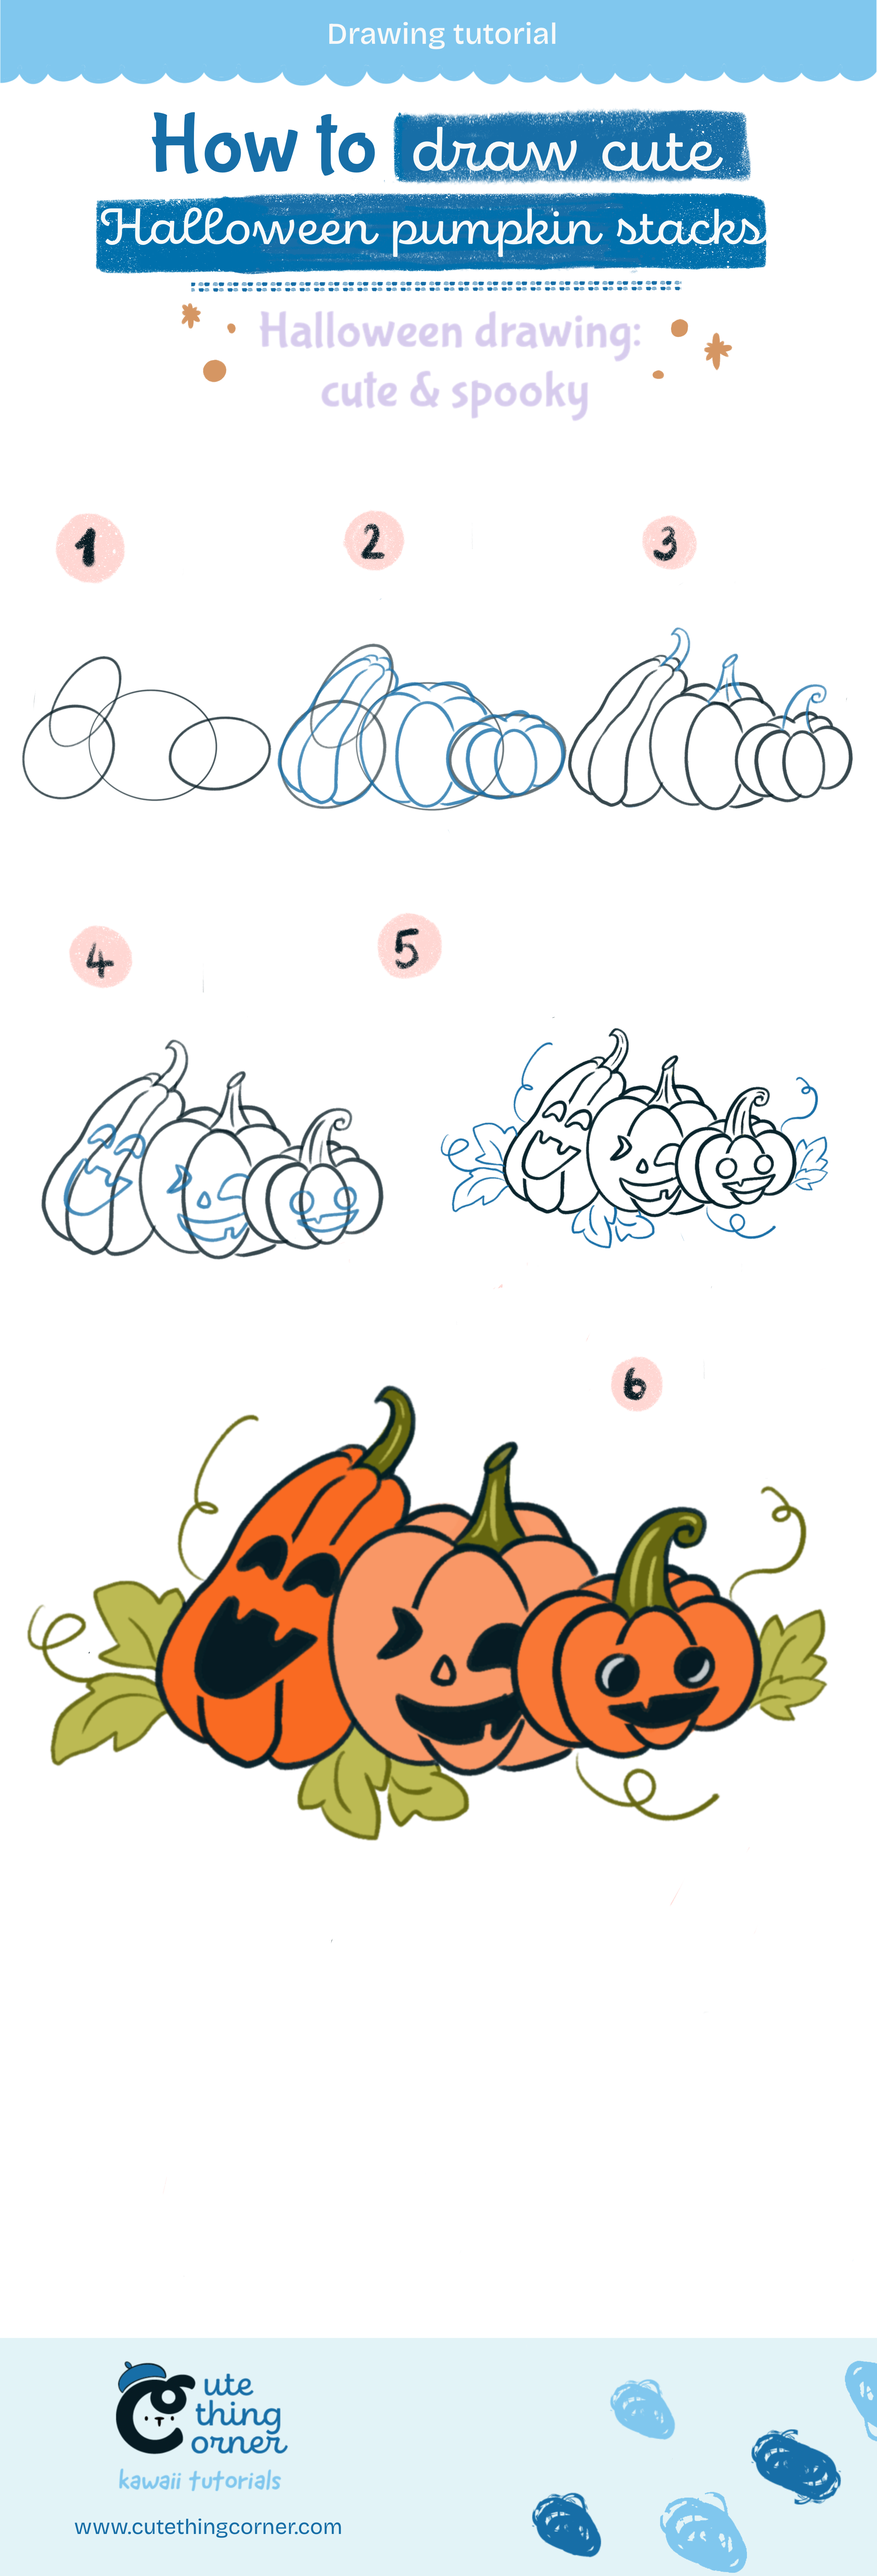
How to draw cute halloween pumpkin stacks

