Want to create a cozy and adorable drawing? In this tutorial Cute Thing Corner, you’ll learn how to draw cute Rilakkuma in pajamas, combining the charm of this beloved San-X character with a warm bedtime look! Perfect for fans of kawaii art and relaxing designs, this step-by-step guide is easy and fun for all skill levels.
Grab your pencils, and let’s bring this snuggly Rilakkuma to life! 🐻🛌✨
Note: This artwork is fan art and is not affiliated with or endorsed by San-X. All rights to the Rilakkuma character belong to San-X
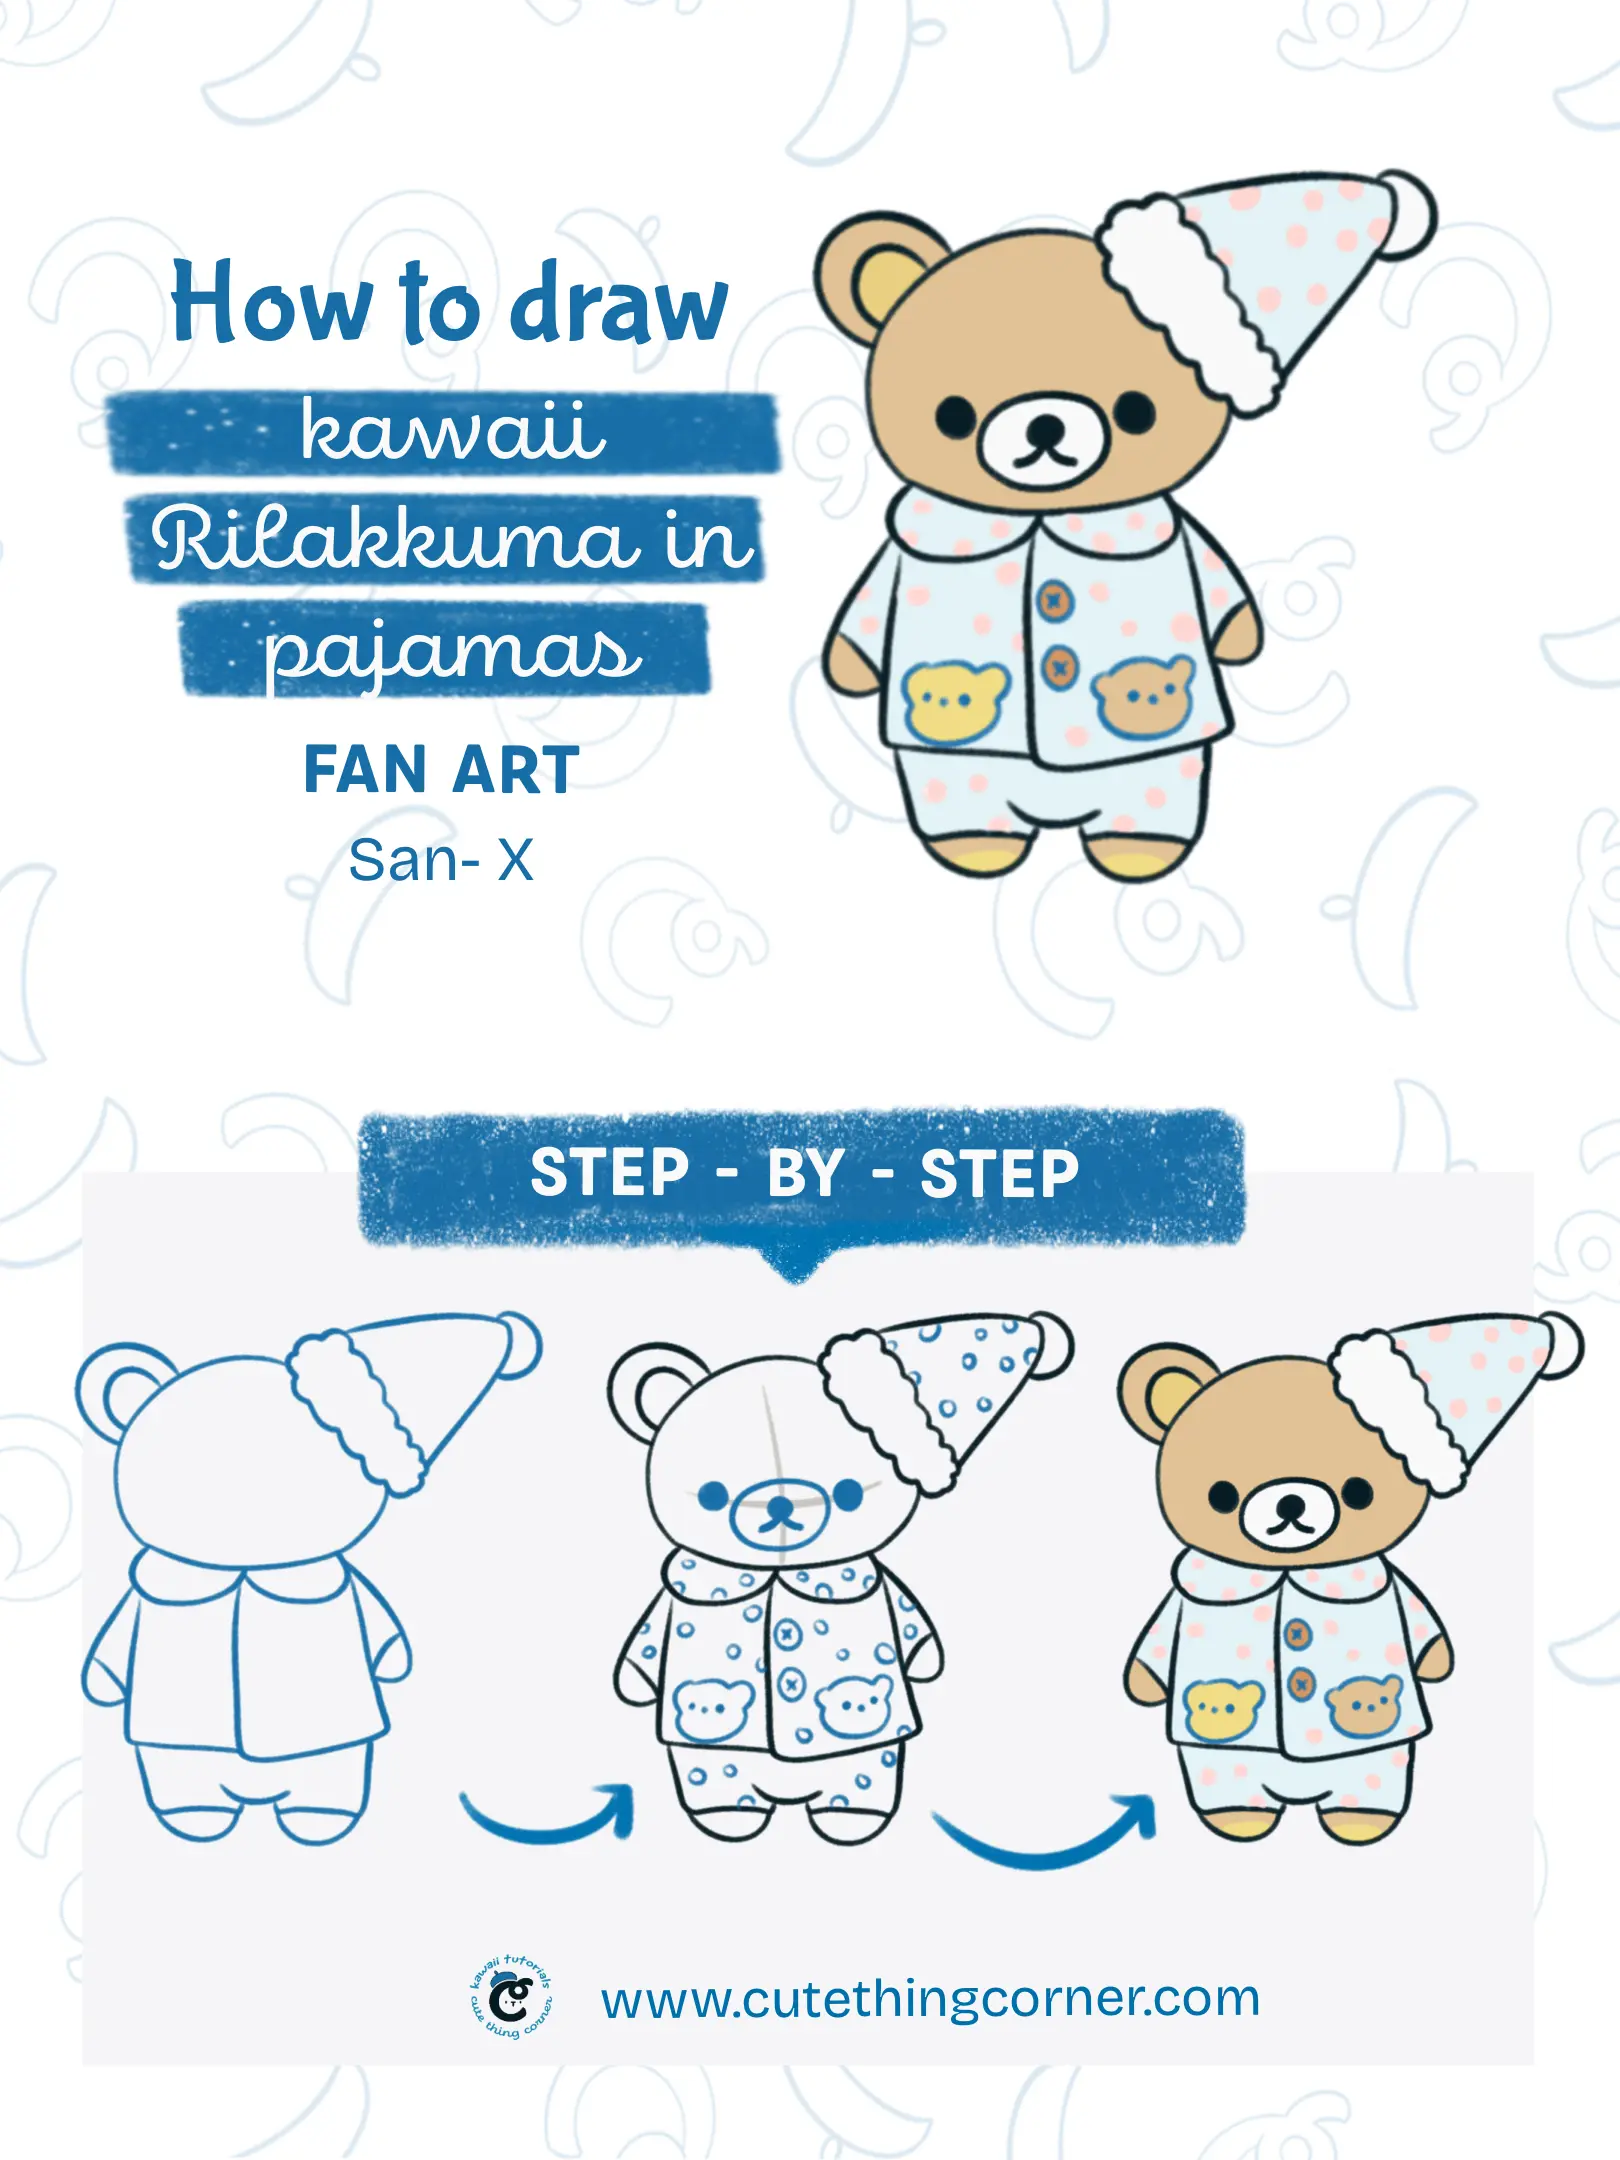
How to Draw Cute Rilakkuma in Pajamas (Step-by-step)
Now jump into step-by-step to draw Cute Rilakkuma in Pajamas:
#Step 1: Start by drawing an oval shape for Rilakkuma’s head
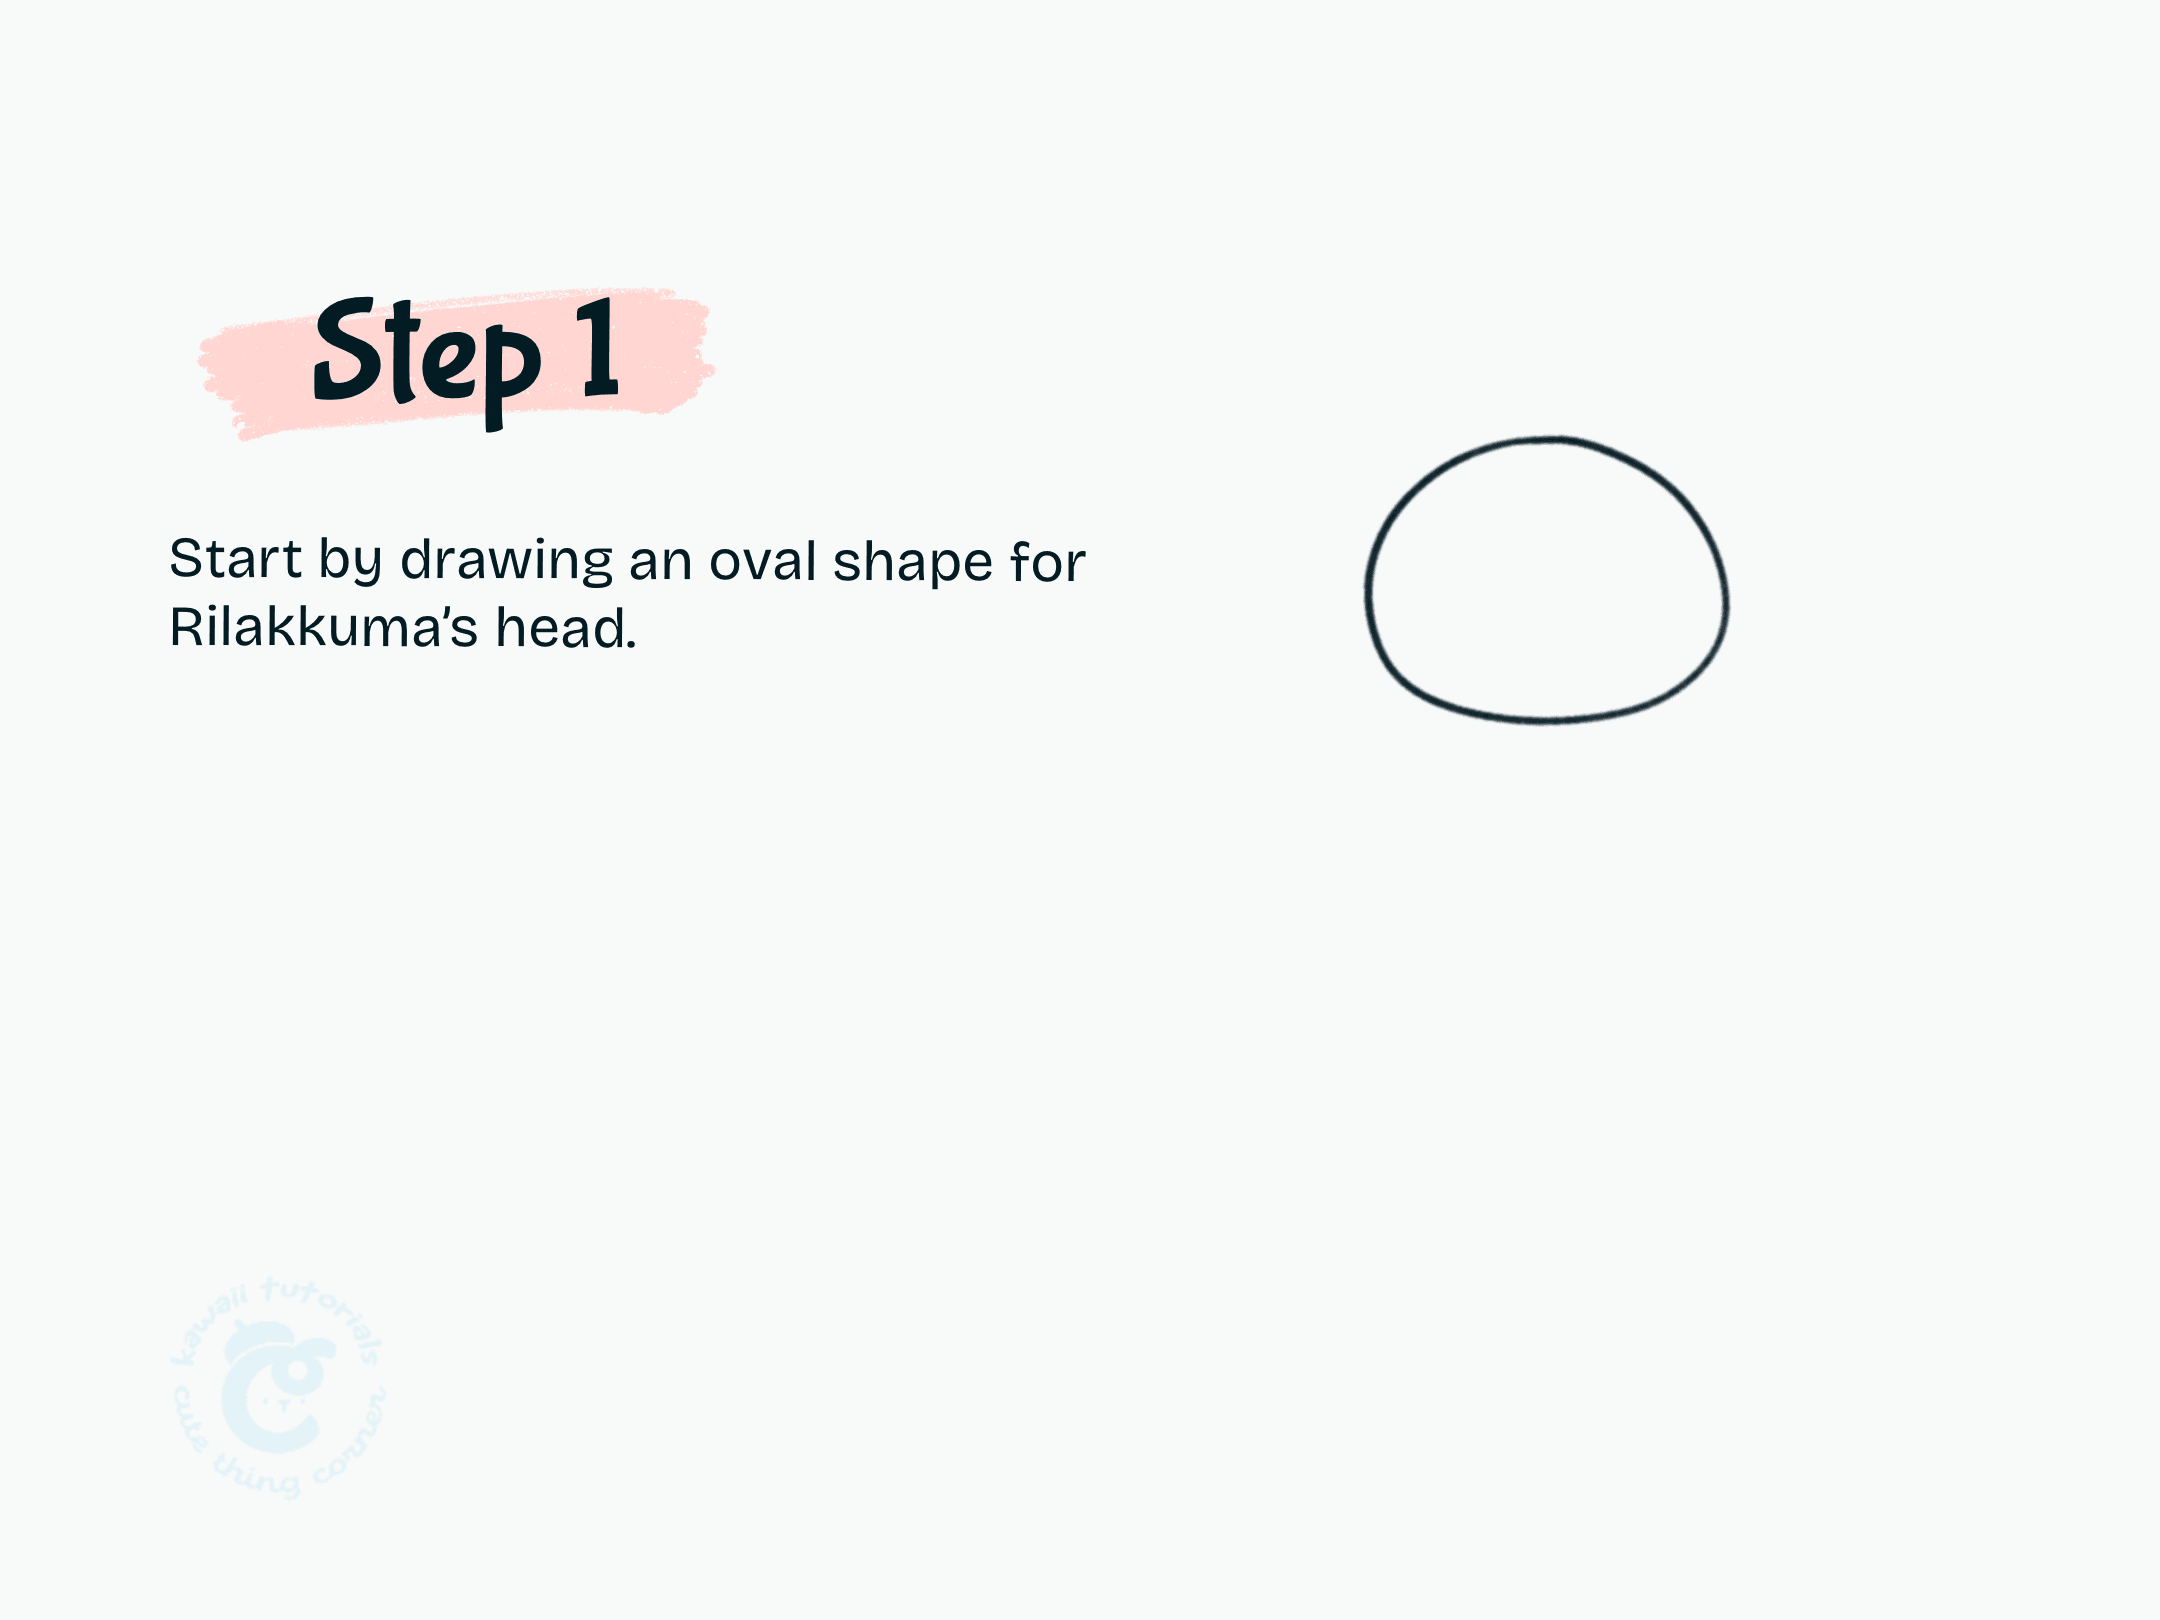
Step 1 Start by drawing an oval shape for Rilakkuma’s head
#Step 2: Add the body below the head, keeping it slightly smaller and rounded.
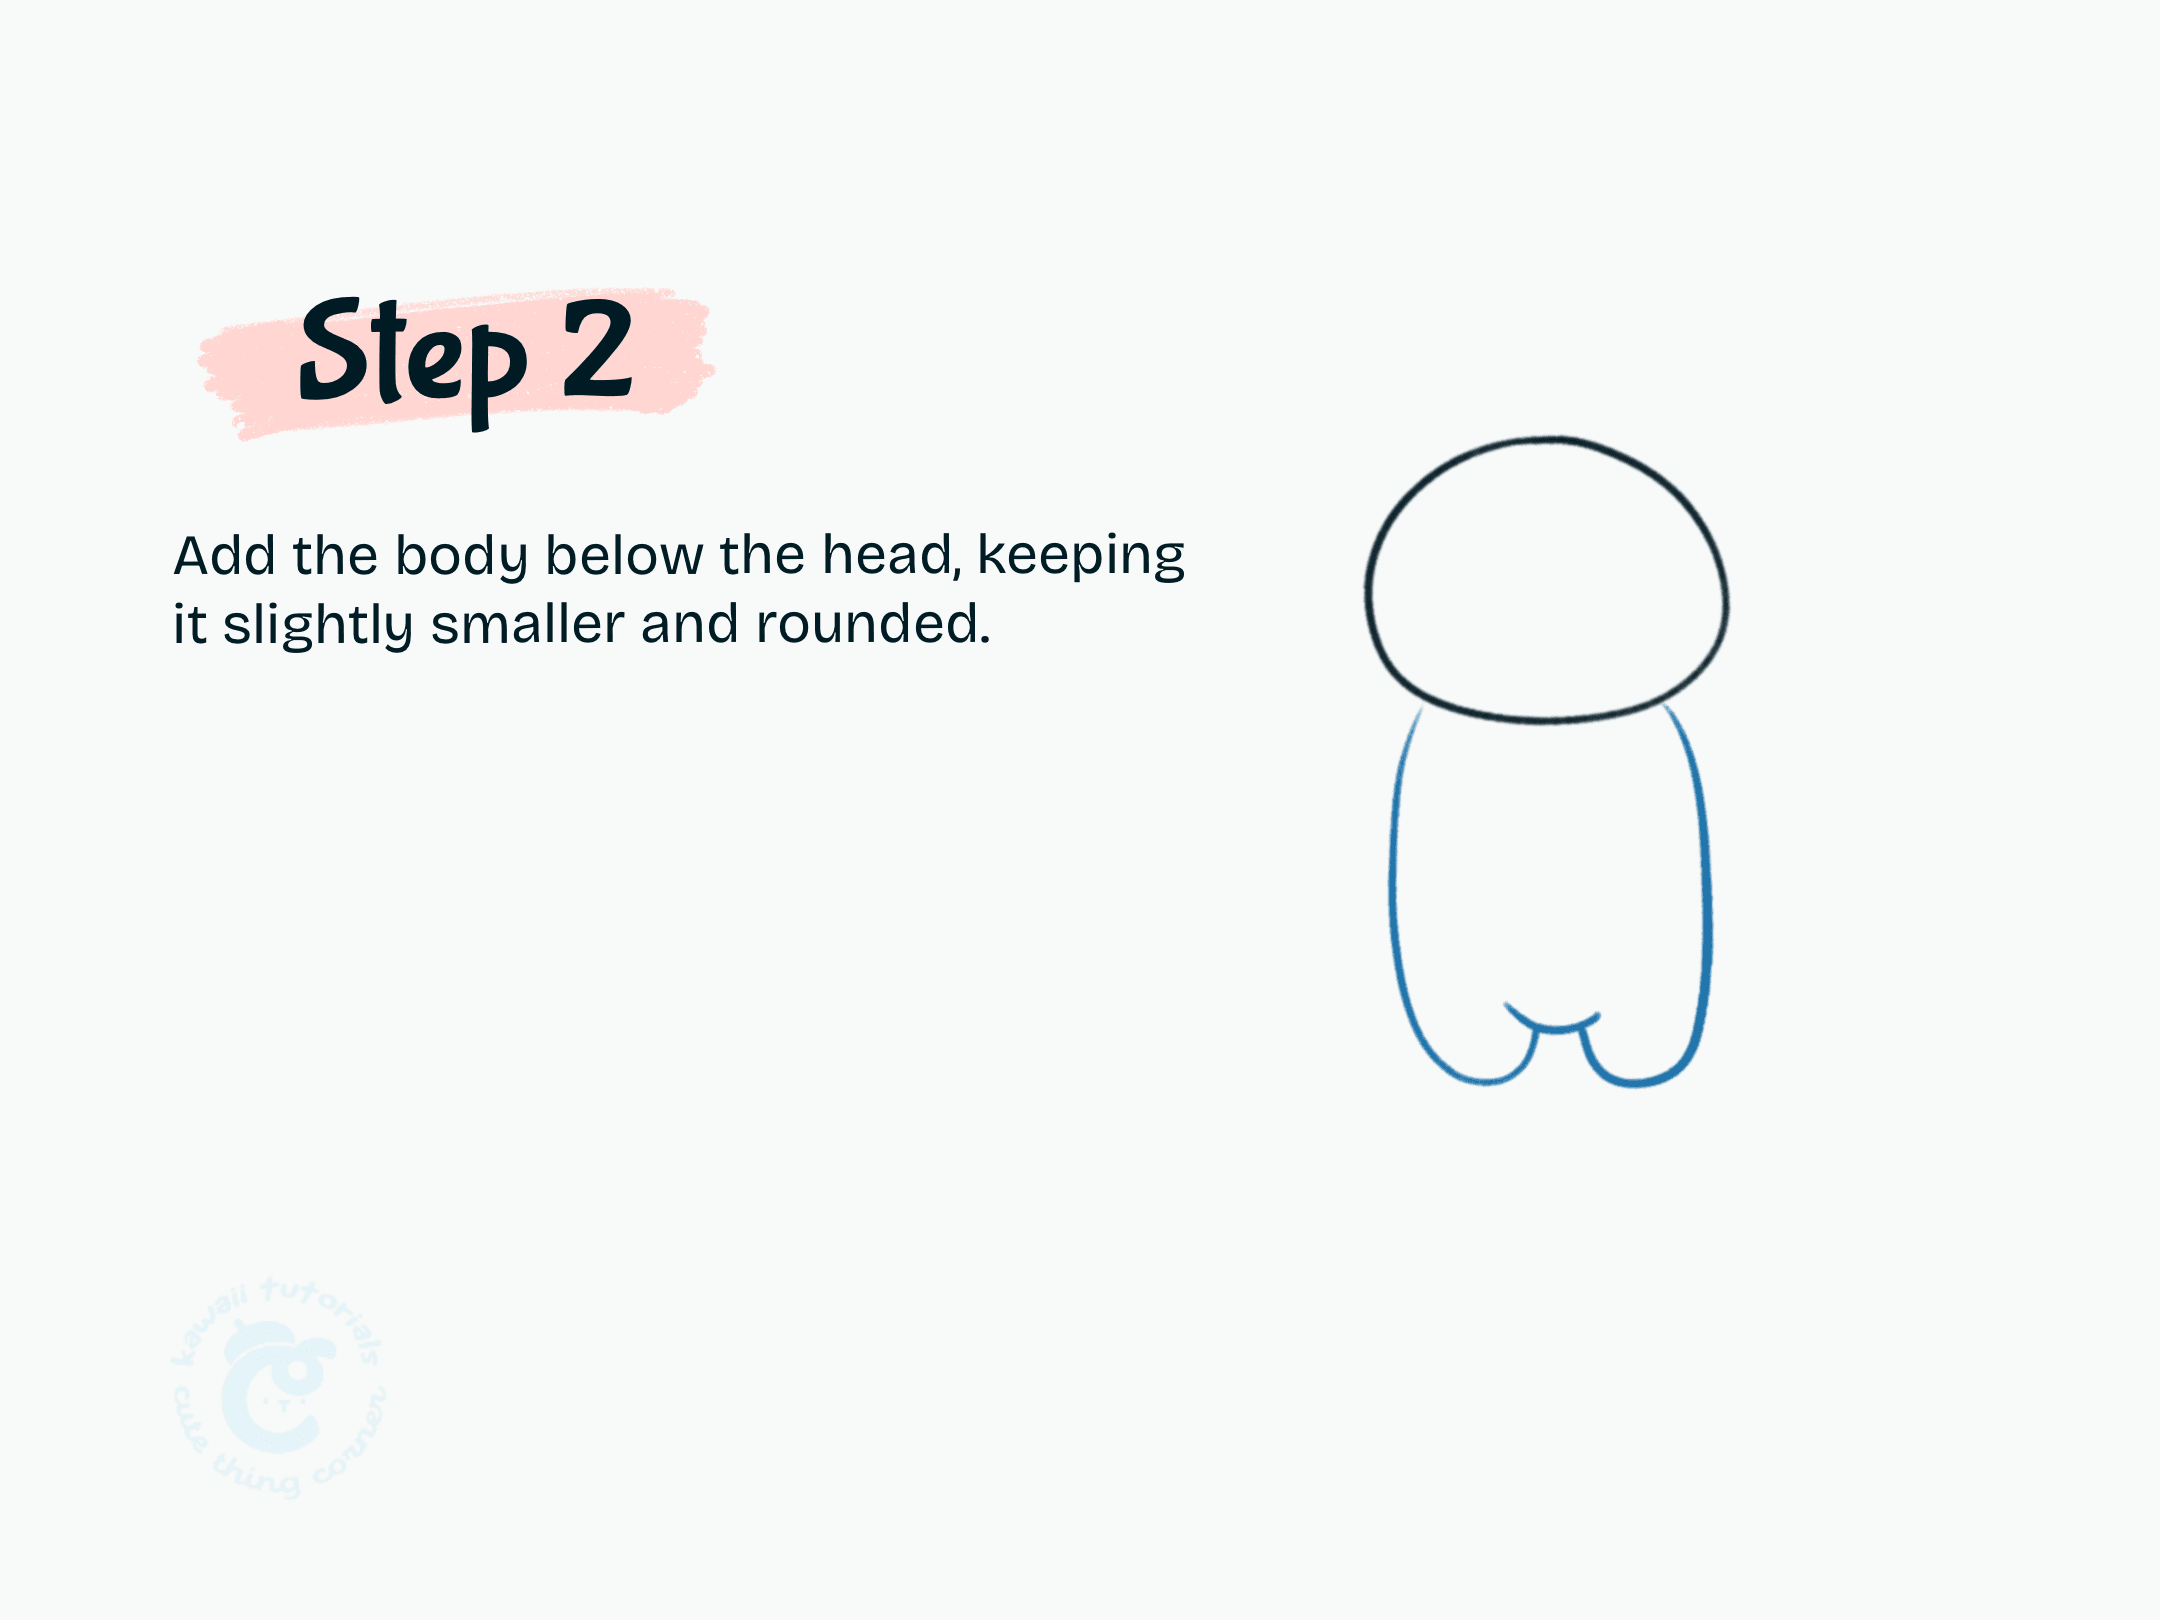
Step 2 Add the body below the head, keeping it slightly smaller and rounded.
#Step 3: Draw the arms on both sides of the body, making them rounded and short.
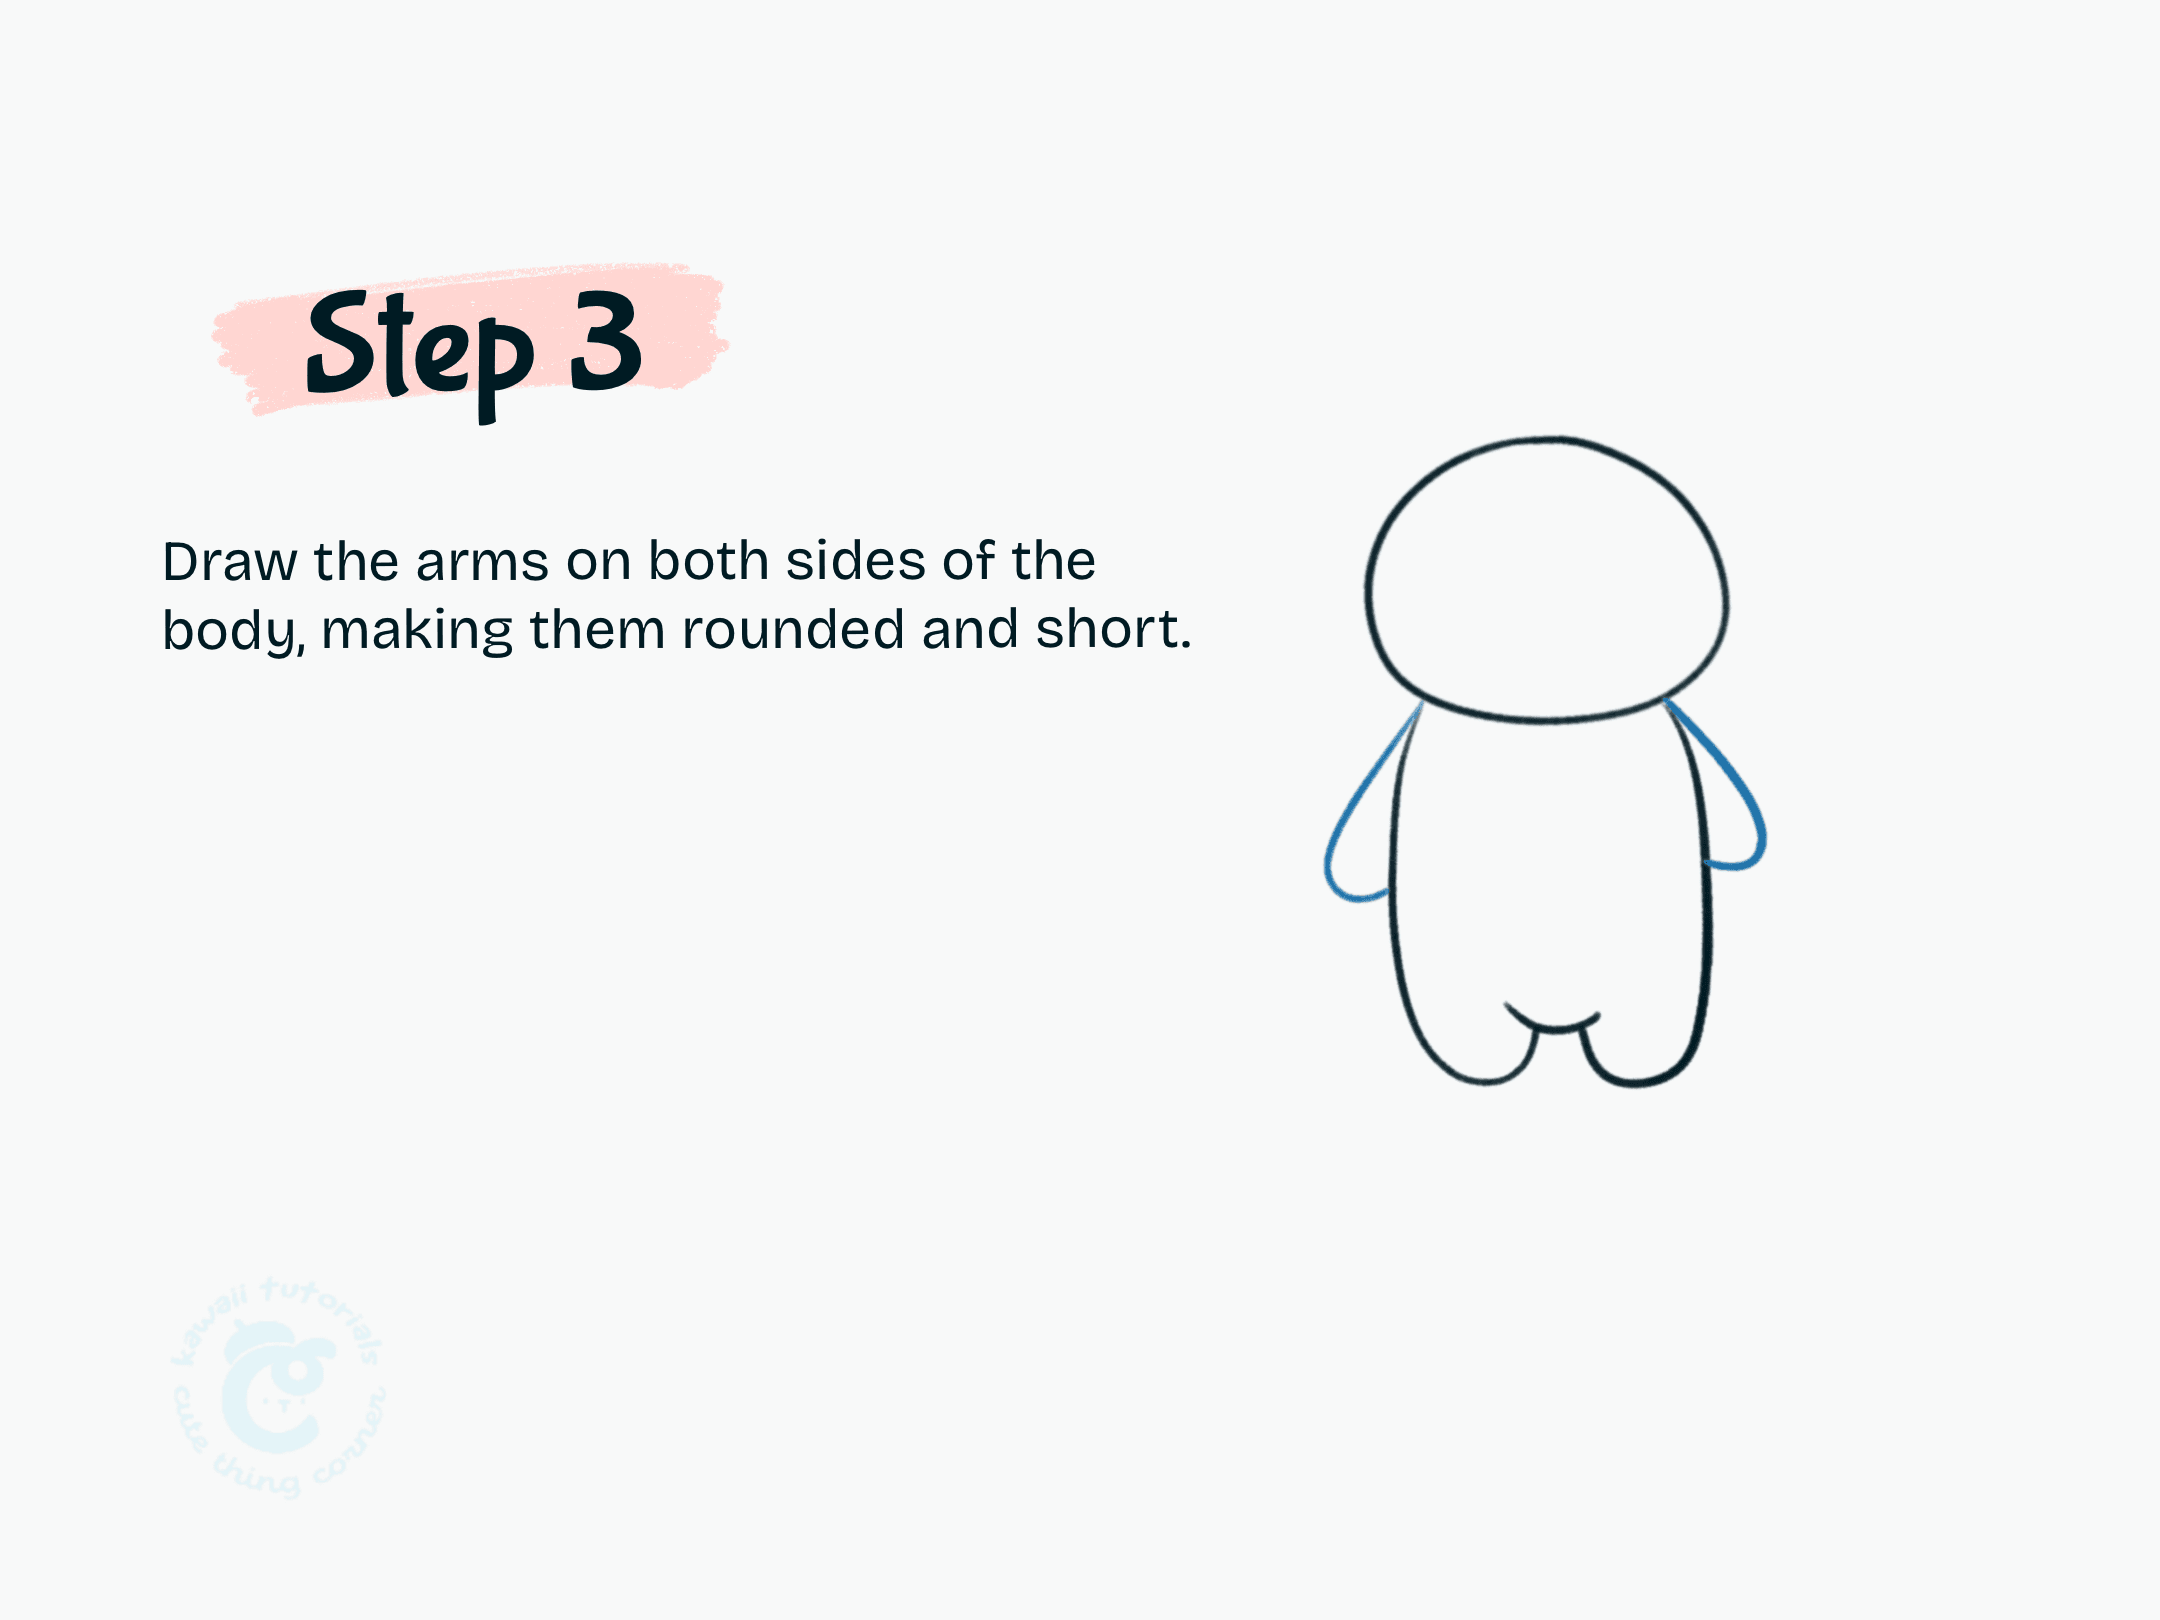
Step 3 Draw the arms on both sides of the body, making them rounded and short.
#Step 4: Sketch Rilakkuma’s pajamas, adding a collar and separating the top and bottom clothing
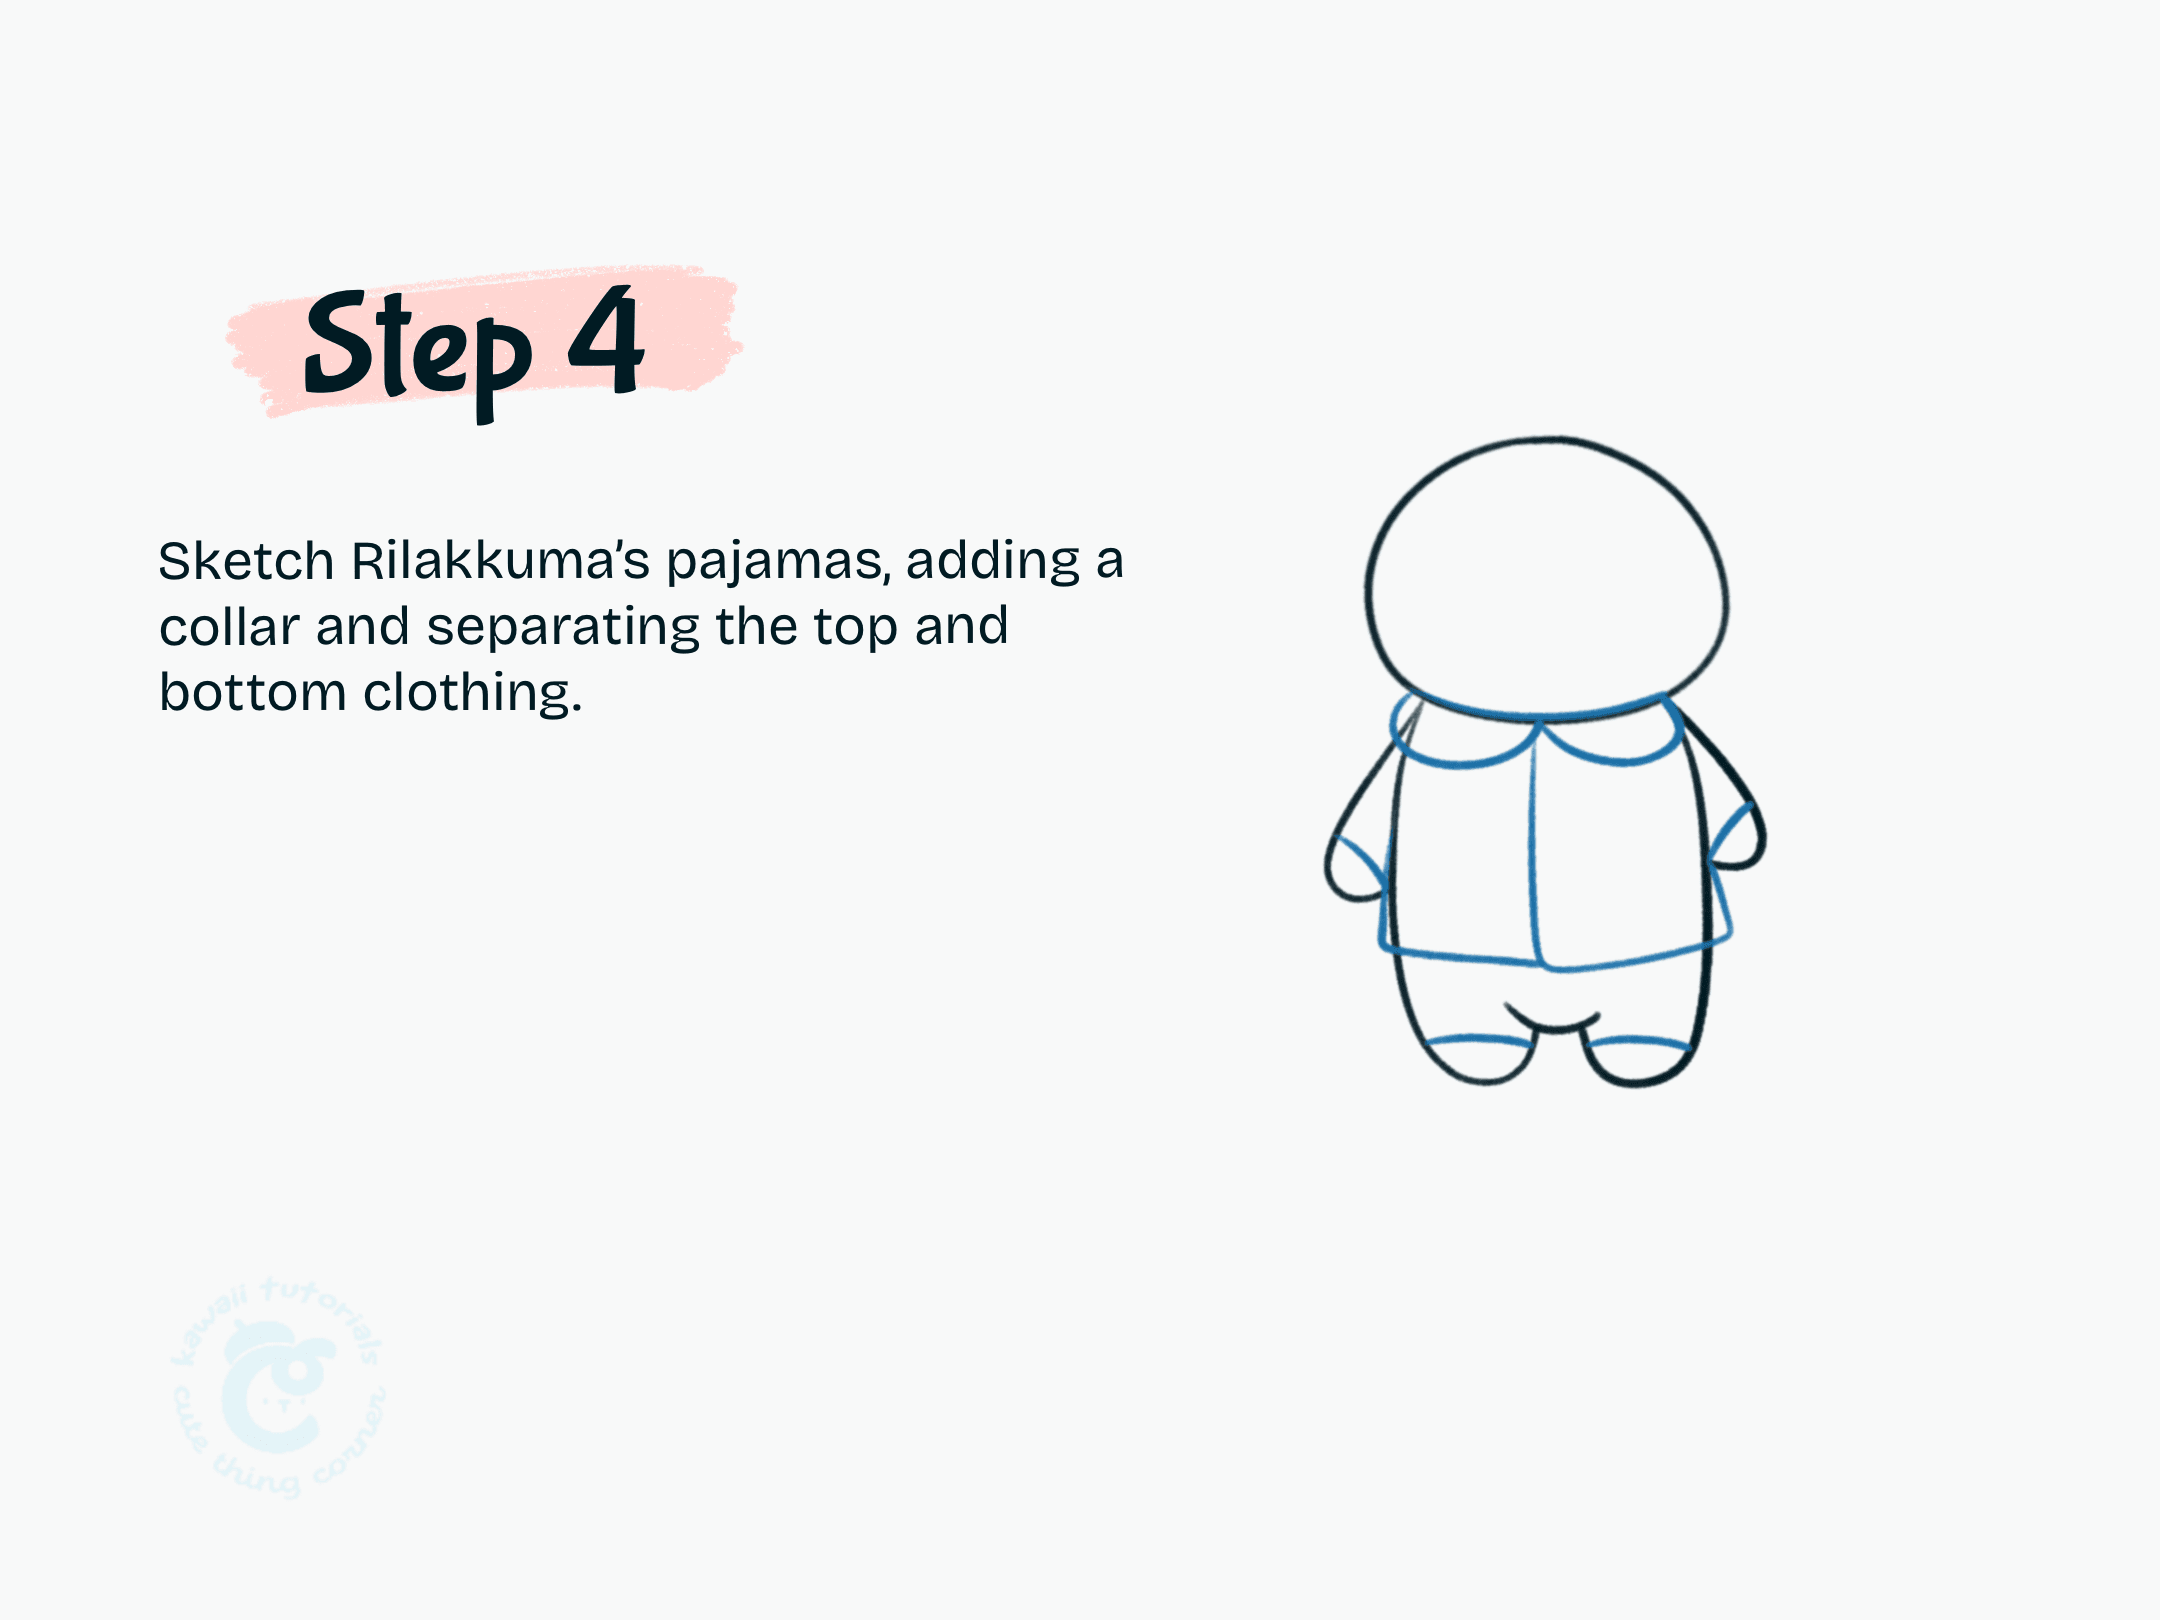
Step 4 Sketch Rilakkuma’s pajamas, adding a collar and separating the top and bottom clothing
#Step 5: Add a cozy nightcap on Rilakkuma’s head. The cap should have a triangular shape, leaning to one side, with a round pom-pom at the tip.
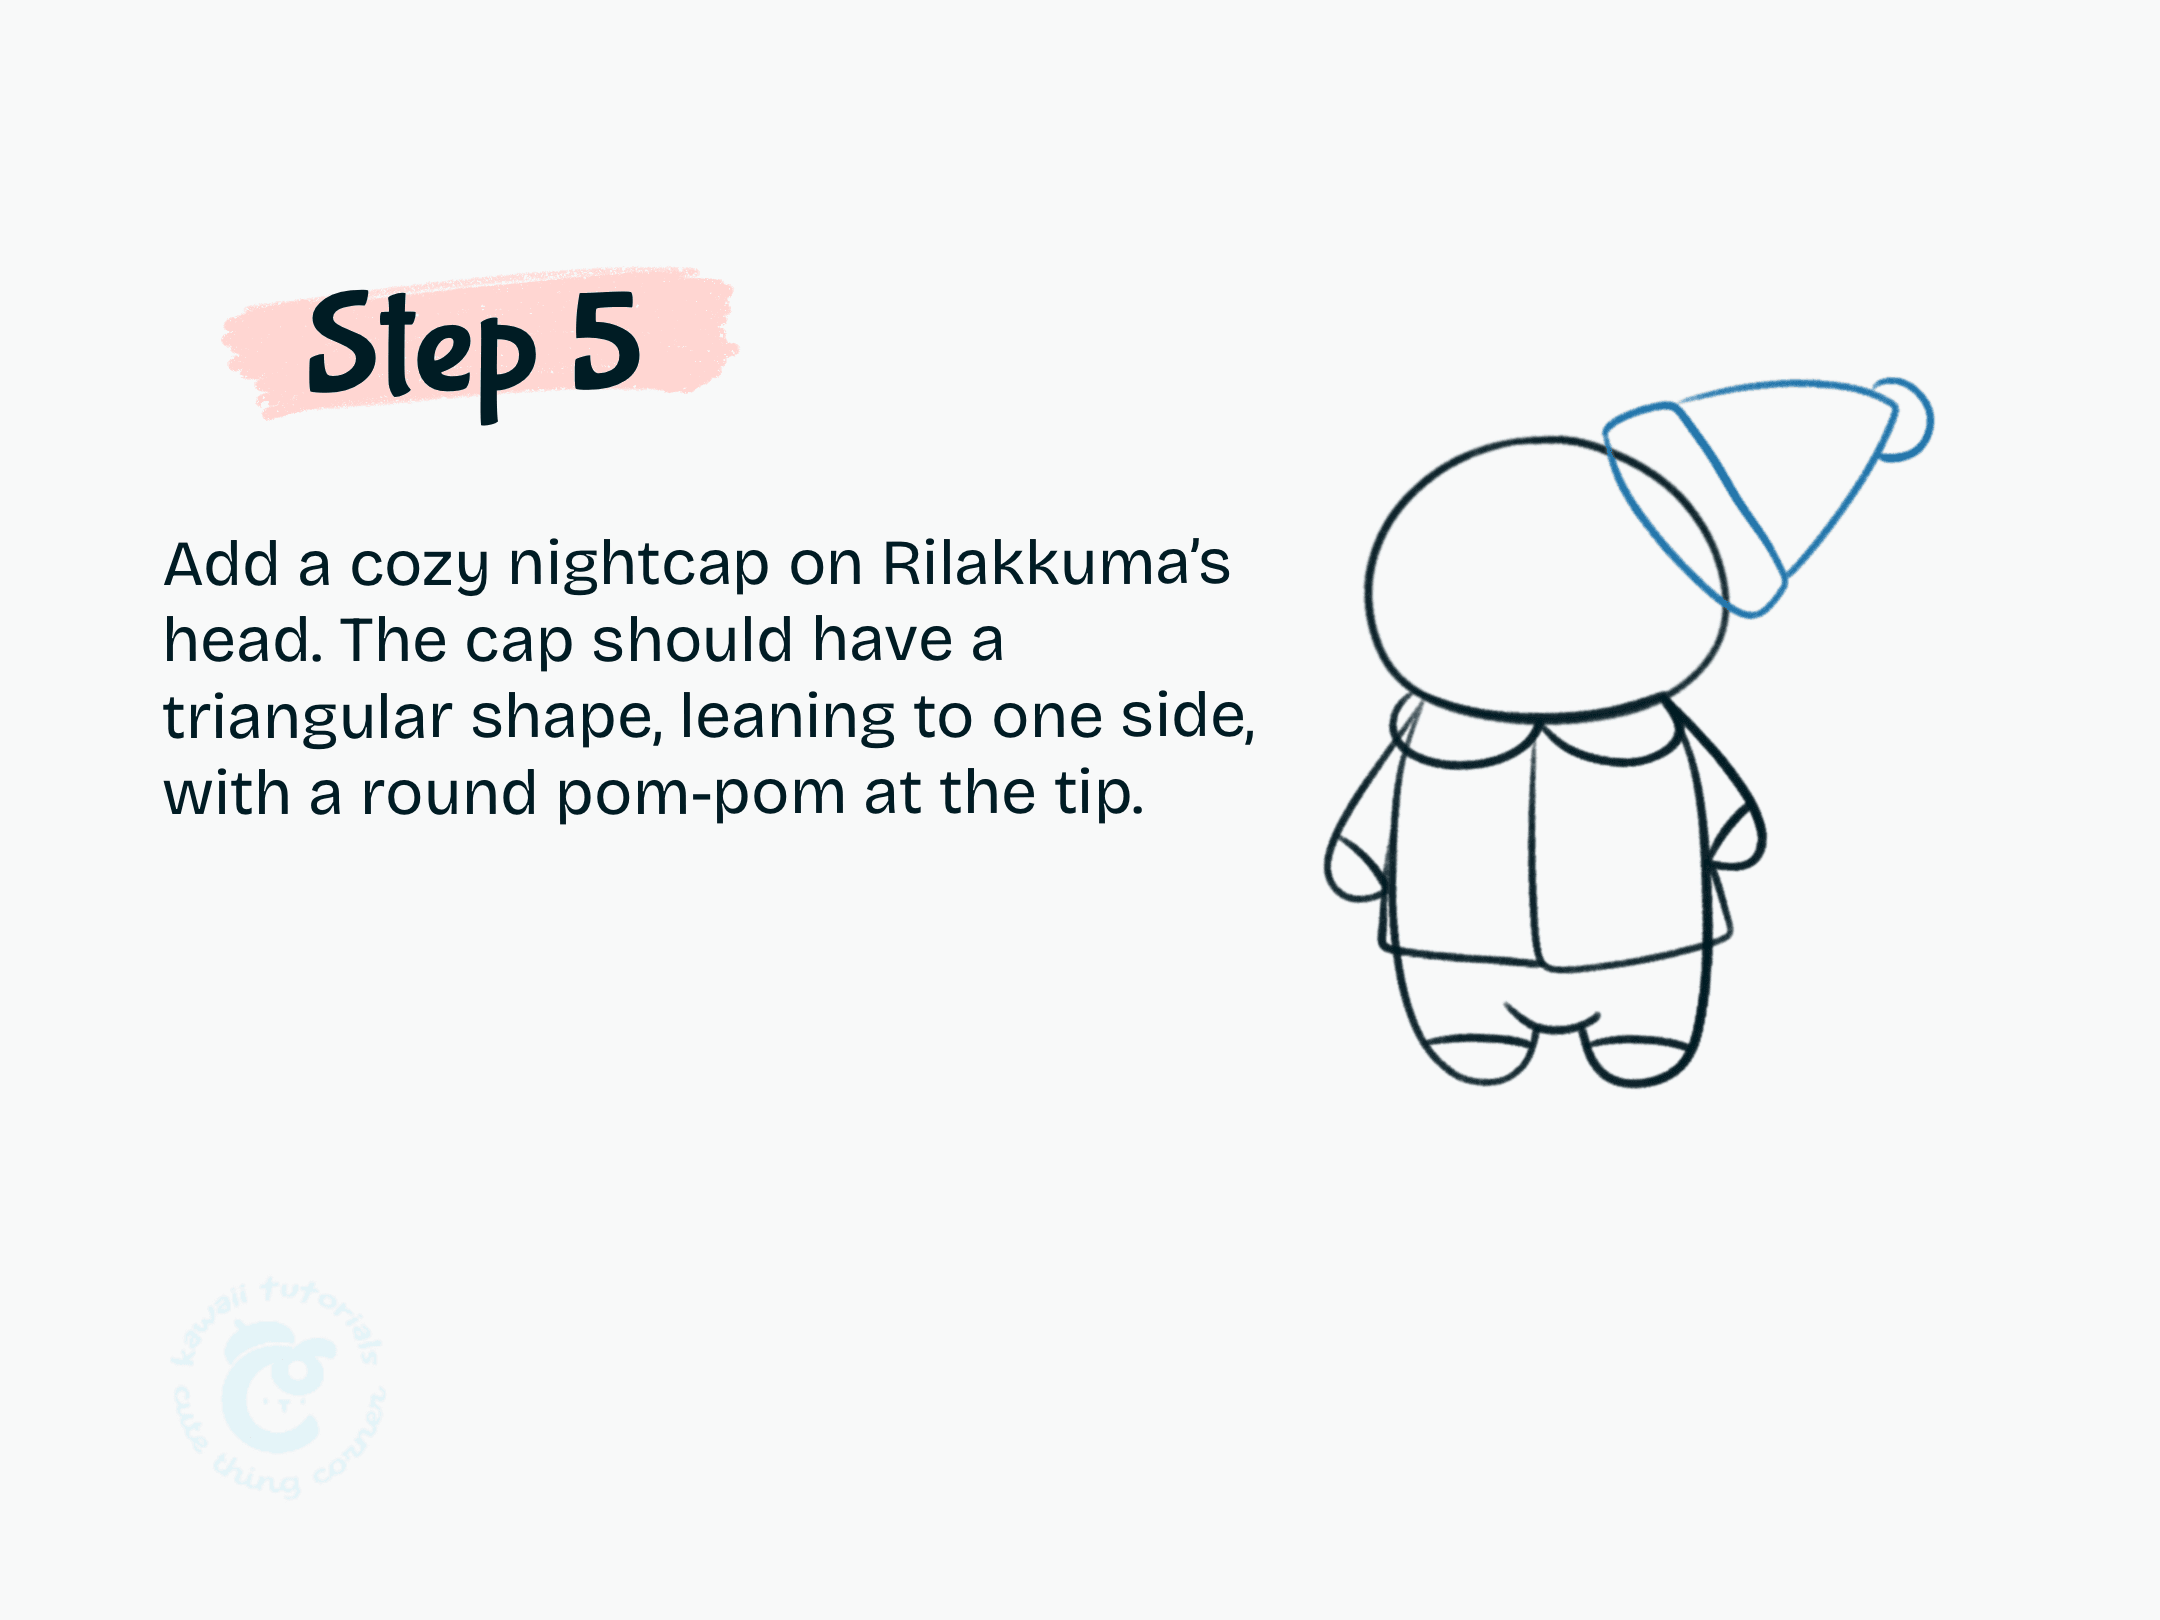
Step 5 Add a cozy nightcap on Rilakkuma’s head. The cap should have a triangular shape, leaning to one side, with a round pom-pom at the tip.
#Step 6: Draw Rilakkuma’s round ears. Add one ear on each side of the head.
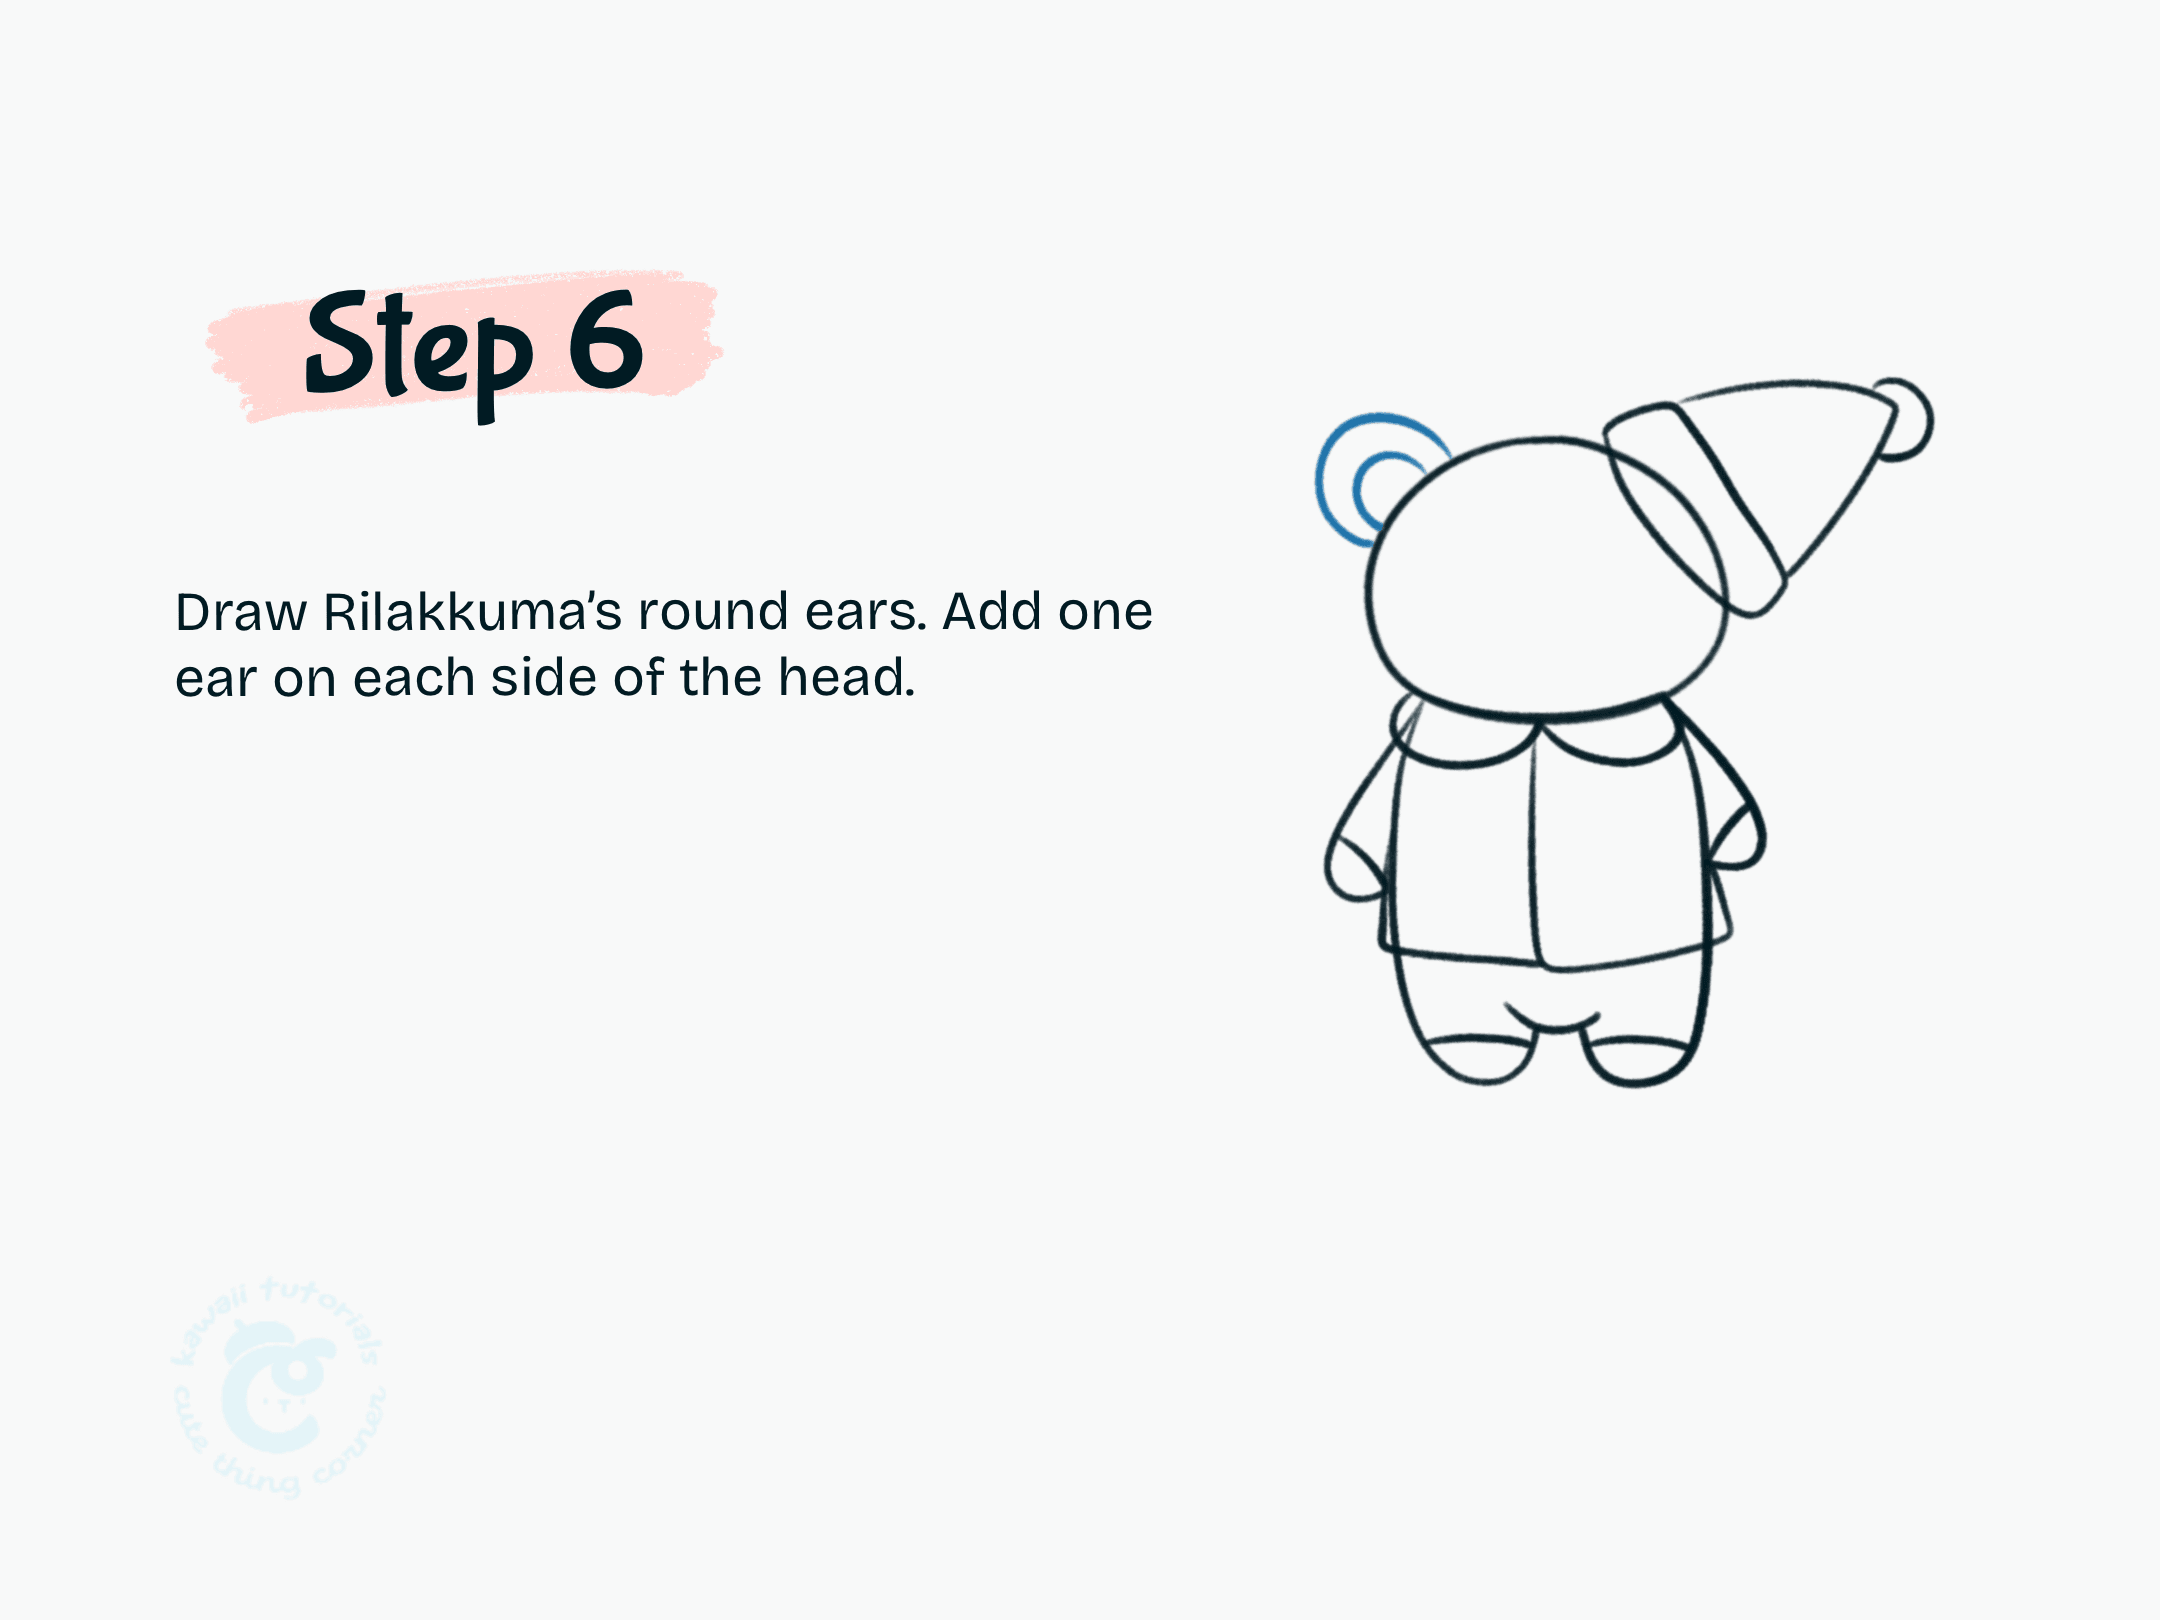
Step 6 Draw Rilakkuma’s round ears. Add one ear on each side of the head.
#Step 7: Refine all lines, use a fluffy texture for the edges of the cap and outline the seam lines for the pajamas to make them stand out.
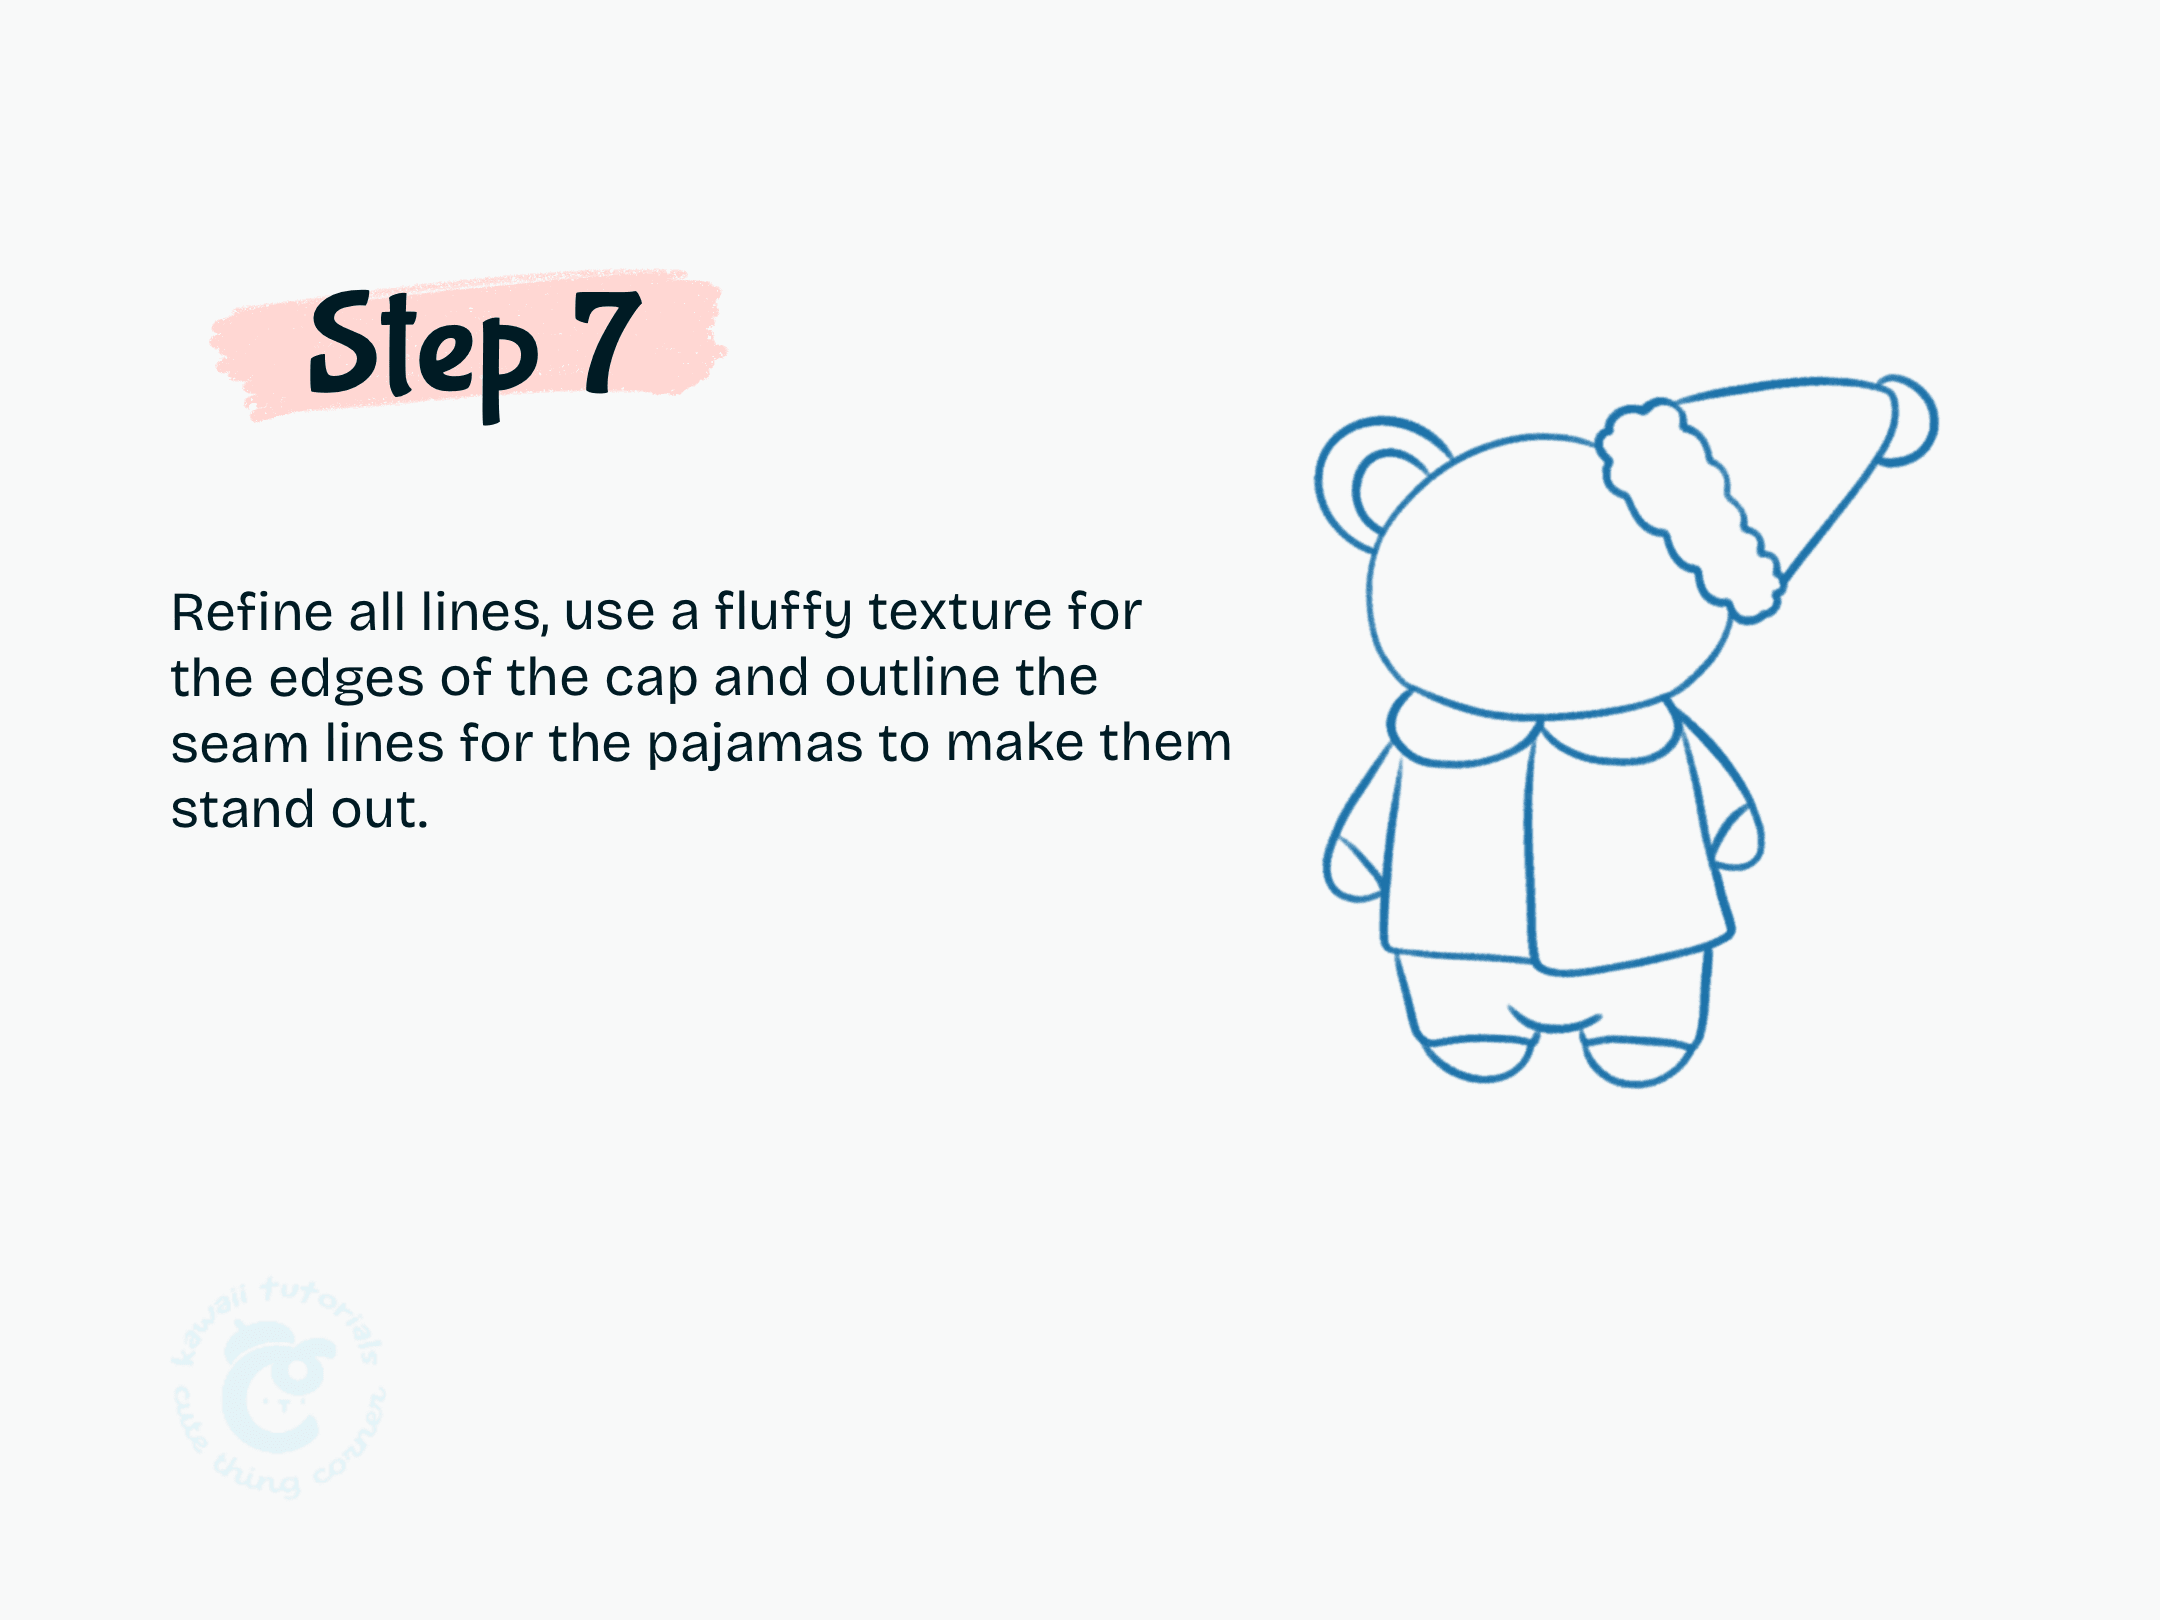
Step 7 Refine all lines, use a fluffy texture for the edges of the cap and outline the seam lines for the pajamas to make them stand out.
#Step 8: Add the face and pajama patterns, then finalize the hat details with small decorations.
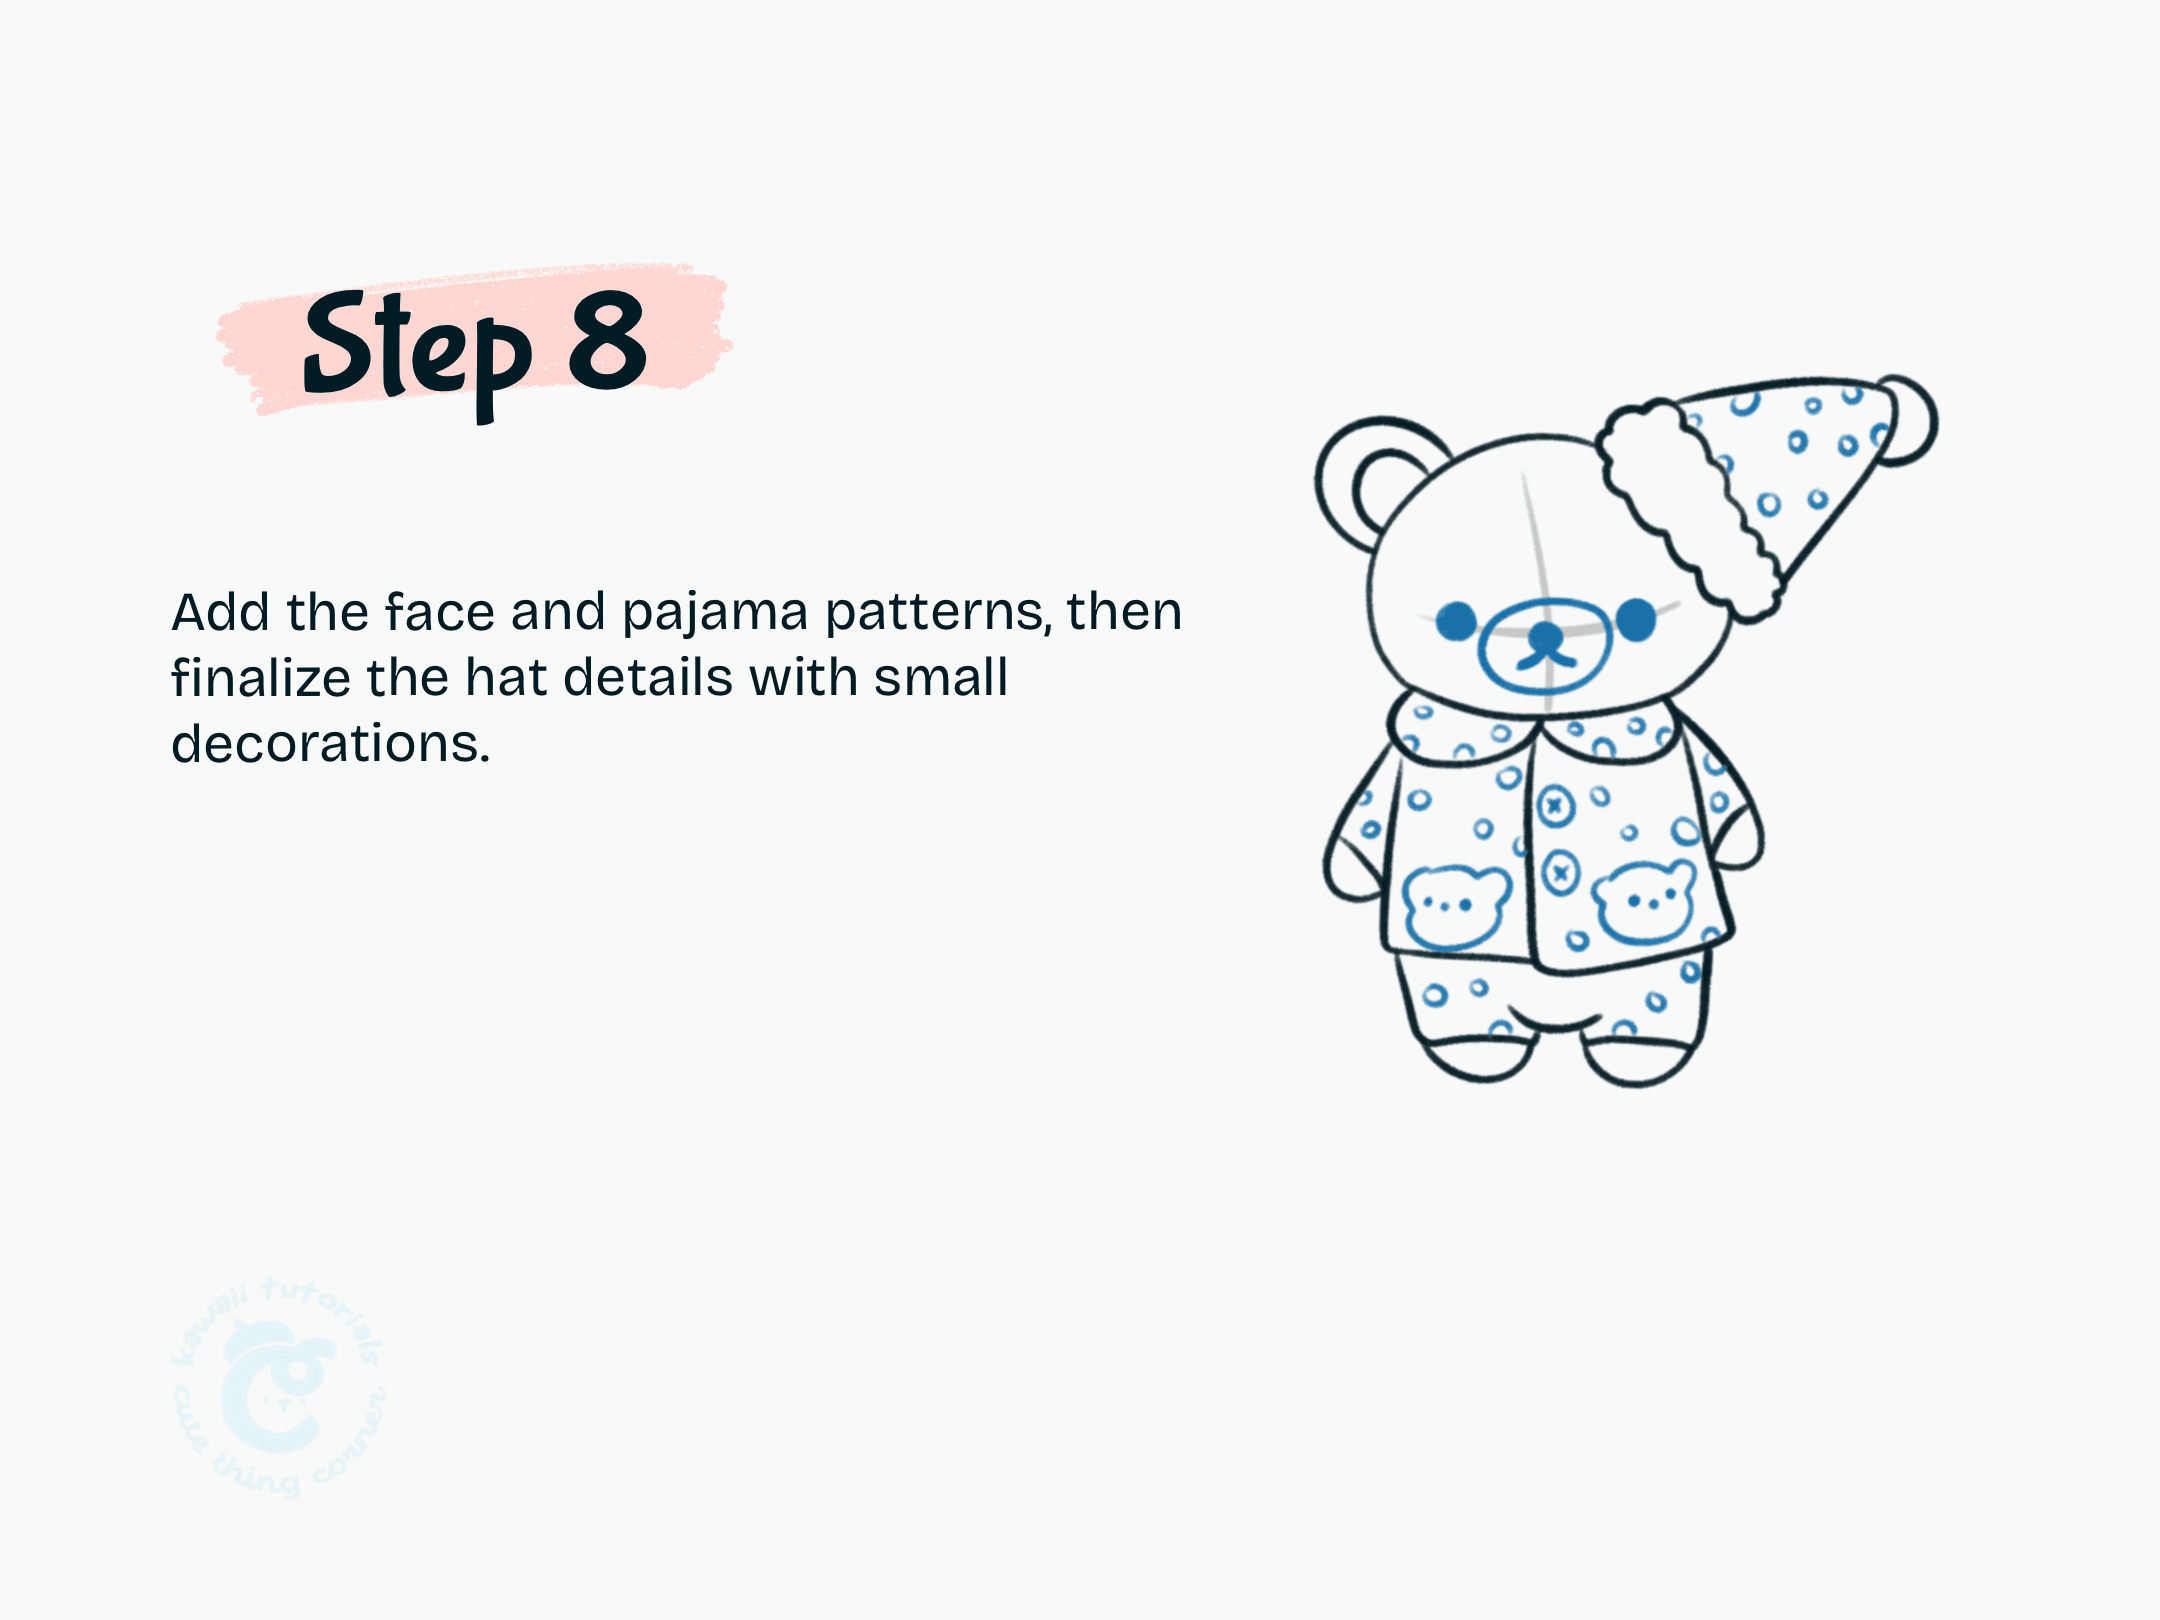
Step 8 Add the face and pajama patterns, then finalize the hat details with small decorations.
#Step 9: Color the bear, pajamas, and hat. Add soft tones for a cozy look.
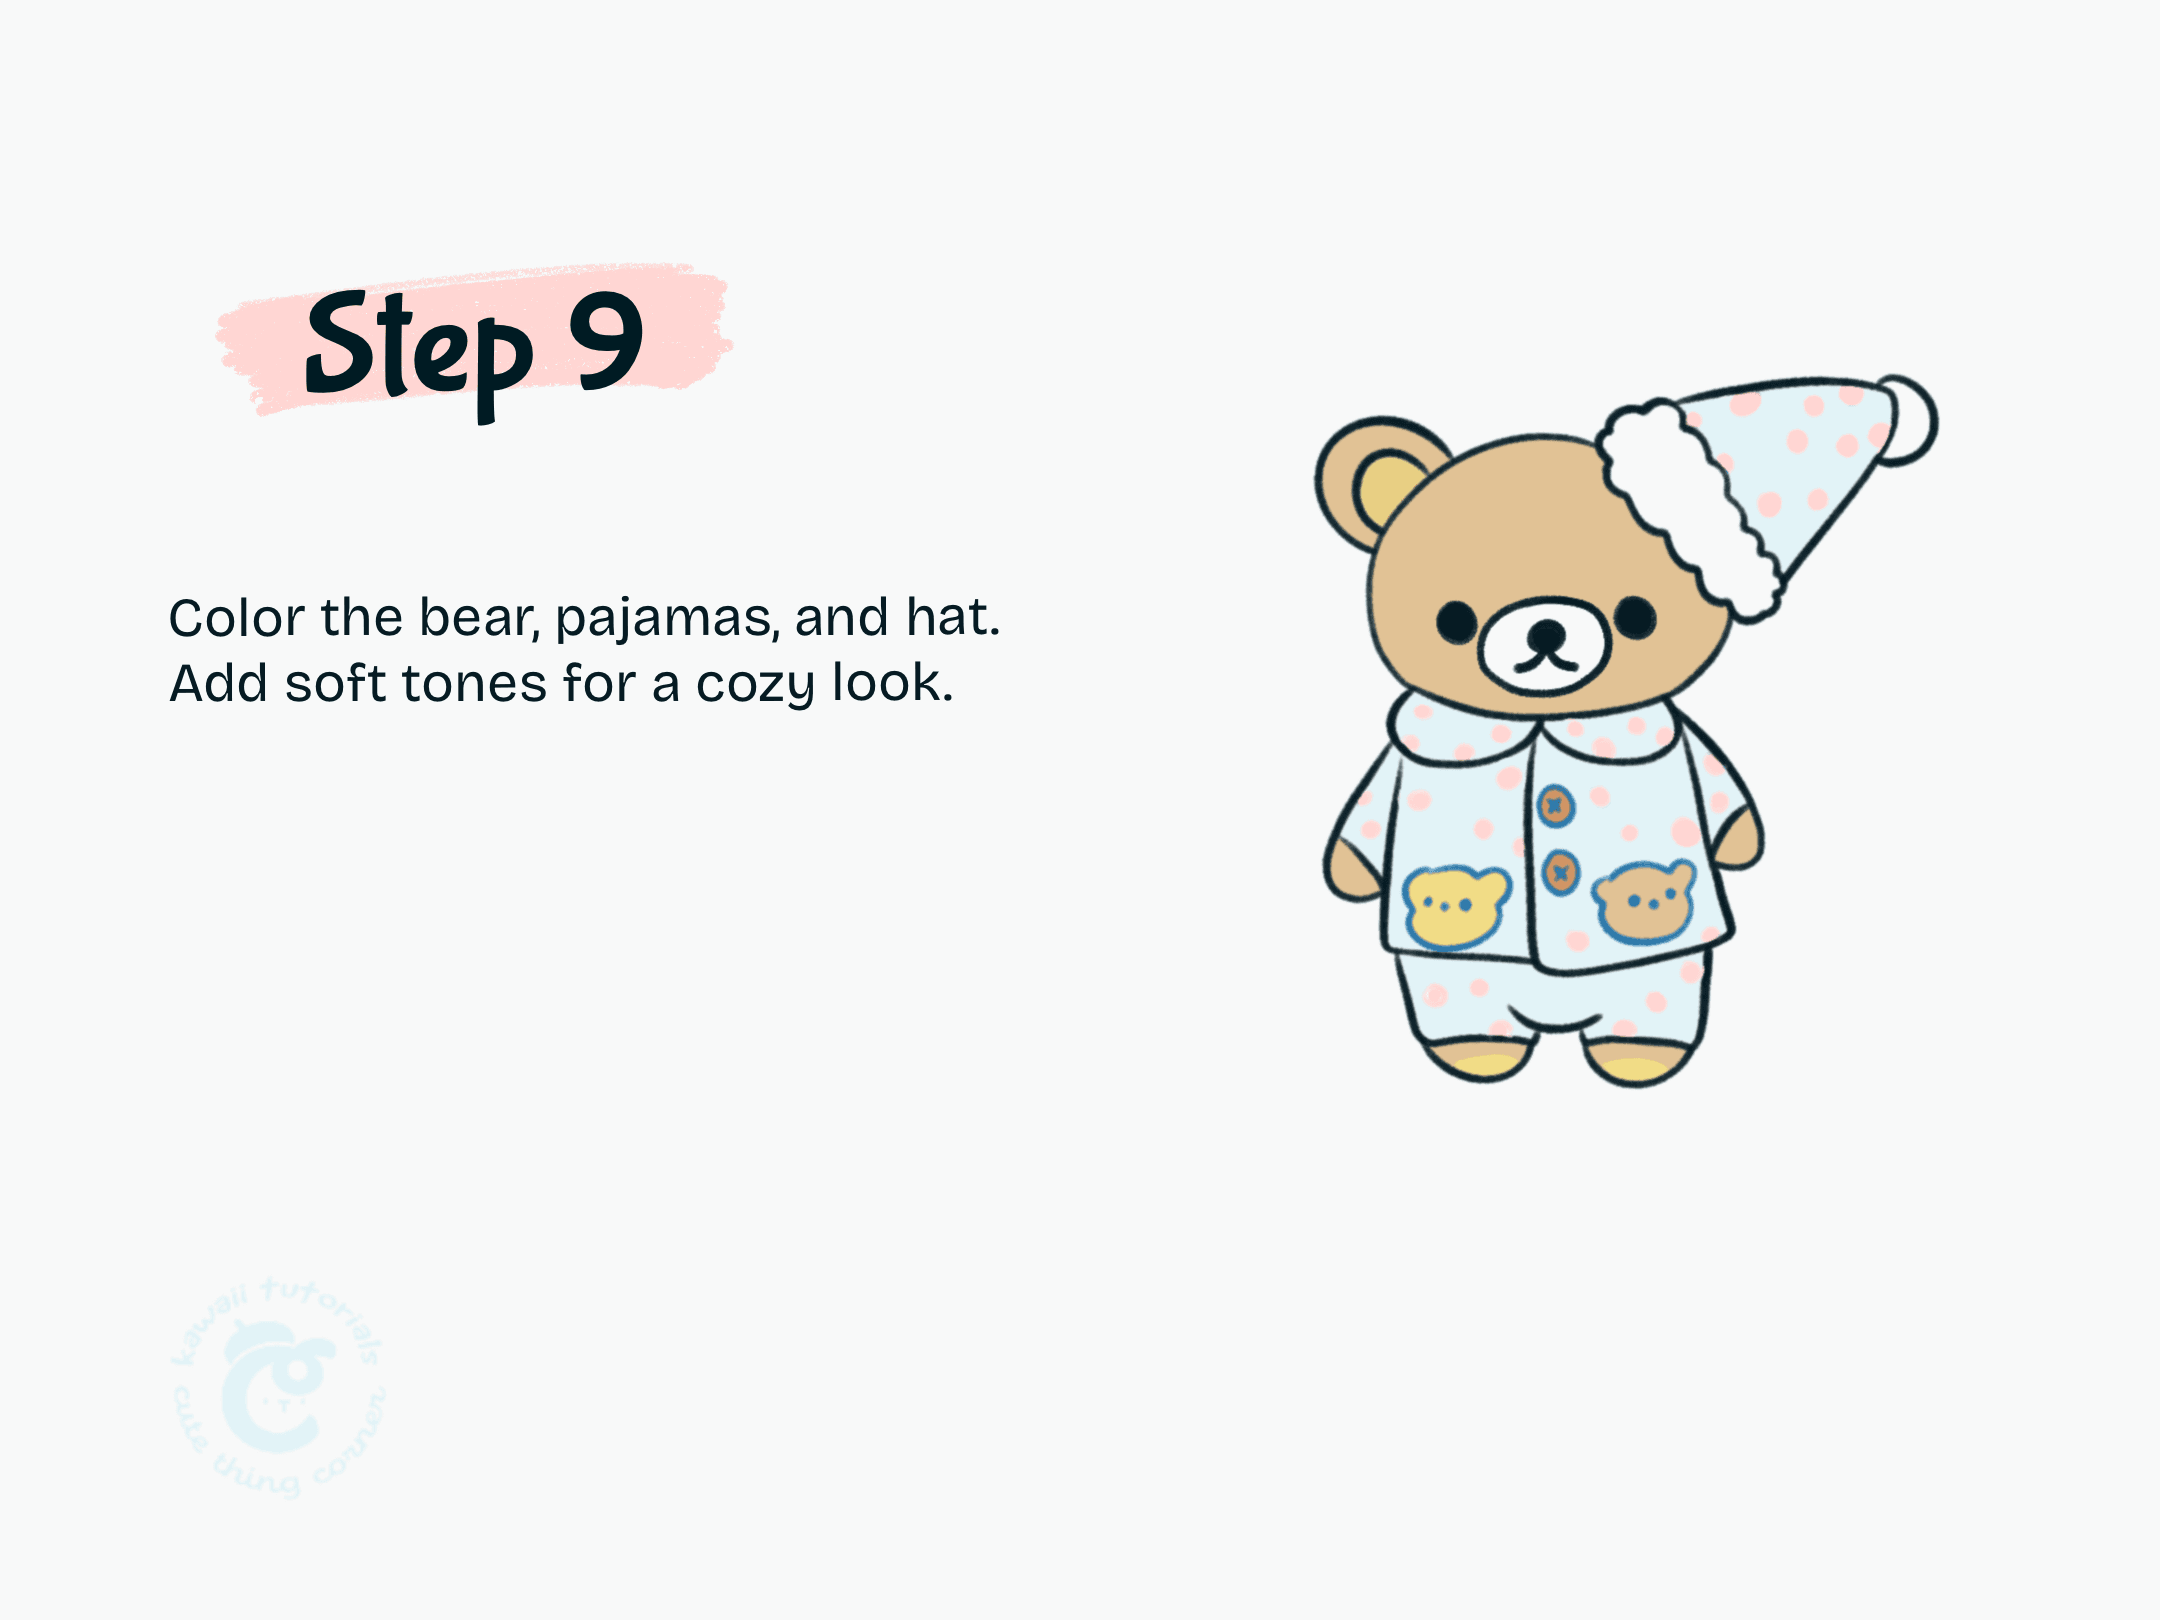
Step 9 Color the bear, pajamas, and hat
And there you have it—your cozy Rilakkuma in pajamas is complete! 🐻🛌✨
I hope you enjoyed following this step-by-step guide and had fun bringing this adorable San-X character to life.
Don’t forget to share your drawing and let us know how it turned out!
For more cute and creative tutorials, visit our blog for more kawaii art ideas.
Let’s keep the creativity going—see you in the next guide!
Learn full steps to draw Cute Rilakkuma in Pajamas:
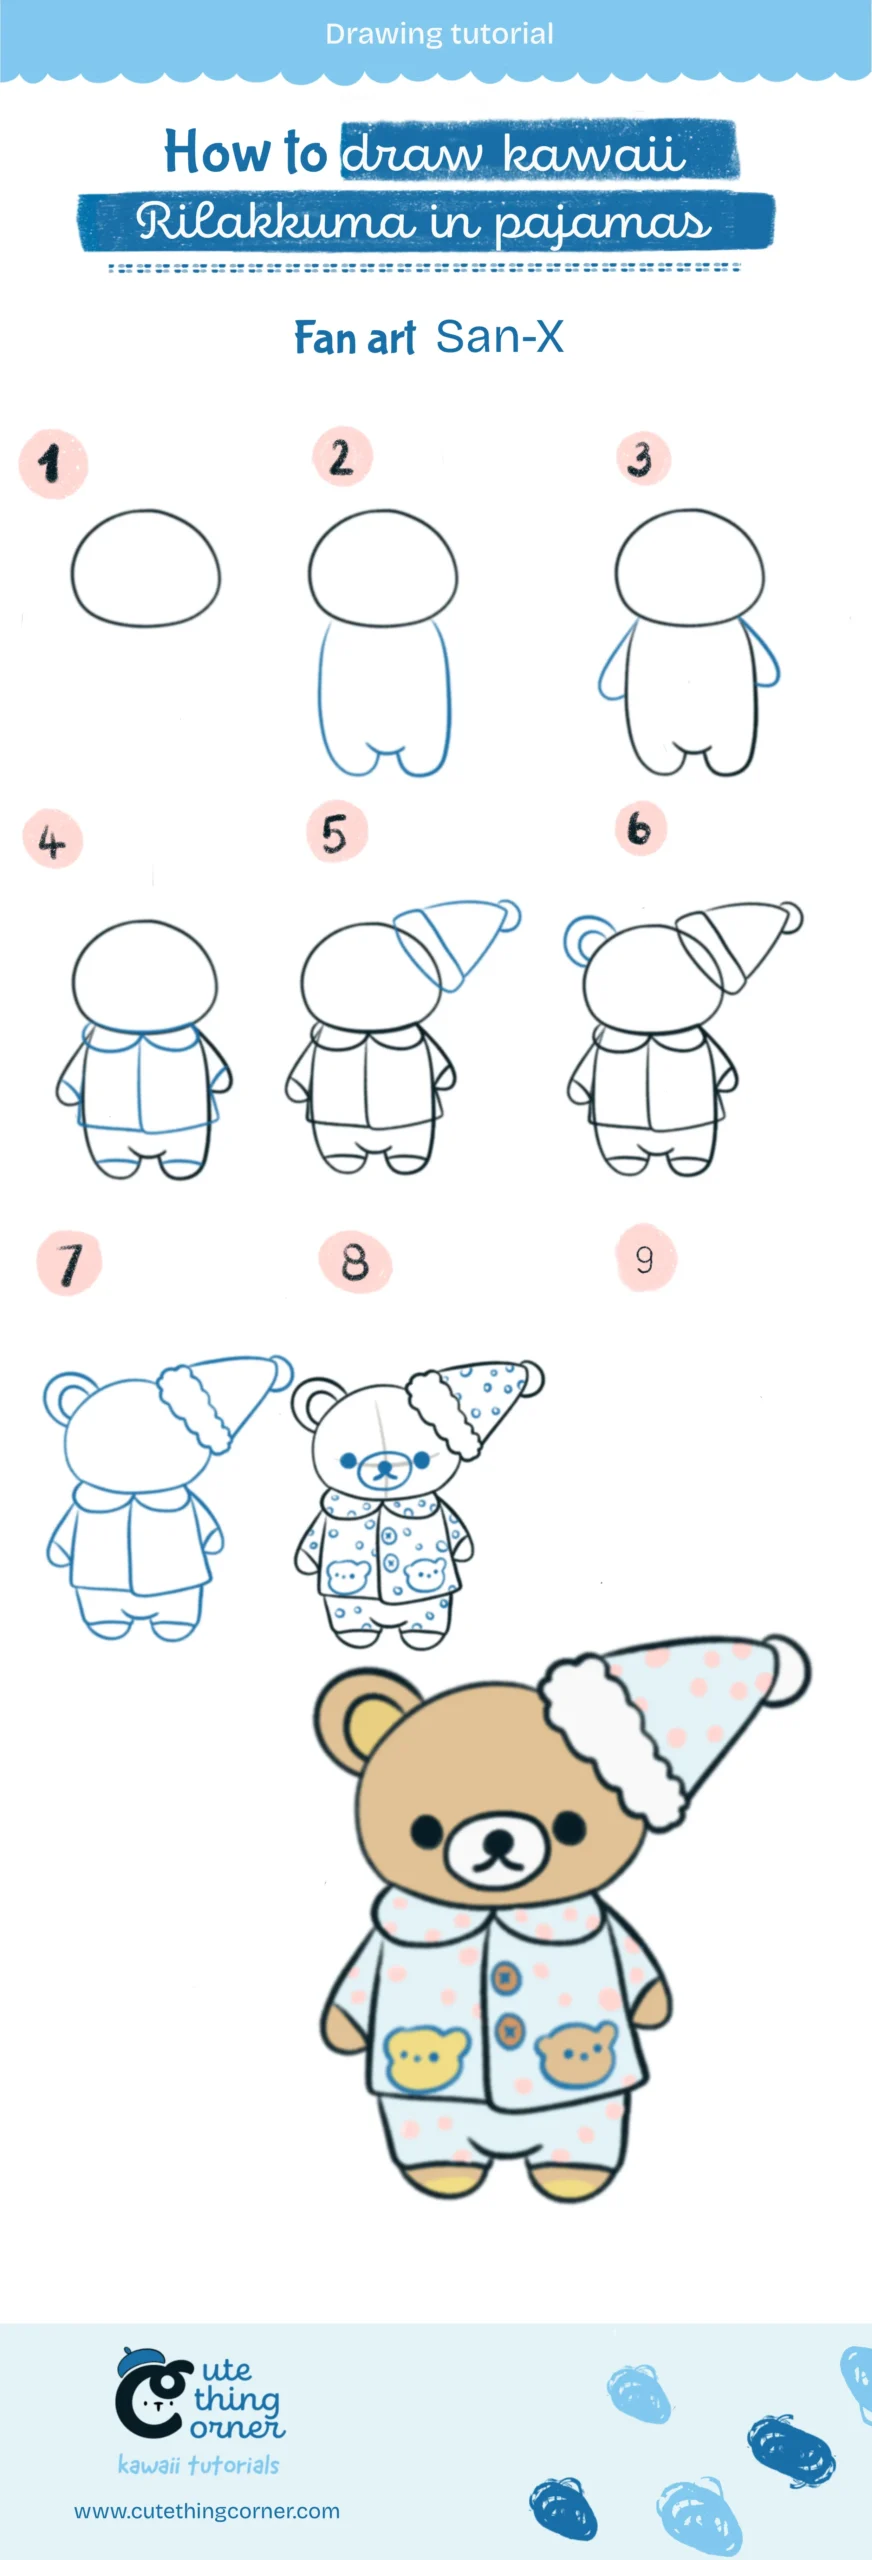
How to Draw Kawaii Rilakkuma in Pajamas (Step-by-step)