Ready to learn how to draw Garfield, the world’s laziest and sassiest orange cat? 🧡 Whether you’re a comic fan or just love drawing expressive characters, this step-by-step Garfield drawing tutorial is perfect for beginners and kids alike!
This guide is part of our growing Cute Drawing Blog — your cozy corner to explore, sketch, and smile. Let’s draw Garfield together!
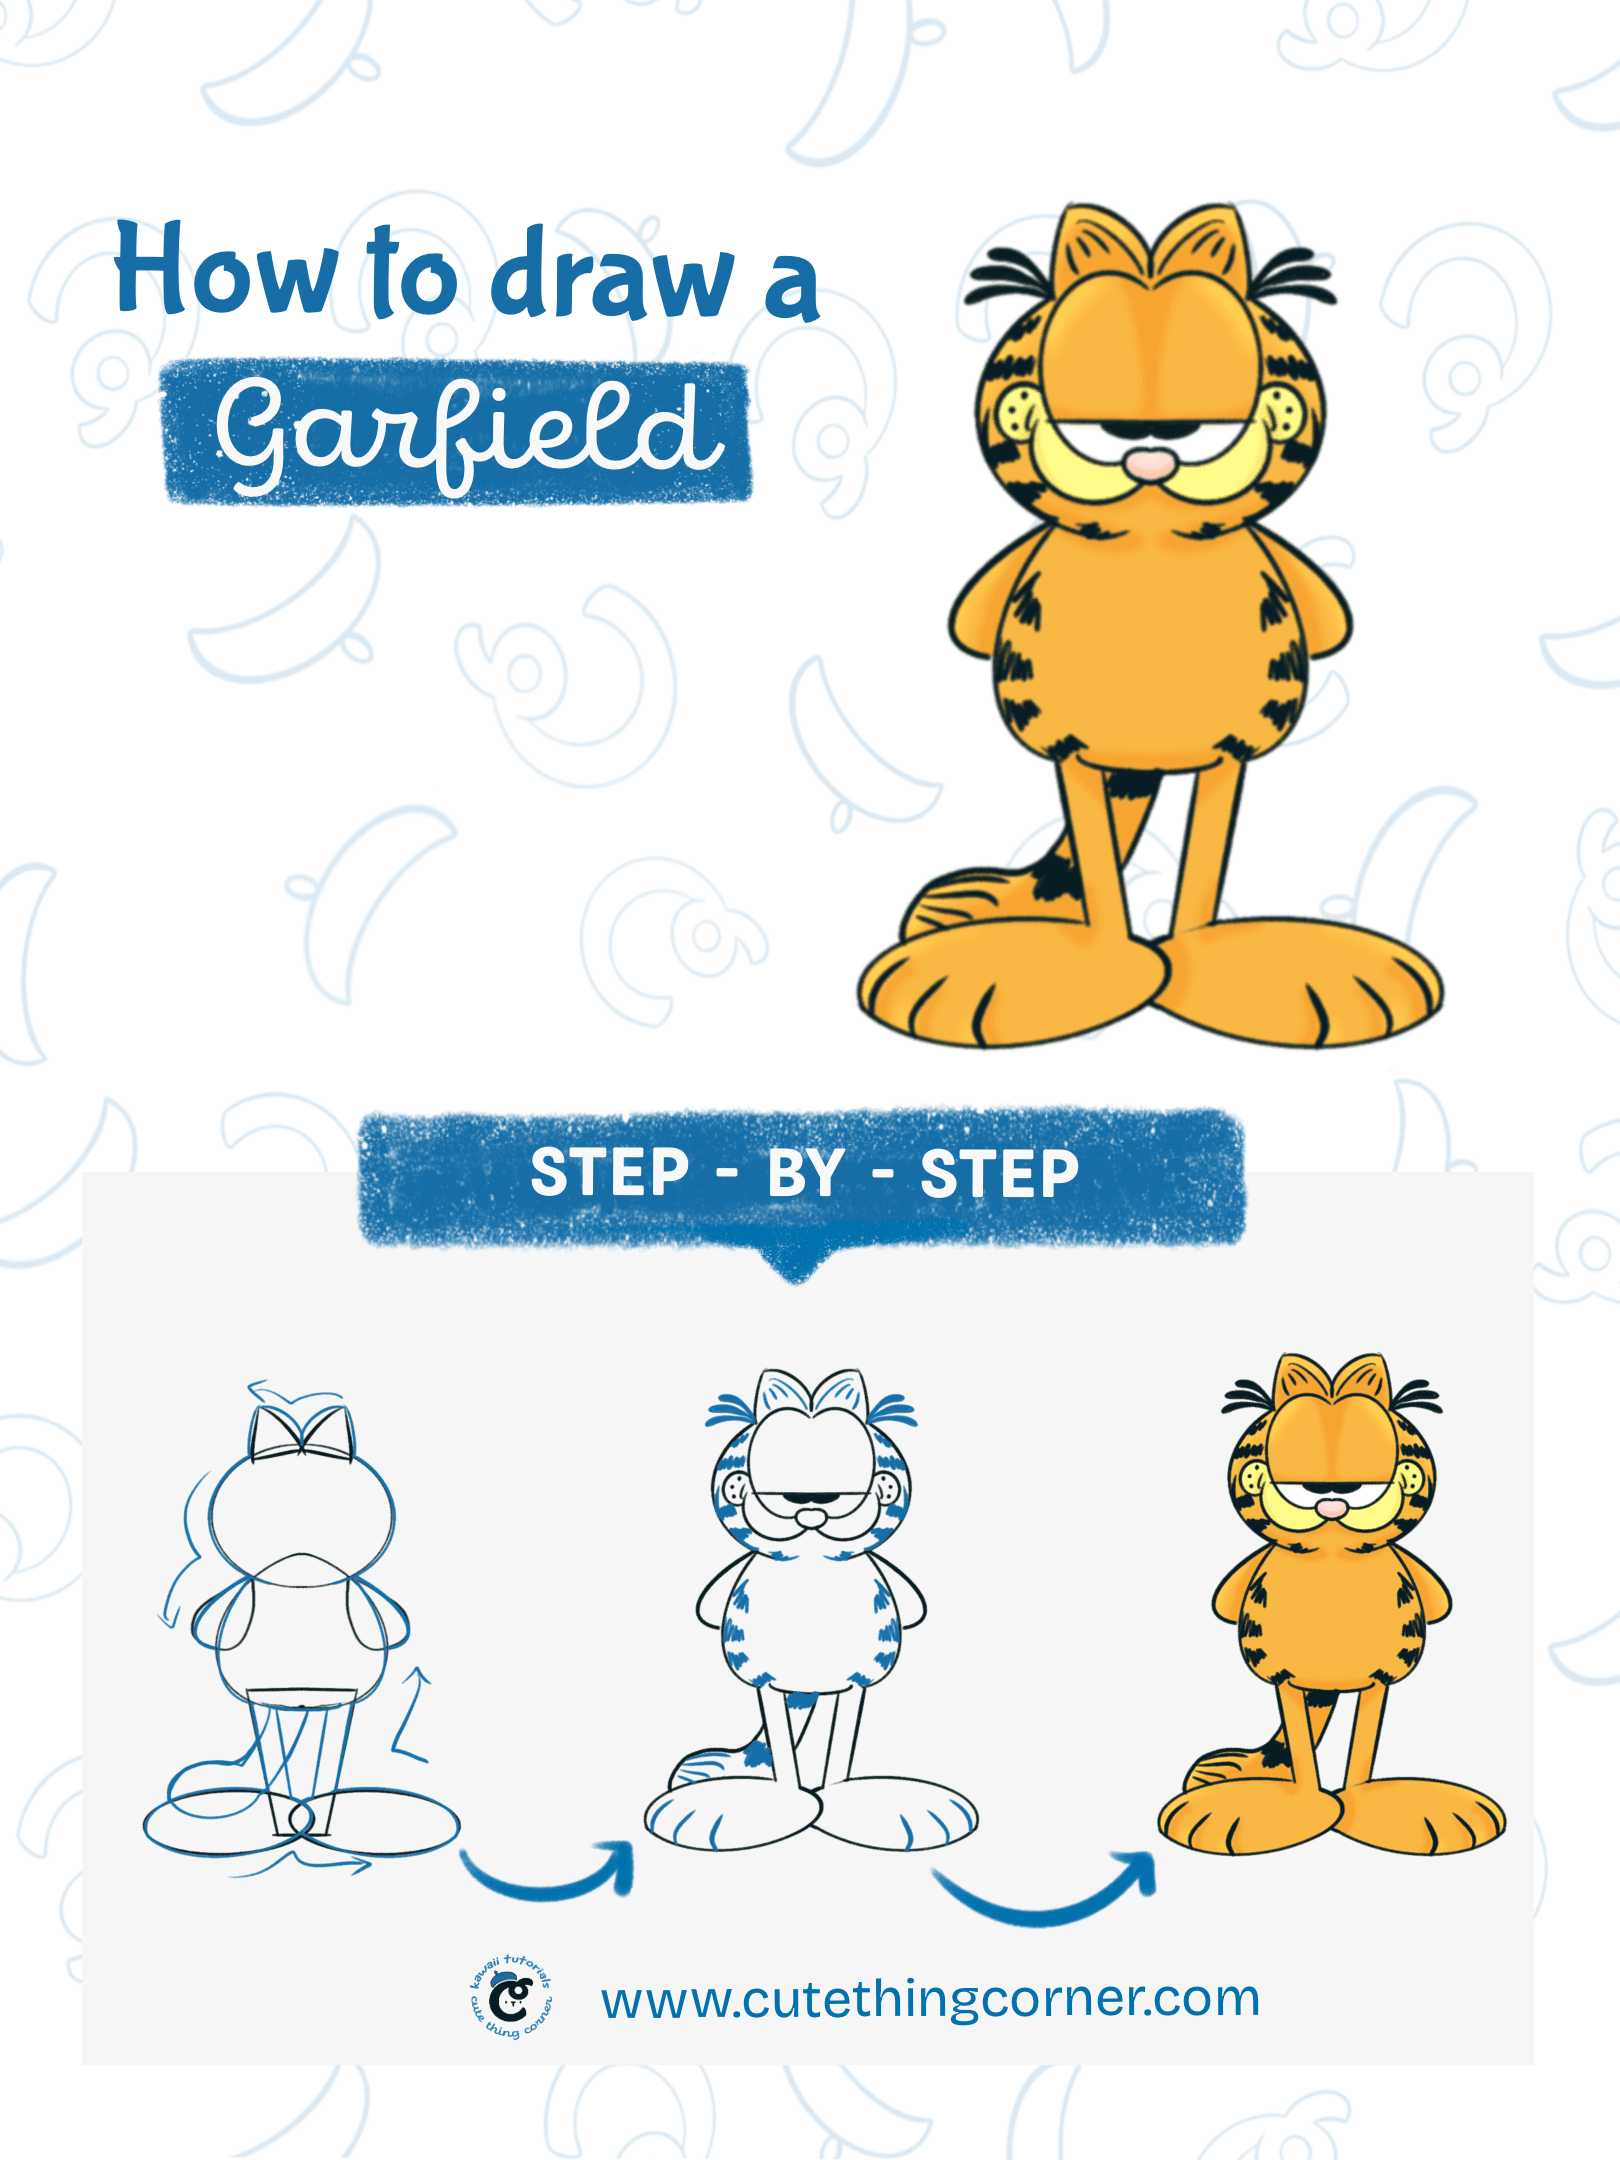
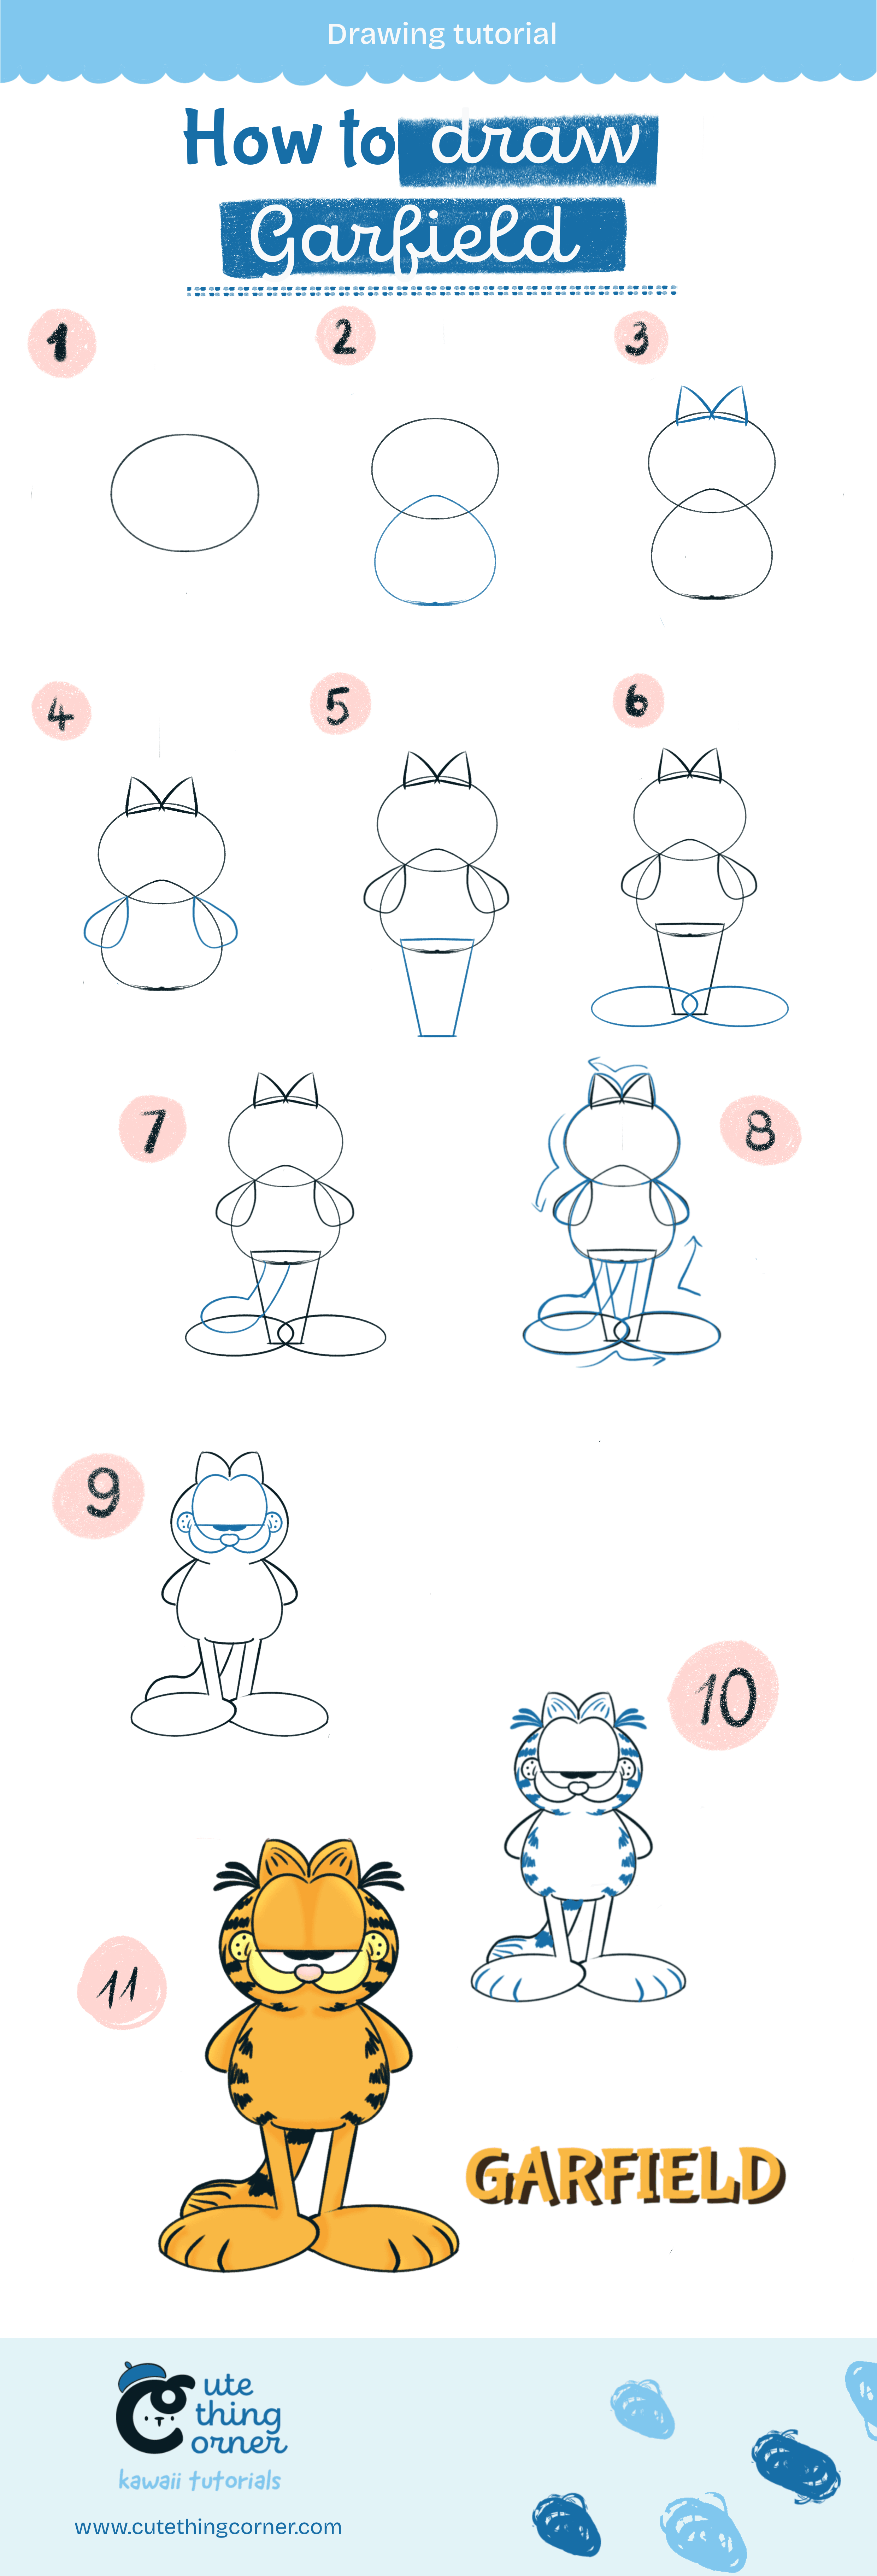
How to draw Garfield Step-by-step
#Step 1: Draw an ellipse shape for the head of Garfield
Start with a simple ellipse to outline Garfield’s big ol’ head.
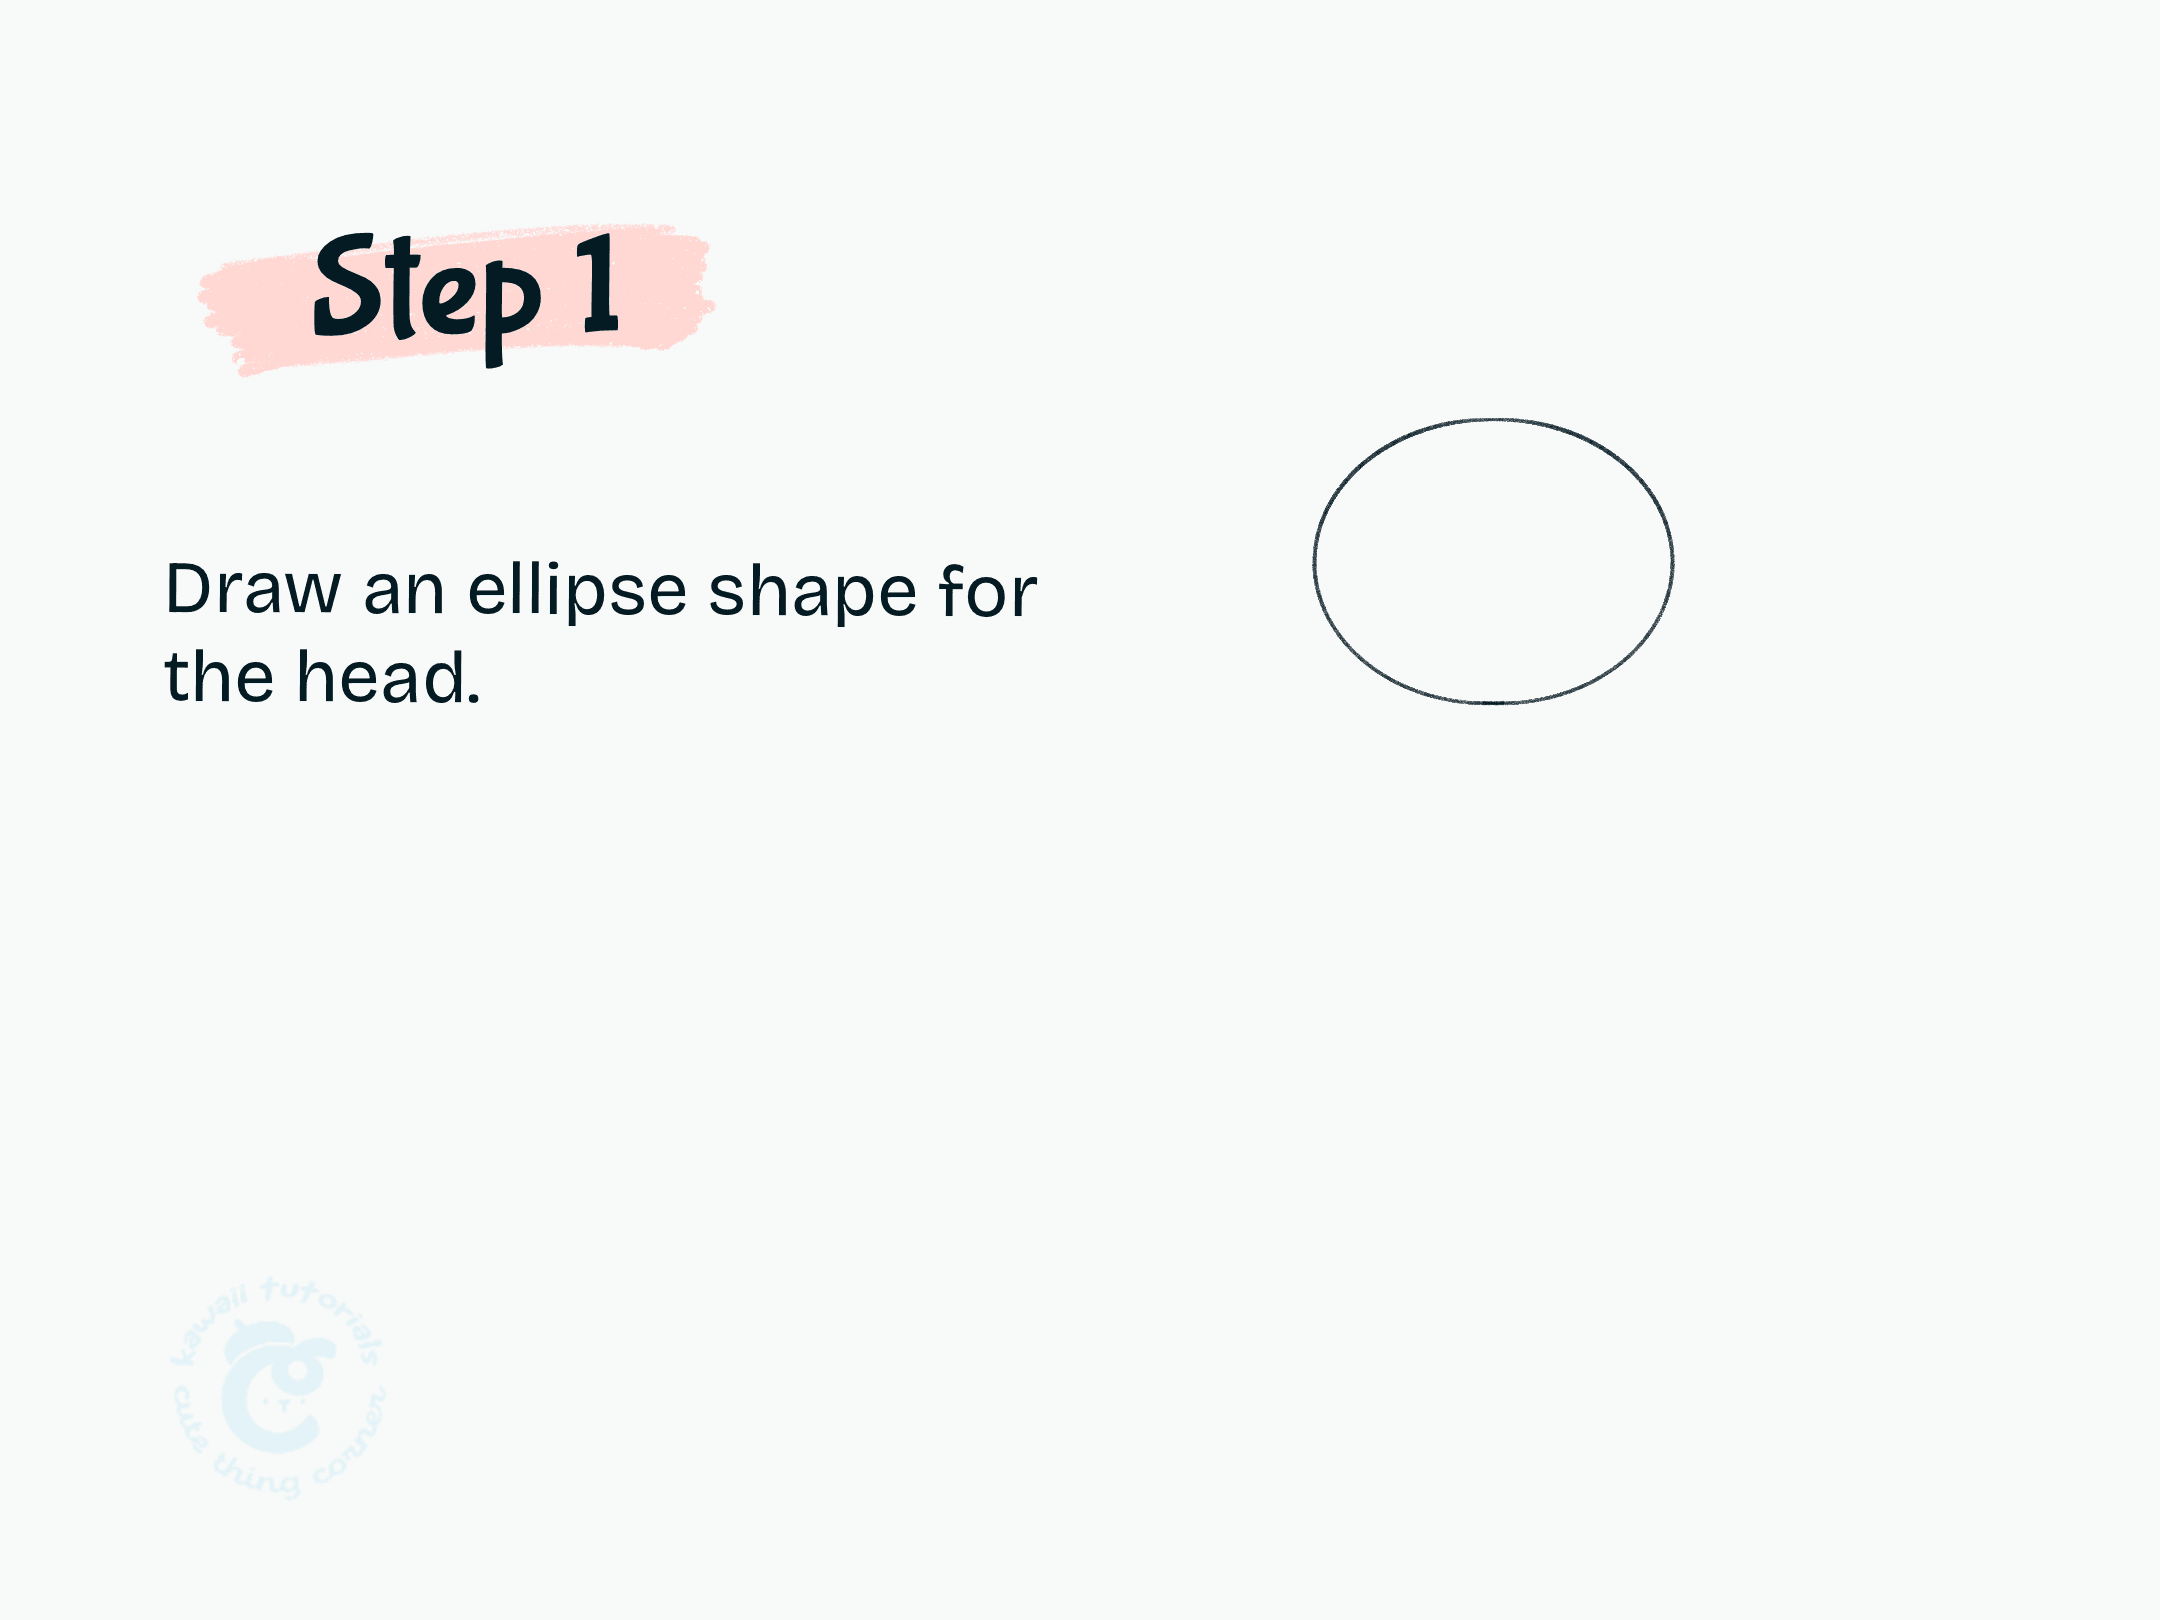
Step 1 Draw an ellipse shape for the head.
#Step 2: Sketch the body shape
Draw an oval shape right below the head. It should overlap a bit for that chubby charm.
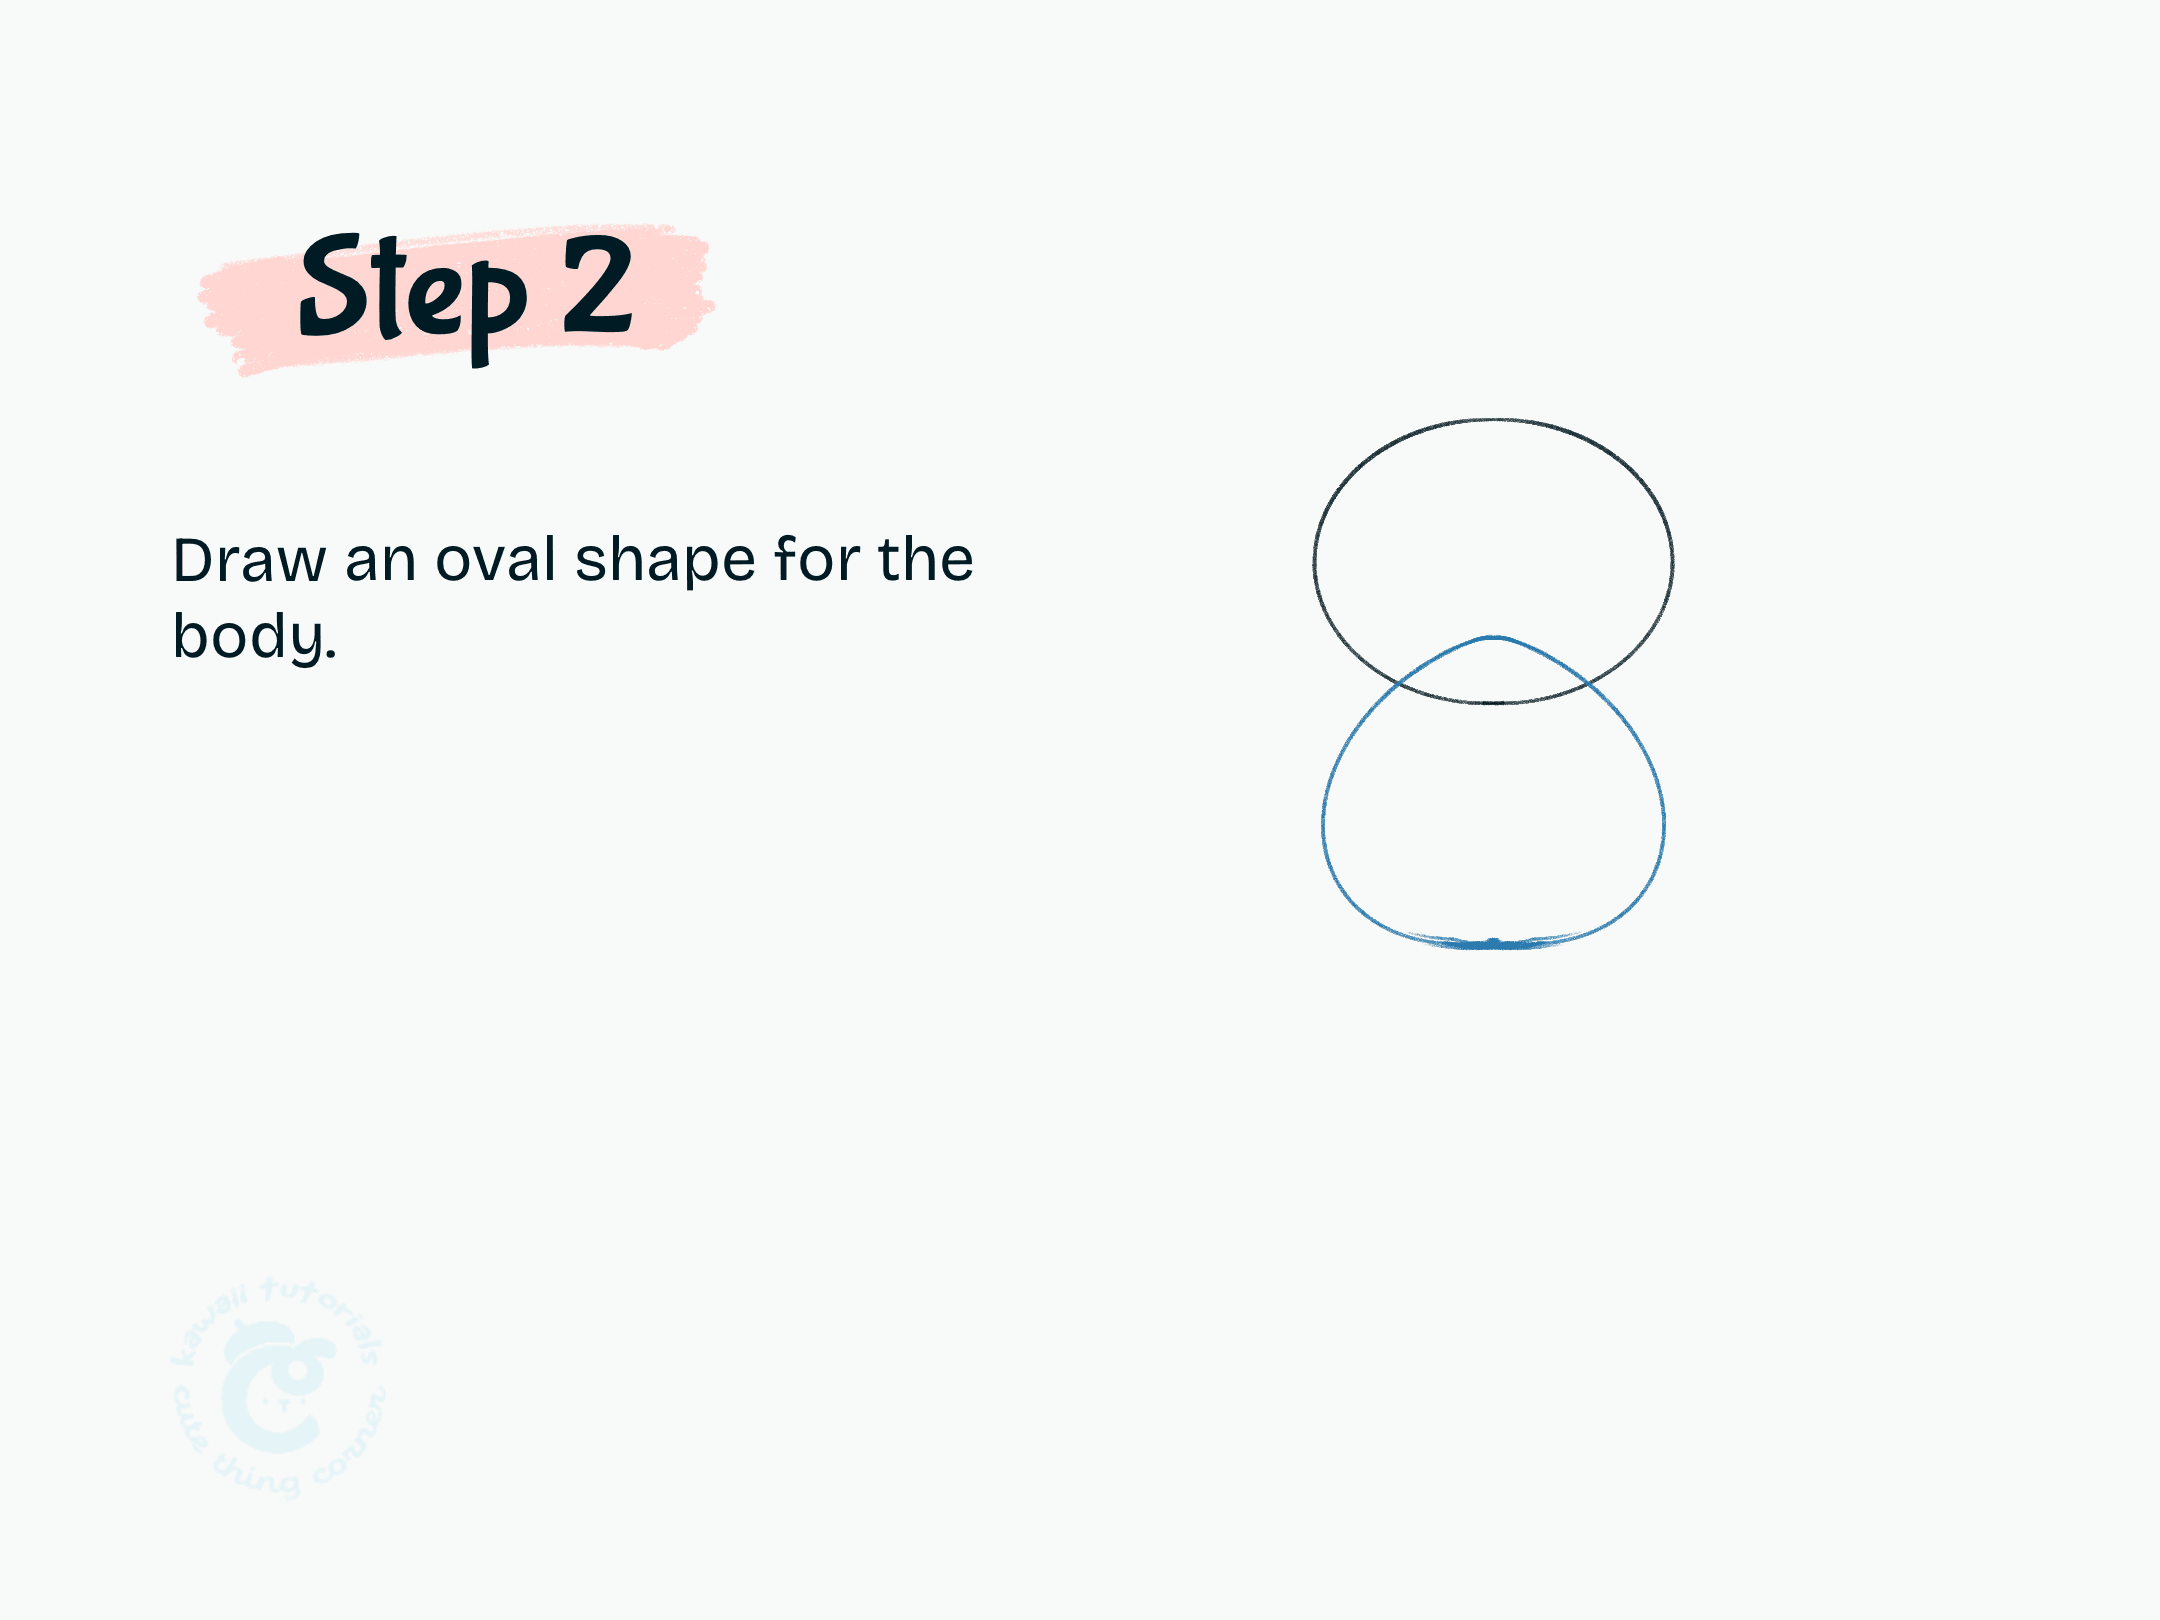
Sketch the body shape
#Step 3: Add two triangle ears
Draw two small triangles at the top of the head — these are Garfield’s signature ears.
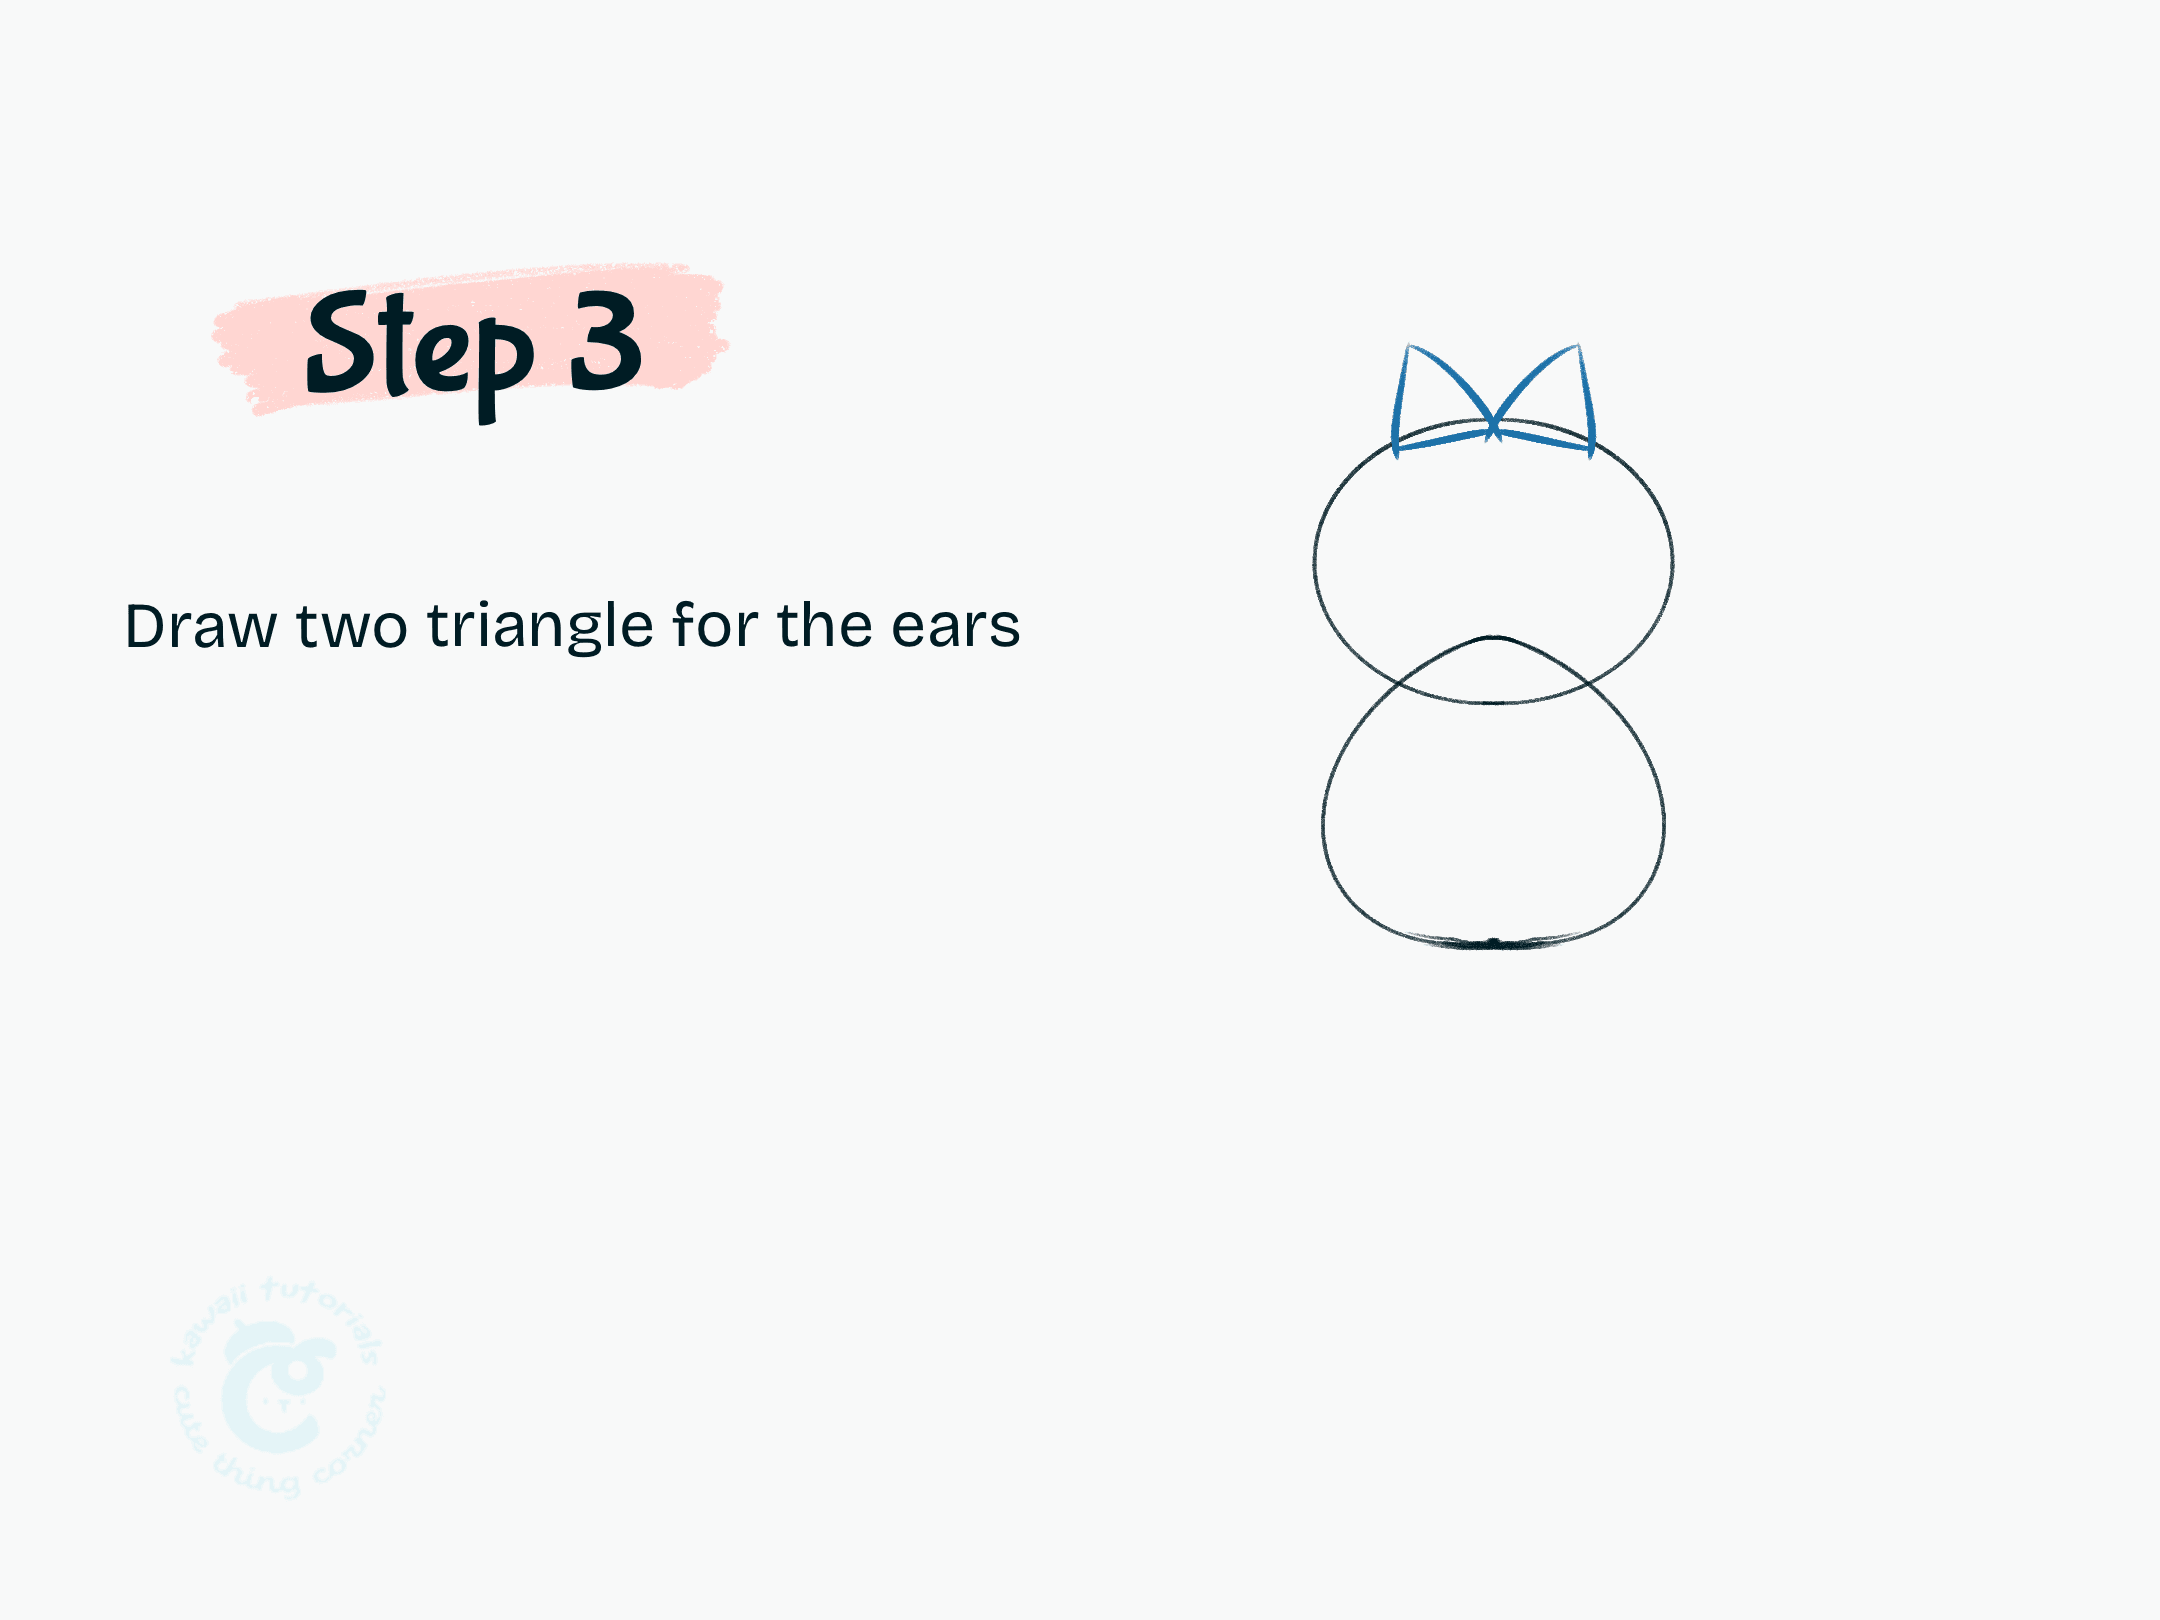
Add two triangle ears
#Step 4: Add the arms
On each side of the body, draw a teardrop shape that intersects the oval — these form Garfield’s arms.
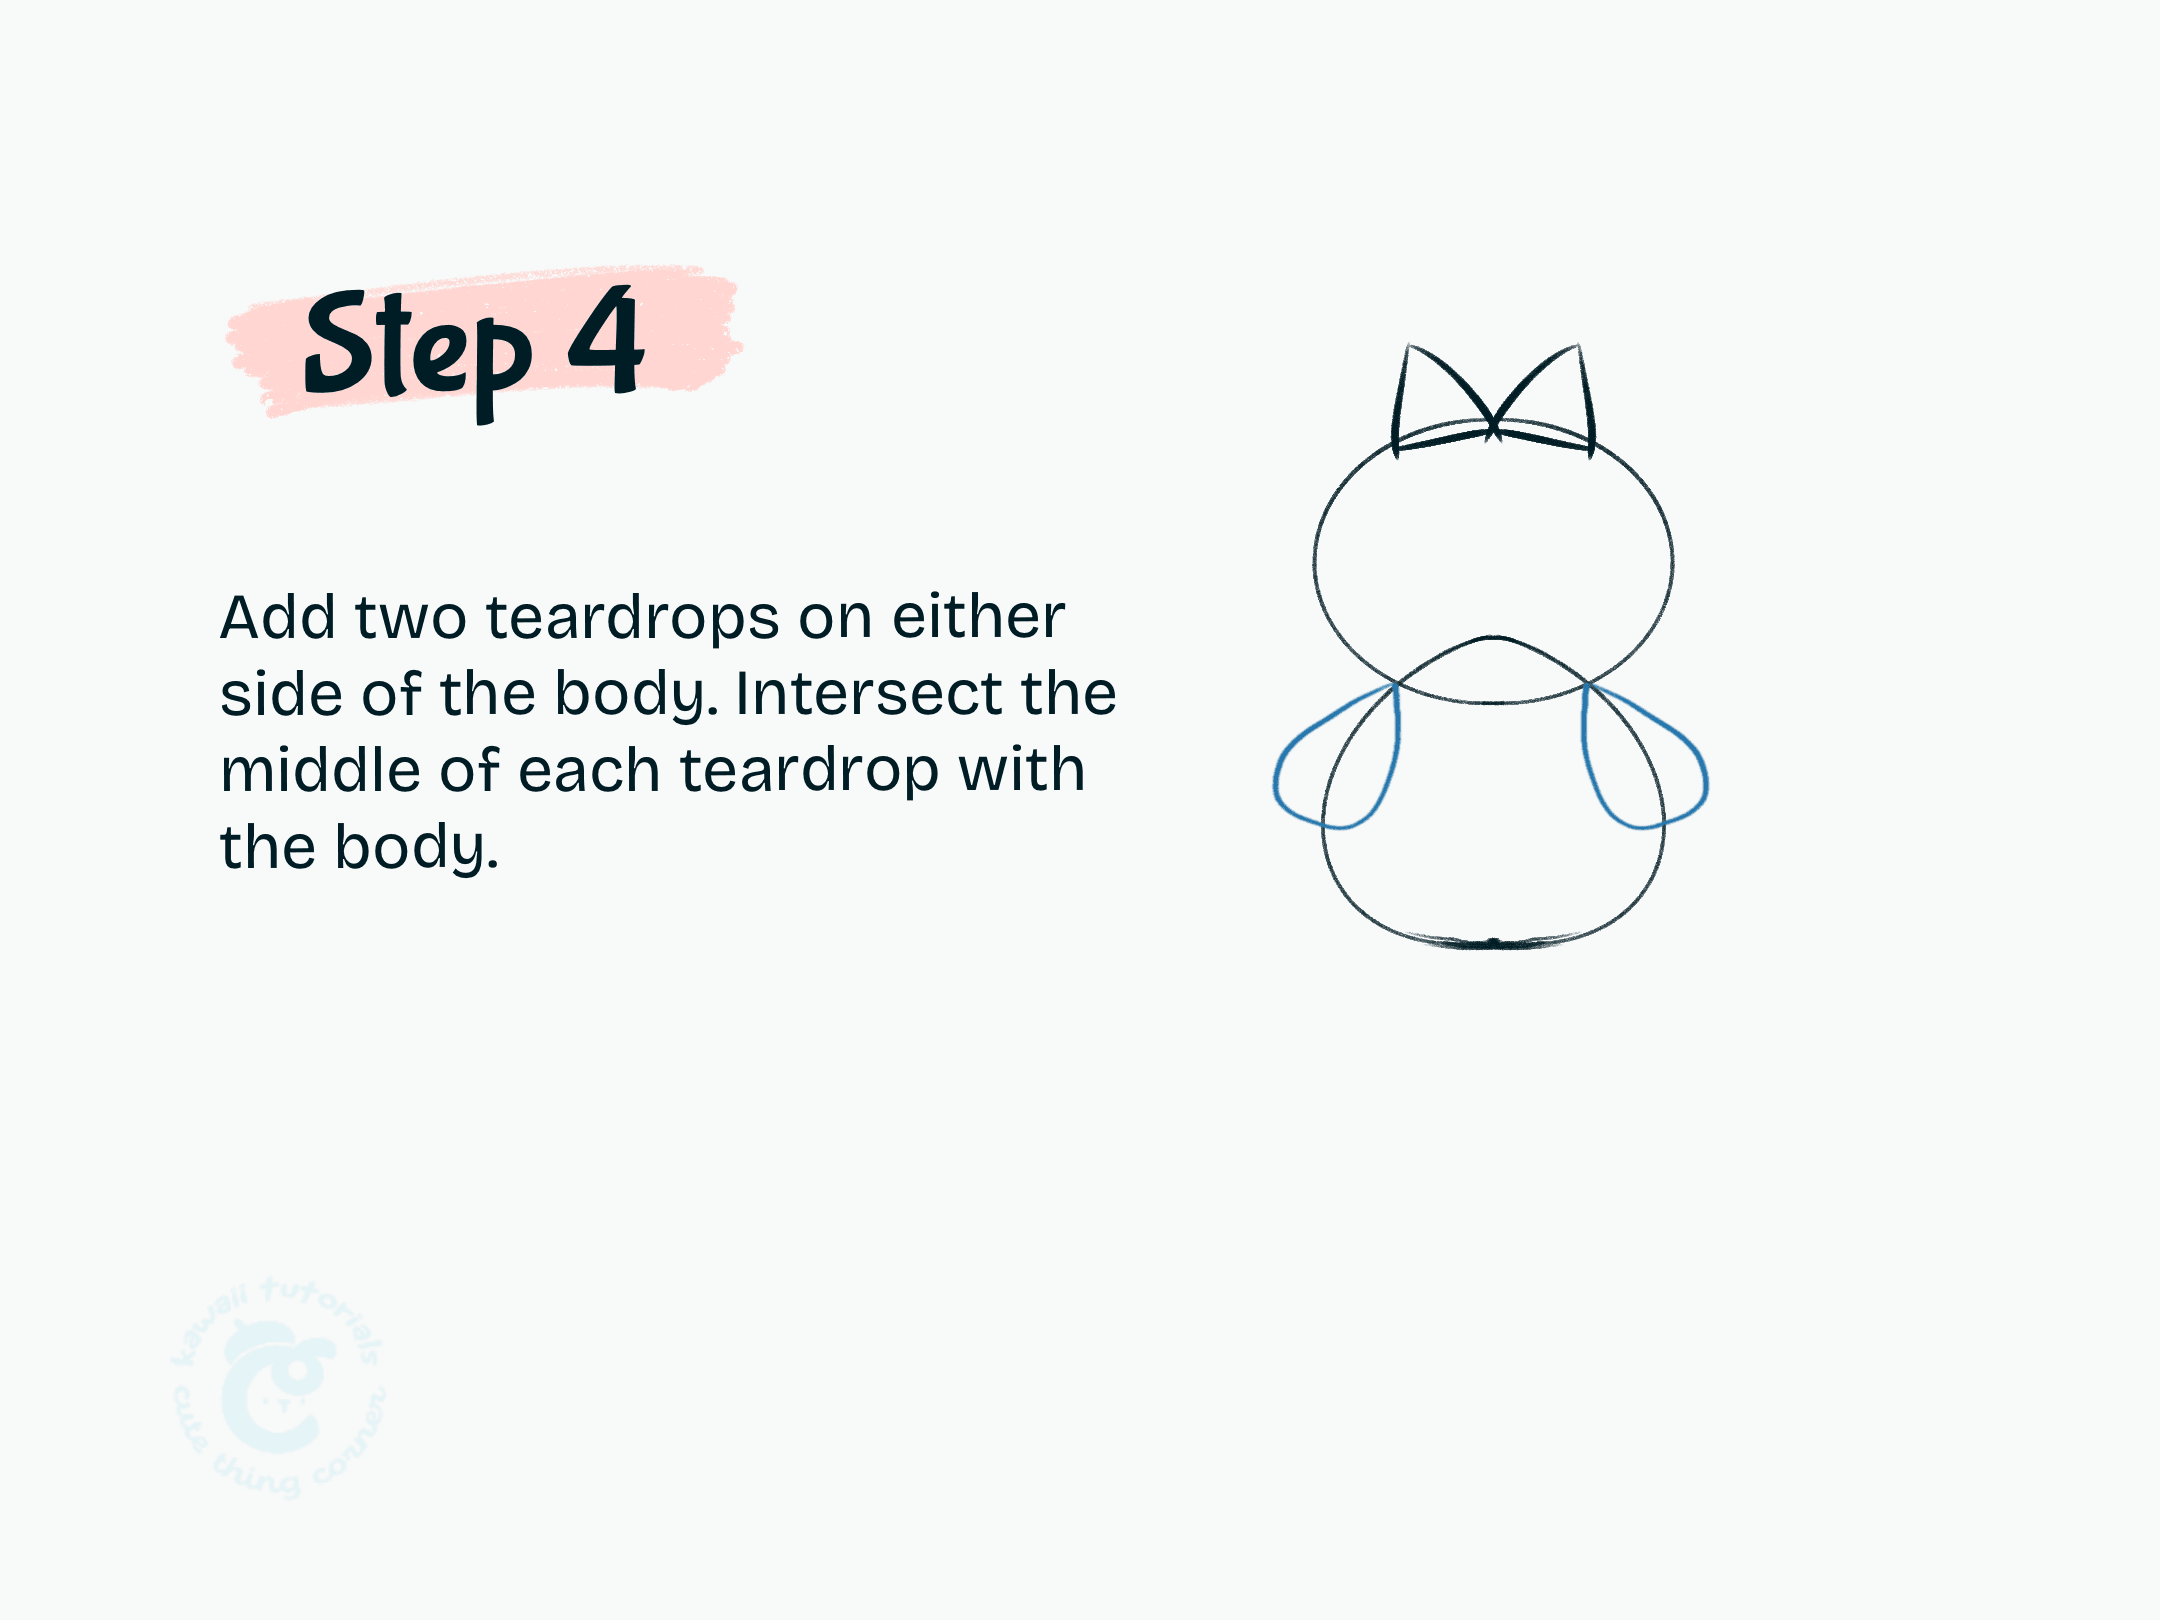
Add the arms
#Step 5: Shape the legs
Now draw a trapezoid for the legs. Make sure the bottom is narrower than the top.

Step 5 Draw a trapezoid for the legs, the bottom narrower than the top
#Step 6: Add Garfield’s feet
Draw two wide ellipses at the base of the legs to form his chunky feet.
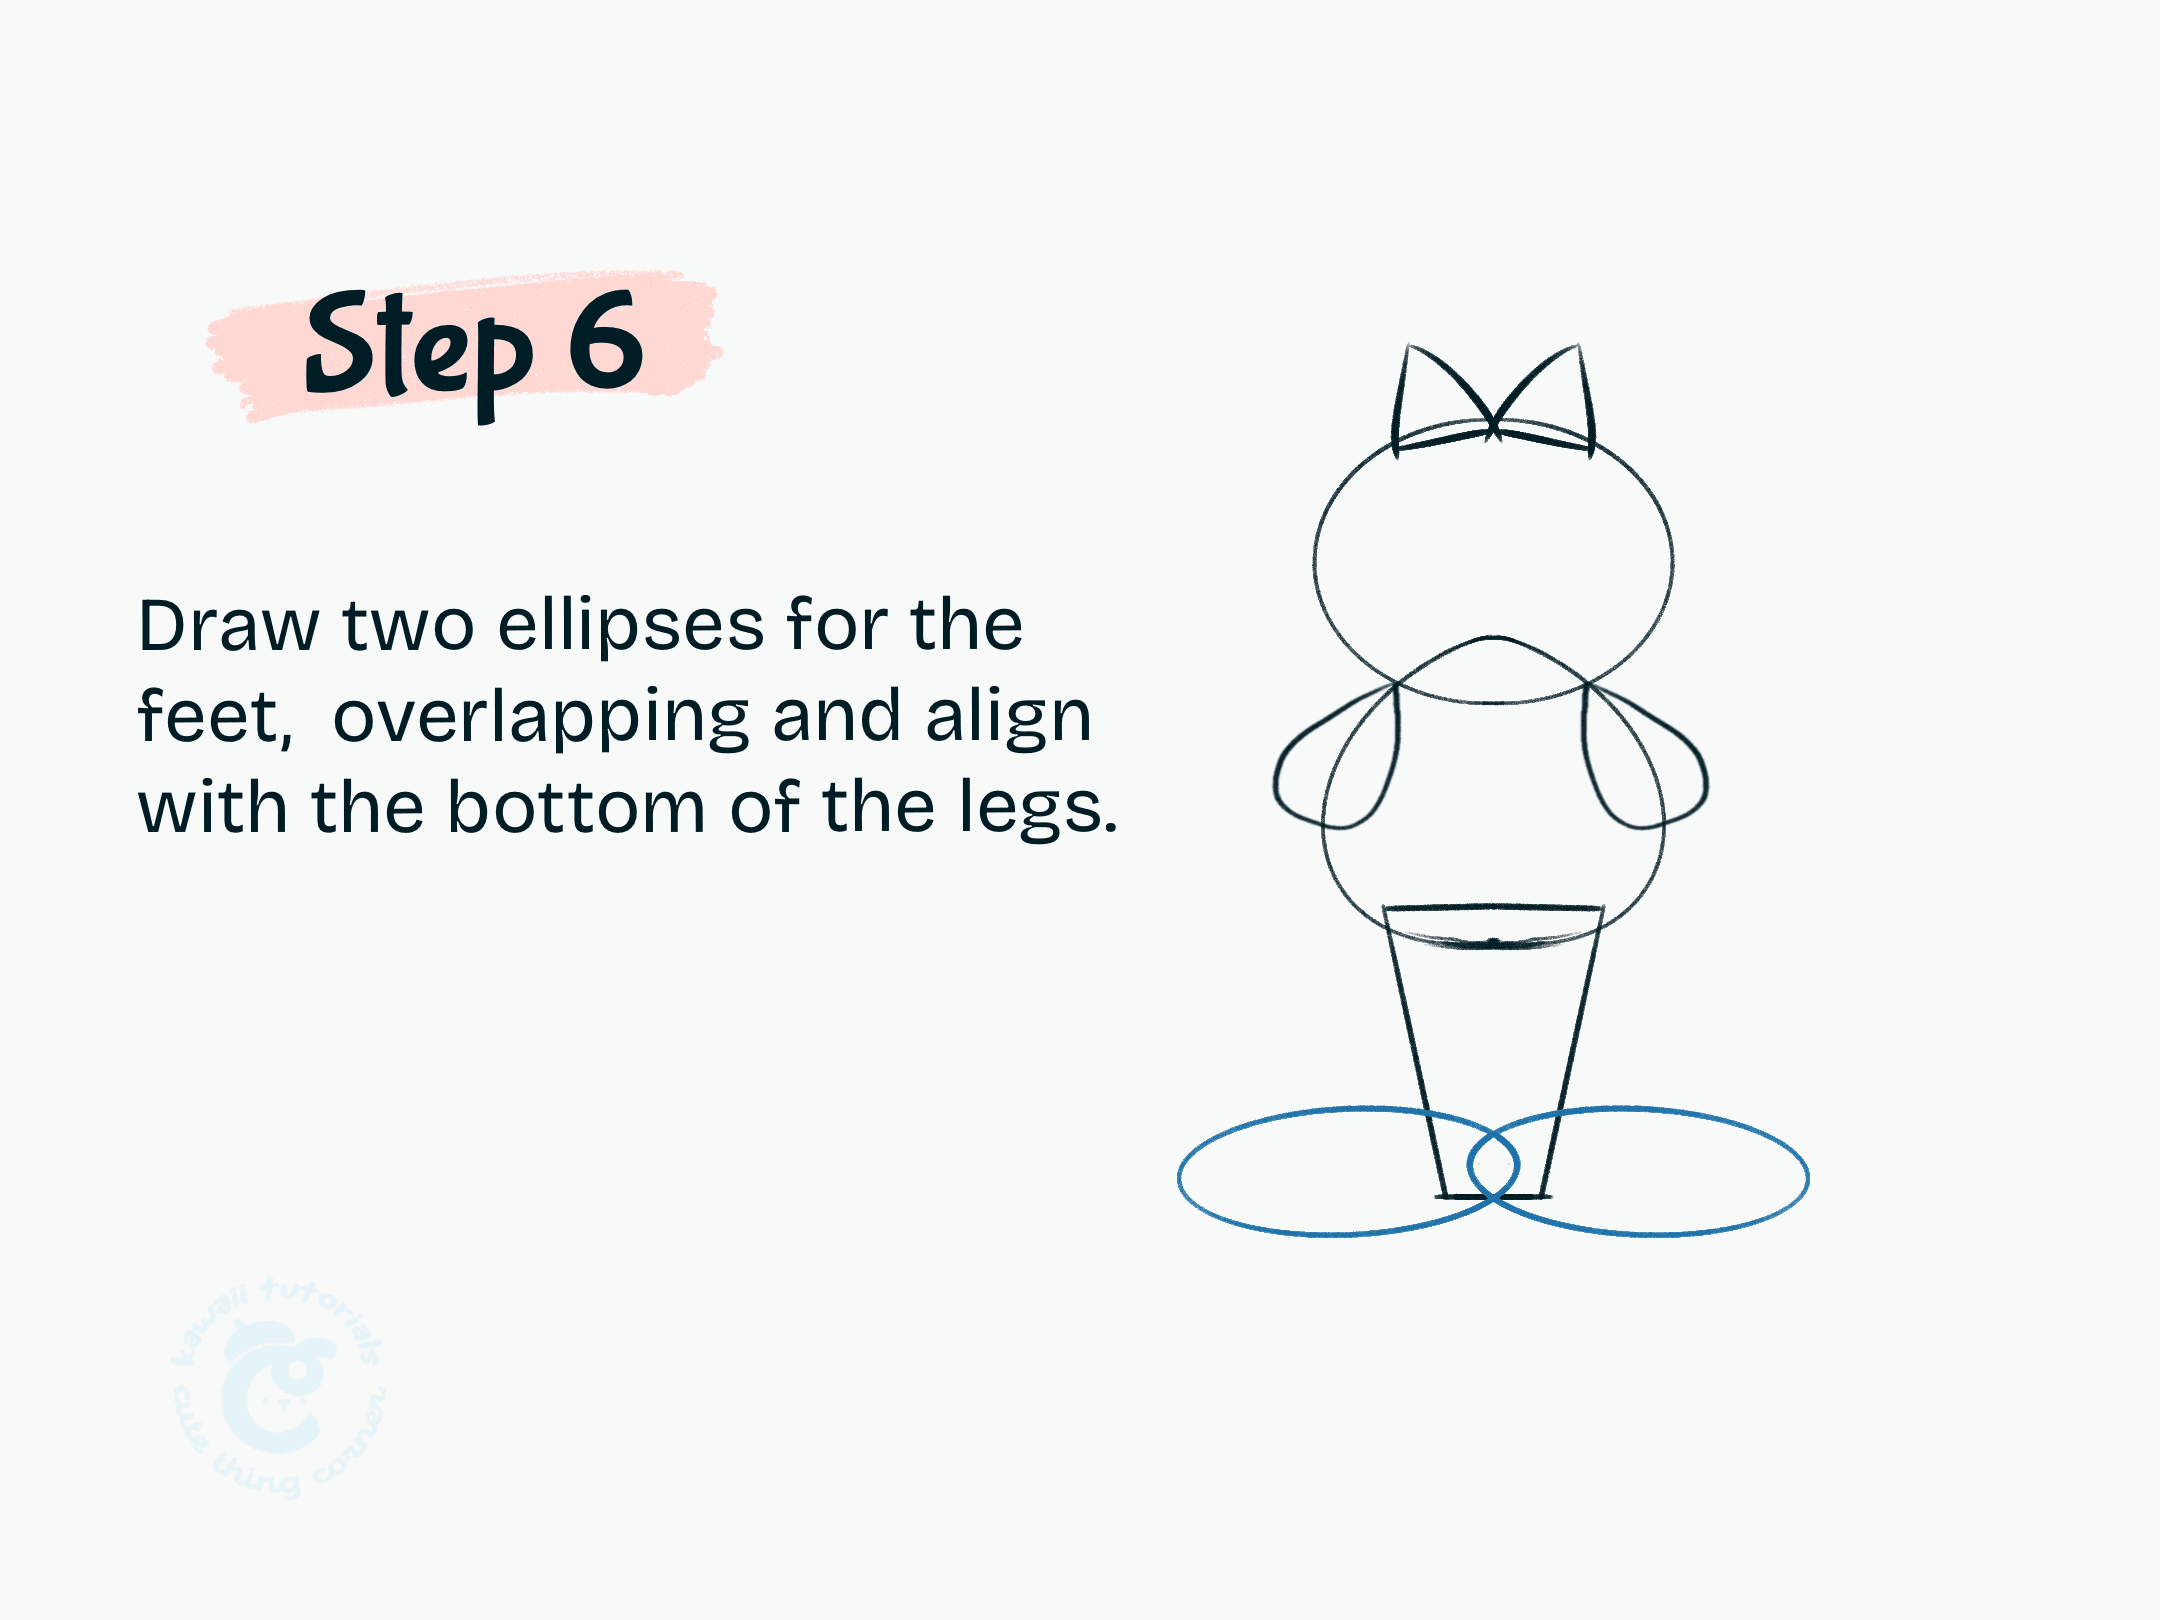
Add Garfield’s feet
#Step 7: Draw the tail
From behind the legs, add Garfield’s tail curving upward. Use long, wavy lines.
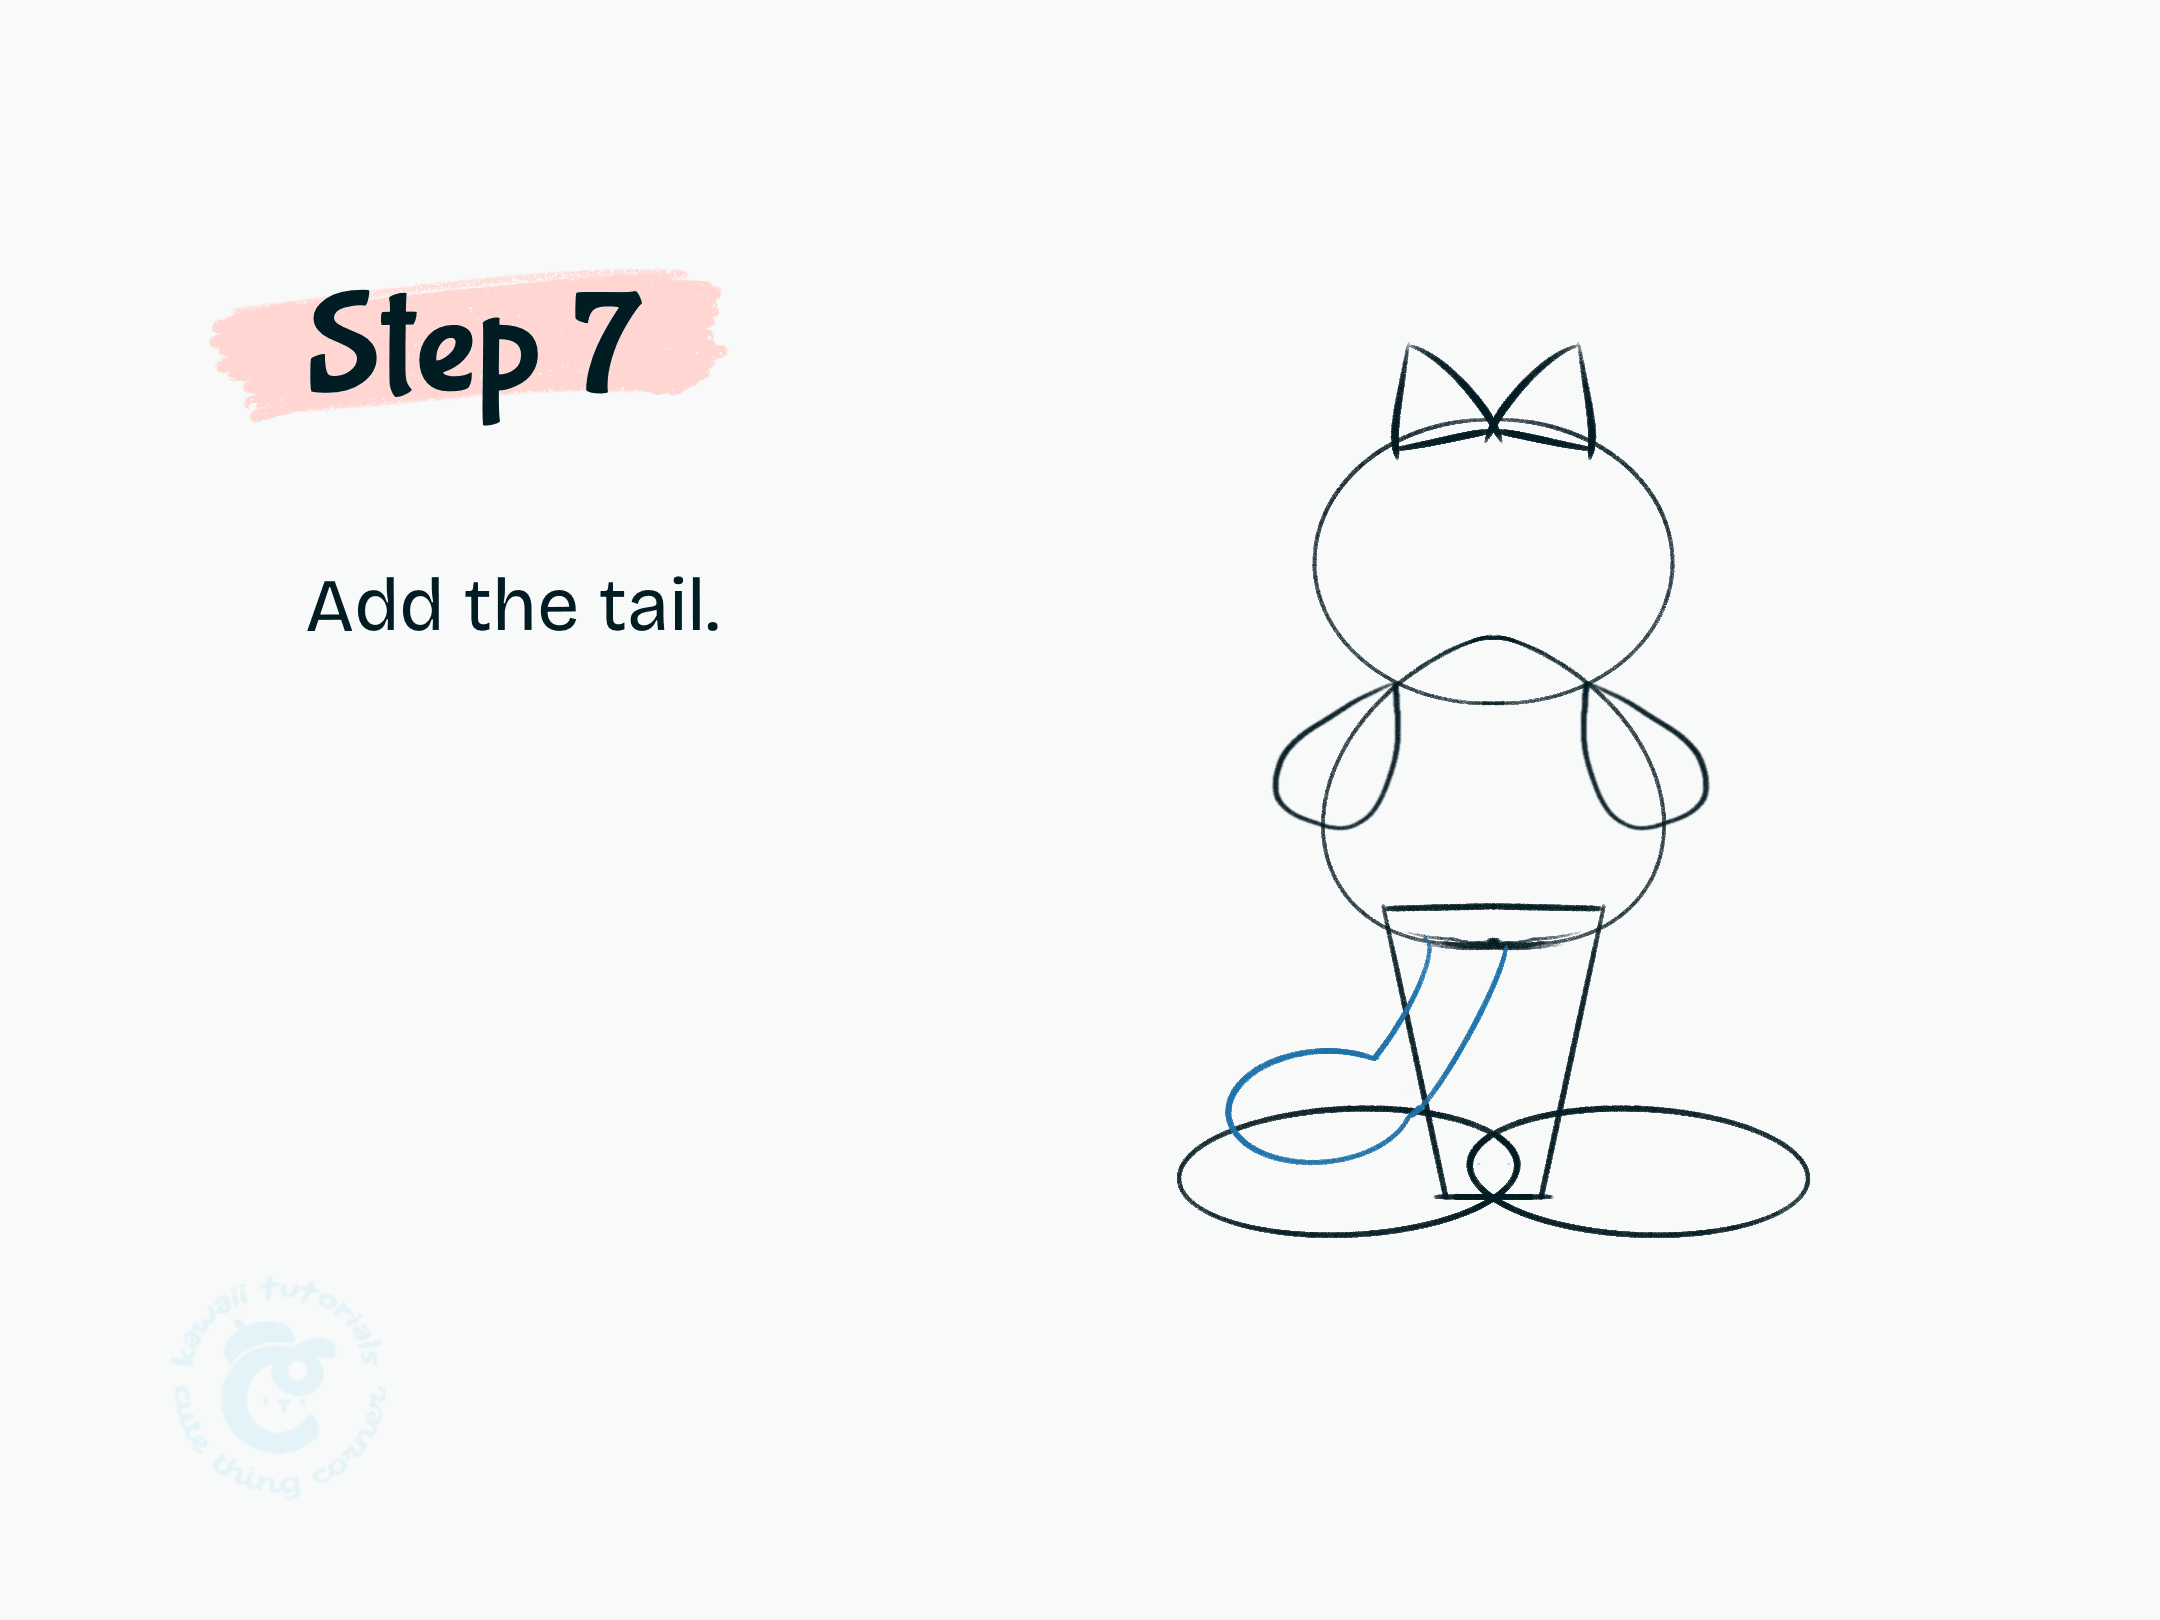
Draw the tail
#Step 8: Outline the full shape
Follow the outermost edges and smooth the shapes together. Soften any sharp corners to get that classic cartoon style.
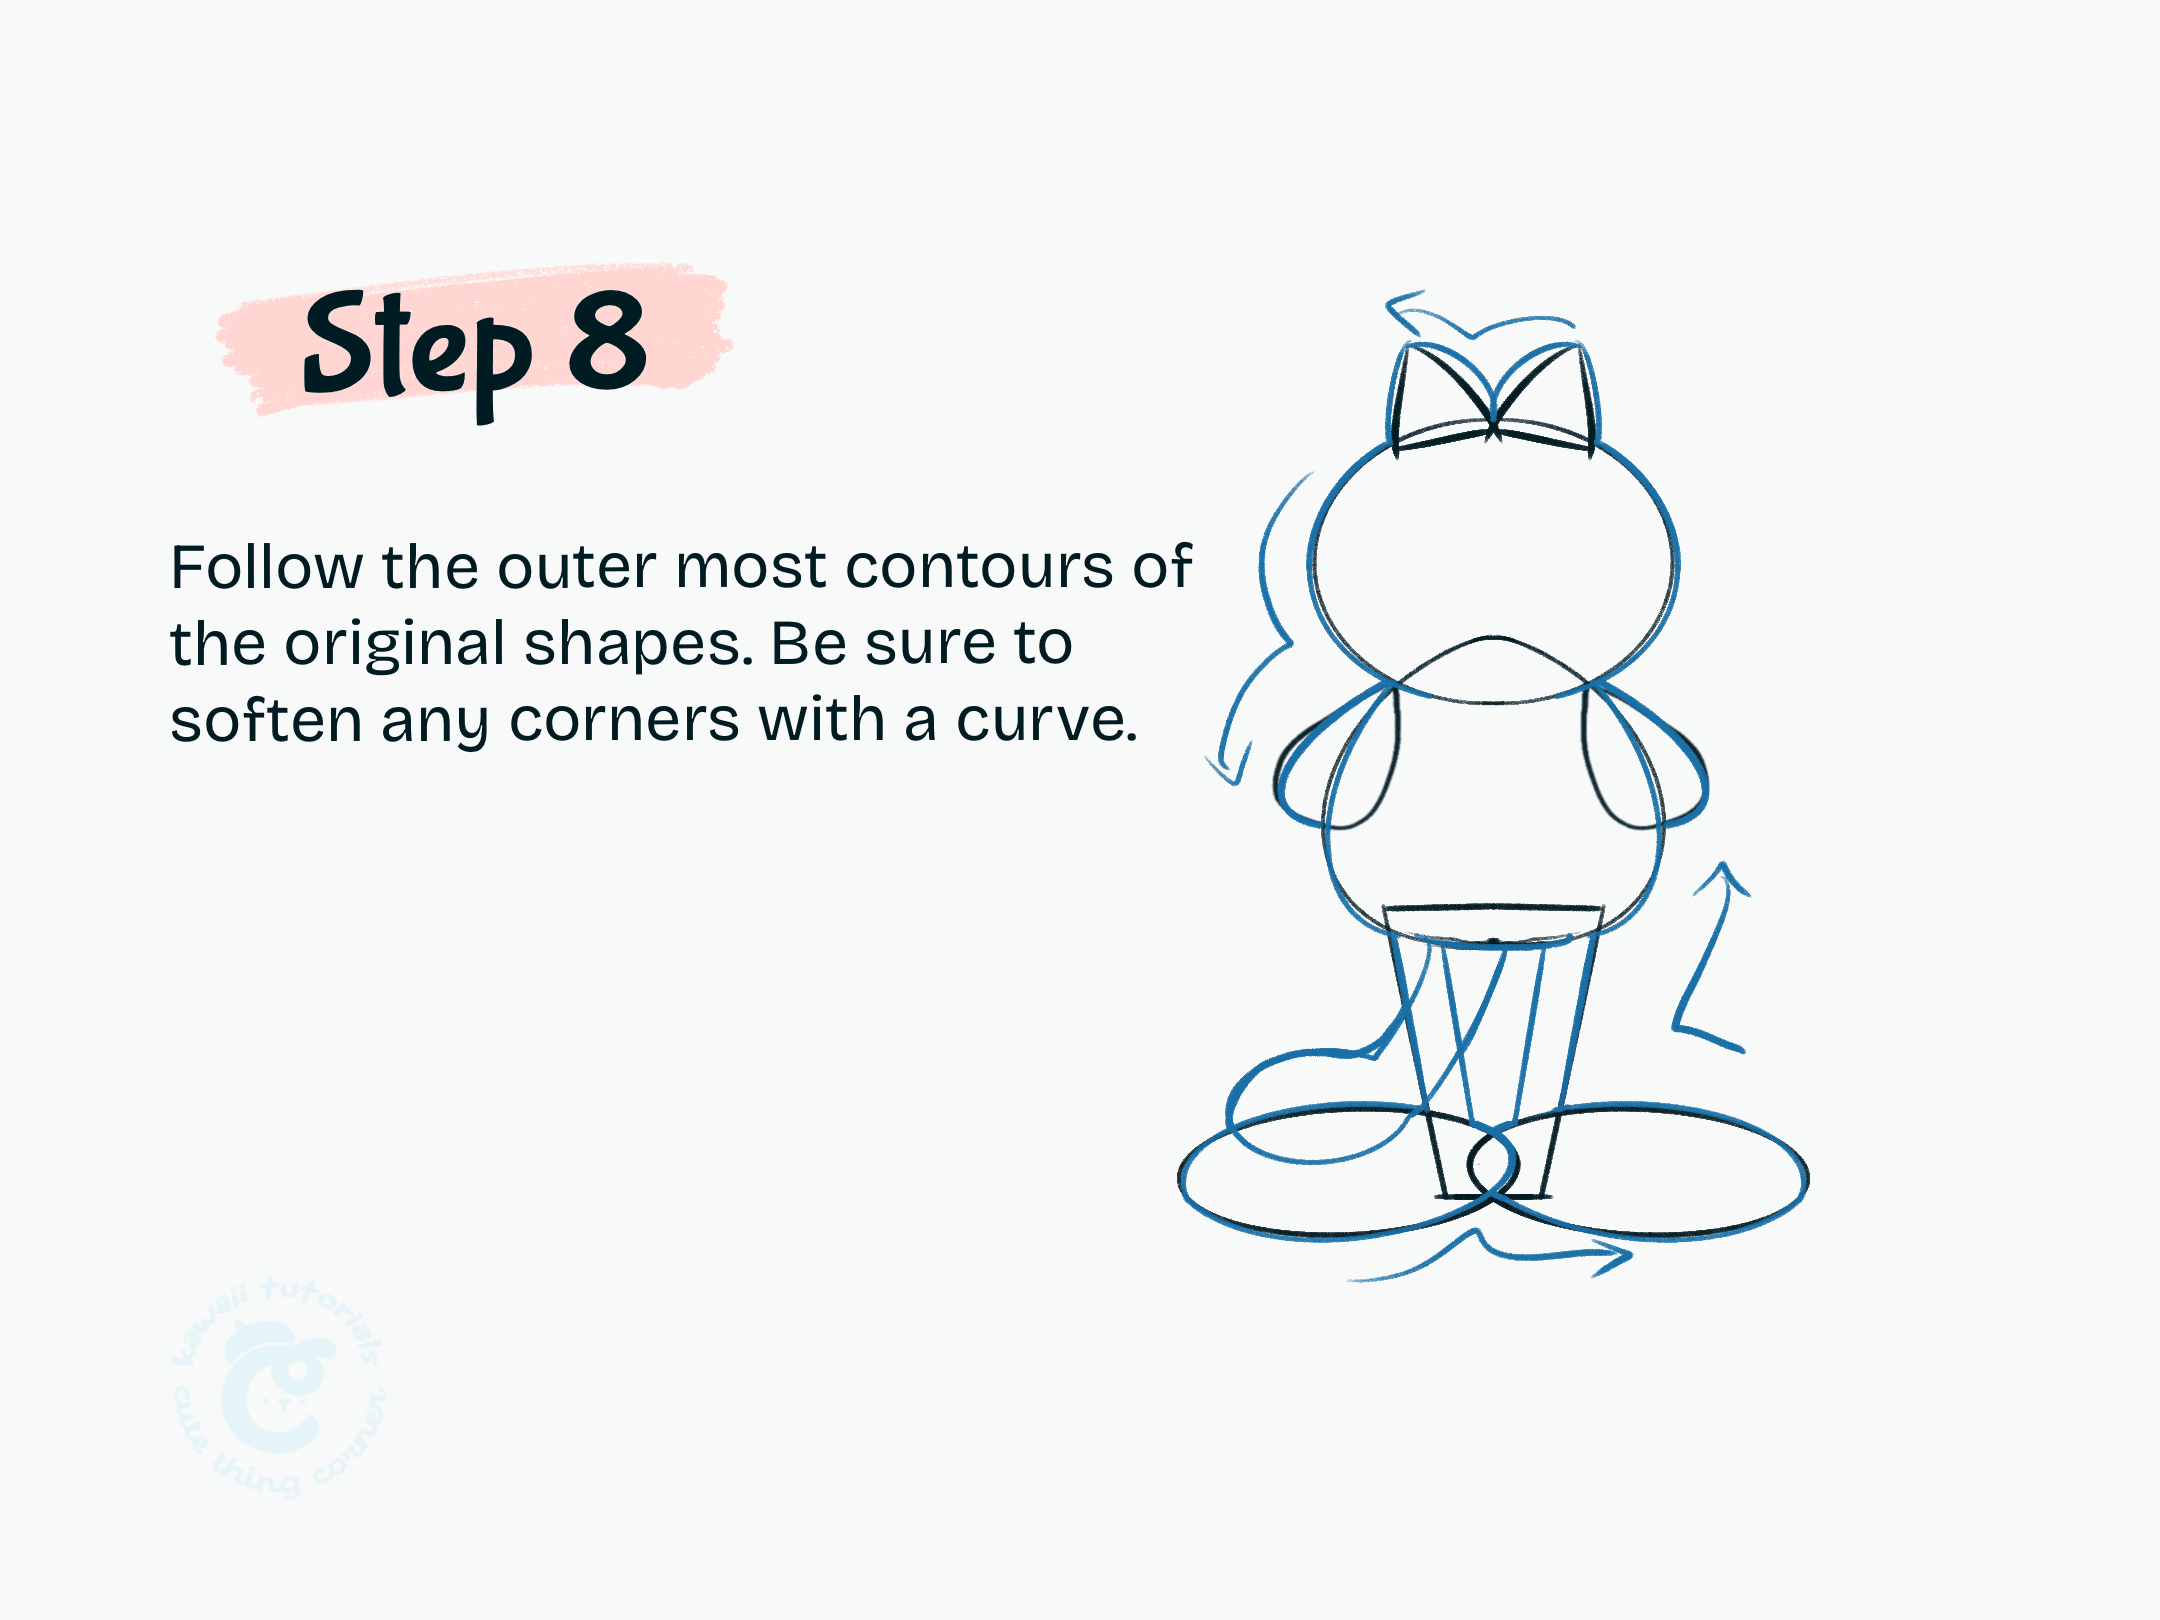
Step 8 Follow the outer most contours of the original shapes
#Step 9: Add the face
Time for that iconic expression! Draw Garfield’s sleepy eyelids, wide cheeks, and cute round nose. Use the guides to place them evenly.
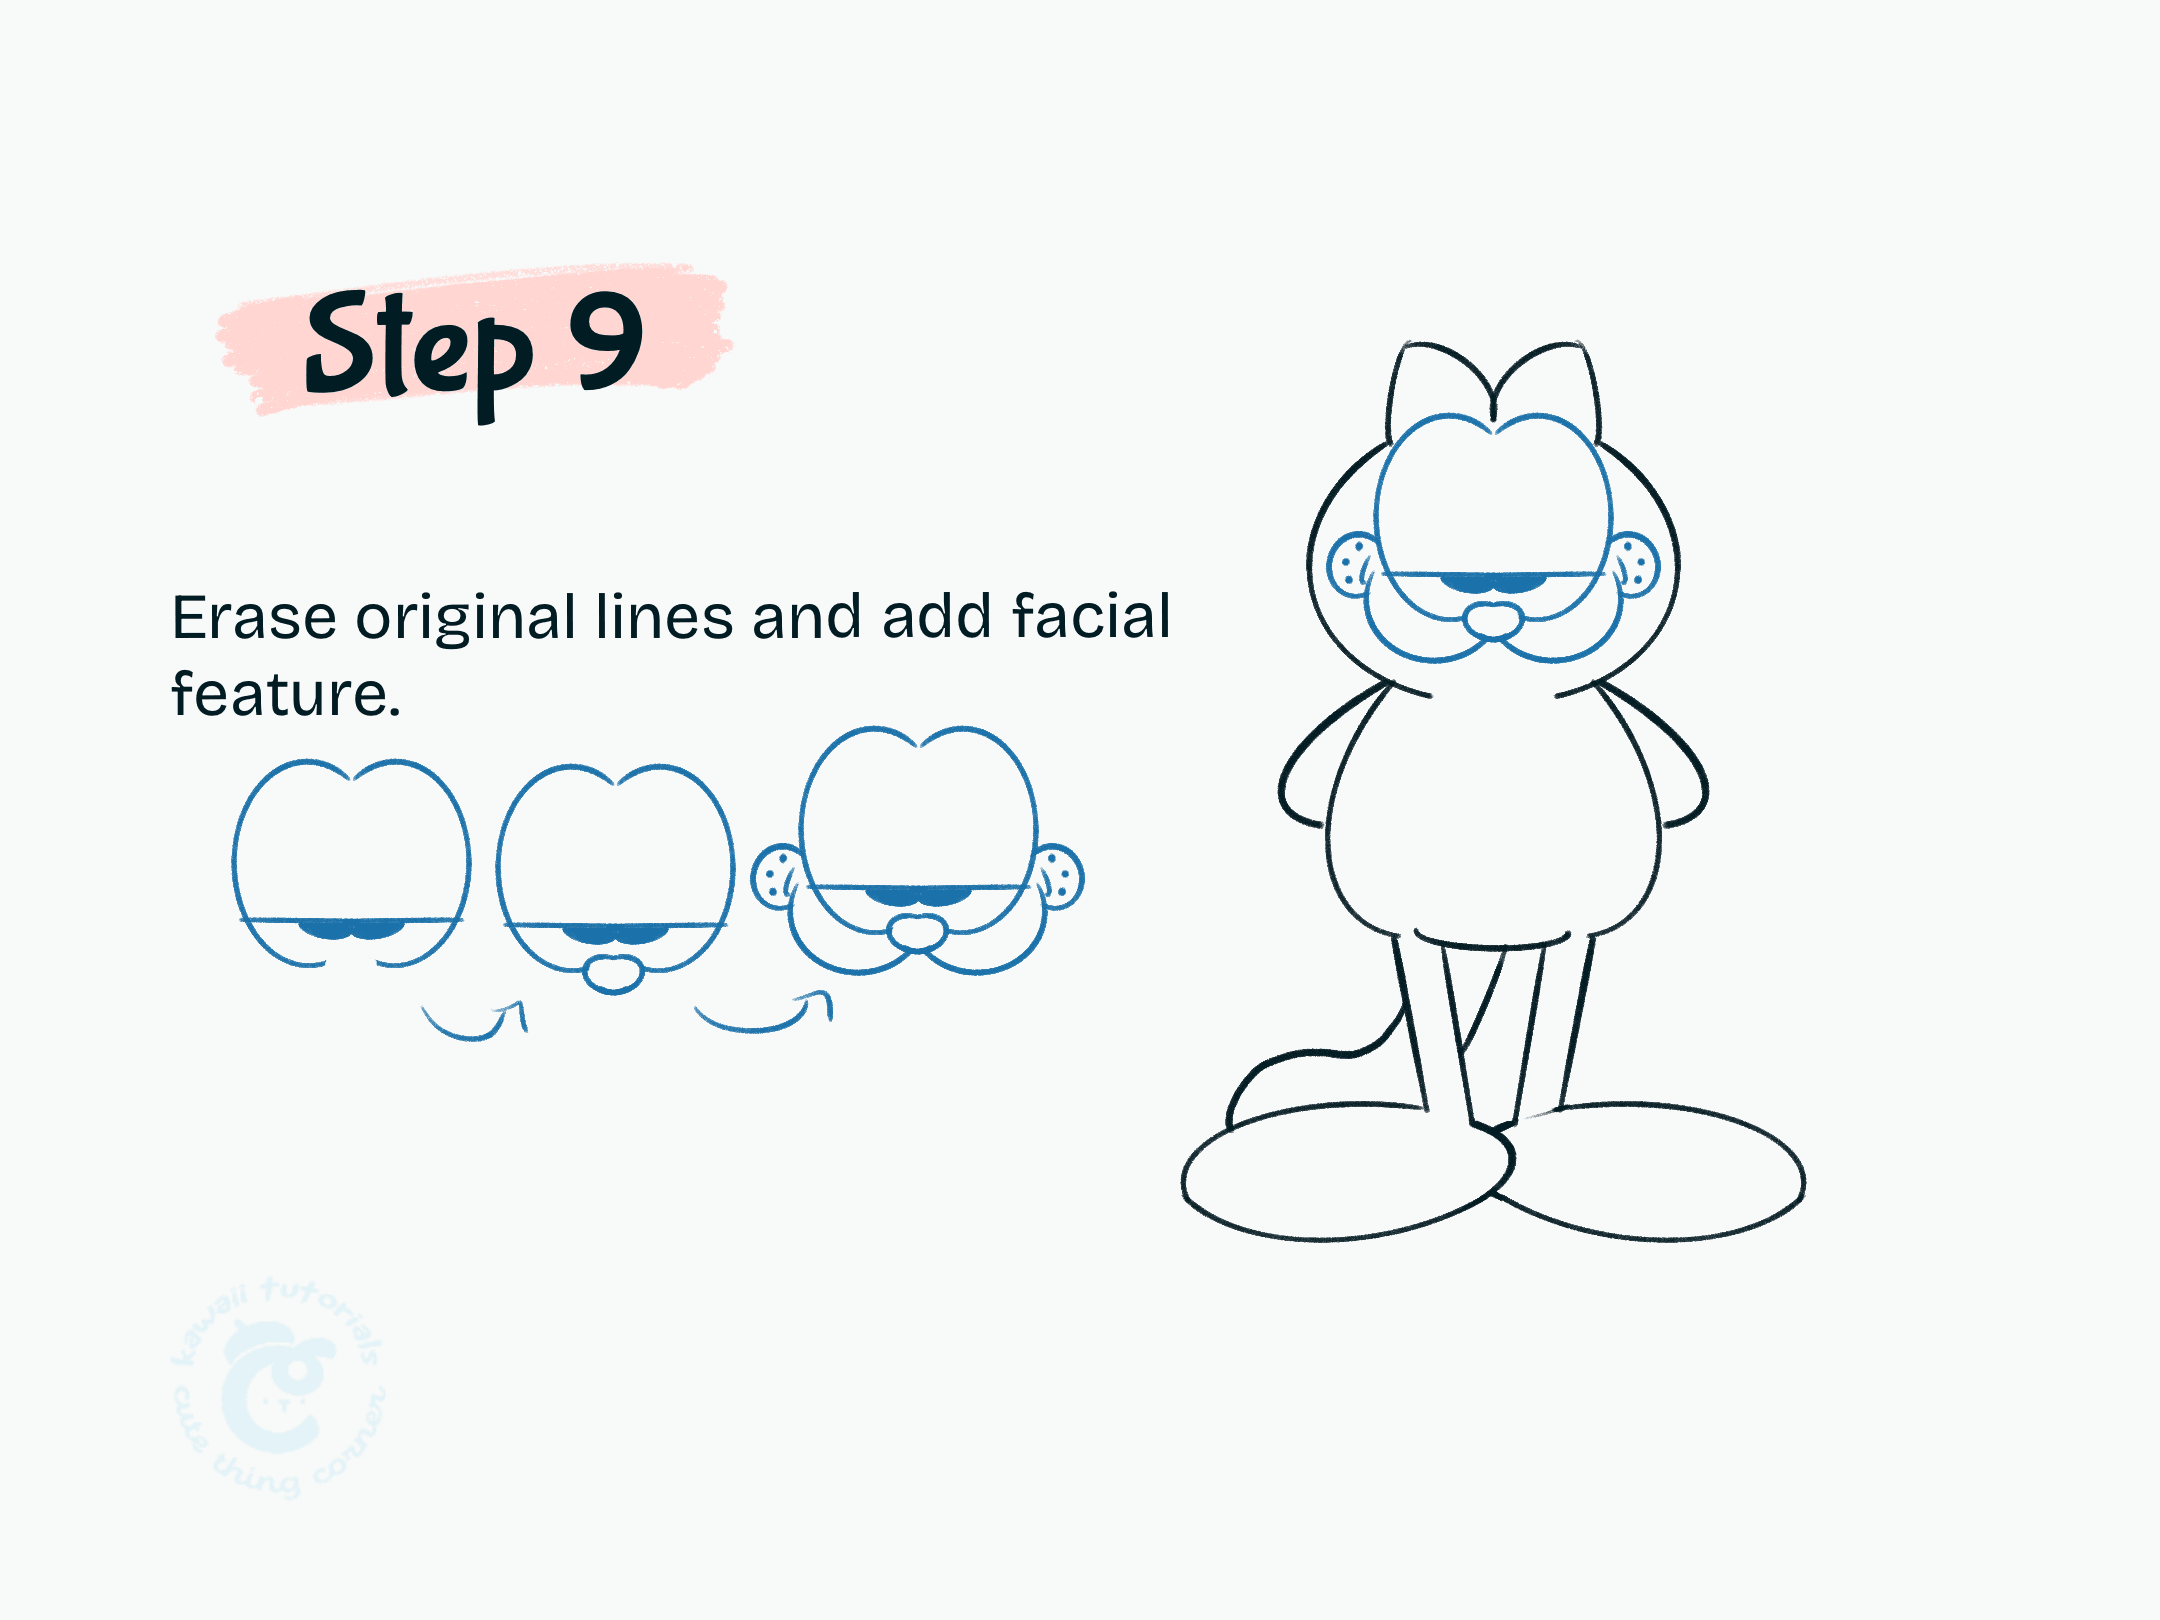
Add the face
#Step 10: Add fur and stripes
Draw fur details, the inside of the ears, and Garfield’s signature stripes across his face, back, and tail.
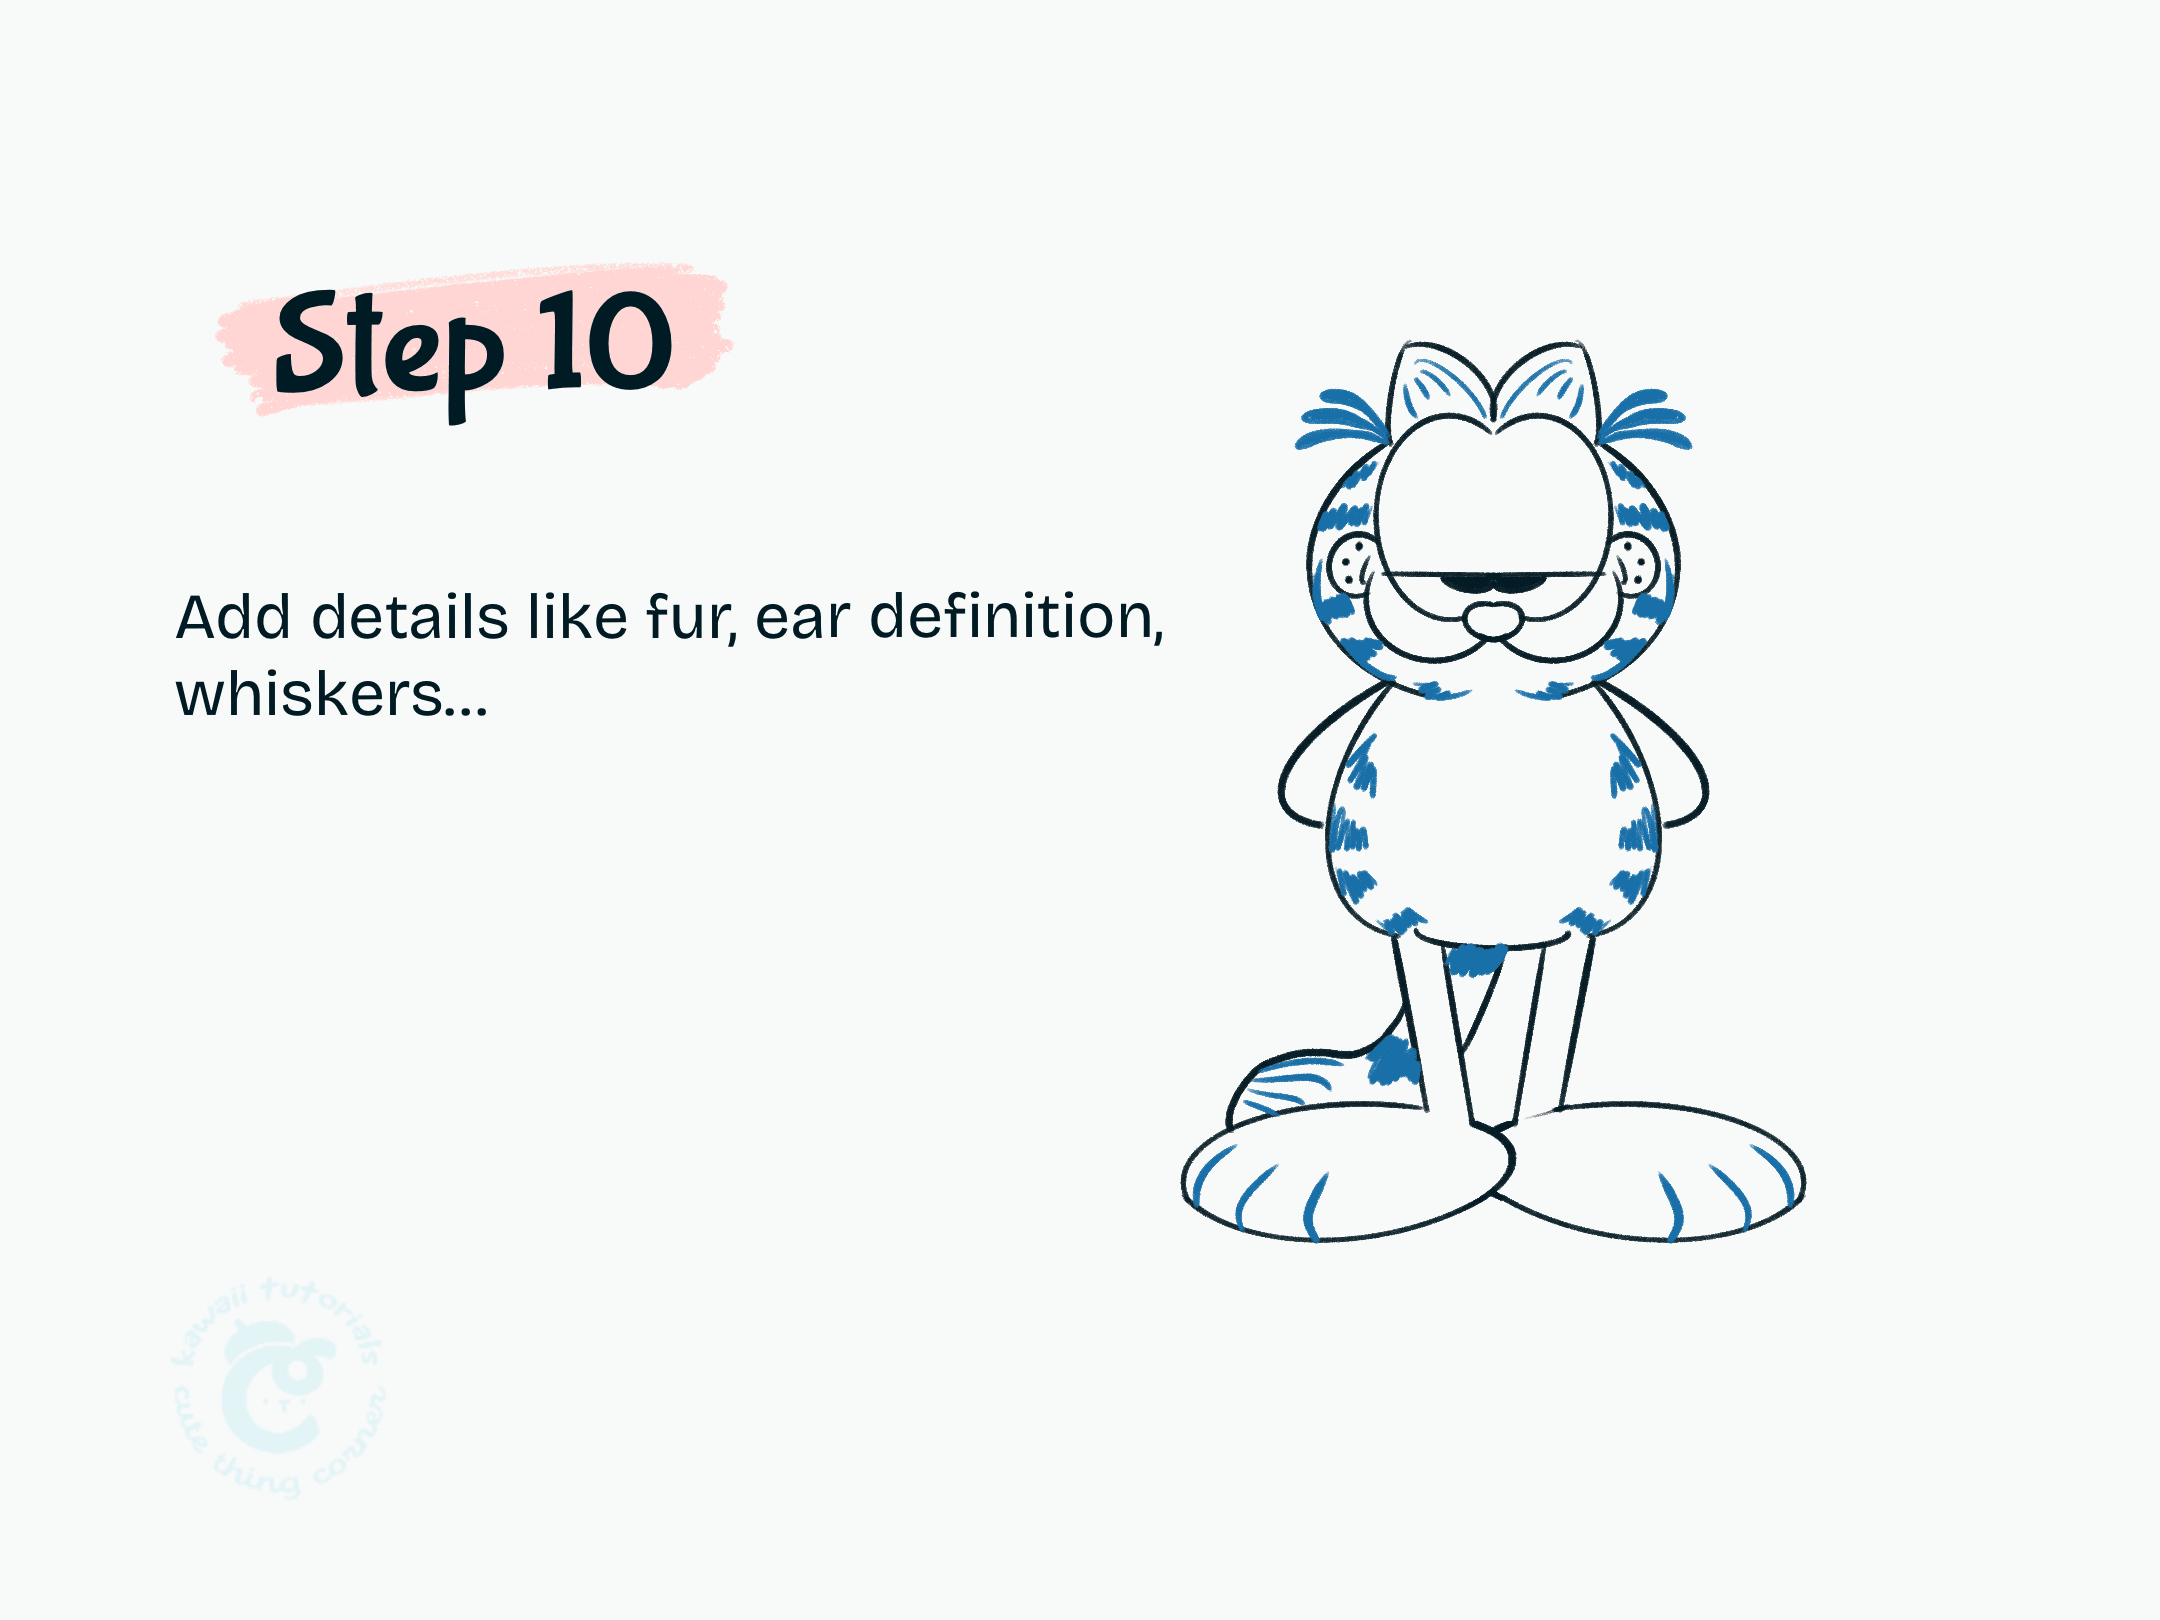
Step 10 Add details like fur, ear definition, whiskers
#Step 11: Color your Garfield!
Use orange for his fur, black for the stripes, and a soft pink for cheeks or nose if you’d like. Now you’ve got a sassy Garfield full of attitude!
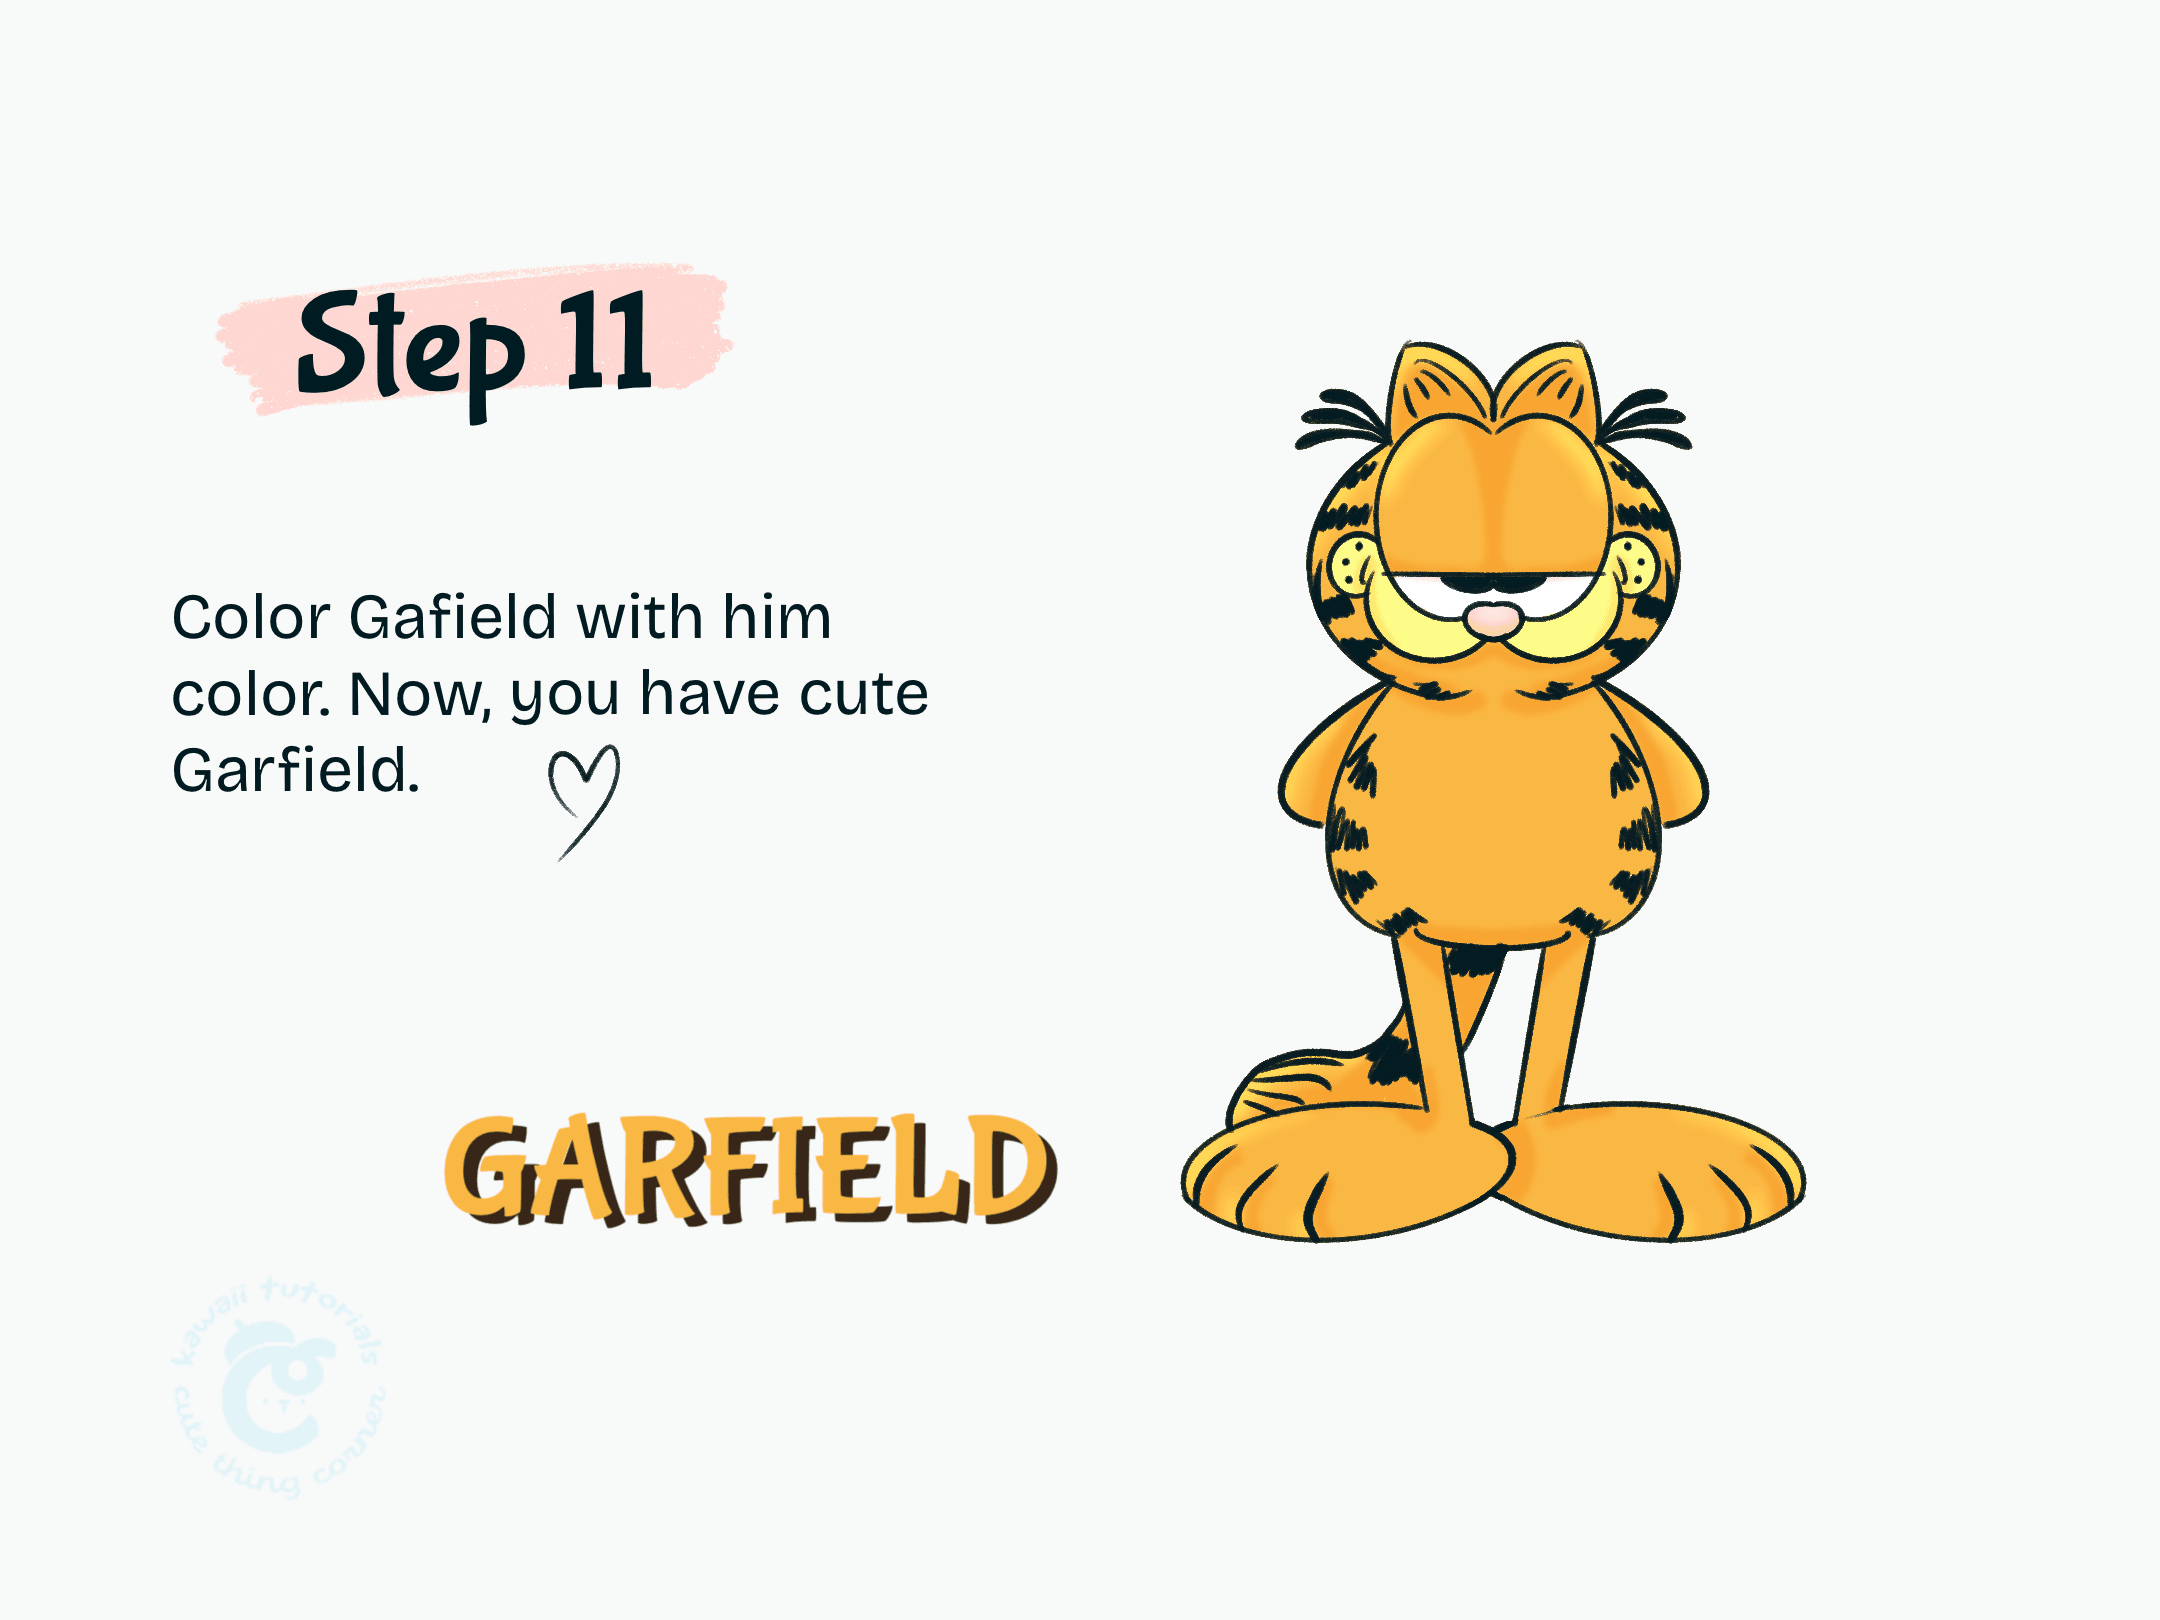
Color your Garfield!
Now that you’ve drawn your very own Garfield, why stop here? There’s a whole world of cute, chubby, cheeky characters waiting for you to bring them to life. Whether it’s puppies, desserts, or spooky ghost pups — your next sketch might be your cutest one yet!
So grab your pen, stay cozy, and let’s keep doodling together. Happy drawing!
Follow full step-by-step drawing Garfield the cat:
Tutotial to draw Garfield