In this easy step-by-step tutorial from Cute Thing Corner, you’ll learn how to draw Hello Kitty in sweater!
Perfect for fans of Hello Kitty and cute character art, this guide will walk you through each simple step to capture her classic charm with a cozy twist.
Grab your pencils, and let’s start drawing Hello Kitty in her new outfit!
*The original character in this post is copyrighted by Sanrio. The character’s design has been reimagined to inspire seasonal drawing. This post is created solely for entertainment and educational purposes. I hope you enjoy a creative experience with me!
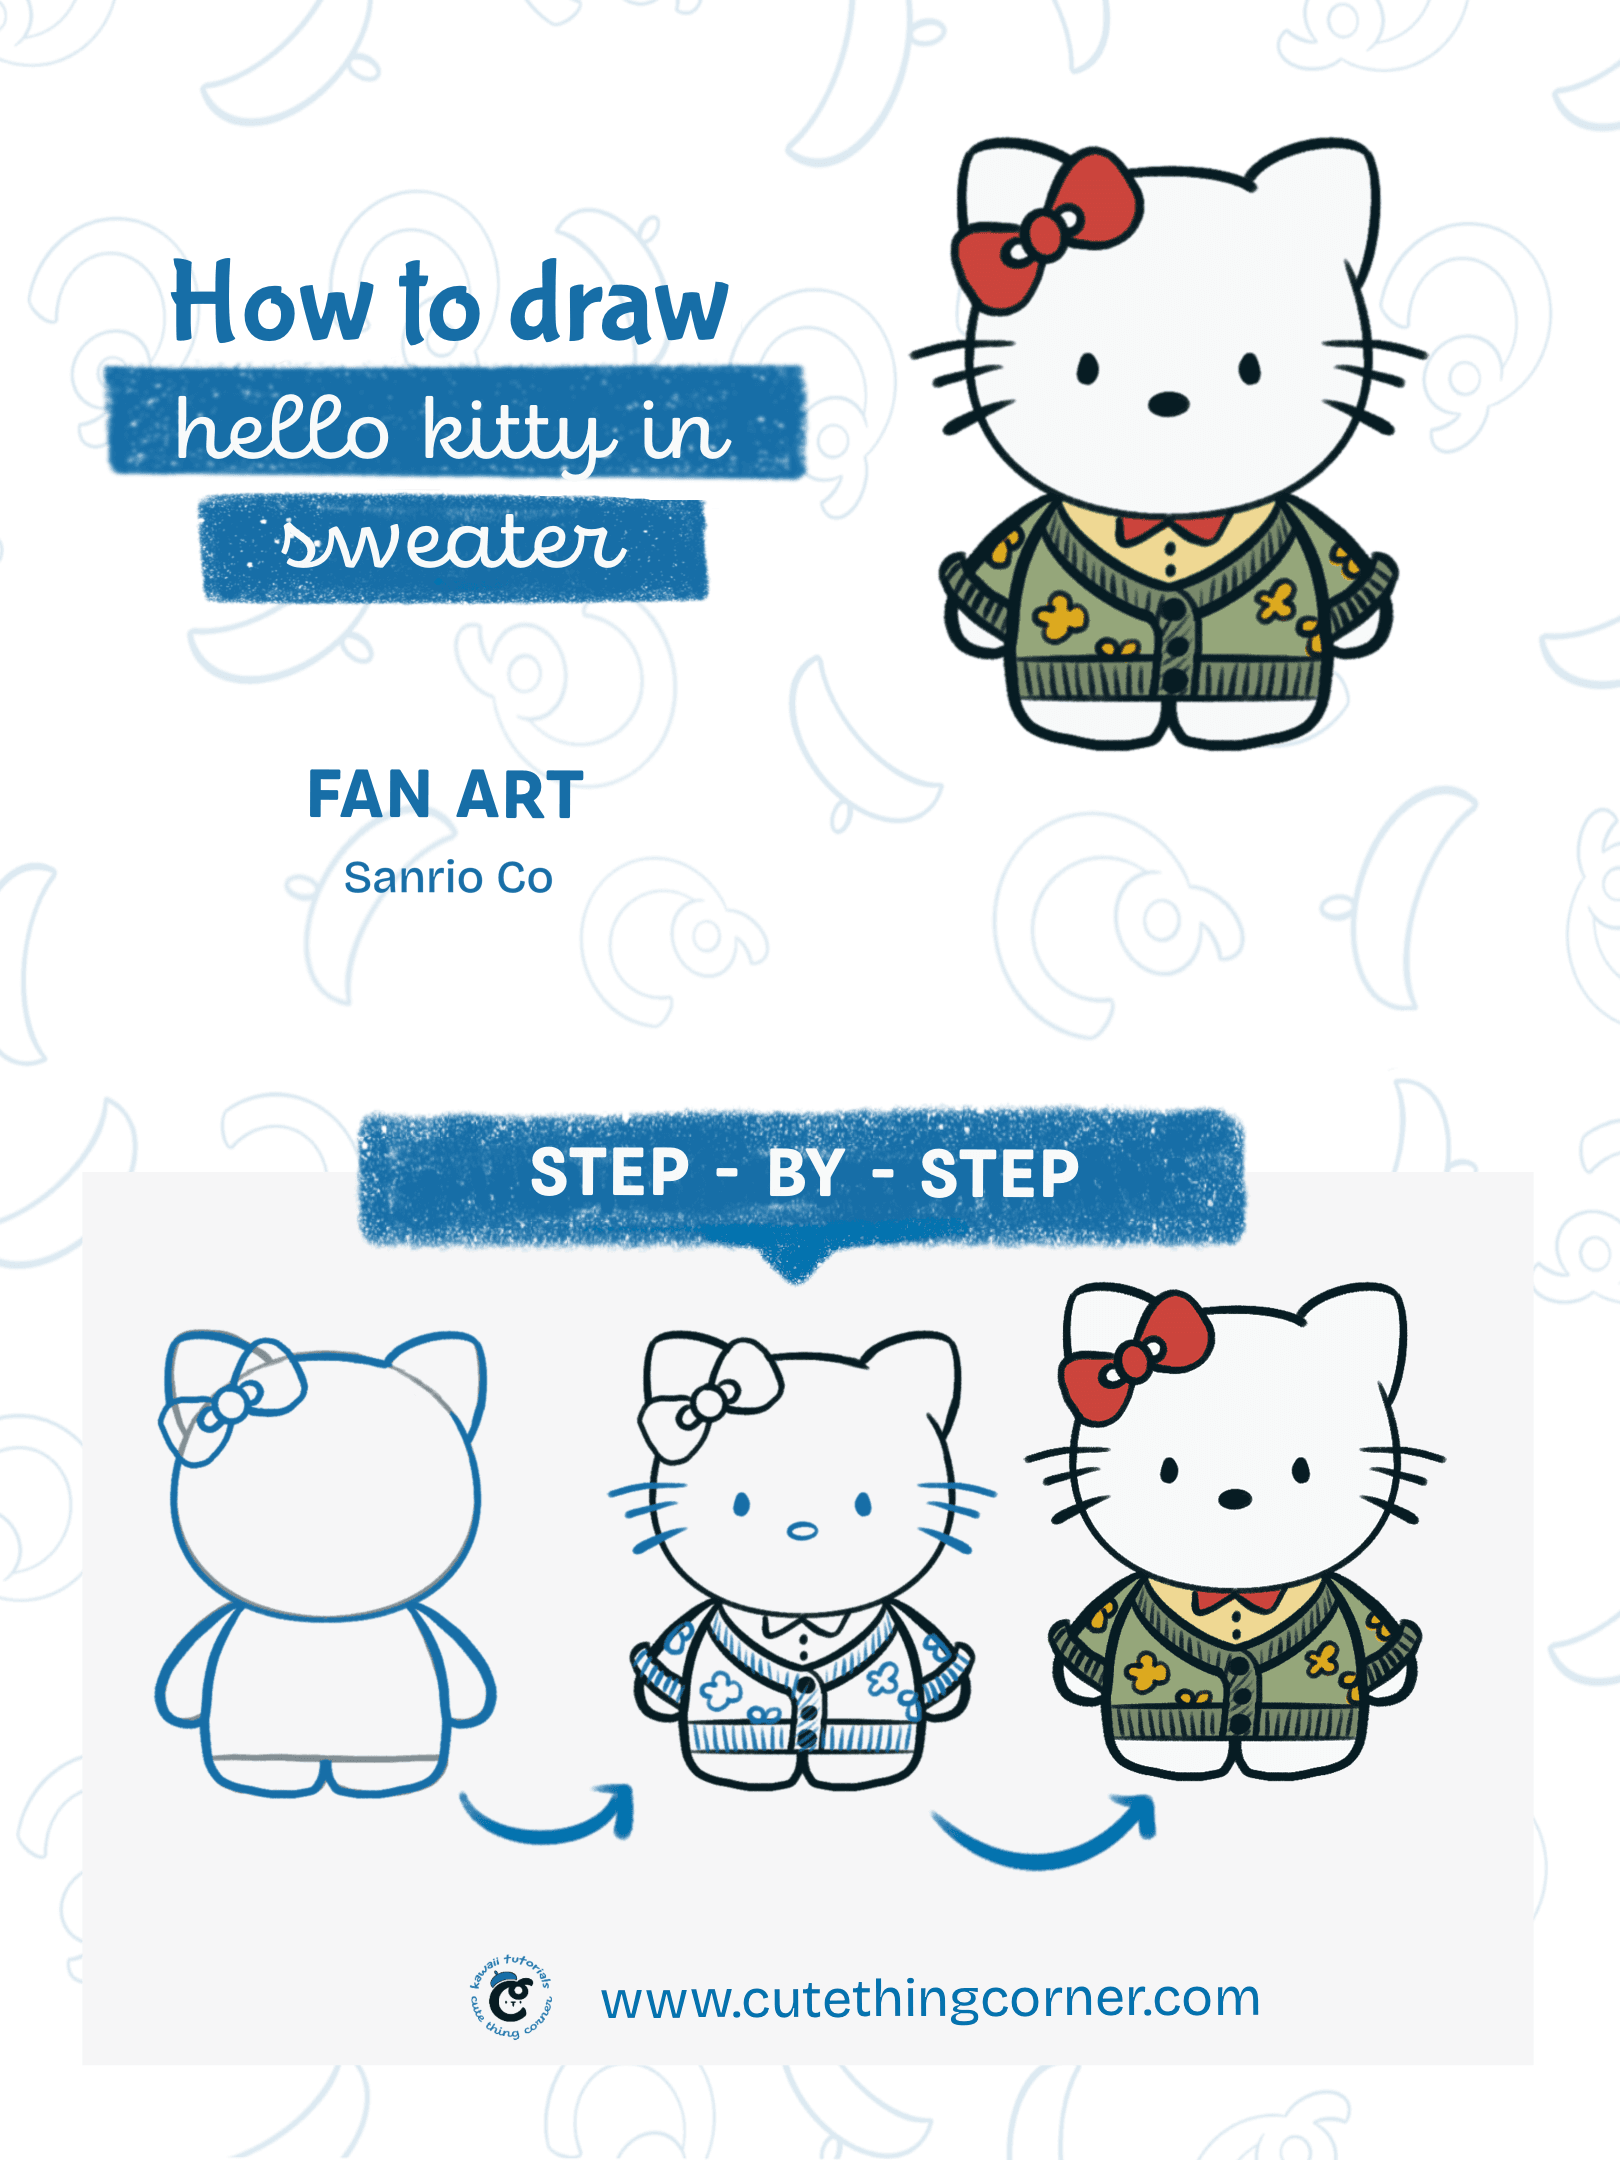
How to draw hello kitty in sweater
You just have paper and a pencil to start. Color will belong to your favorite or using an Ipad and pencil.
Whatever makes you comfortable to start.
Now jump into step-by-step to draw Hello Kitty in sweater.
#Step 1: Draw a round circle shape for the head.
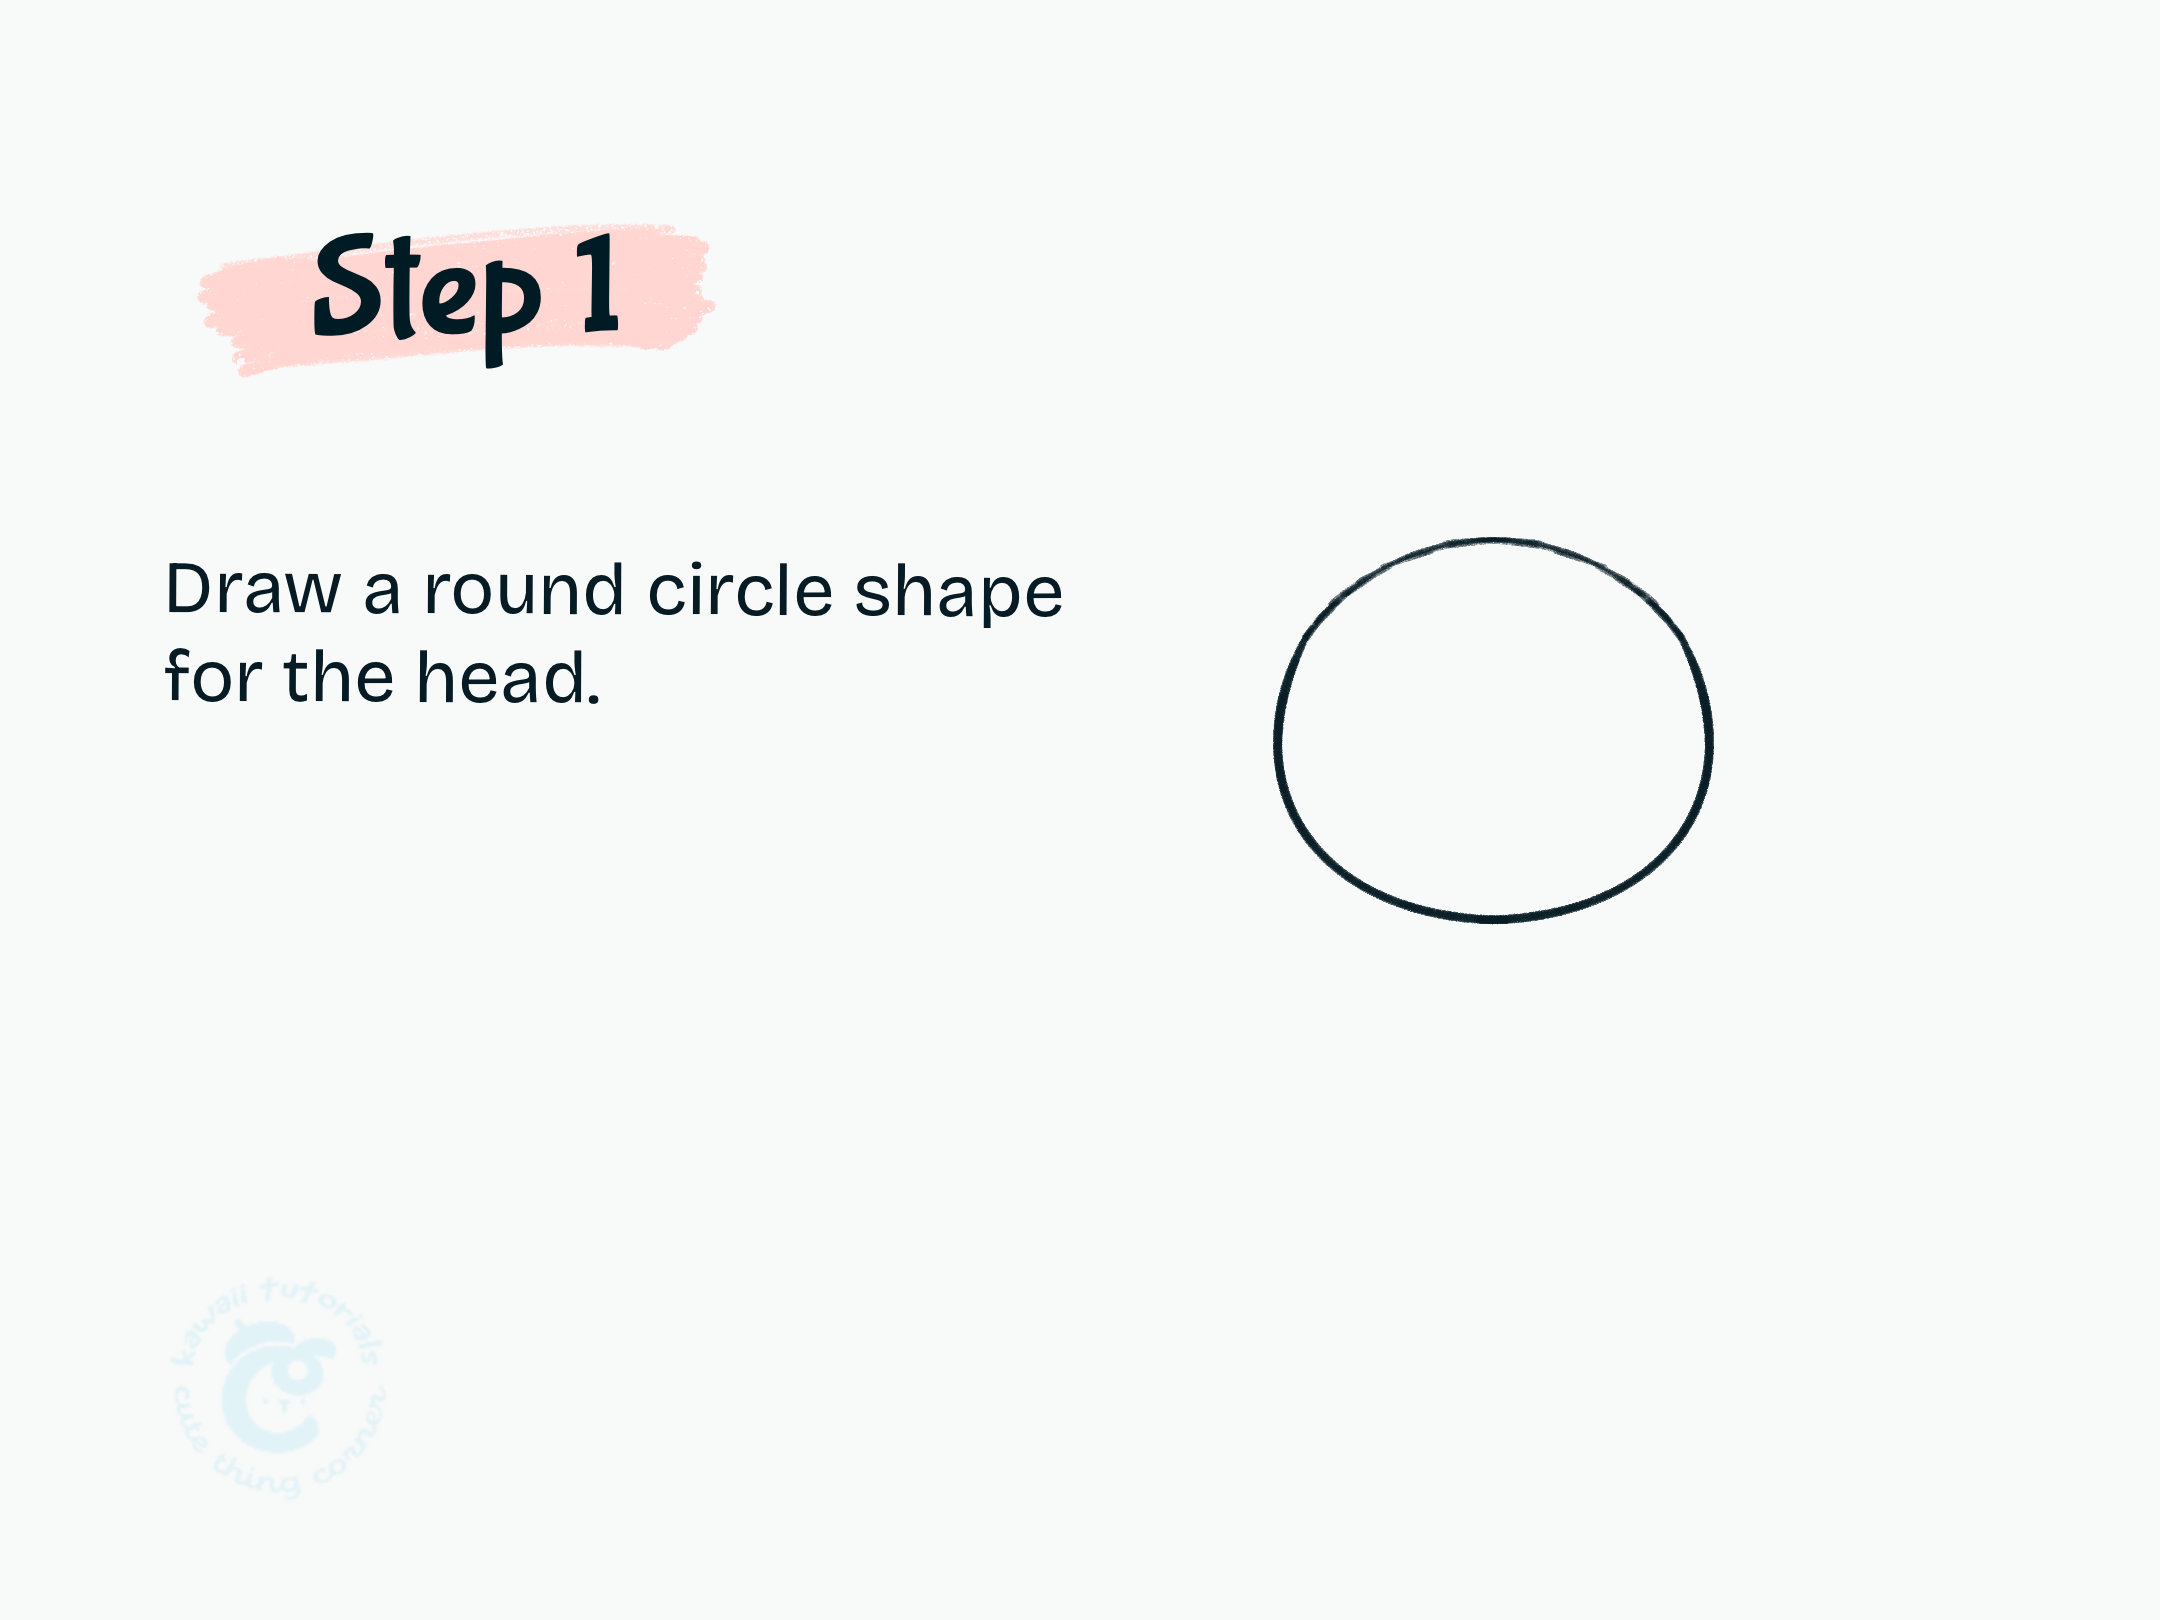
Step 1 Draw a round circle shape for the head.
#Step 2: Draw two triangular shapes on top for the ears.
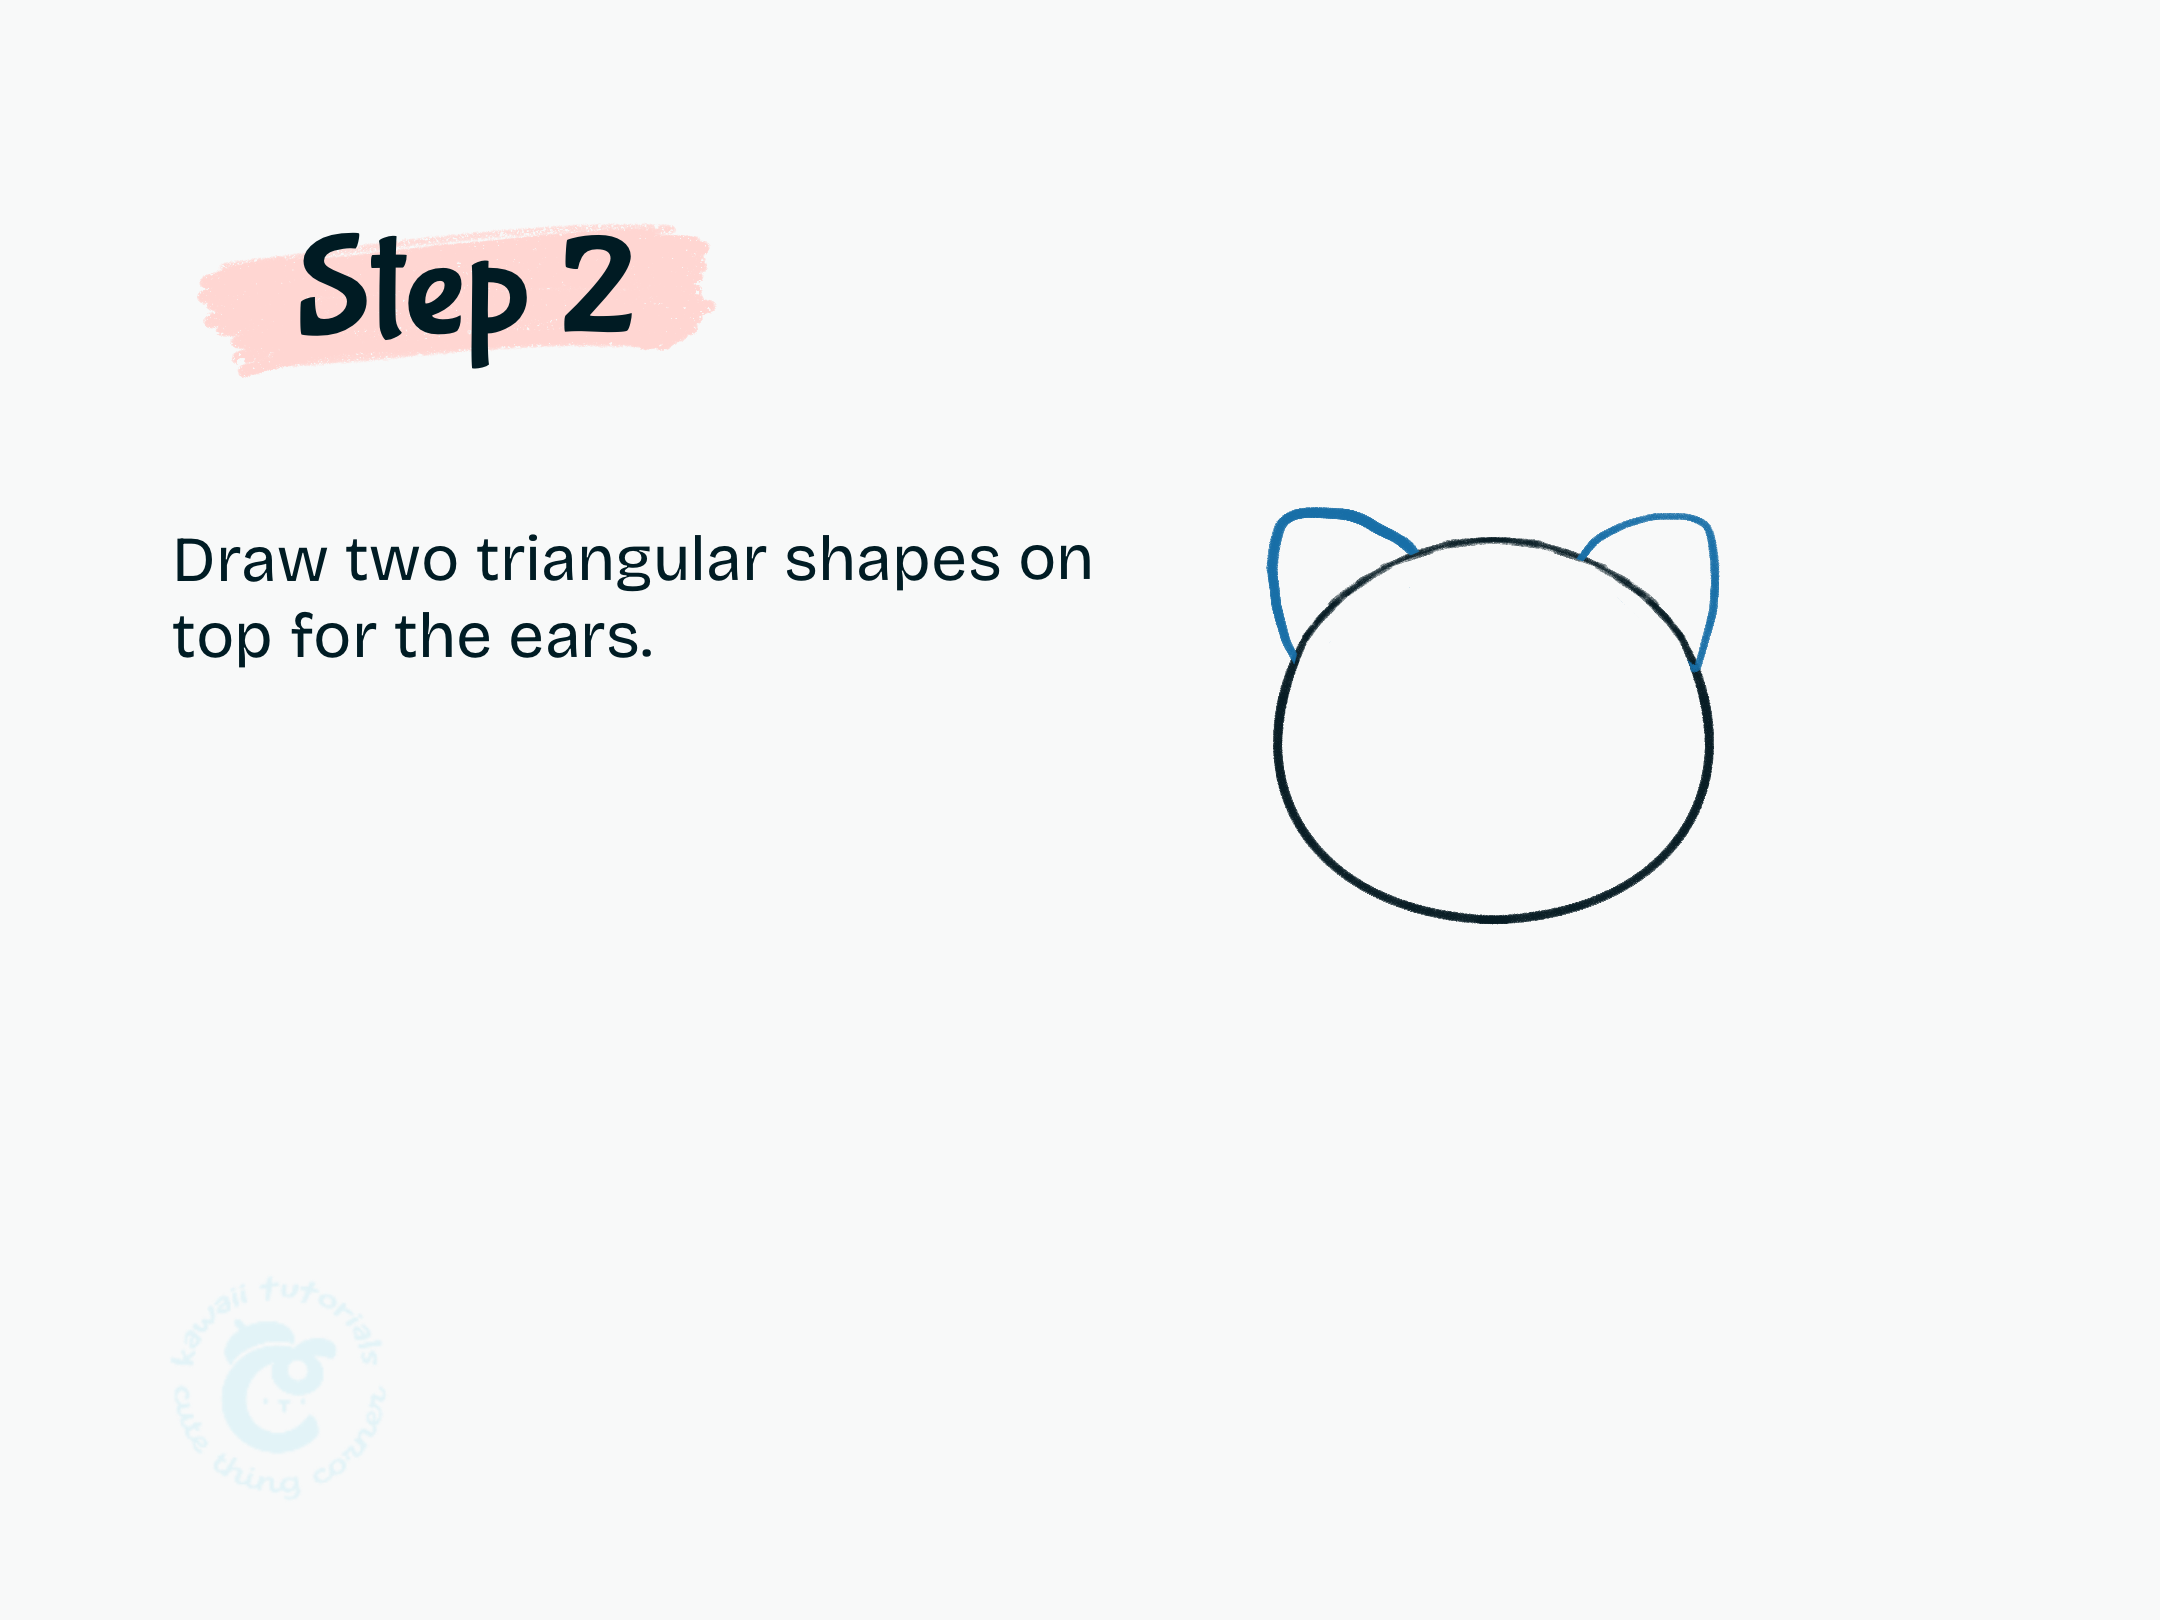
Step 2 Draw two triangular shapes on top for the ears.
#Step 3: Sketch a small body below the head.
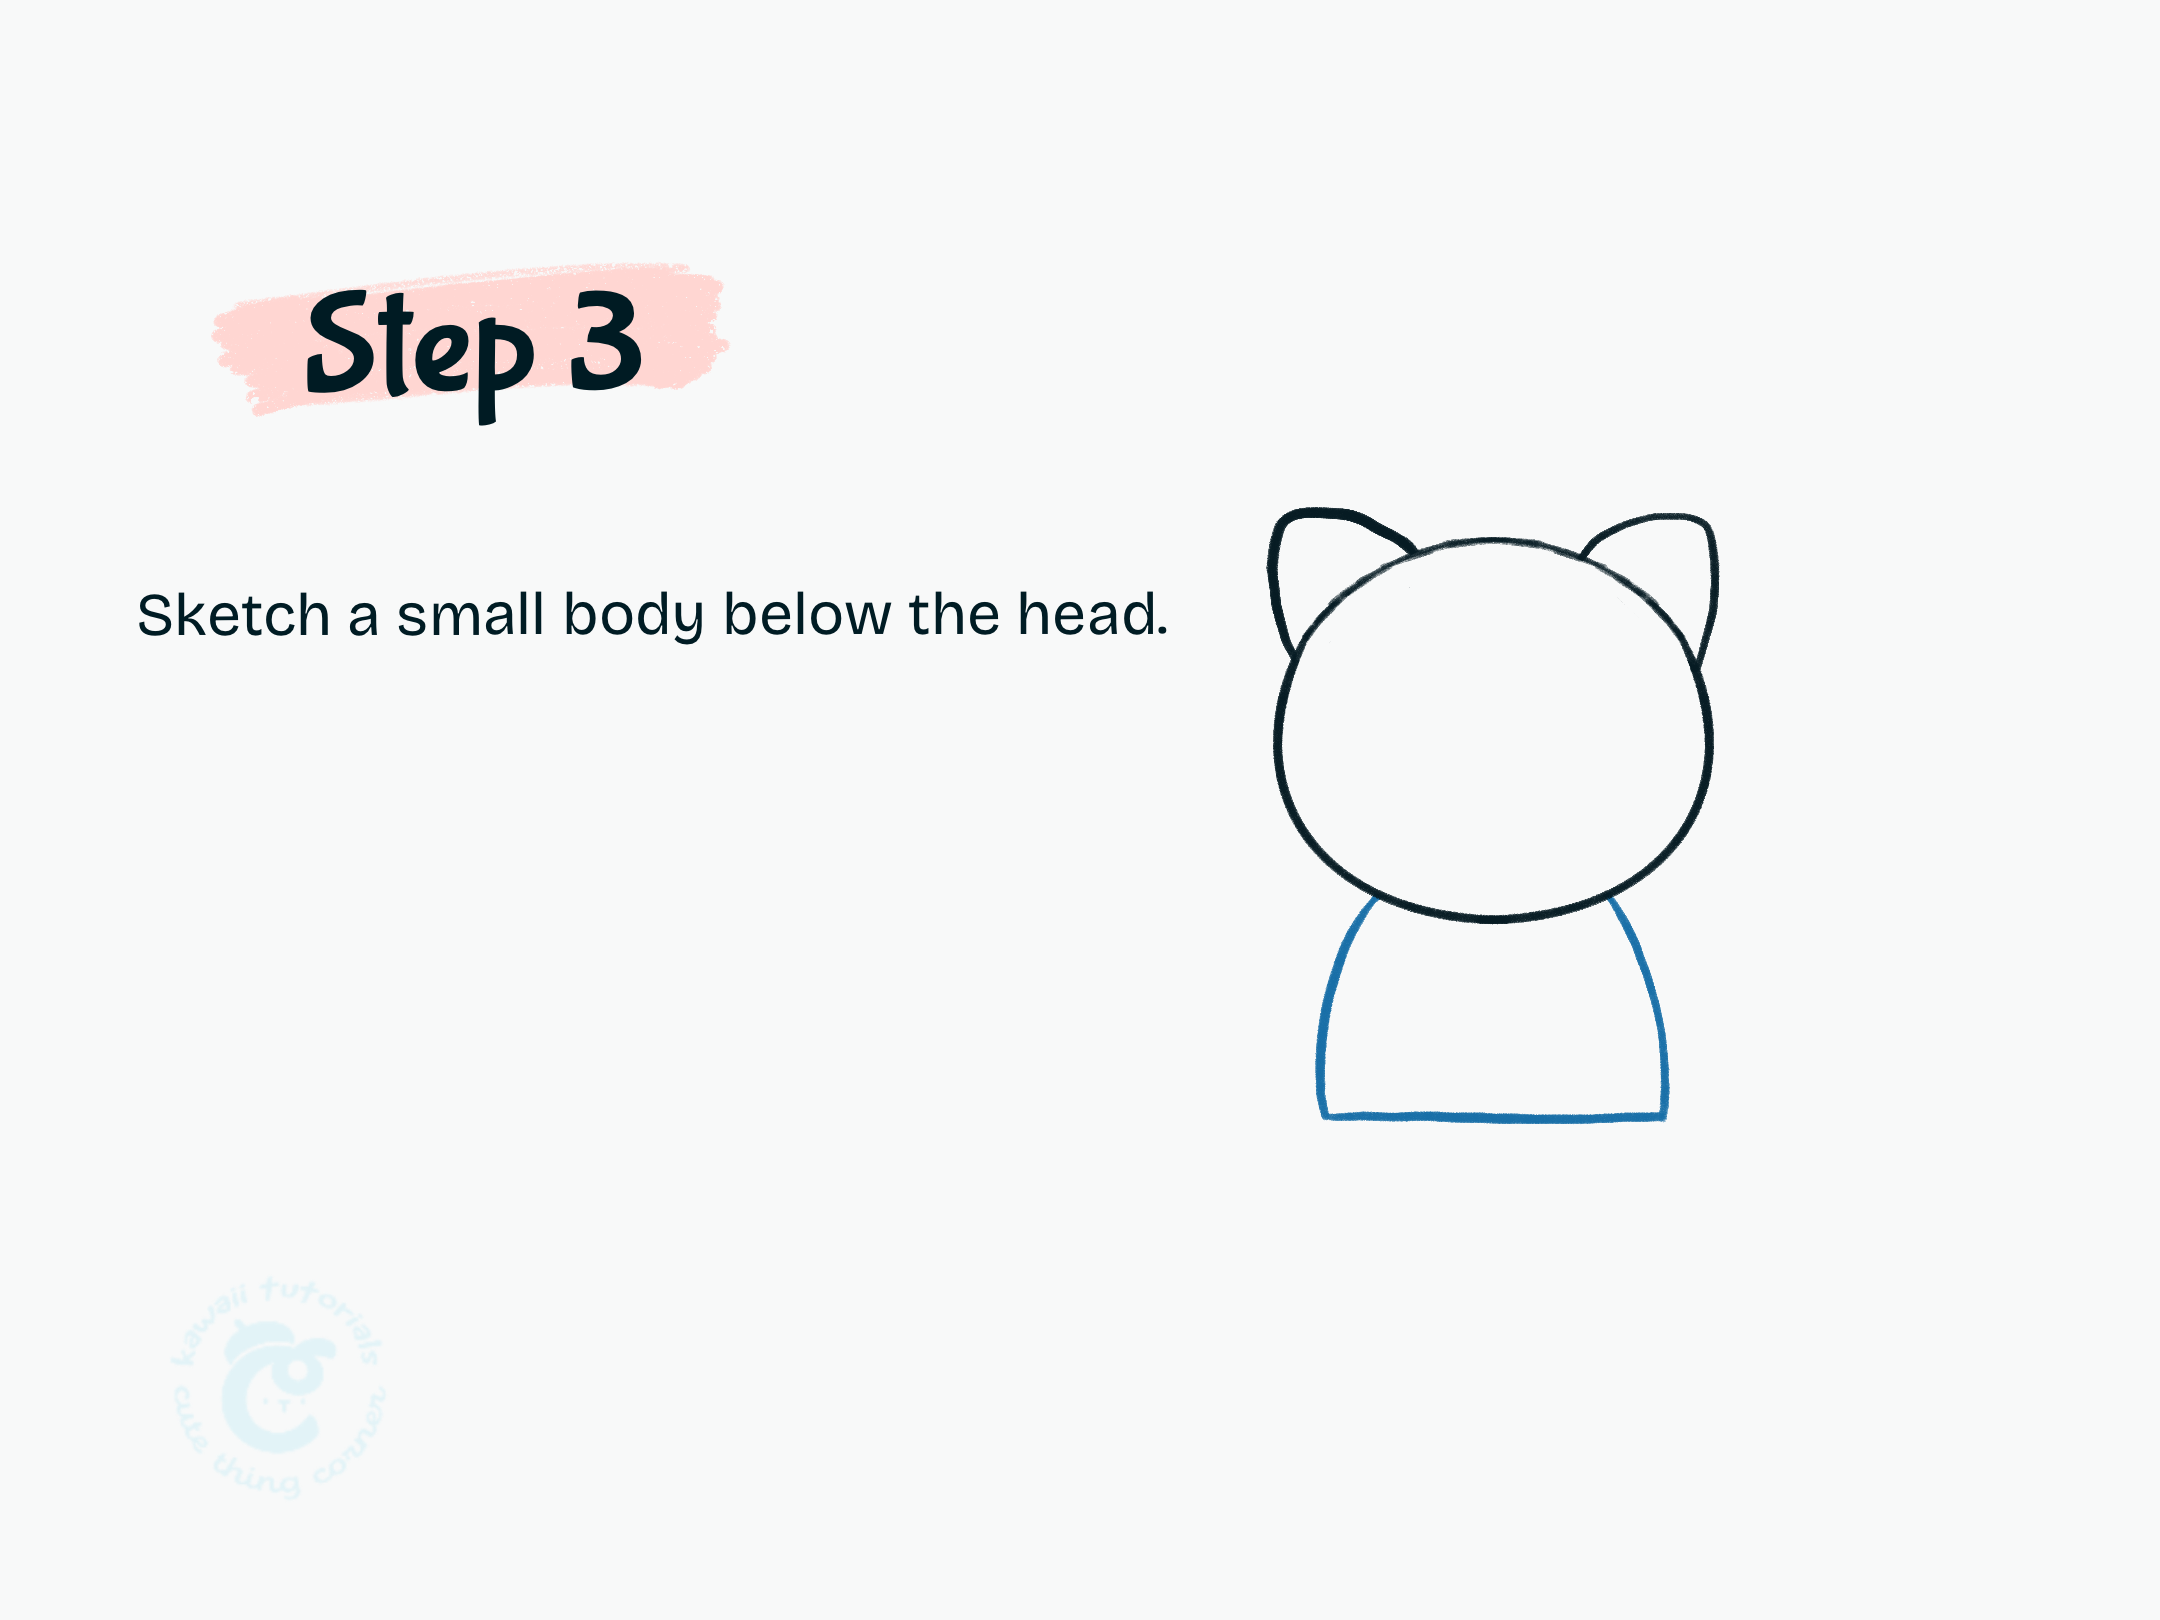
Step 3 Sketch a small body below the head.
#Step 4: Sketch a small body below the head.
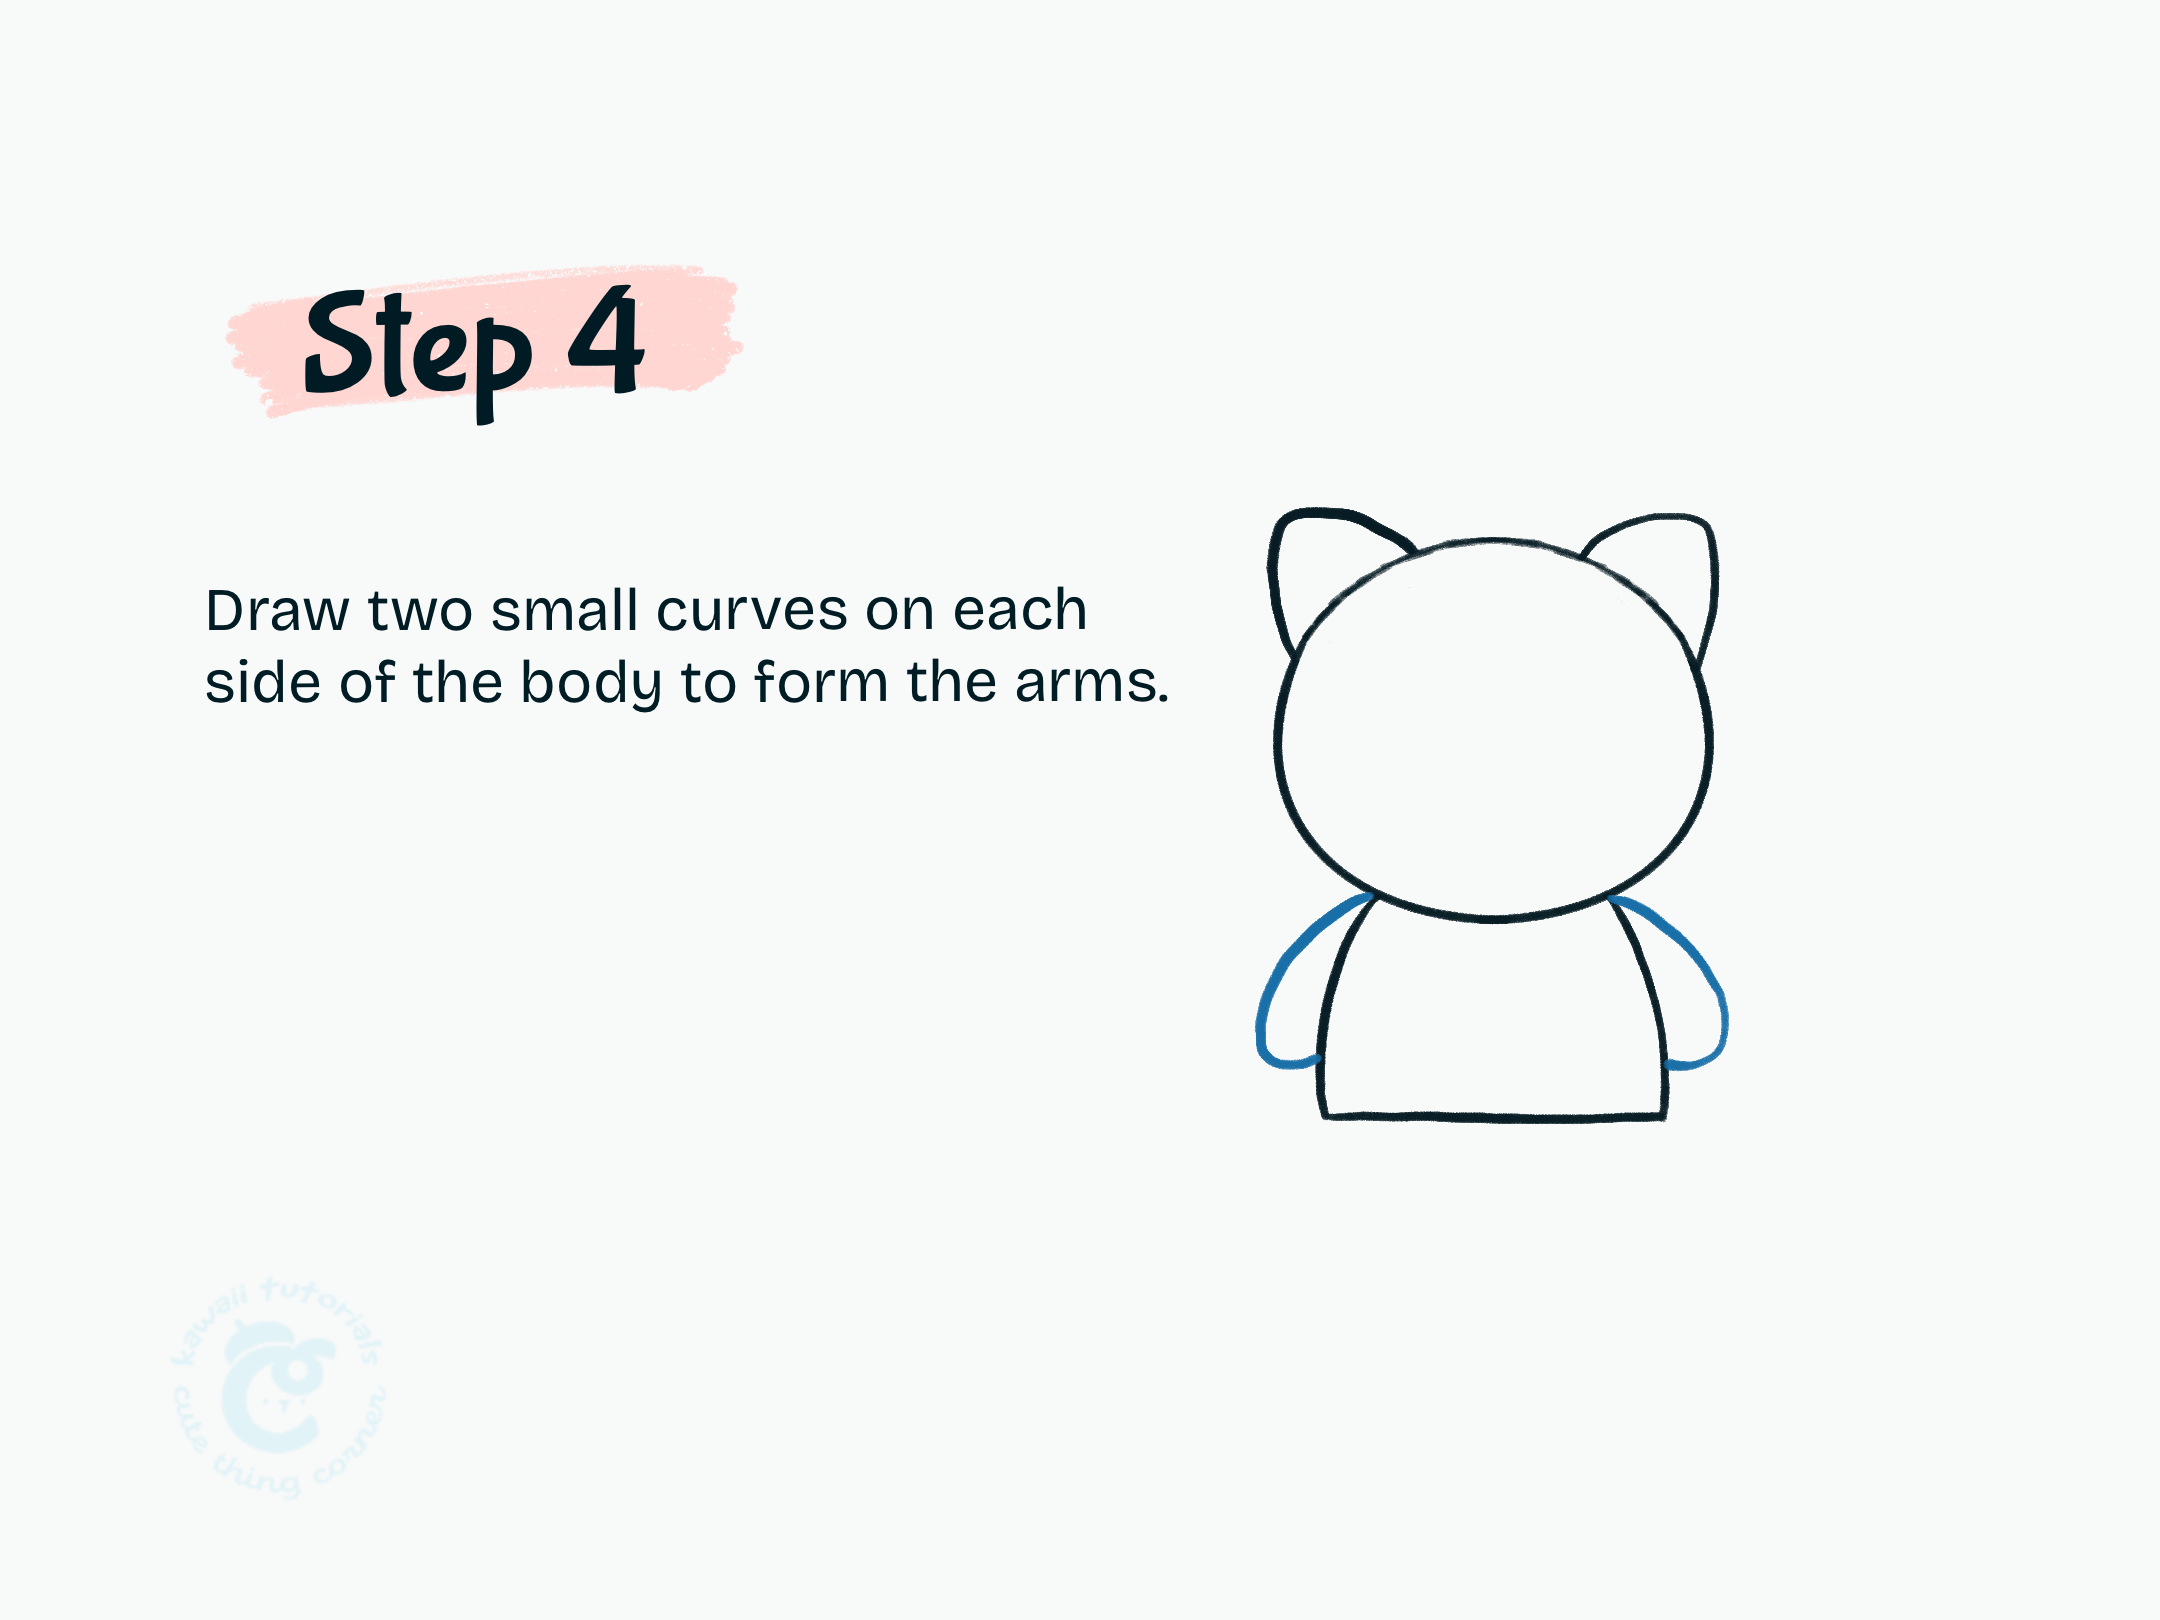
Step 4 Draw two small curves on each side of the body to form the arms.
#Step 5: Draw two small legs
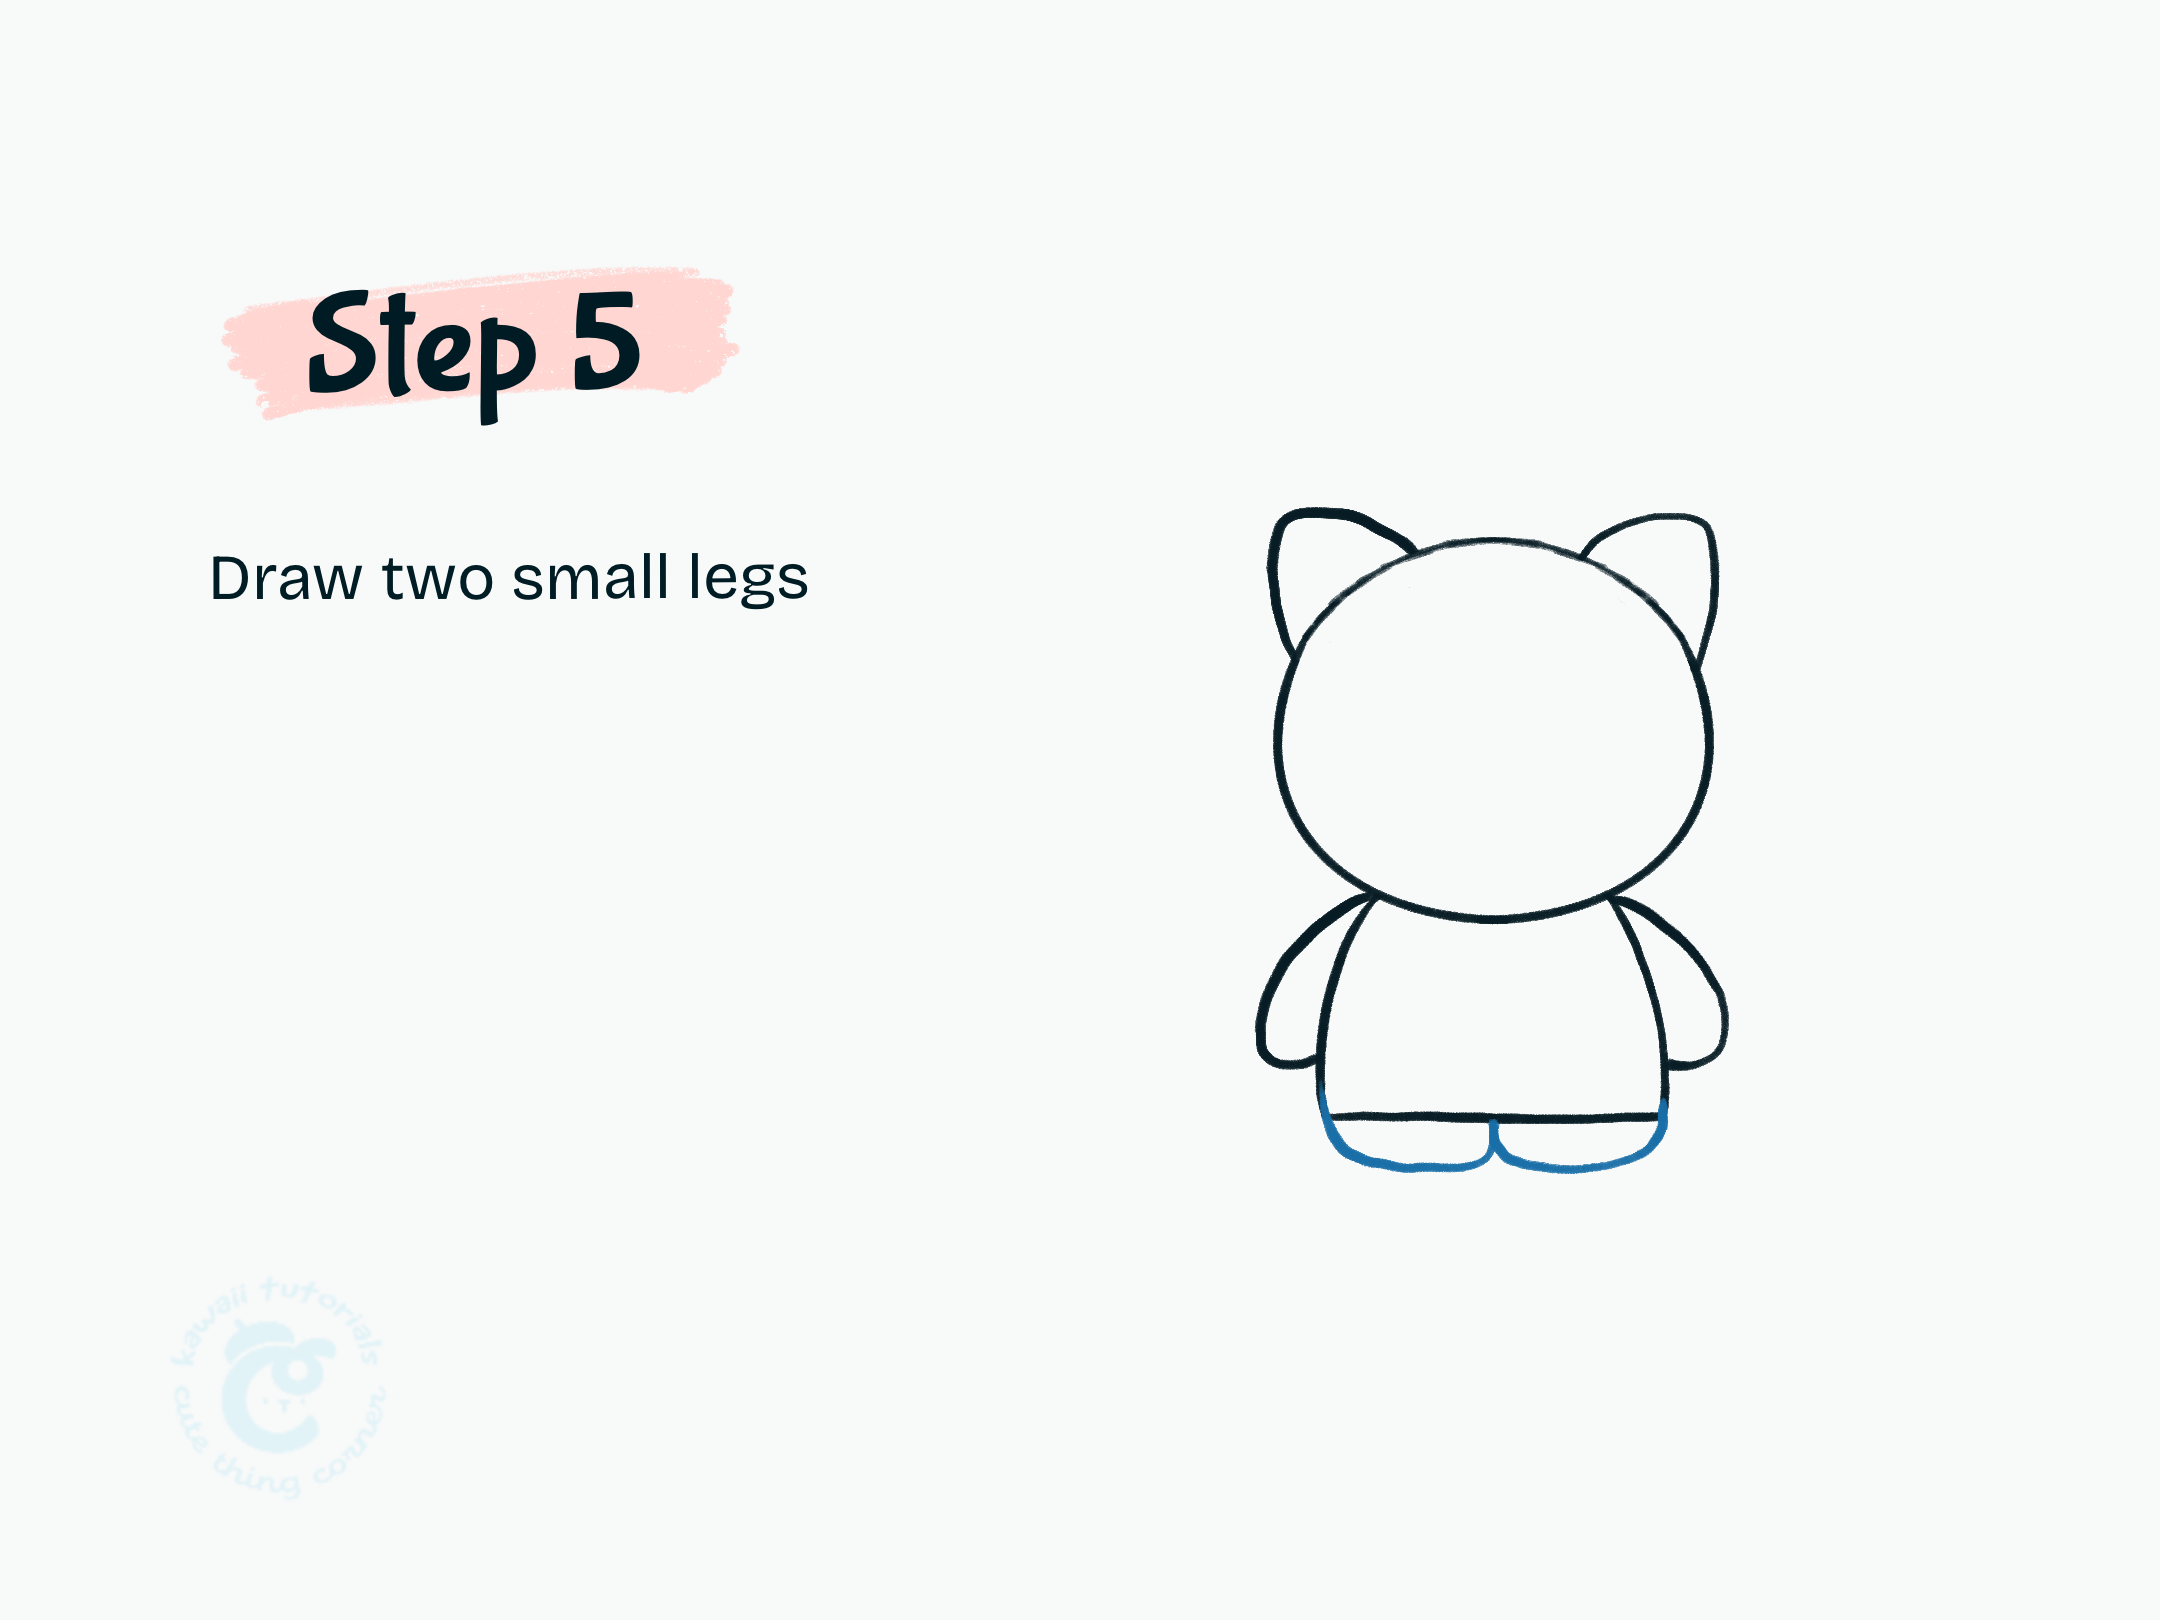
Step 5 Draw two small legs
#Step 6: Draw a cute bow on the top left of the head, using a small circle in the middle and loops on each side.
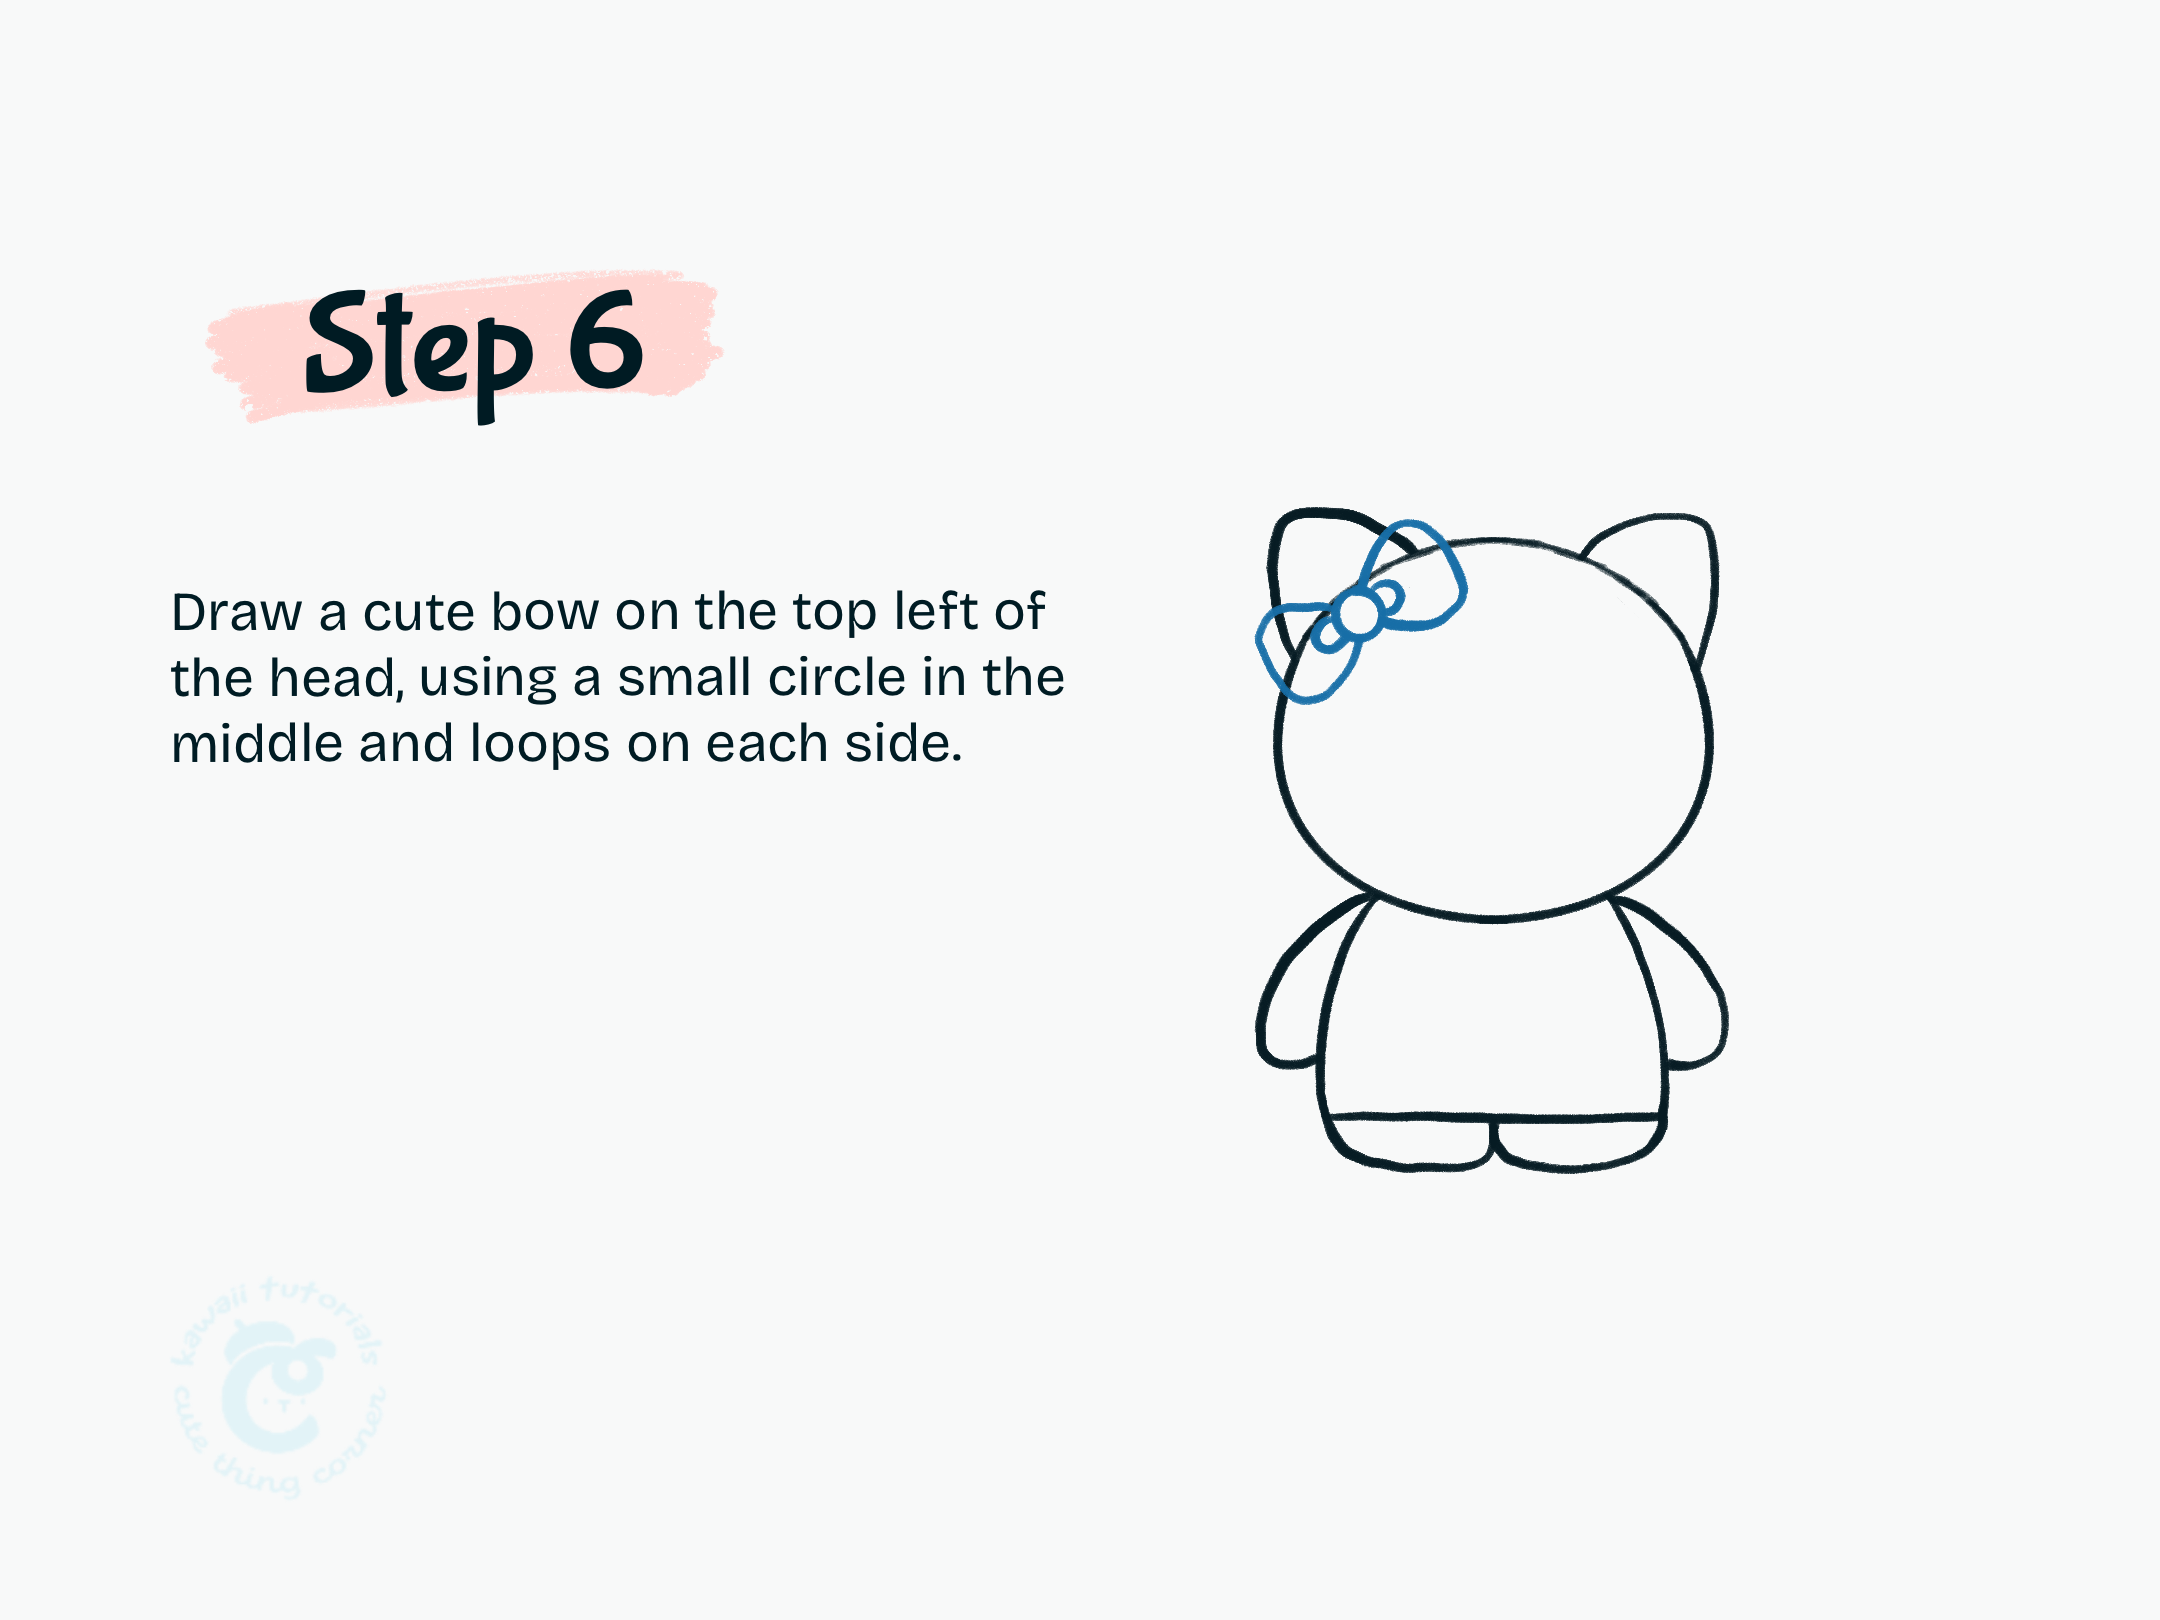
Step 6 Draw a cute bow on the top left of the head, using a small circle in the middle and loops on each side.
#Step 7: Follow the outer contours of the shapes, noting the lines that need to kept and the skipped lines.
Trace the outer contours of the shapes, keeping the necessary lines and omitting the unnecessary ones. Refine the head, ears, body, and arms to create a finished outline.
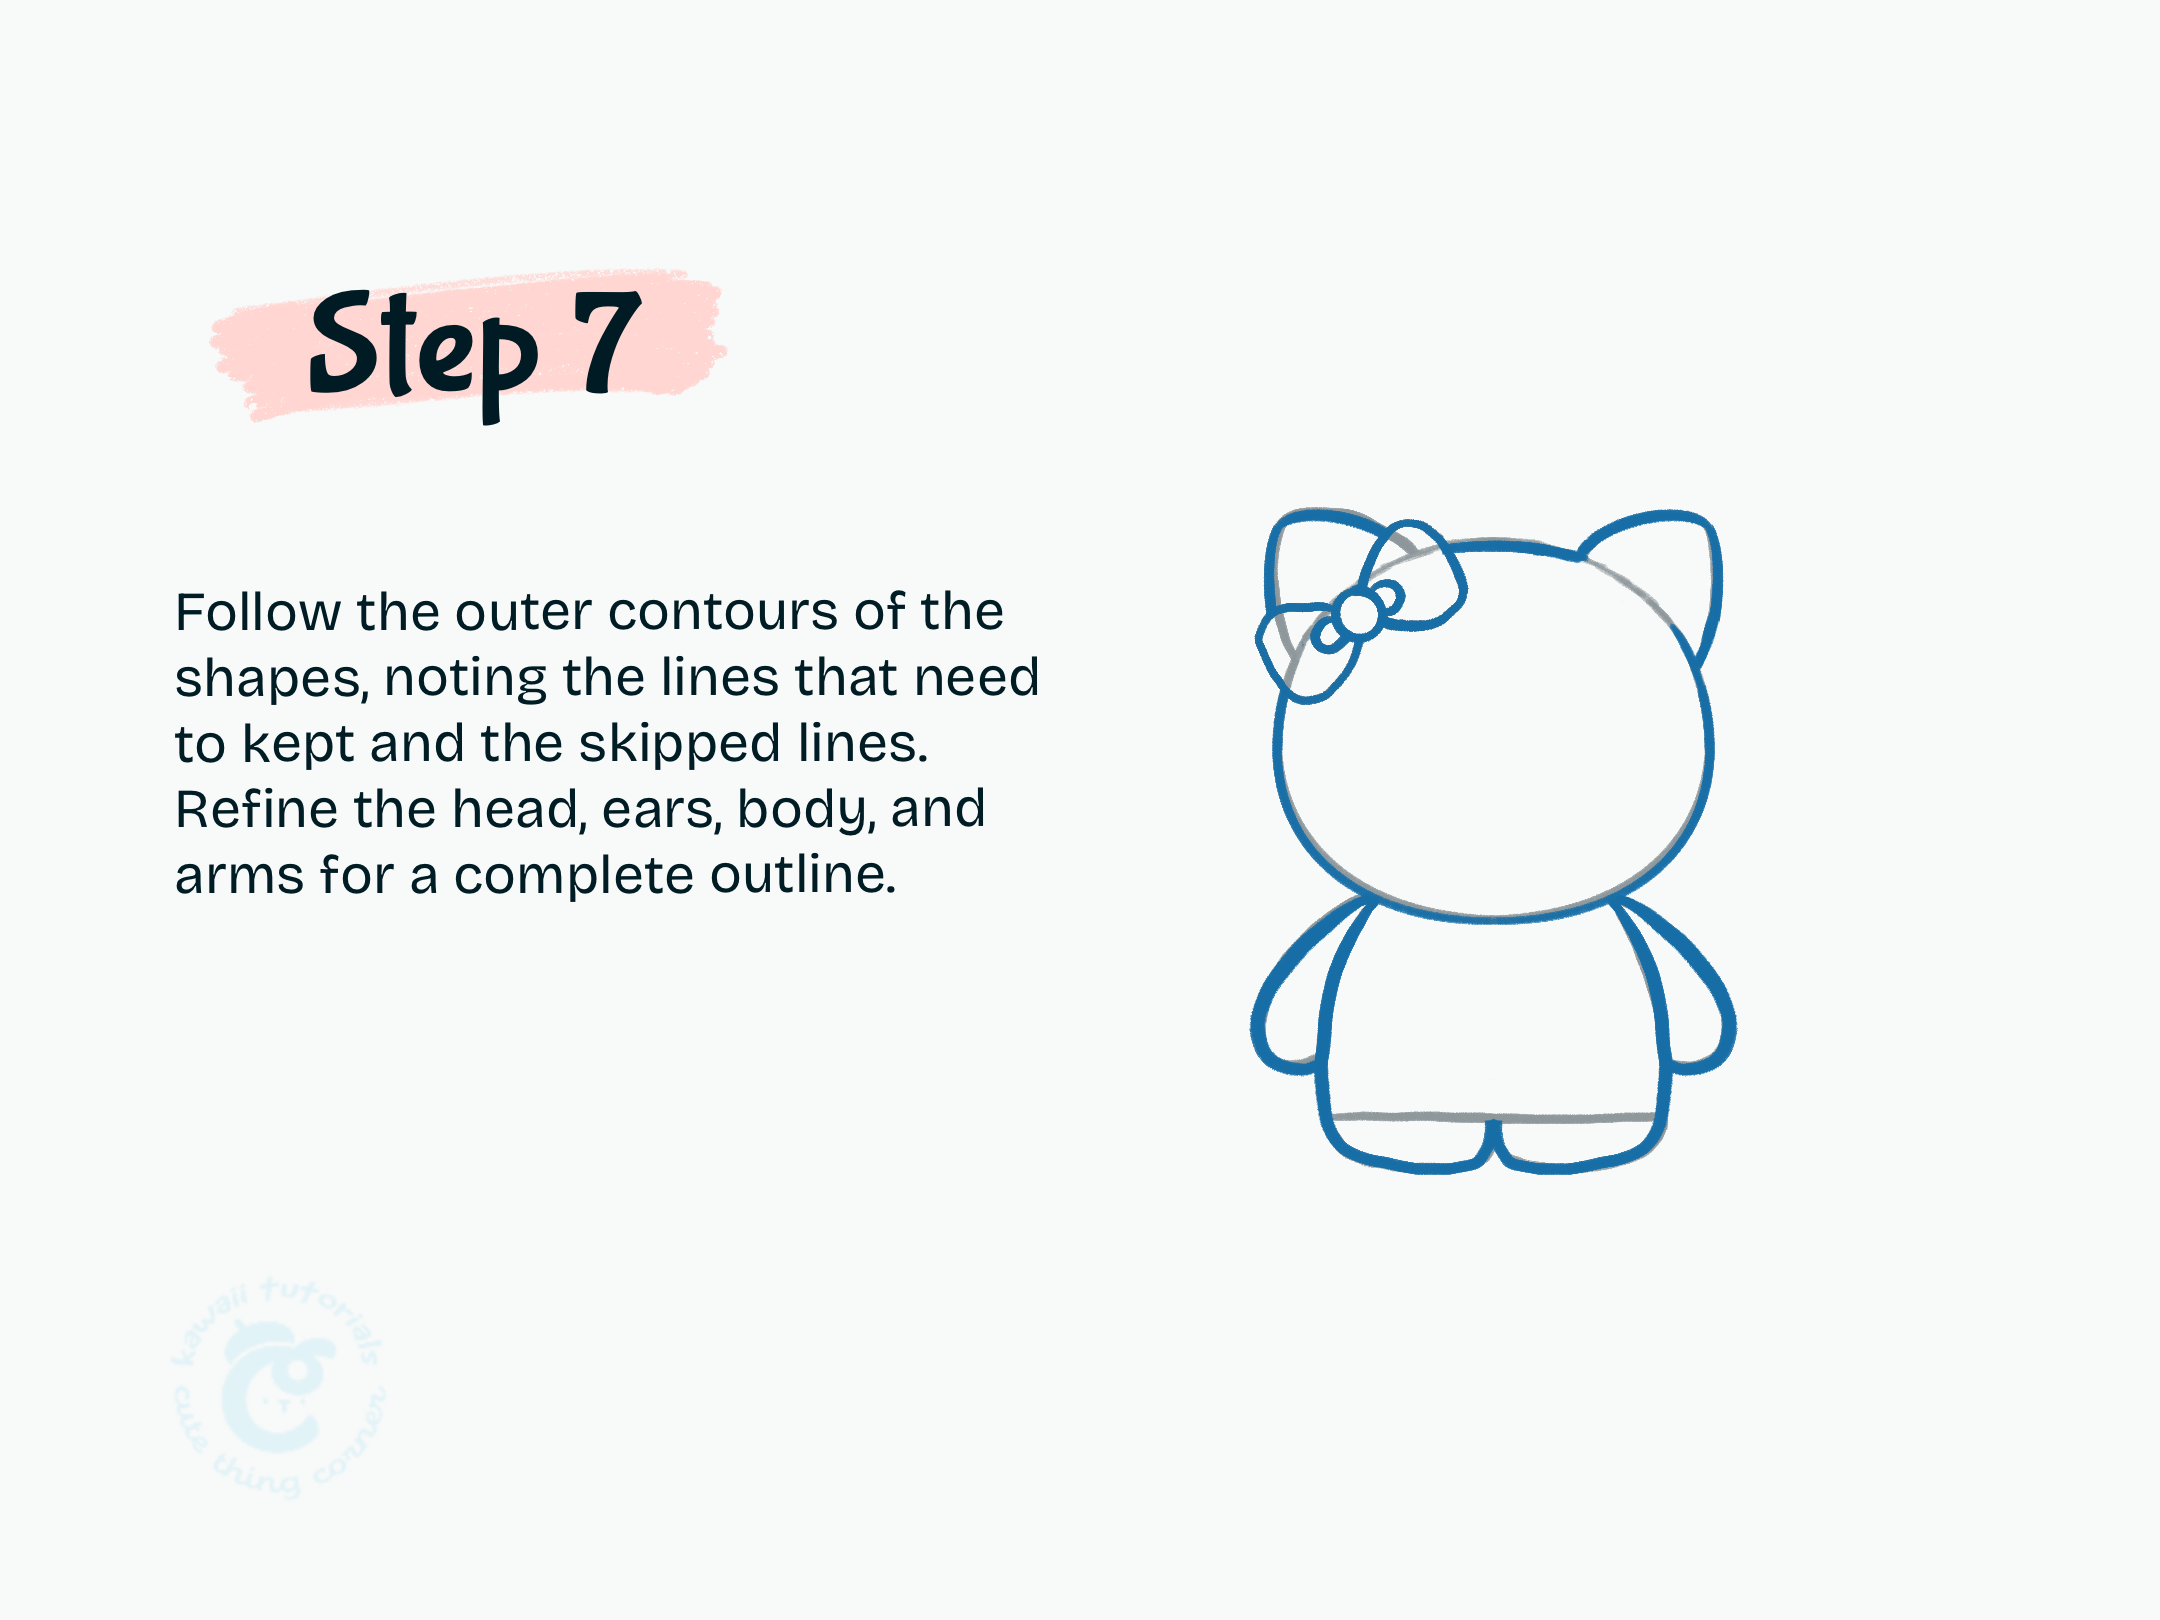
Step 7 Follow the outer contours of the shapes, noting the lines that need to kept and the skipped lines.
#Step 8: Erase original lines and add sweater sleeves.
Remove the original lines and add sweater sleeves. Draw lines around the arms to form the sweater sleeves.
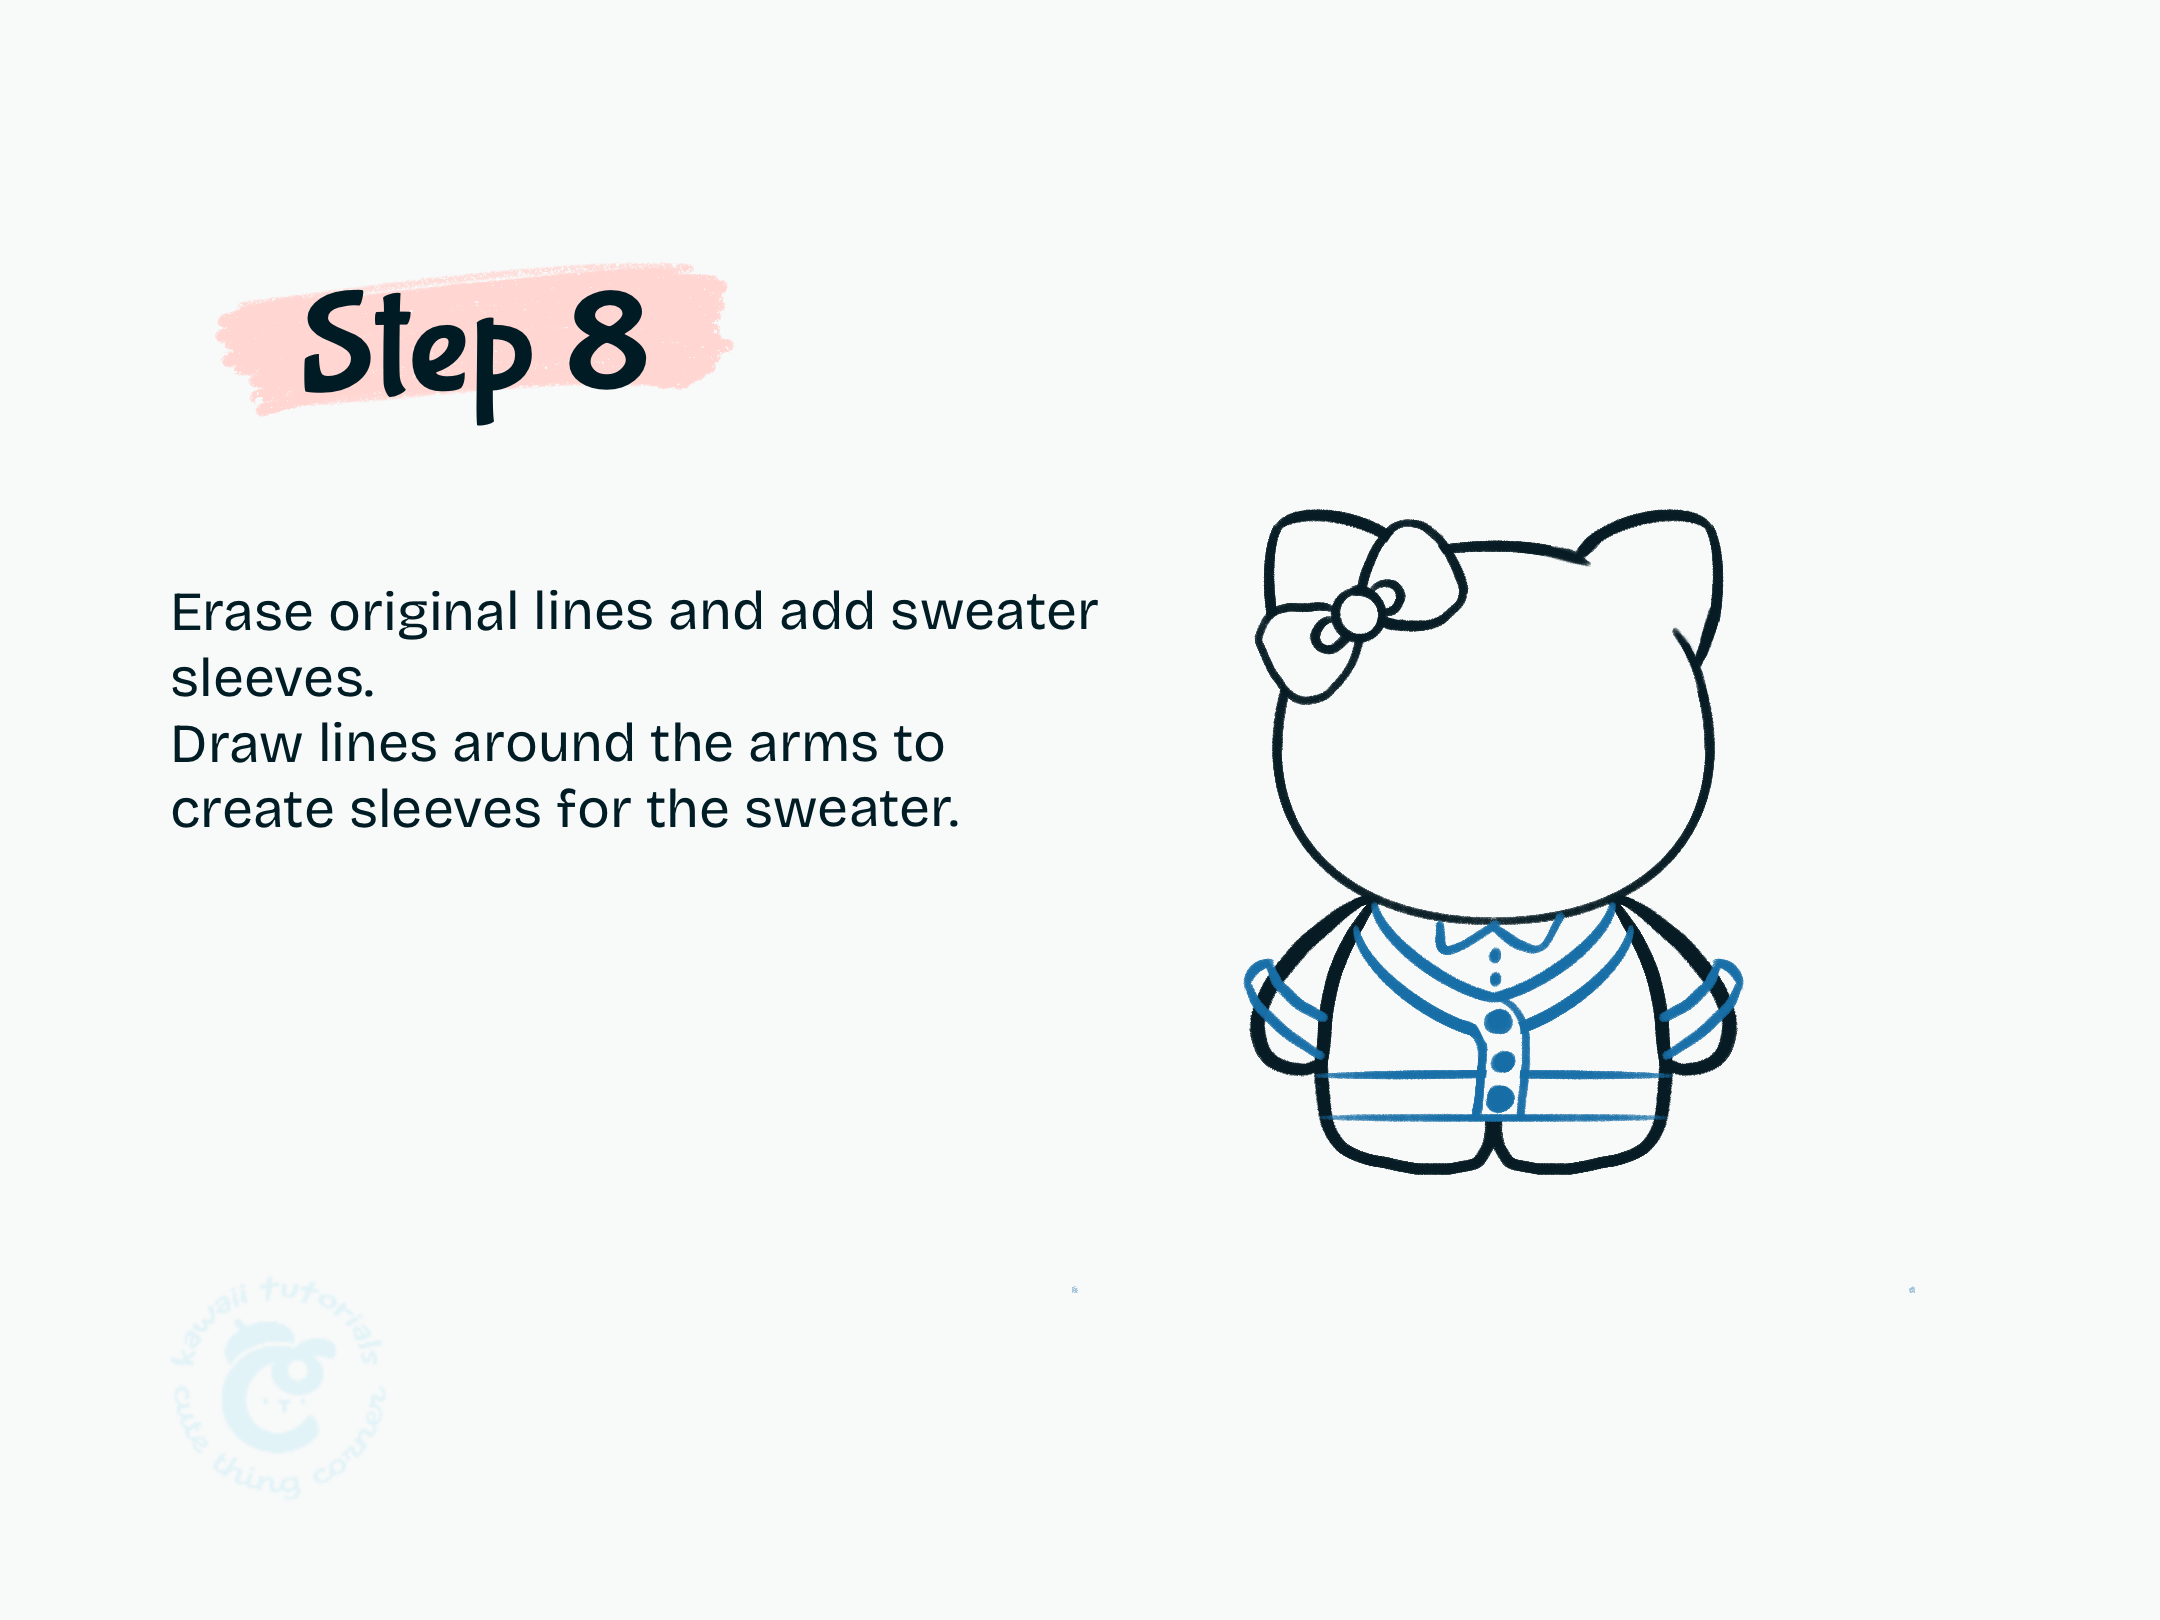
Step 8 Erase original lines and add sweater sleeves.
#Step 9: Add face details and add some details for sweater design like tiny flowers.
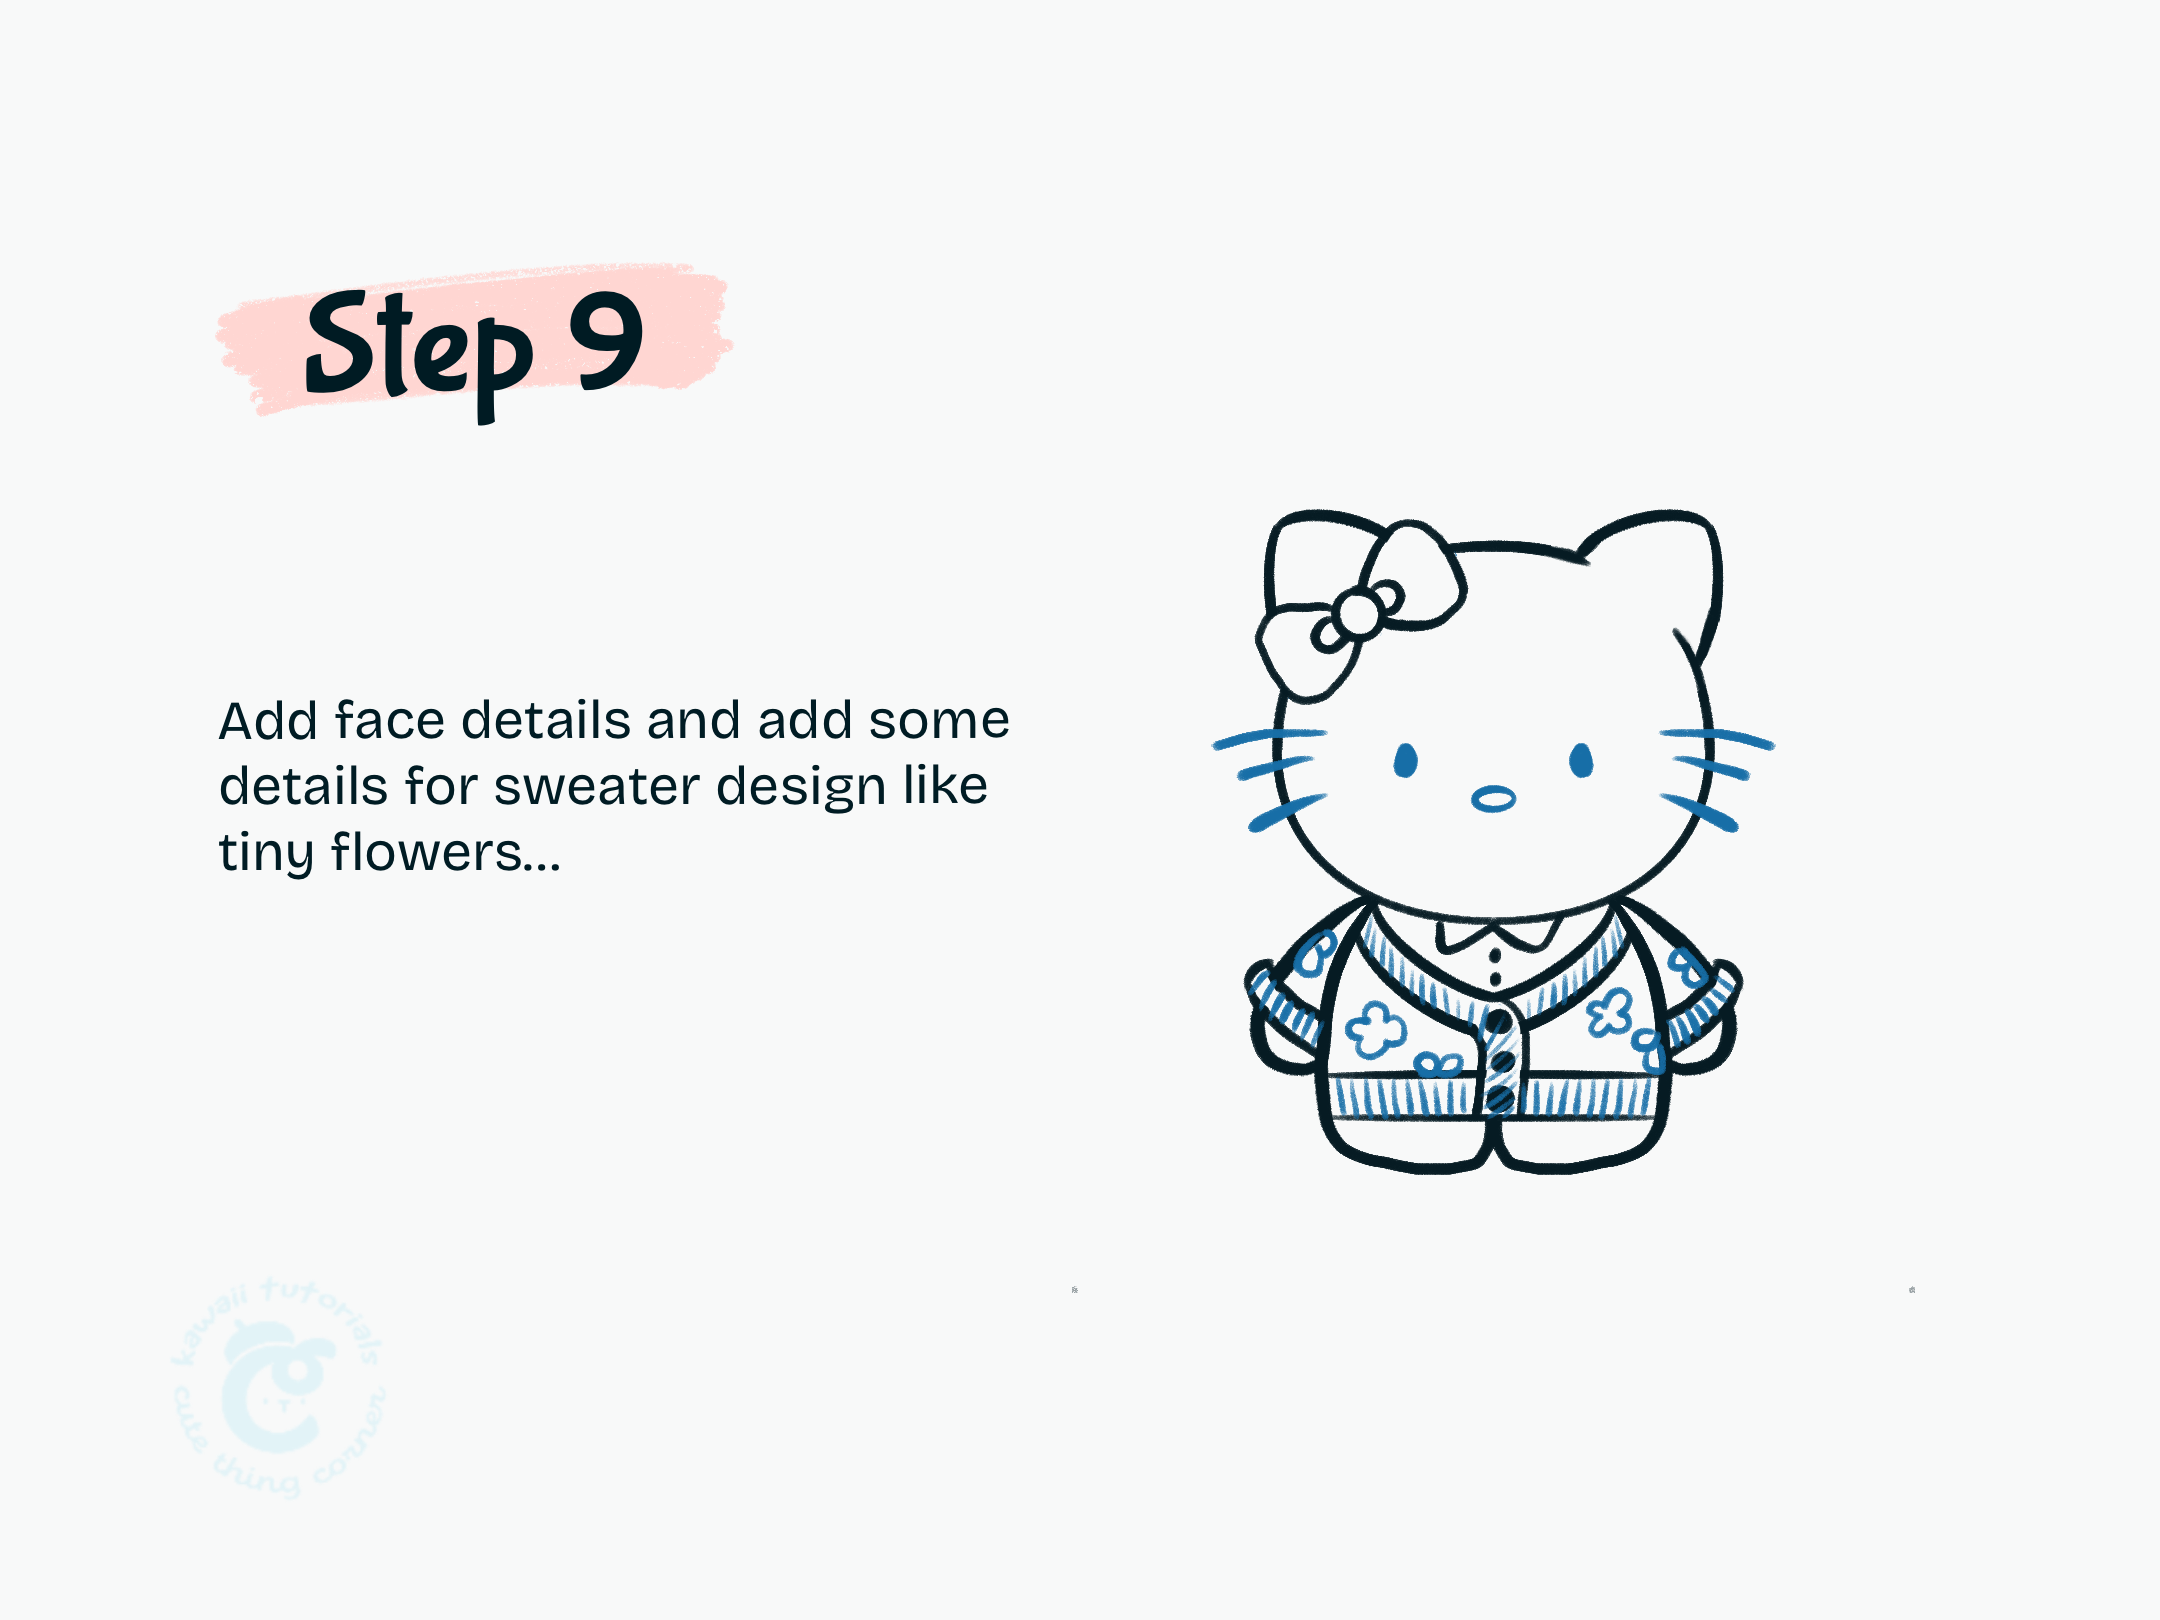
Step 9 Add face details and add some details for sweater design like tiny flowers.
#Step 10: Color your drawing with cozy colors.
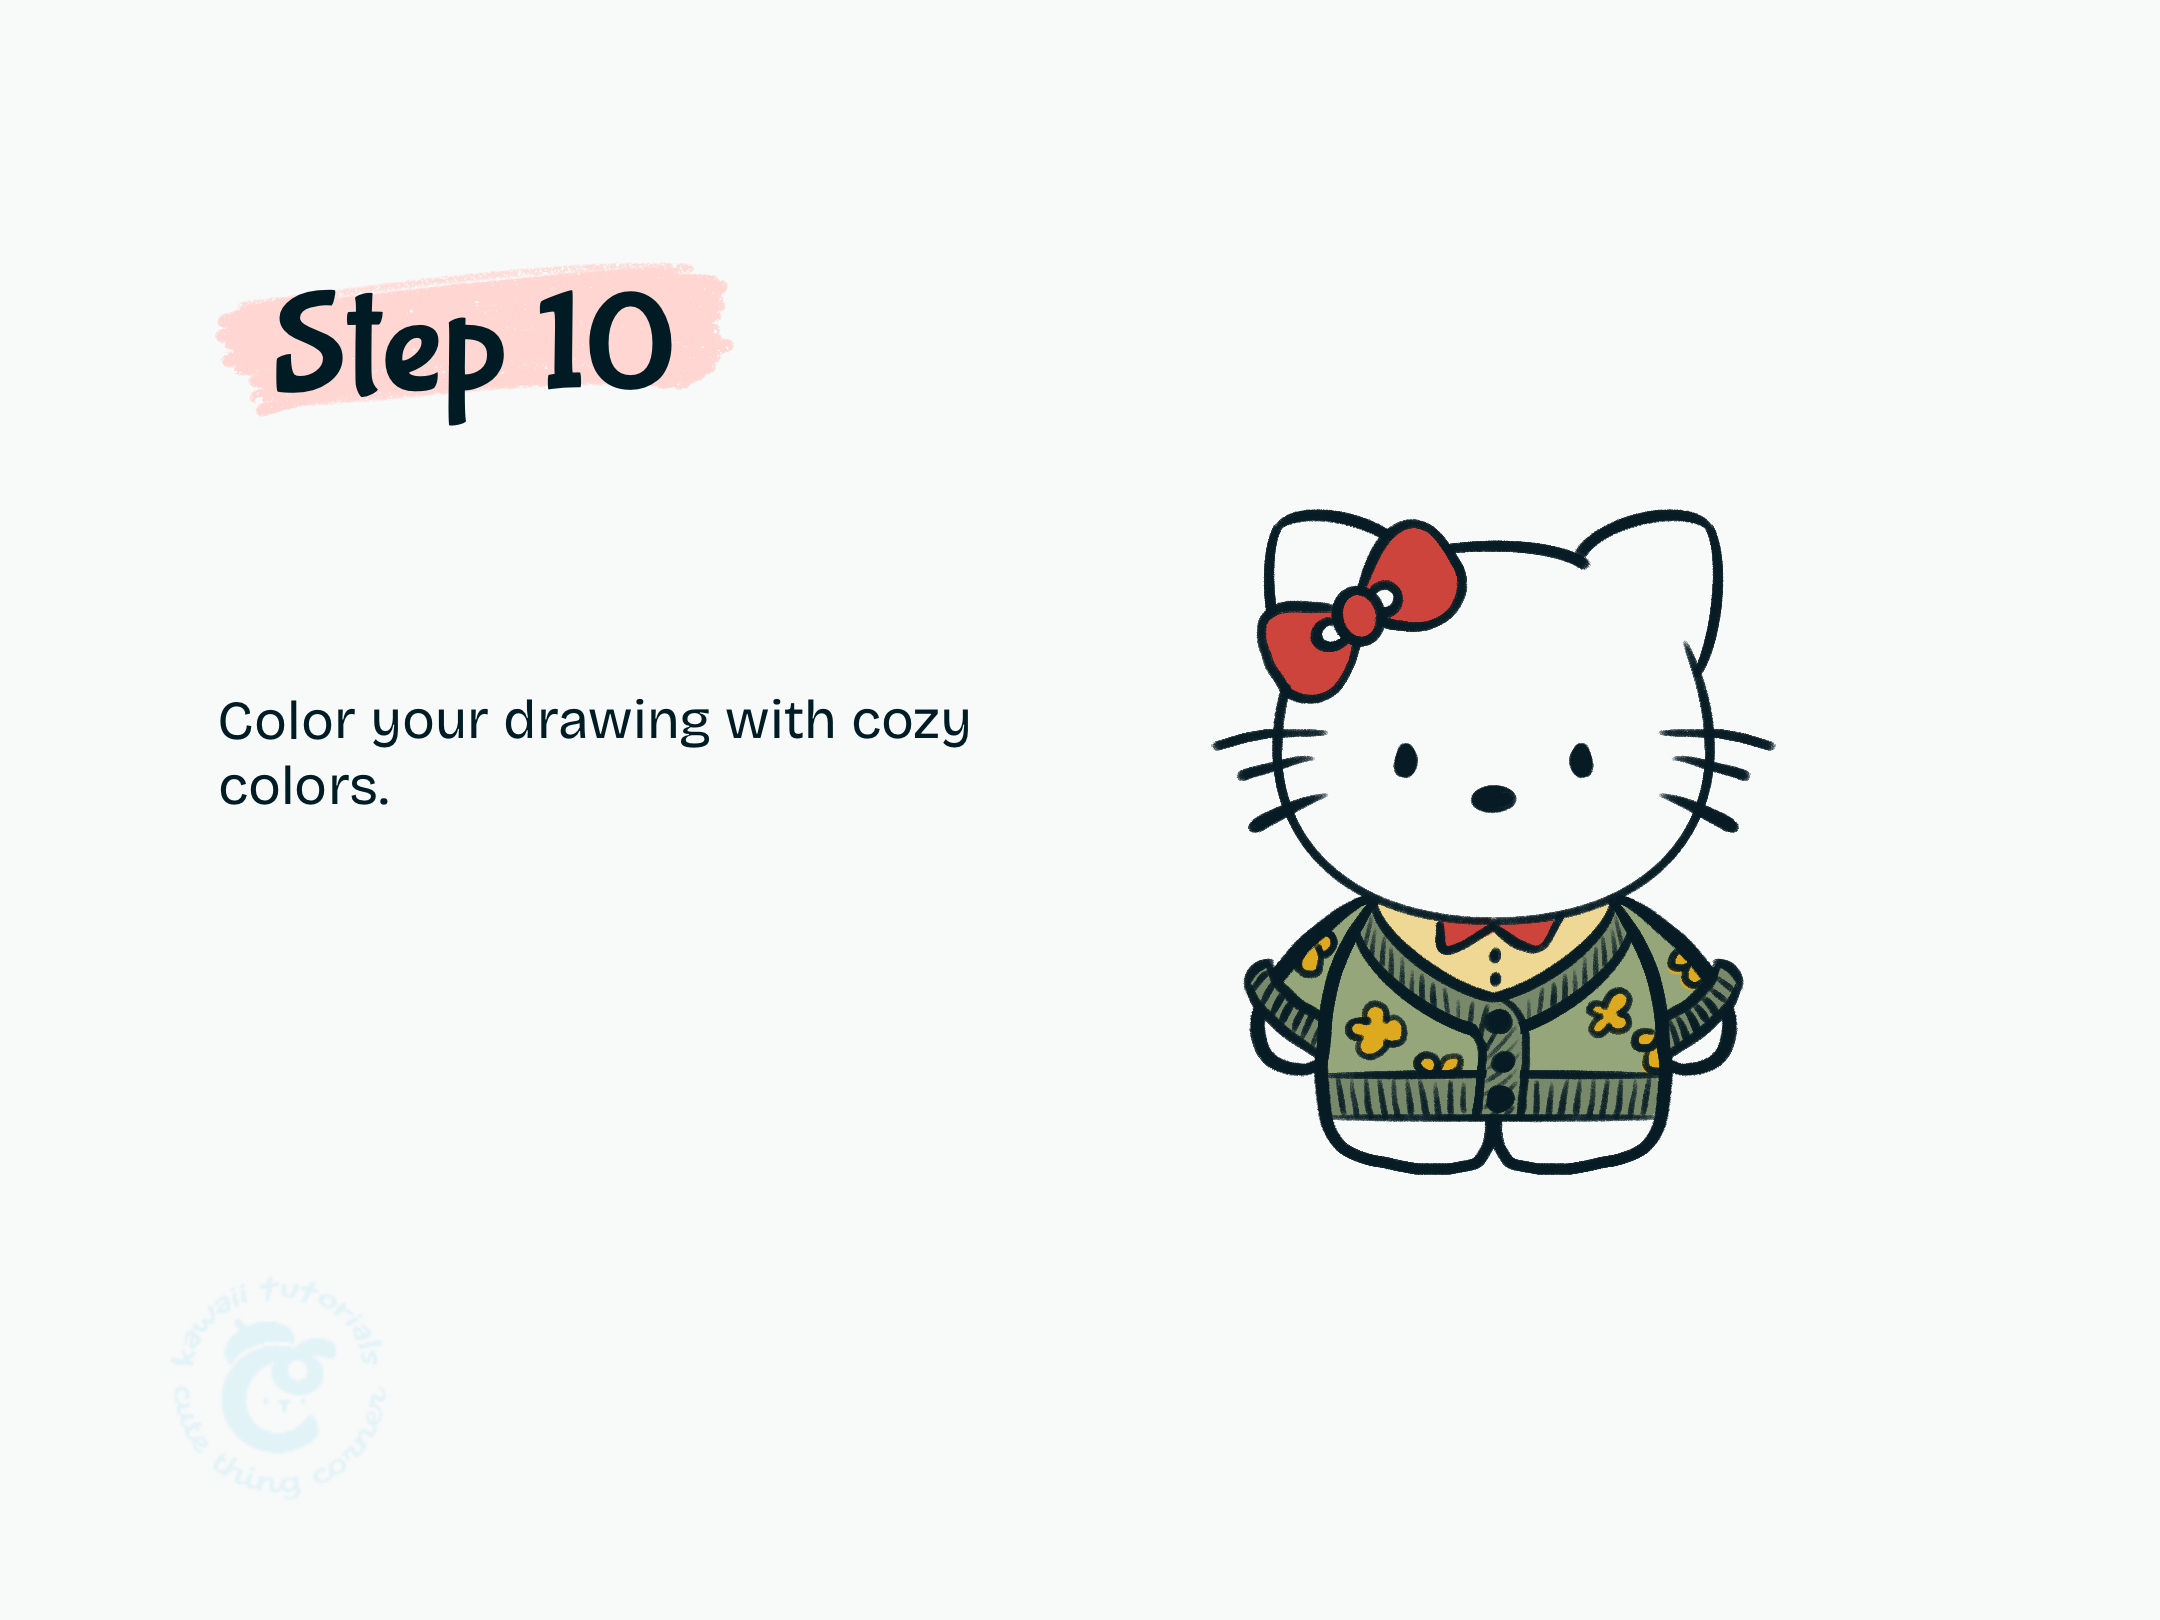
Step 10 Color your drawing with cozy colors.
I hope you had fun drawing this cute Hello Kitty in sweater! Thank you for following along with this guide. Goodbye for now, and see you next time!
Don’t forget to check out the full step-by-step instructions for drawing kawaii Hello Kitty in sweater!
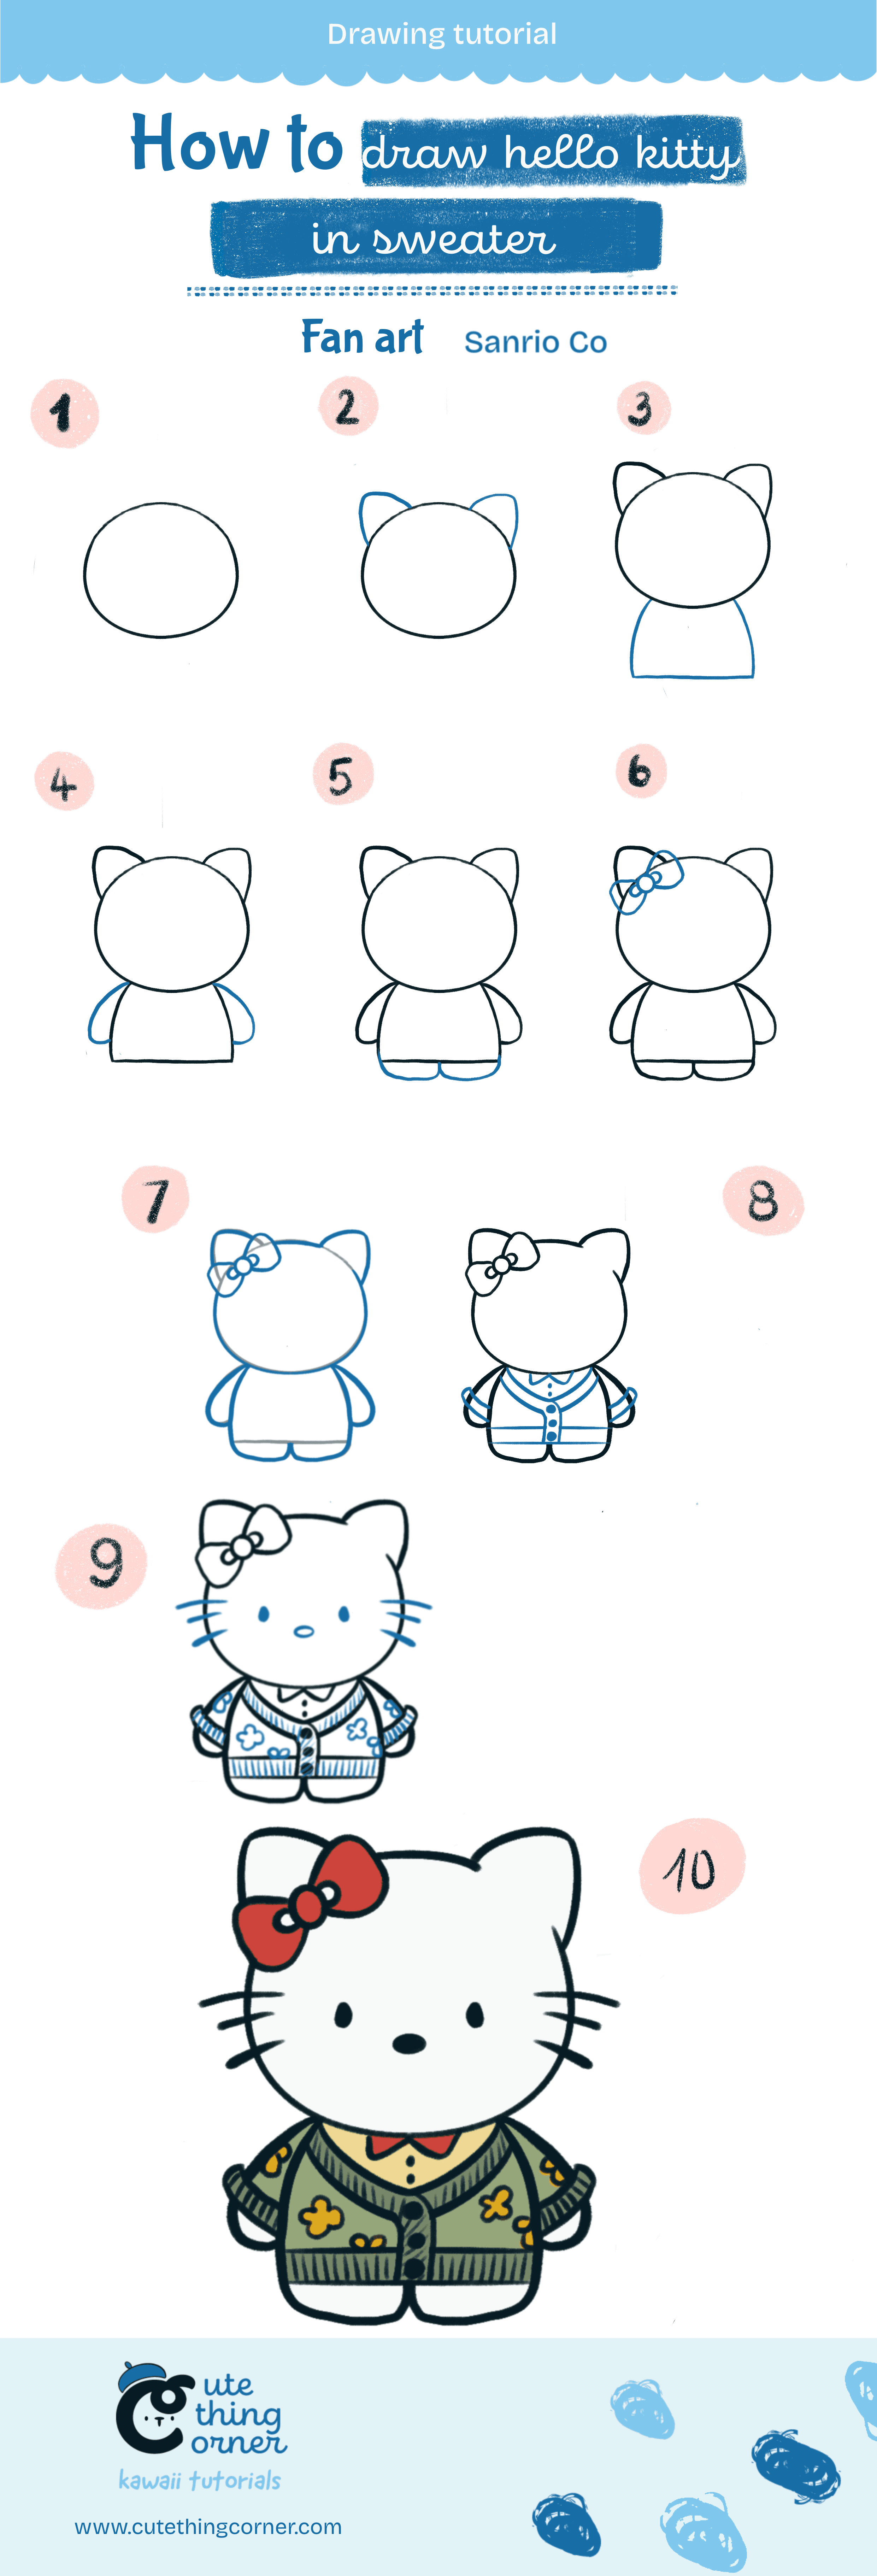
How to draw kawaii hello kitty in sweater (Step-by-step)

