Home 5 Kawaii Tutorials 5 How to draw Kawai Pie (Step-by-step) – Autumn Drawing Ideas

How to draw Kawai Pie (Step-by-step) – Autumn Drawing Ideas

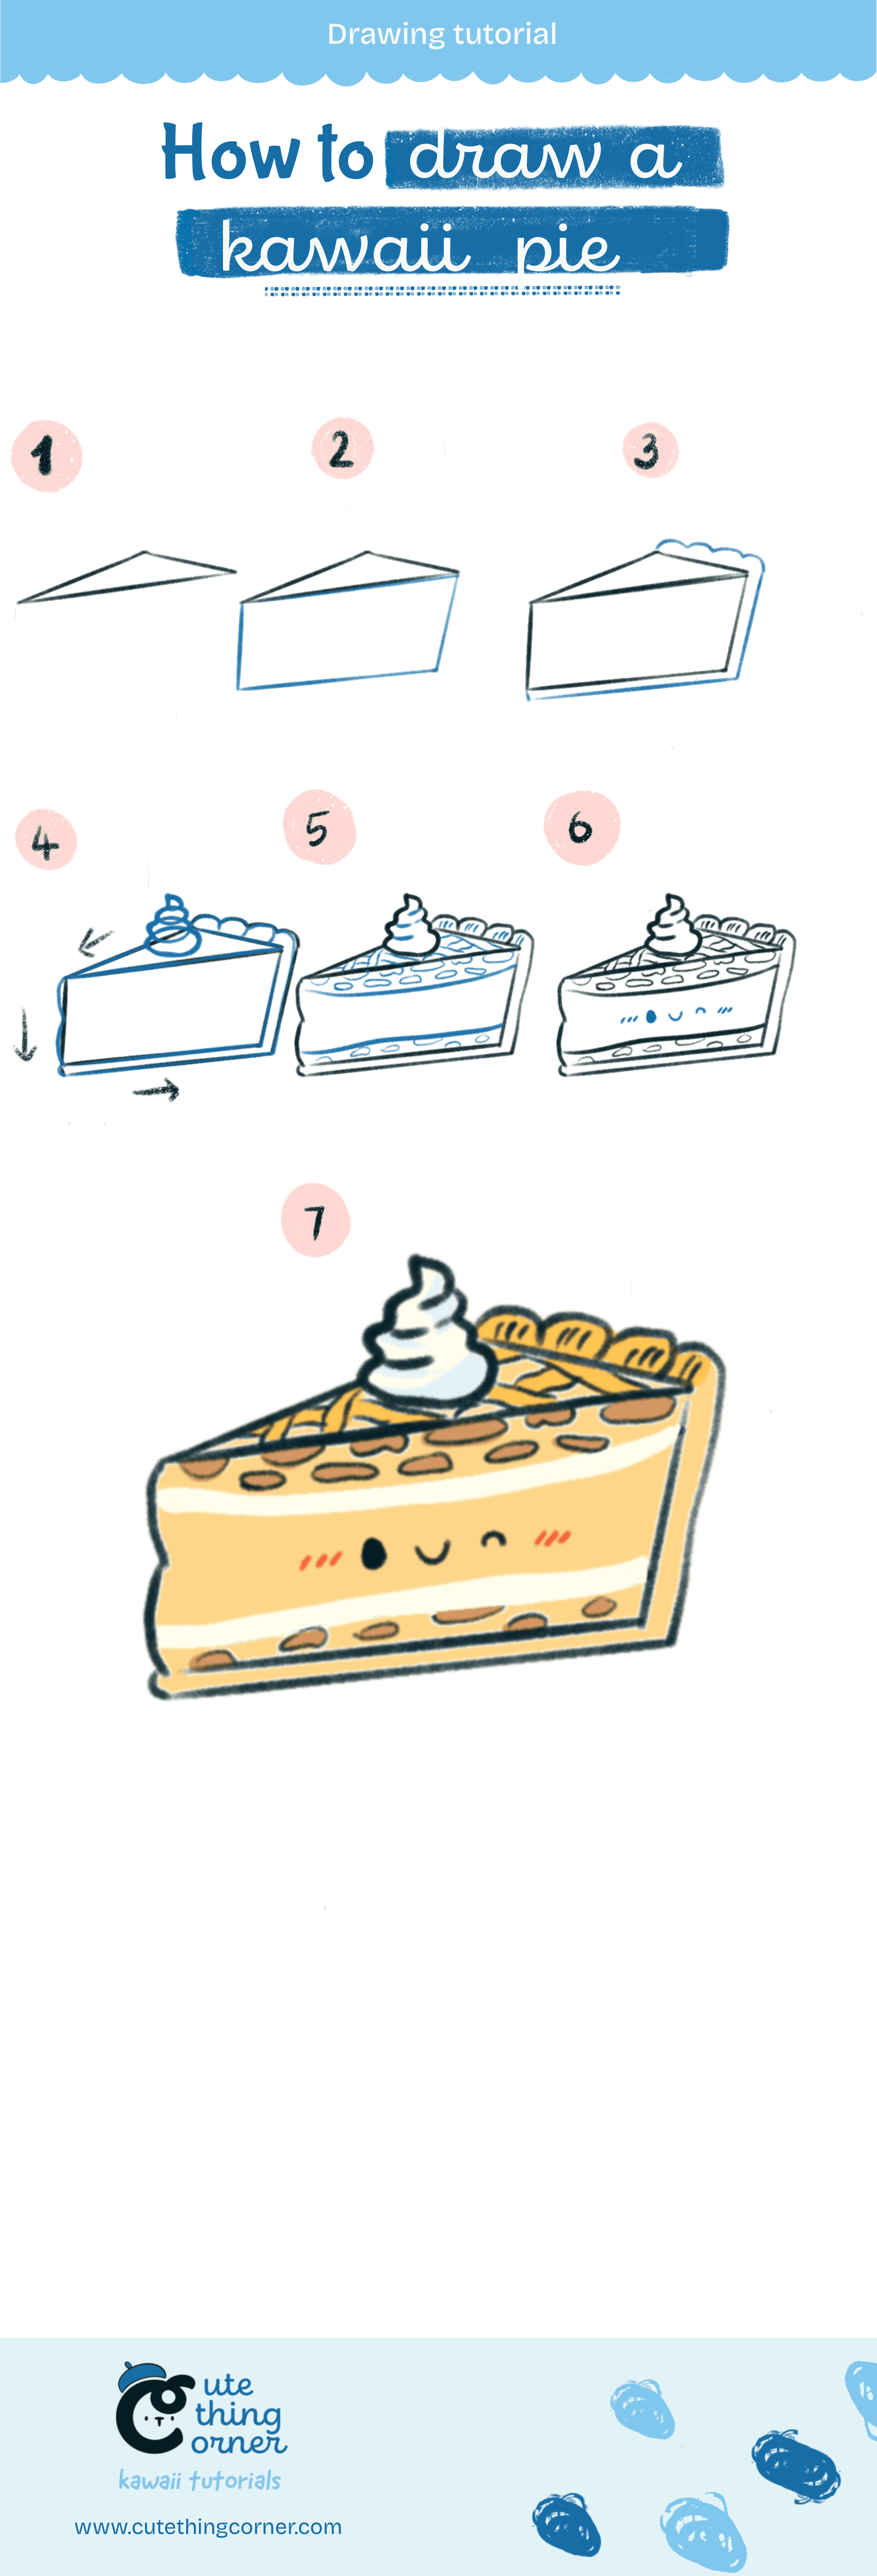
Want to learn how to draw an adorable pie with a cute, kawaii twist?

In this easy step-by-step tutorial from Cute Thing Corner, you’ll create a kawaii pie complete with a happy face and sweet details.

Perfect for beginners or anyone who loves cute food art, this guide will make drawing a kawaii pie fun and simple.

Grab your pencils, and let’s get started on this delightful drawing!

How to draw a kawai pie

How to draw a kawai pie

You just have paper and a pencil to start. Color will belong to your favorite or using an Ipad and pencil.

Whatever makes you comfortable to start.

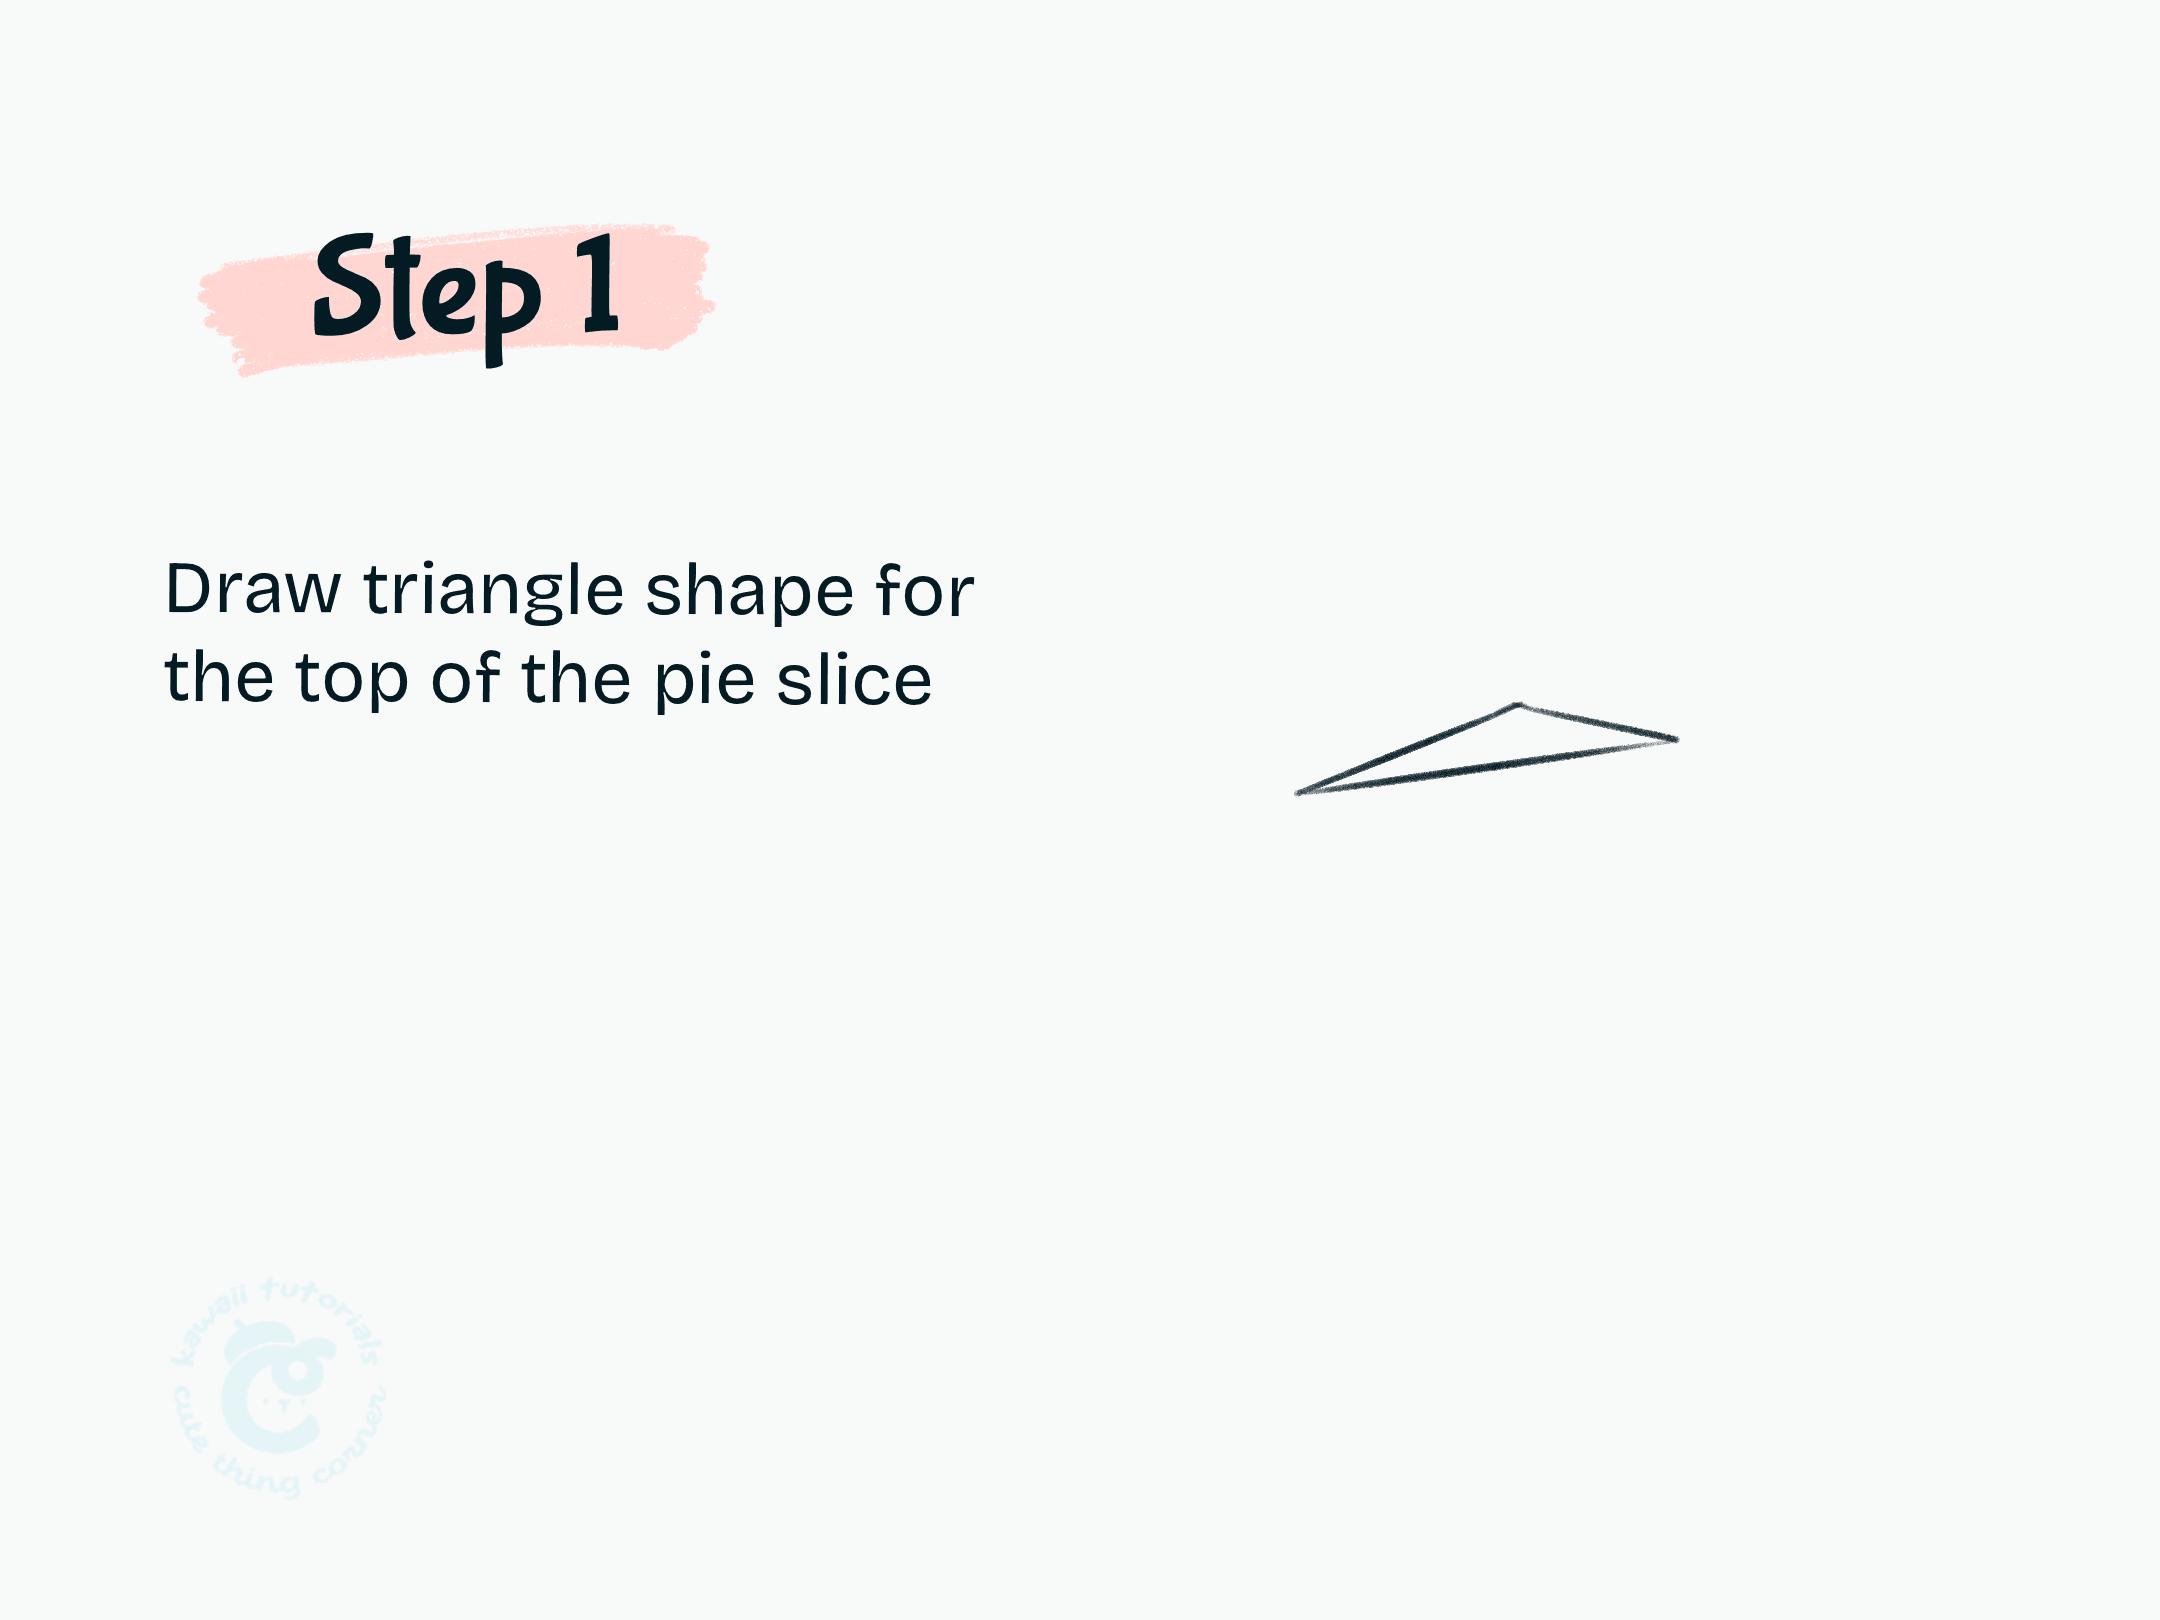
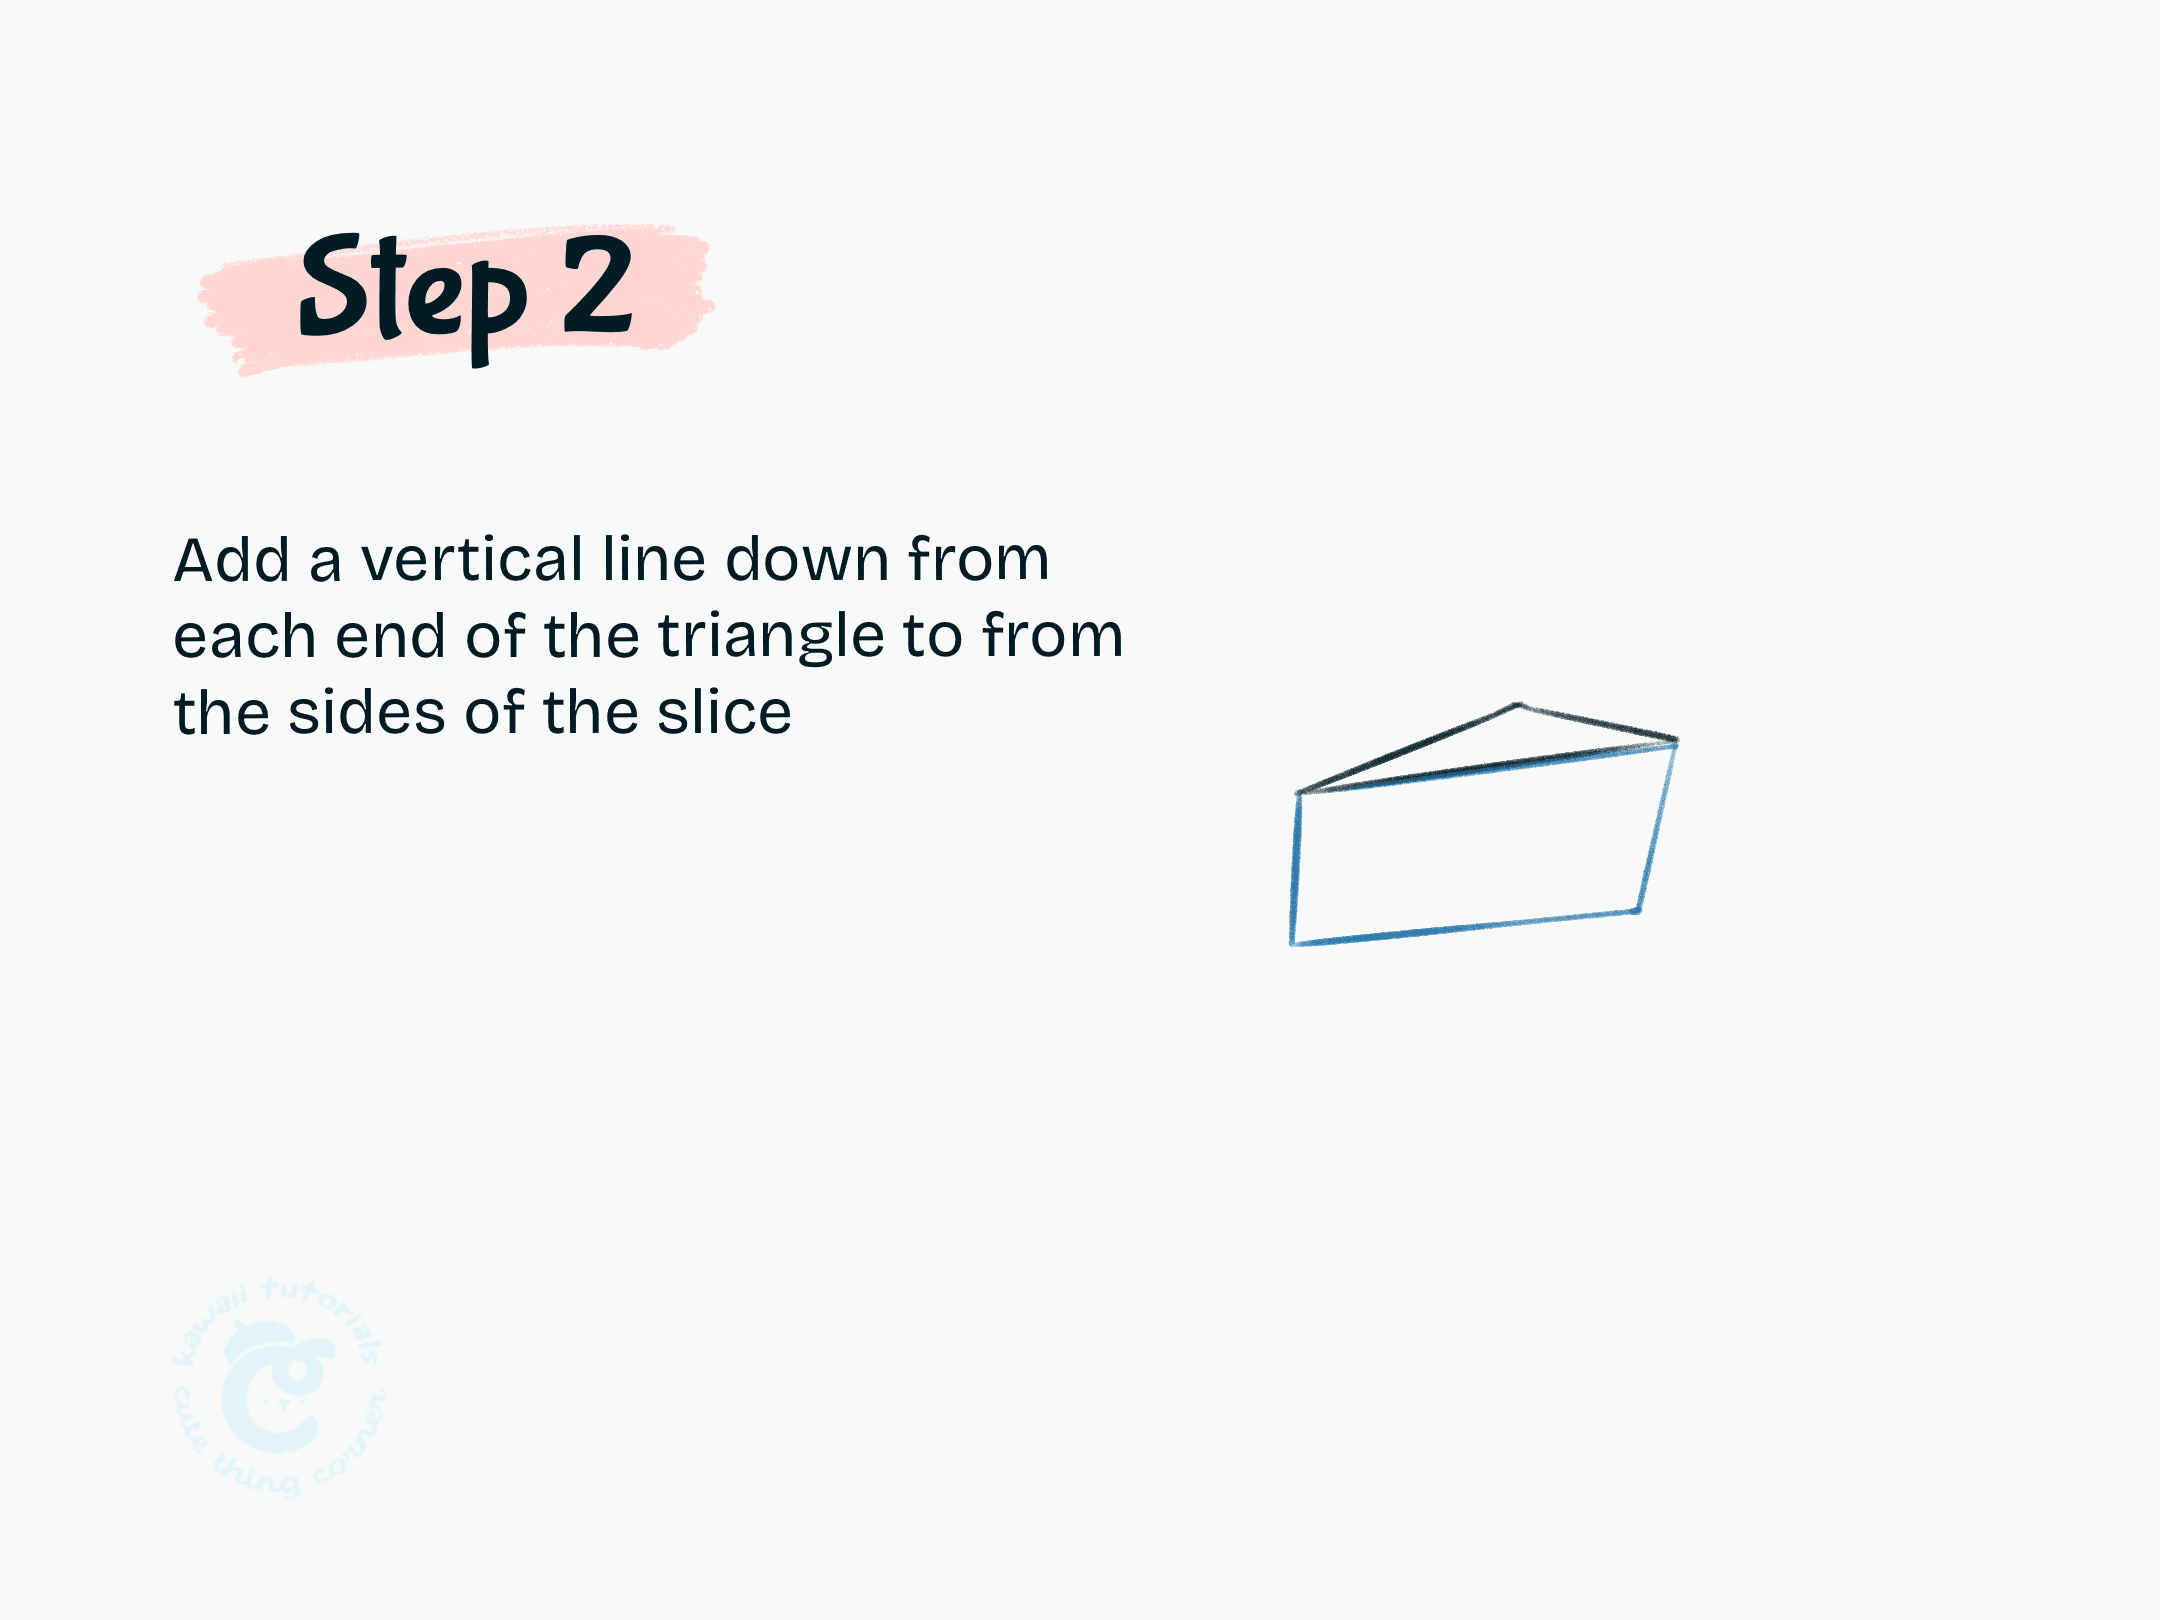
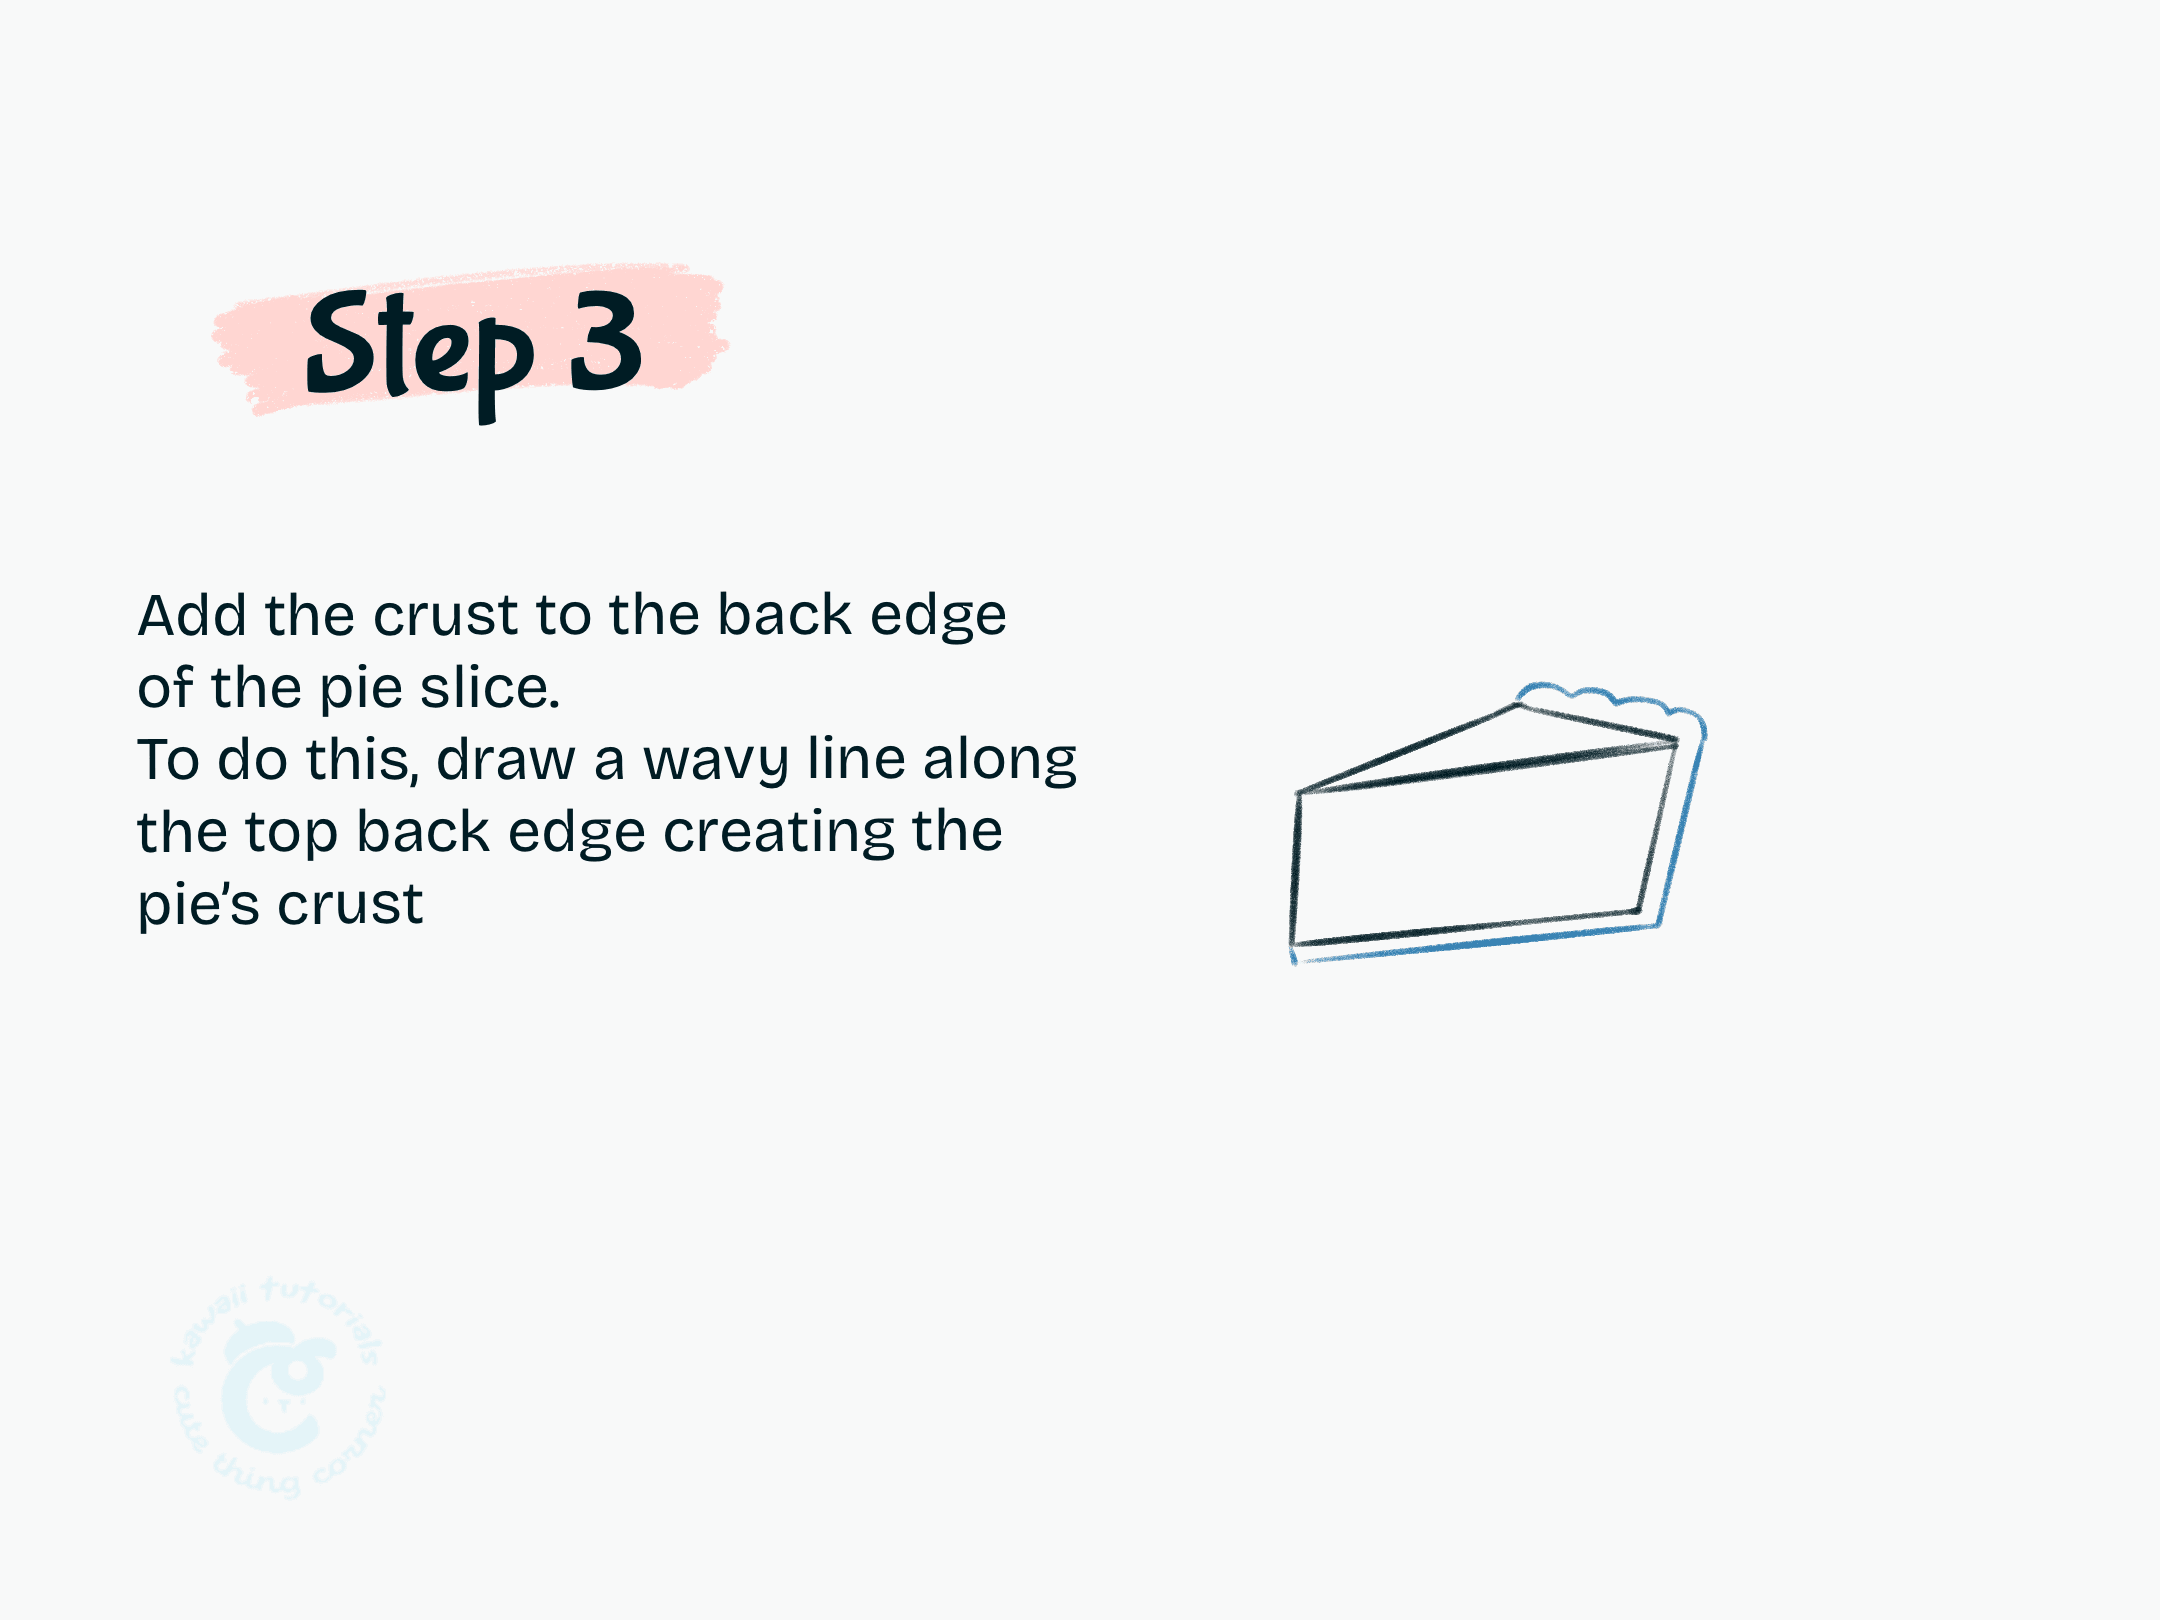
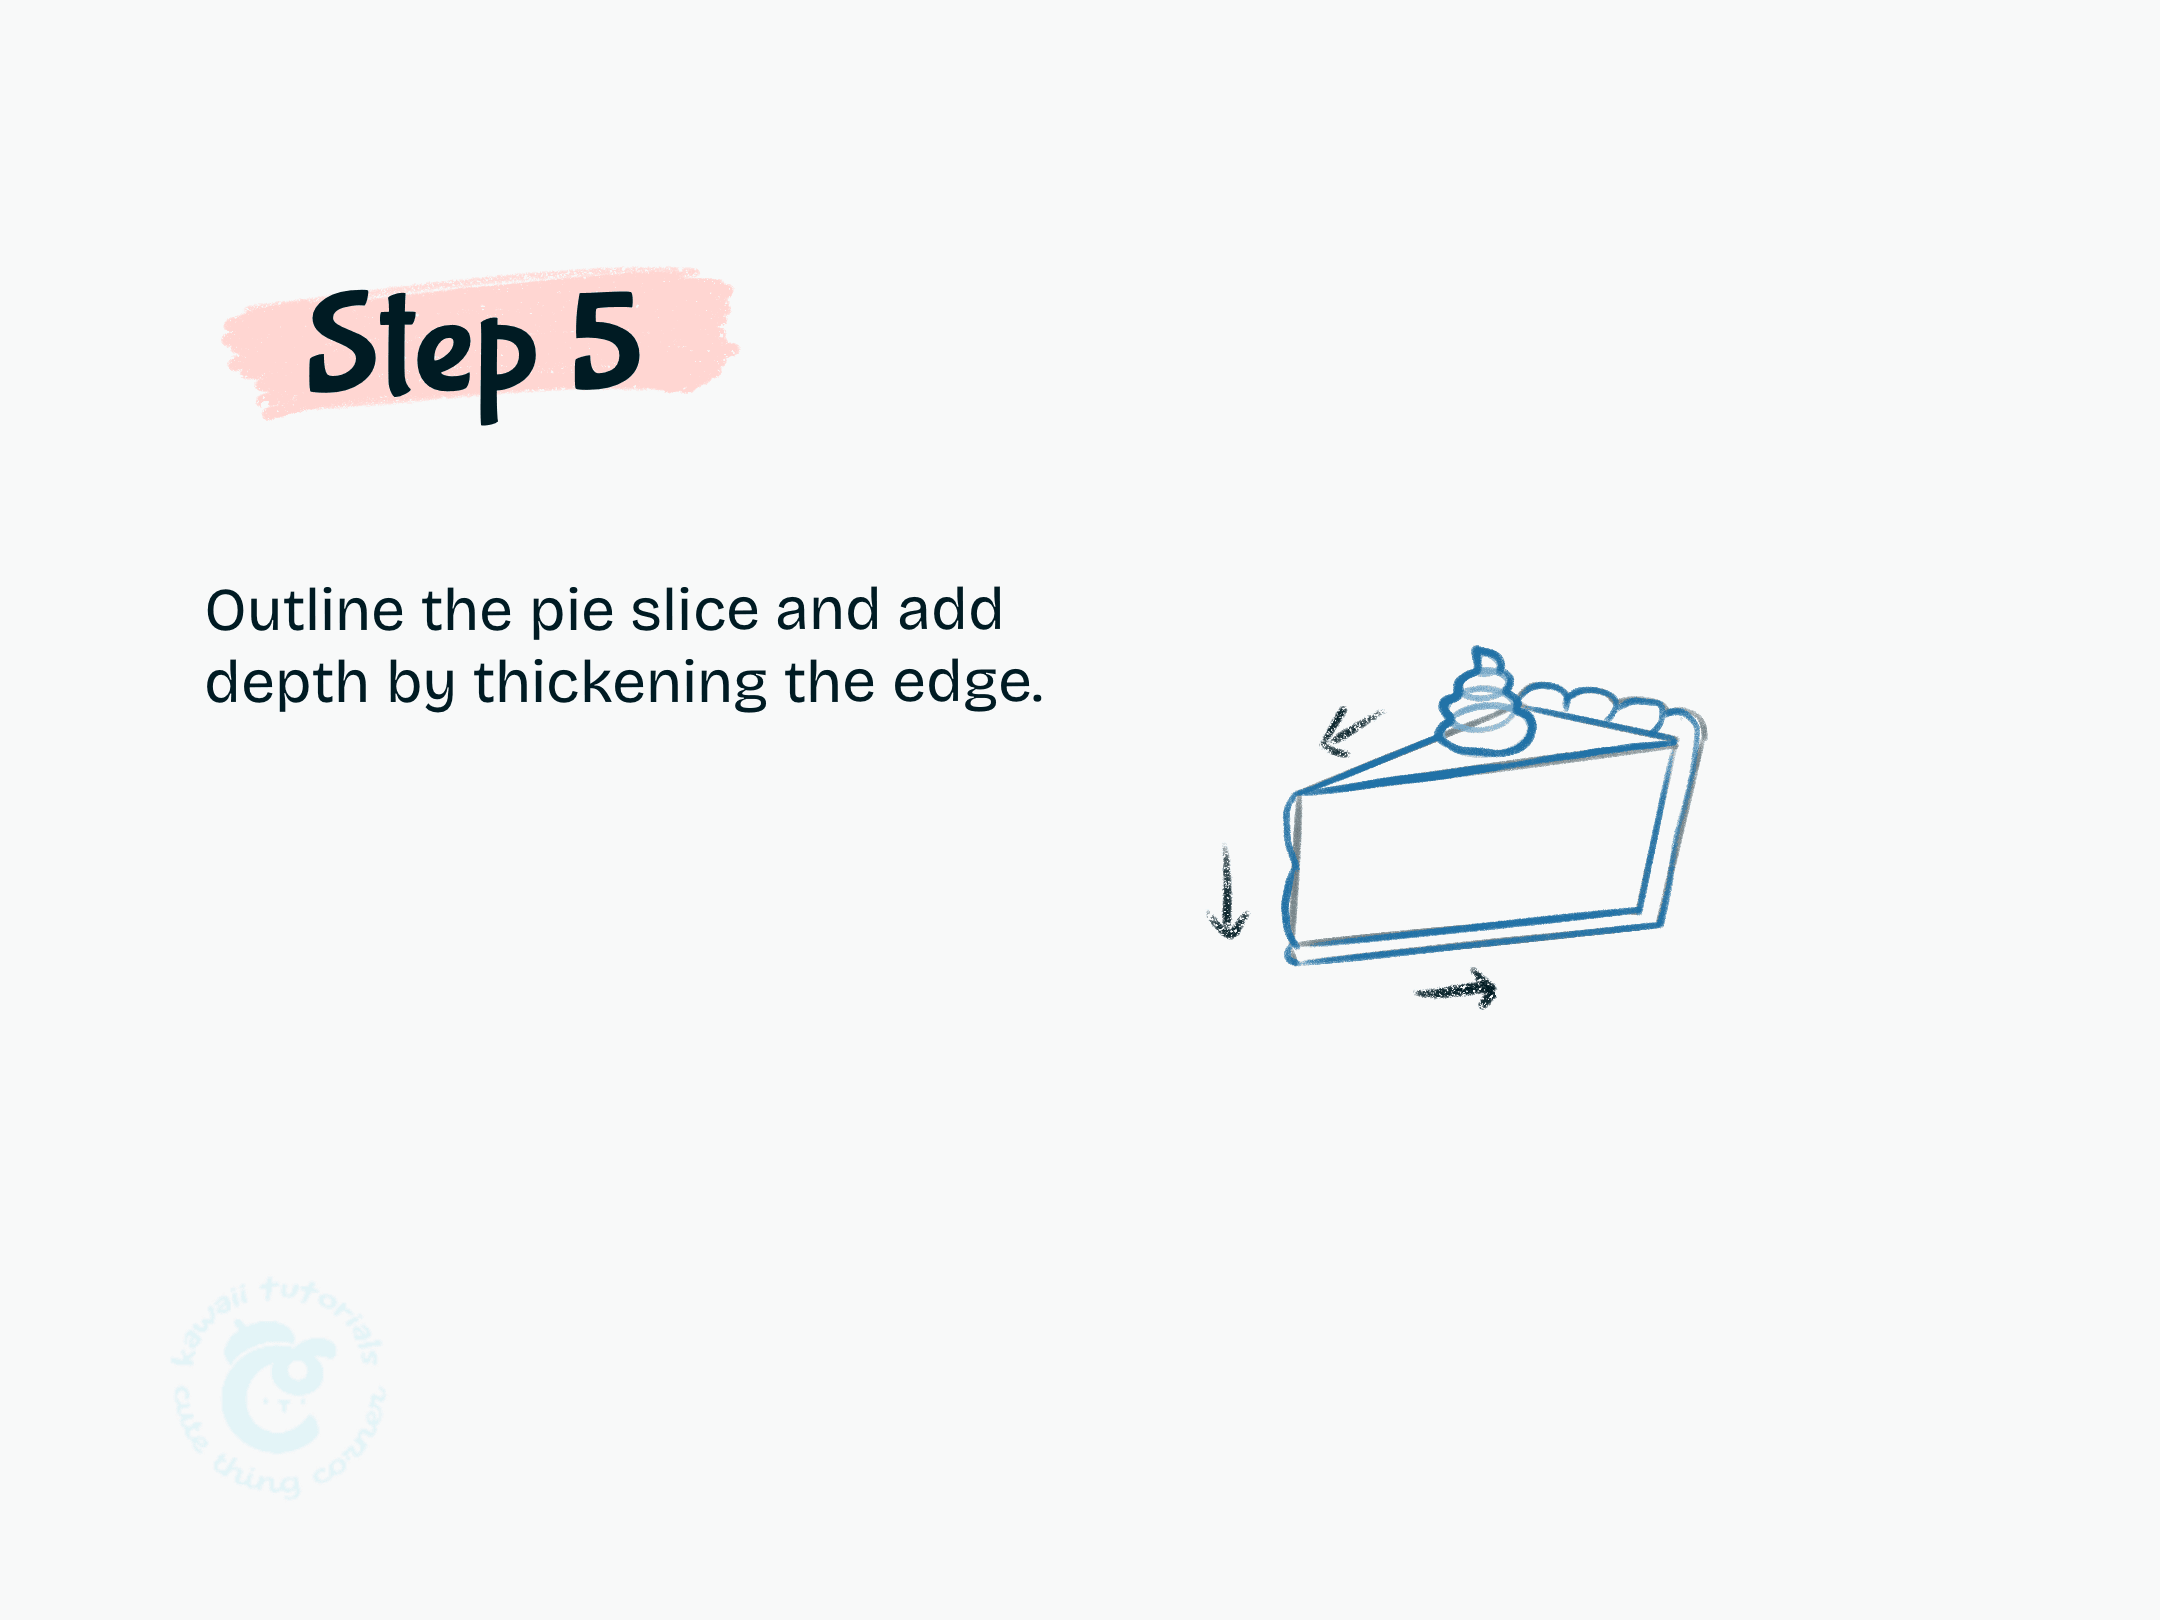
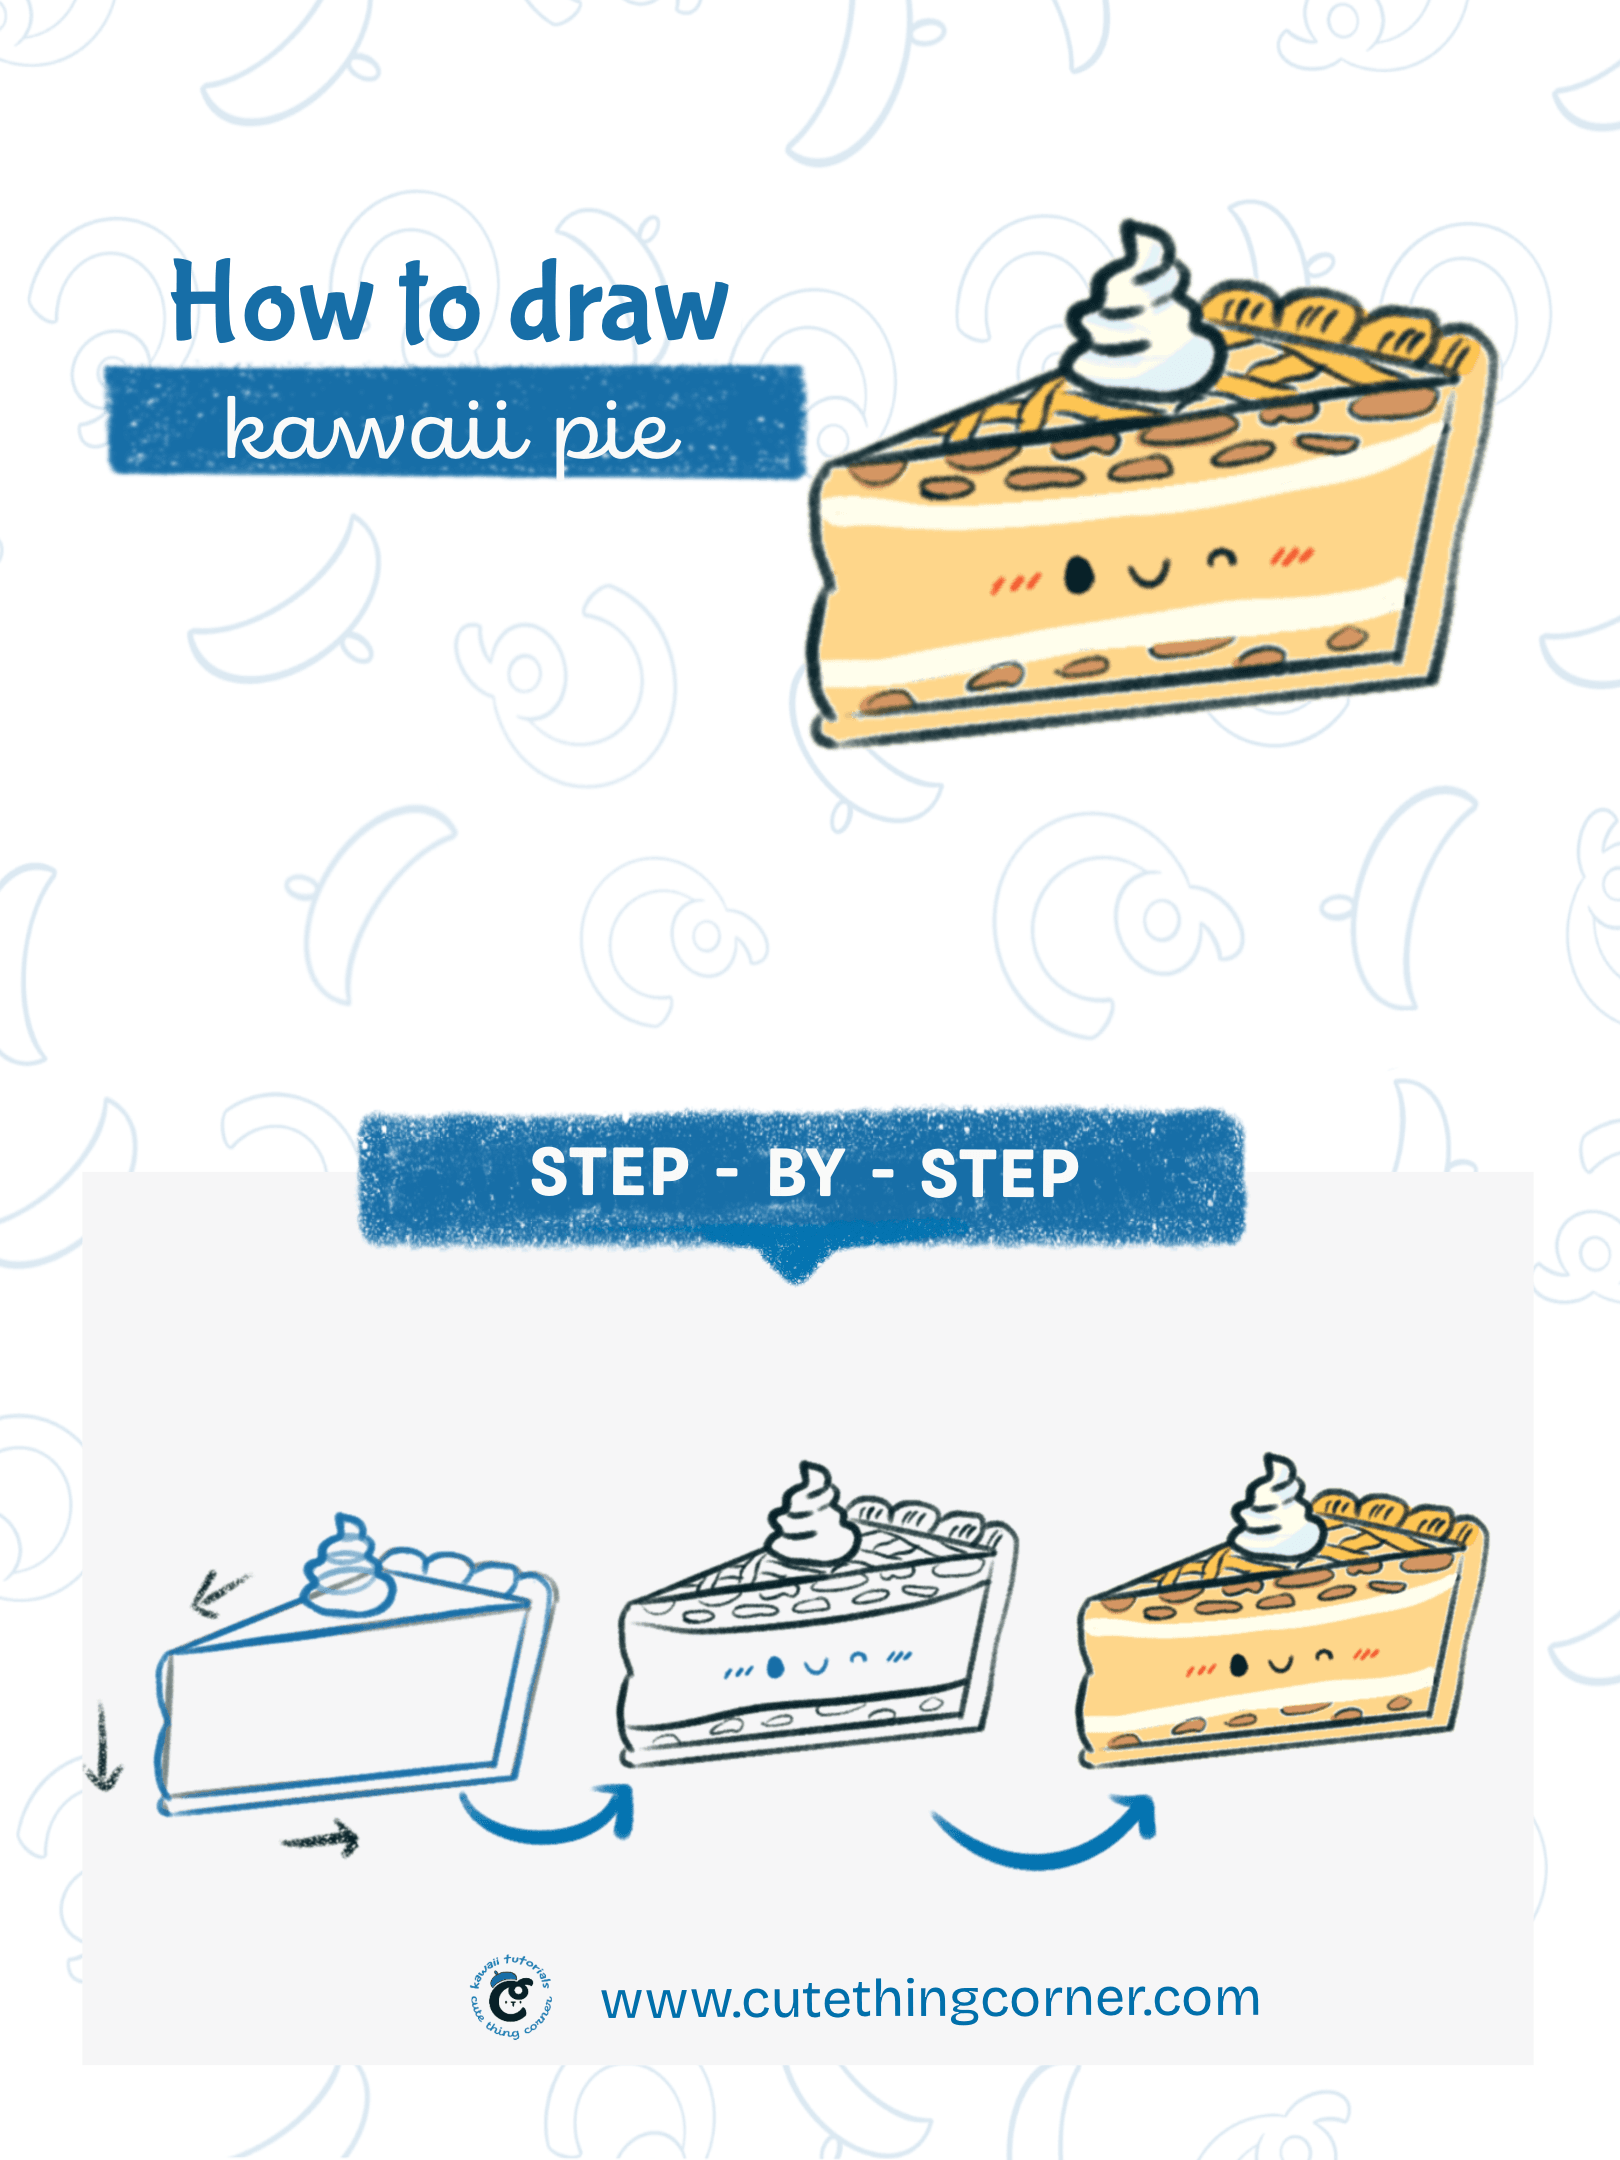
Now jump into step-by-step to draw Kawai Pie.

#Step 1: Draw triangle shape for the top of the pie slice

Draw a triangle shape to form the top part of the pie slice.

Make sure the triangle is slightly rounded at the edges to give it a soft, cute look.

This triangle will serve as the main crust of the pie slice, so keep it slightly wider at the base for a more balanced appearance.

Step 1 Draw triangle shape for the top of the pie slice

Step 1 Draw triangle shape for the top of the pie slice

#Step 2: Add a vertical line down from each end of the triangle to from the sides of the slice

Draw a vertical line extending downward from each end of the triangle to create the sides of the pie slice.

Make sure the lines are parallel and of equal length to give the slice a balanced look.

These lines will form the edges of the pie slice, connecting the top of the pie to the base.

Step 2 Add a vertical line down from each end of the triangle to from the sides of the slice

Step 2 Add a vertical line down from each end of the triangle to from the sides of the slice

#Step 3: Add the crust to the back edge of the pie slice

Create the crust along the back edge of the pie slice by drawing a wavy line across the top.

This wavy line will give the appearance of a textured, baked crust for the pie.

Step 3 Add the crust to the back edge of the pie slice

Step 3 Add the crust to the back edge of the pie slice

#Step 4: Draw a swirl of whipped cream on top of the pie slice by drawing stacked circles.

Add a swirl of whipped cream on top of the pie slice by drawing a series of circles stacked on each other.

This will create the look of a fluffy, layered dollop of cream.

Step 4 Draw a swirl of whipped cream on top of the pie slice by drawing stacked circles.

Step 4 Draw a swirl of whipped cream on top of the pie slice by drawing stacked circles.

#Step 5: Outline the pie slice and add depth by thickening the edge.

Trace the outline of the pie slice and give it a three-dimensional look by making the edges thicker.

Step 5 Outline the pie slice and add depth by thickening the edge.

Step 5 Outline the pie slice and add depth by thickening the edge.

#Step 6: Add details to pie by drawing small oval shapes on the surface and layers within the slice

Enhance the pie by adding small oval shapes on the surface and lines to show layers within the slice. This will give it more texture and detail.

Step 6 Add details to pie by drawing small oval shapes on the surface and layers within the slice

Step 6 Add details to pie by drawing small oval shapes on the surface and layers within the slice

I hope you had fun drawing this cute pie! Thank you for following along with this guide.

Goodbye for now, and see you next time!

Don’t forget to check out the full step-by-step instructions for drawing cute pie!

How to draw a cute pie (Step-by-step)

How to draw a cute pie (Step-by-step)

A world of cute, adorable, kawaii things.
Inspiring and guiding you how to draw cute things.

Latest Tutorial

Related Tutorials

How to Draw a Cute Leprechaun – Step-by-Step Guide

How to Draw a Cute Leprechaun – Step-by-Step Guide

St. Patrick’s Day is just around the corner, and what better way to celebrate than by drawing an adorable leprechaun! This post I will guide you how to draw a cute leprechaun by yourself. In this easy step-by-step tutorial from Cute Thing Corner, you’ll learn how to...

read more
How to Draw Cute Player 067 from Squid Game (Step-by-step)

How to Draw Cute Player 067 from Squid Game (Step-by-step)

Want to learn how to draw cute Player 067 from Squid Game? 🎨✨ In this easy step-by-step tutorial from Cute Thing Corner, we’ll guide you through sketching Kang Sae-byeok in a kawaii style! With her iconic look and strong personality, this is a fun drawing project for...

read more
How to Draw Cute Player 240 from Squid Game (Step-by-Step)

How to Draw Cute Player 240 from Squid Game (Step-by-Step)

Are you a fan of Squid Game and love drawing kawaii characters? 🎨✨ In this tutorial from Cute Thing Corner, we’ll guide you step by step on how to draw cute Player 240 in a cute and easy style. From her signature outfit to her expressive face, this guide will help you...

read more
How to Draw Kawaii Box of Chocolate (Step-by-step)

How to Draw Kawaii Box of Chocolate (Step-by-step)

How to Draw Kawaii Box of Chocolate in Valentine's day. Nothing says sweet and adorable like a kawaii box of chocolates! 🍫💕 Whether you’re drawing for Valentine’s Day, a cute gift idea, or just love chocolate-inspired art, this step-by-step tutorial from Cute Thing...

read more
How to Draw Cute Thanos Squidgame (Step-by-step)

How to Draw Cute Thanos Squidgame (Step-by-step)

How to Draw Cute Thanos Squidgame. How to draw Squid Game characters. Easy cute step by step drawing tutorial with Cute Thing Corner that is intended for artists of all ages and skill levels. Choi Su-bong (Korean: 최수봉), also known as Thanos and Player 230, is a major...

read more