Looking to add some festive fun to your art projects? In this step-by-step guide from Cute Thing Corner, you’ll learn how to draw a kawaii Chococat Christmas tree, featuring the beloved Sanrio character with cute holiday details. This tutorial is perfect for beginners, Sanrio fans, or anyone who loves kawaii art. Grab your pencils, and let’s create a charming holiday scene together! 🎄🐾✨
Note: This artwork is fan art and is not affiliated with or endorsed by Sanrio. All rights to the Chococat character belong to Sanrio
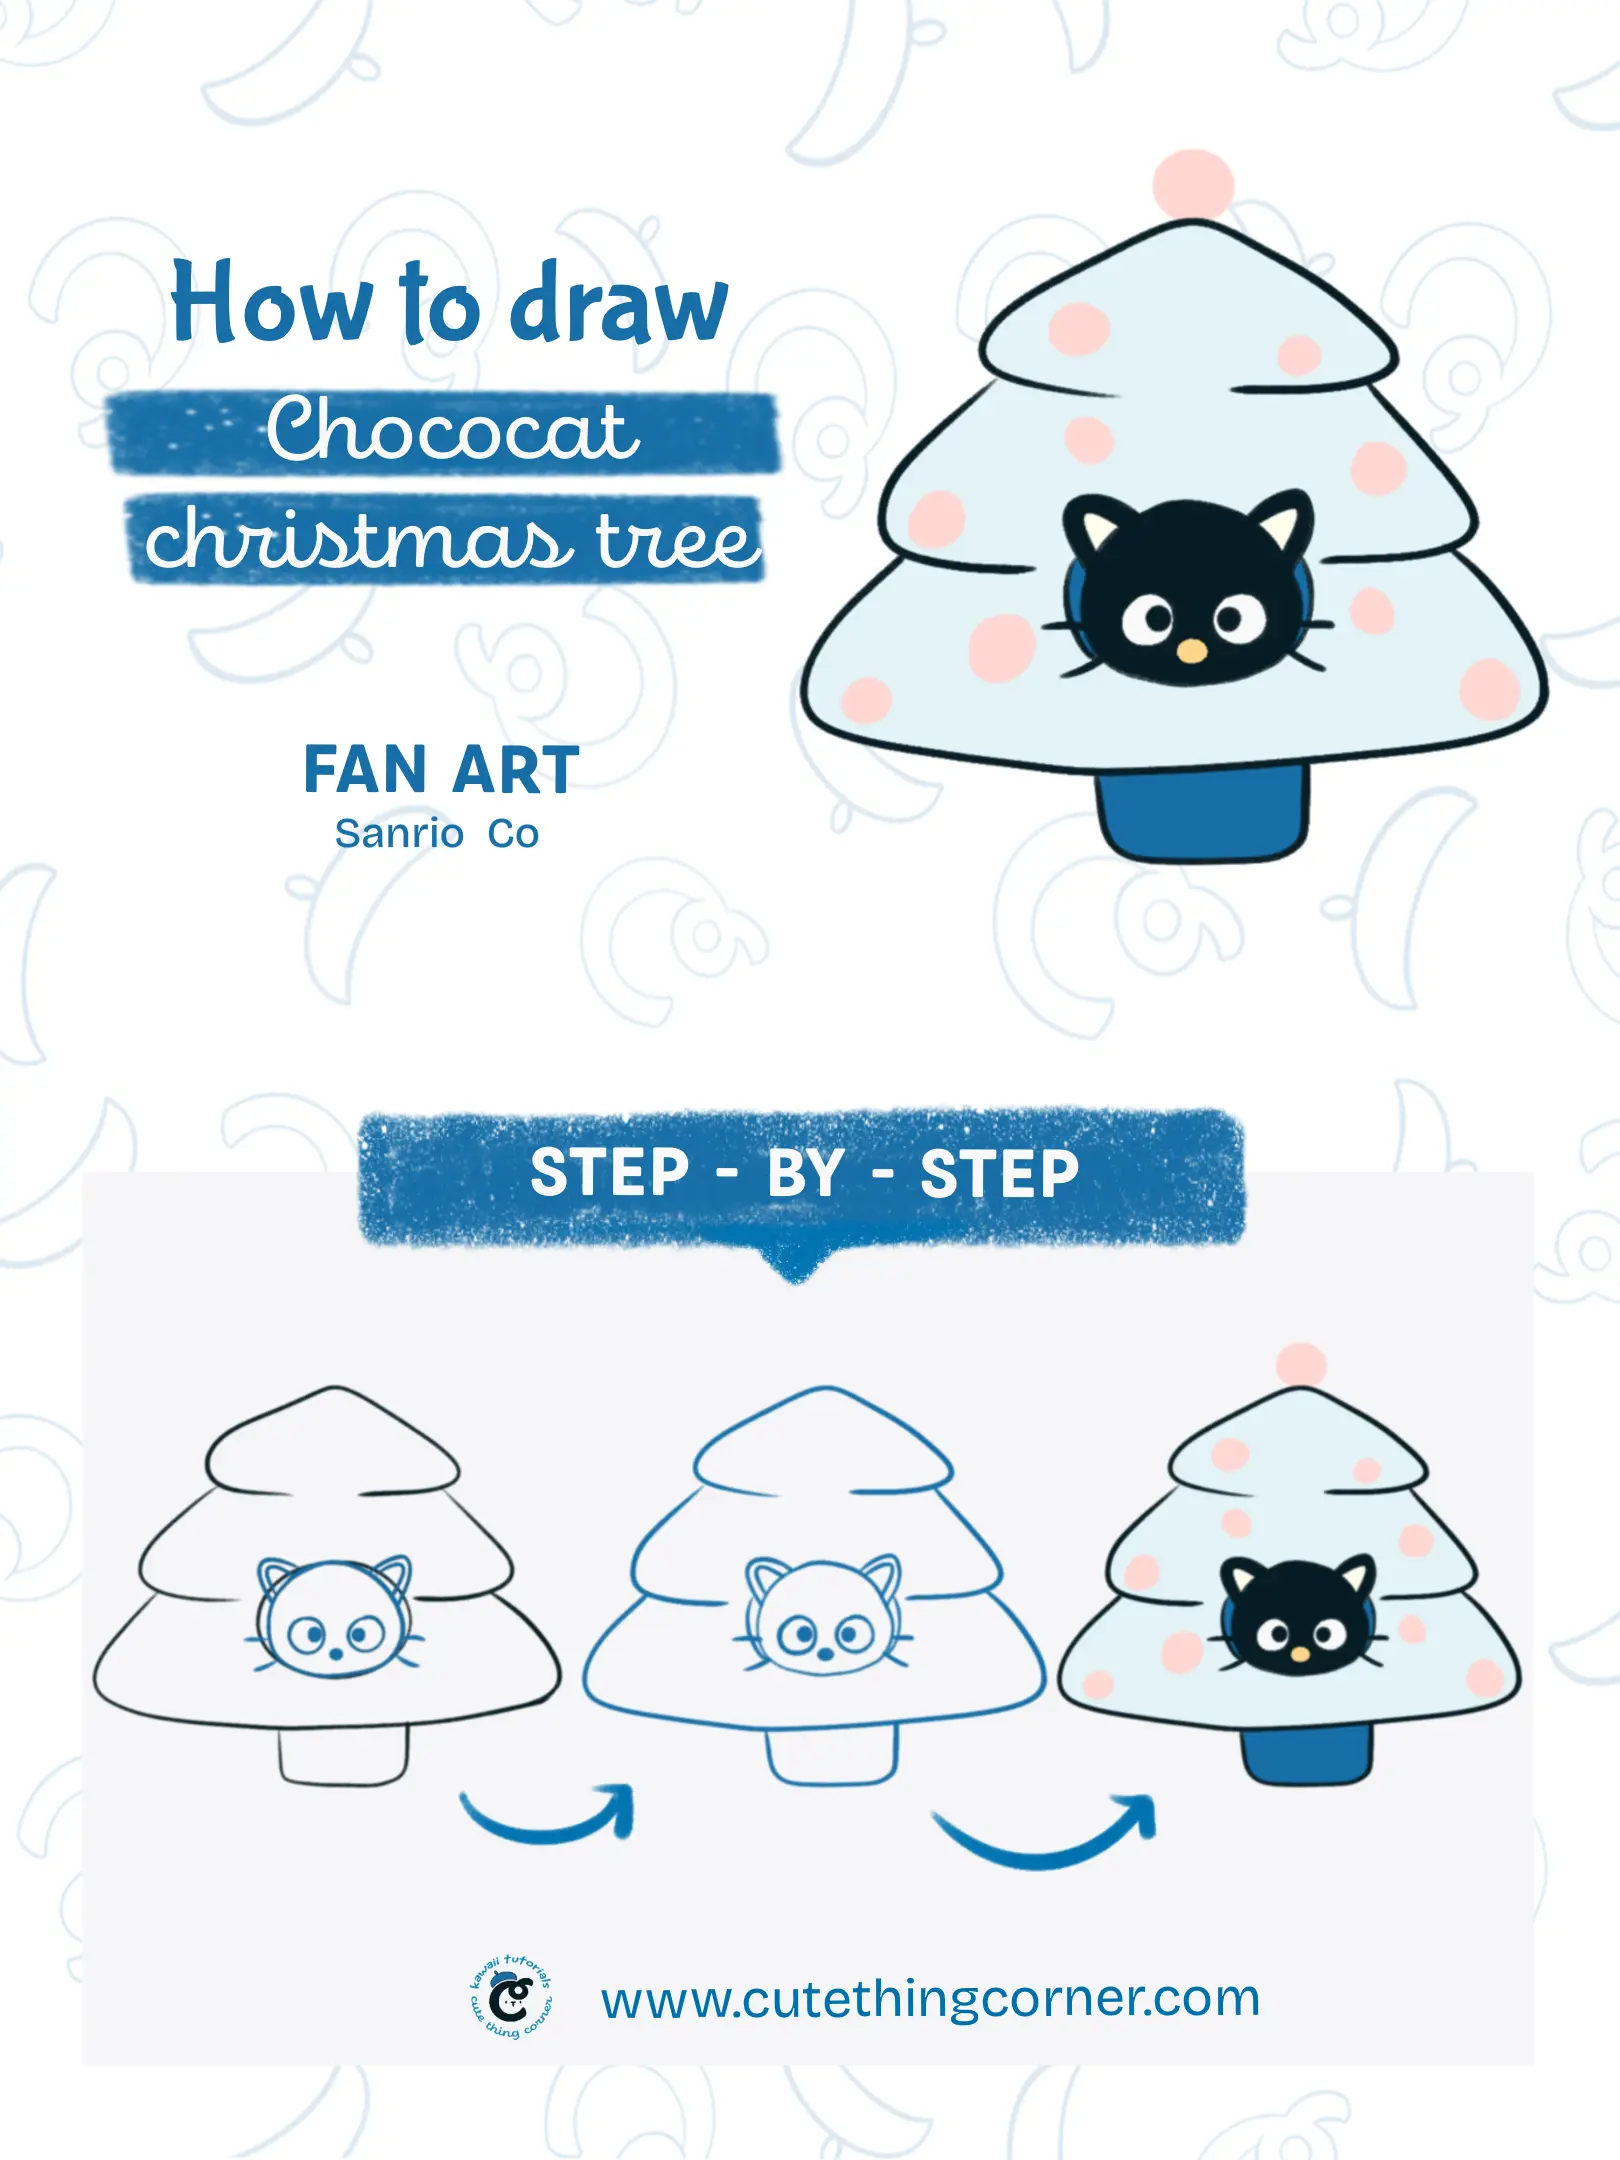
How to draw kawaii Chococat christmas tree
Now jump into each steps to draw kawaii Chococat christmas tree:
#Step 1: Draw a triangular shape for the tree and a small rectangle at the bottom to form the trunk. Add horizontal lines inside the triangle to divide it into sections
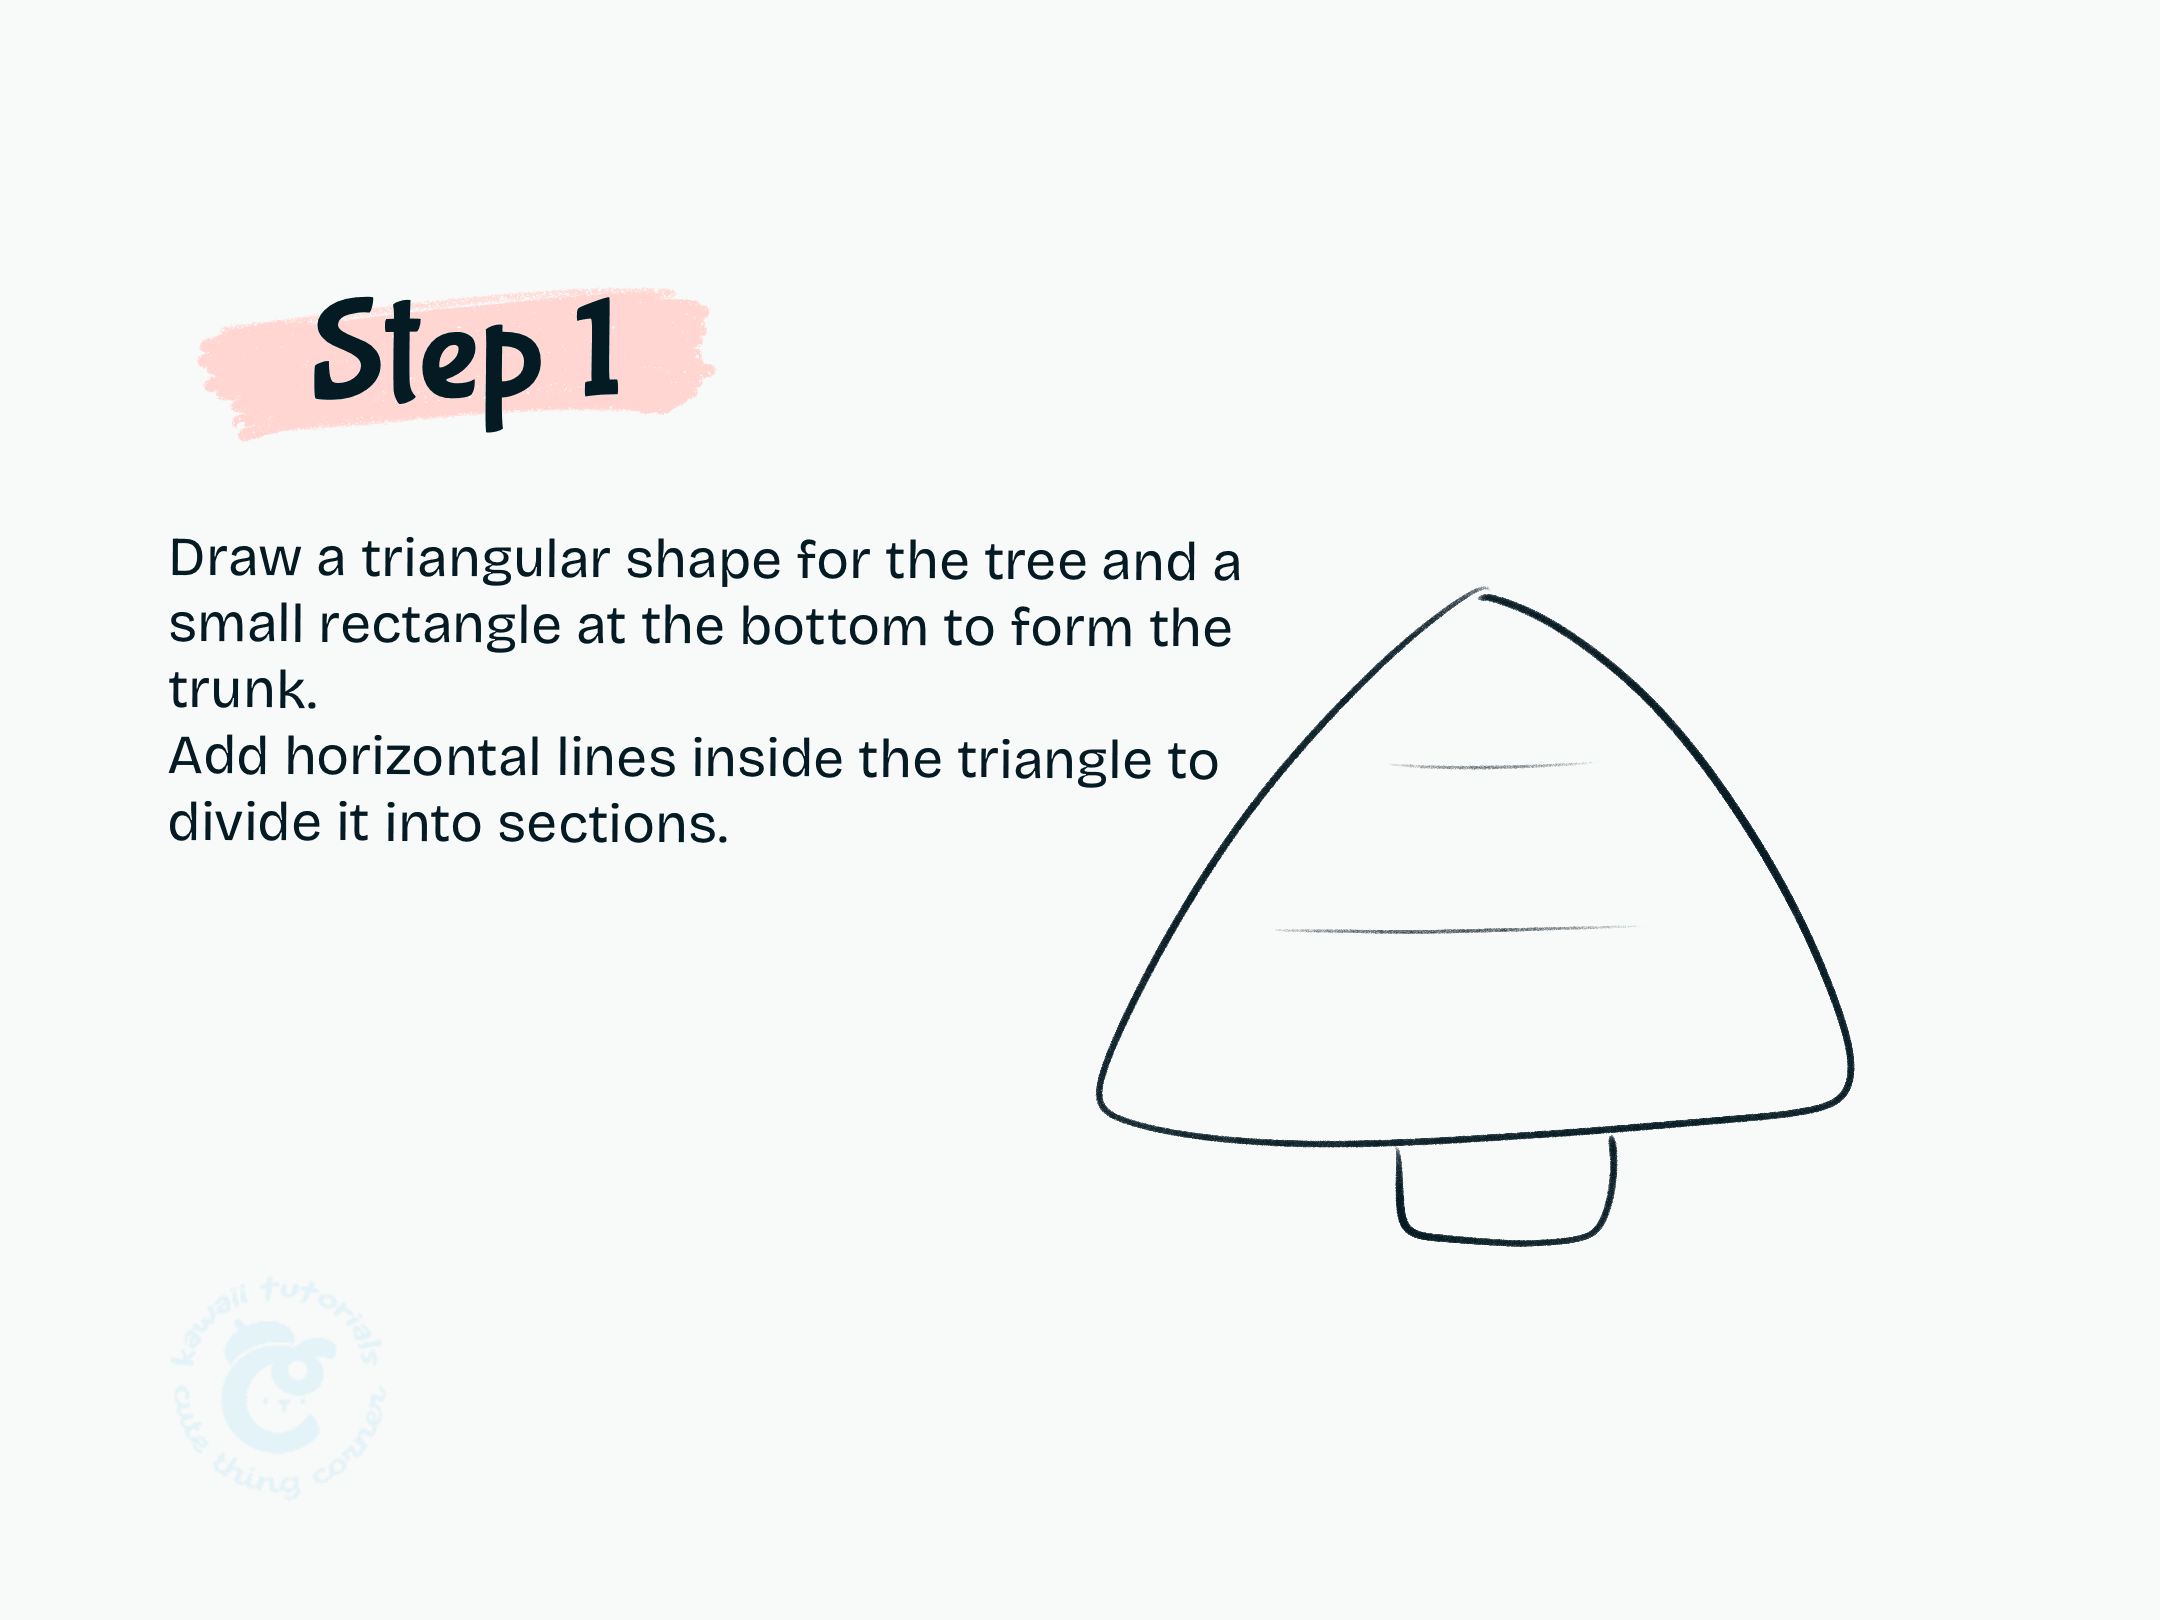
Step 1 Draw a triangular shape for the tree and a small rectangle at the bottom to form the trunk
#Step 2: Refine the triangular shape into curved layers for the tree. Add smooth, rounded edges to create a natural look for the branches
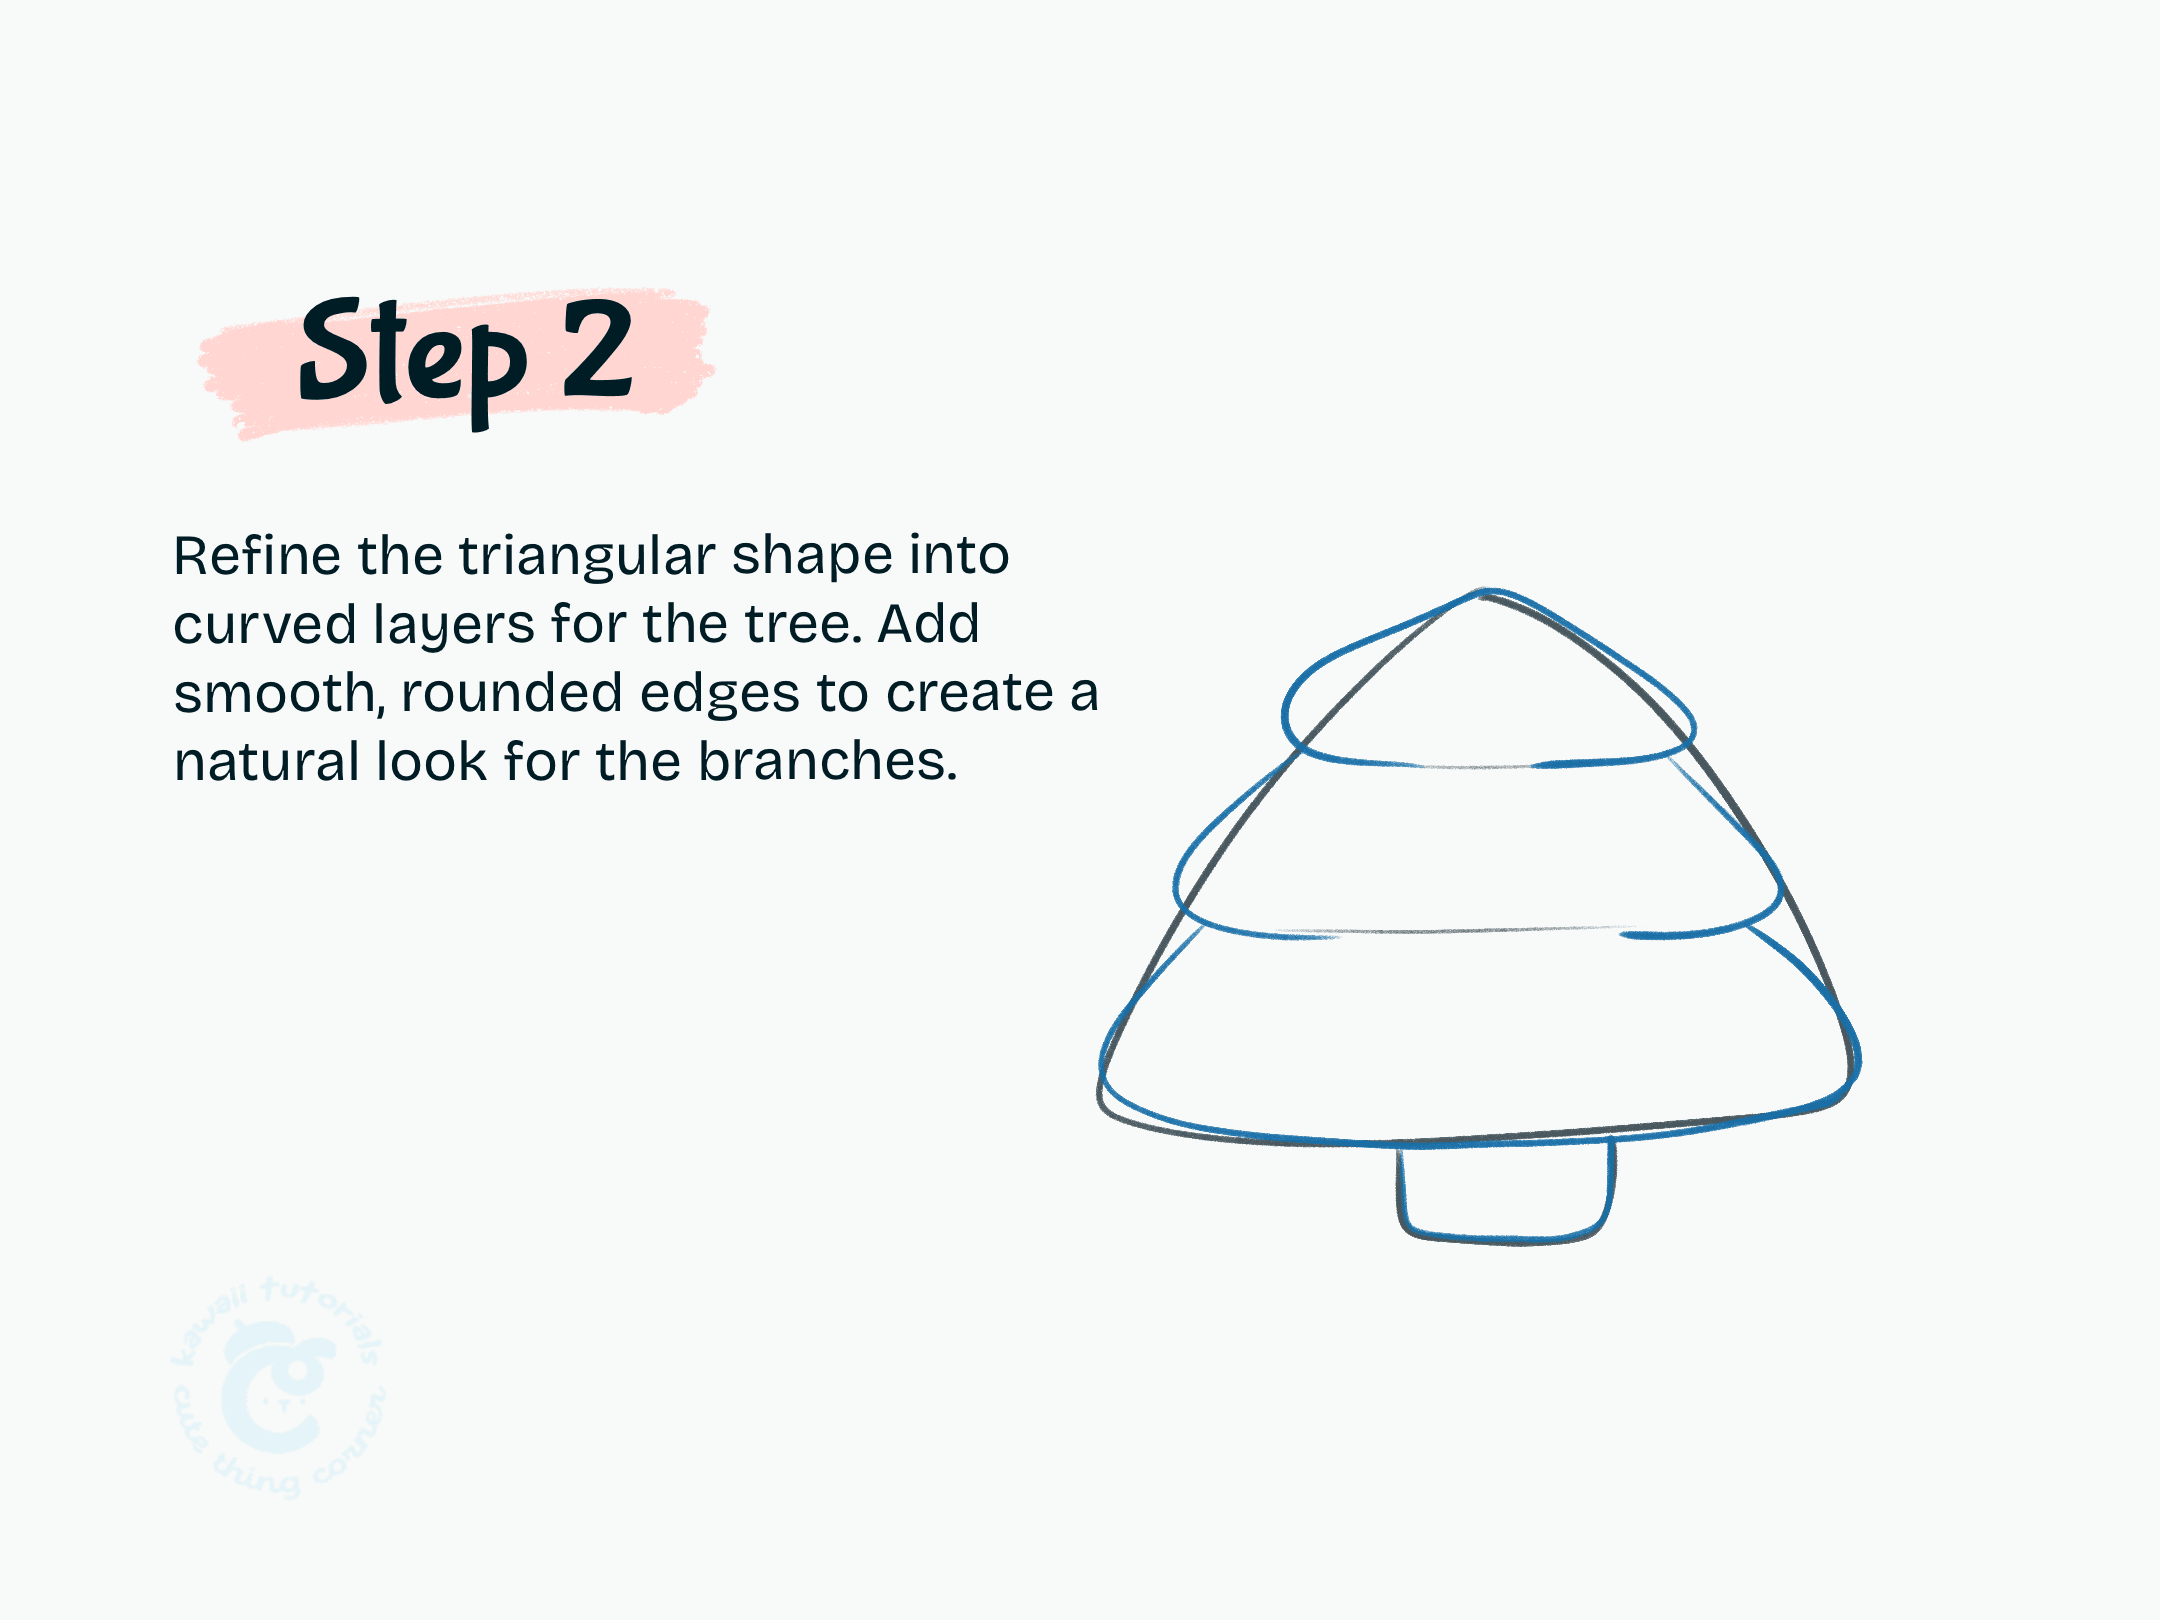
Step 2 Refine the triangular shape into curved layers for the tree
#Step 3: Add a circle to the center of the tree to outline where the face or decorative element will be placed. This creates a focal point on the tree.
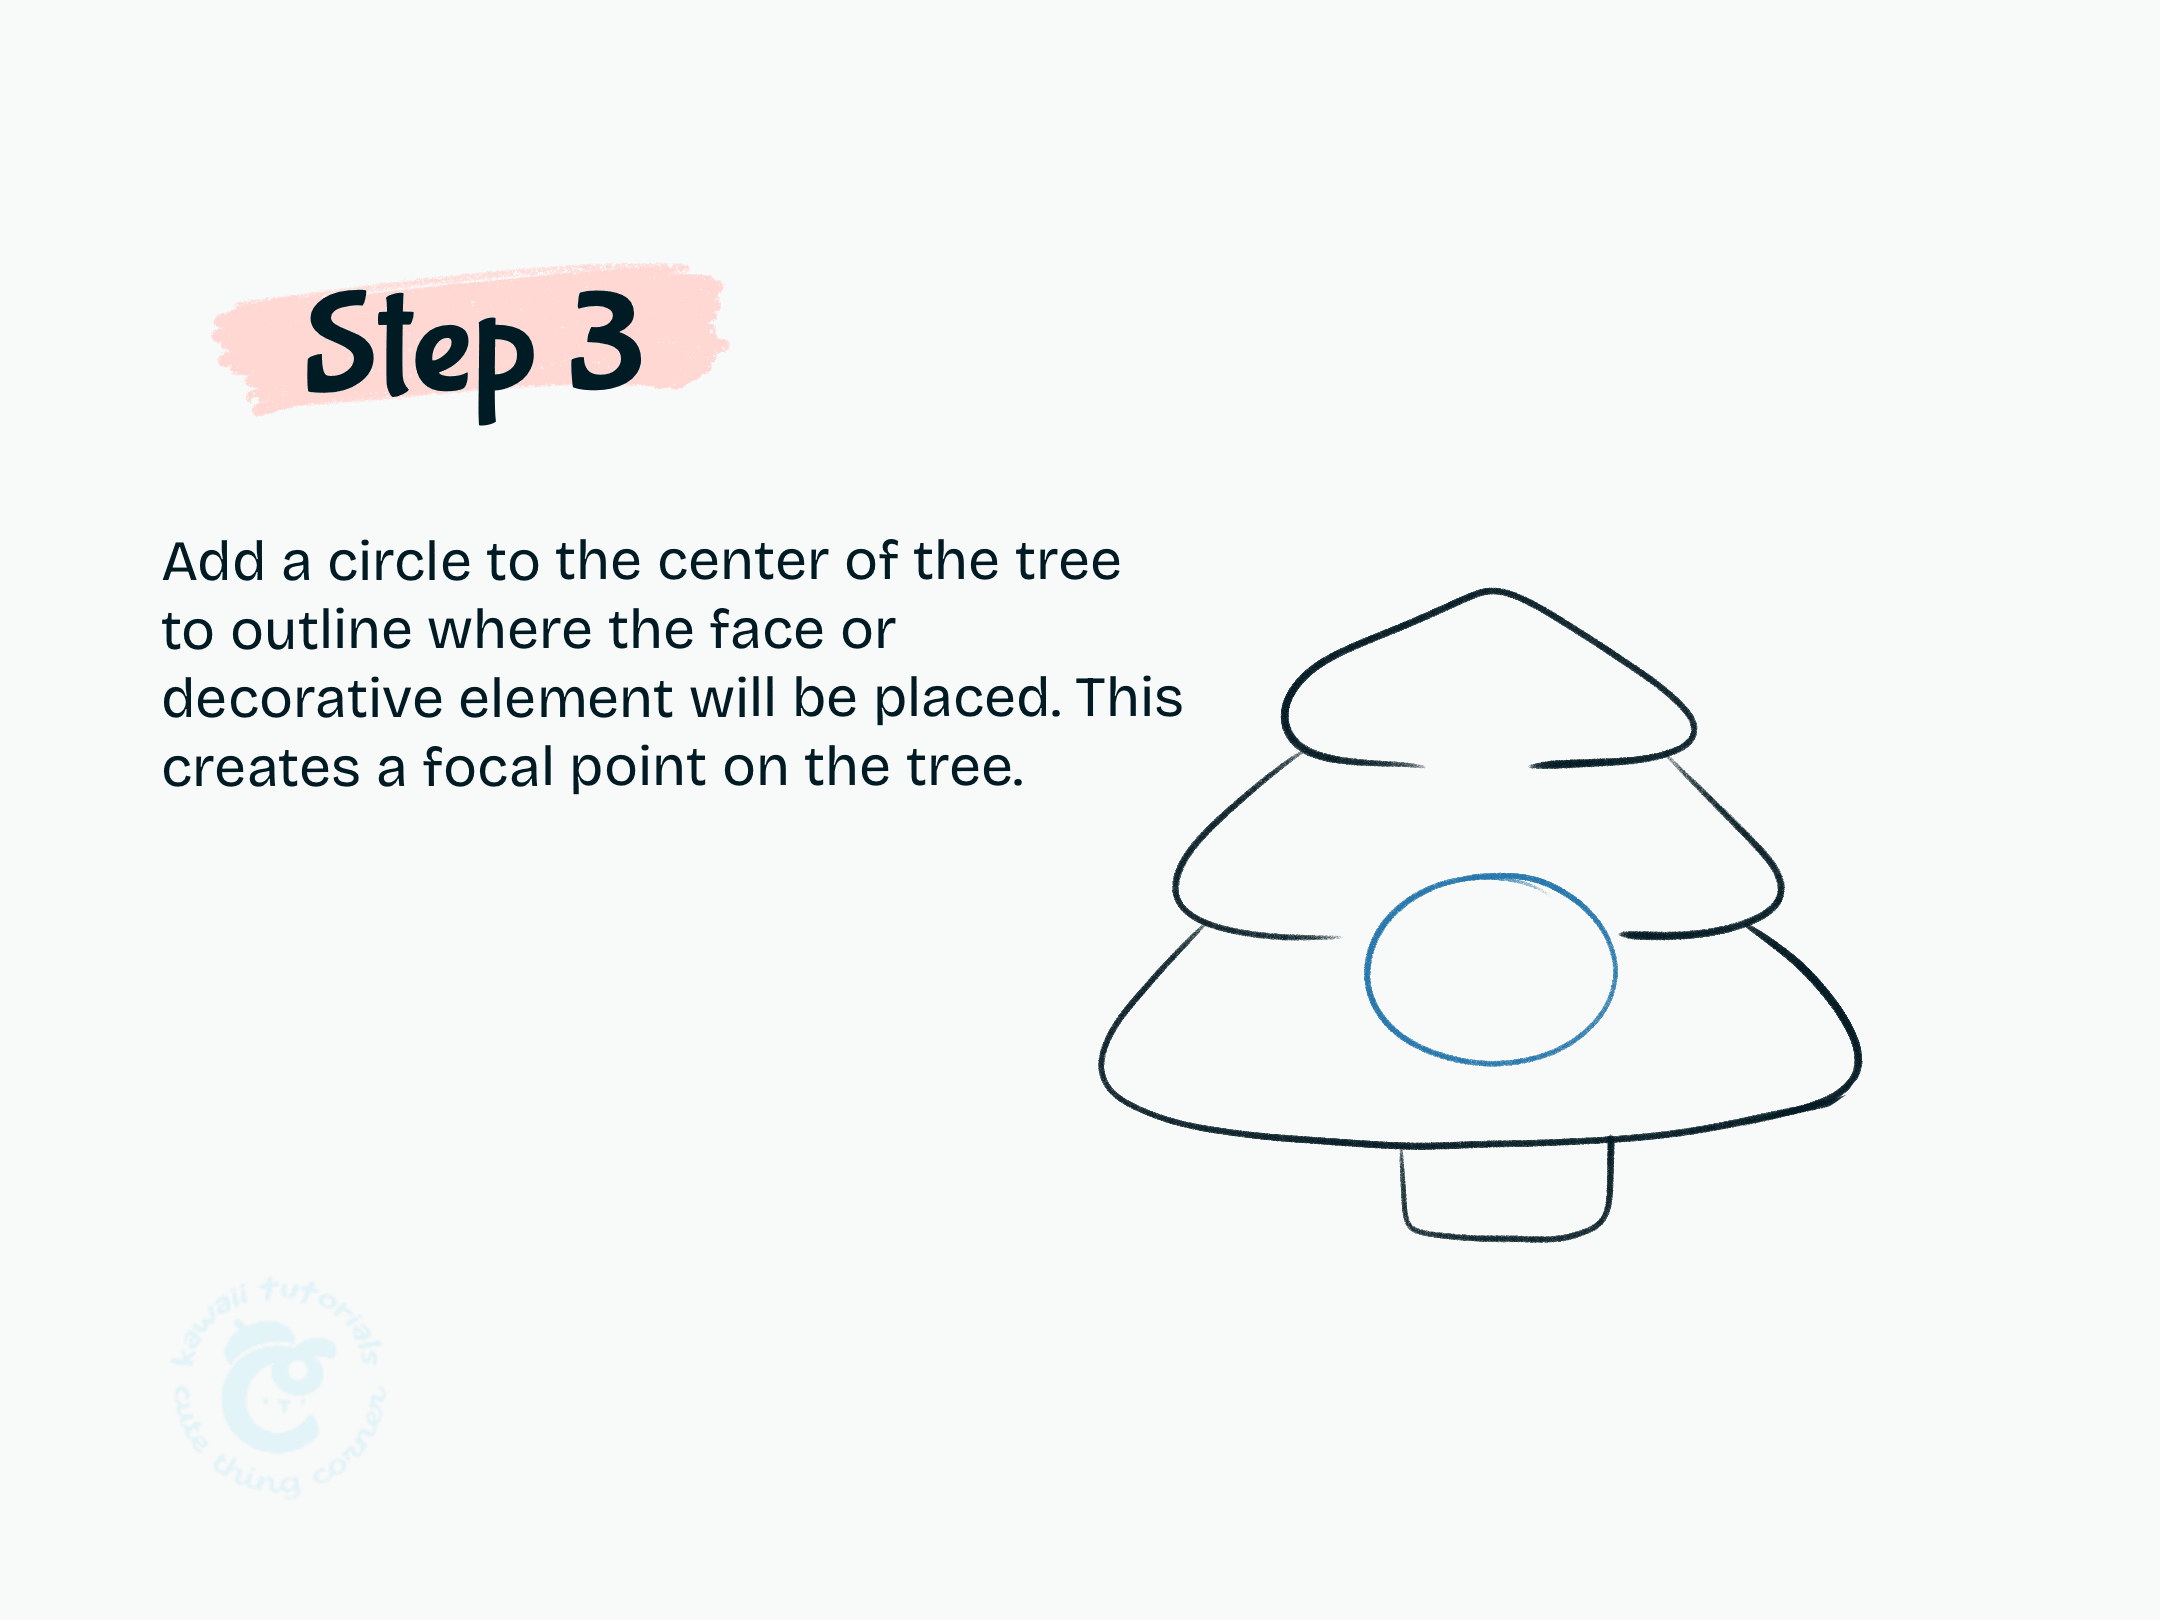
Step 3 Add a circle to the center of the tree to outline where the face or decorative element will be placed
#Step 4: Add two small triangle shapes for the ears and add a circle to create head
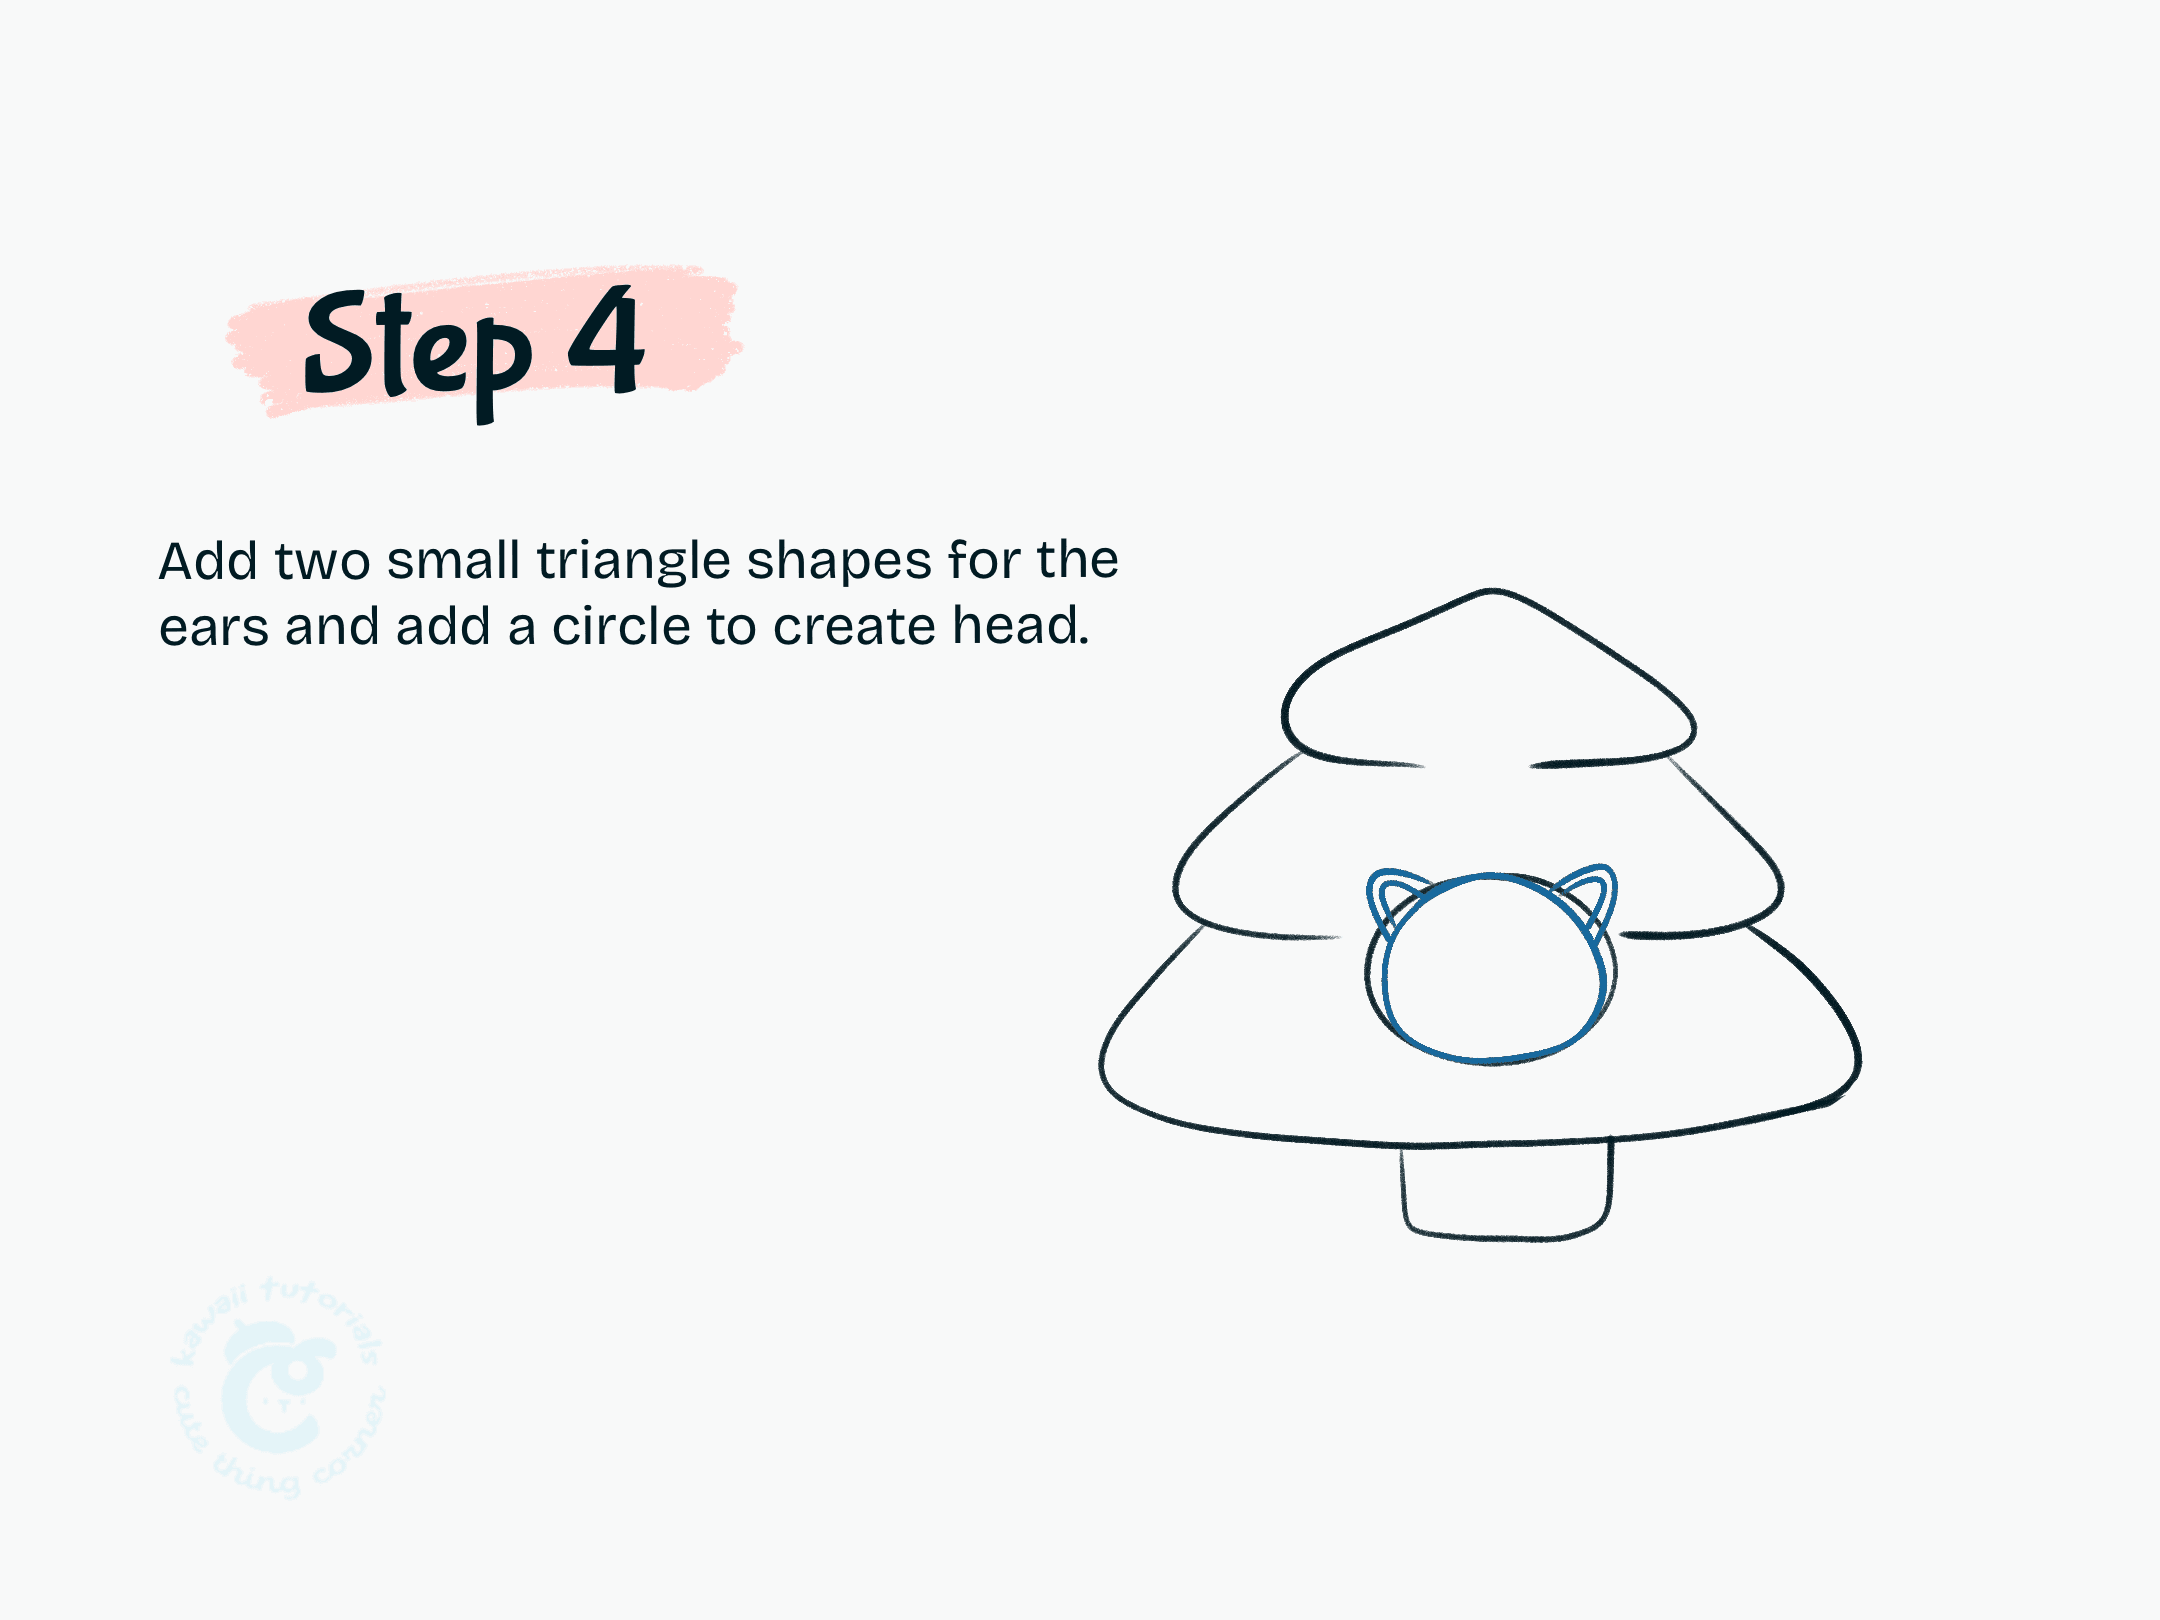
Step 4 Add two small triangle shapes for the ears and add a circle to create head
#Step 5: Draw two large circular eyes inside the face and add small pupils to make the face more expressive and cute
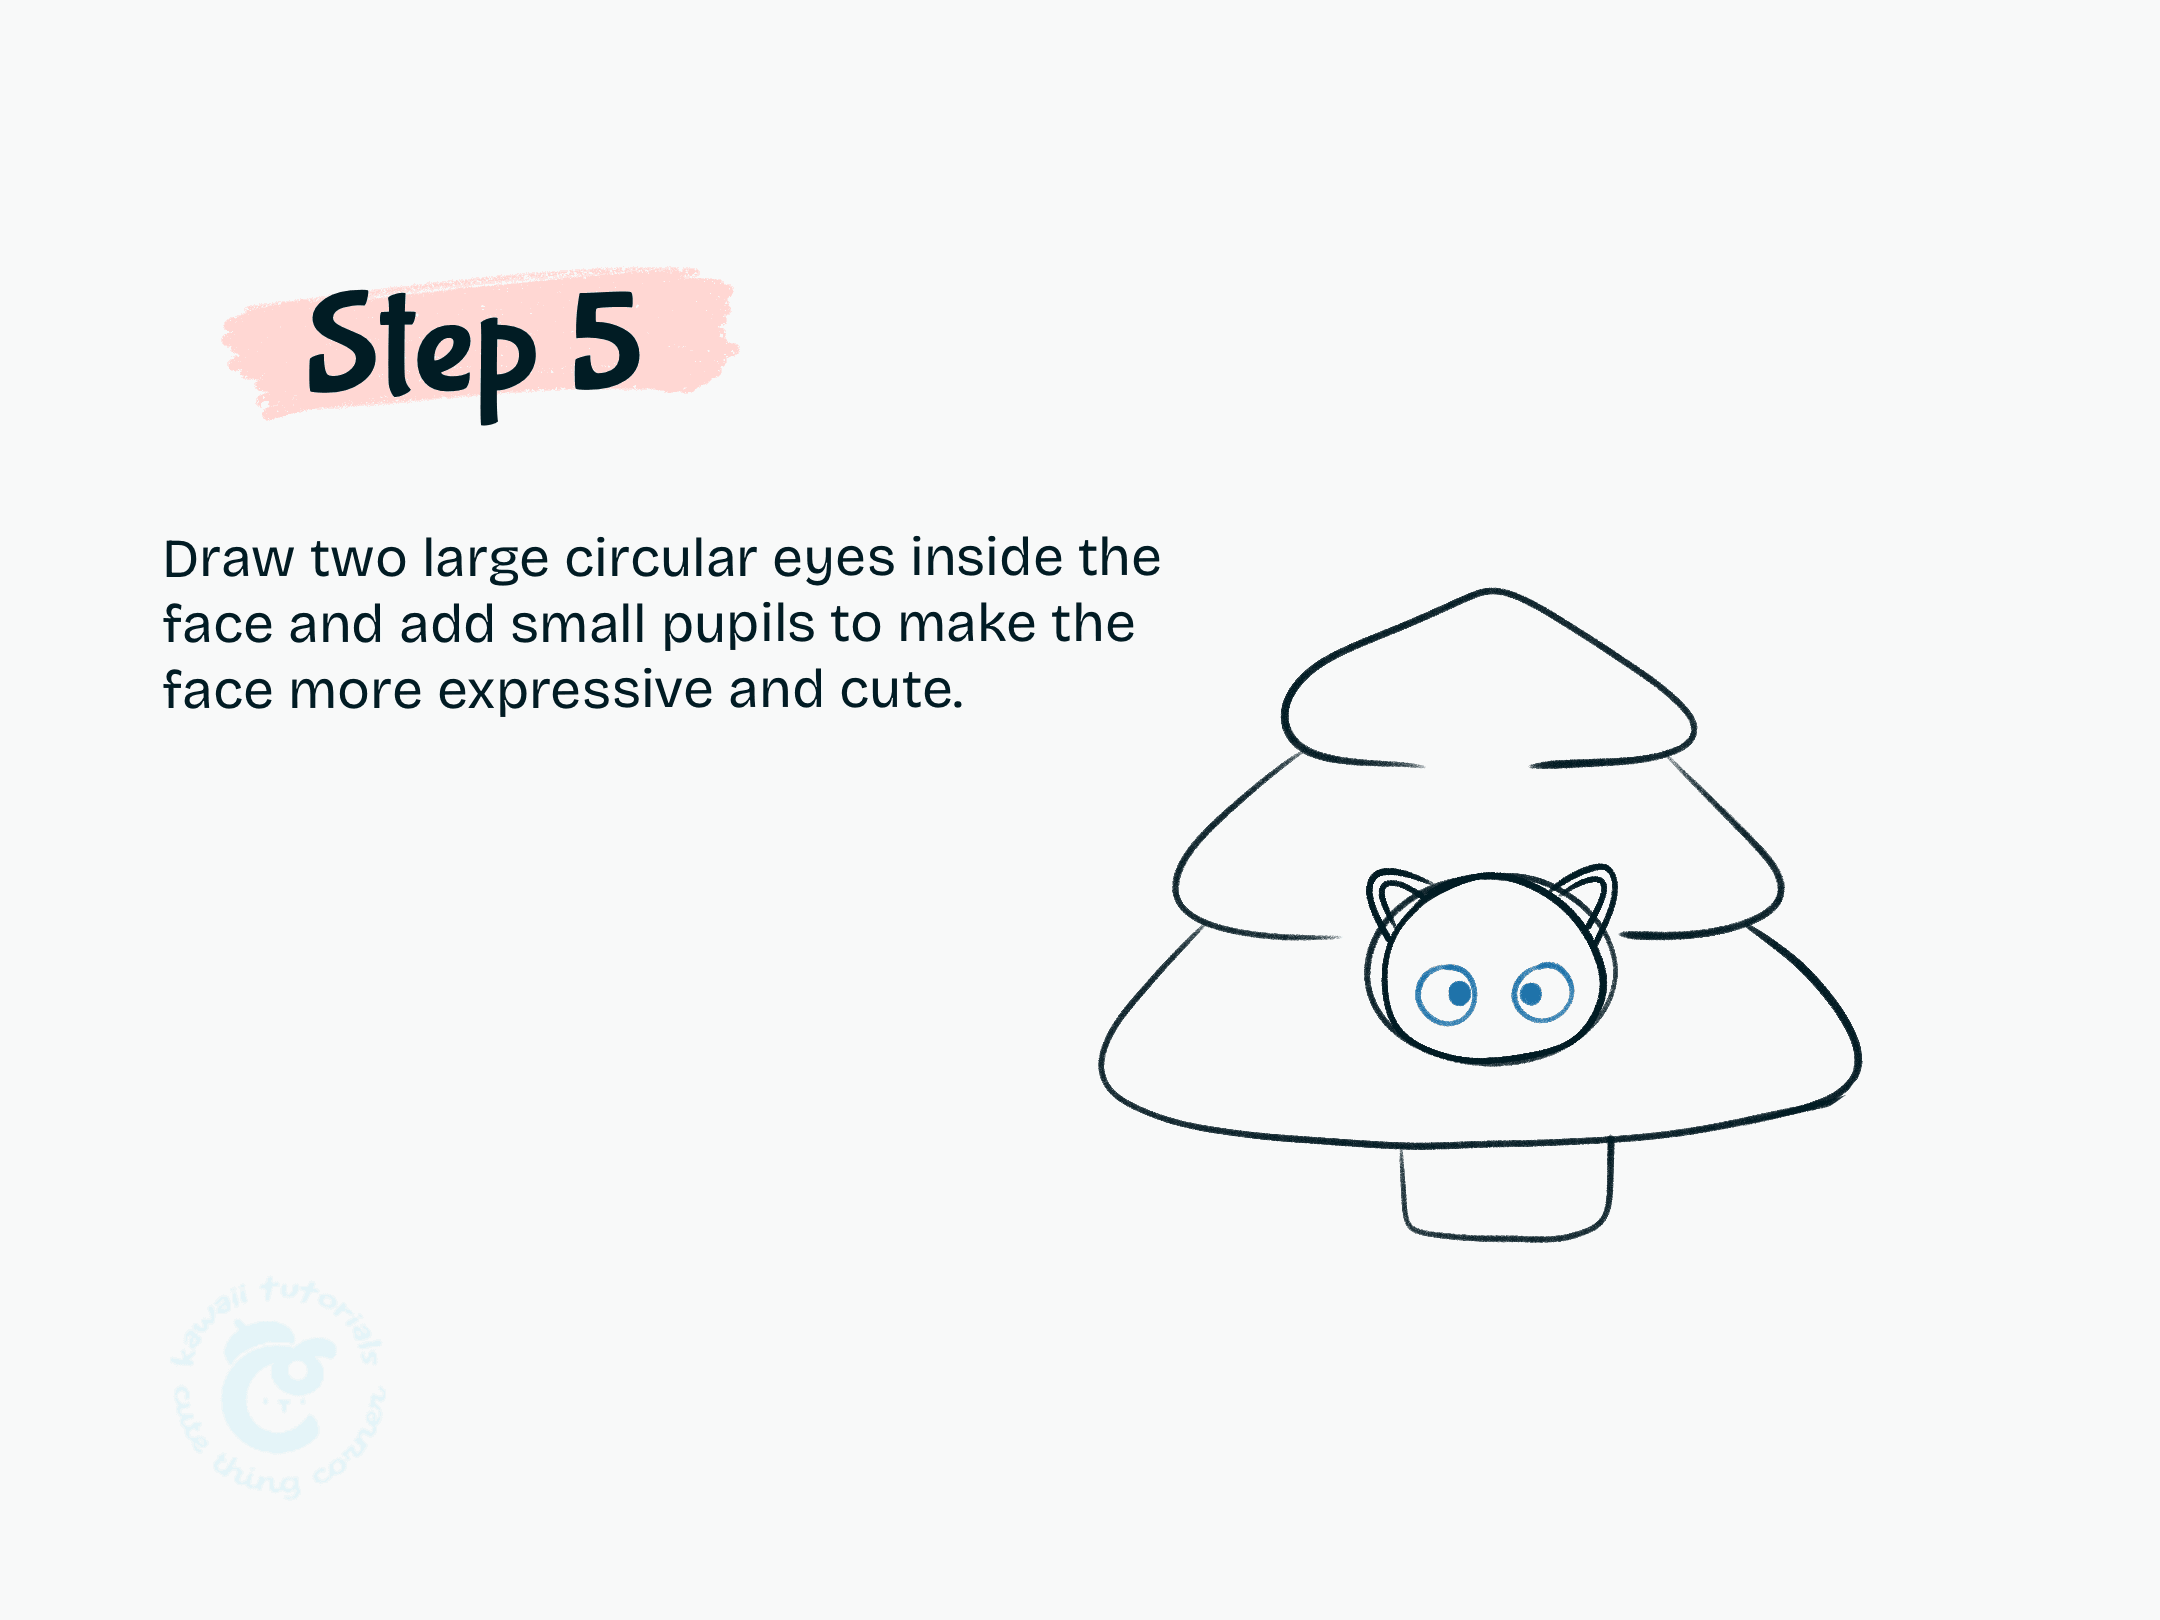
Step 5 Draw two large circular eyes inside the face and add small pupils to make the face more expressive and cute
#Step 6: Add a small nose and whiskers on each side of the face to complete the cute chococat look within the tree
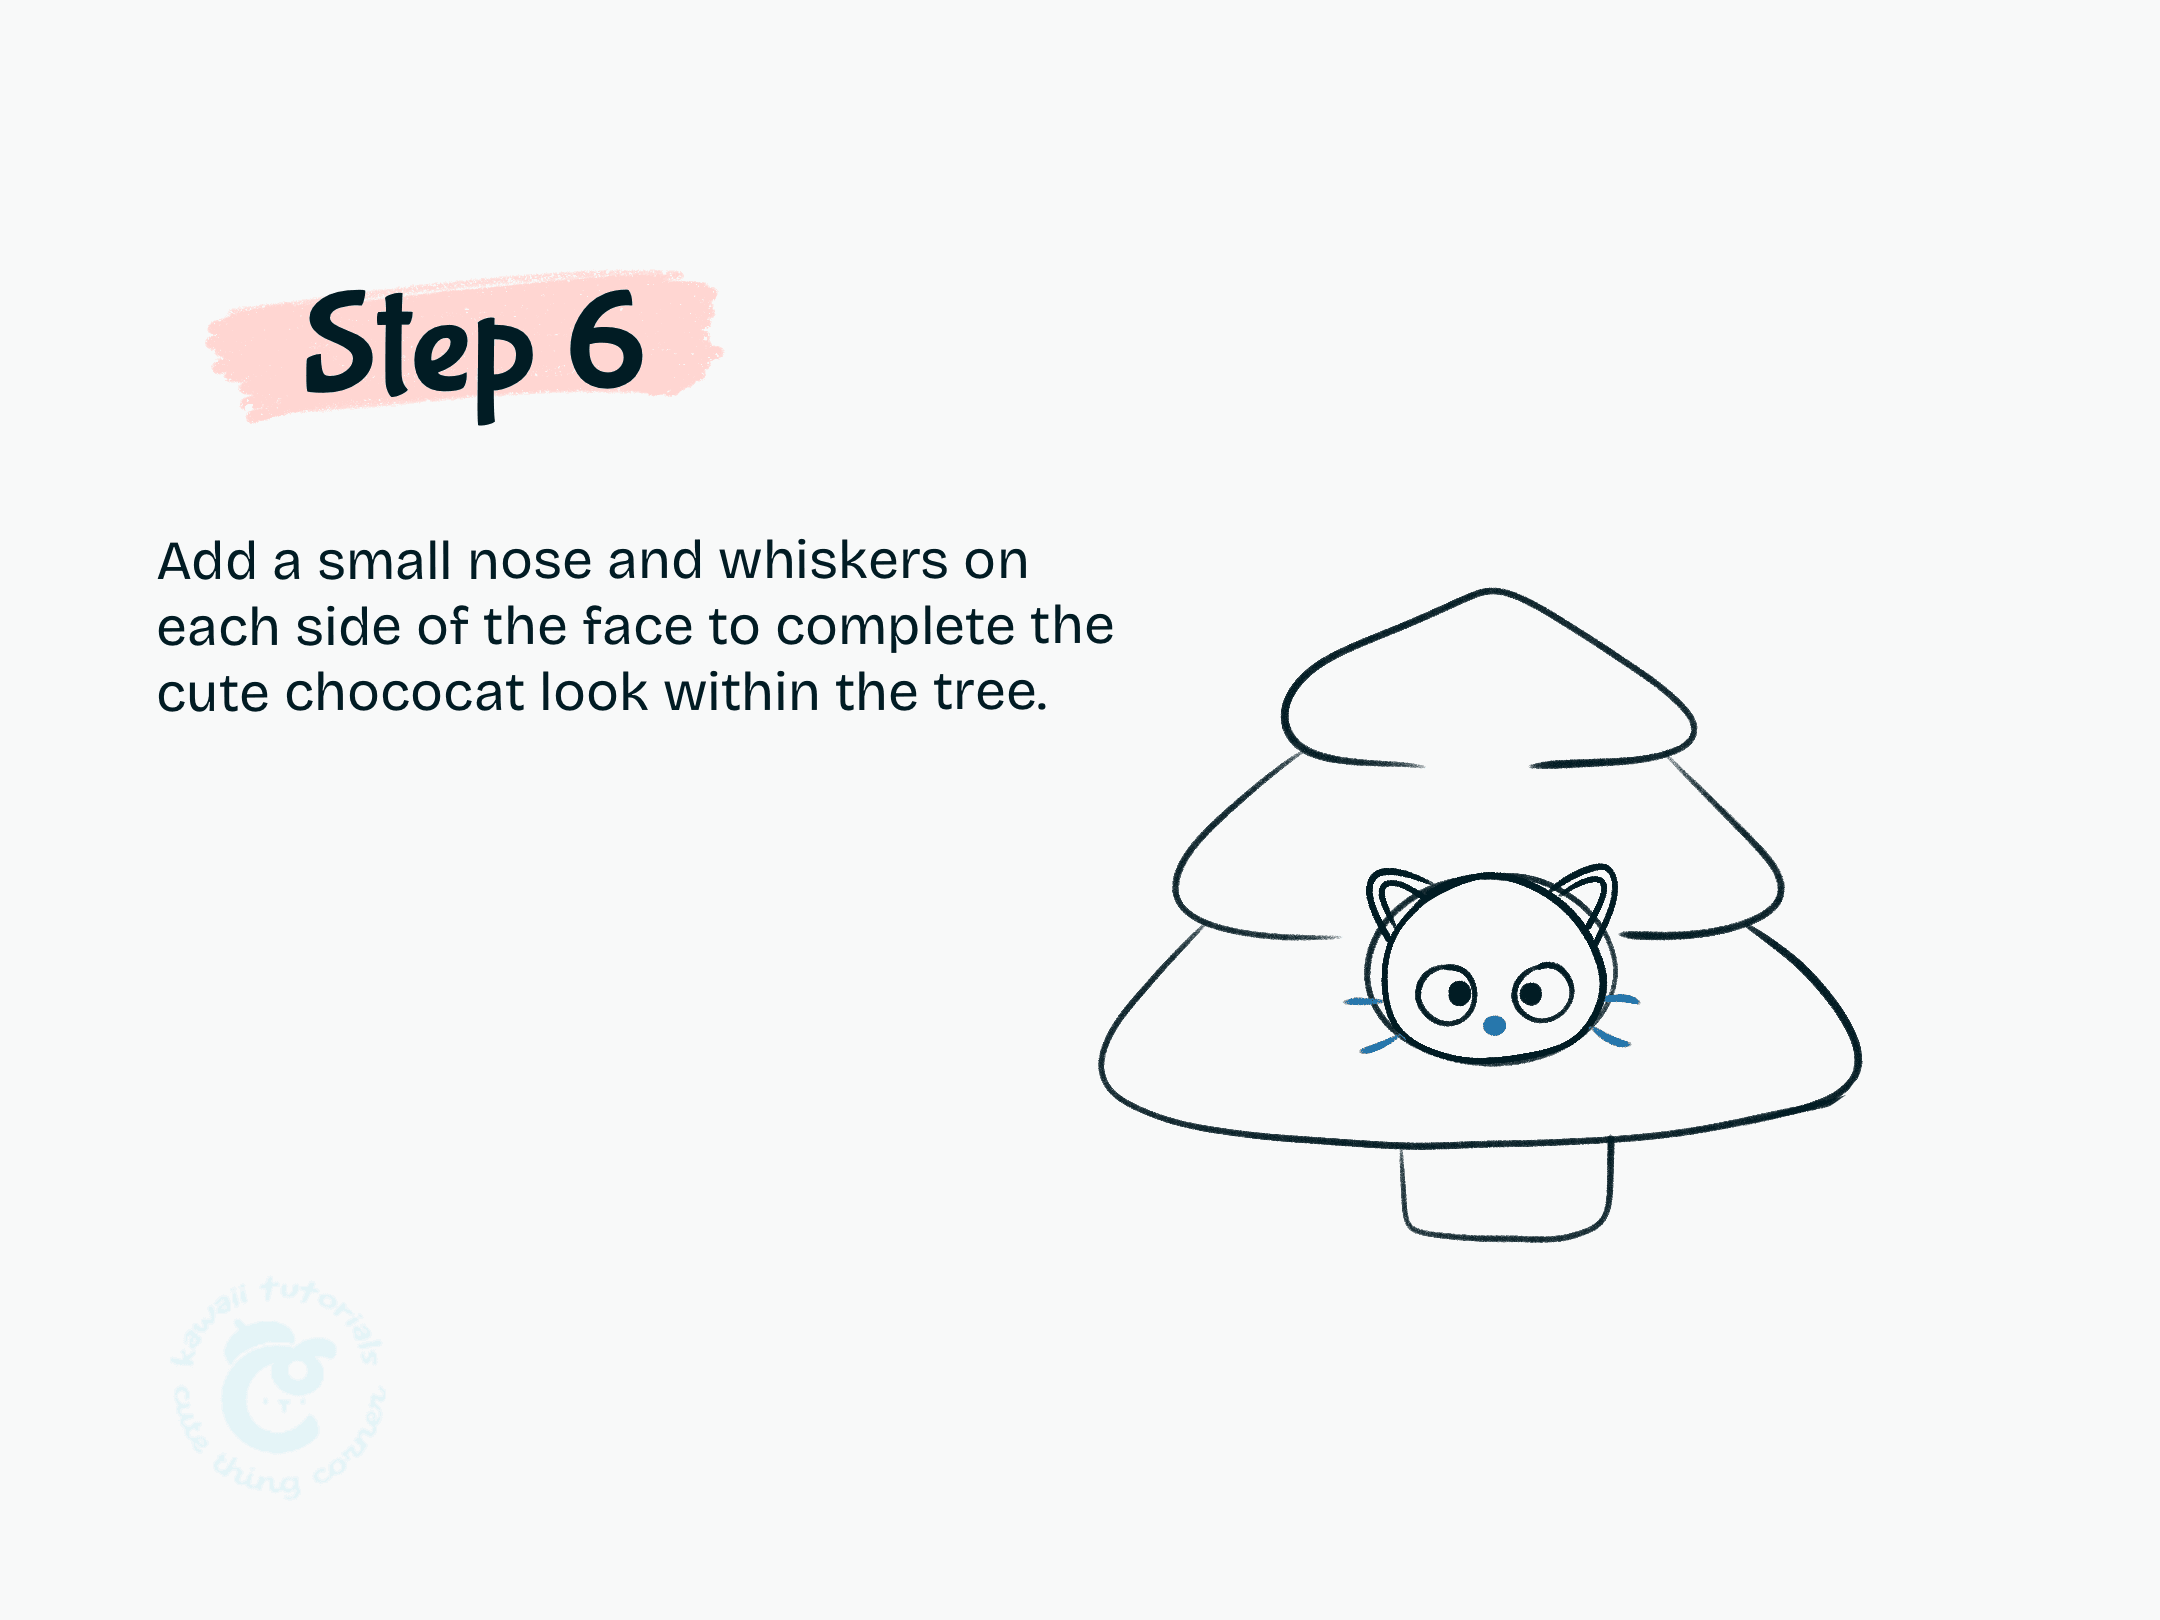
Step 6 Add a small nose and whiskers on each side of the face to complete the cute chococat look within the tree
#Step 7: Refine the outline of the tree and its sections for a cleaner, polished look
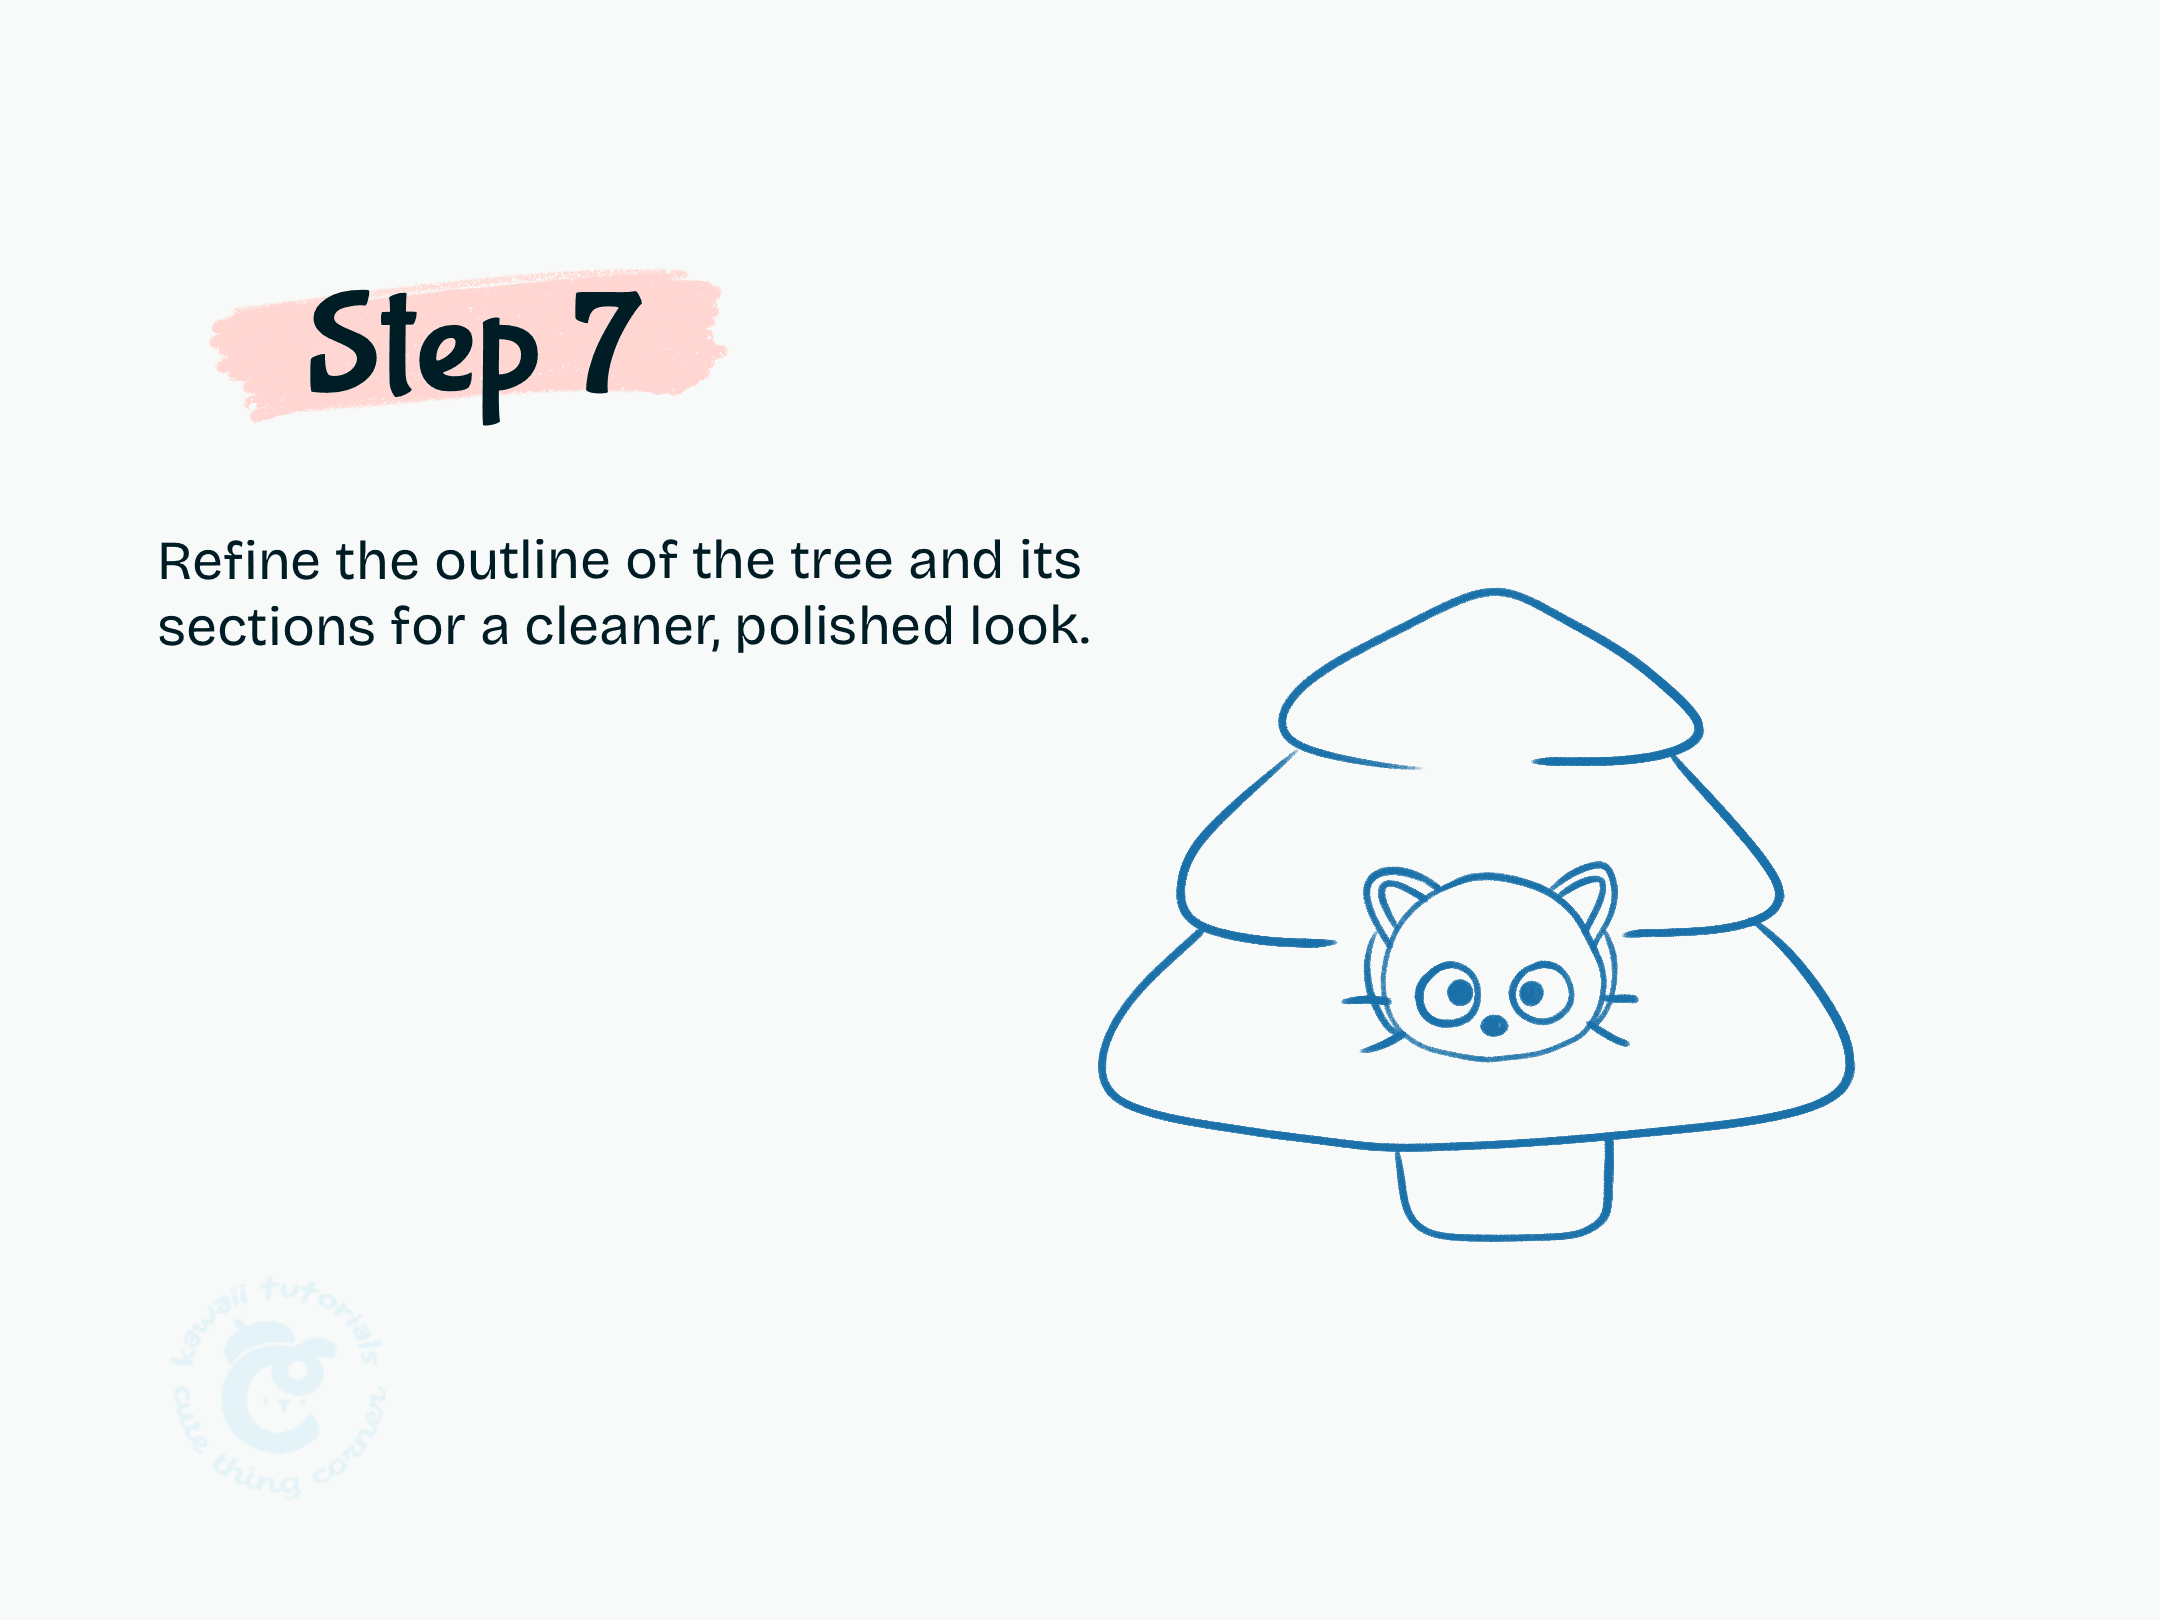
Step 7 Refine the outline of the tree and its sections for a cleaner, polished look
#Step 8: Add colors to your drawing. Finish by adding pink ornaments for a festive look
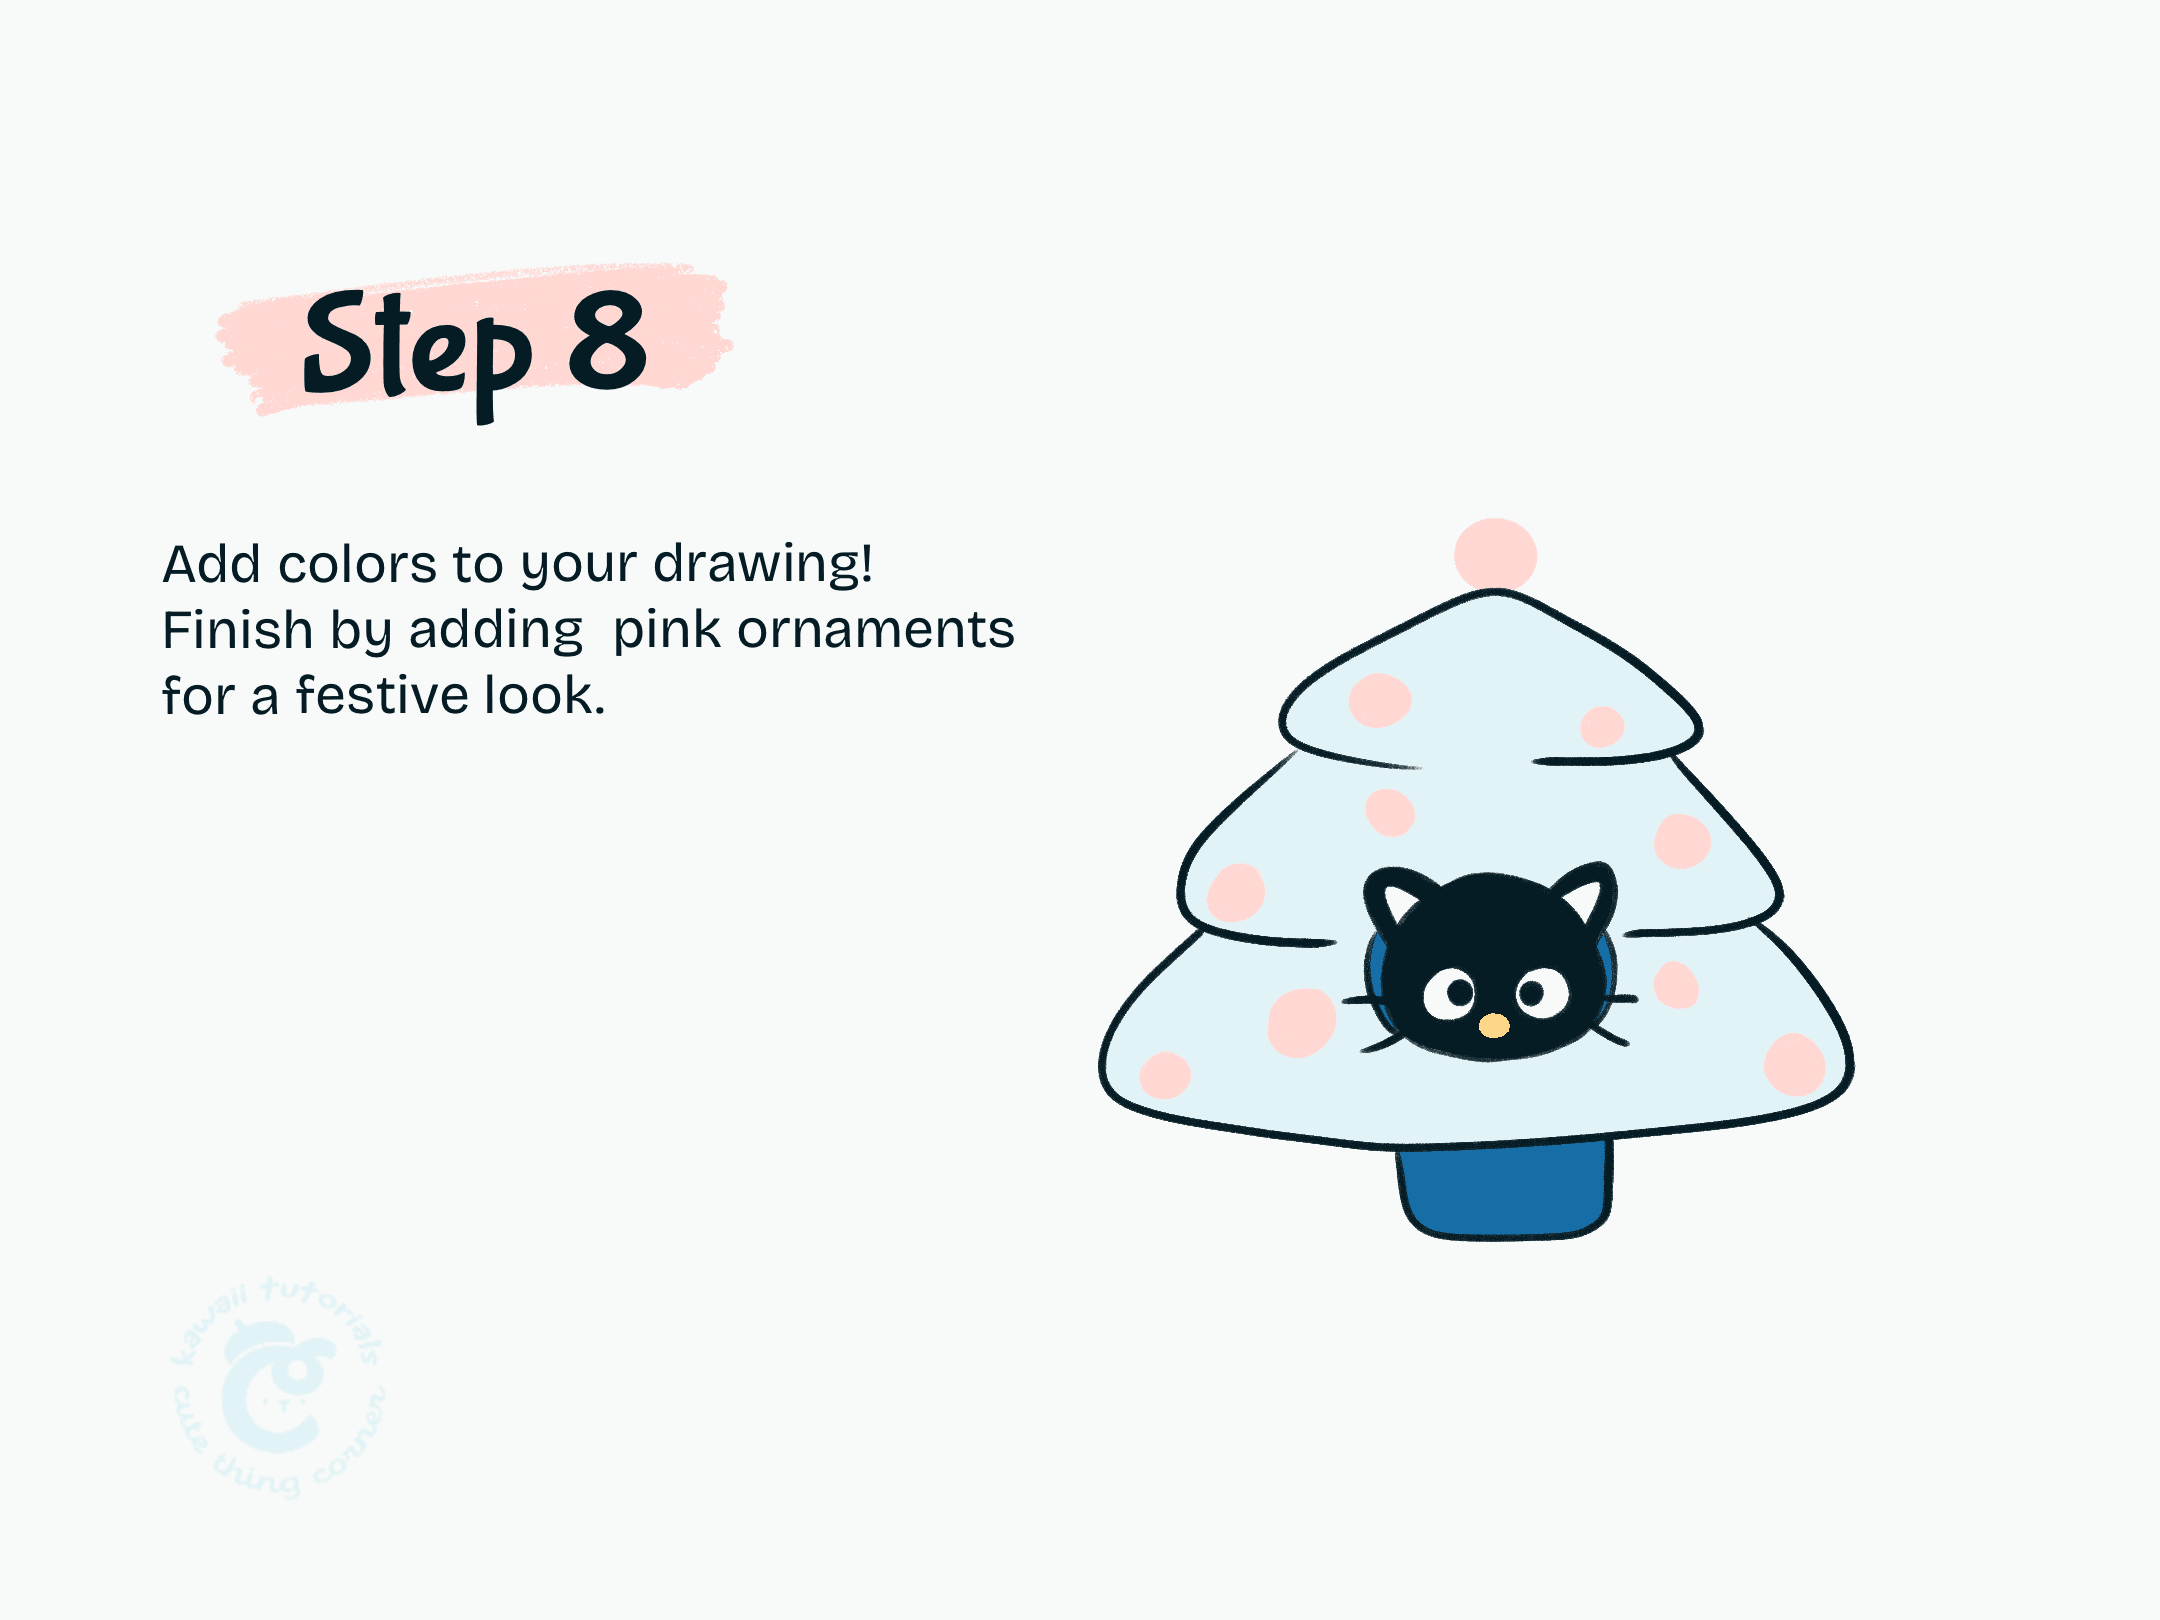
Step 8 Add colors to your drawing. Finish by adding pink ornaments for a festive look
And there you have it—your kawaii Chococat Christmas tree is complete! 🎄🐾✨
I hope you enjoyed following this step-by-step guide and had fun bringing this festive Sanrio-inspired design to life.
Don’t forget to share your drawing and show off your creativity!
For more fun and kawaii tutorials, check out our blog and explore other festive art ideas.
Let’s keep the holiday spirit alive—see you in the next guide! 🎨💕
Learn full steps to draw kawaii Chococat Christmas tree:
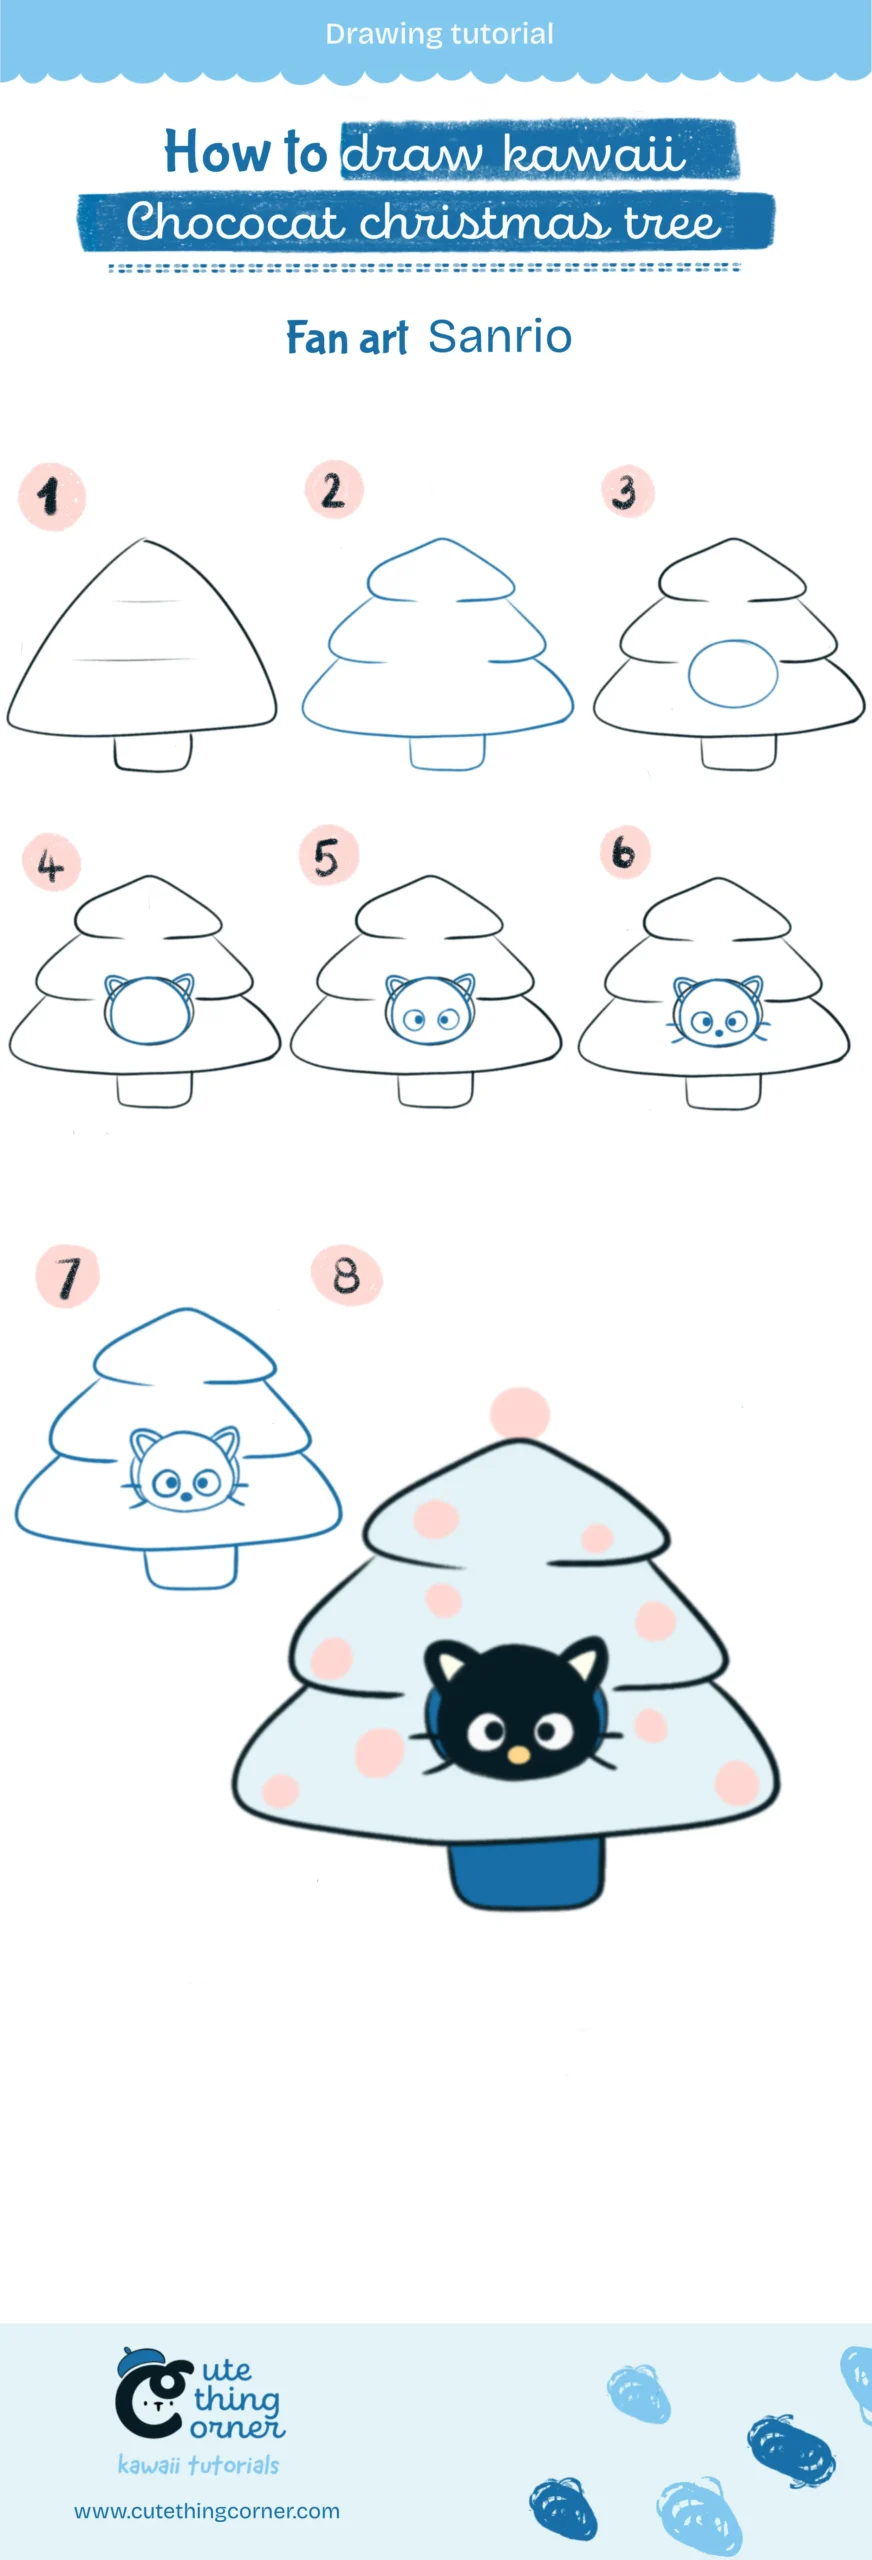
How to draw cute Chococat christmas tree (Step-by-step)

