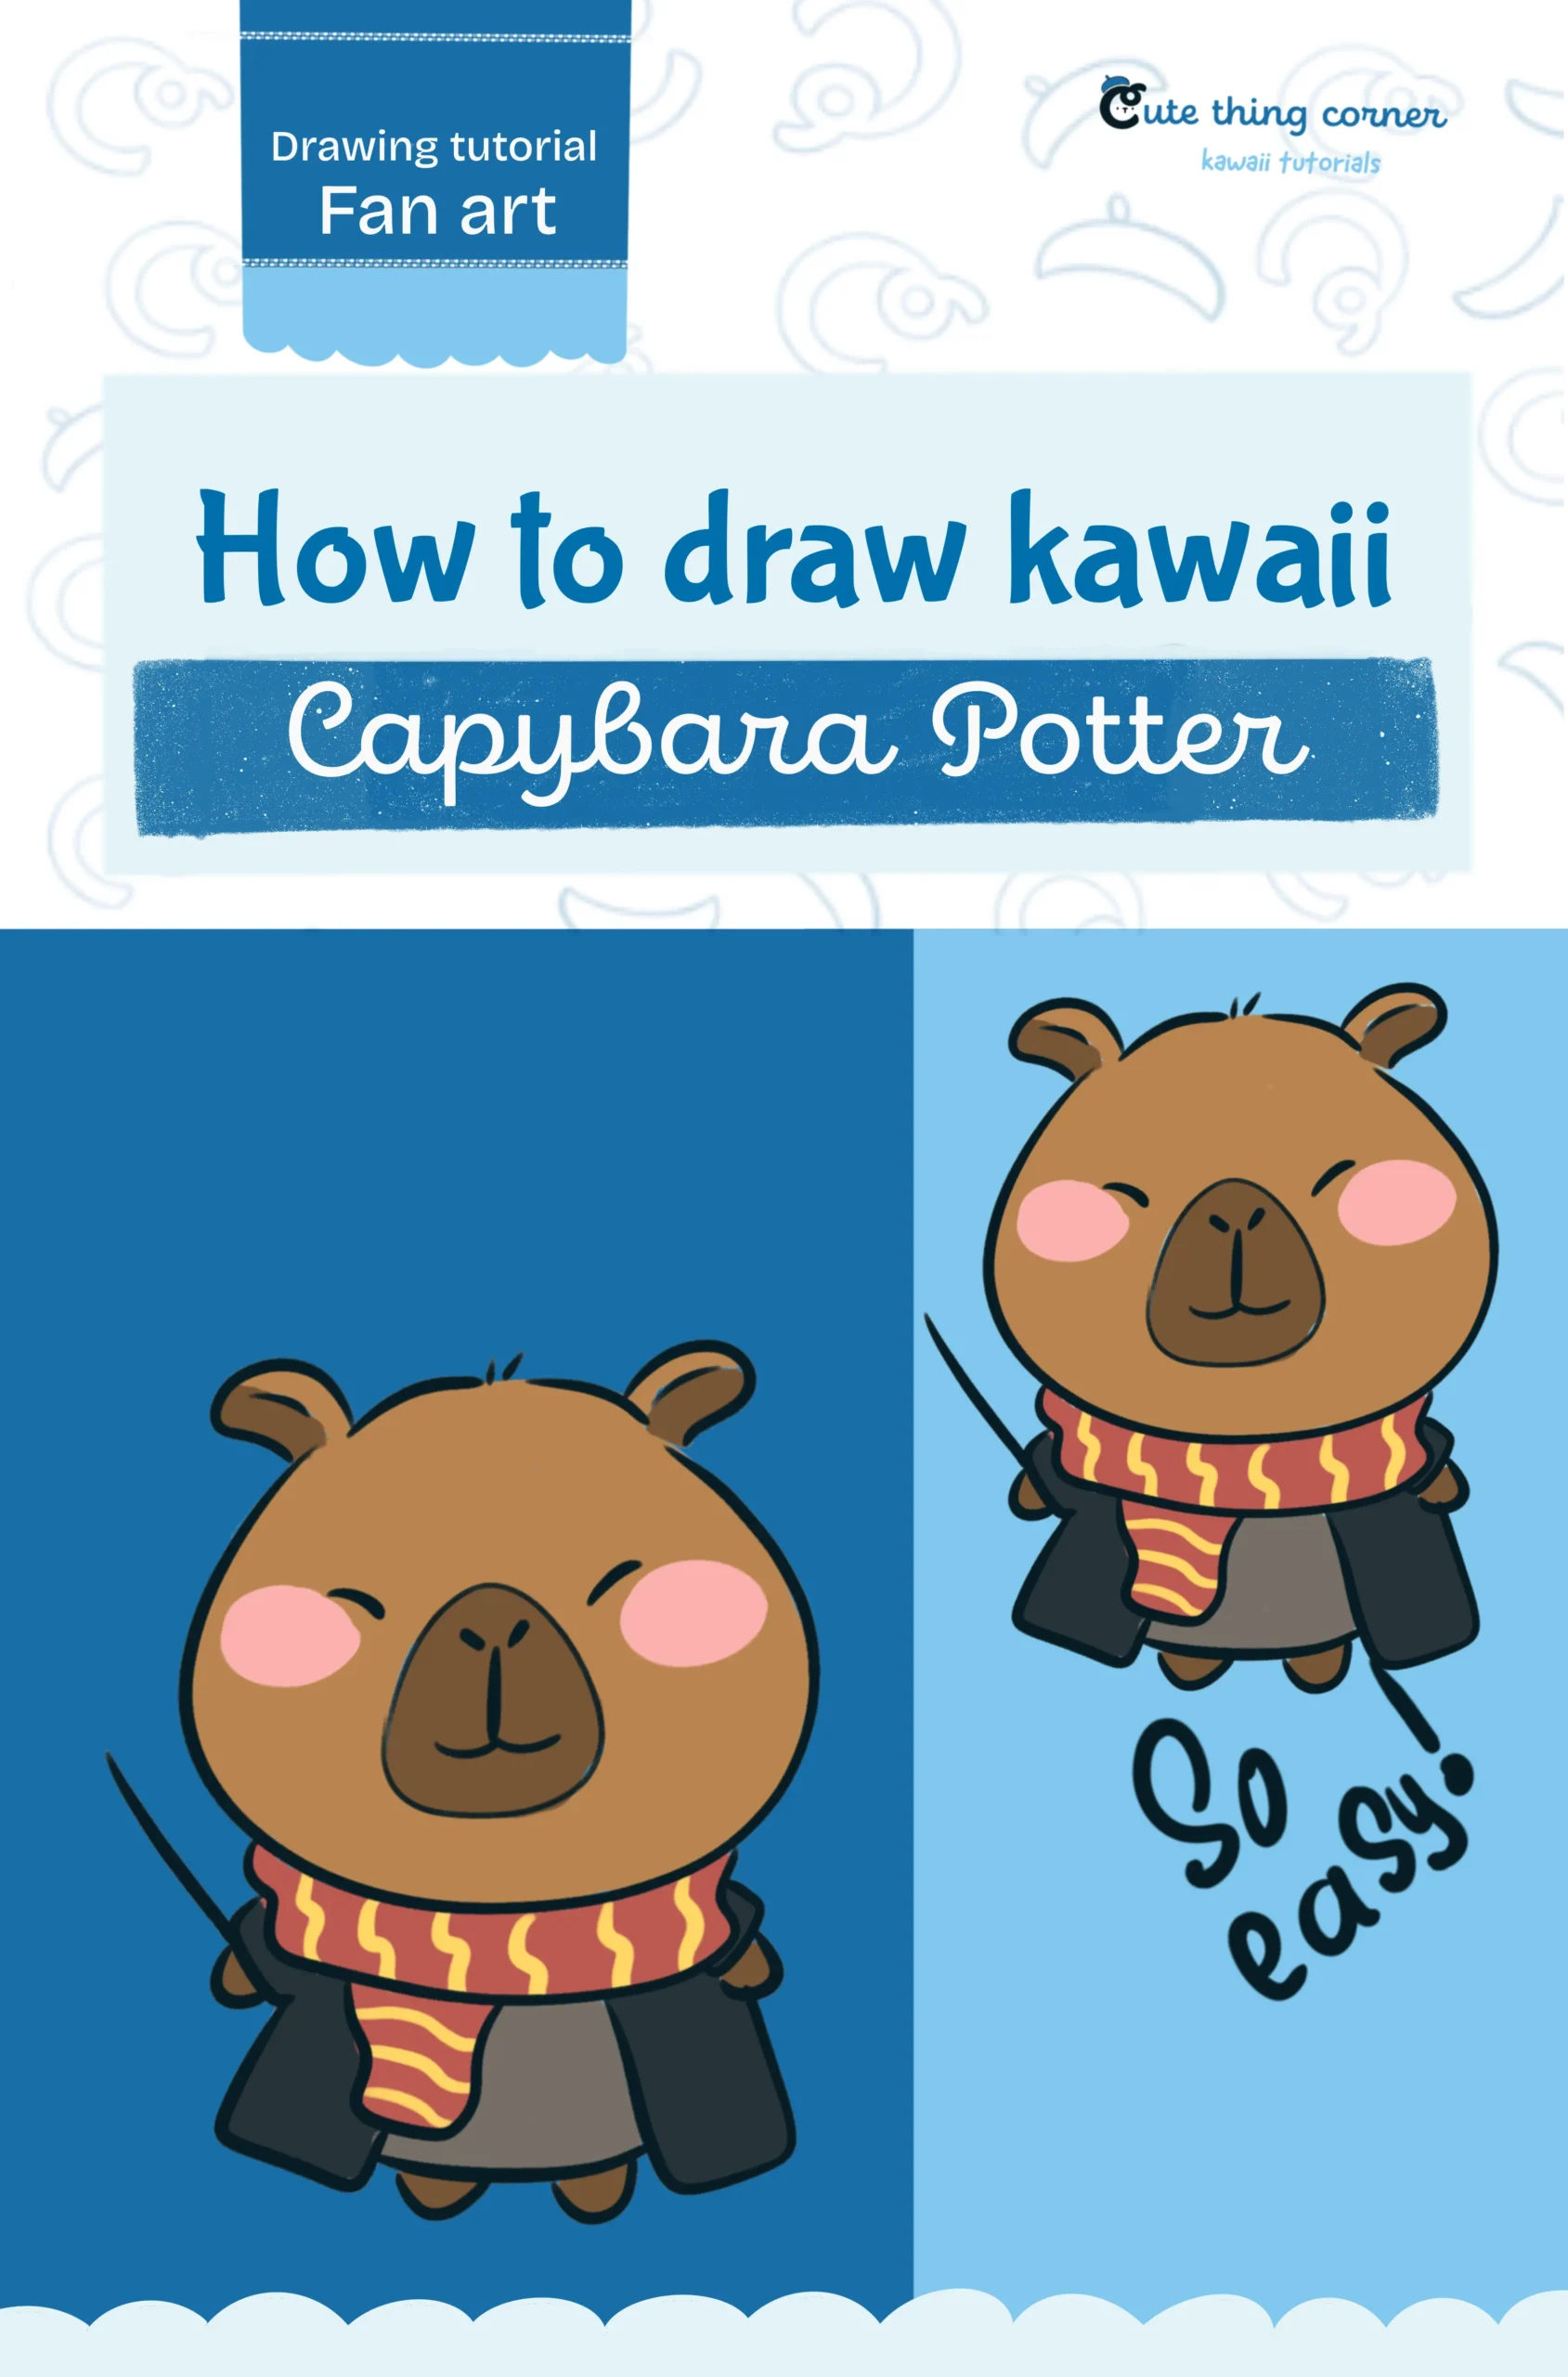
Welcome back to another fun Kawaii Tutorial Blog from Cute Thing Corner!
Today, let’s learn how to draw the adorable and kind-hearted Lilo from Lilo & Stitch!
In this step-by-step tutorial is super easy to follow, even for beginners.
Grab your favorite pen or tablet and let’s bring Lilo to life with her sweet smile and iconic red dress.
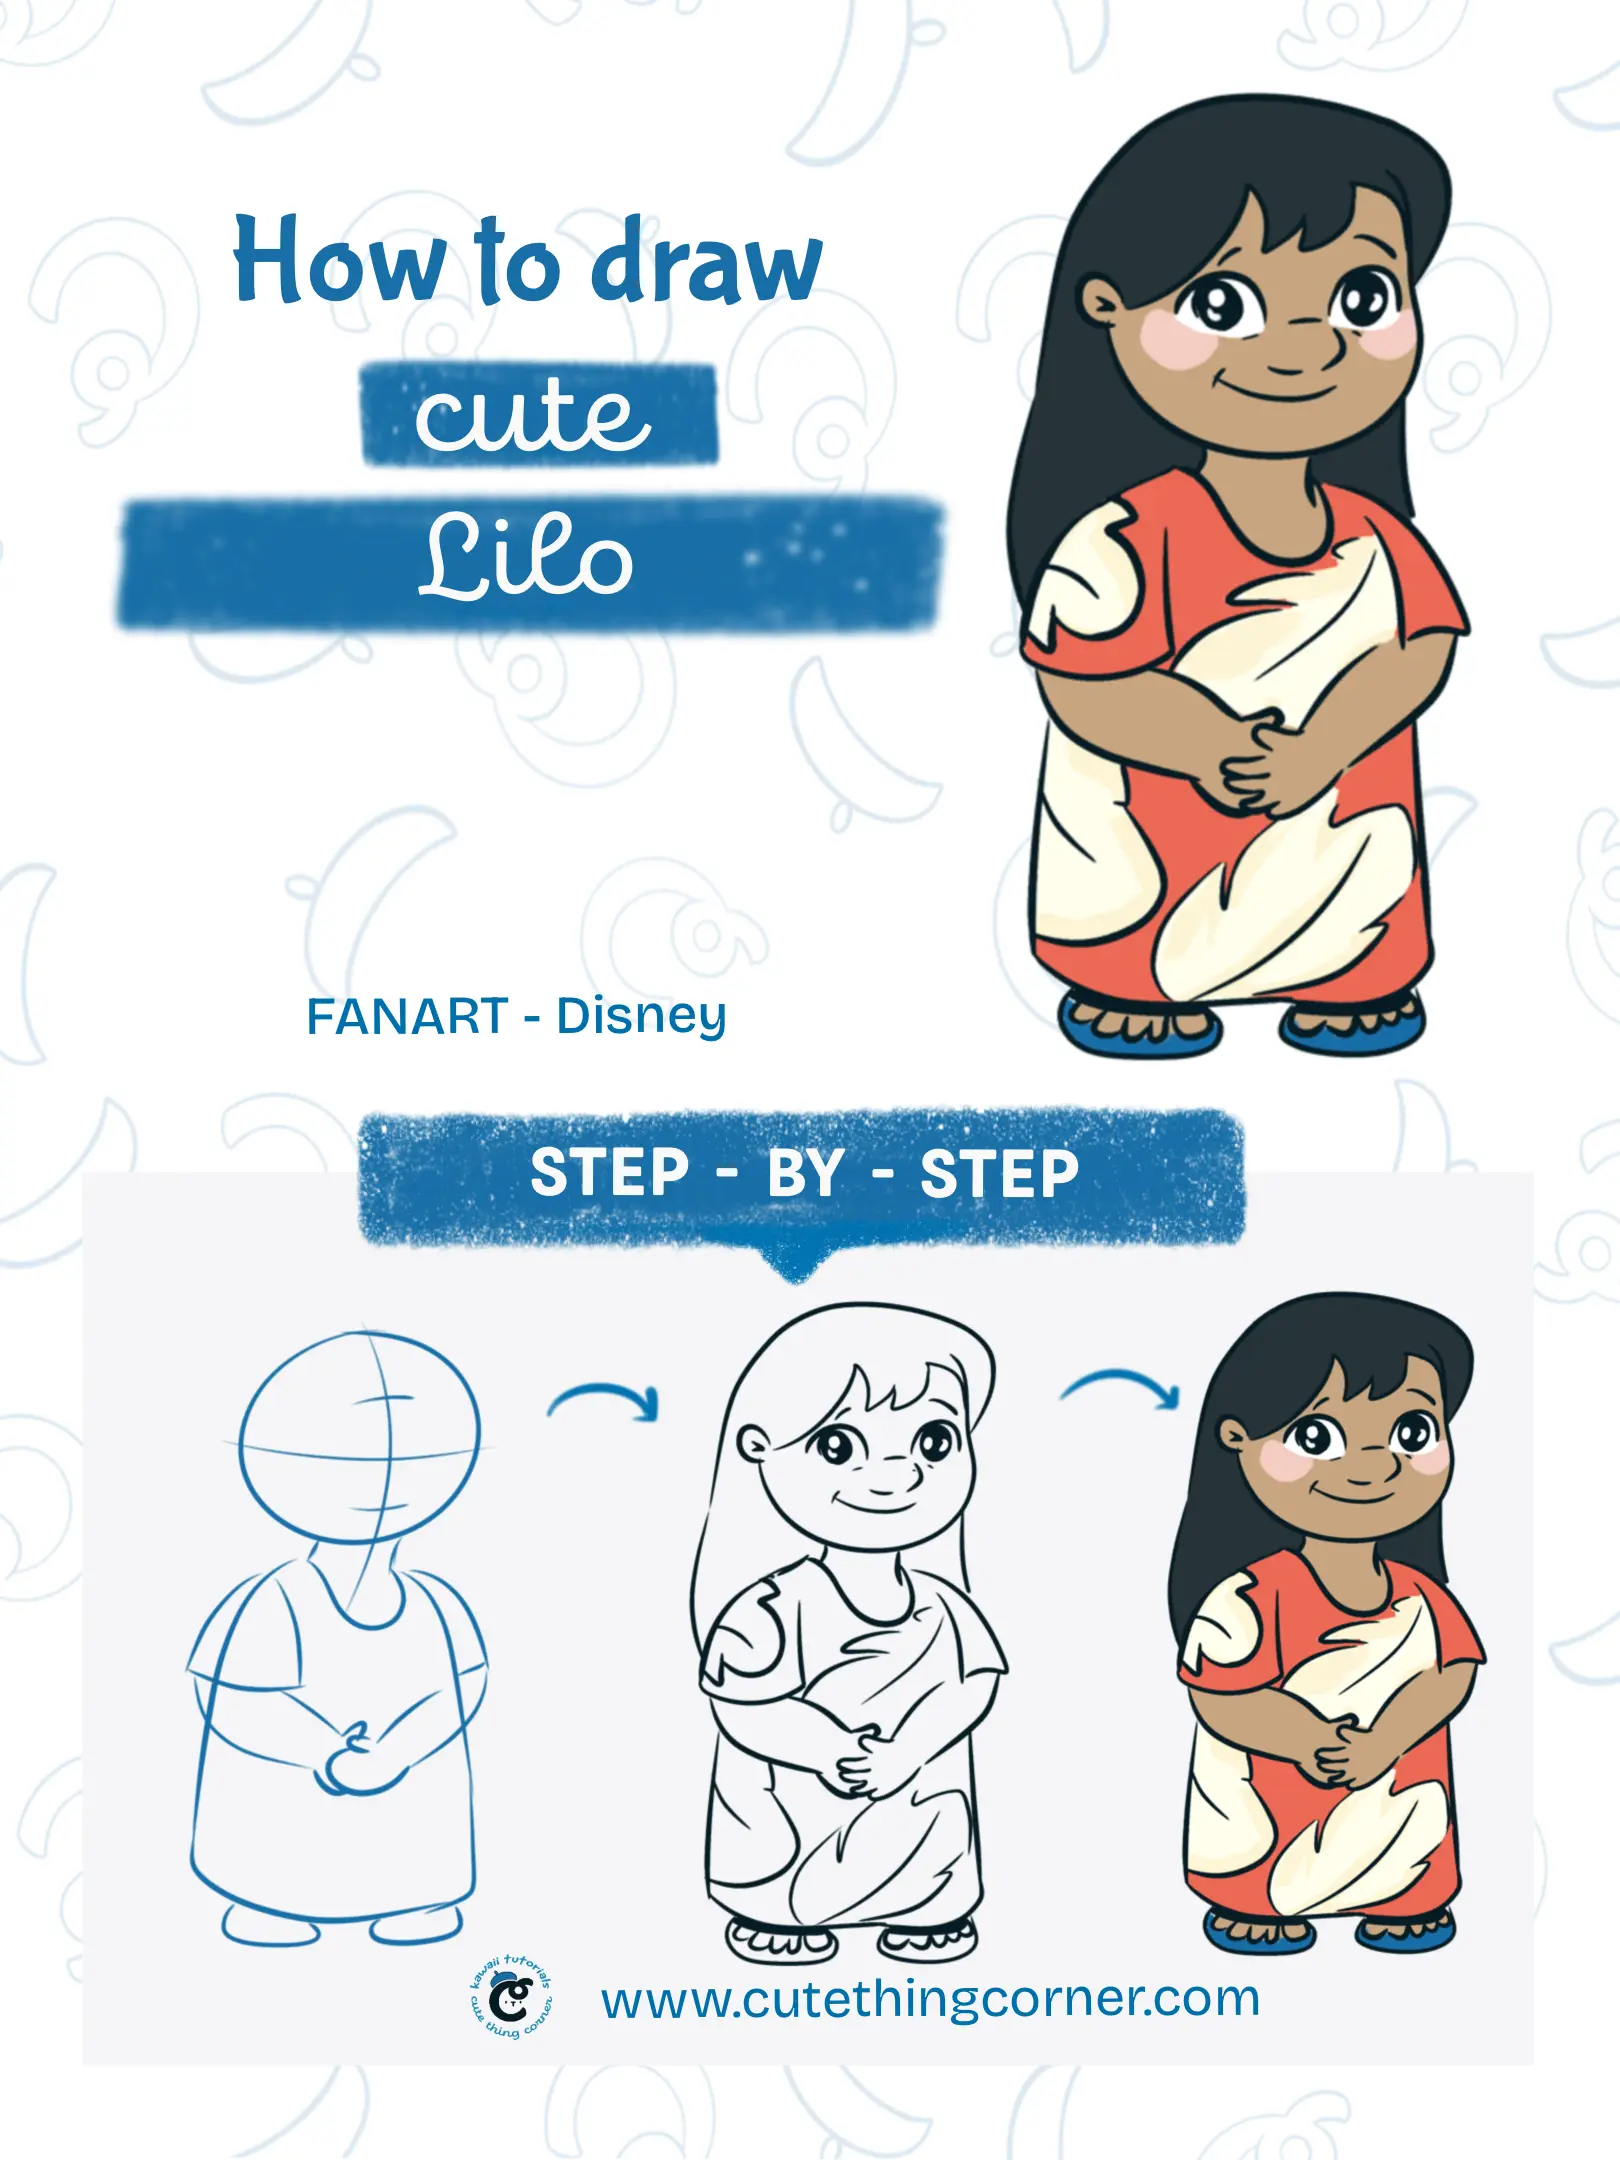
How to draw Lilo
✨ Step 1: Draw a big circle
Draw a big circle for the head and add a vertical and horizontal guideline to help place the face and body.
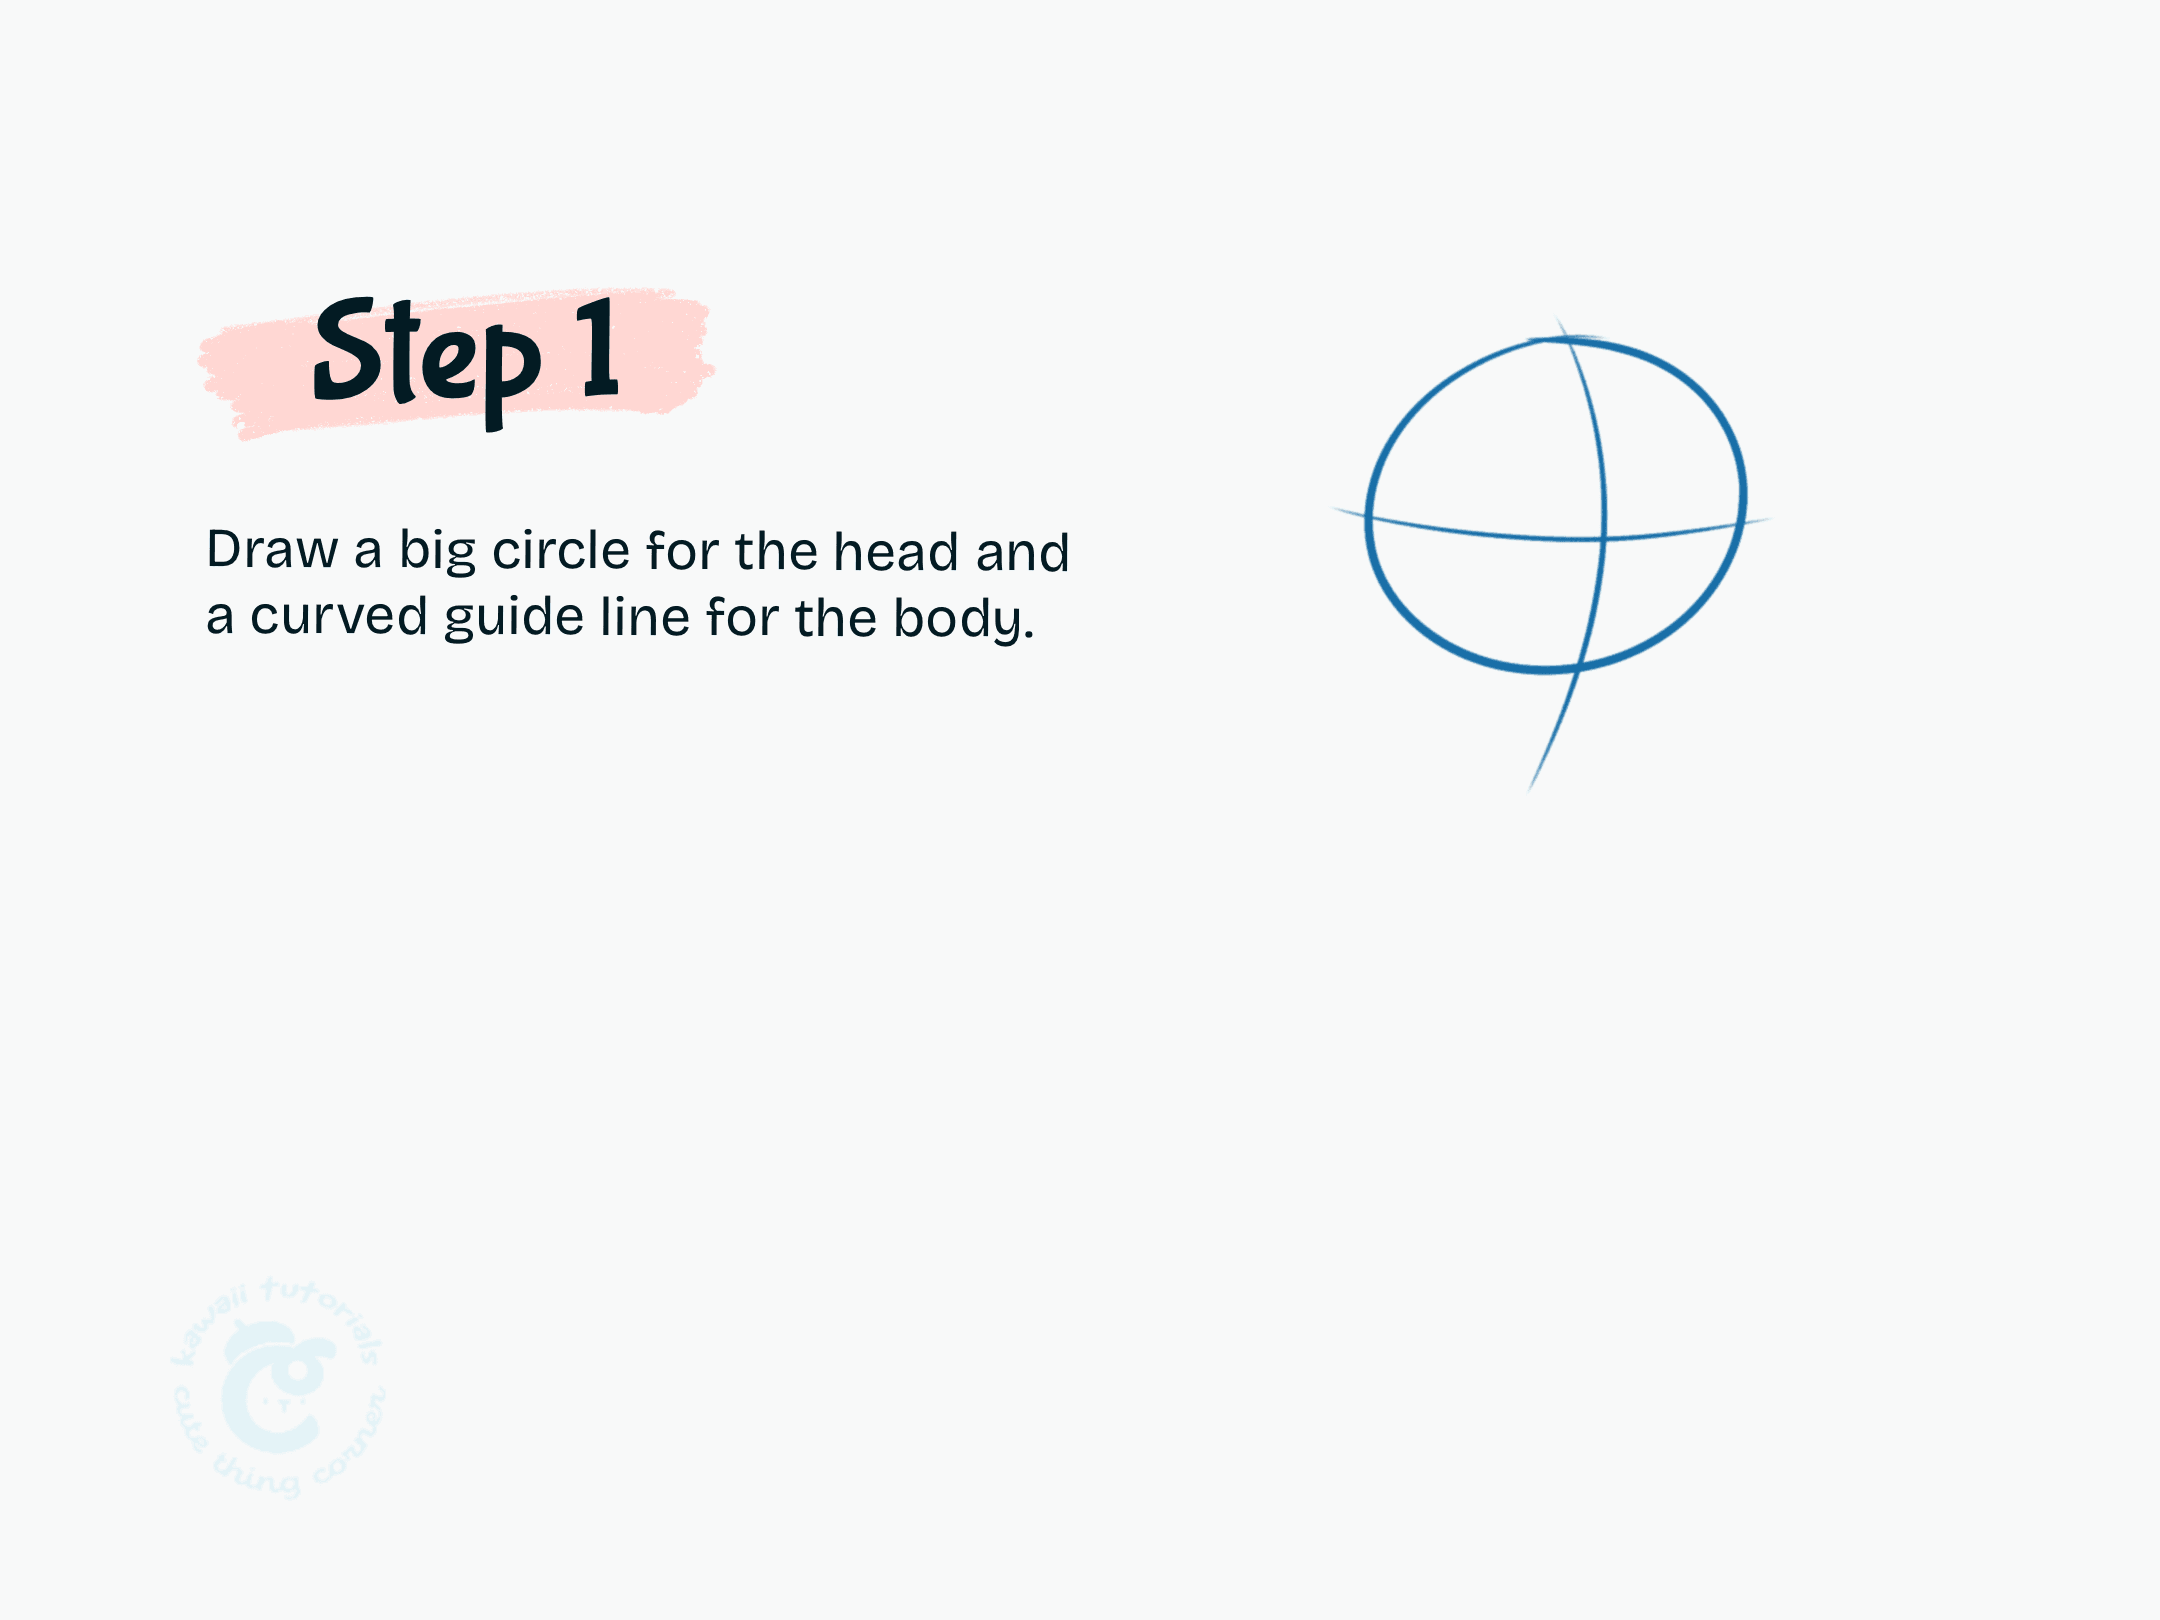
Draw a big circle
✨ Step 2: Add the neck and a small U-shape
Add the neck and a small U-shape below the head to form the base of her body.
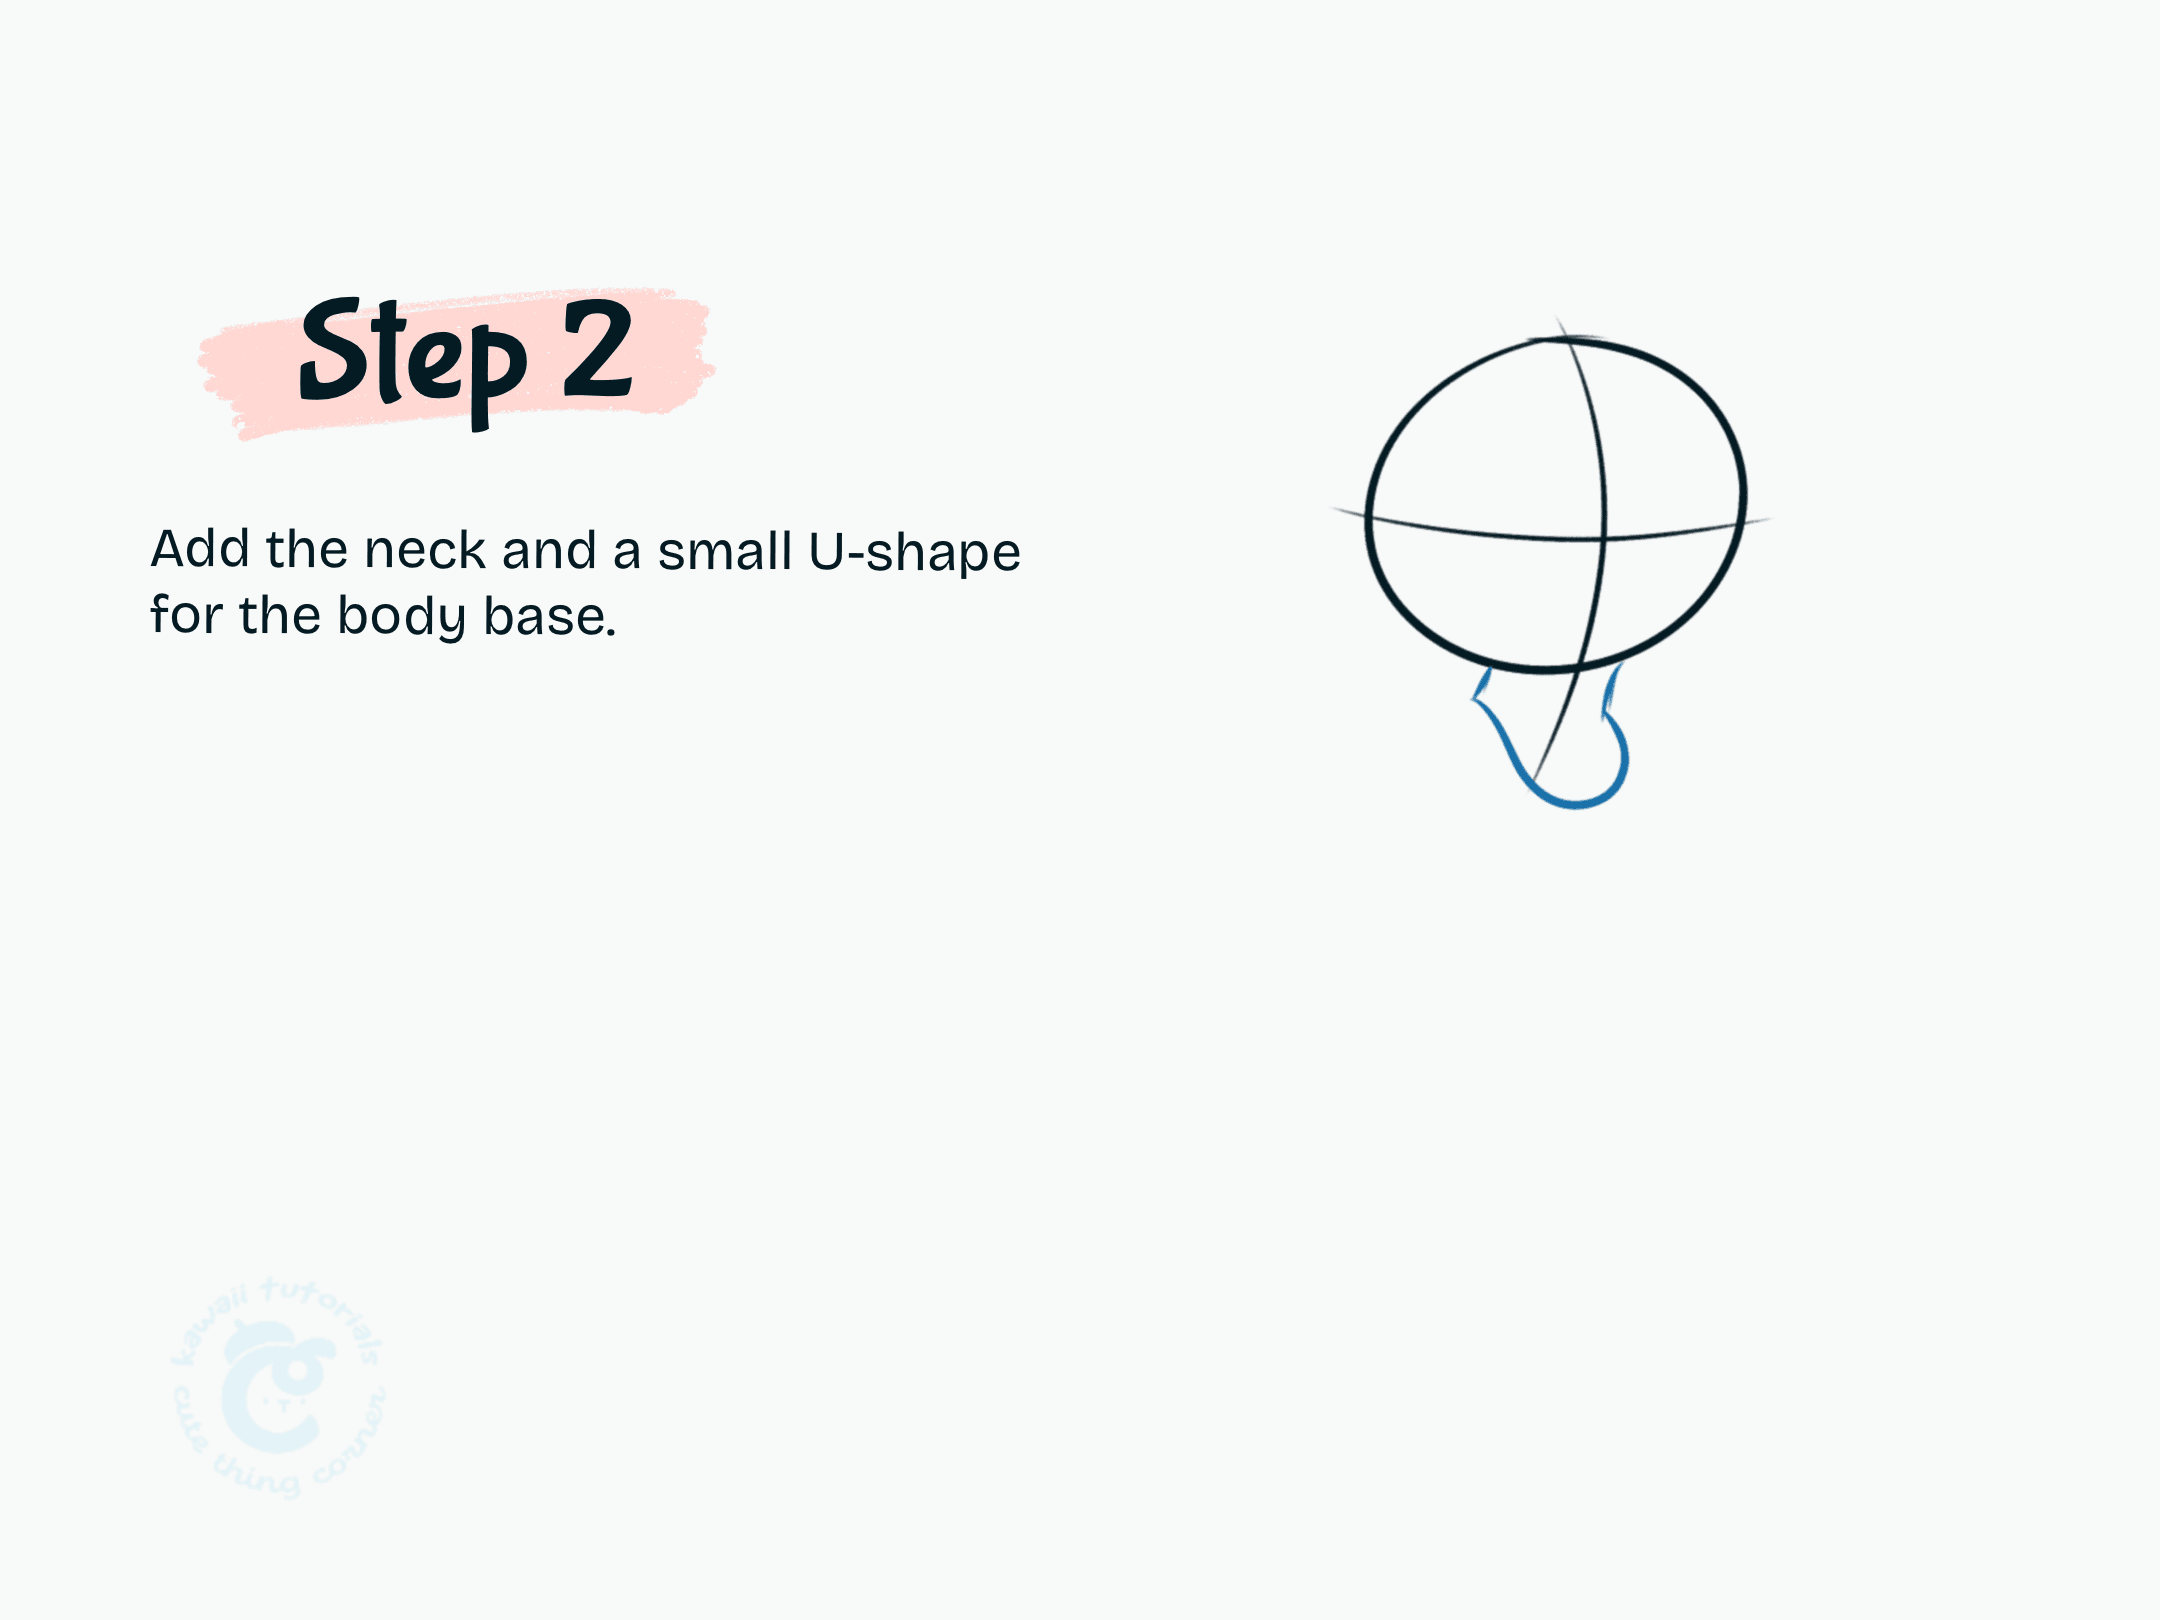
Add the neck and a small U-shape
✨ Step 3: Sketch a long dress shape
Sketch a long dress shape starting from the neck and flowing down. This will be Lilo’s signature Hawaiian dress.
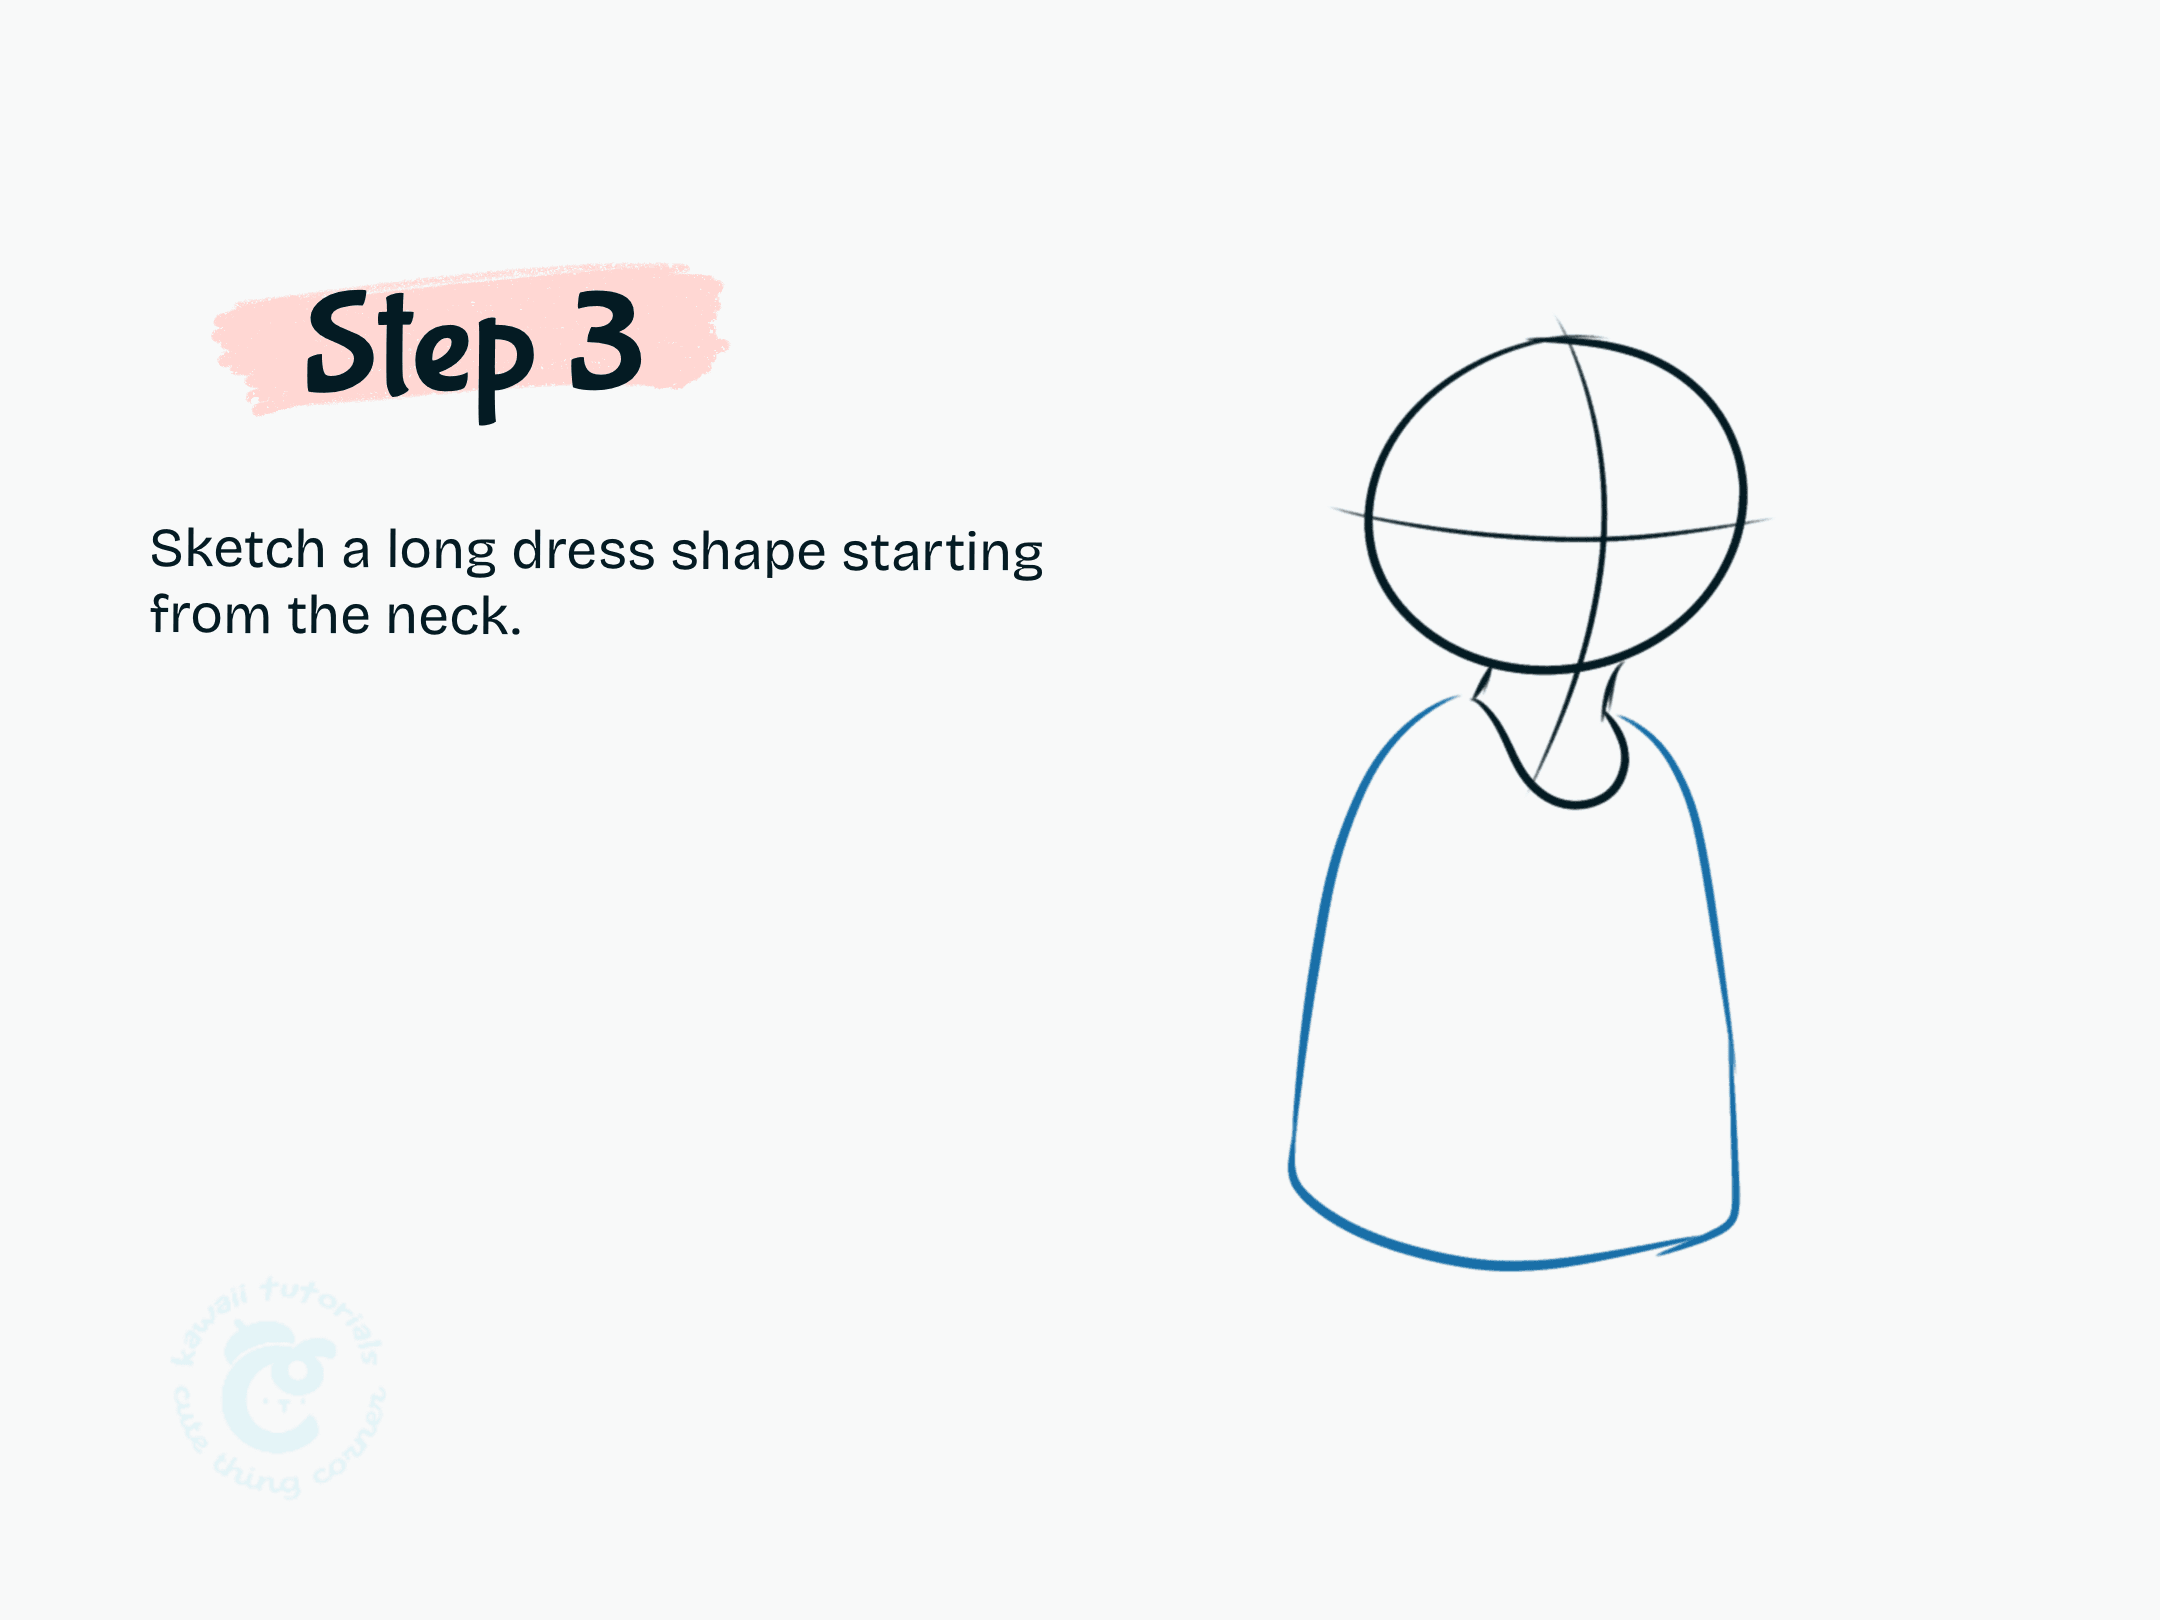
Sketch a long dress shape
✨ Step 4: Add short sleeves and curve the dress down to the base.
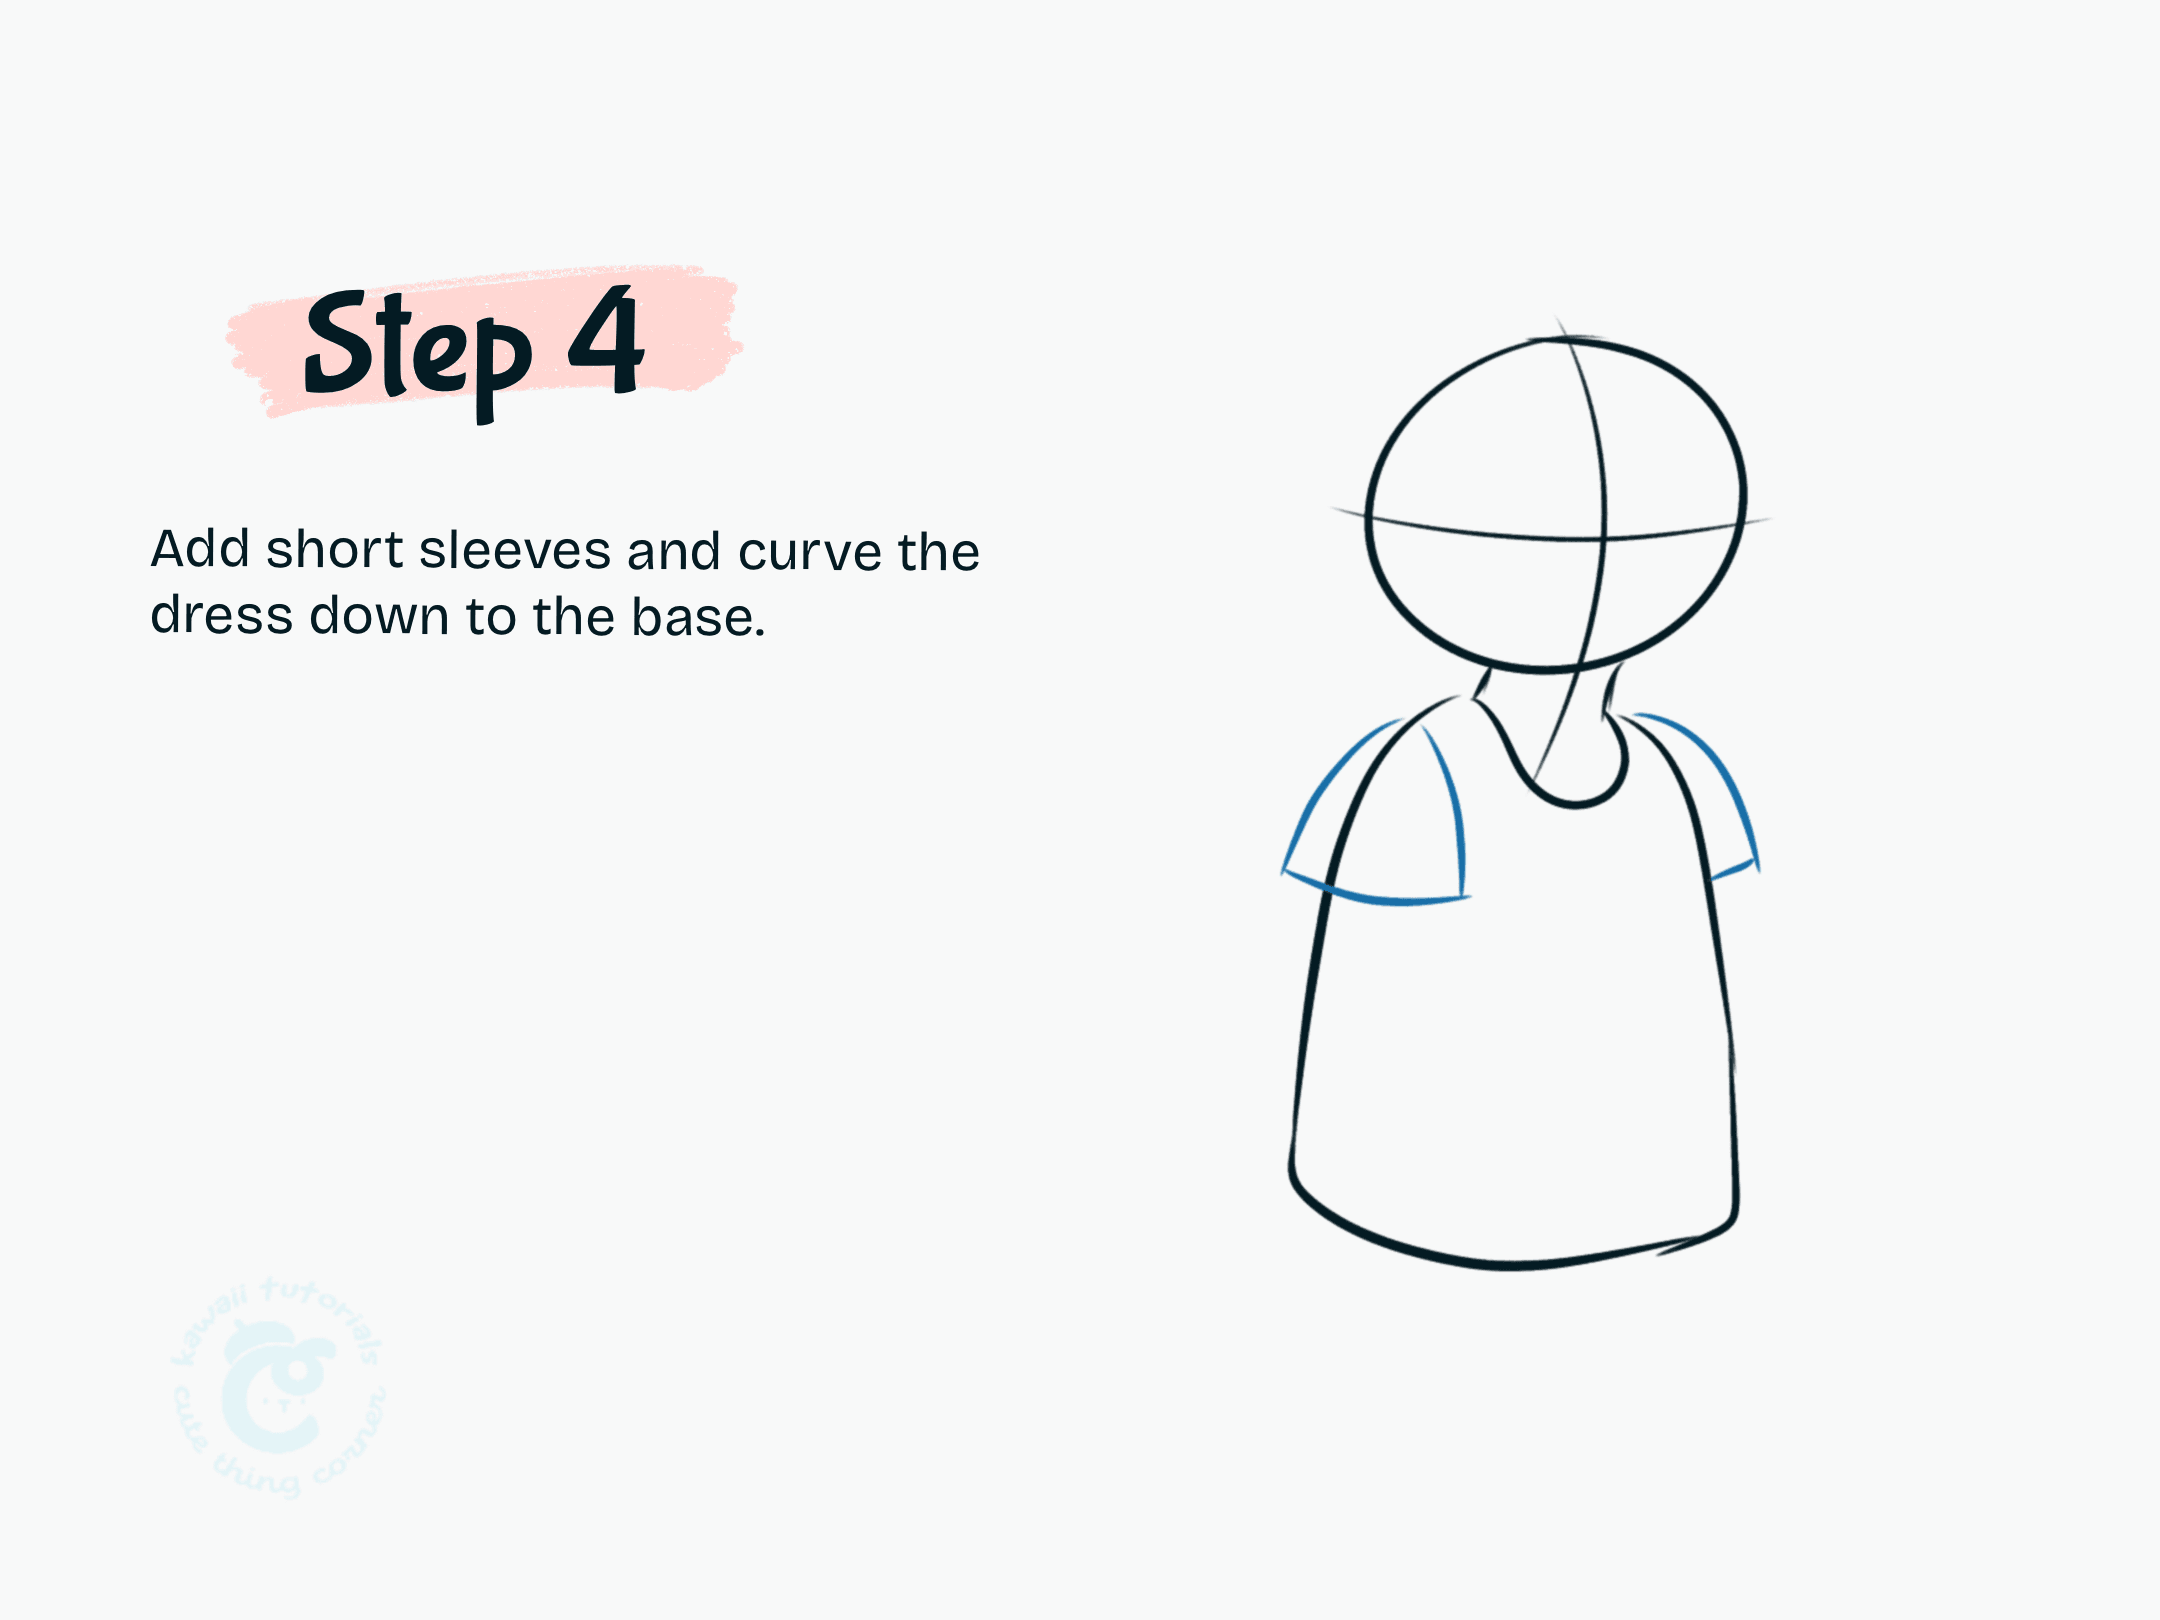
Step 4 Add short sleeves and curve the dress down to the base.
✨ Step 5: Draw both arms and hands in front of the body. Add feet under the dress.
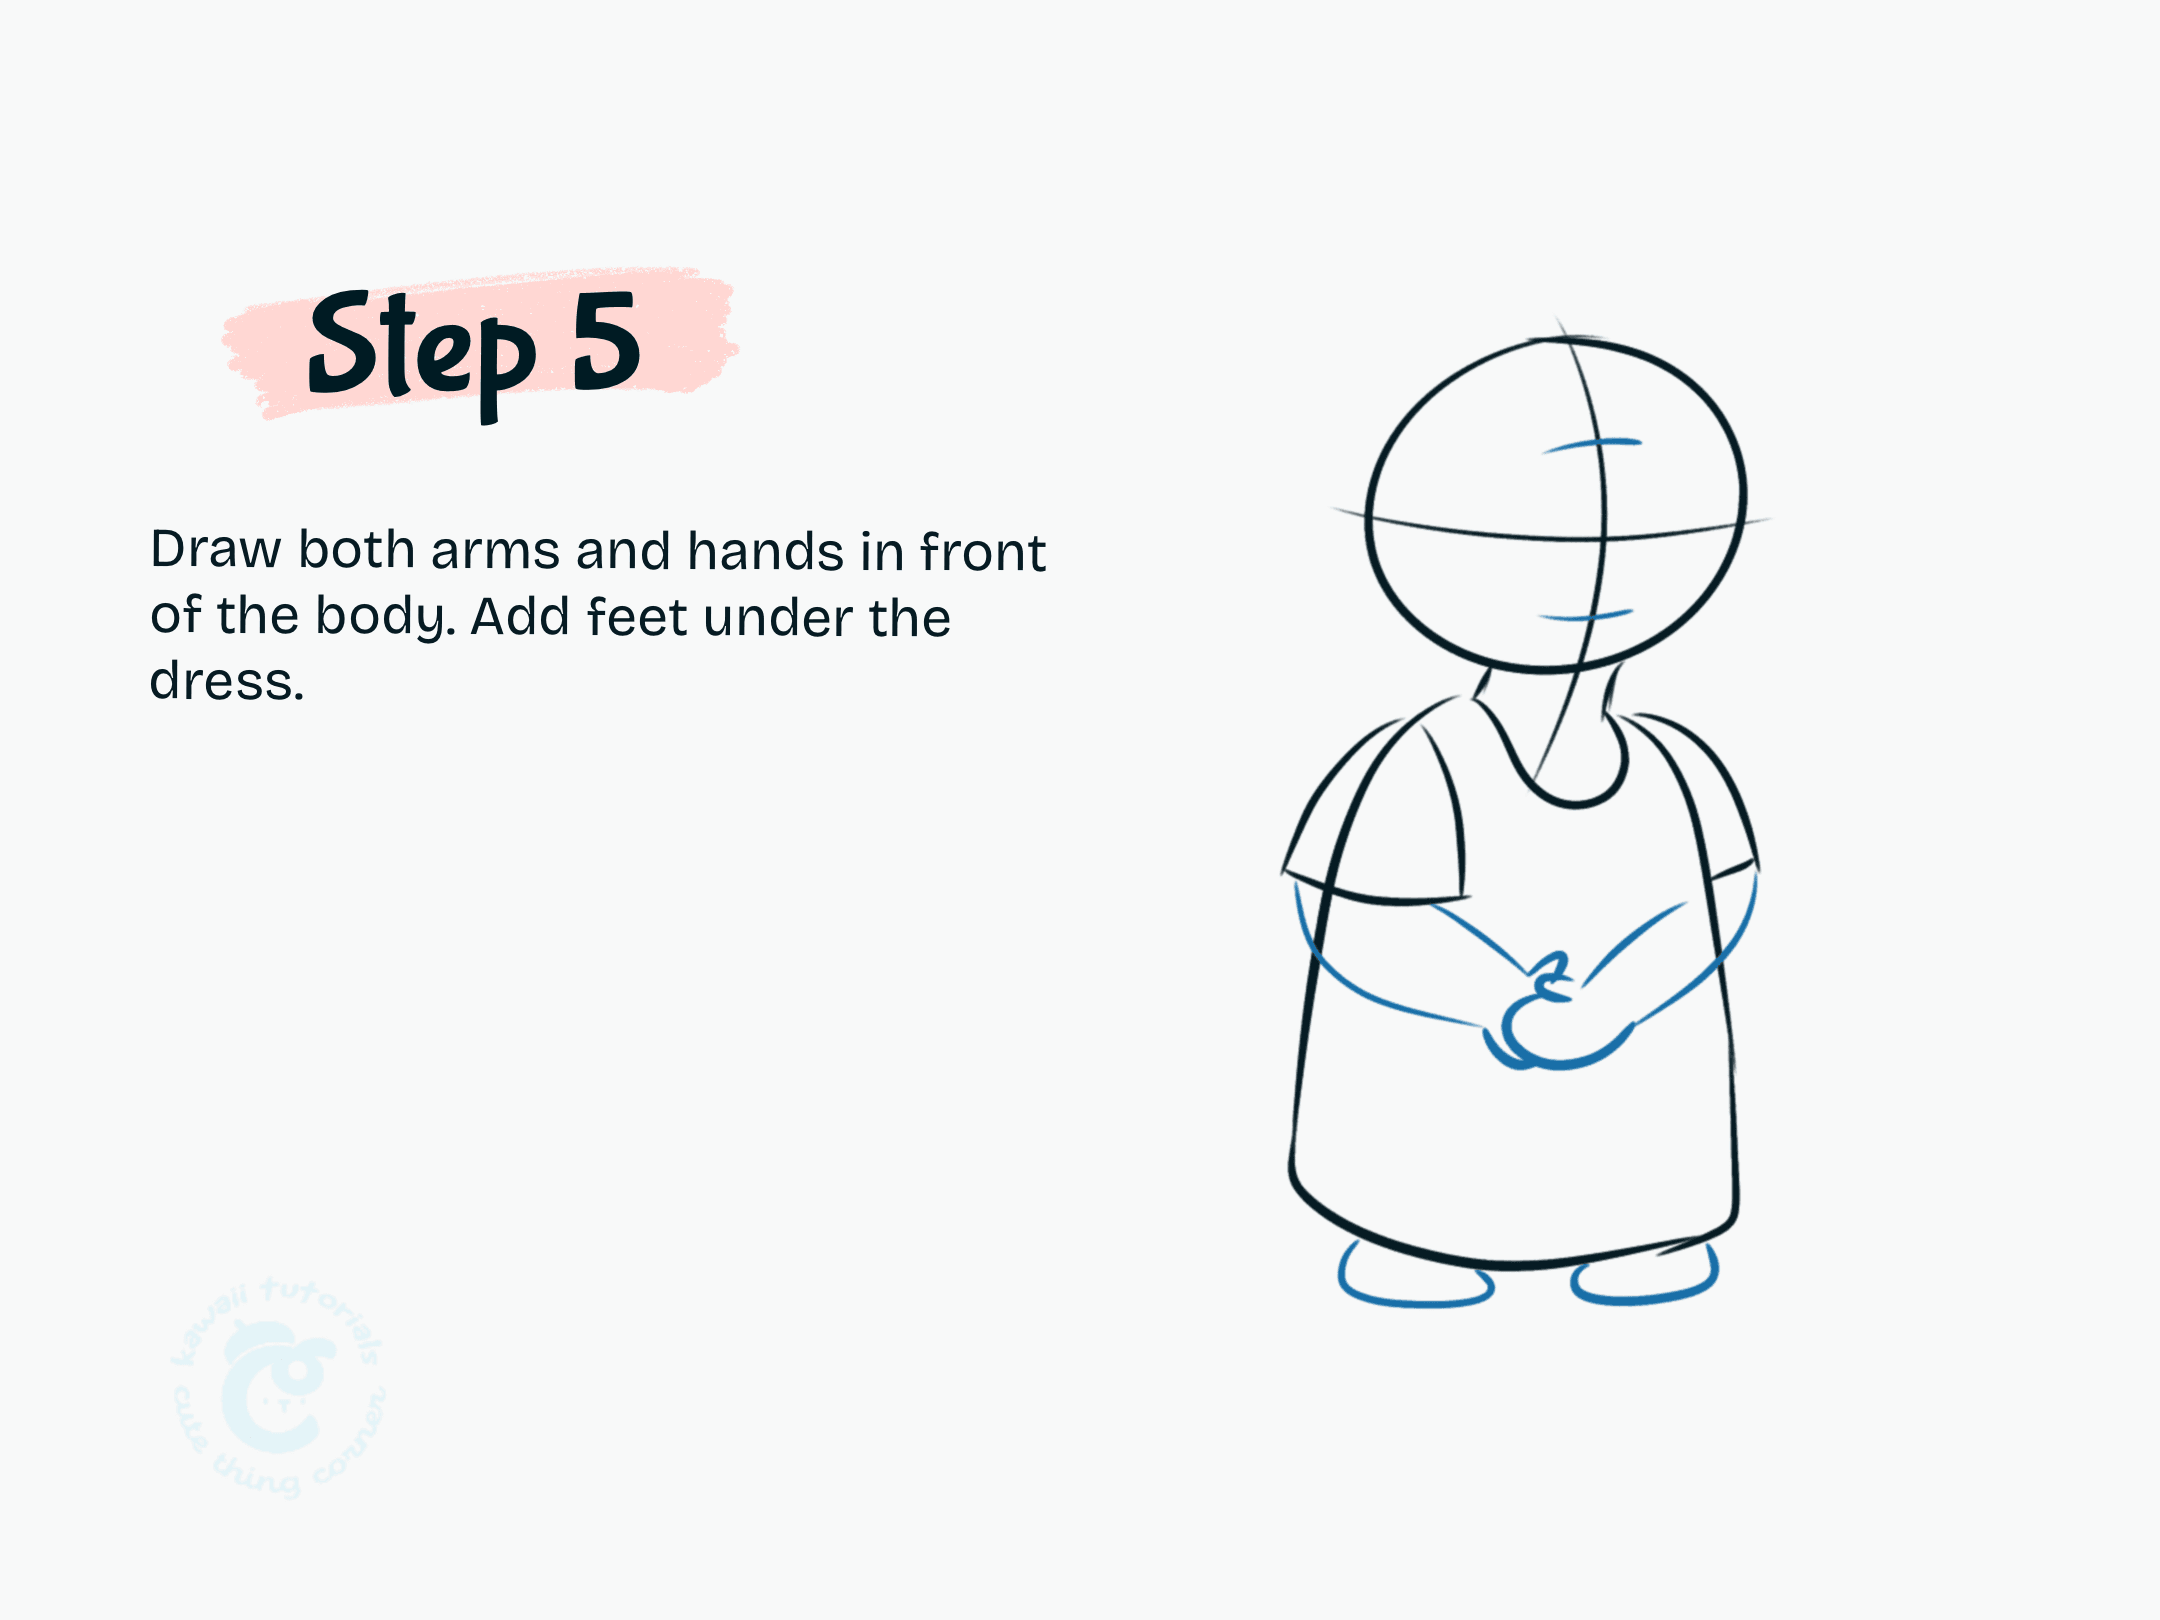
Step 5 Draw both arms and hands in front of the body.
✨ Step 6: Complete the sketch by adding her hair, facial lines, and cleaning up the body outline.
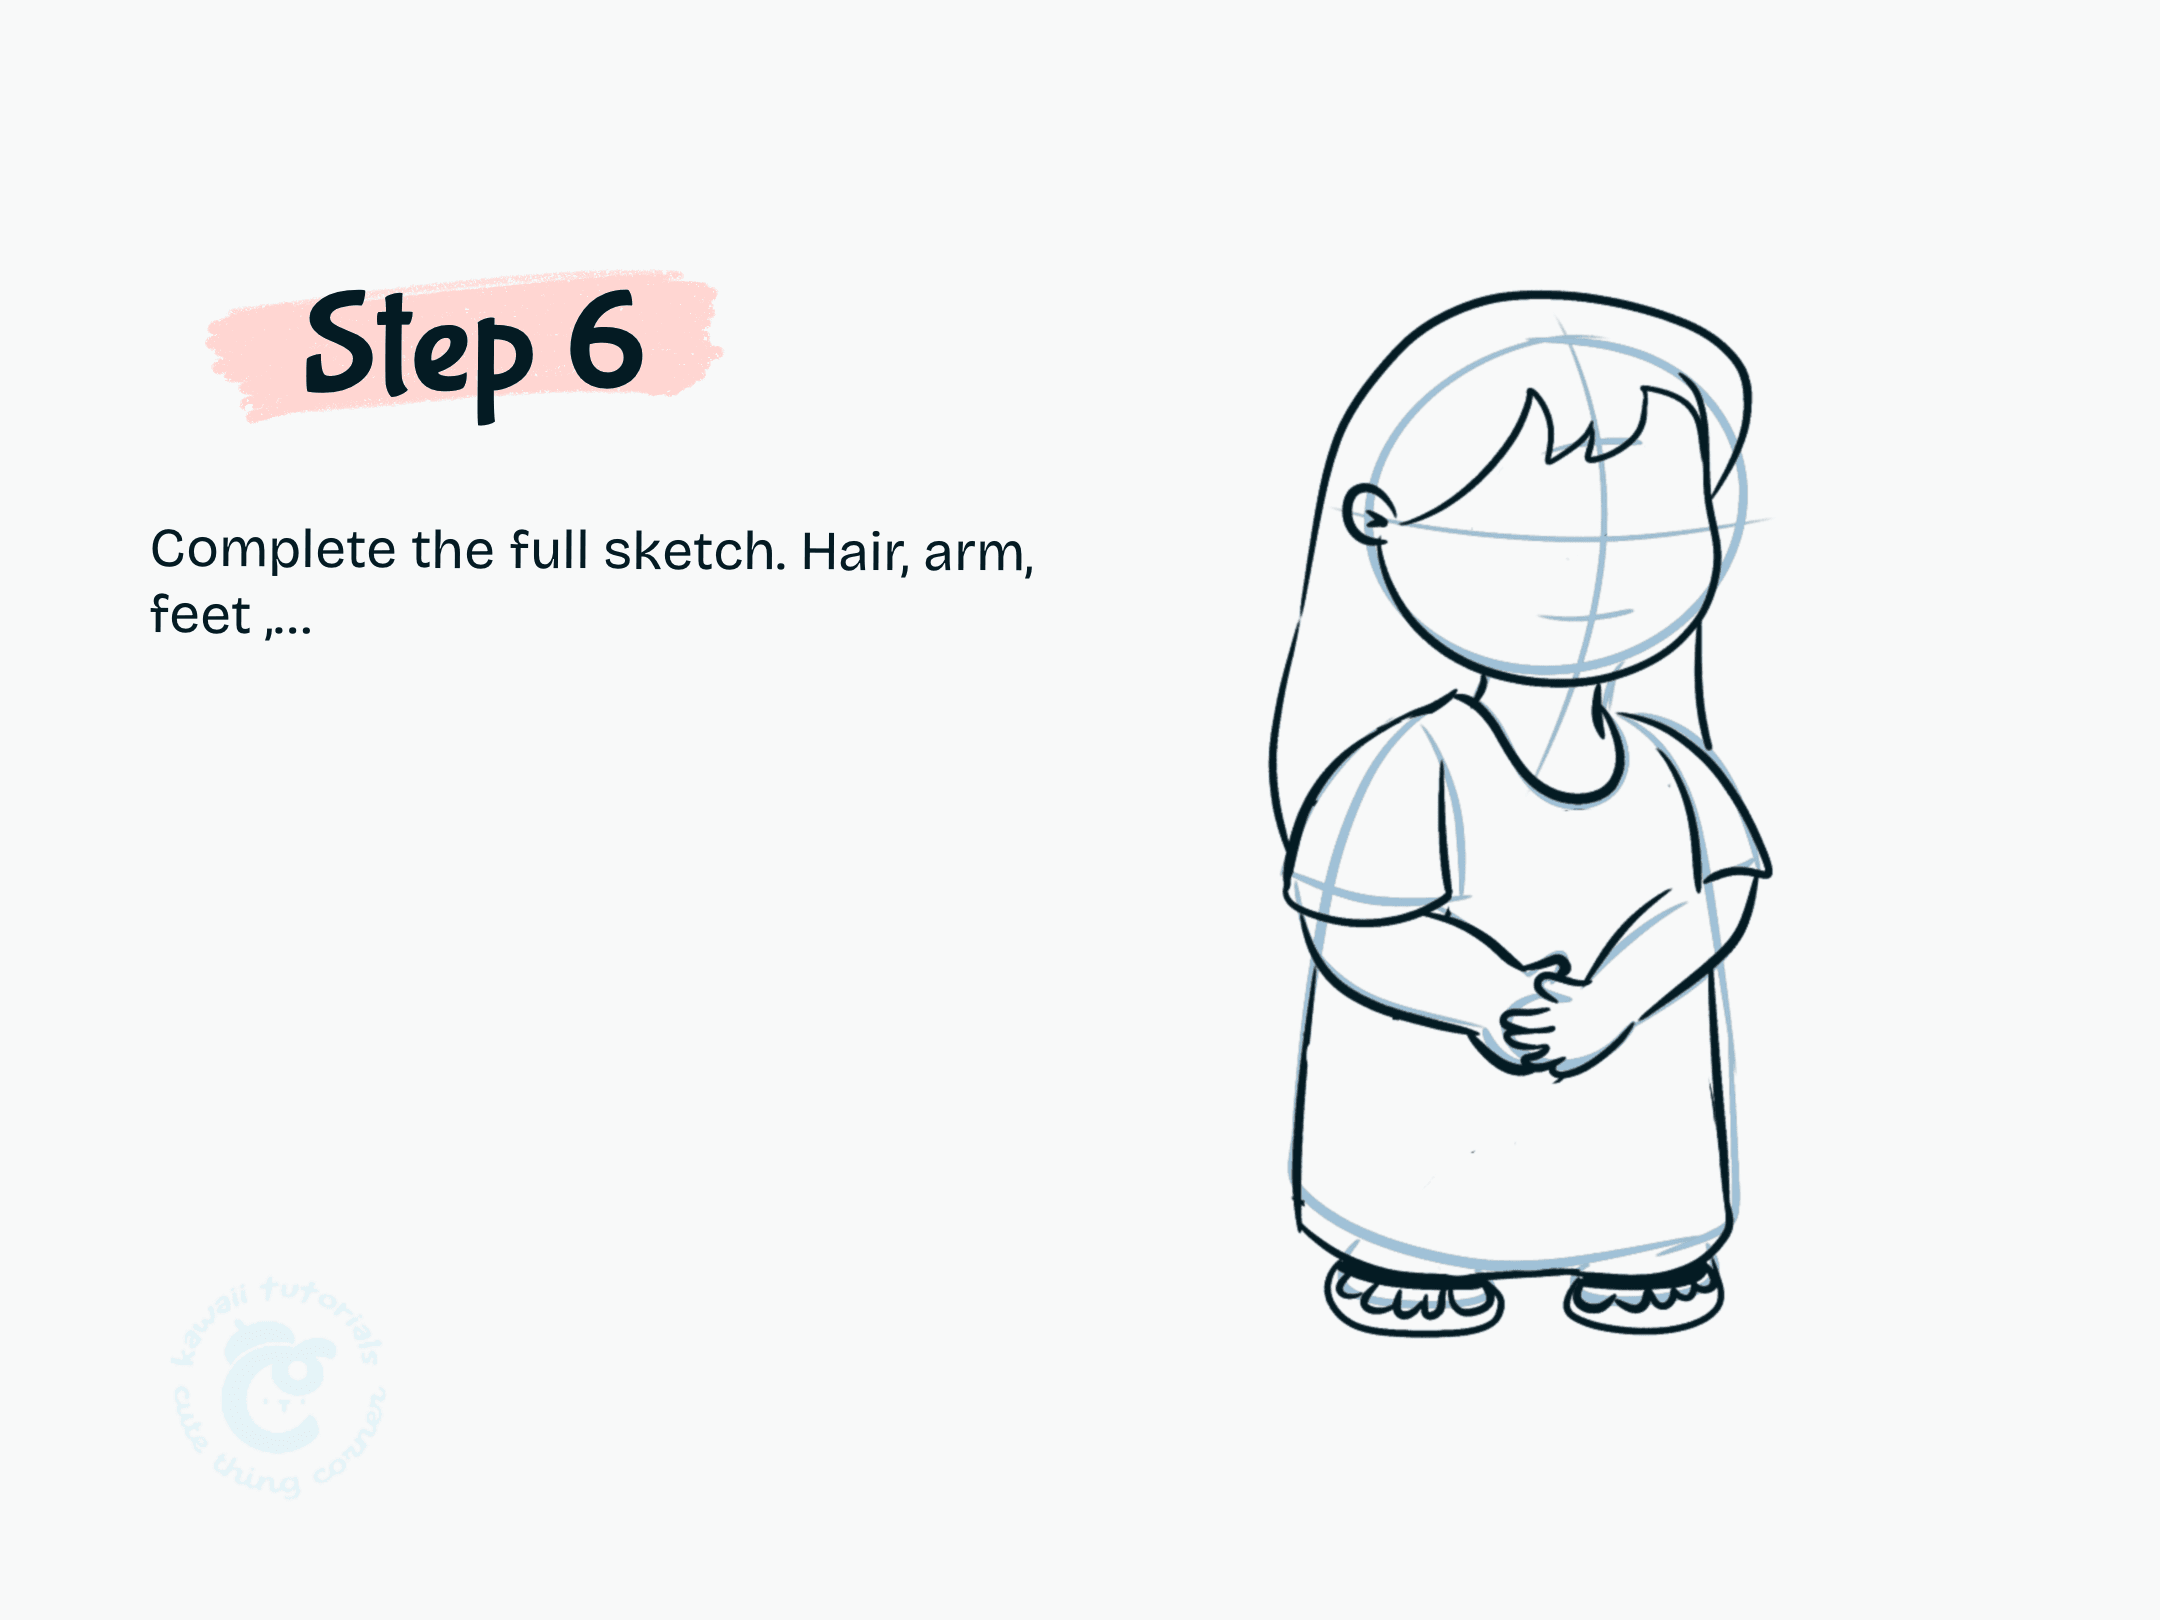
Step 6 Complete the sketch by adding her hair, facial lines, and cleaning up the body outline.
✨ Step 7: Add facial details
Add facial details: big kawaii eyes, eyebrows, a cute smile, and her nose. Then draw the large leaf patterns on her dress for that tropical touch!
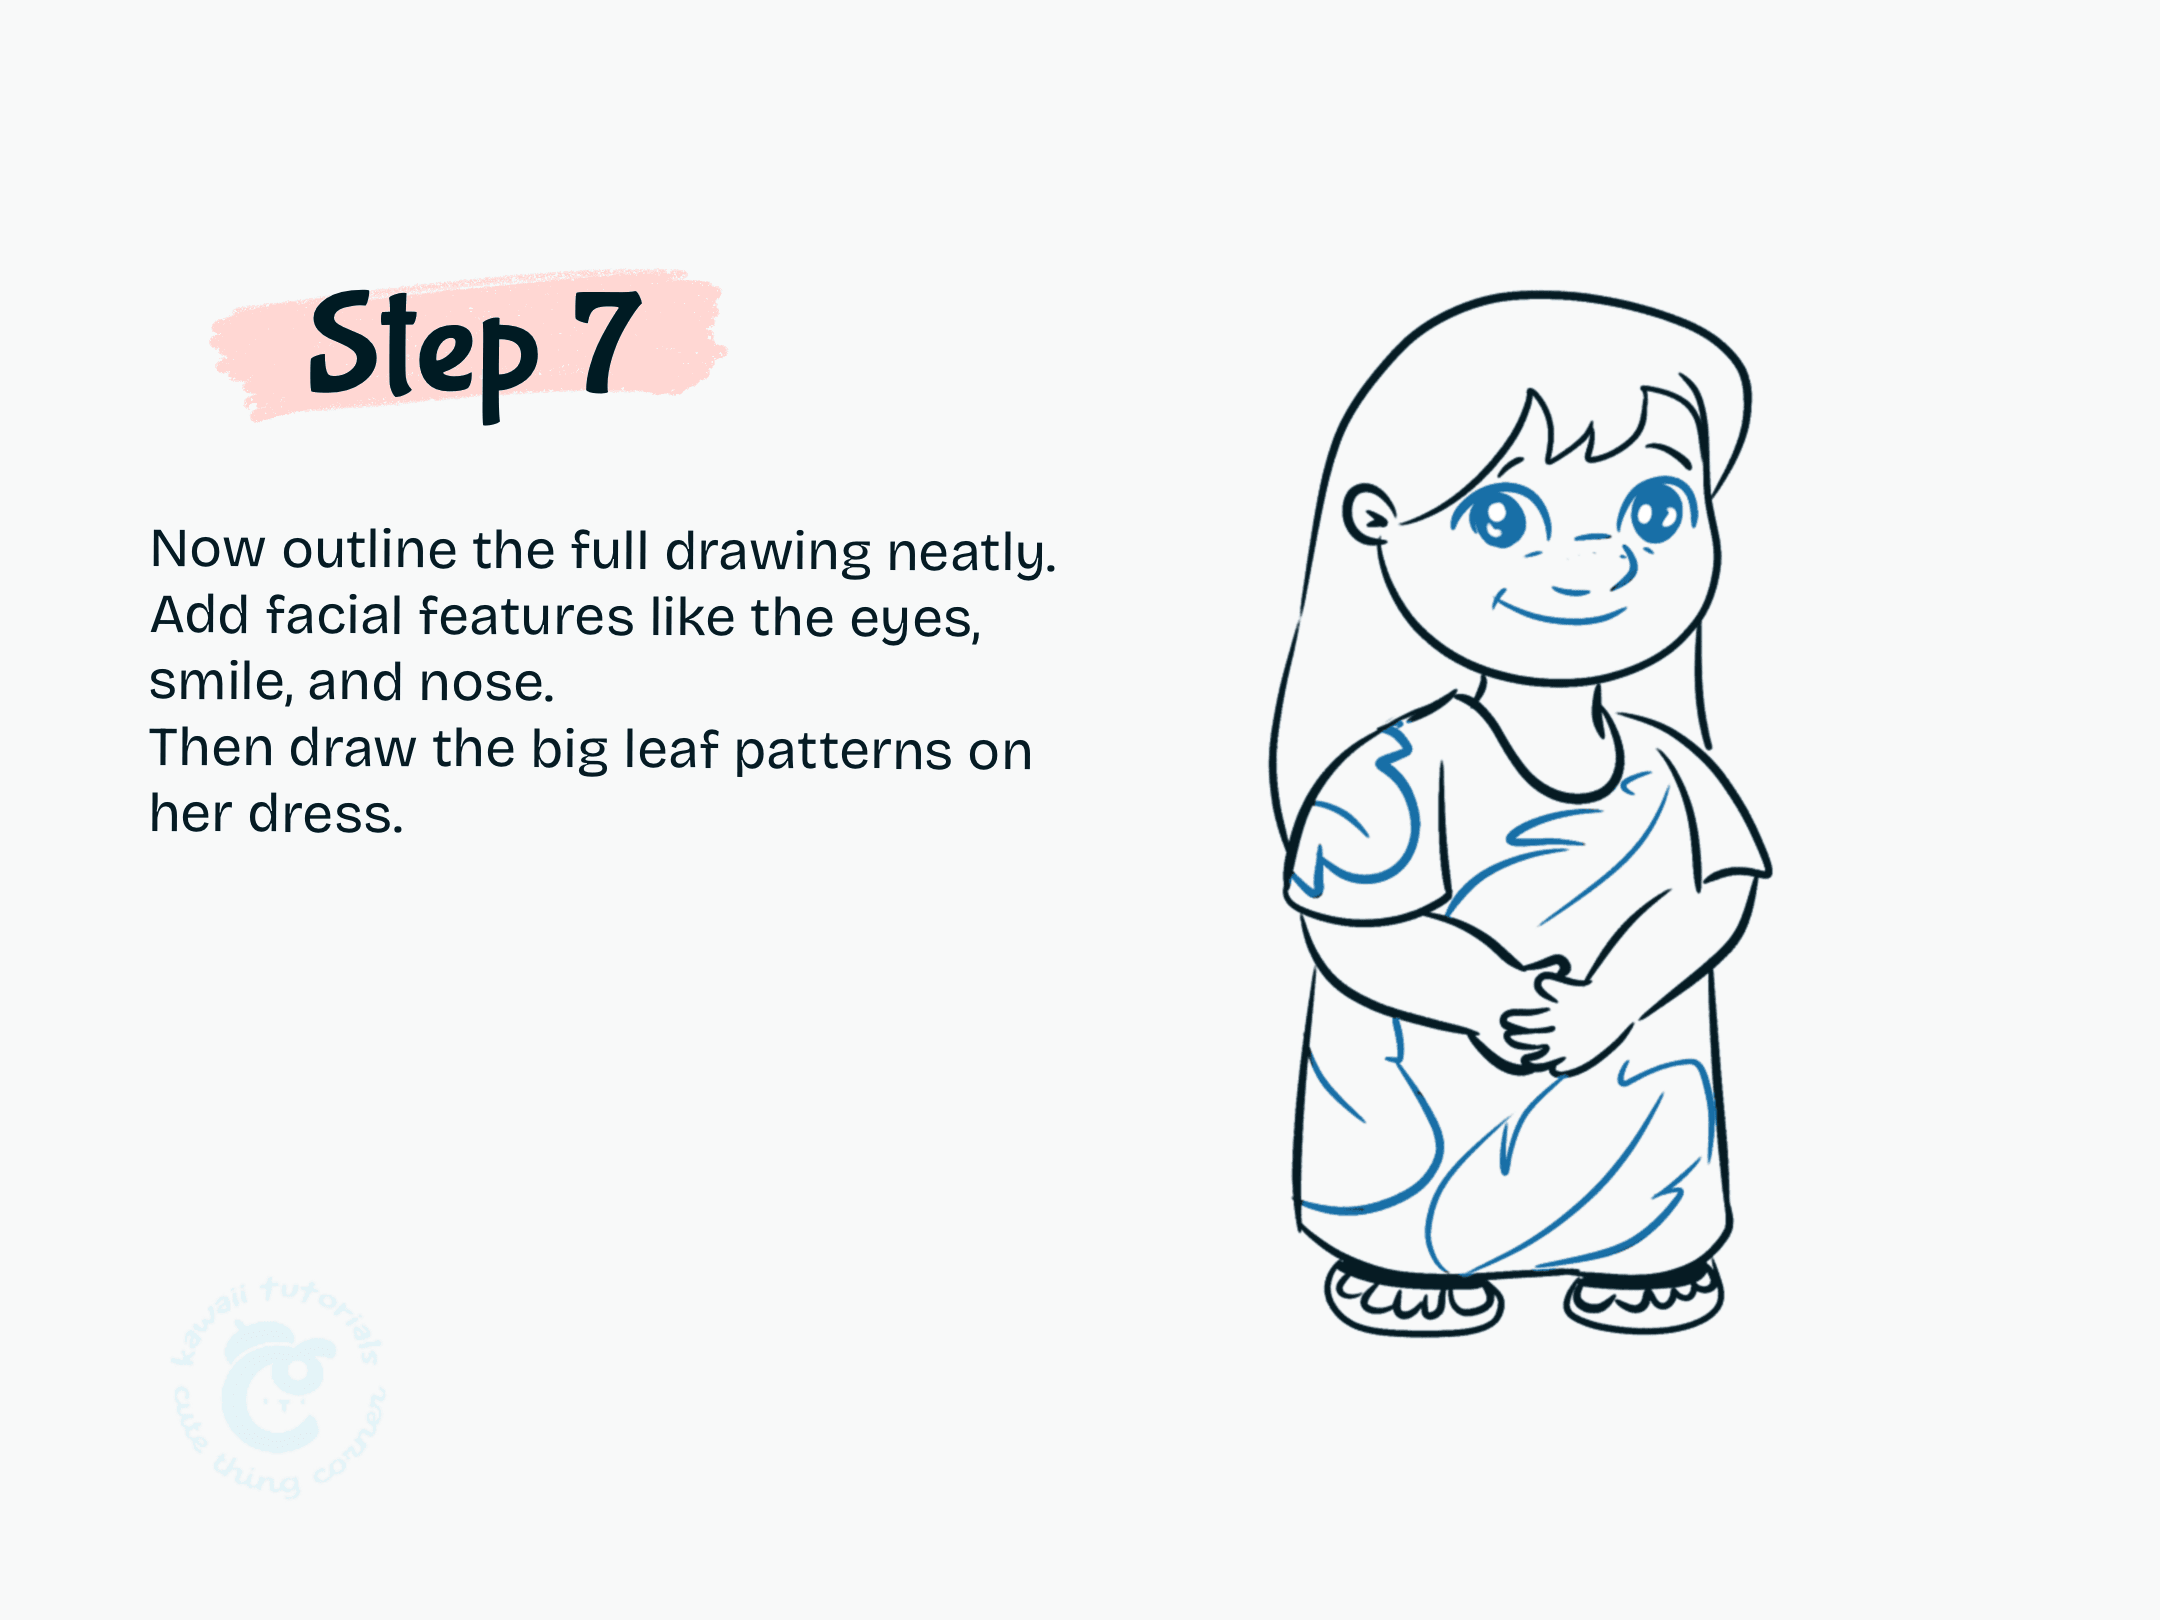
Step 7 Add facial details: big kawaii eyes, eyebrows, a cute smile, and her nose. Then draw the large leaf patterns on her dress for that tropical touch!
✨ Step 8: Time to color Lilo
-
Red dress
-
Cream-colored leaves
-
Warm tan skin
-
Black hair and eyes
-
Add a soft pink blush on her cheeks for extra cuteness 💖
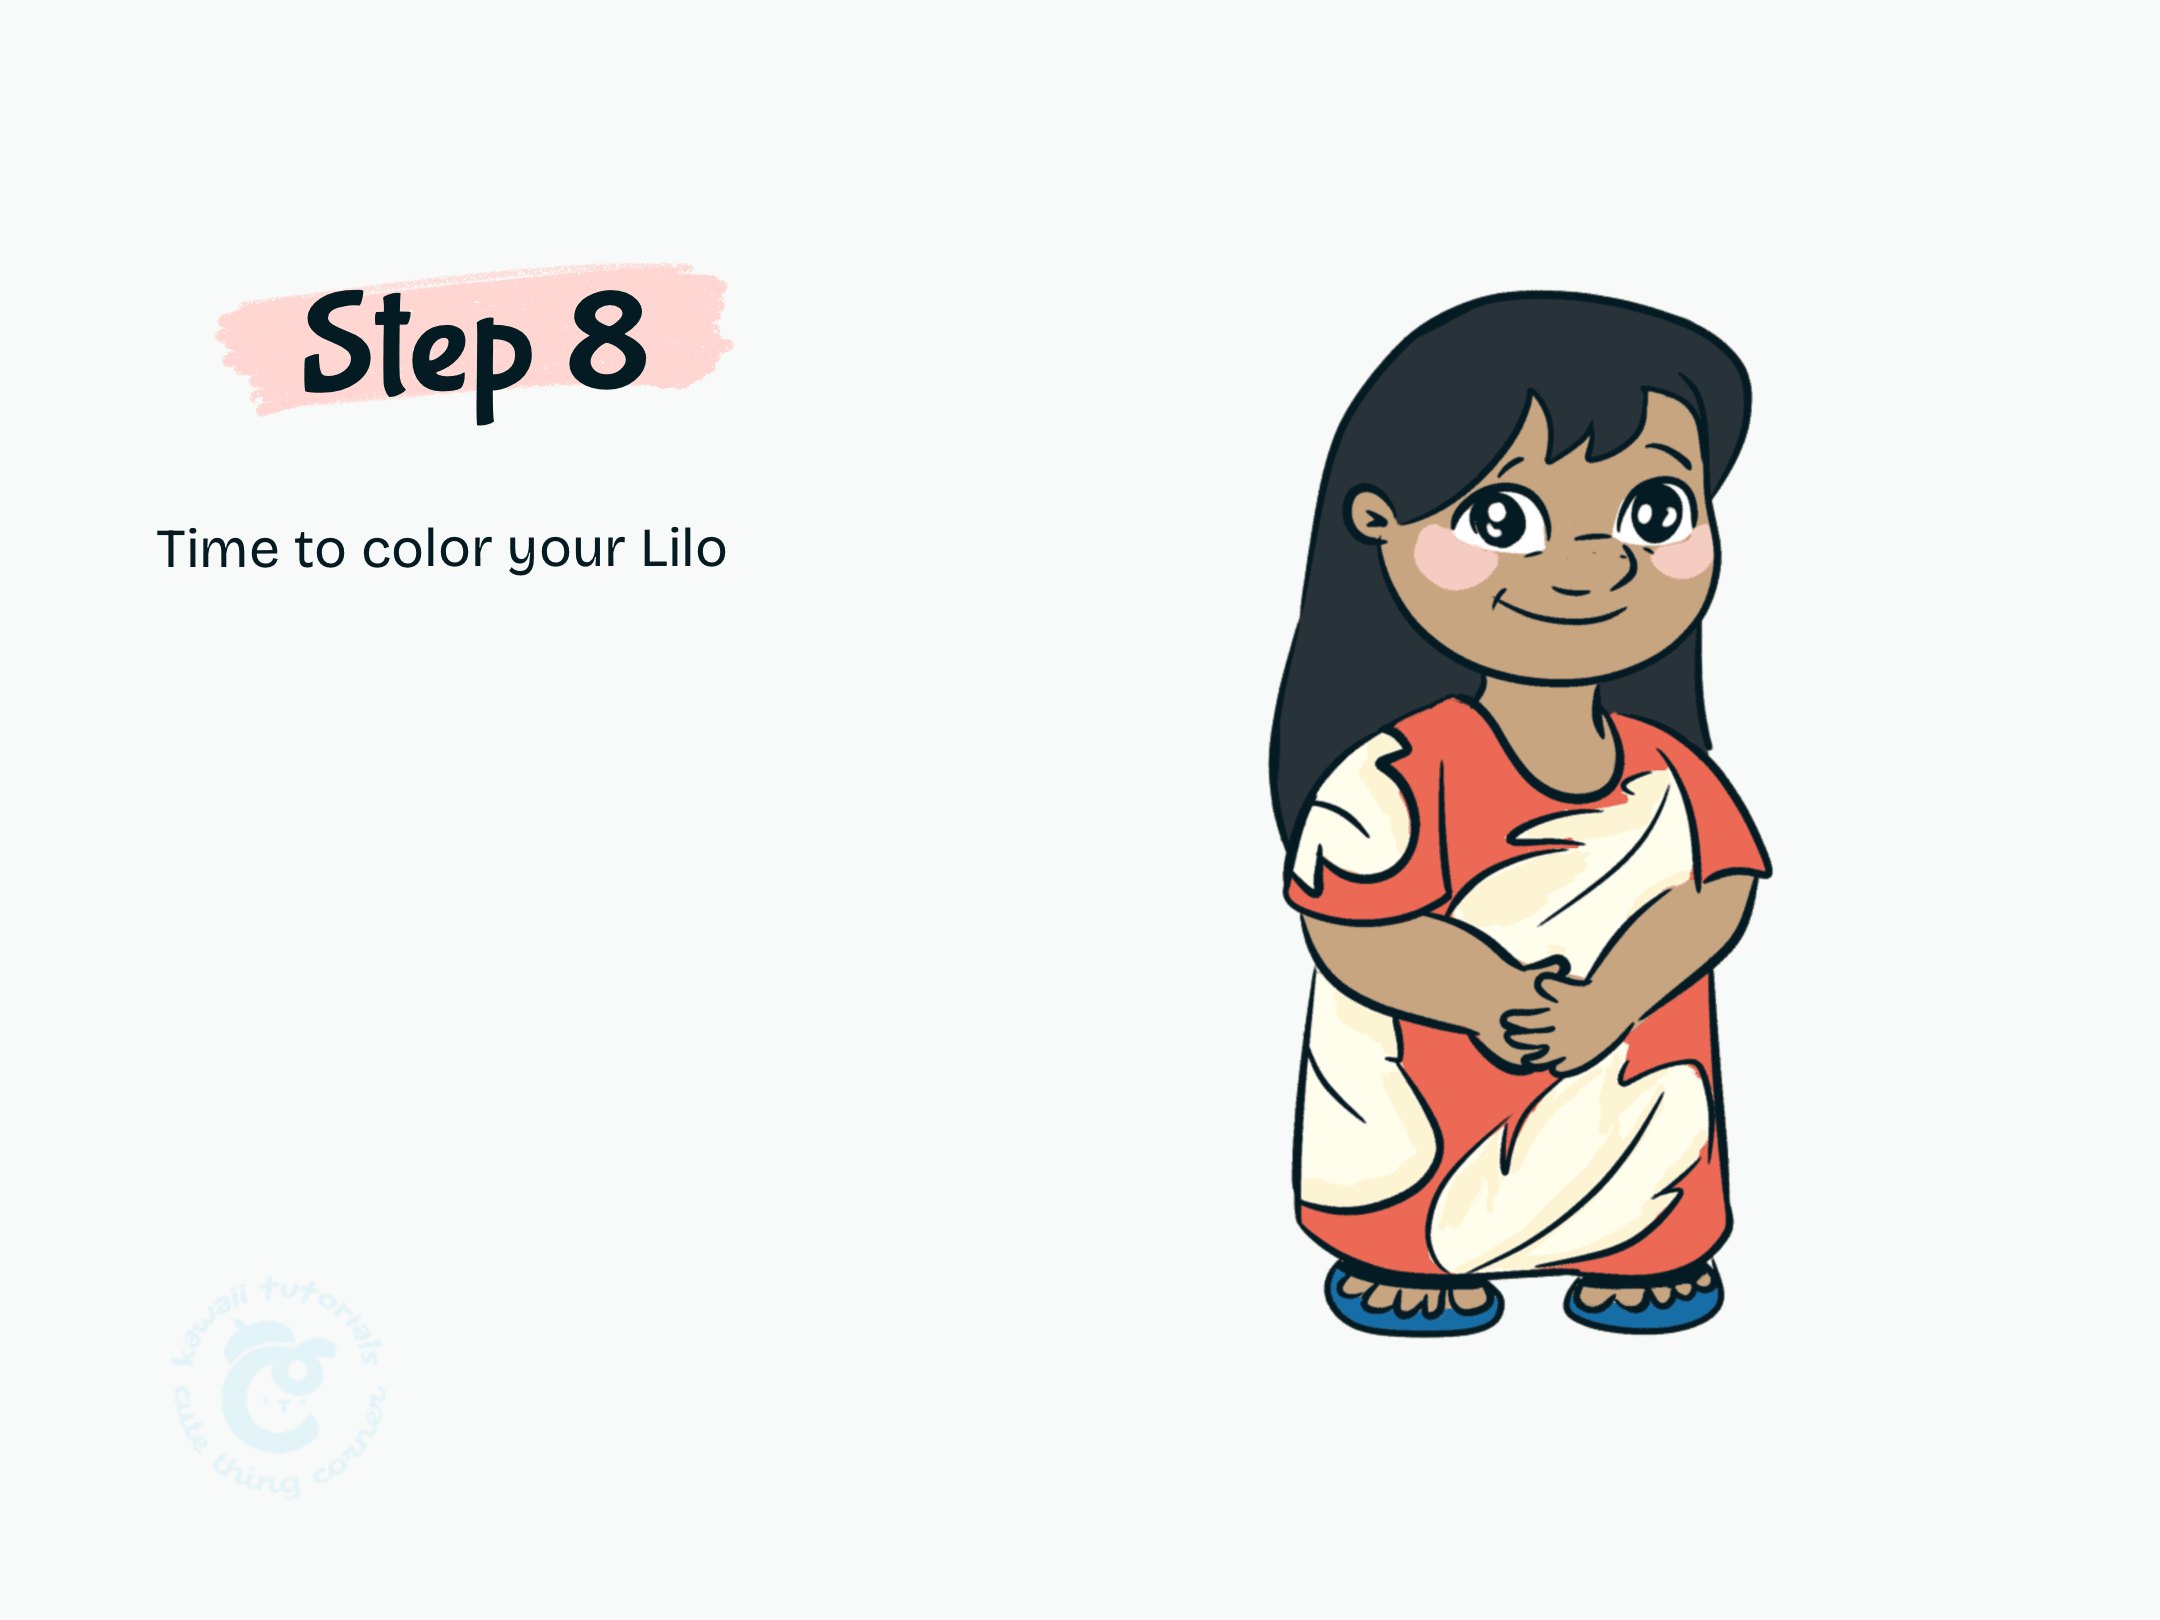
Step 8 Color Lilo
📺 Watch the Full Tutorial
Follow along with this video:
👉 How to Draw Lilo from Lilo and Stitch (YouTube)
💖 Want to draw Stitch too?
Check out these matching tutorials: