Cute Thing Corner

Chiikawa

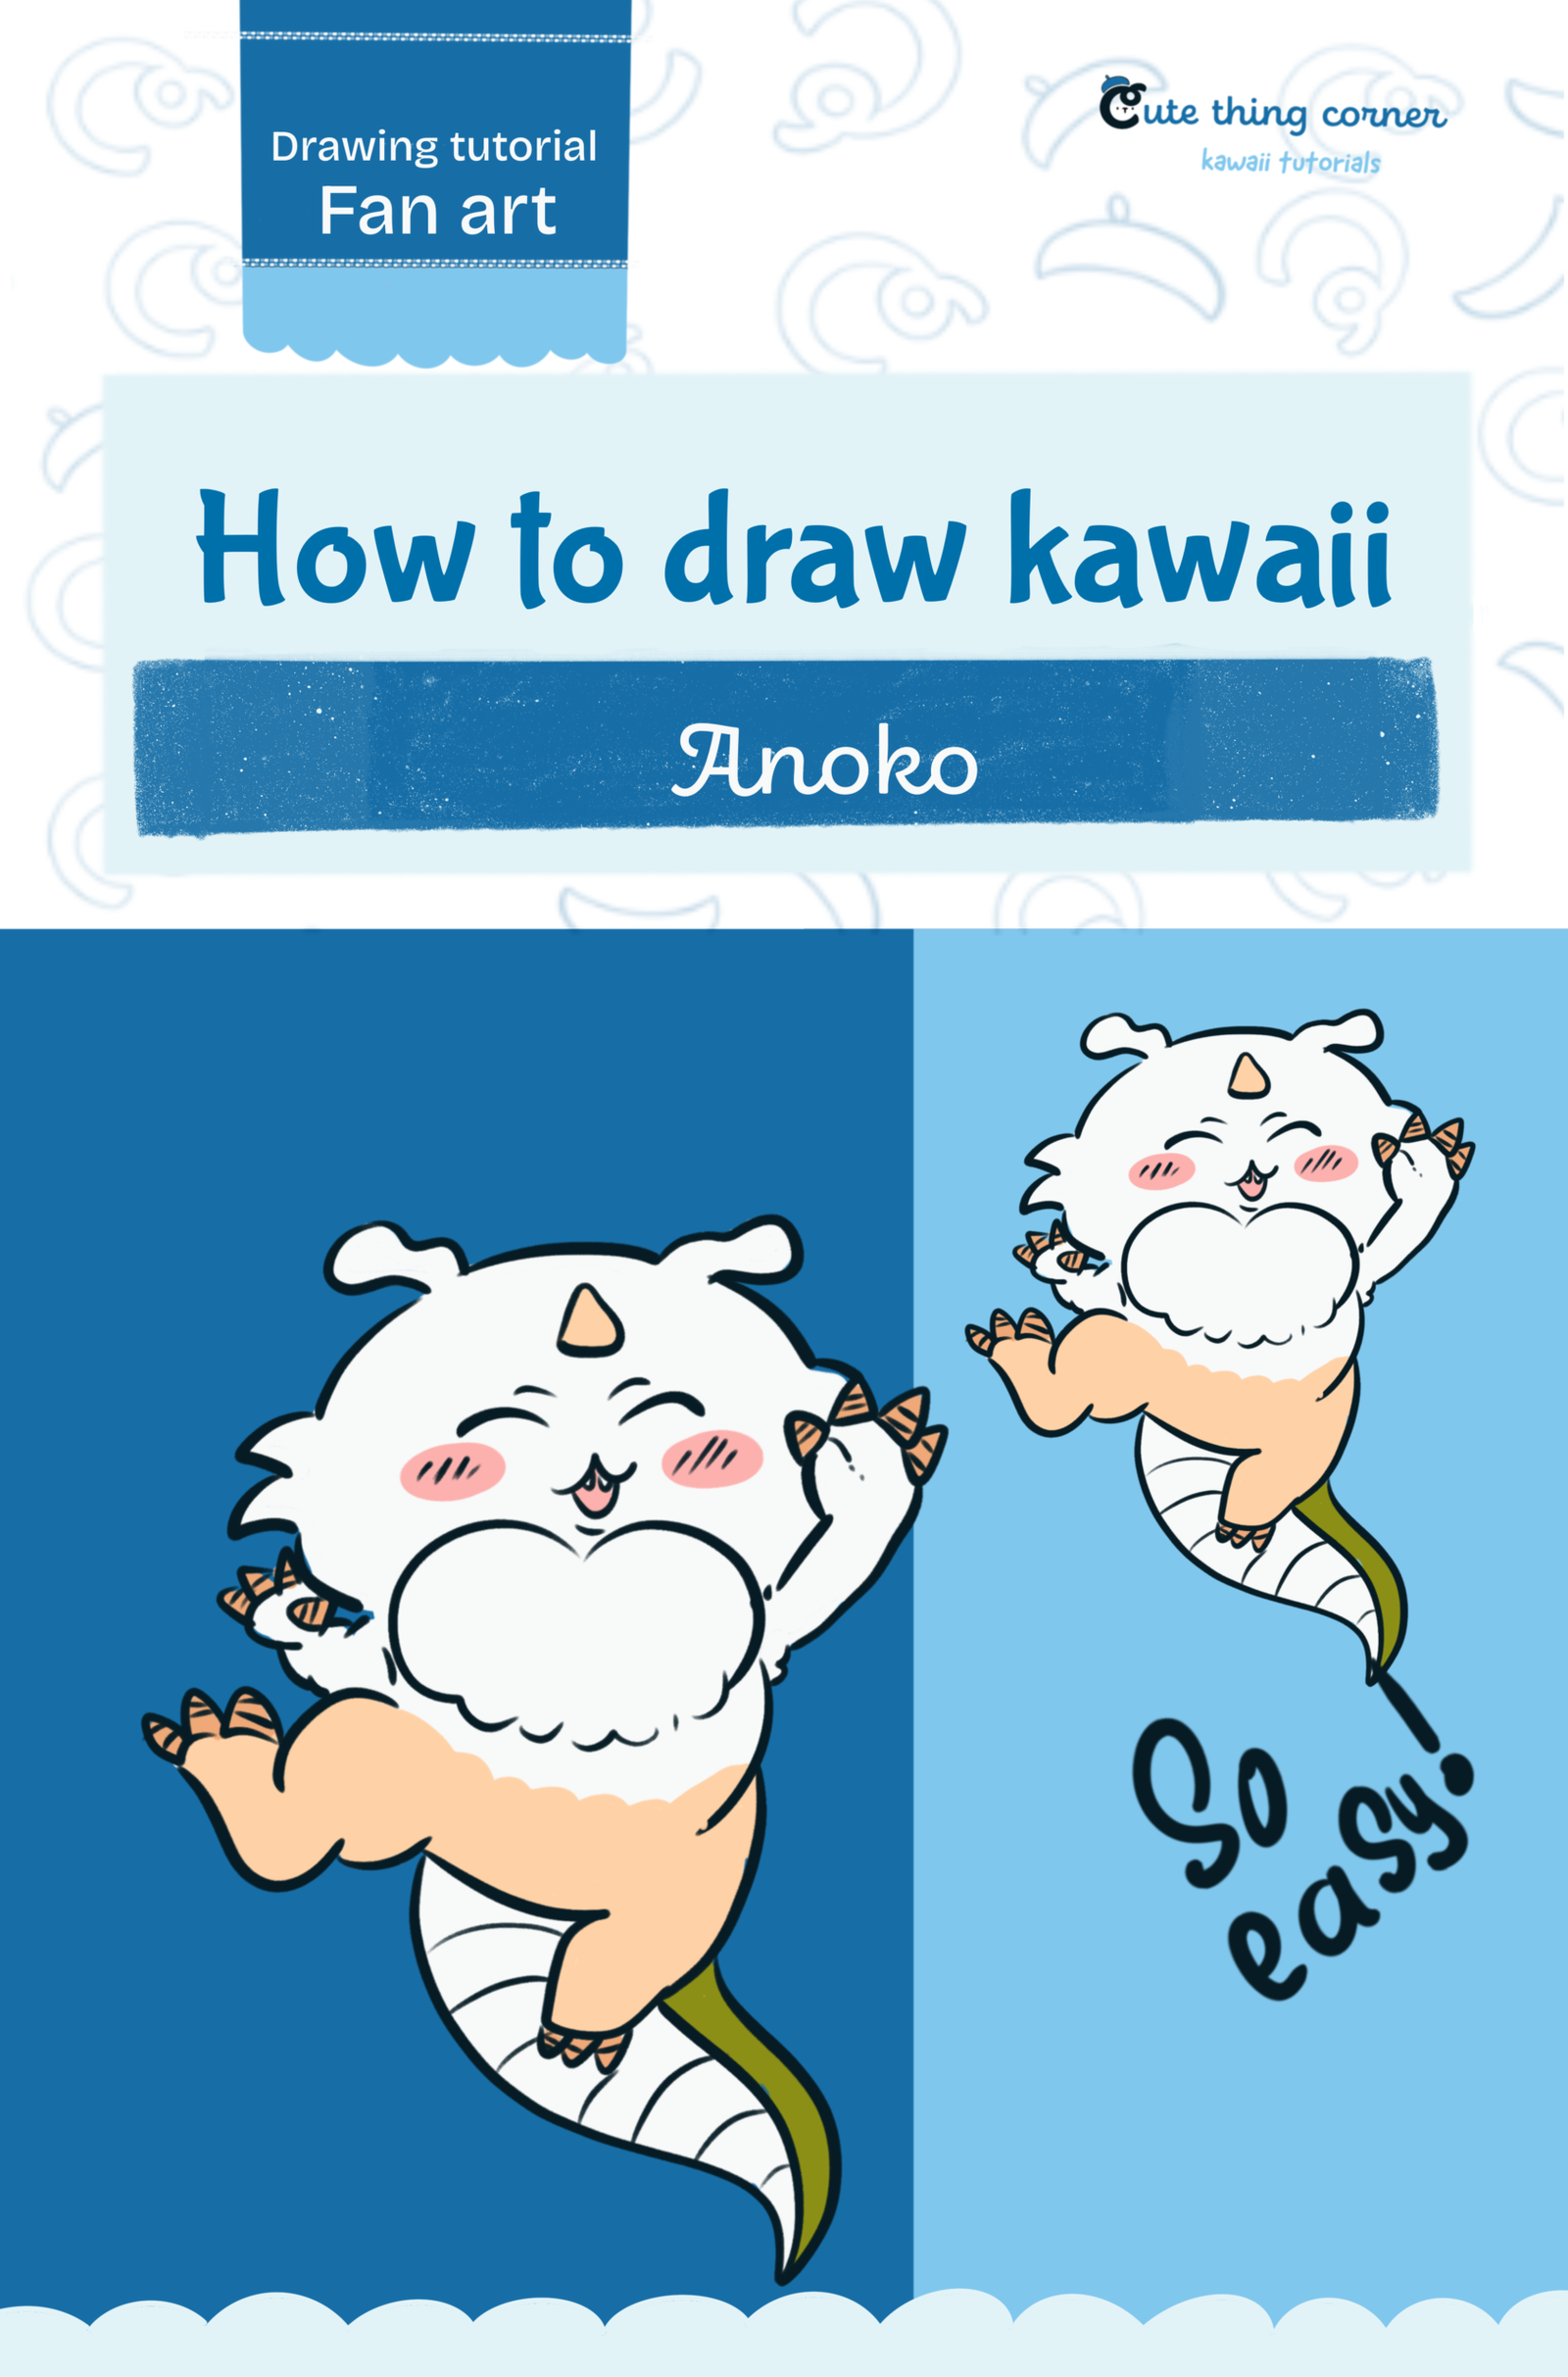
How to Draw Anoko Chiikawa (Easy Step-by-Step Drawing Tutorial)

Want to learn how to draw Anoko from Chiikawa? This easy step-by-step tutorial will teach you how to draw Anoko using simple shapes and clean lines. Whether you’re a beginner, a young artist, or a Chiikawa…

  • Quick
  • 12 minutes
  • 9 steps
How to Draw Anoko Chiikawa (Easy Step-by-Step Drawing Tutorial)

Before You Start

Want to learn how to draw Anoko from Chiikawa? This easy step-by-step tutorial will teach you how to draw Anoko using simple shapes and clean lines. Whether you’re a beginner, a young artist, or a Chiikawa fan, this kawaii drawing guide makes it fun and easy to follow.

Grab your pencil, eraser, and coloring tools—let’s start drawing Anoko!

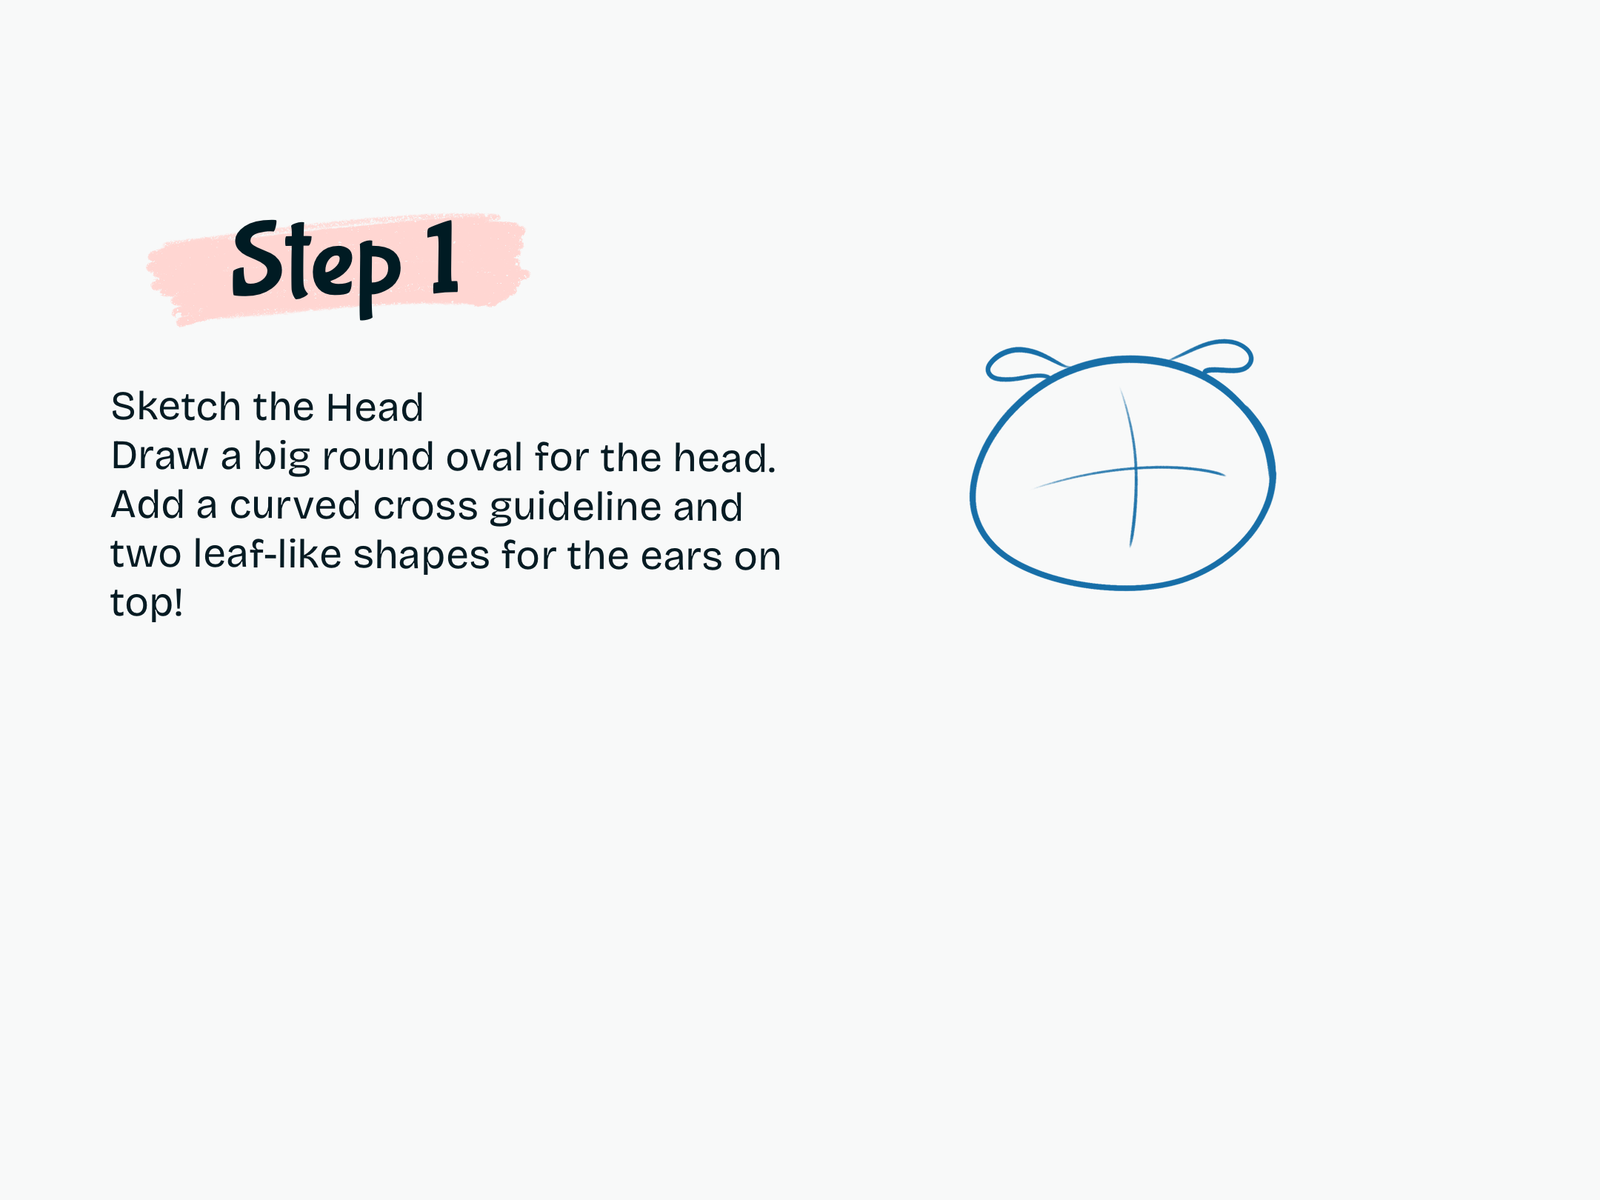
Step 1

Sketch the Head

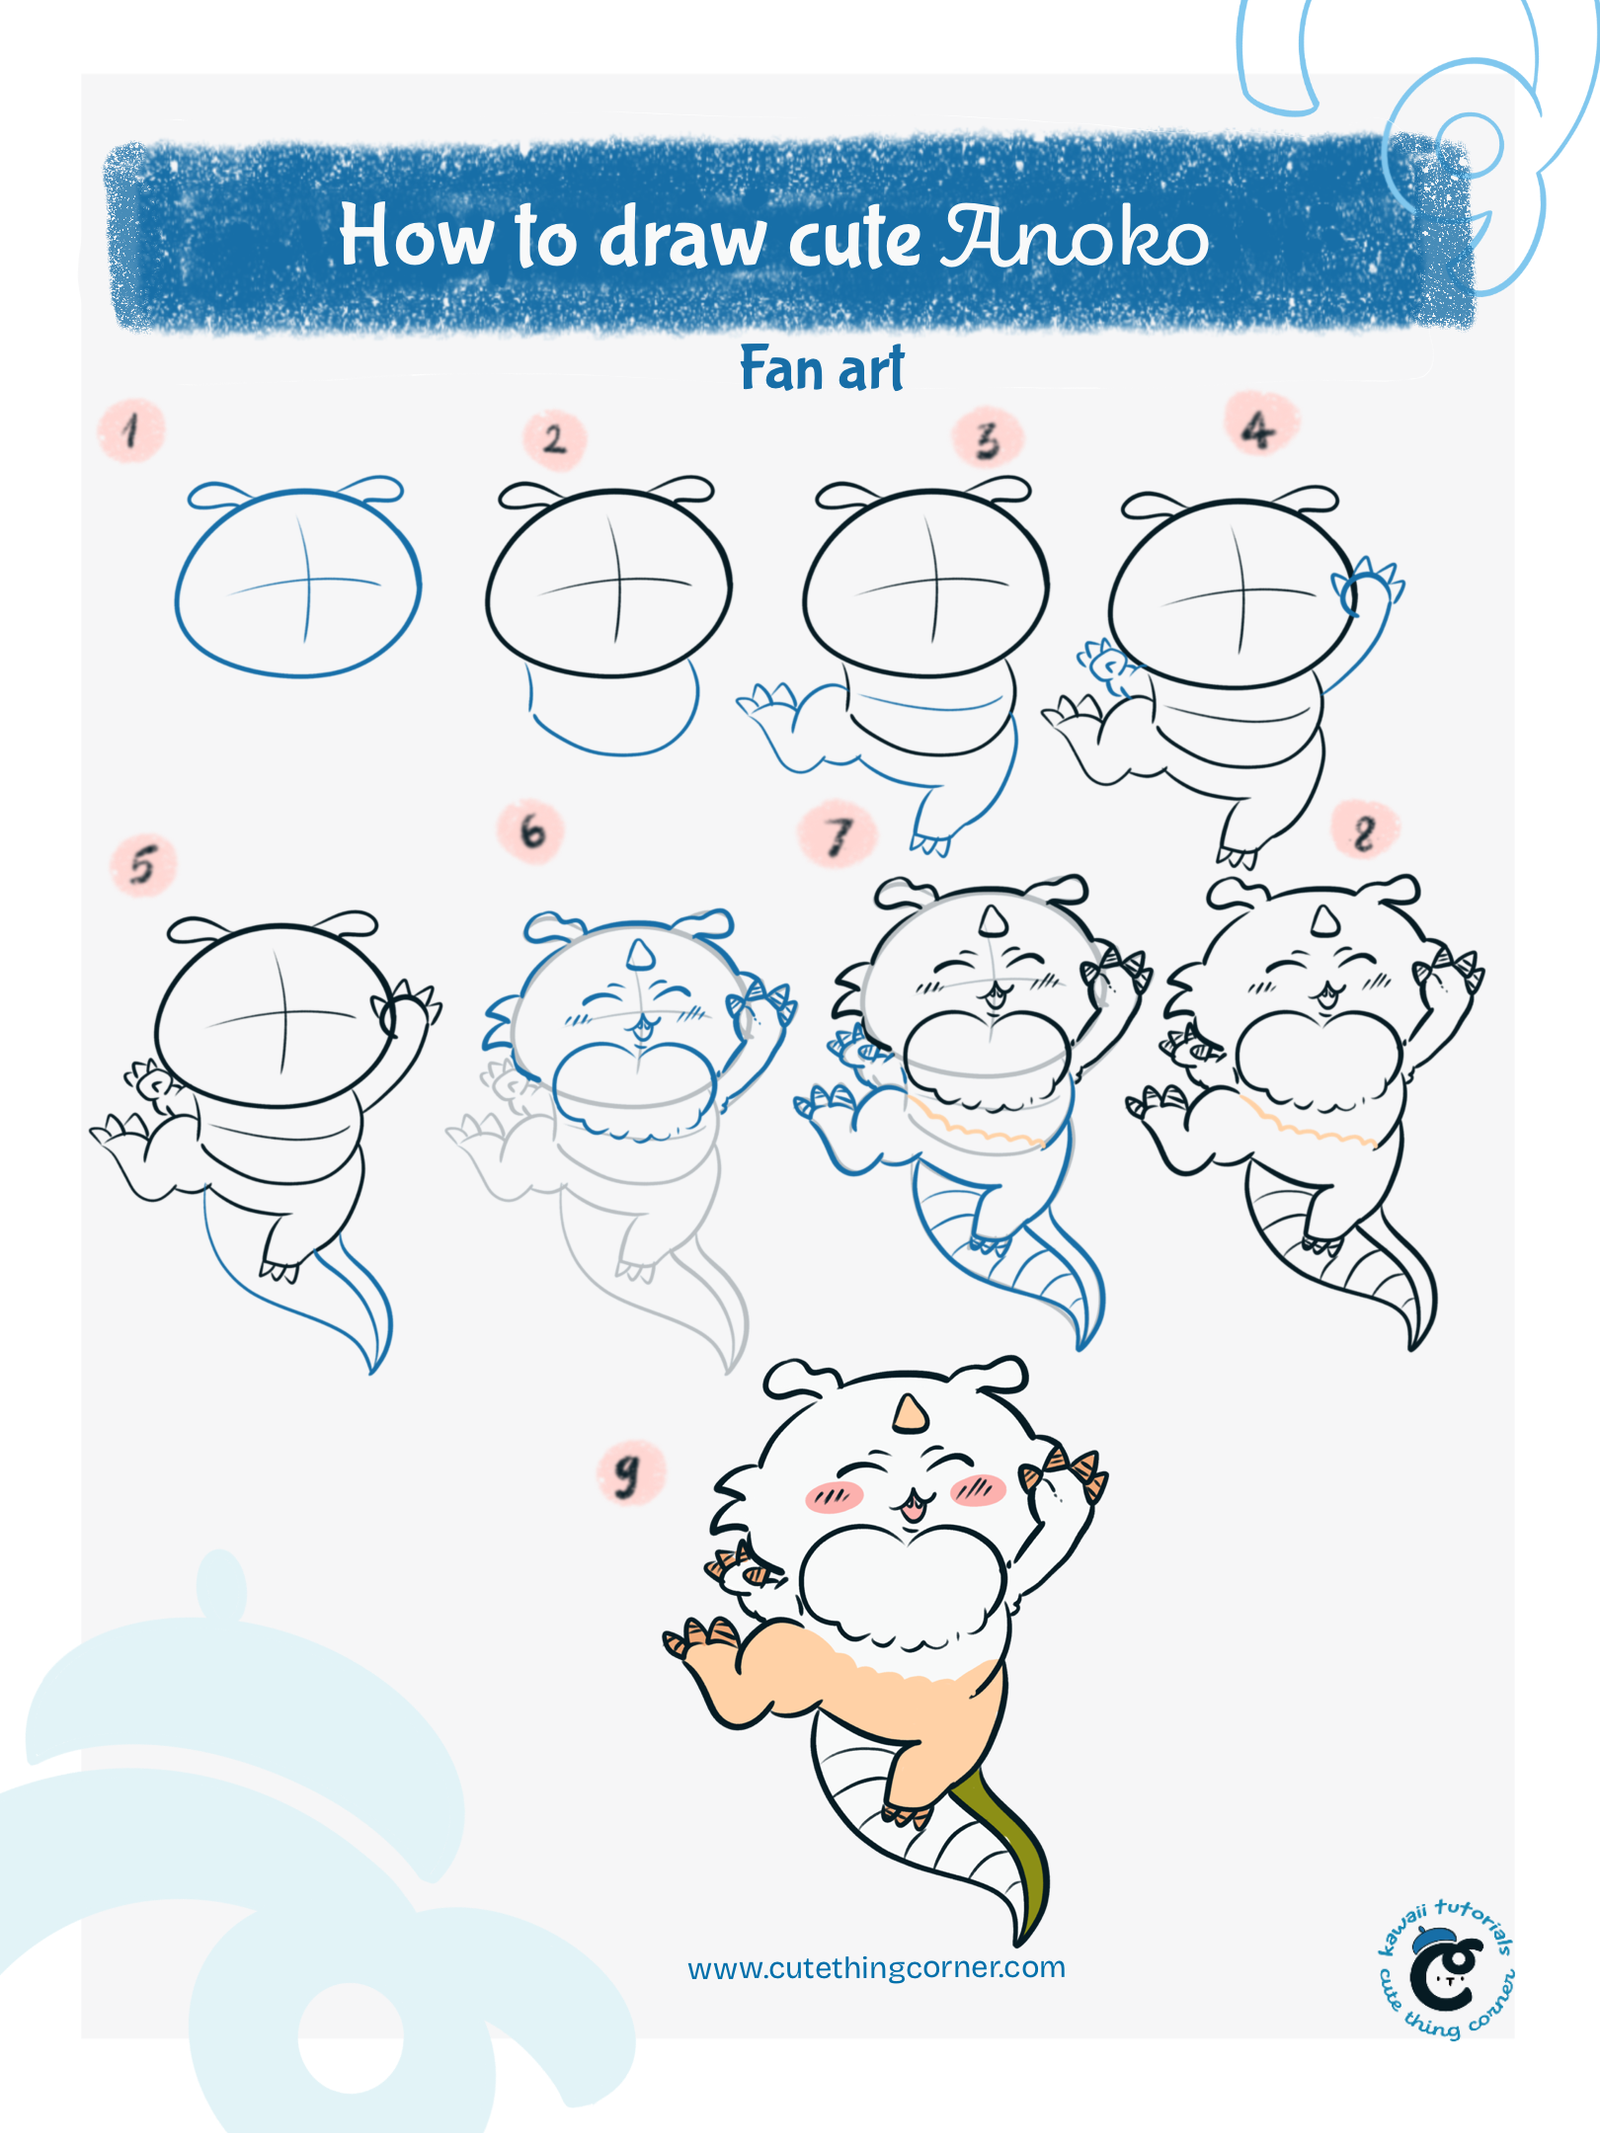
Begin by drawing a large oval for Anoko’s head. Add a light vertical and horizontal guideline across the face to help position the facial features later. Finish by sketching two leaf-shaped ears on top of the head.

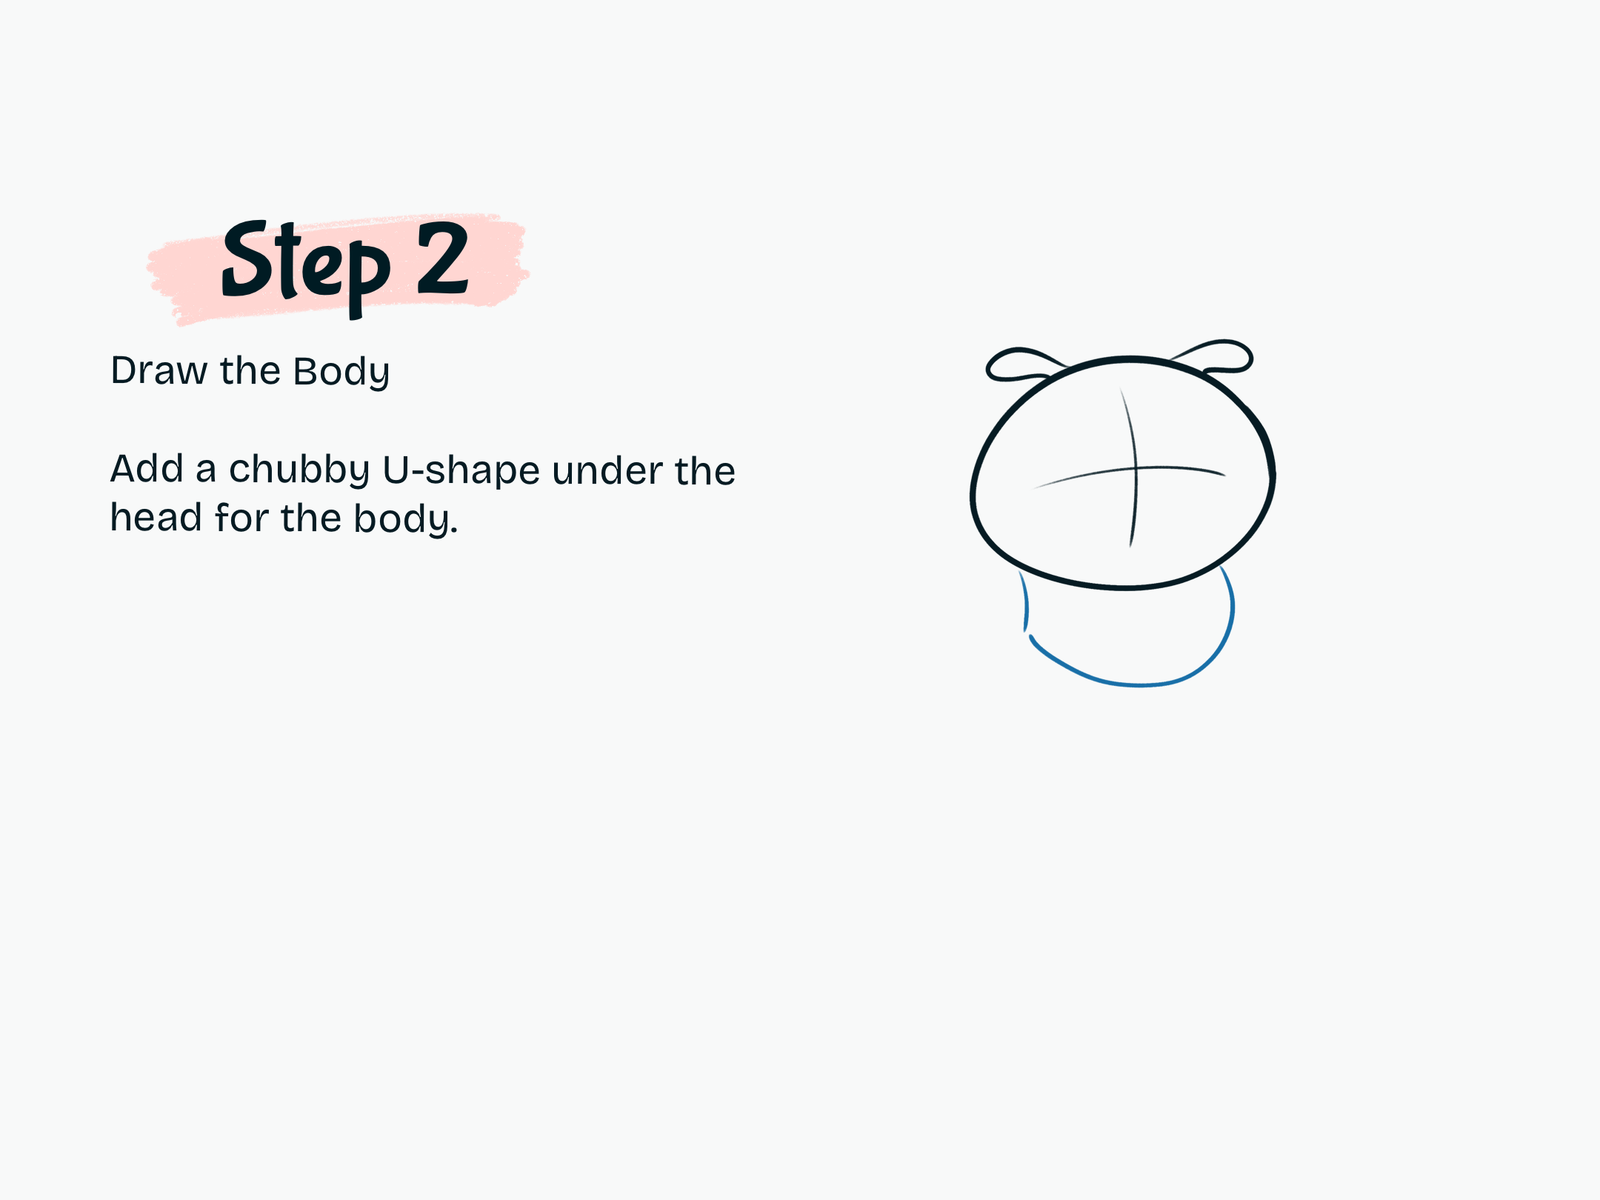
Step 2

Draw the Body

Under the head, draw a rounded U-shaped body. Keep the body soft and chubby so it matches the cute Chiikawa art style.

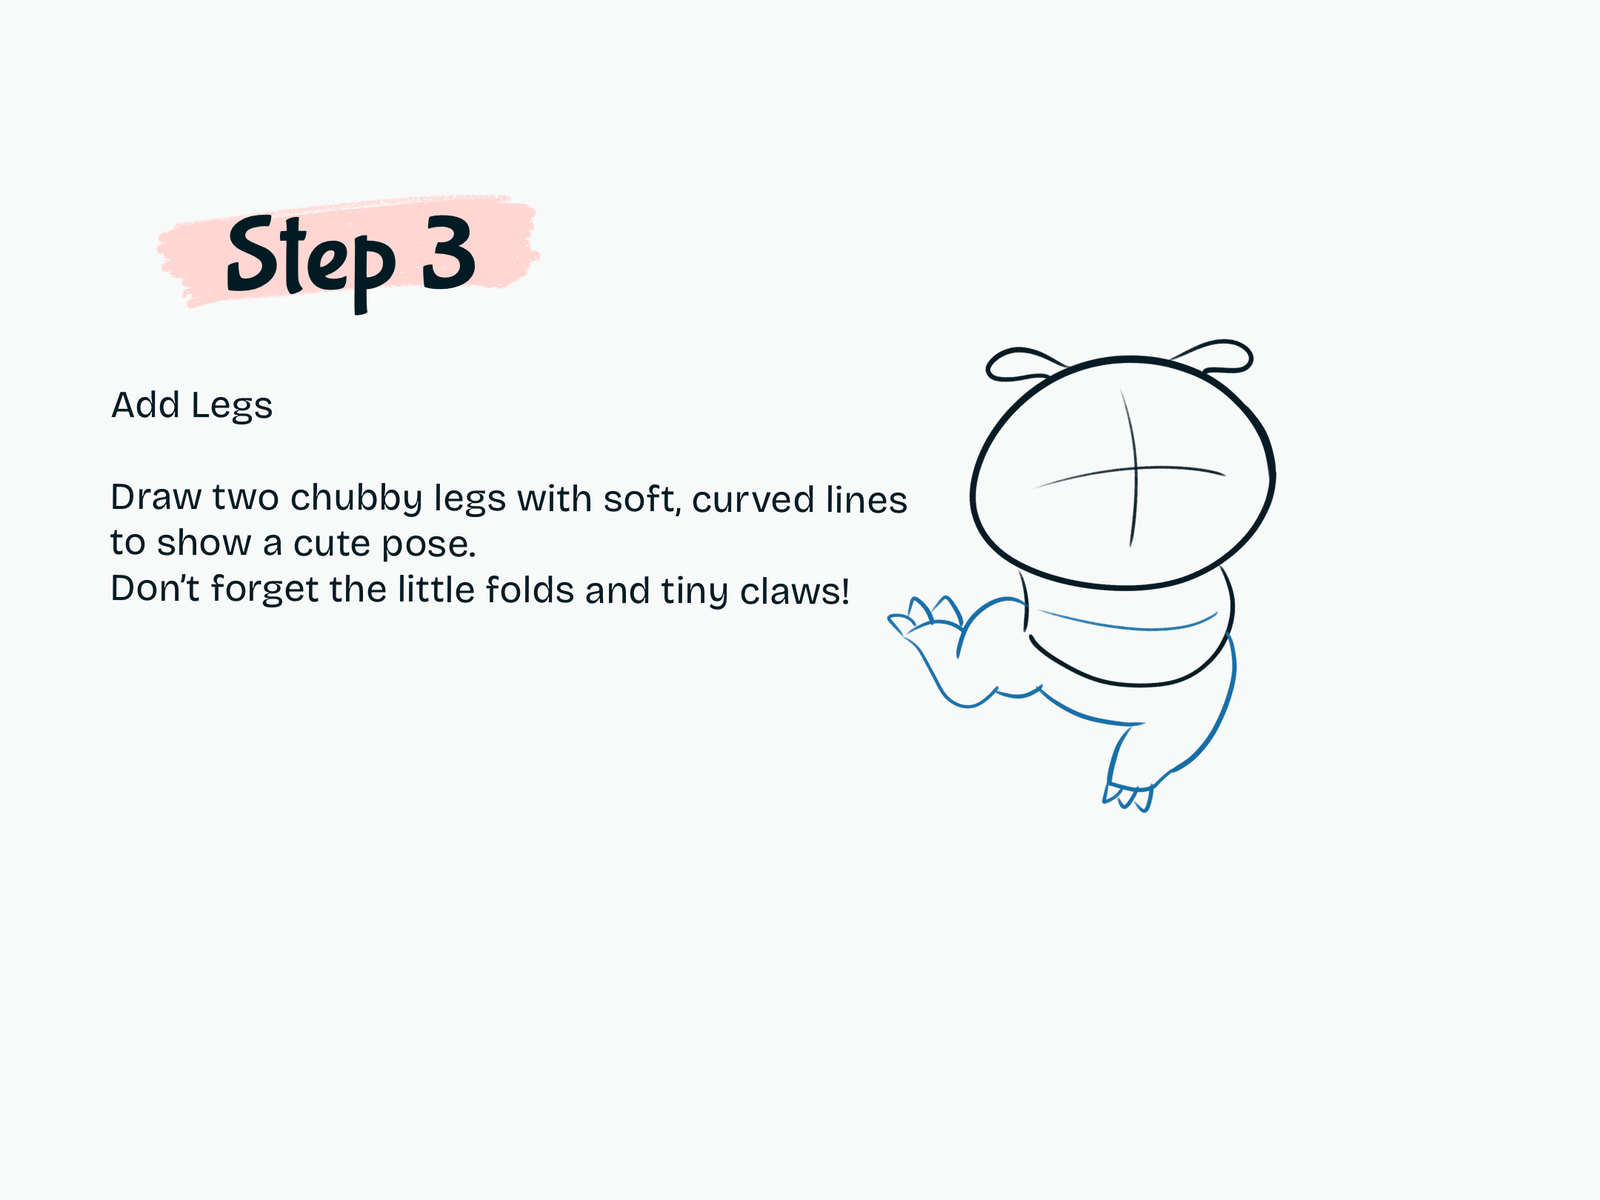
Step 3

Add the Legs

Draw two chunky legs with gentle curved lines. Give each foot a few tiny claws and add soft folds around the legs to create a relaxed, playful pose.

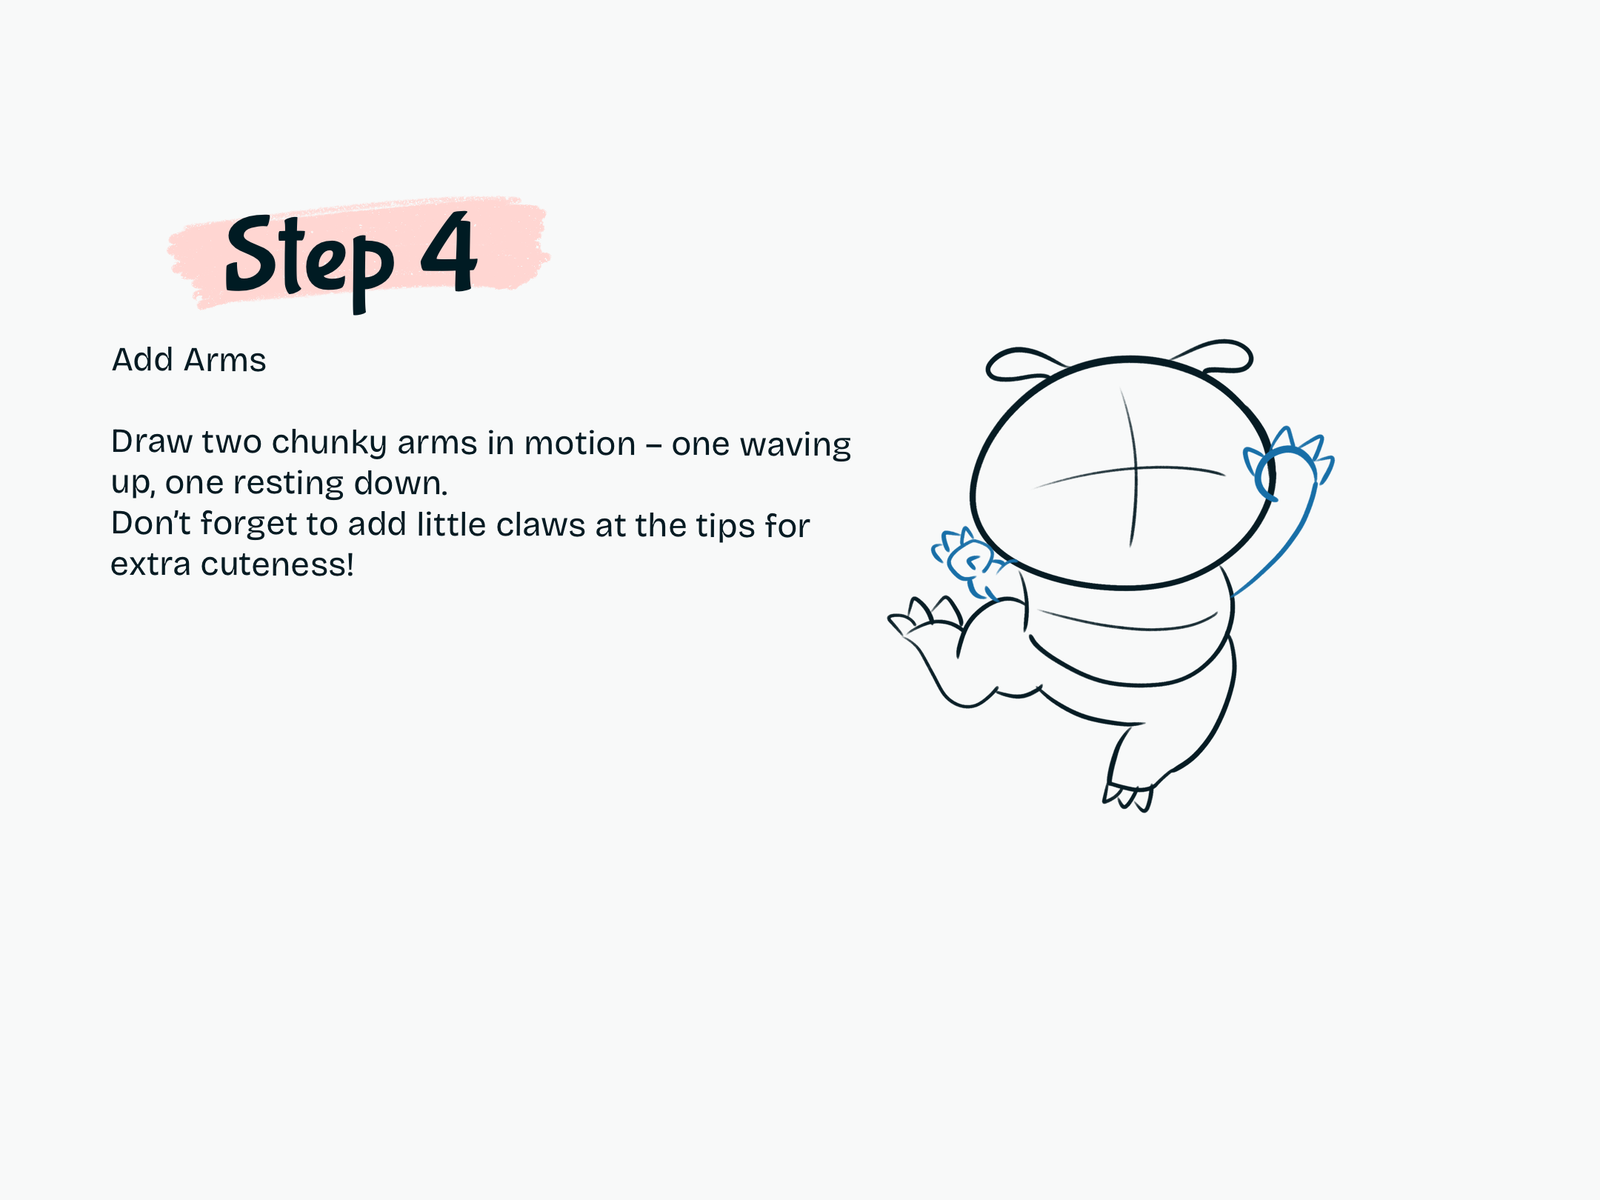
Step 4

Draw the Arms

Sketch two rounded arms. Raise one arm as if Anoko is happily waving, while the other rests near the body. Add small claws at the fingertips to complete the cute monster look.

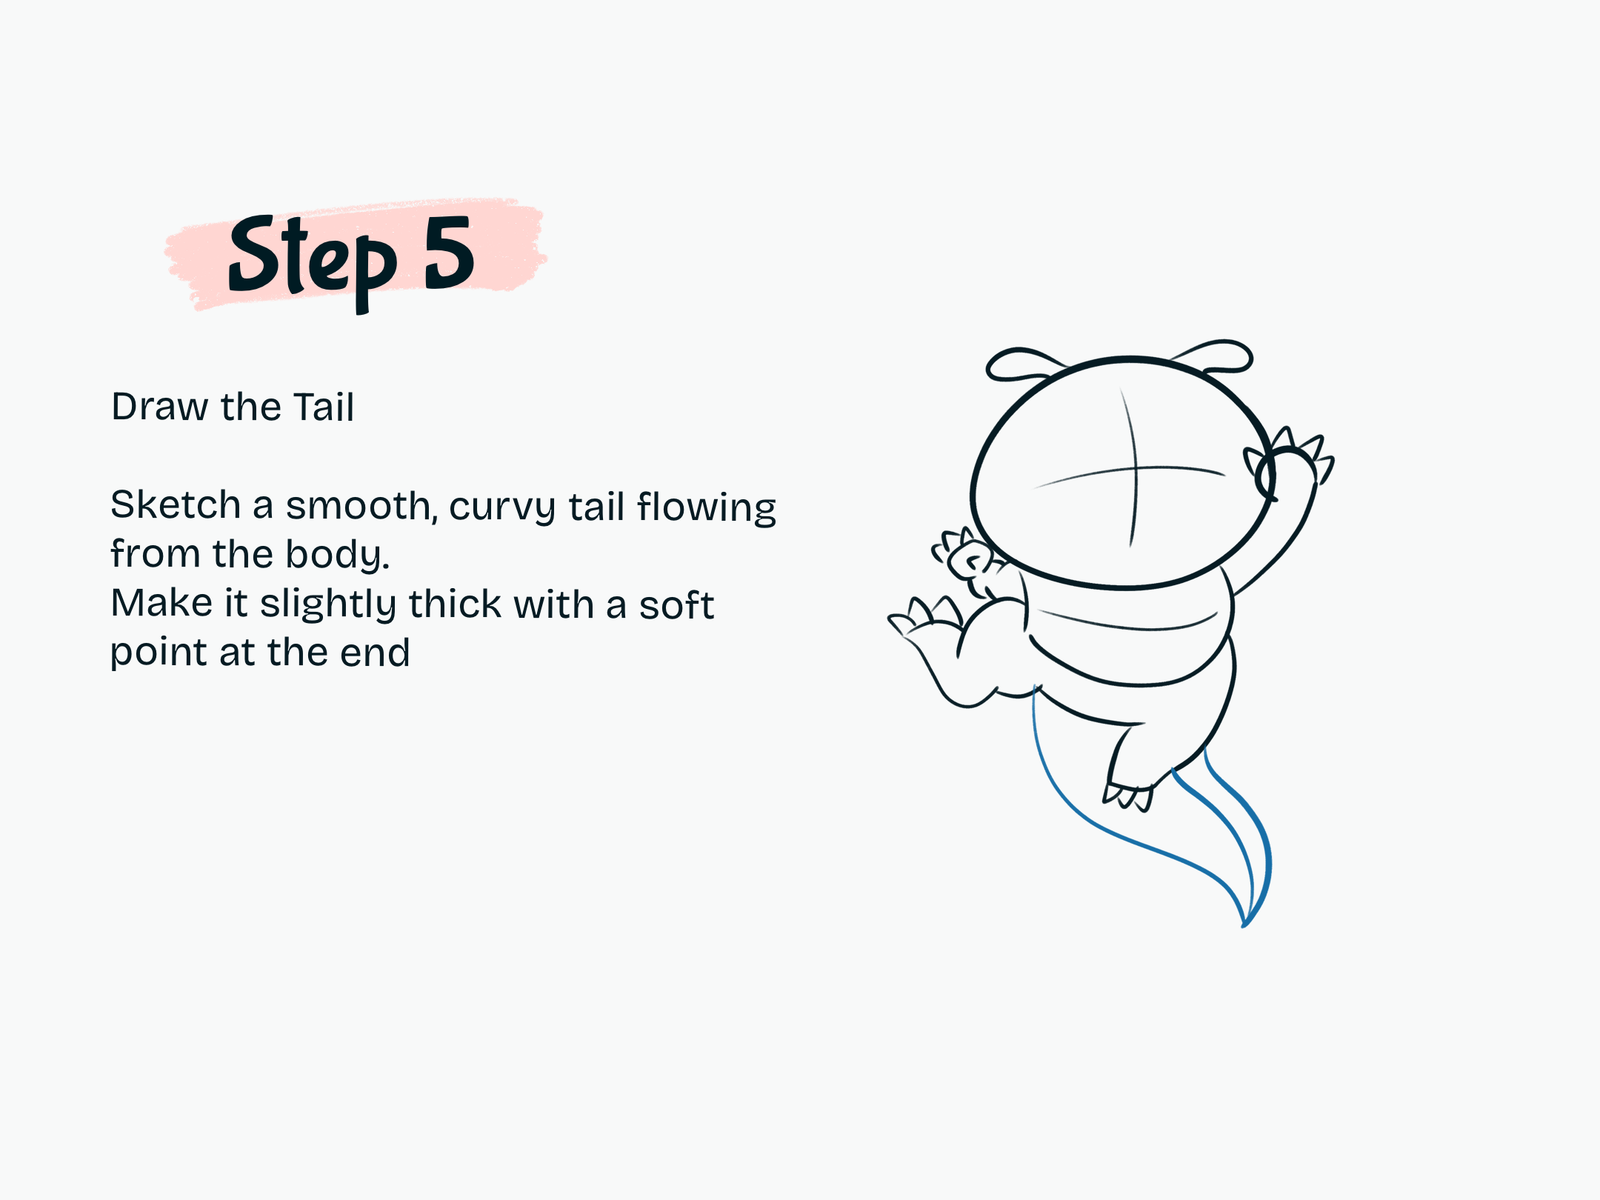
Step 5

Draw the Tail

Extend a long, curved tail from the back of the body. Make it slightly thicker near the base and taper it into a soft point for a smooth, flowing shape.

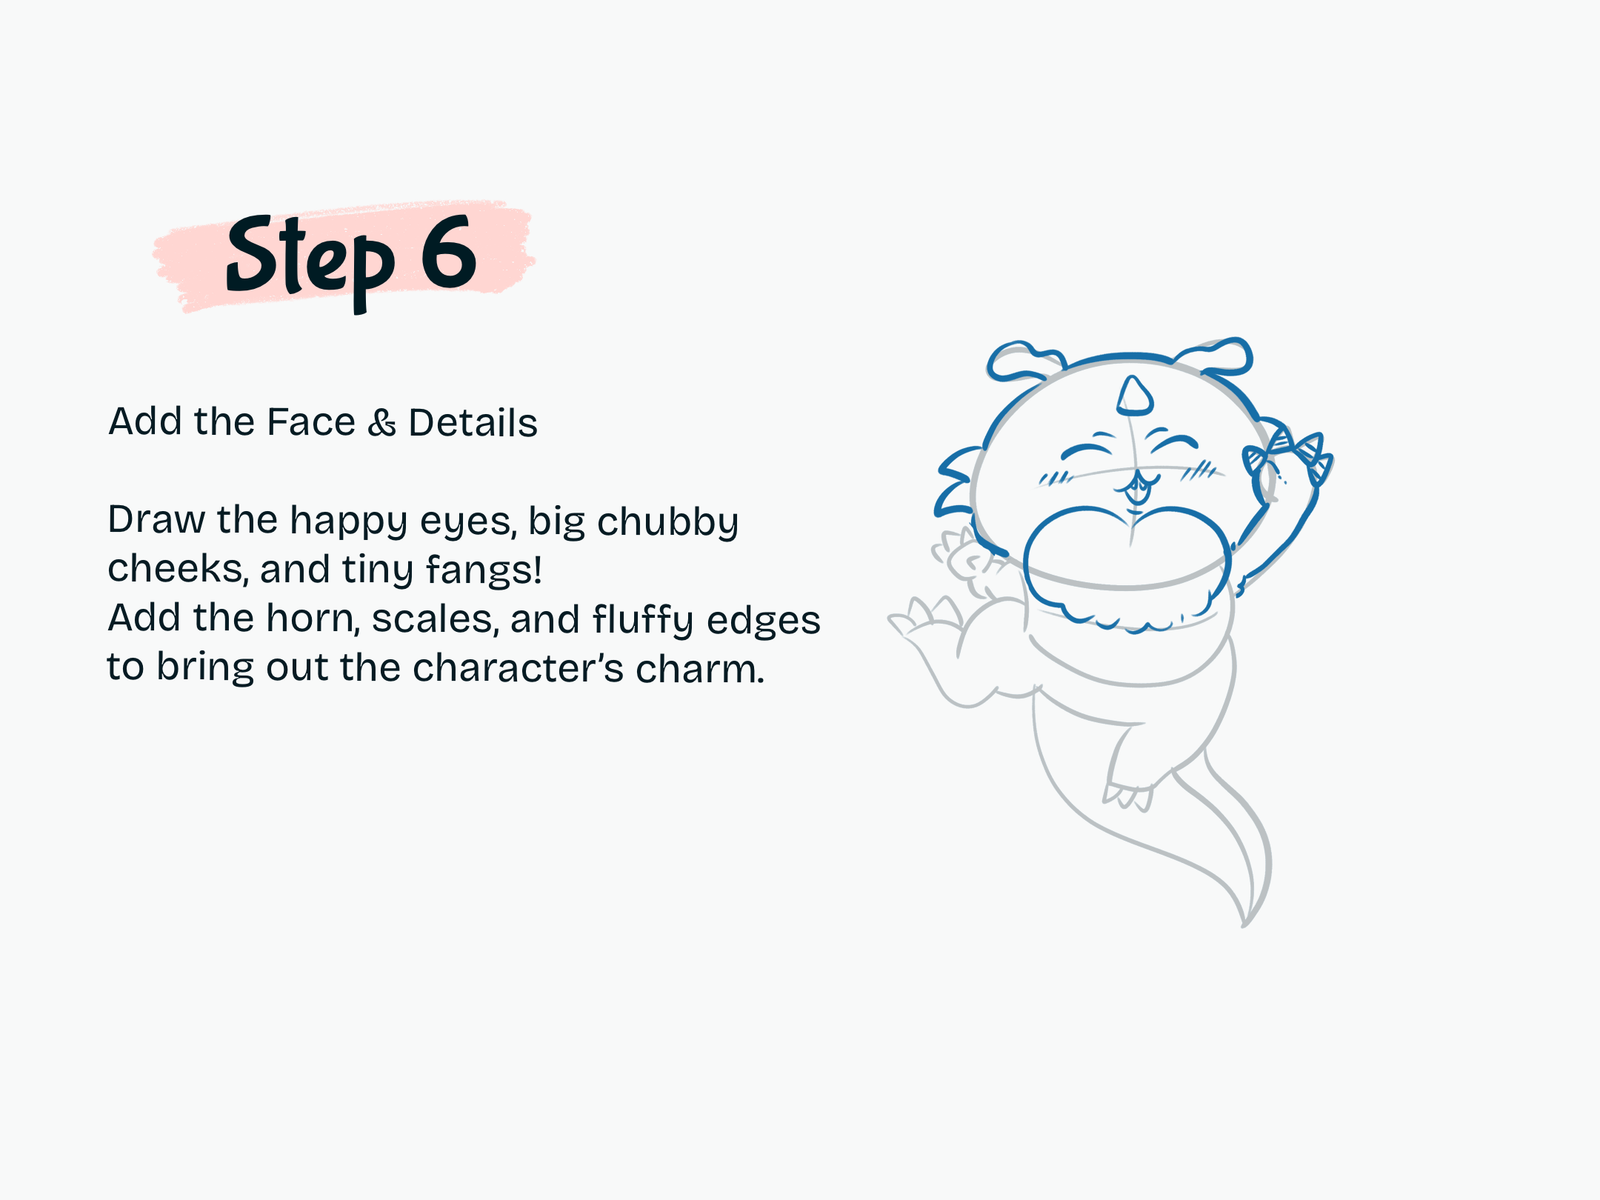
Step 6

Add the Face and Details

Draw Anoko’s cheerful expression with closed smiling eyes, round puffy cheeks, a tiny nose, and small fangs. Add the little horn on top of the head, fluffy neck fur, and side spikes to capture Anoko’s unique design.

Step 7

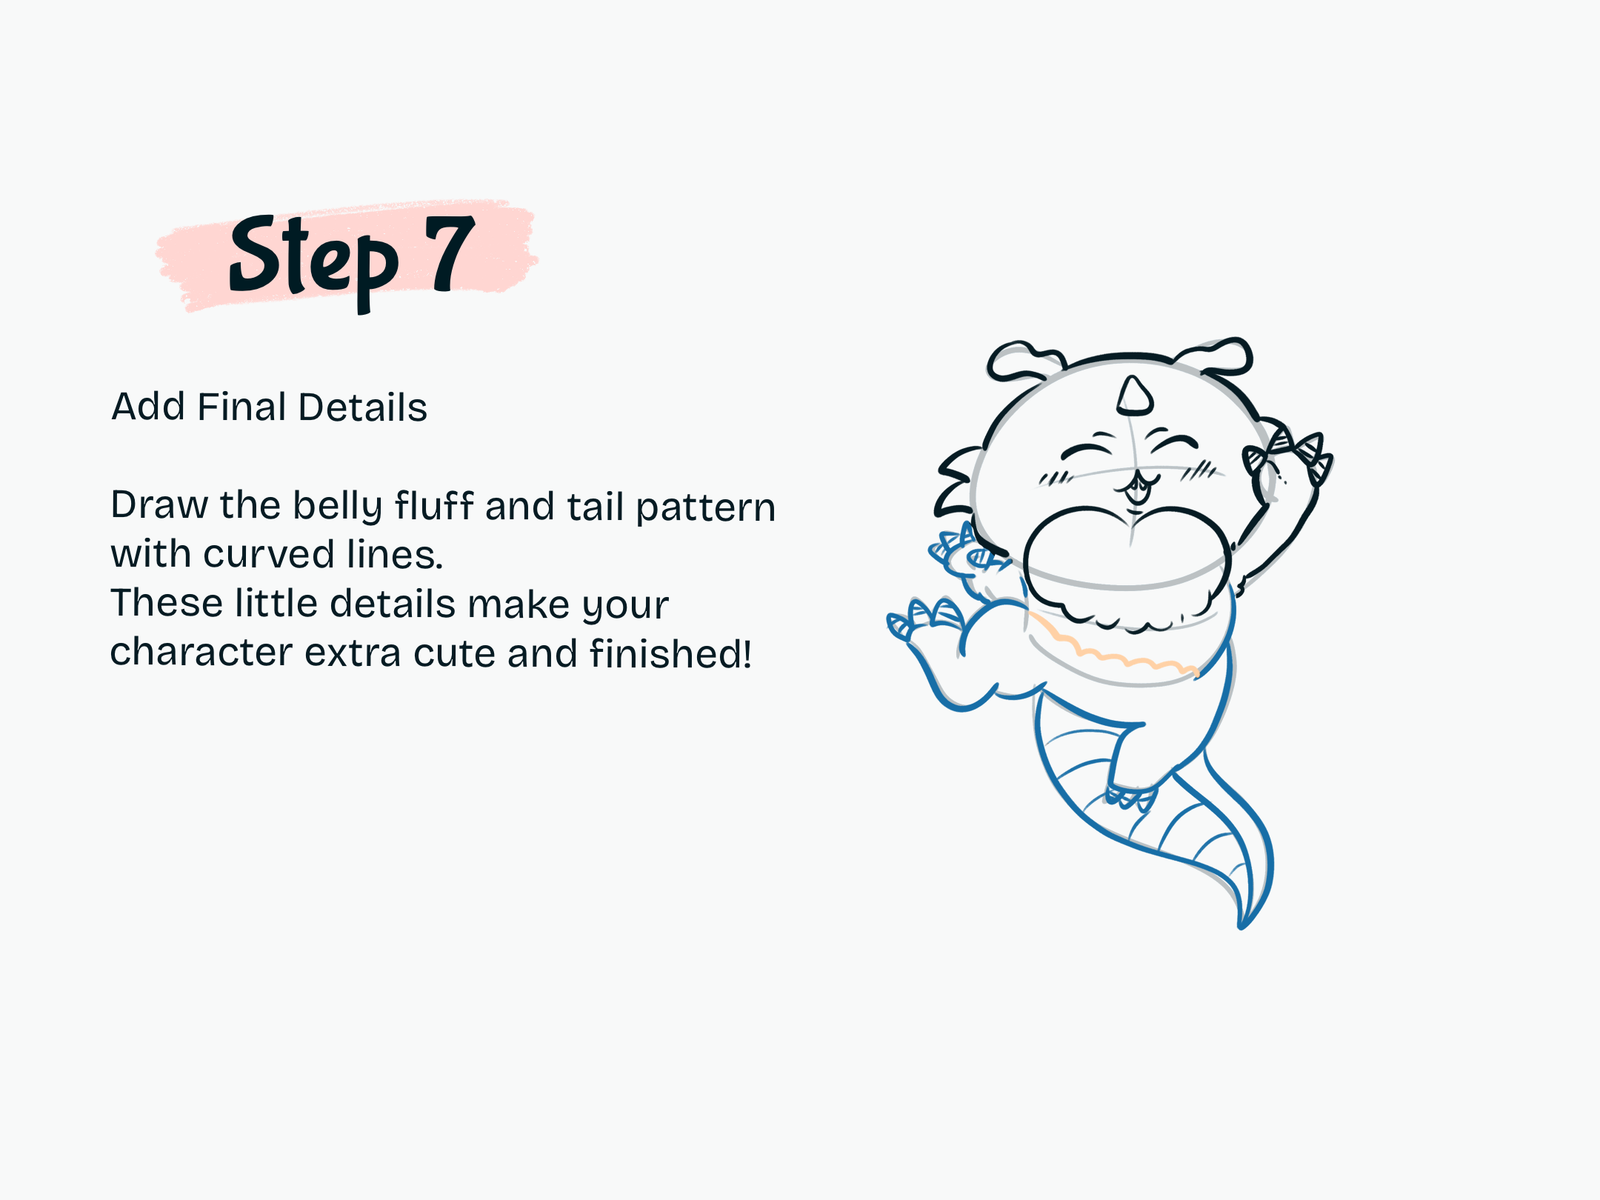
Add the Final Details

Complete the character by drawing the fluffy belly edge and curved stripes along the tail. These simple details make Anoko look more polished and recognizable.

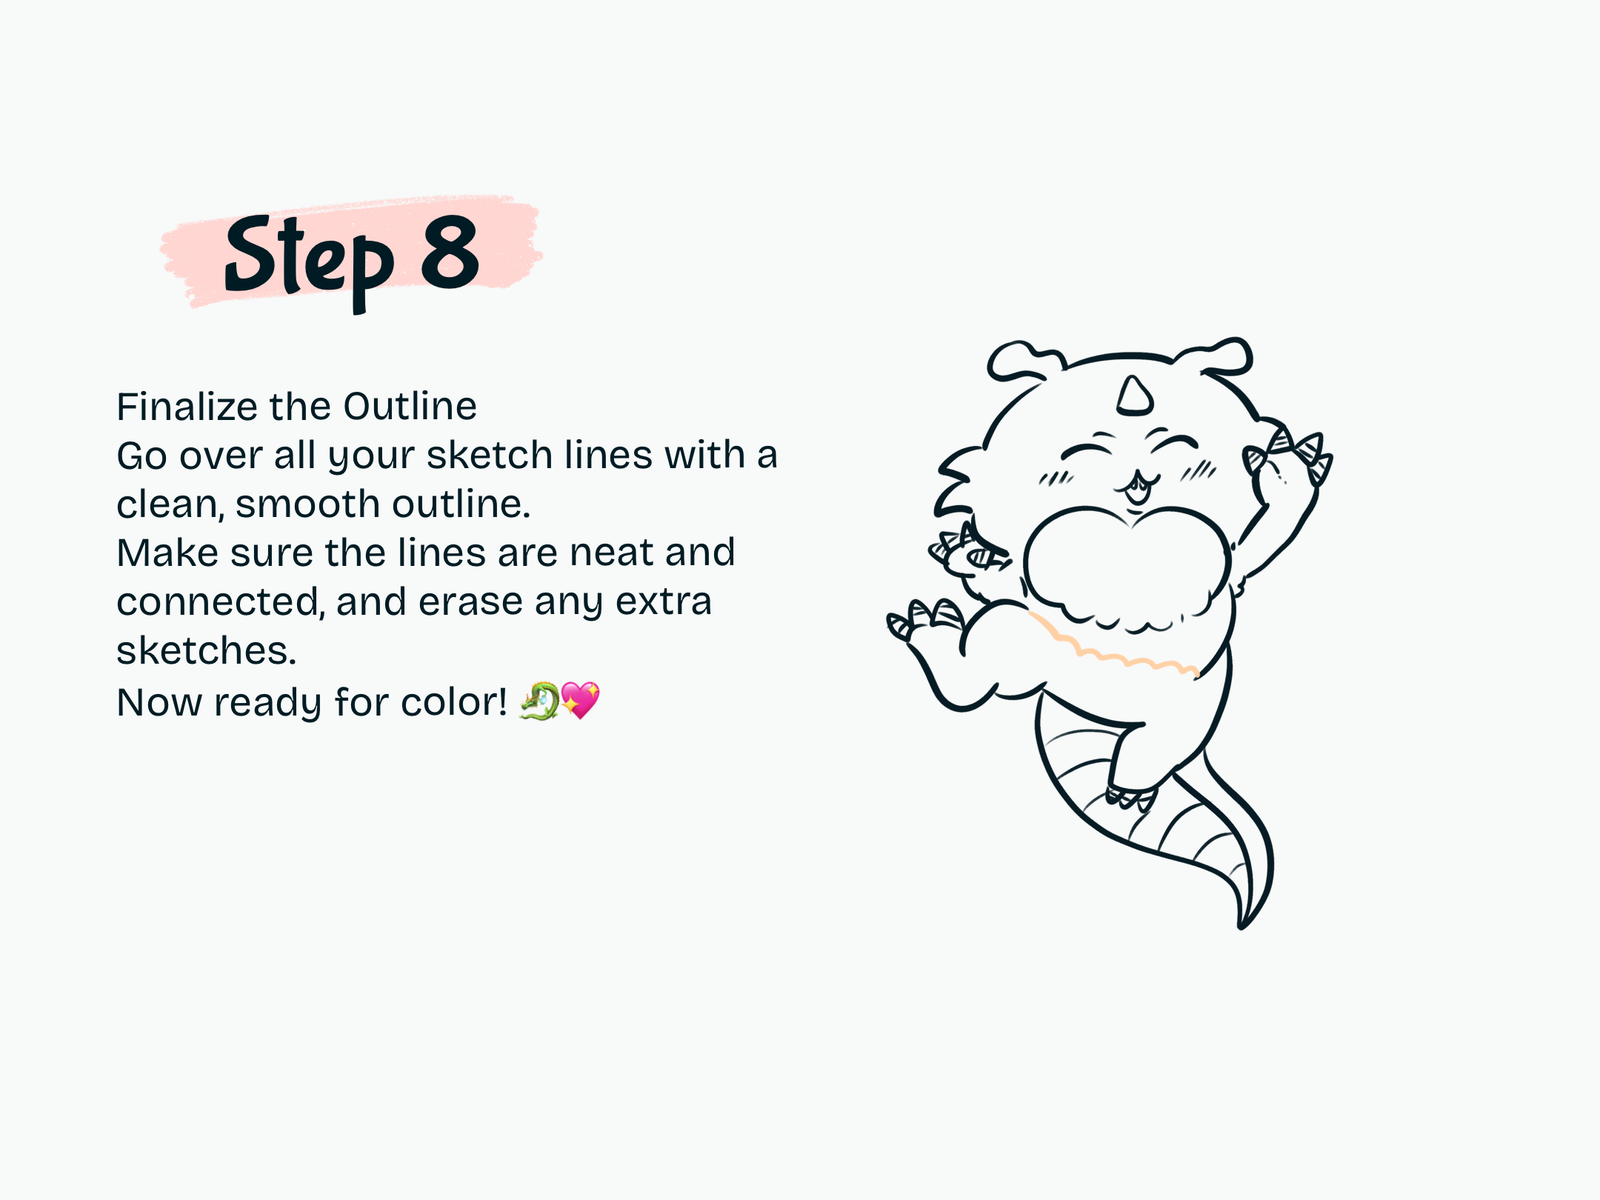
Step 8

Clean the Line Art

Trace the entire drawing with smooth, bold lines. Erase all sketch guidelines and extra construction lines until your artwork has a crisp, clean outline that’s ready for coloring.

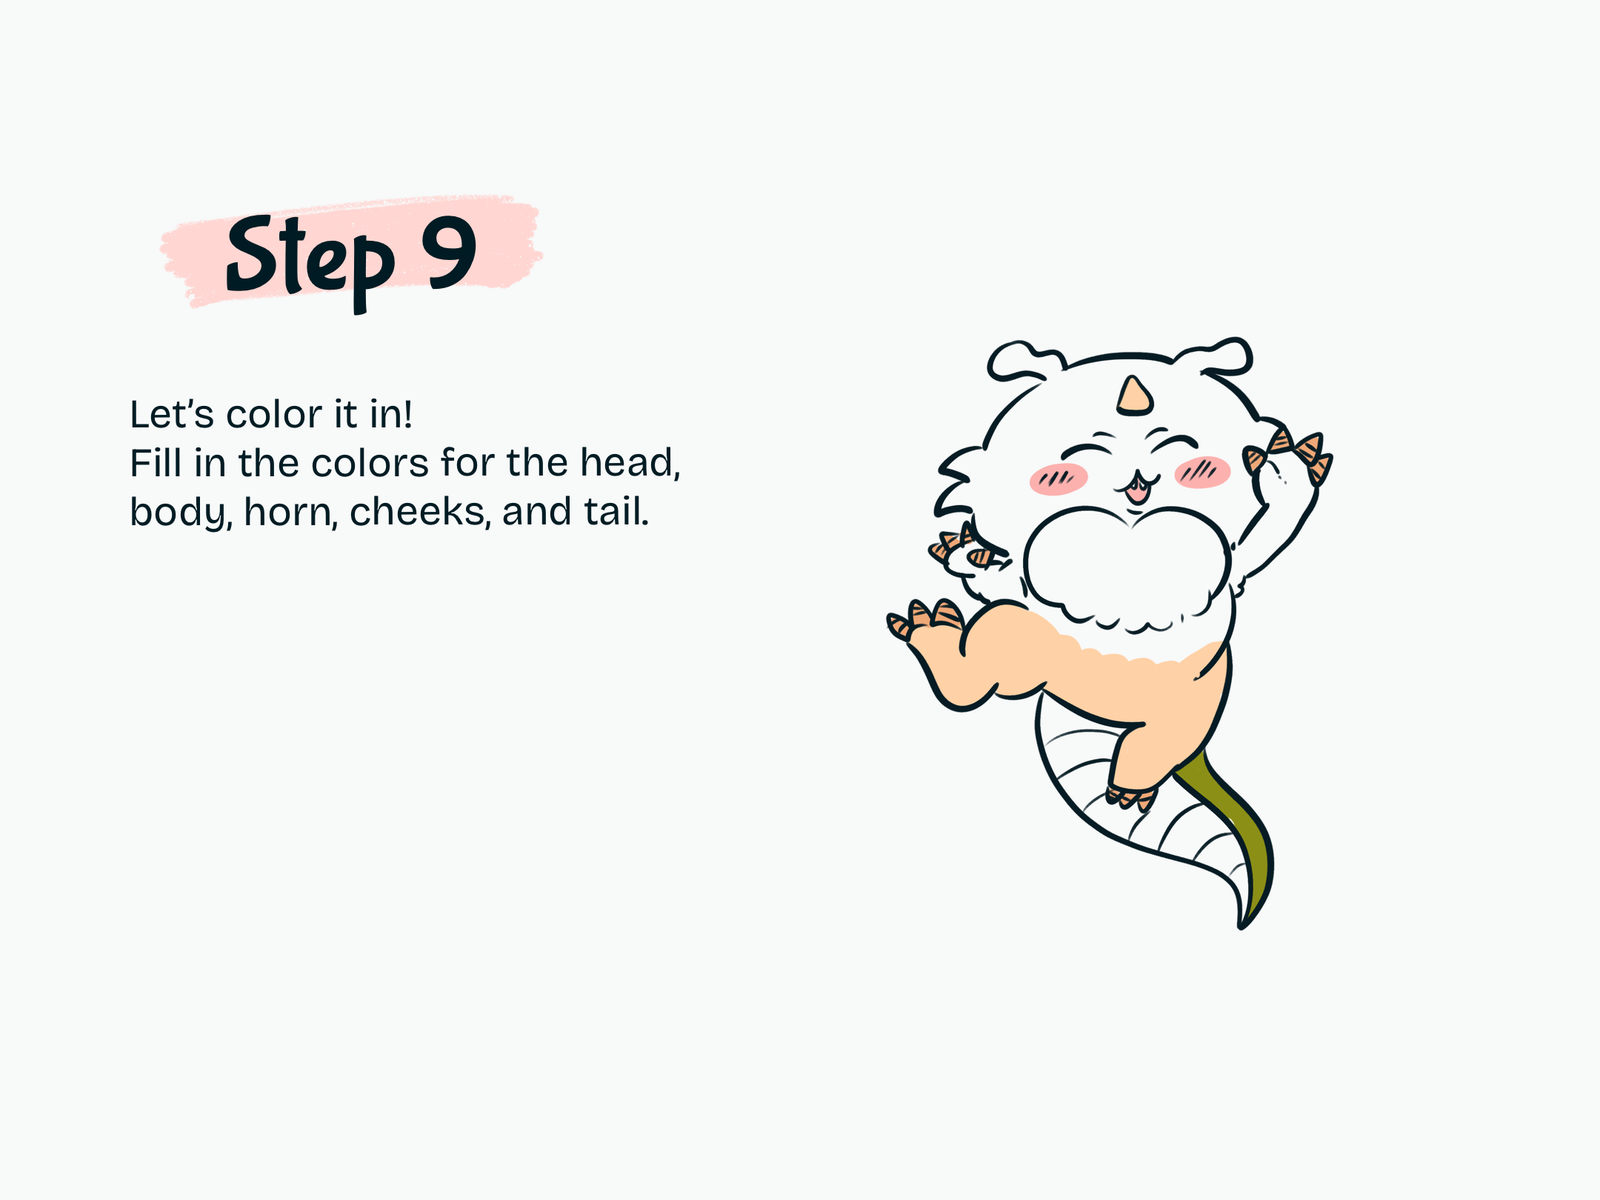
Step 9

Color Your Drawing

Bring Anoko to life with color! Use soft cream for the head and fluffy chest, warm peach for the body, light pink for the cheeks, and olive green for the top of the tail. Color the horn and claws with a light tan, then add subtle shading if you’d like extra depth.

Drawing Resources

A few tools and books that can make drawing easier and more fun.

Kawaii Drawing Book

Kawaii Drawing Book

A simple guide for cute characters and beginner-friendly sketching.

View on Amazon
iPad for Digital Drawing

iPad for Digital Drawing

A great digital drawing tool for sketching cute tutorials anywhere.

View on Amazon
Apple Pencil

Apple Pencil

Perfect for line art, note-taking, and digital doodling.

View on Amazon
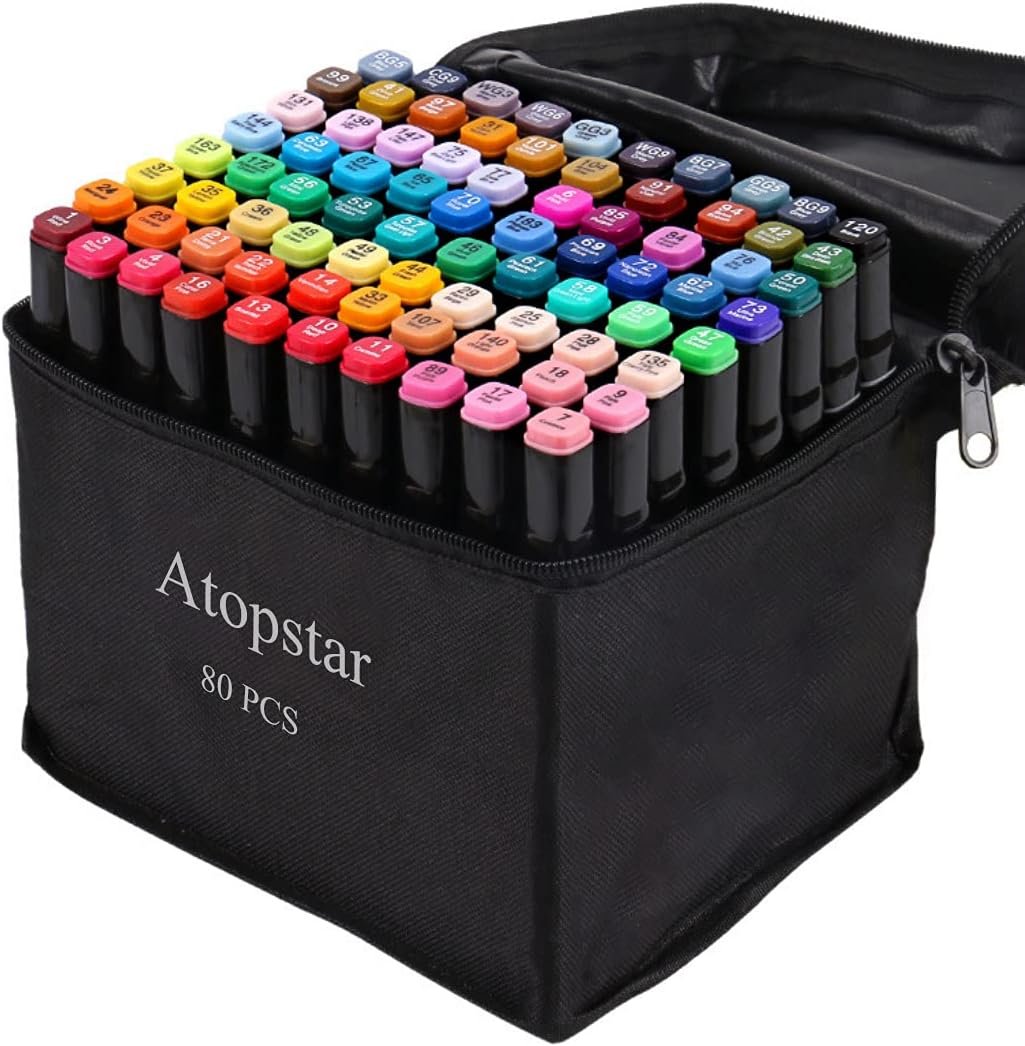
Colors Alcohol Markers

Colors Alcohol Markers

Smooth, vibrant markers for coloring cute drawings.

View on Amazon
Sketchbook

Sketchbook

A nice everyday sketchbook for practice and doodles.

View on Amazon
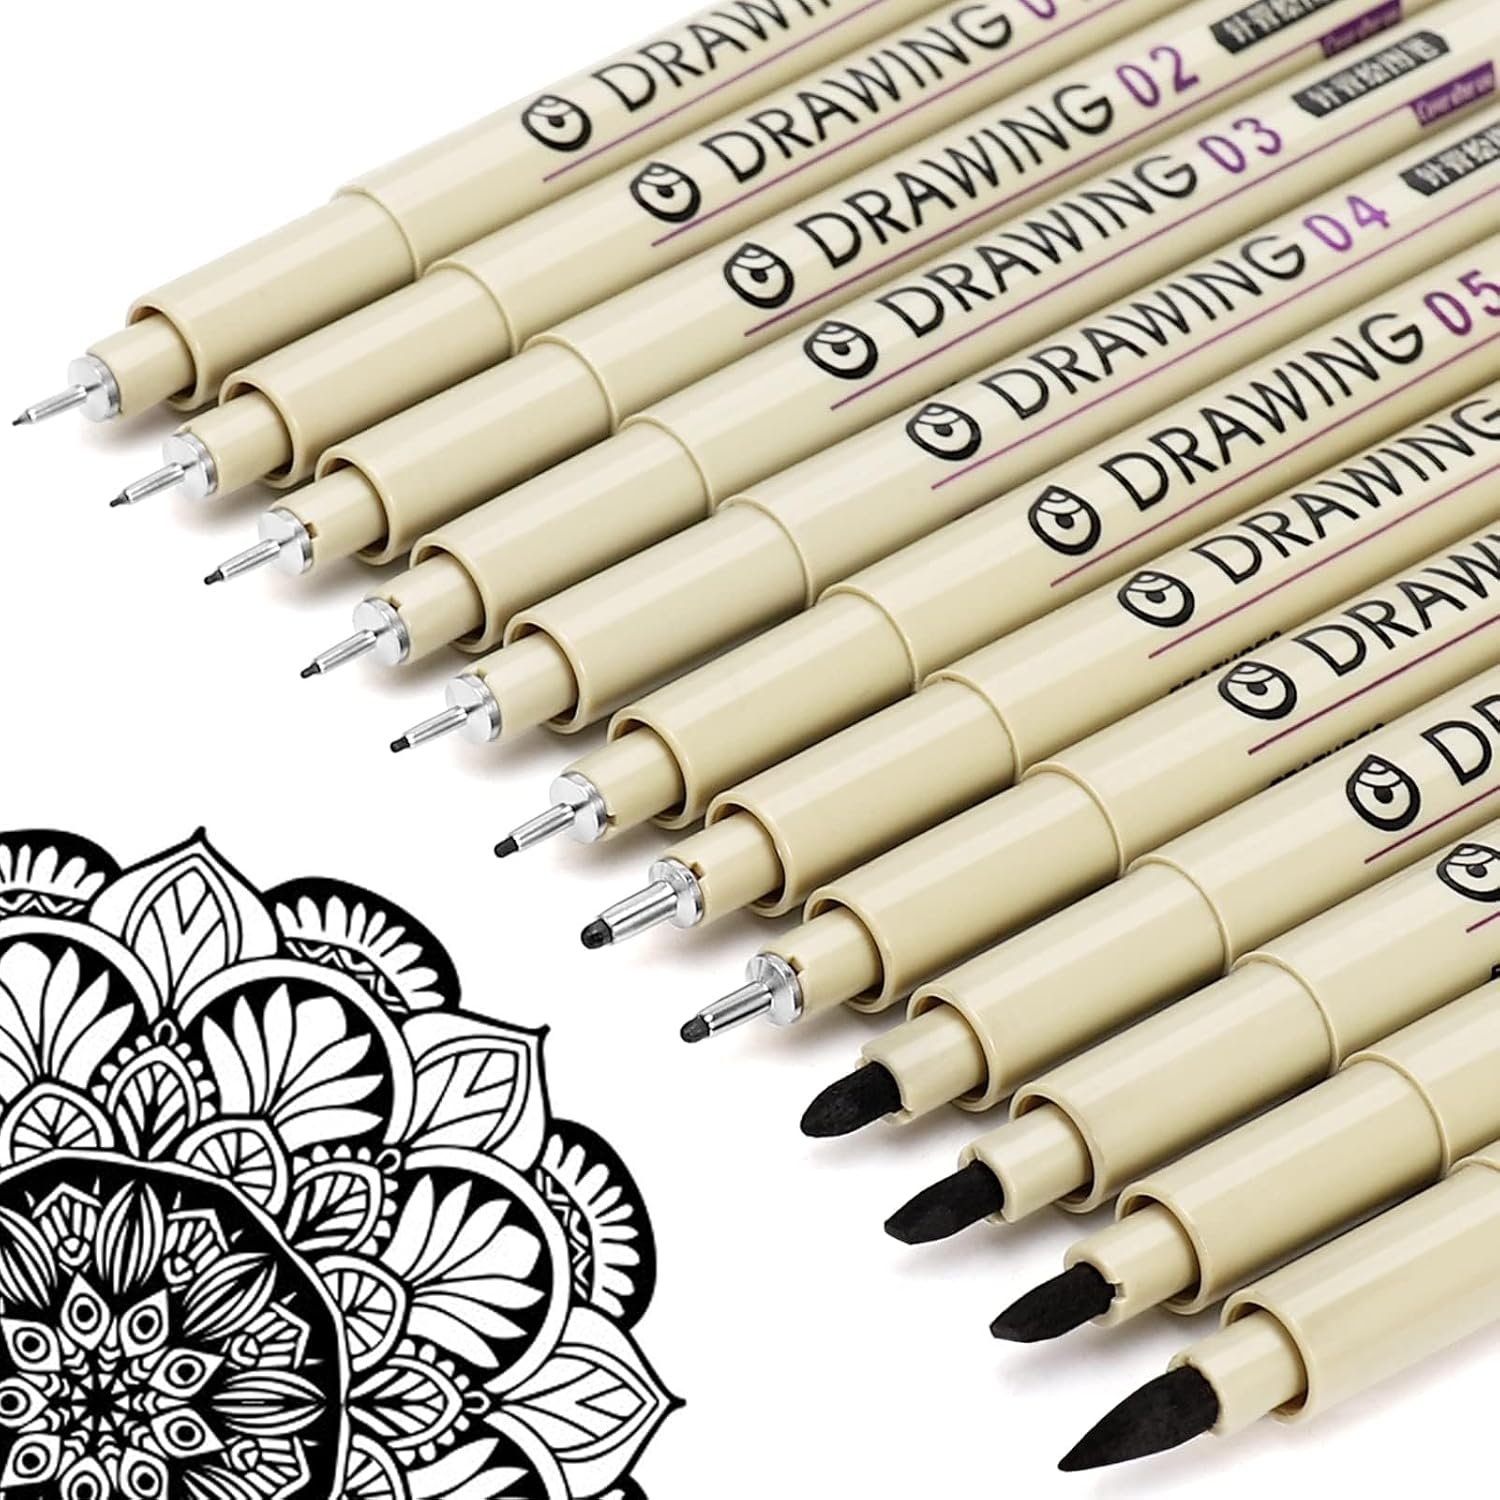
Fine Line Pens

Fine Line Pens

Helpful for clean outlines and cute little details.

View on Amazon

Some links may be affiliate links, which means Cute Thing Corner may earn a small commission at no extra cost to you.

Final Tips

Congratulations! You’ve finished your adorable Anoko Chiikawa drawing. By building the character one simple step at a time, you’ve created a cute illustration that’s perfect for practicing kawaii art.

Keep experimenting with different expressions, poses, or backgrounds to make your drawing unique. You can even draw Anoko alongside Chiikawa, Hachiware, Usagi, Momonga, and other favorite characters.

If you enjoyed this lesson, be sure to explore more Chiikawa drawing tutorials, easy kawaii character guides, and step-by-step anime drawing lessons here at Cute Thing Corner. Happy drawing!


Leave a Comment