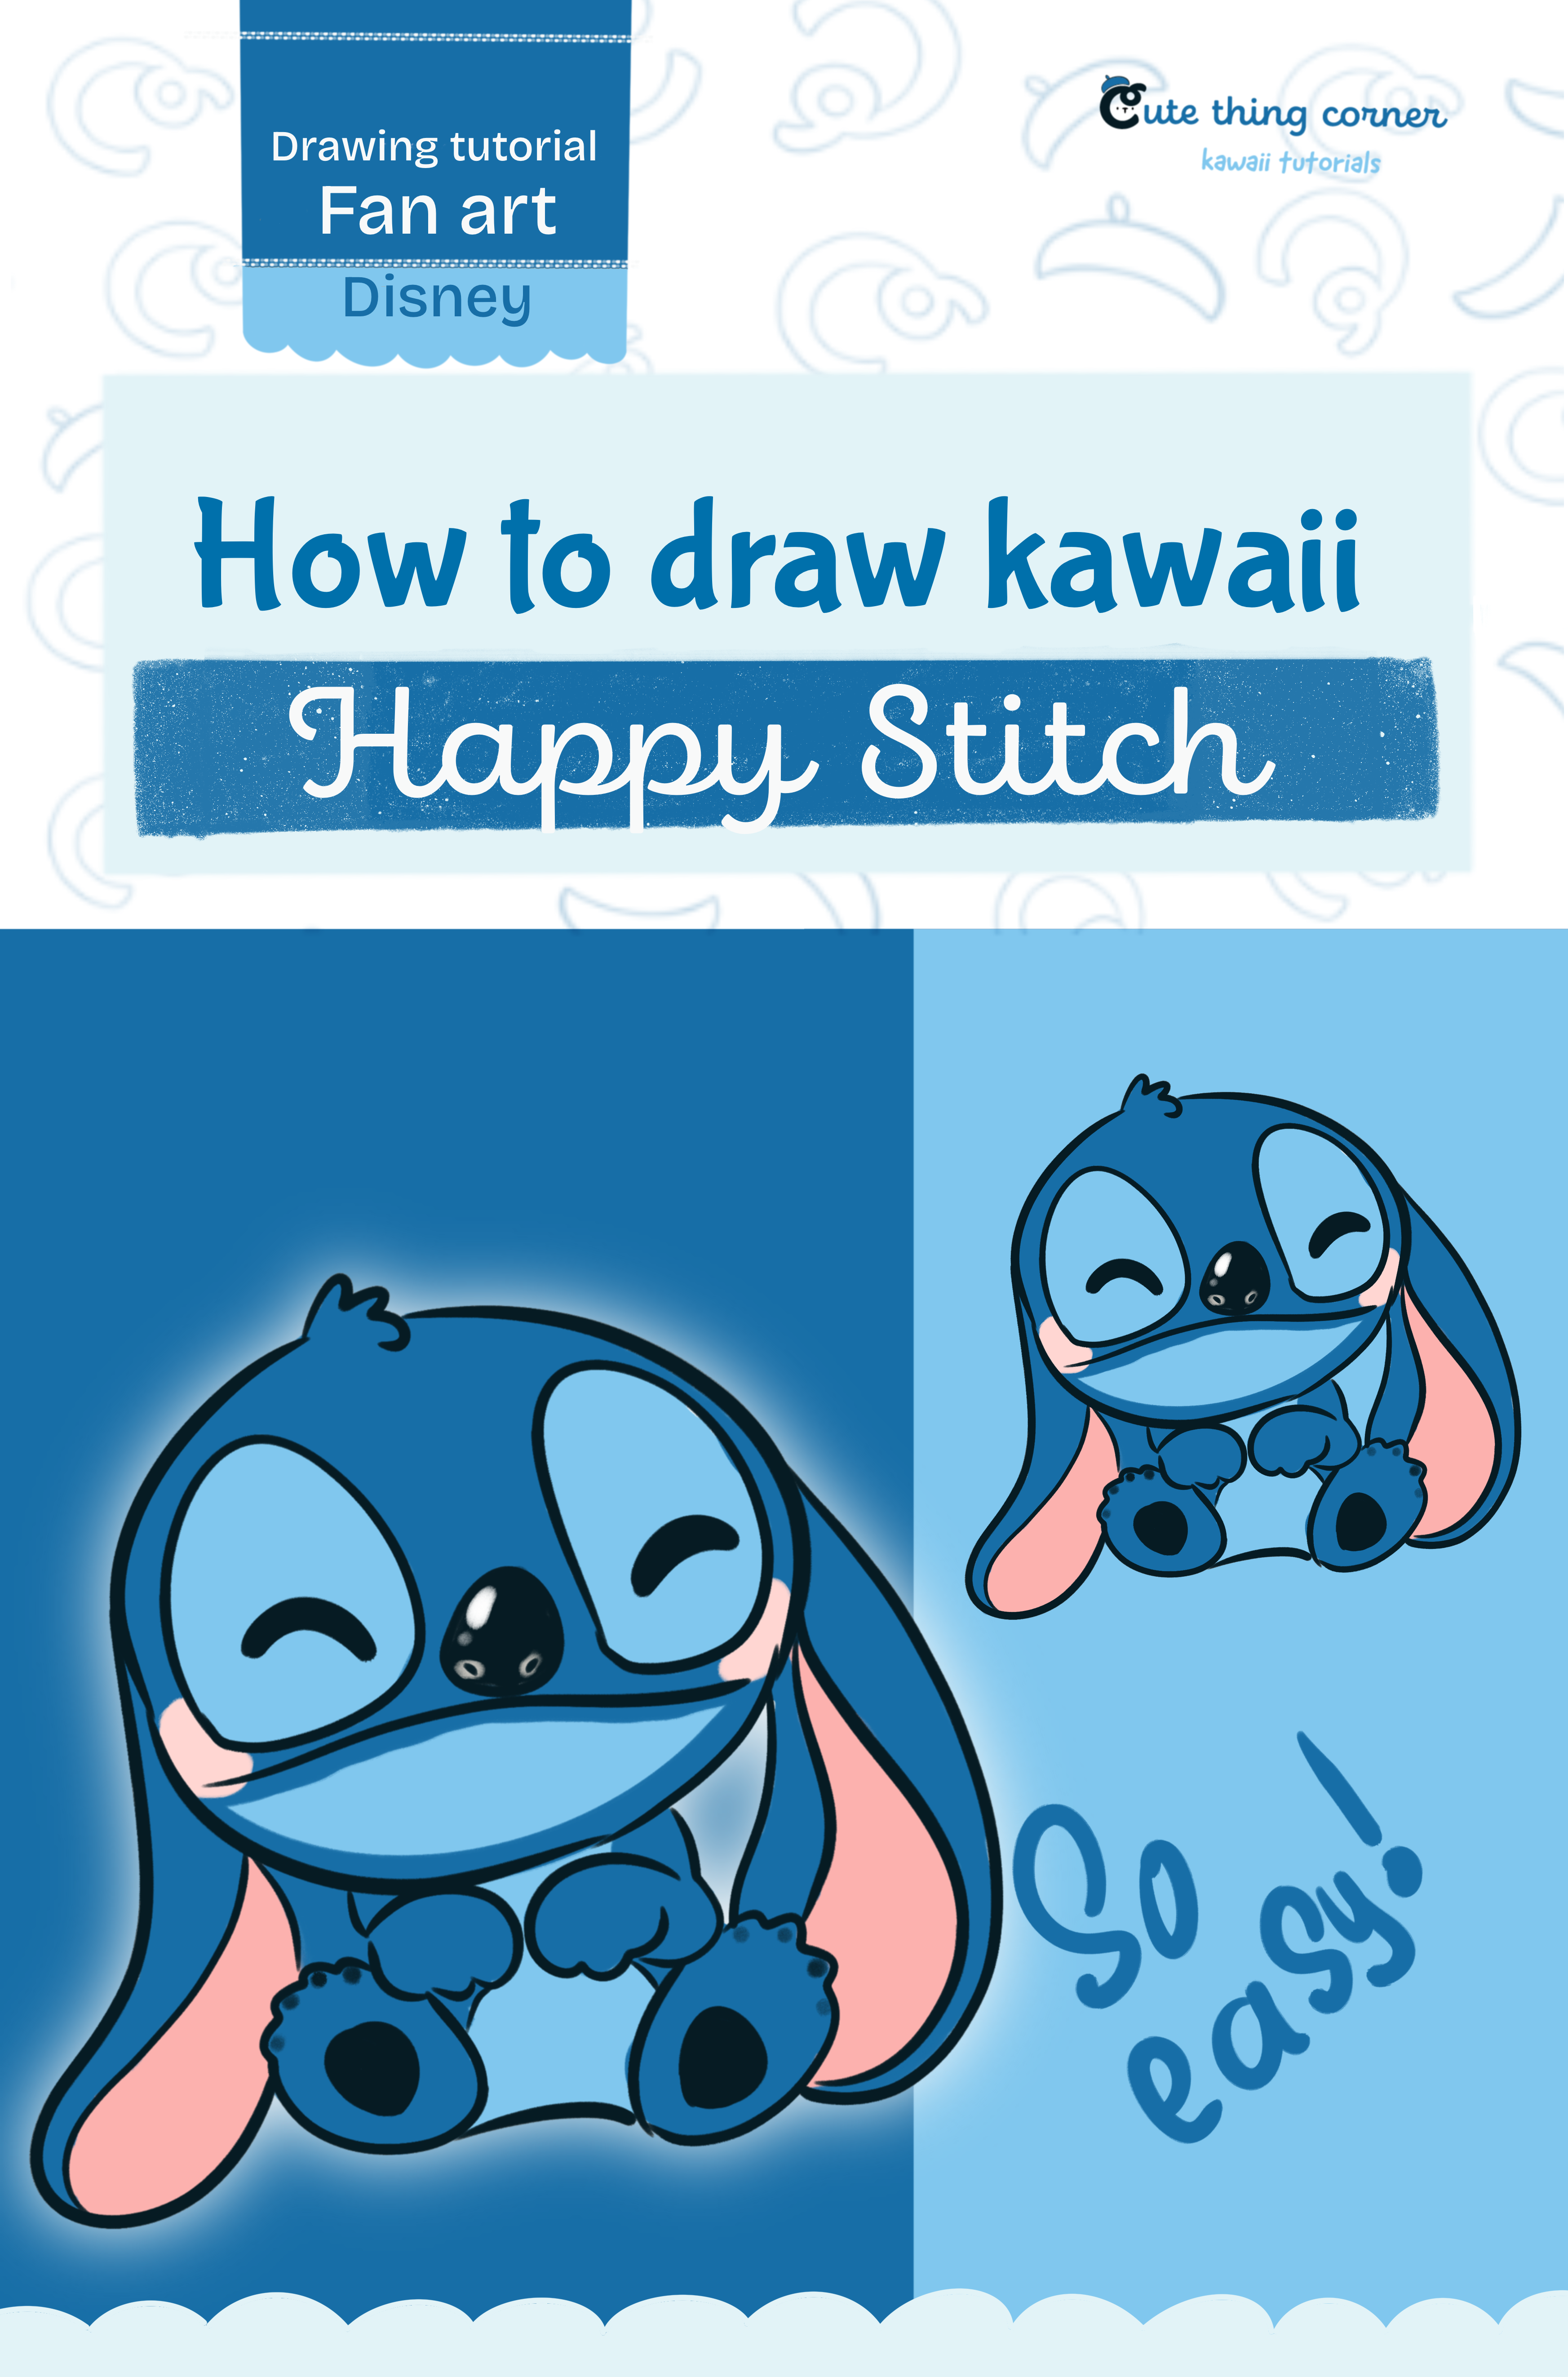
Ready to bring some cuteness into your sketchbook? 💙 Let’s learn how to draw Happy Stitch in the cutest Kawaii style!
Start from basic shapes and build up step-by-step until your Stitch is smiling sweetly on the page.
You’ll love how easy and fun this one is!
👉 Check out more tutorials on our Kawaii Tutorial Blog!
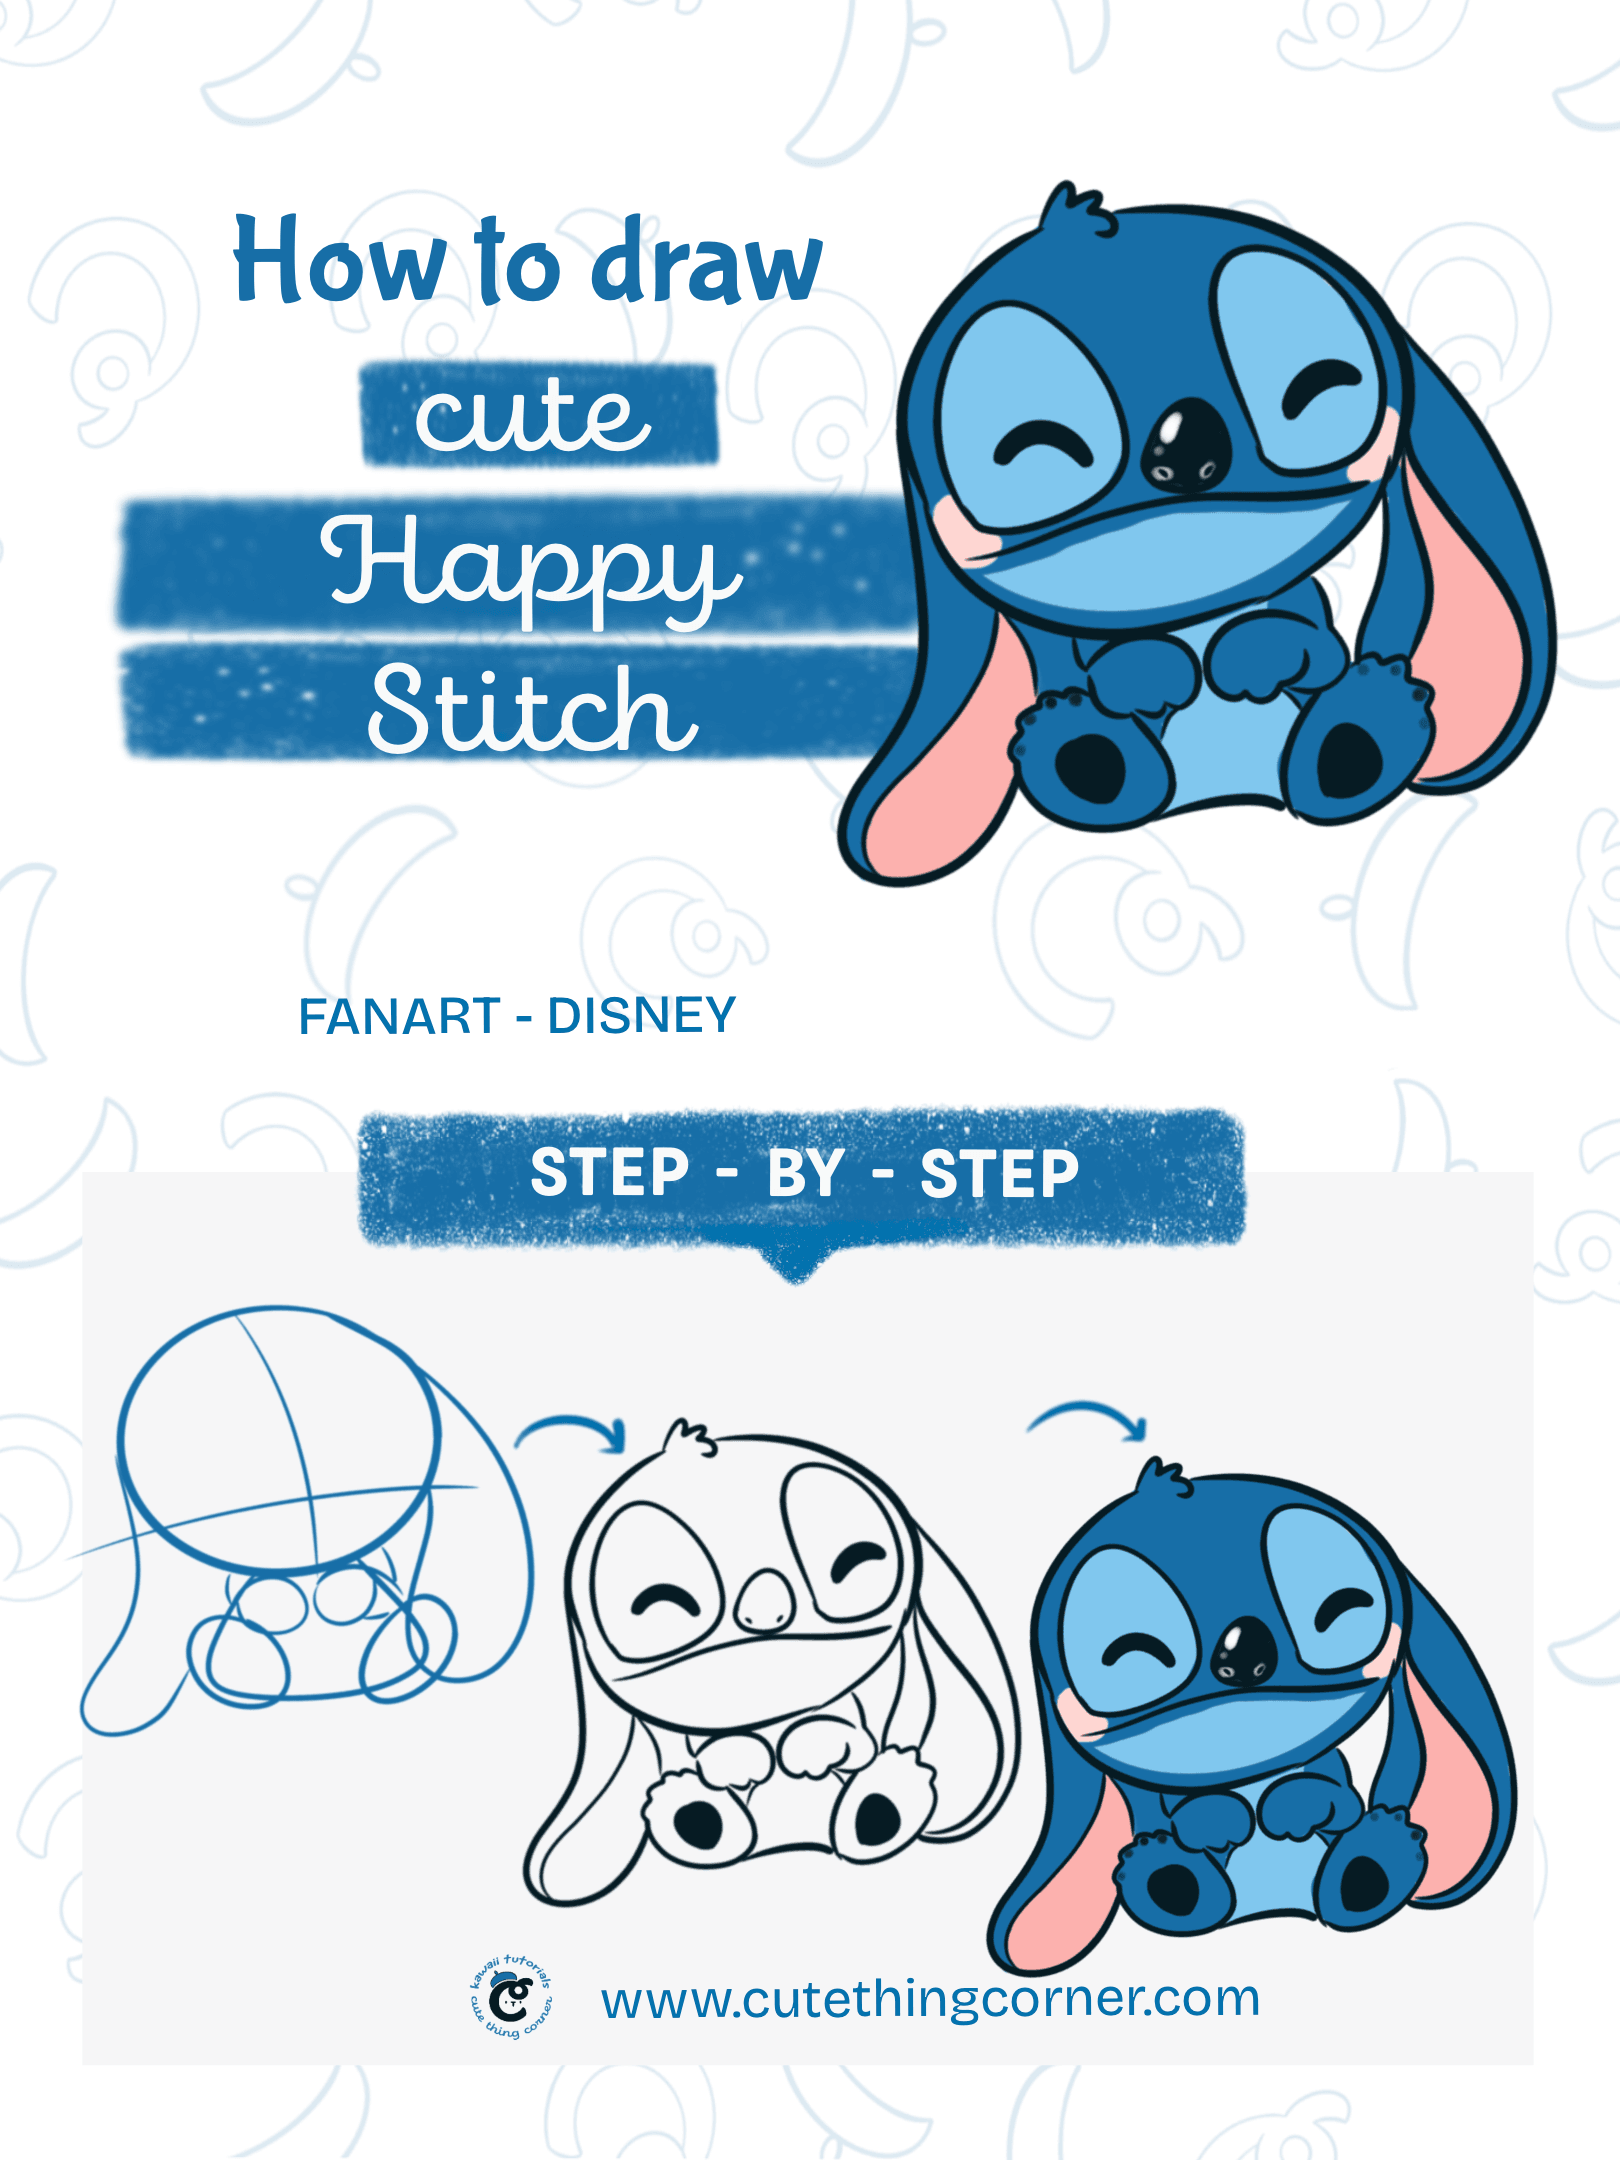
How to draw Happy Stitch (Step-by-step)
✏️ Materials You’ll Need:
-
Paper or sketchbook
-
Pencil & eraser
-
Fineliner or black pen
-
Coloring tools (markers, colored pencils, or digital brushes)
🧷 Step-by-Step: How to Draw Happy Stitch
👉 Step 1: Draw a circle for the head and add a curved horizontal guide line.
Start by drawing a circle for the head and a wide U-shape underneath for the body. Add a curved horizontal guideline and a vertical one to help place Stitch’s face later.

Draw a circle for the head and add a curved horizontal guide line.
👉 Step 2: Sketch two short feet at the base of the body
Sketch two rounded feet at the base of the body. These shapes will become Stitch’s adorable toes.
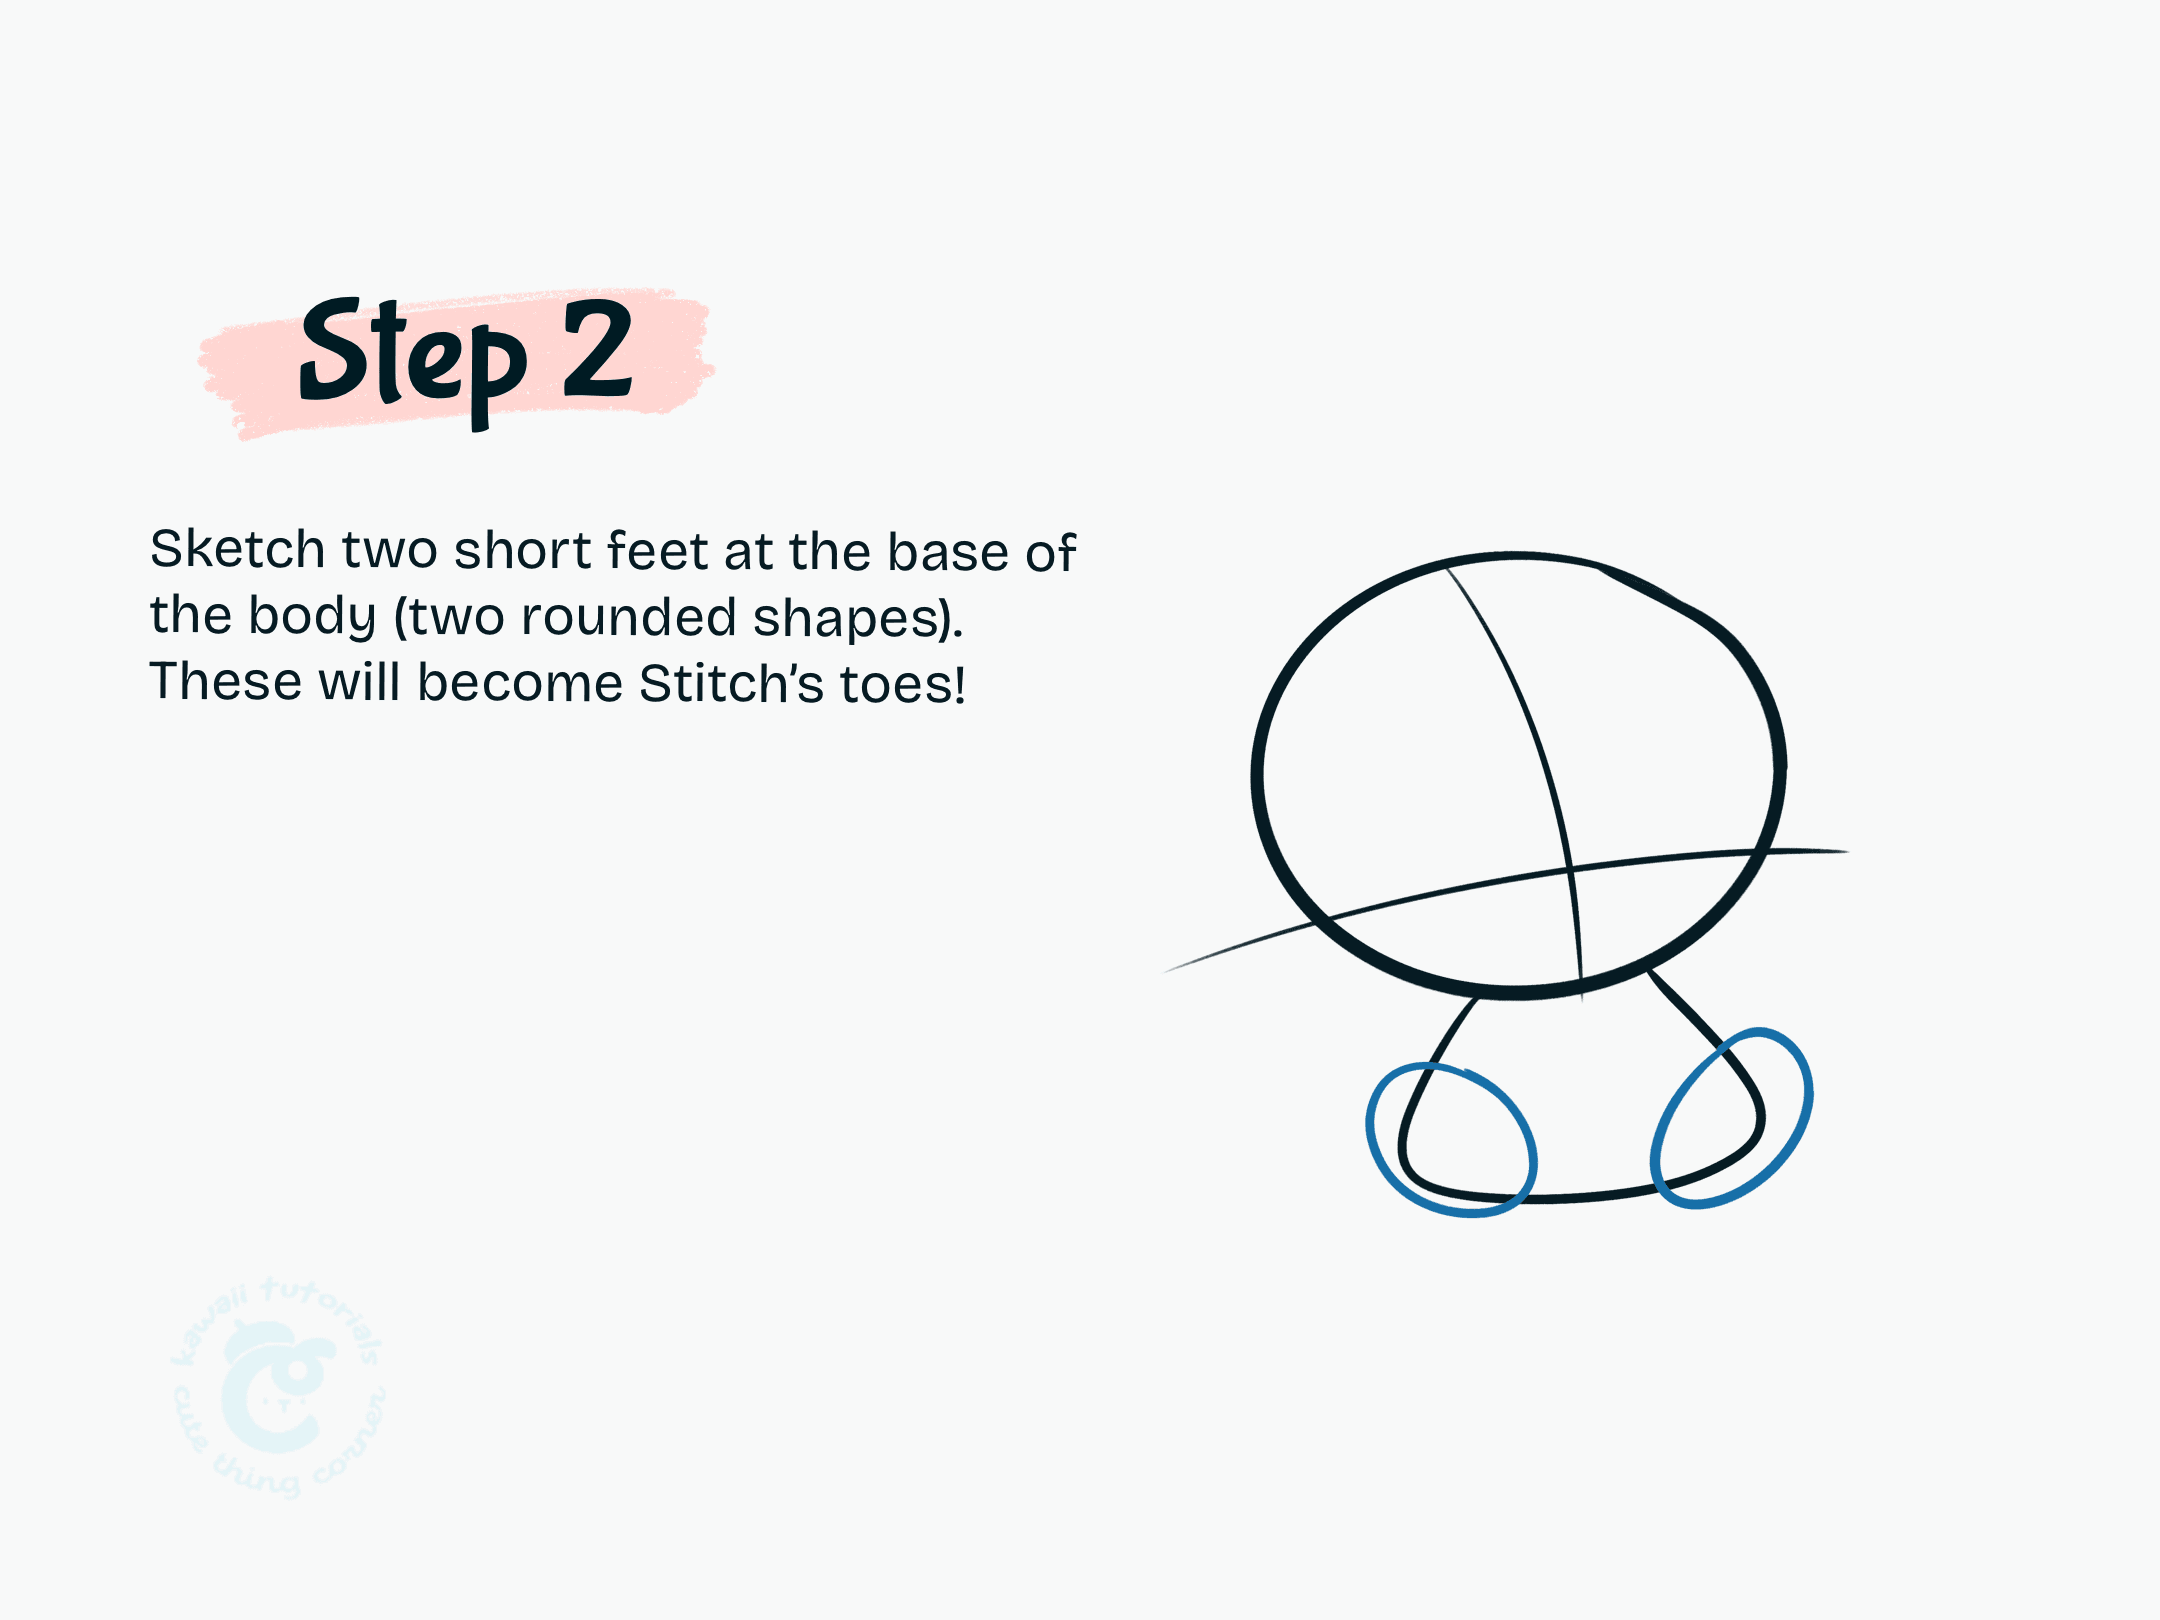
Sketch two rounded feet at the base of the body. These shapes will become Stitch’s adorable toes.
👉 Step 3: Add two small arms that curve inward, touching the toes.
Draw two small arms curving inward so they gently touch the toes. Keep them soft and rounded.
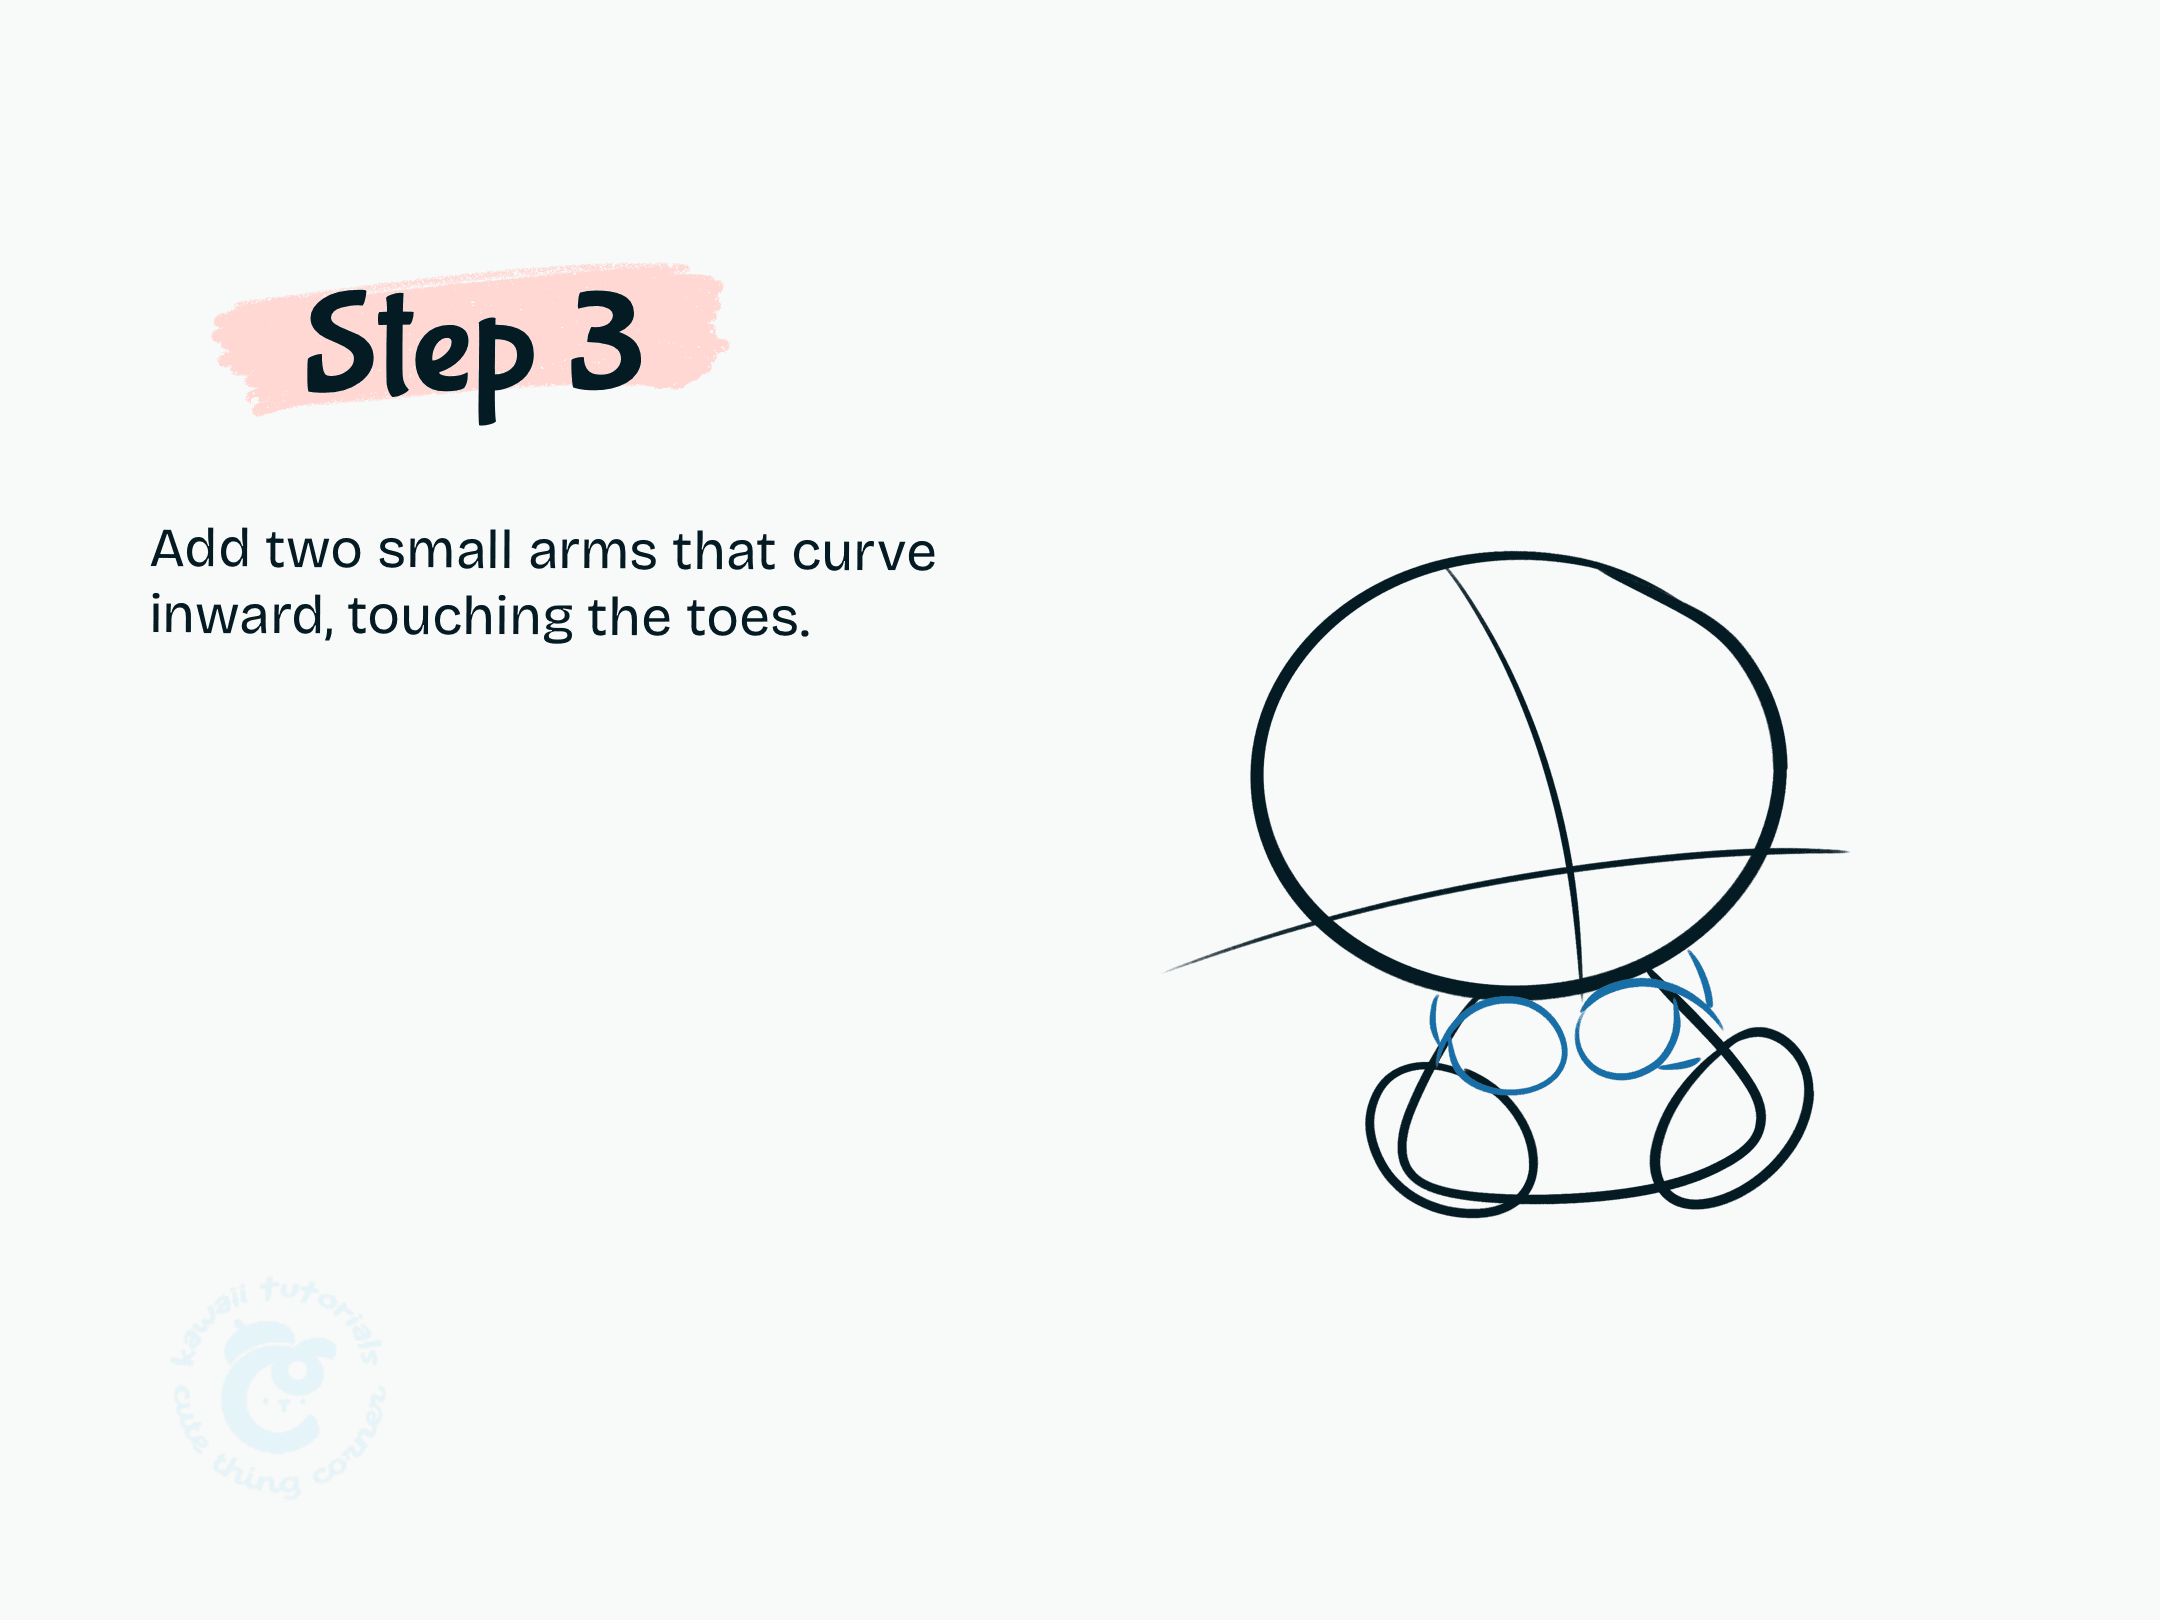
Add two small arms that curve inward, touching the toes.
👉 Step 4: Draw the big floppy ears coming down both sides of the face.
Add Stitch’s signature long ears flopping down both sides of the head. Make sure they curve softly for a relaxed pose.
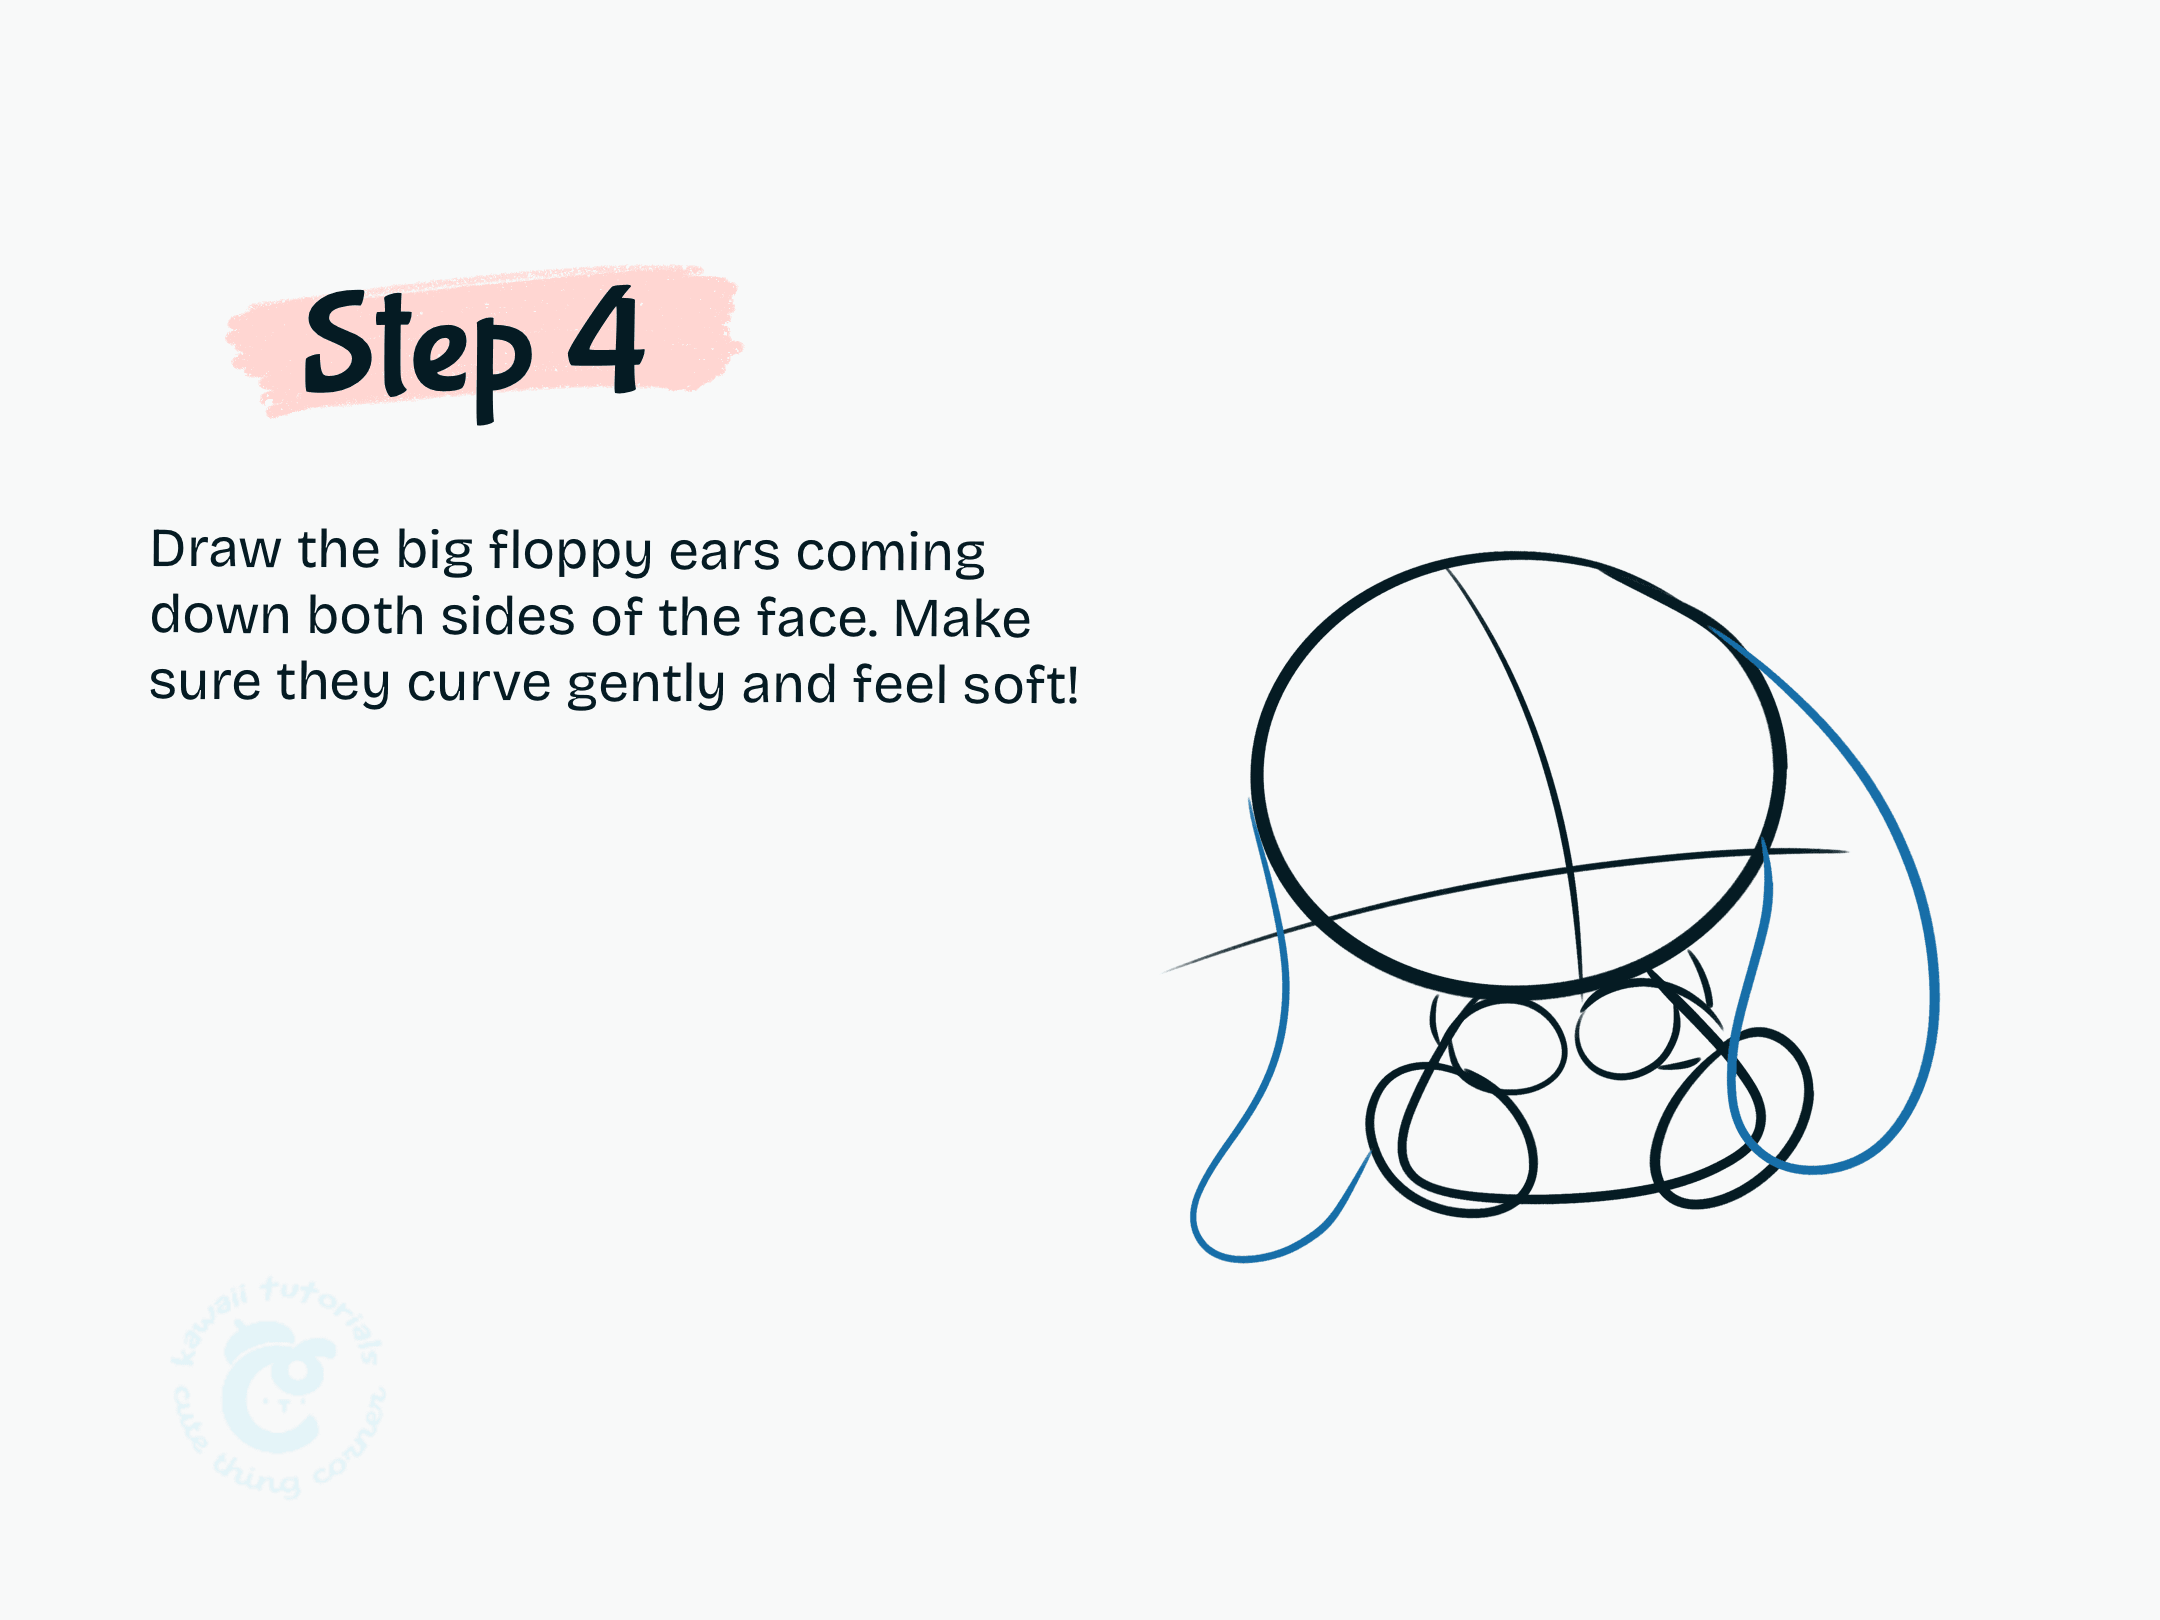
Draw the big floppy ears coming down both sides of the face.
👉 Step 5: Outline the shape of the head, and ears with smooth continuous lines.
Smoothly outline the head and ears. Add the tiny fur spike on top for extra charm, and start cleaning up your lines.
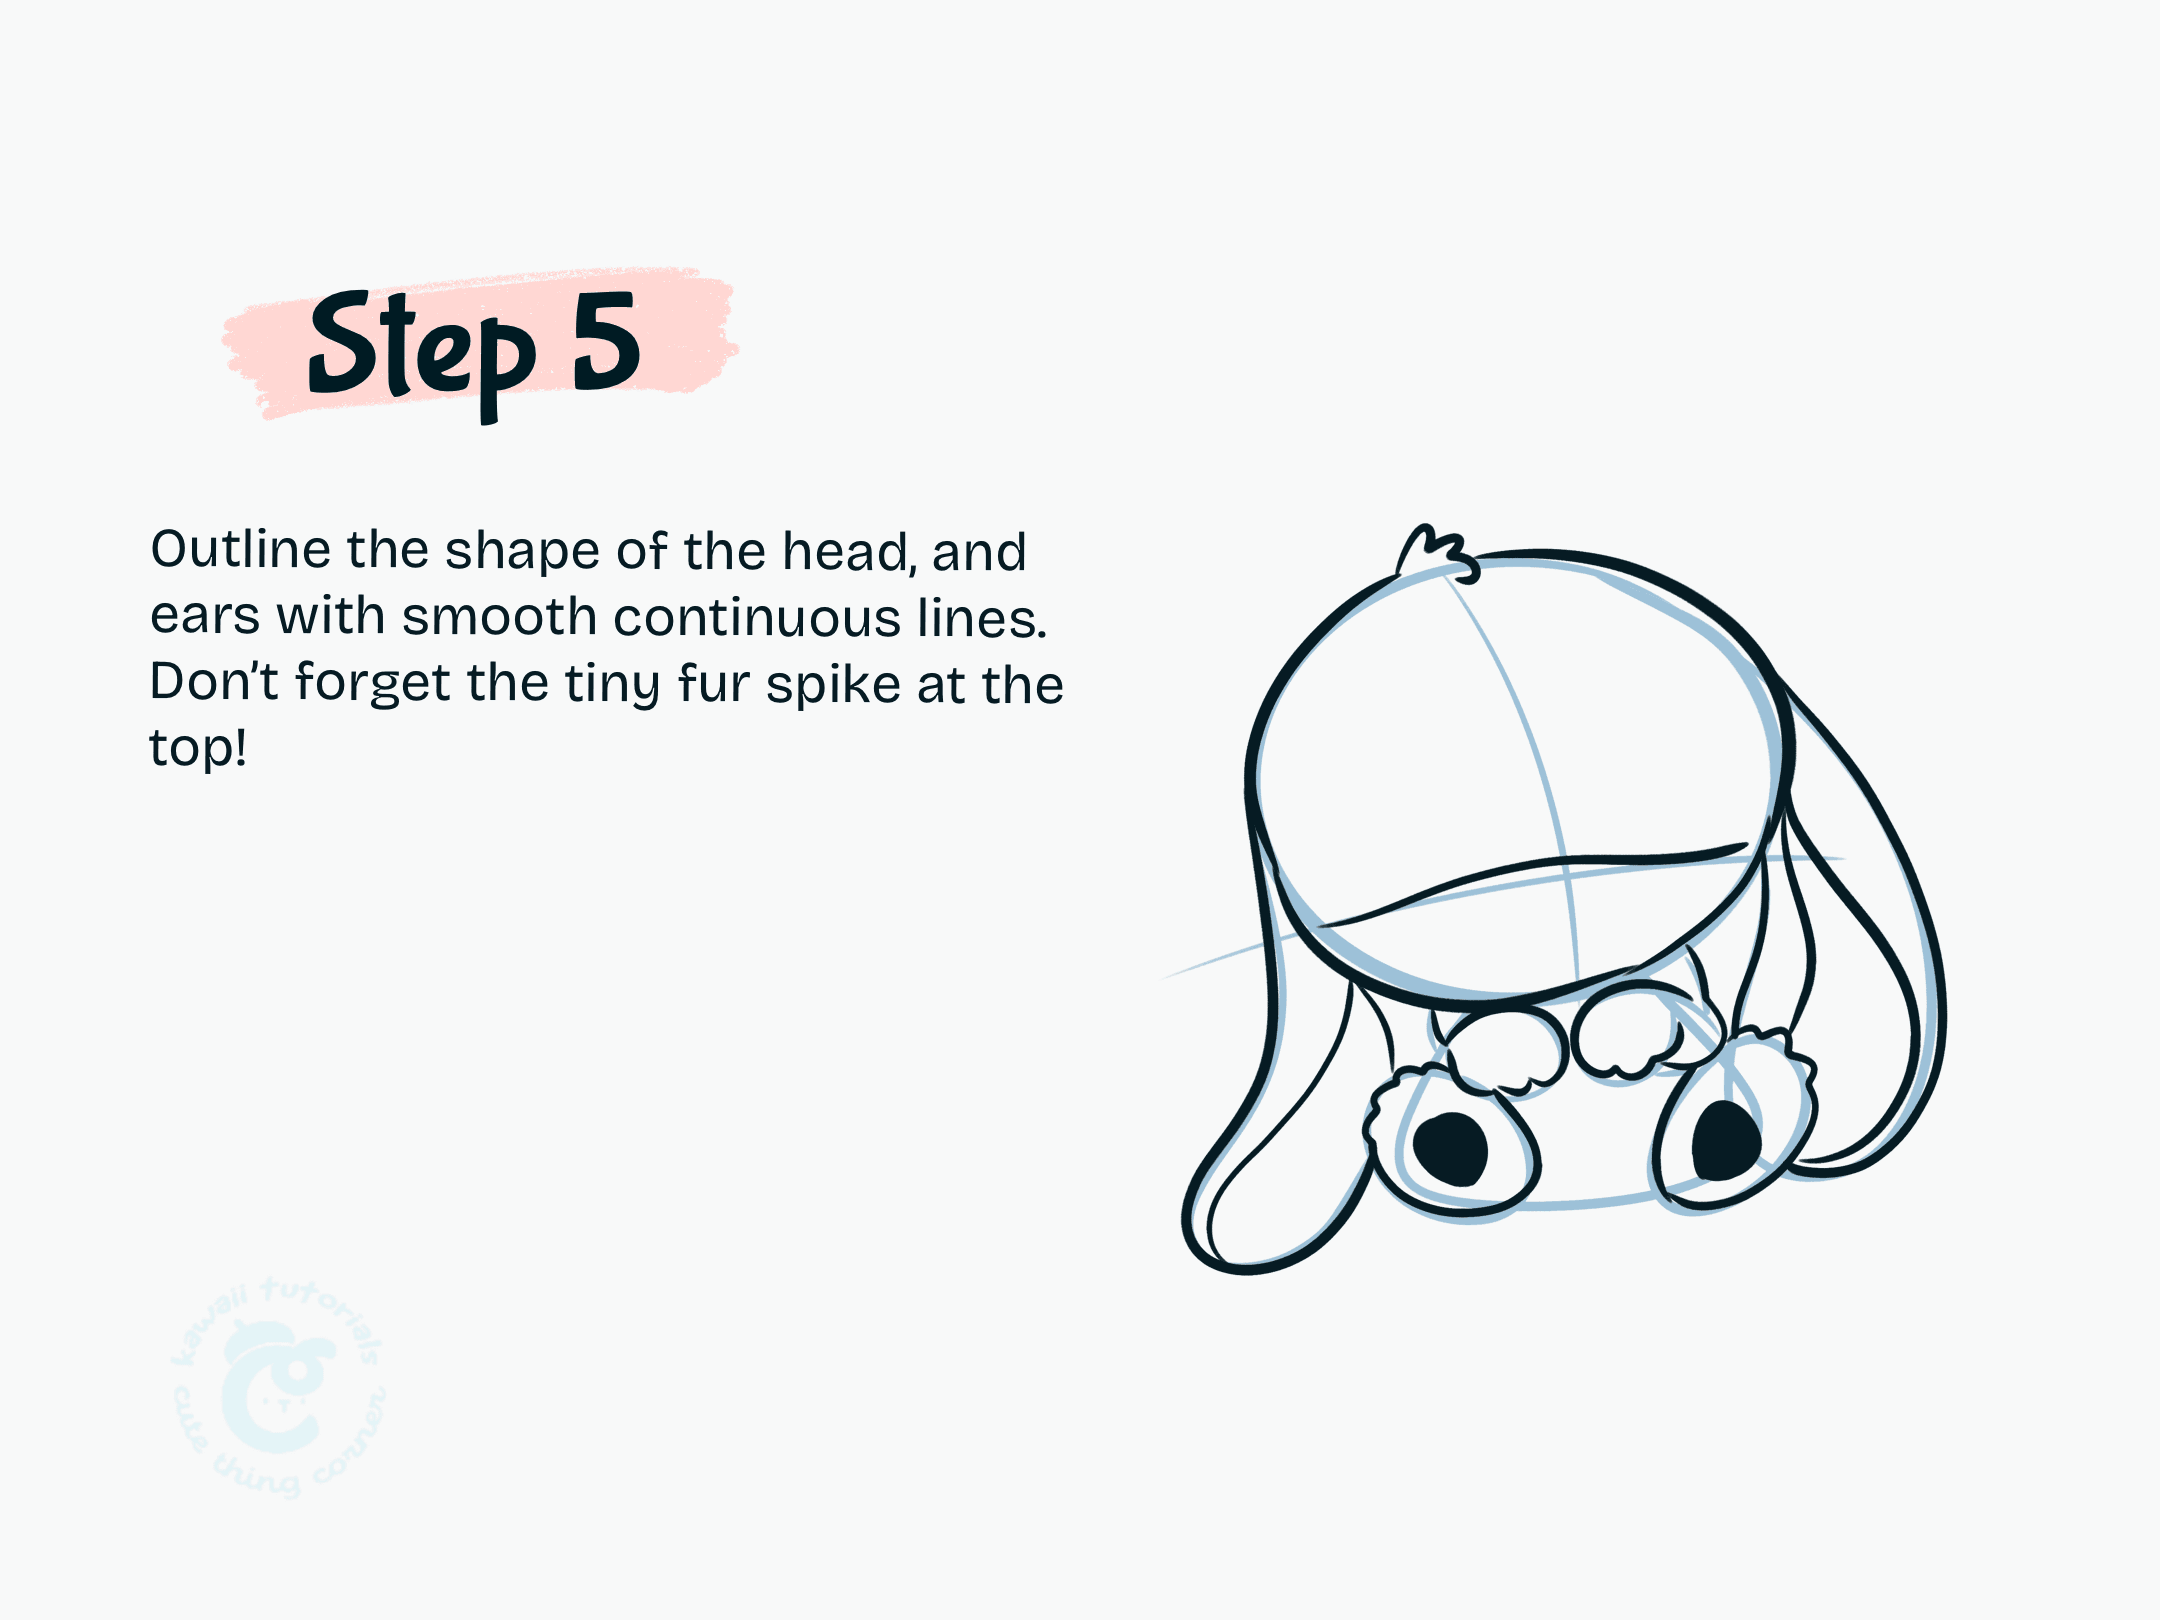
Outline the shape of the head, and ears with smooth continuous lines
👉 Step 6: Draw the nose – a rounded triangle at the center of the face.
Sketch a small rounded triangle nose in the middle of the face. This helps define Stitch’s signature look.
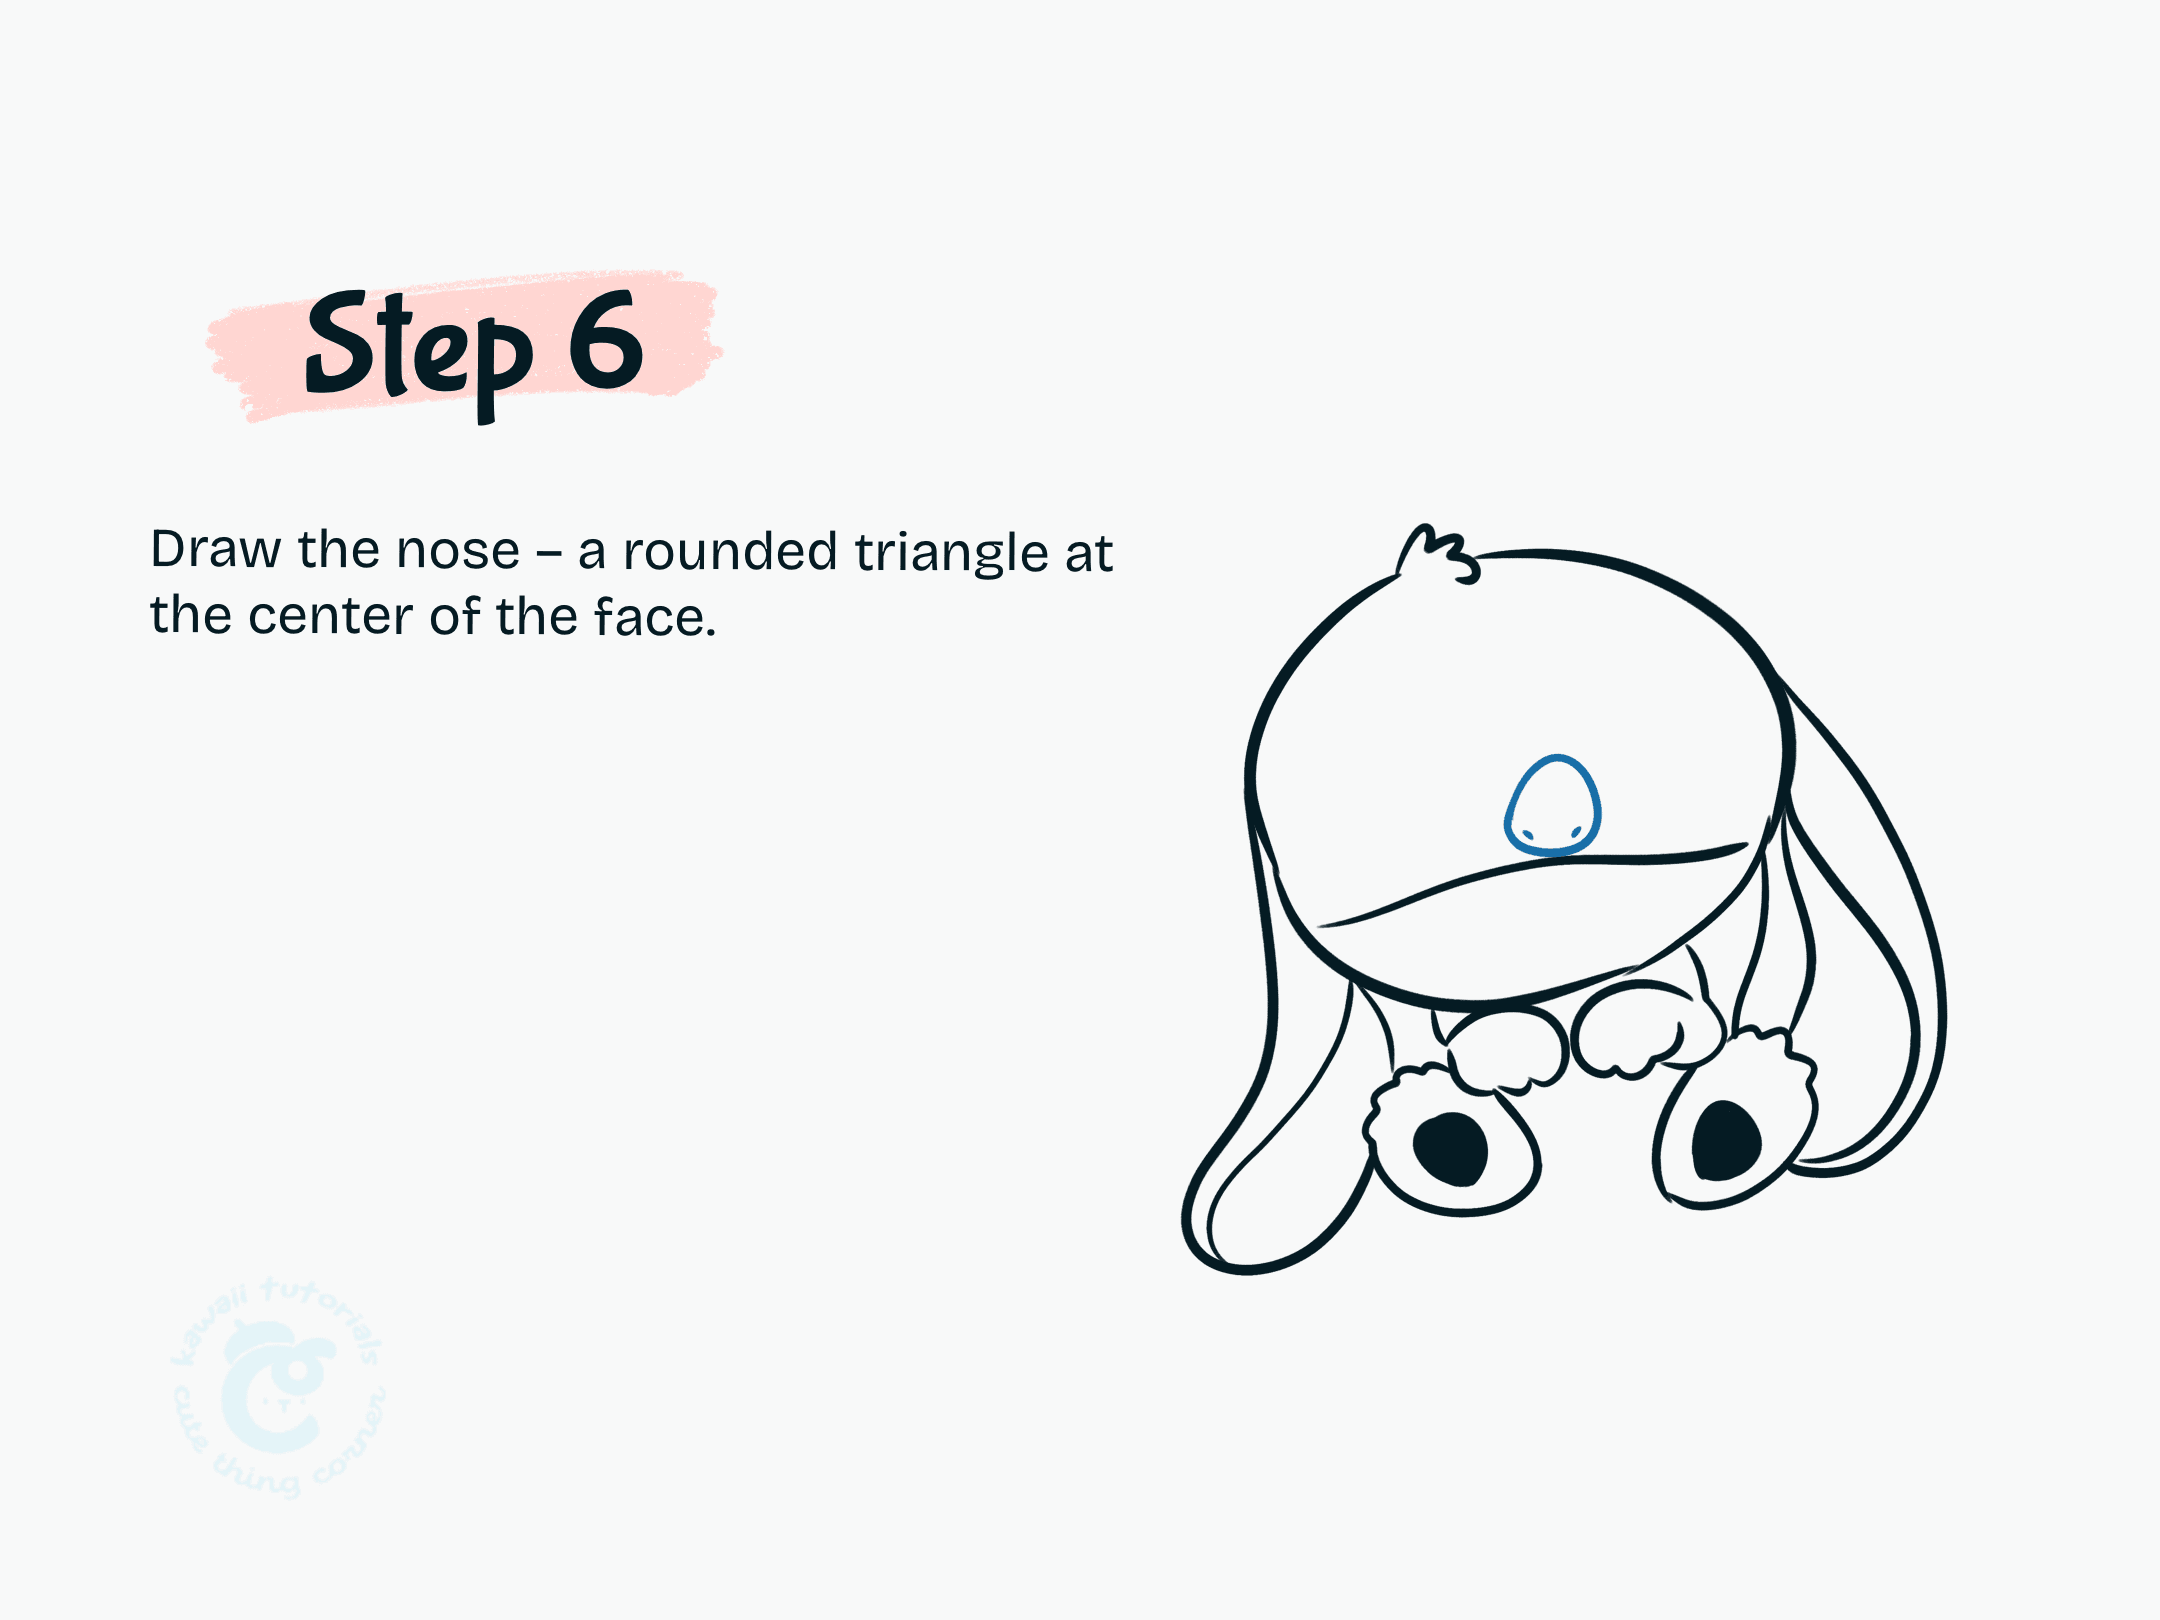
Draw the nose – a rounded triangle at the center of the face.
👉 Step 7: Add sleepy curved eyes and simple eyebrows above them.
Draw closed, curved eyes and tiny eyebrows to show Stitch’s relaxed and happy mood. It gives him such a peaceful vibe!
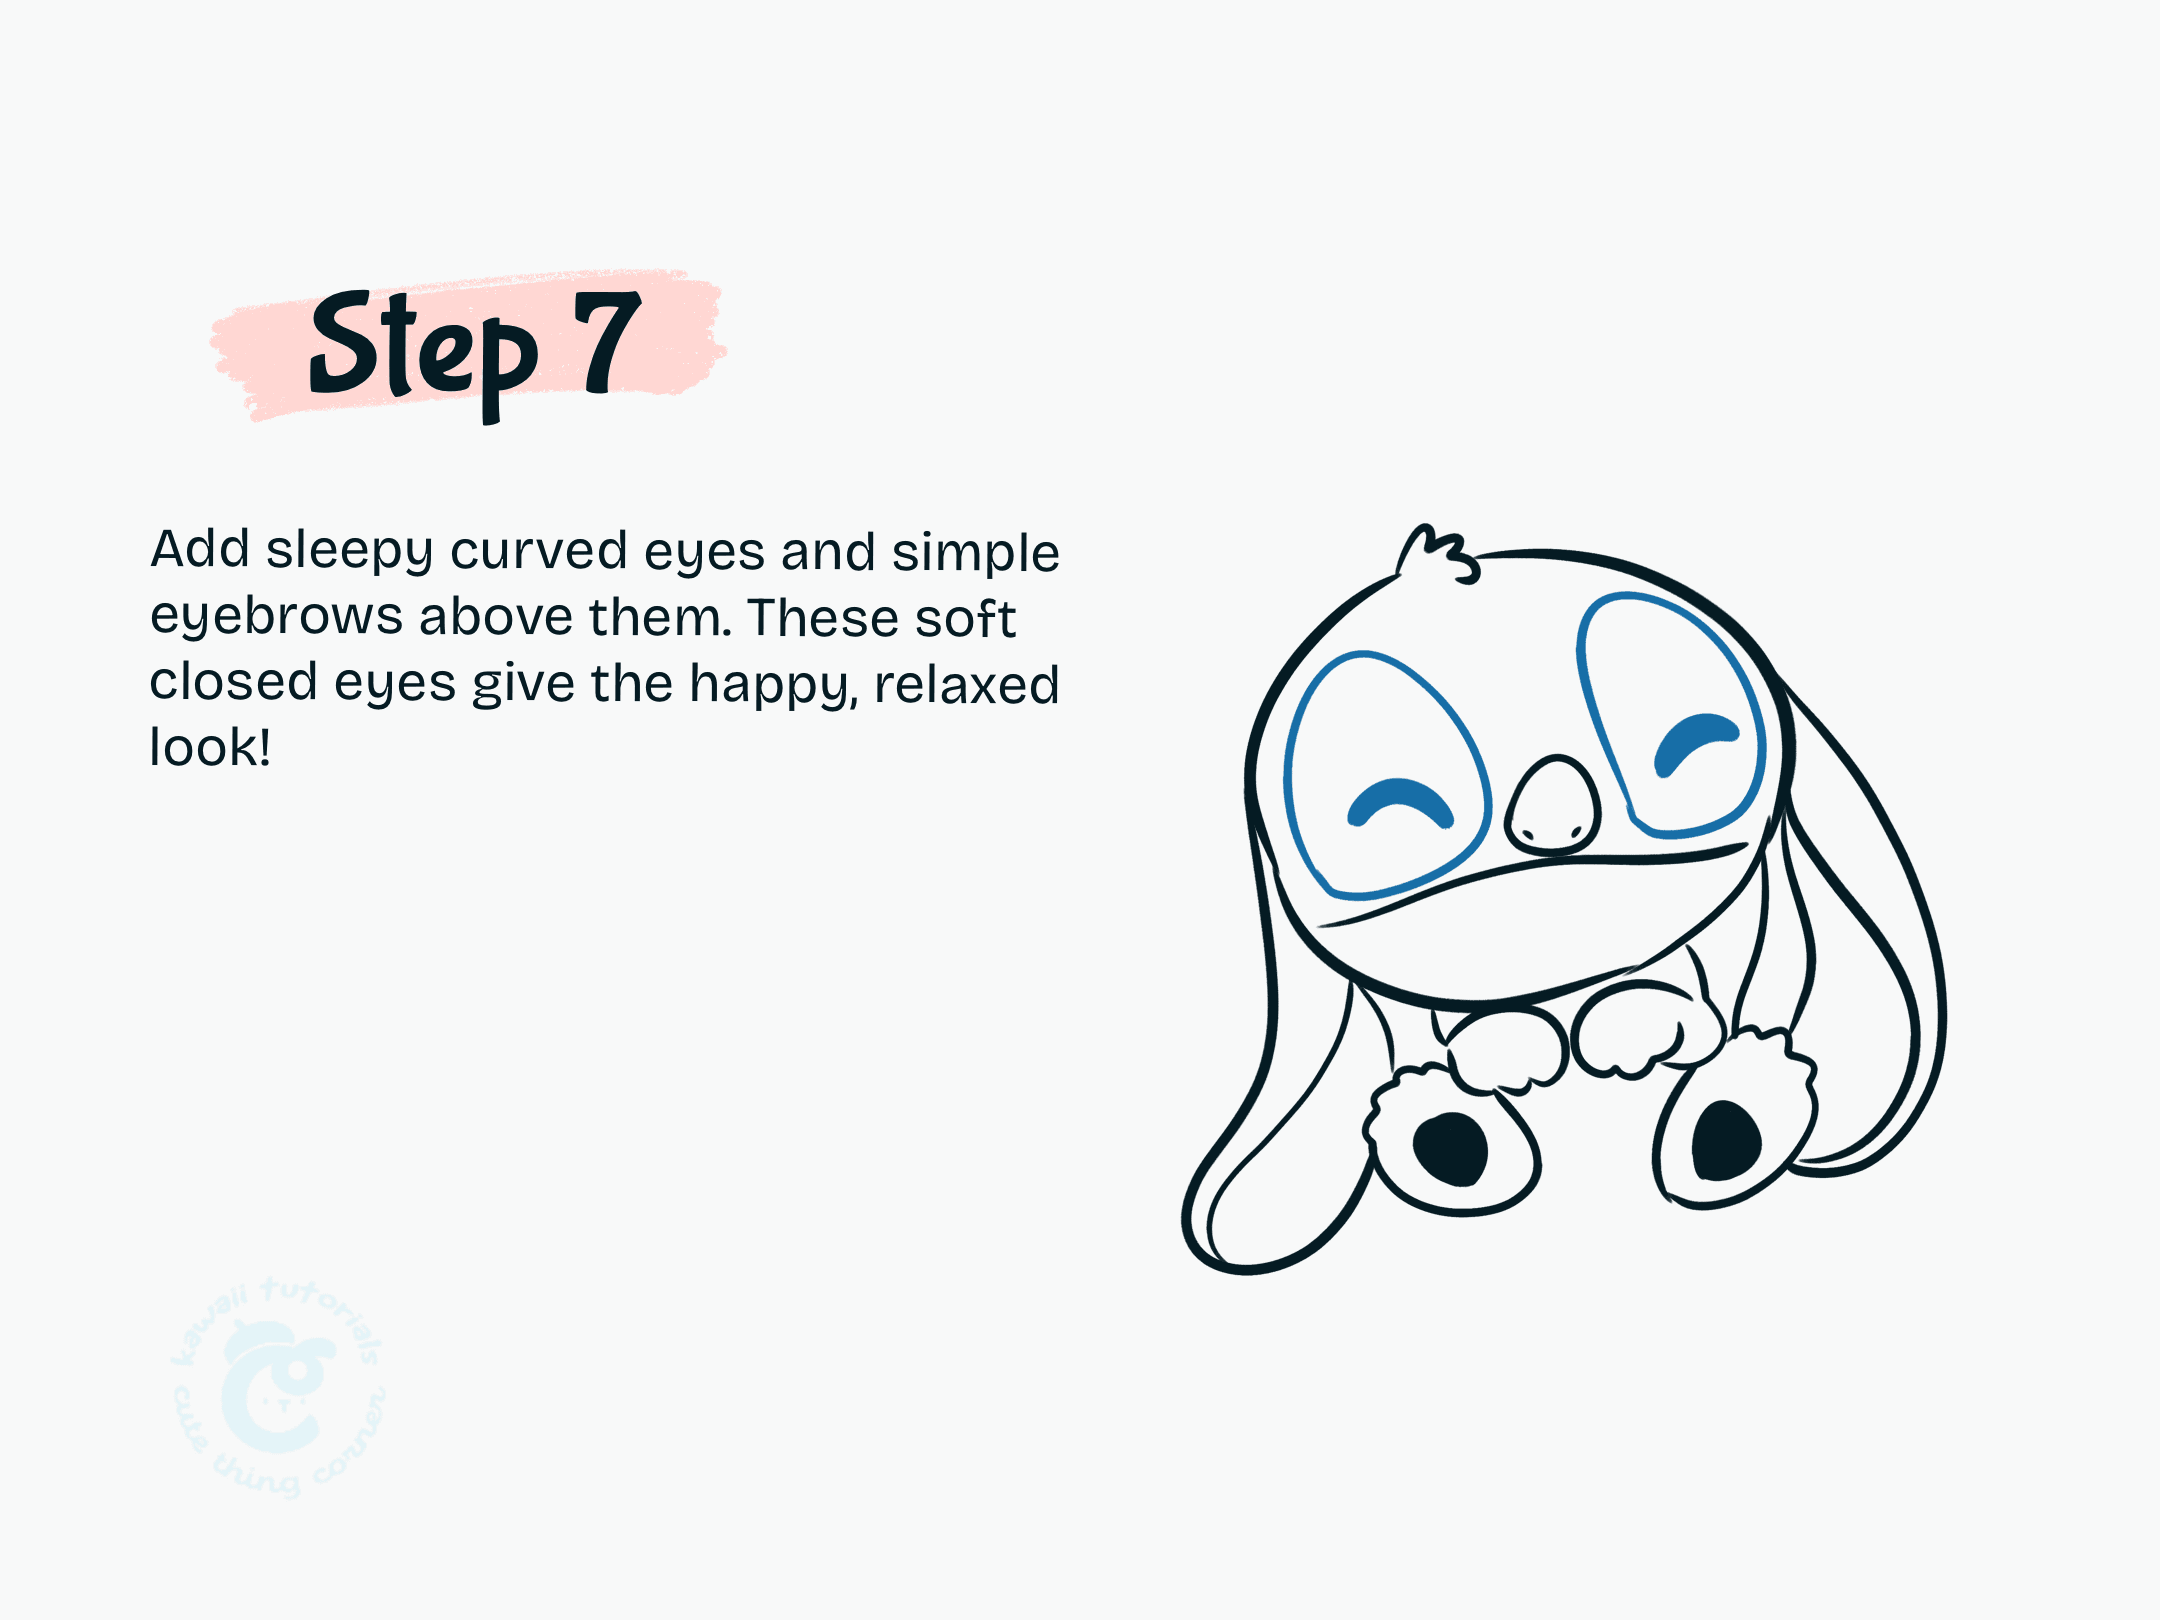
Add sleepy curved eyes and simple eyebrows above them.
👉 Step 8: Draw the belly line, paw pads on the feet, and three small fingers on each hand.
Draw the belly line, tiny paw pads on the feet, and three little fingers on each hand. These small touches add so much cuteness!
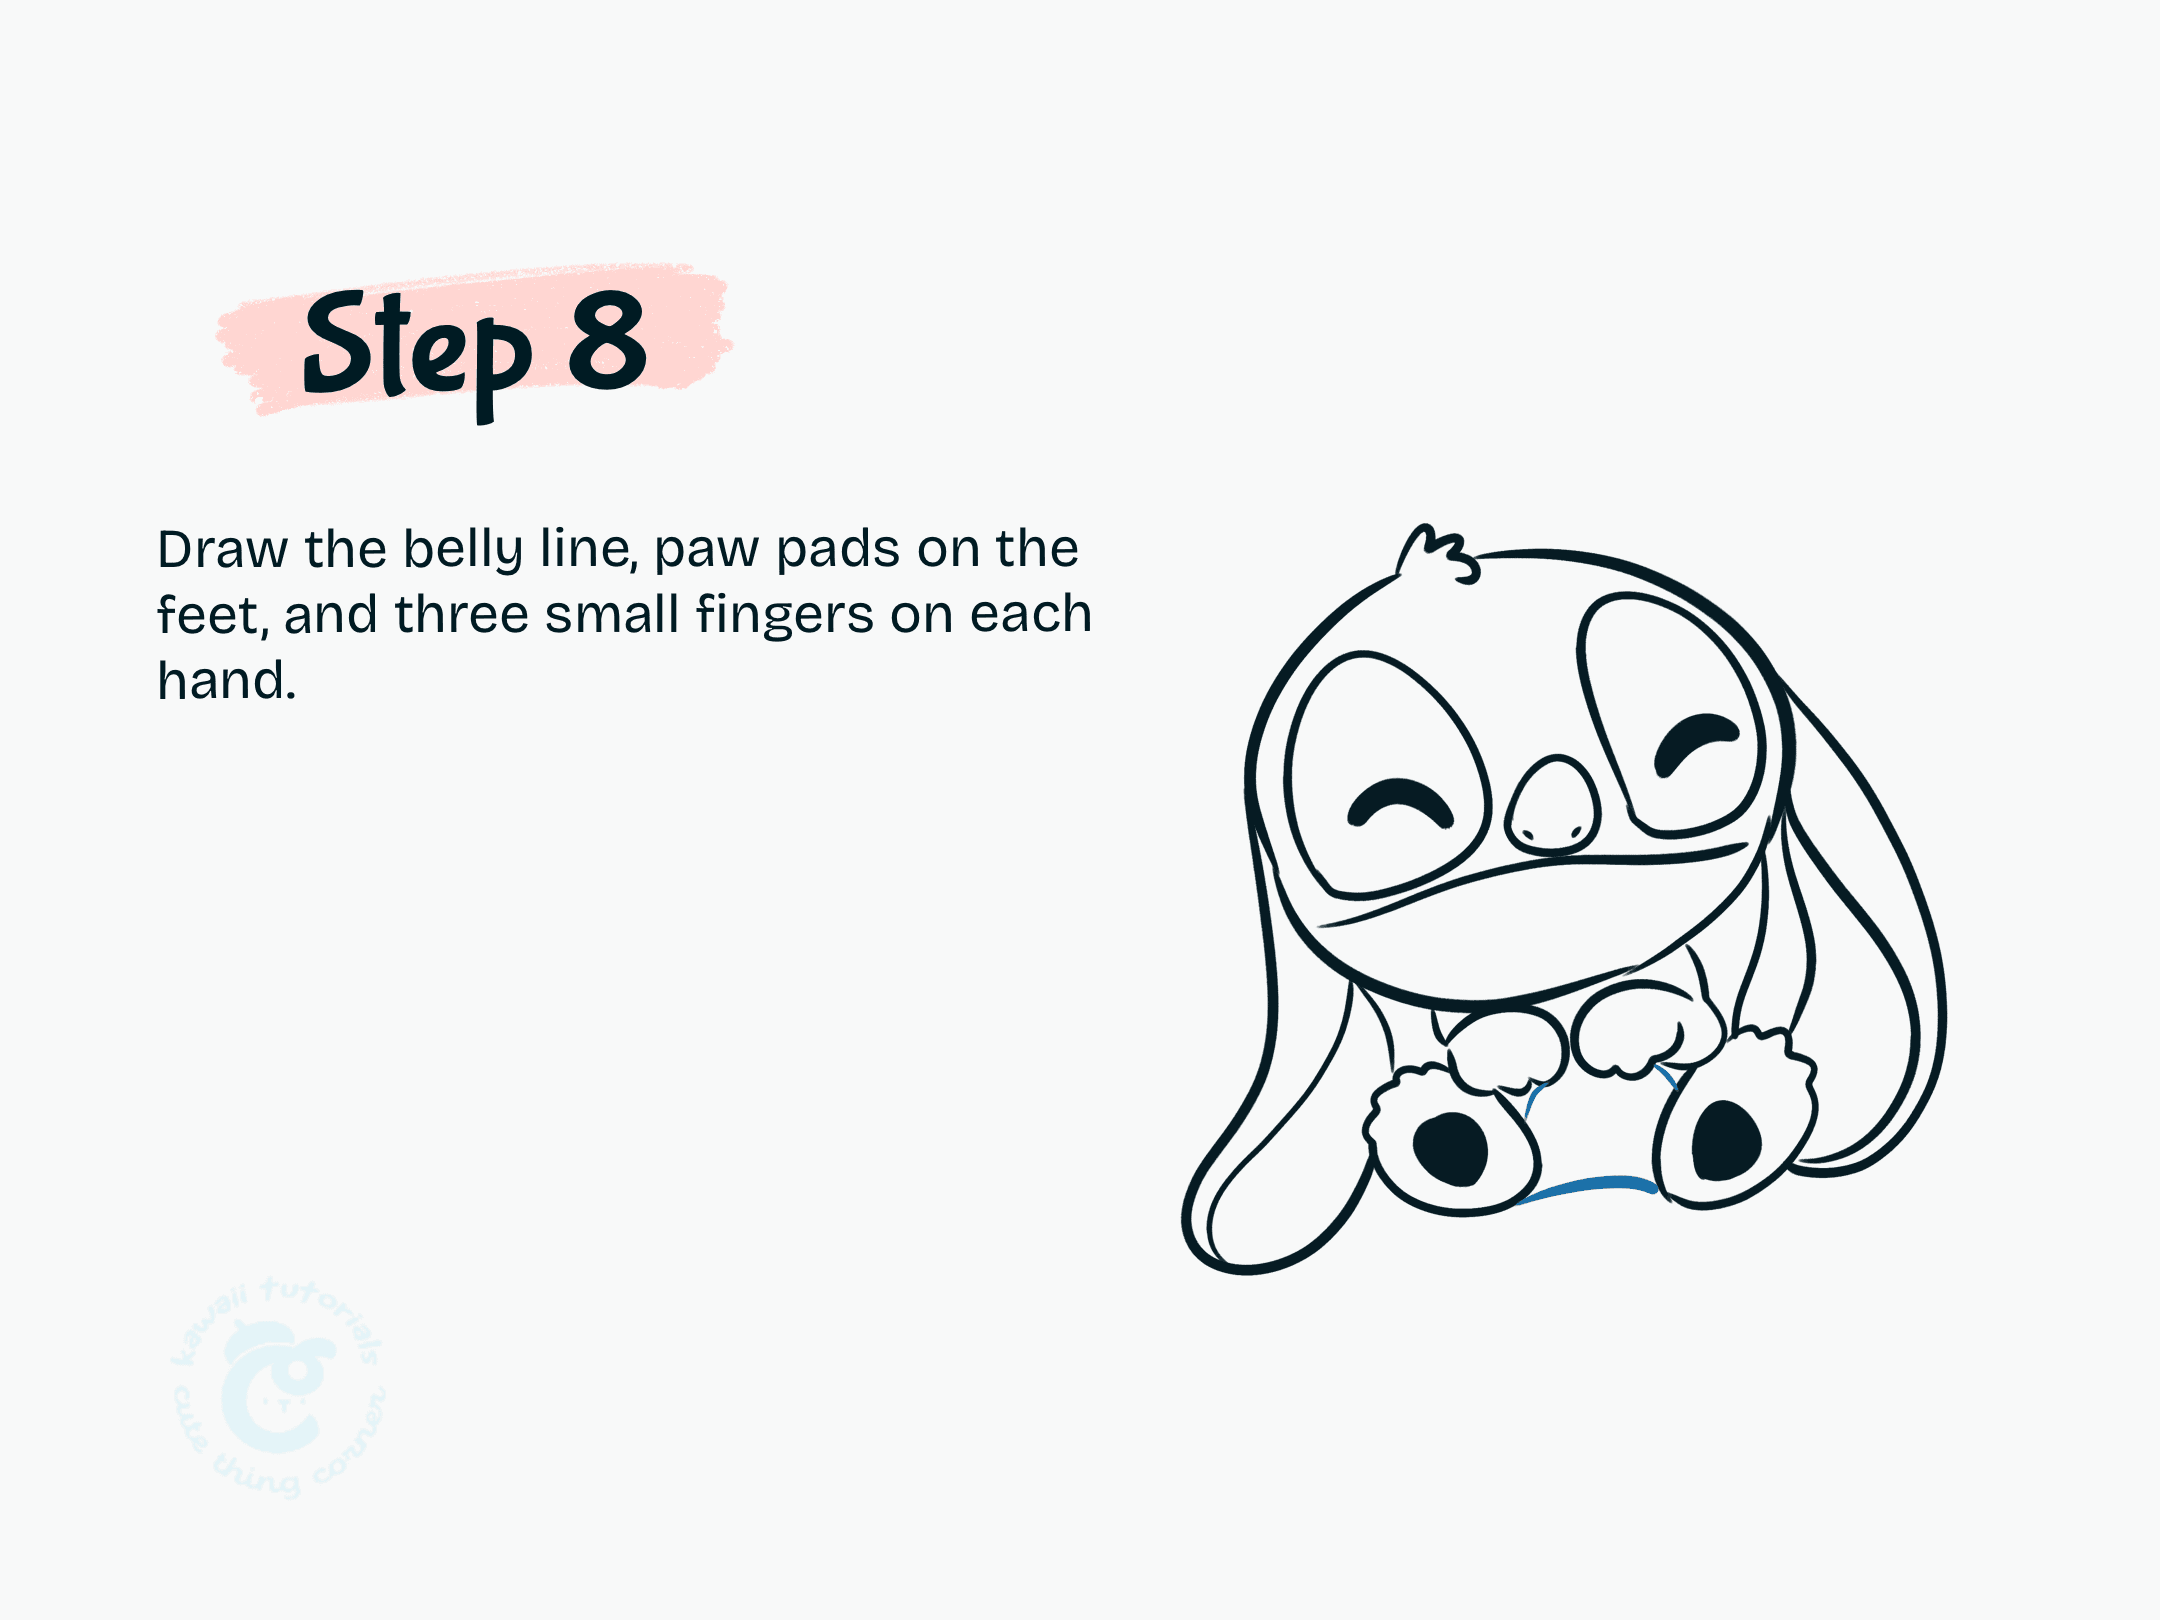
Draw the belly line, paw pads on the feet, and three small fingers on each hand.
👉 Step 9: Time to color Stitch!
-
Blue for the body
-
Pink for the inside of the ears
-
Black for the nose and paw pads
-
White highlights for extra sparkle ✨ And your Happy Stitch is ready to cuddle!

Time to color Stitch
📣 Show Off Your Art!
We’d love to see your fierce little Thanos!
📸 Tag us on Instagram: @cutethingcorner
💬 Let us know who you want to see next? We’re ready.
▶️ Watch on YouTube: How to Draw Happy Stitch
Want to try more Stitch poses?
Full steps to draw happy Stitch: