
Cute Thing Corner
Buy me a coffee

Doraemon

How to Draw Kawaii Doraemon Movie 44 | Easy Step-by-Step Drawing Tutorial

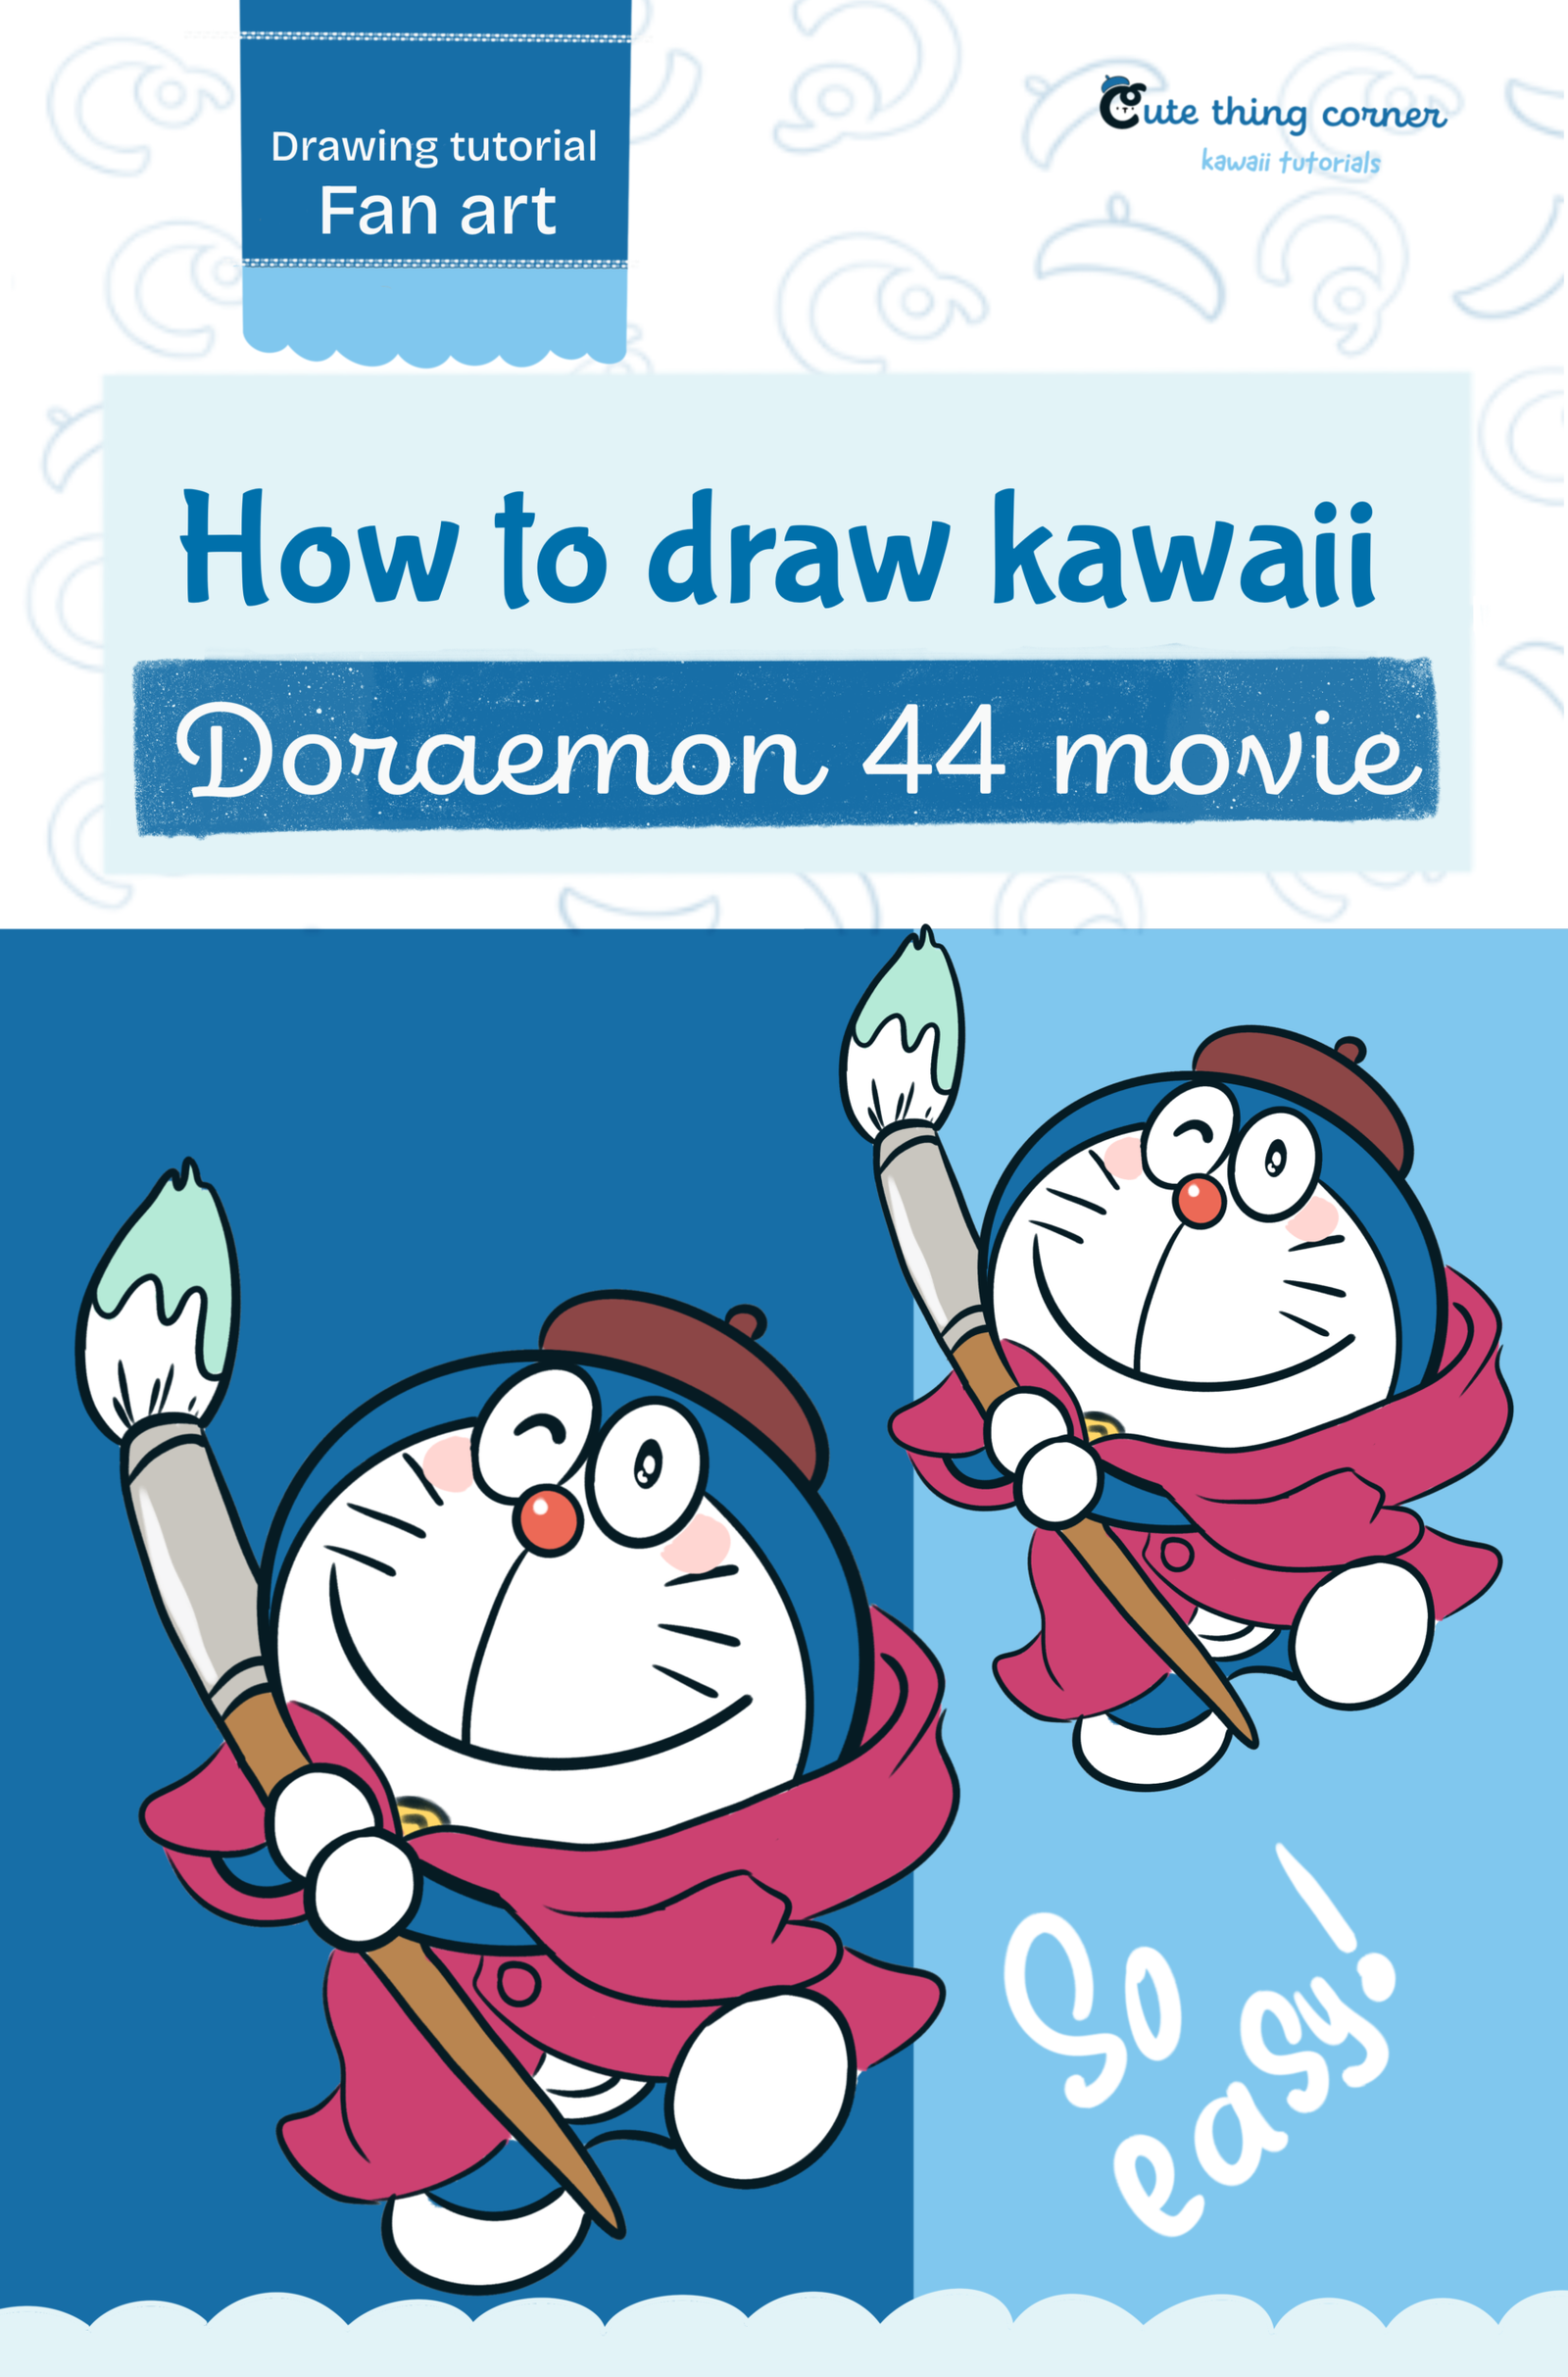
Are you ready to draw Doraemon in his adorable artist outfit from Doraemon Movie 44? In this easy step-by-step tutorial, we’ll draw a cute version of Doraemon wearing his artist hat and flowing cape while holding…
  • Quick
  • 15 minutes
  • 11 steps
How to Draw Kawaii Doraemon Movie 44 | Easy Step-by-Step Drawing Tutorial

Before You Start

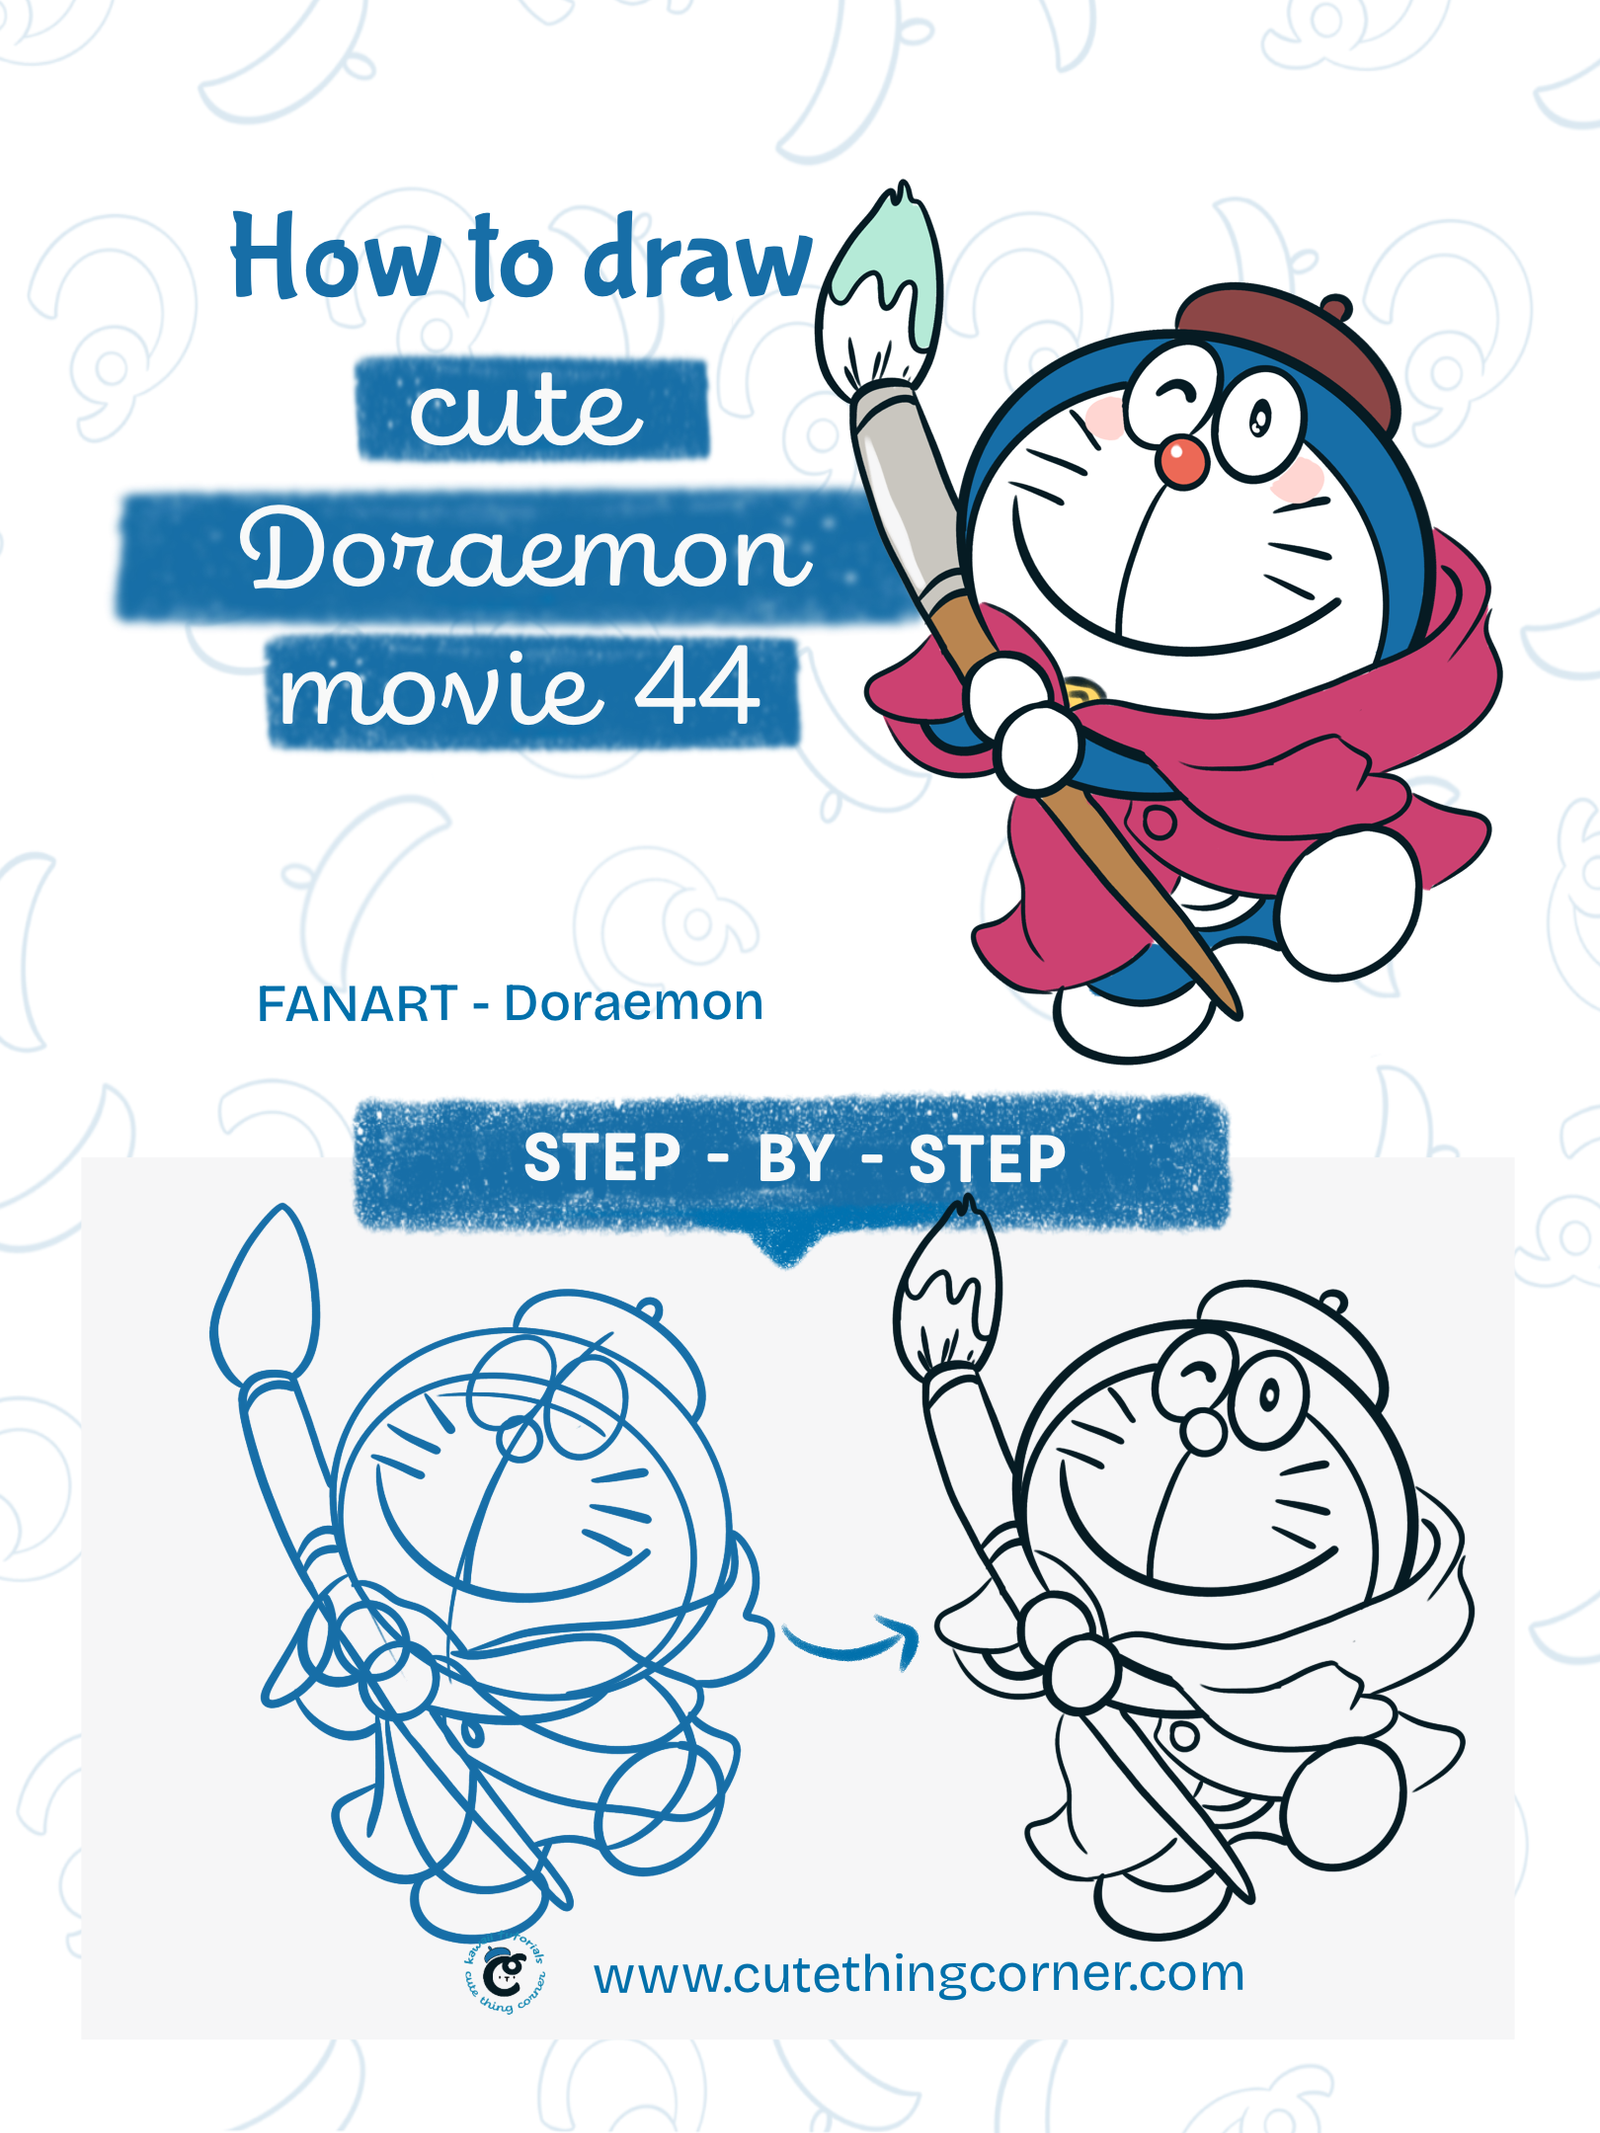
Are you ready to draw Doraemon in his adorable artist outfit from Doraemon Movie 44? In this easy step-by-step tutorial, we’ll draw a cute version of Doraemon wearing his artist hat and flowing cape while holding a giant paintbrush.

Although this design has more details than classic Doraemon, we’ll build everything from simple shapes. Whether you’re drawing on paper or on a tablet, sketch lightly at the beginning so you can easily erase the guide lines when we clean up the final outline.

Grab your pencil, eraser, and favorite coloring tools, and let’s learn how to draw kawaii Doraemon Movie 44 step by step!

Step 1

Sketch Doraemon’s Head

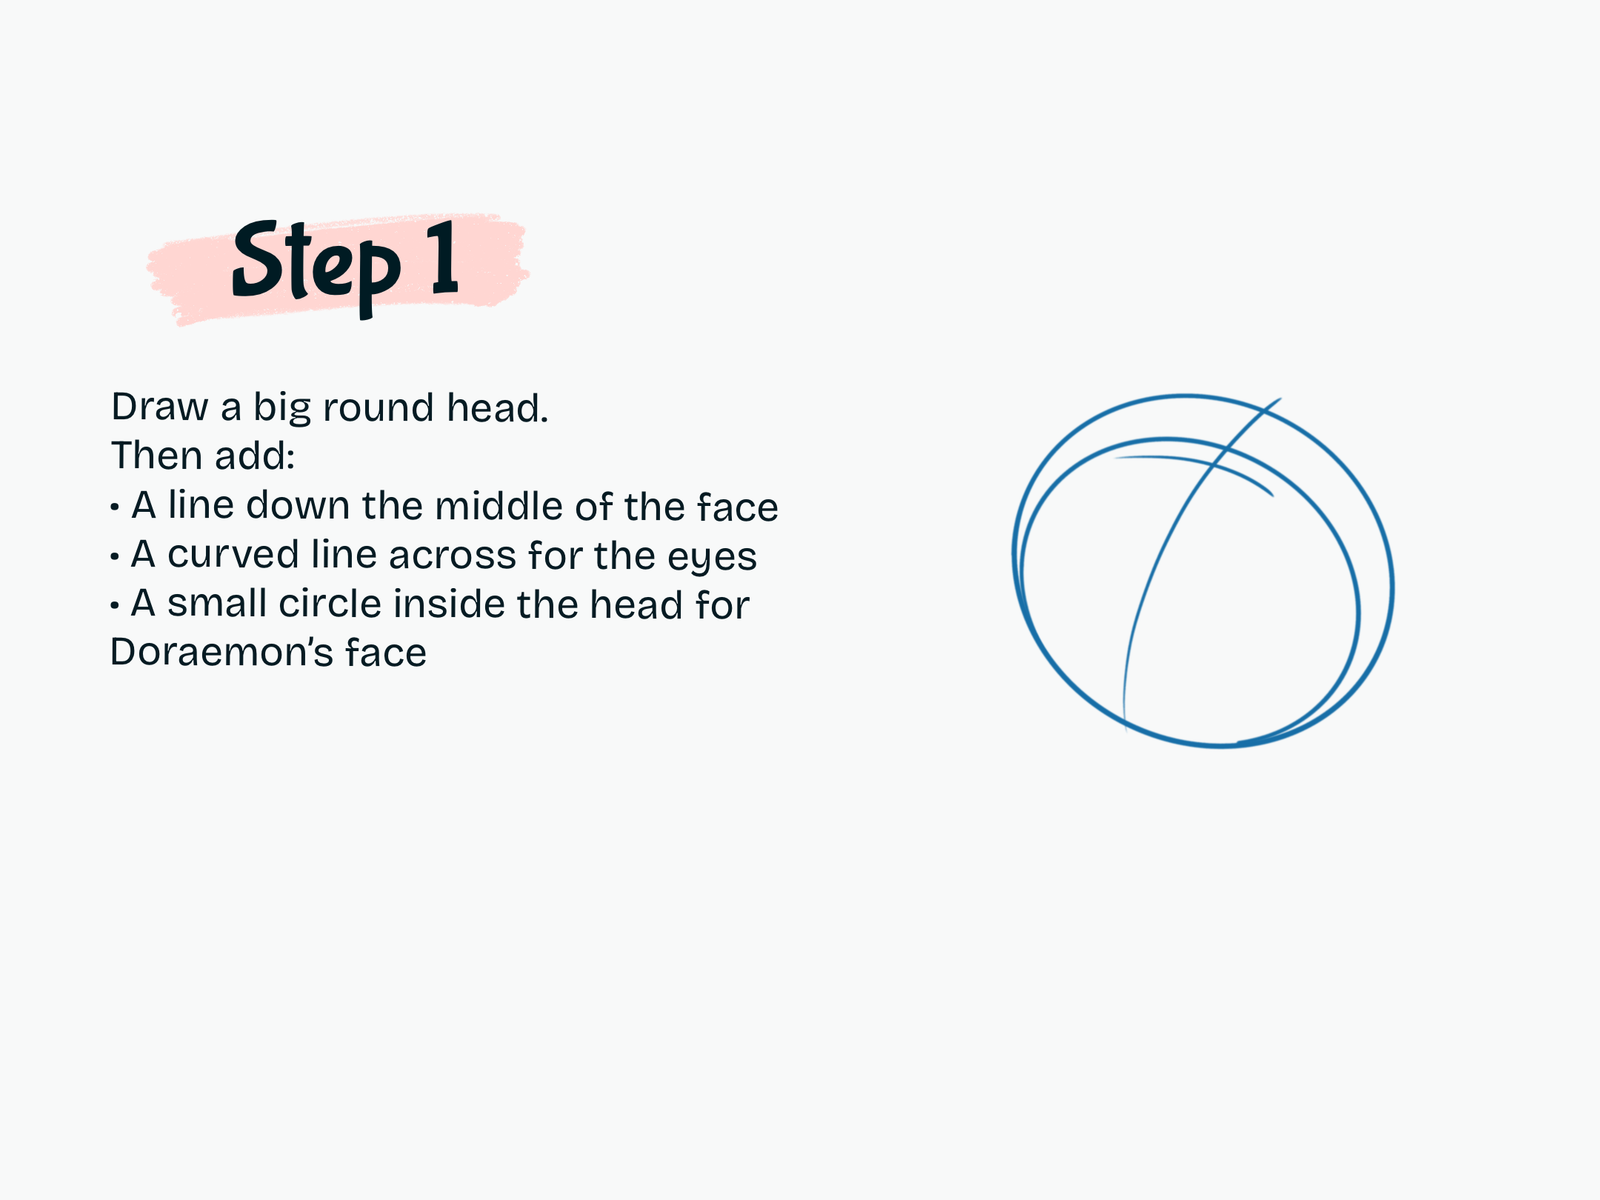
Start with a large round shape for Doraemon’s head.

Lightly draw a curved vertical guideline through the face, then add another curved guideline across the upper part of the head. These will help us position the facial features and show the direction Doraemon is facing.

Next, sketch a smaller curved shape inside the head to guide the white face area.

Keep all these lines light because we’ll erase them later.

Step 2

Draw Doraemon’s Eyes

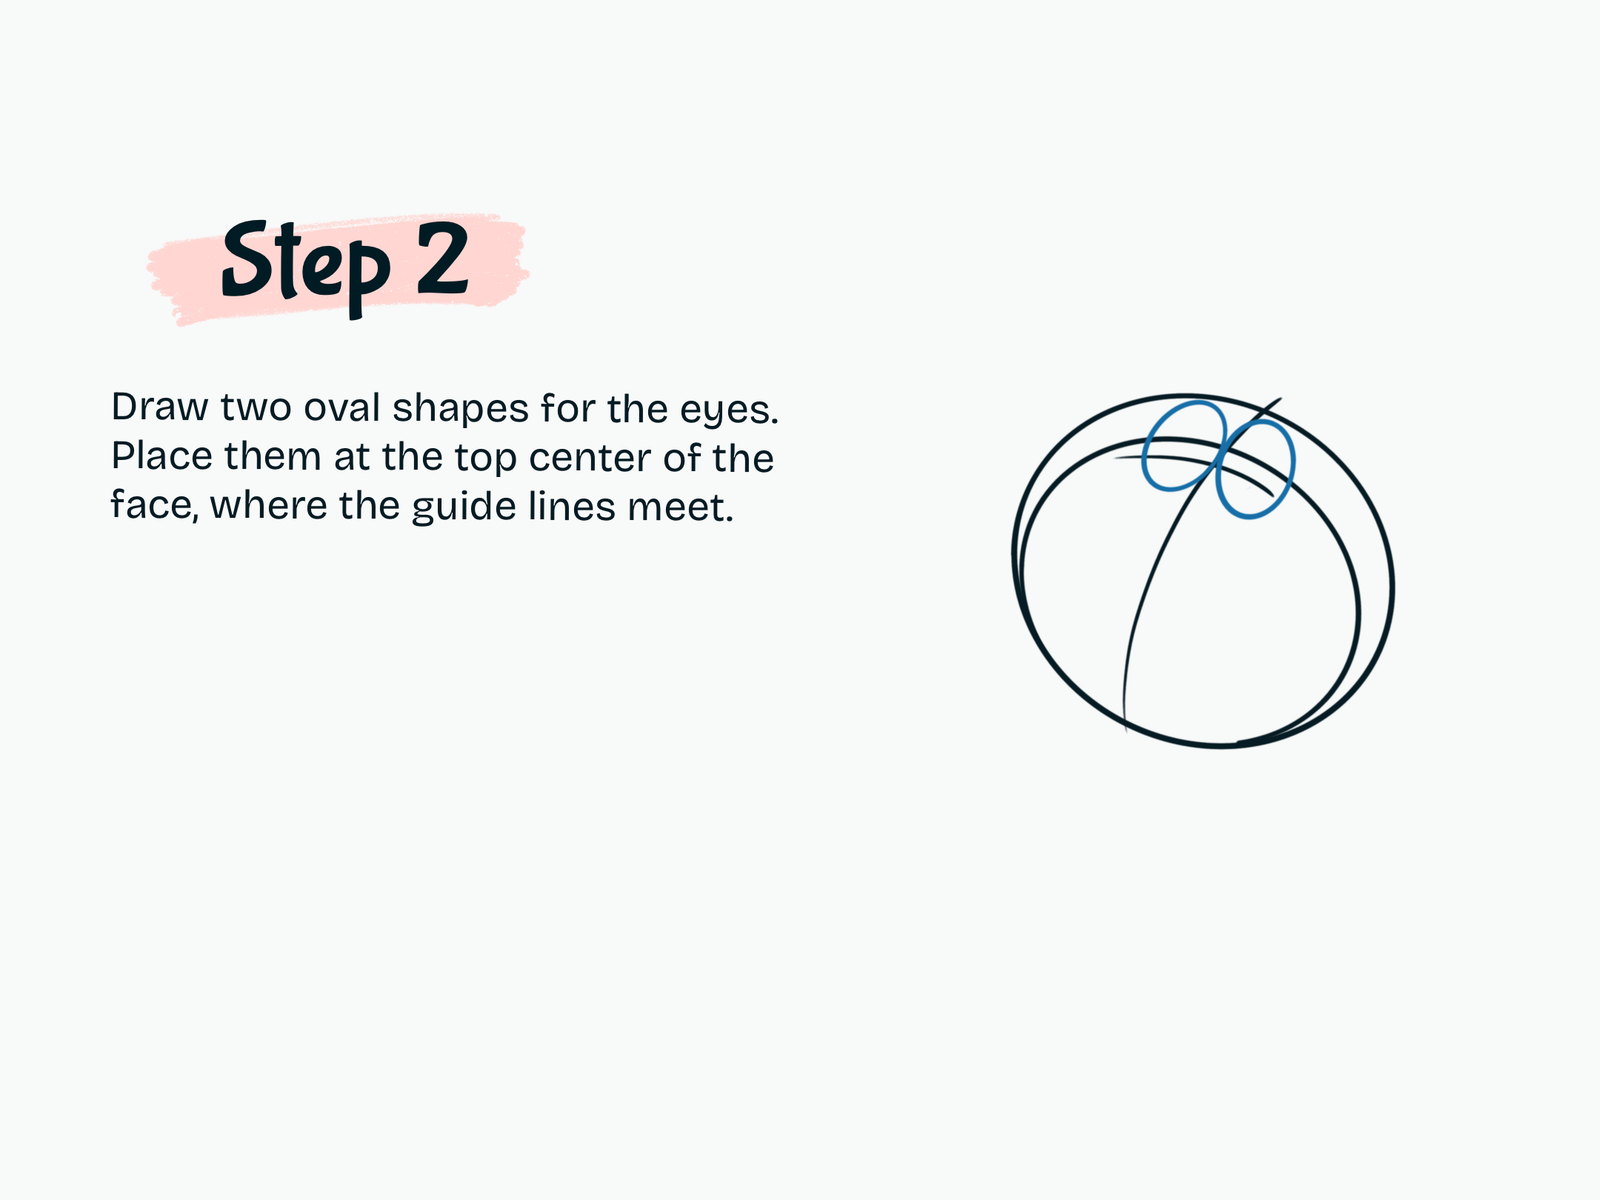
Near the upper center of the face, draw two tall oval shapes for Doraemon’s eyes.

Place them close together around the point where your guidelines meet. Since Doraemon’s head is slightly turned, the two eyes don’t need to look perfectly identical.

For now, focus on their size and placement. We’ll add the pupils and final eye details later.

Step 3

Add the Nose, Mouth, and Whiskers

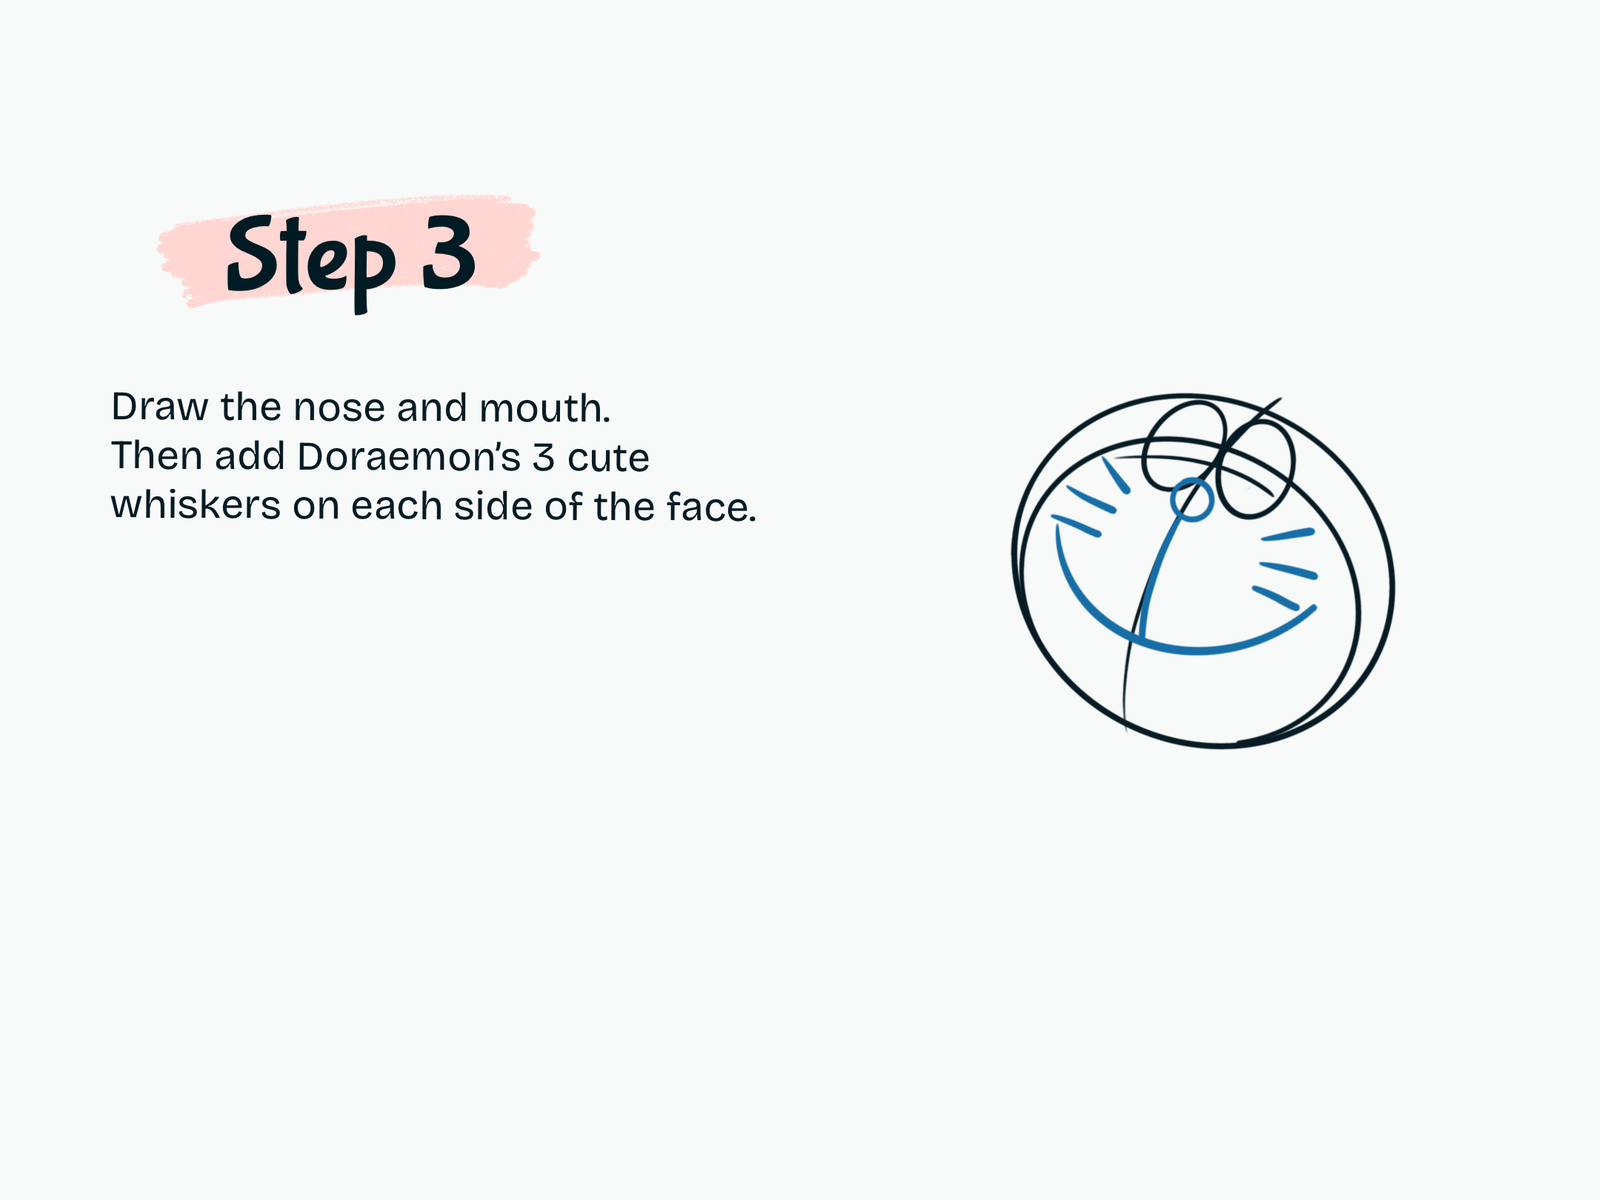
Draw a small round nose between and slightly below the eyes.

From the nose, bring a curved line downward through the center of the face. Then draw a wide curved smile across the lower half of the face.

Add three short whiskers on each cheek to complete Doraemon’s familiar expression.

Step 4

Draw the Artist Hat

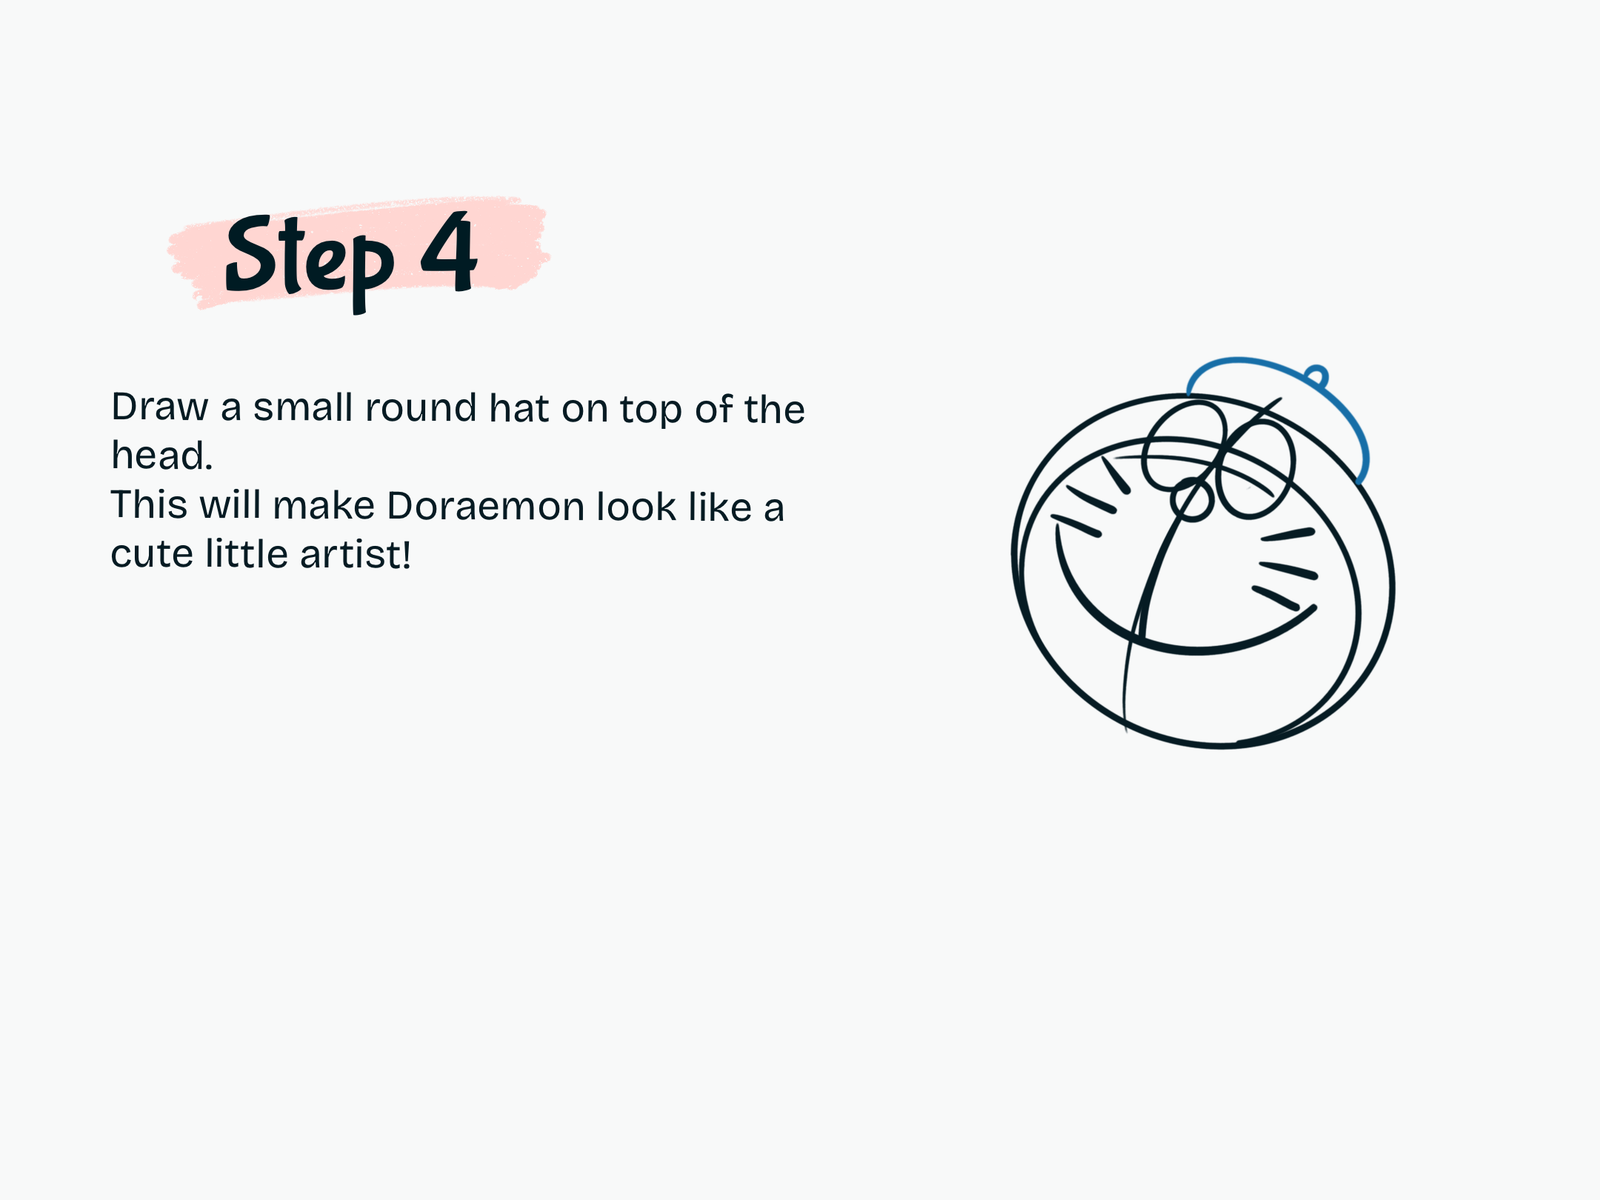
Now let’s give Doraemon his cute artist look!

Draw a small rounded beret sitting slightly tilted on top of his head. Add the tiny detail at the top of the hat.

Keeping the hat tilted instead of perfectly centered makes the pose feel more playful.

Step 5

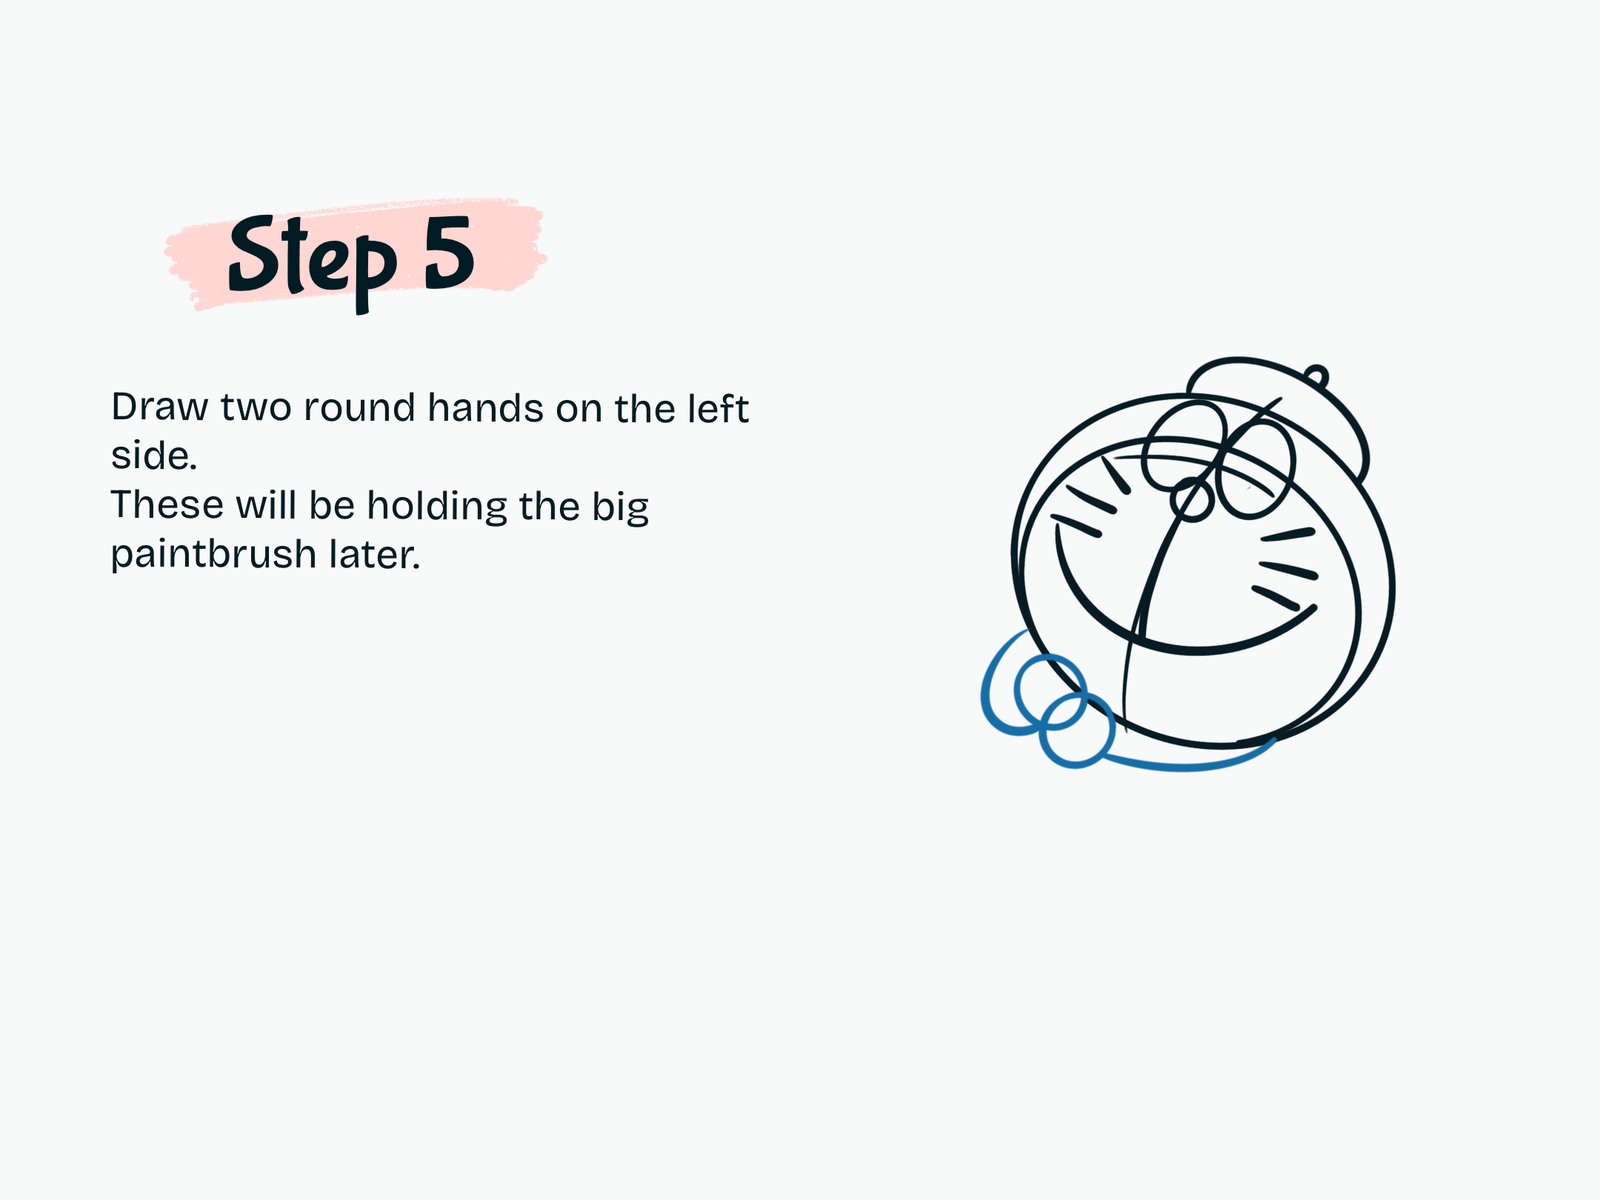
Sketch Doraemon’s Hands

On the left side of the drawing, add two small overlapping round shapes for Doraemon’s hands.

Position them close together because both hands will be holding the large paintbrush.

Keep these shapes simple for now—we’ll clean up the overlapping lines later.

Step 6

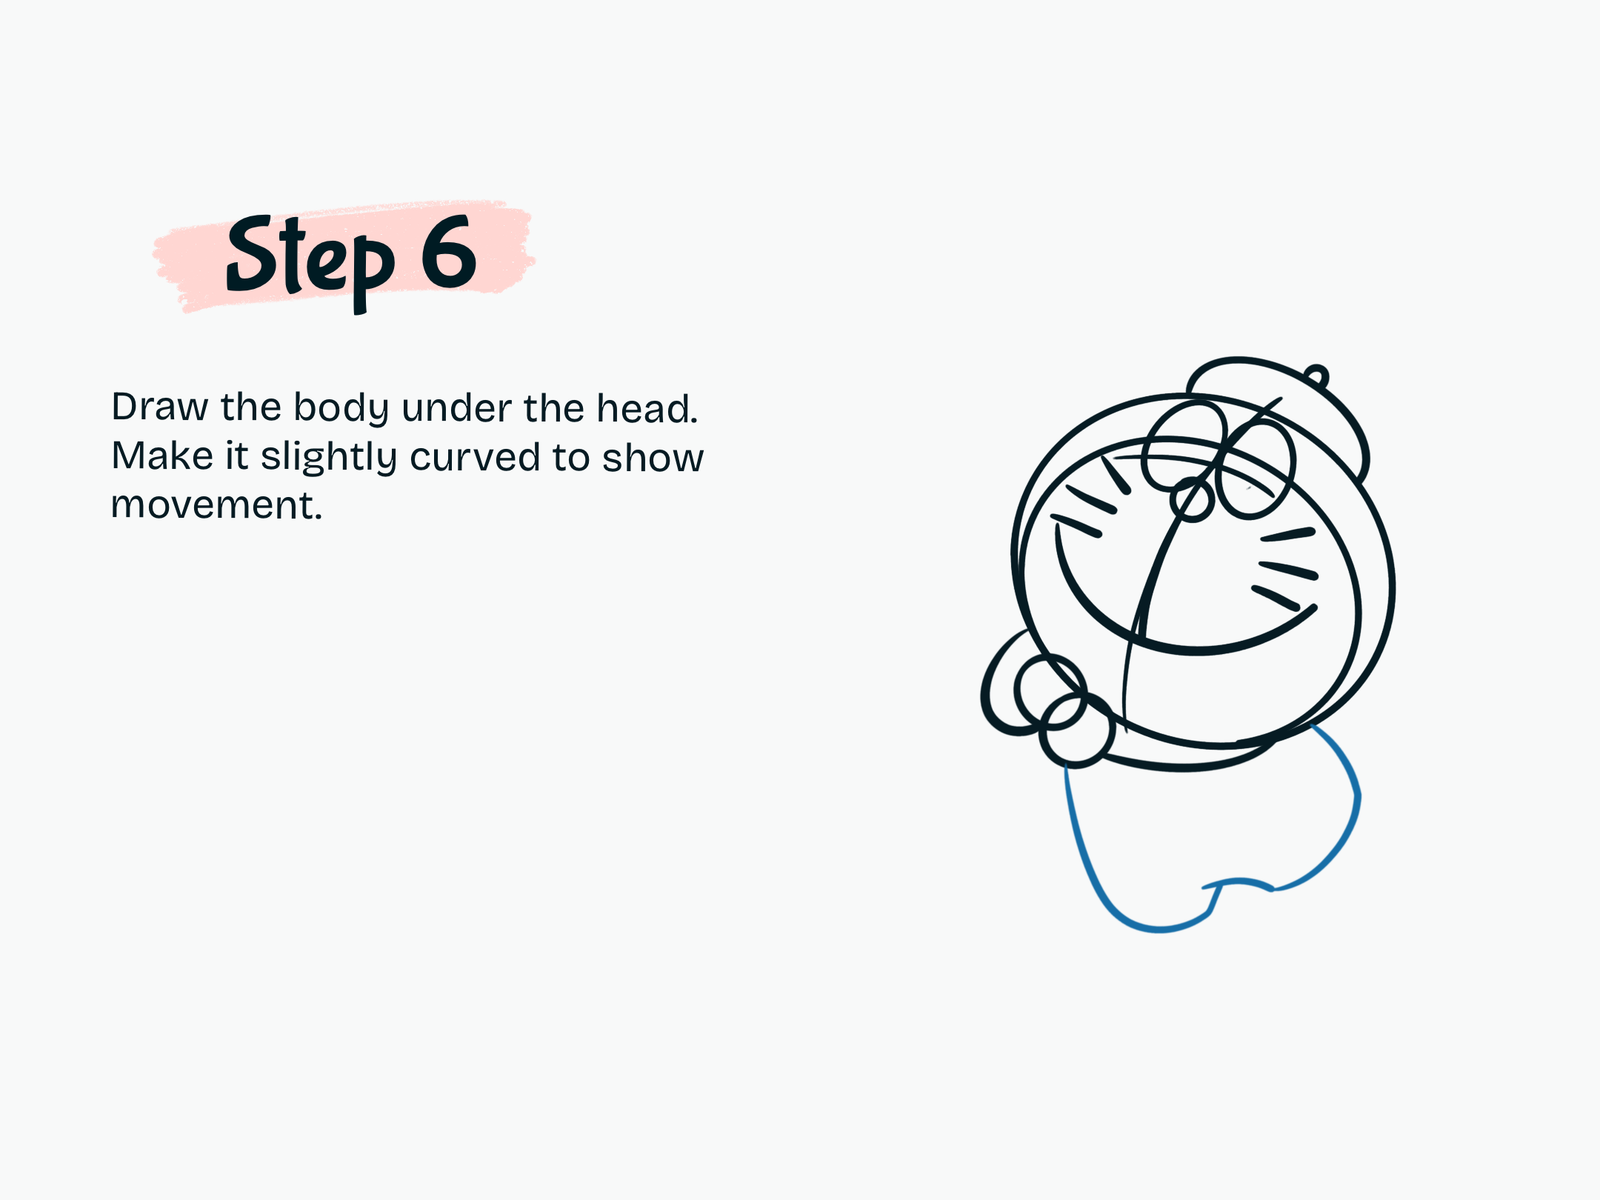
Draw Doraemon’s Body

Under the head, sketch Doraemon’s small rounded body.

Curve the body slightly to follow the movement of the pose rather than drawing it completely straight.

The head should remain much larger than the body to keep the drawing cute and recognizable.

Step 7

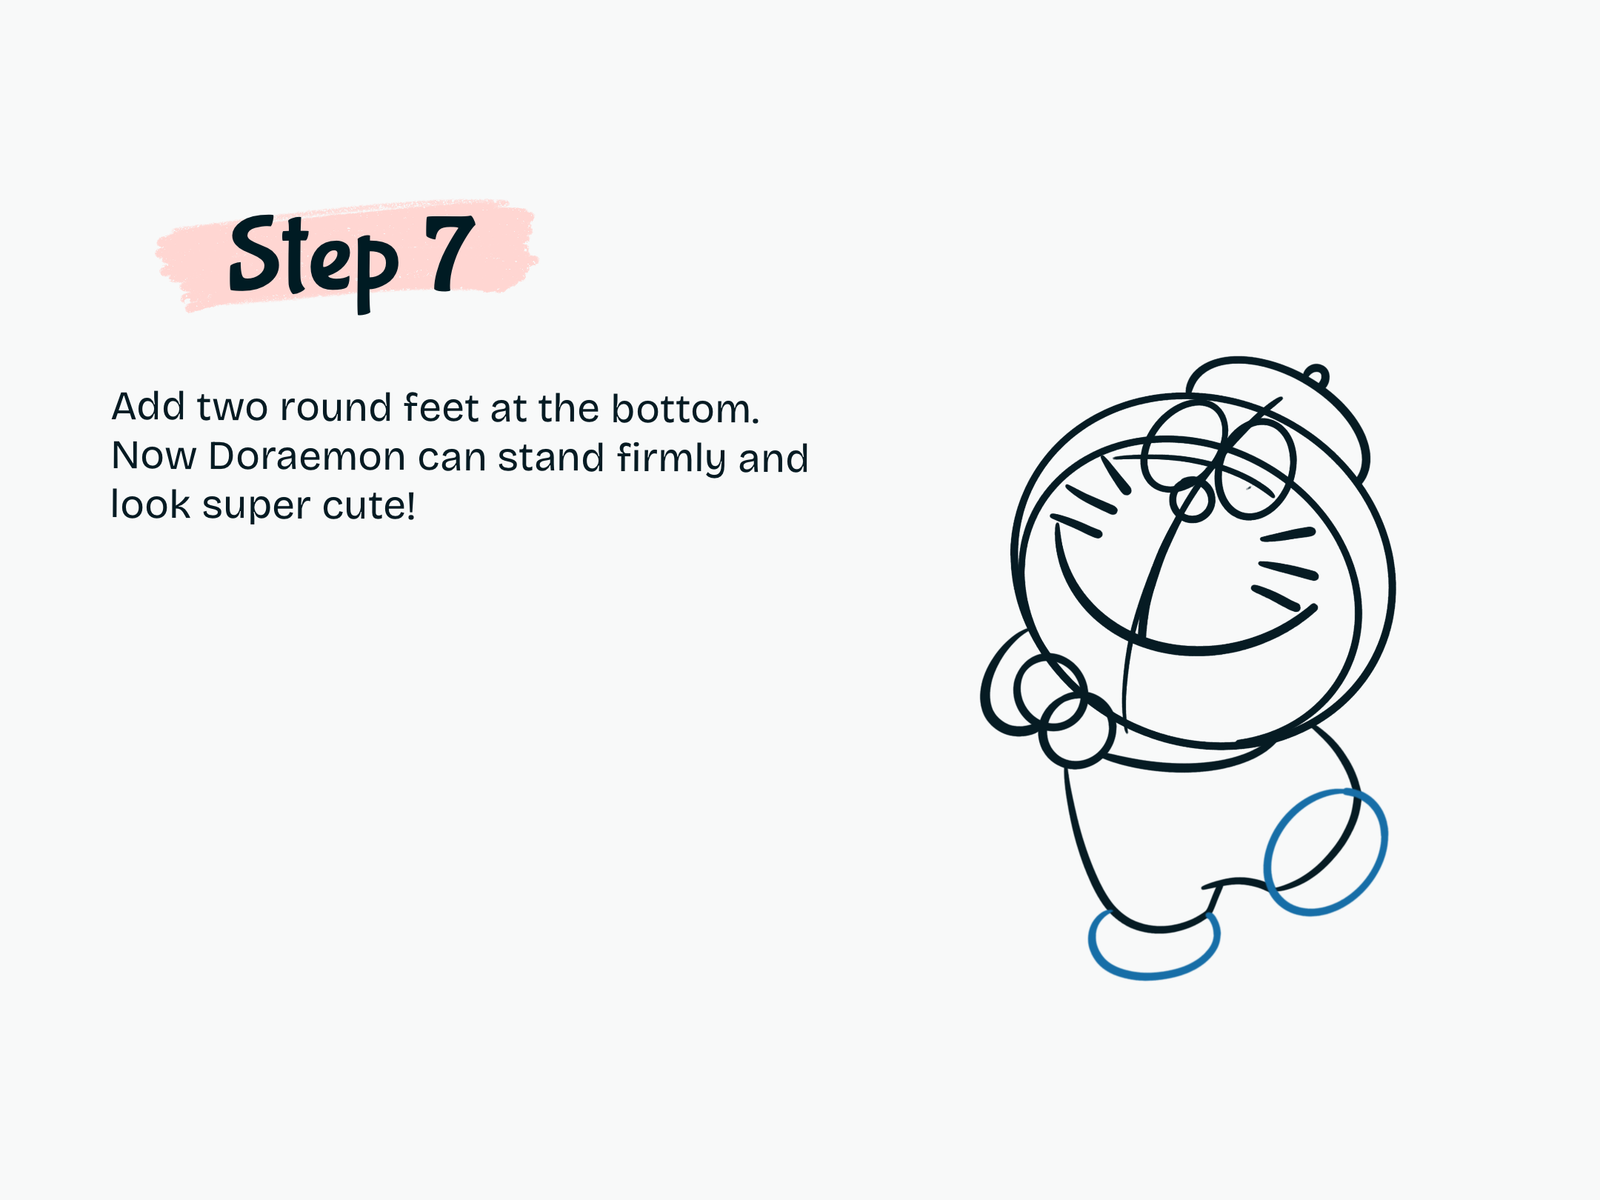
Add the Feet

Draw two rounded feet at the bottom of Doraemon’s body.

One foot sits underneath the body, while the other extends outward to the side. This creates a more active pose and helps balance the large head and paintbrush.

Step 8

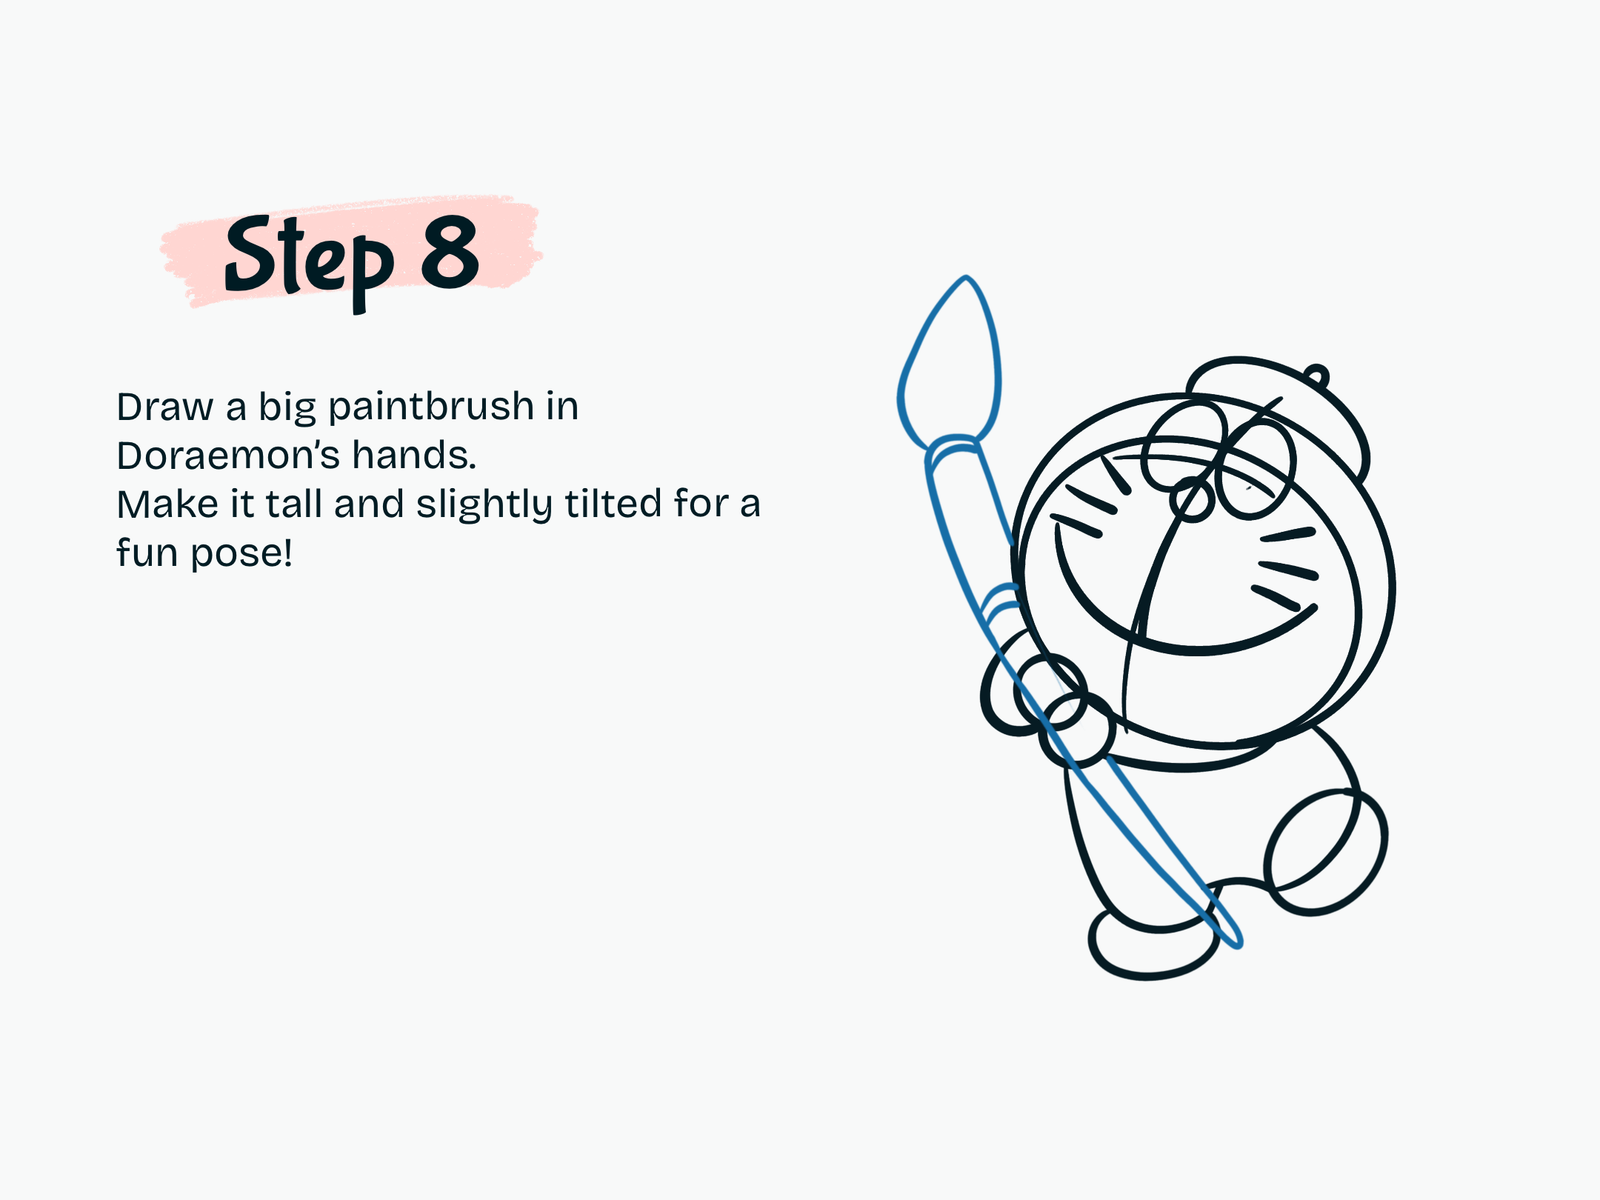
Draw the Giant Paintbrush

Now draw the large paintbrush passing through Doraemon’s hands.

Start with a long handle running diagonally across the drawing. Extend it upward past Doraemon’s head, then add the brush ferrule and a large pointed brush tip.

Let the brush lean at an angle to make the whole pose feel more energetic and fun.

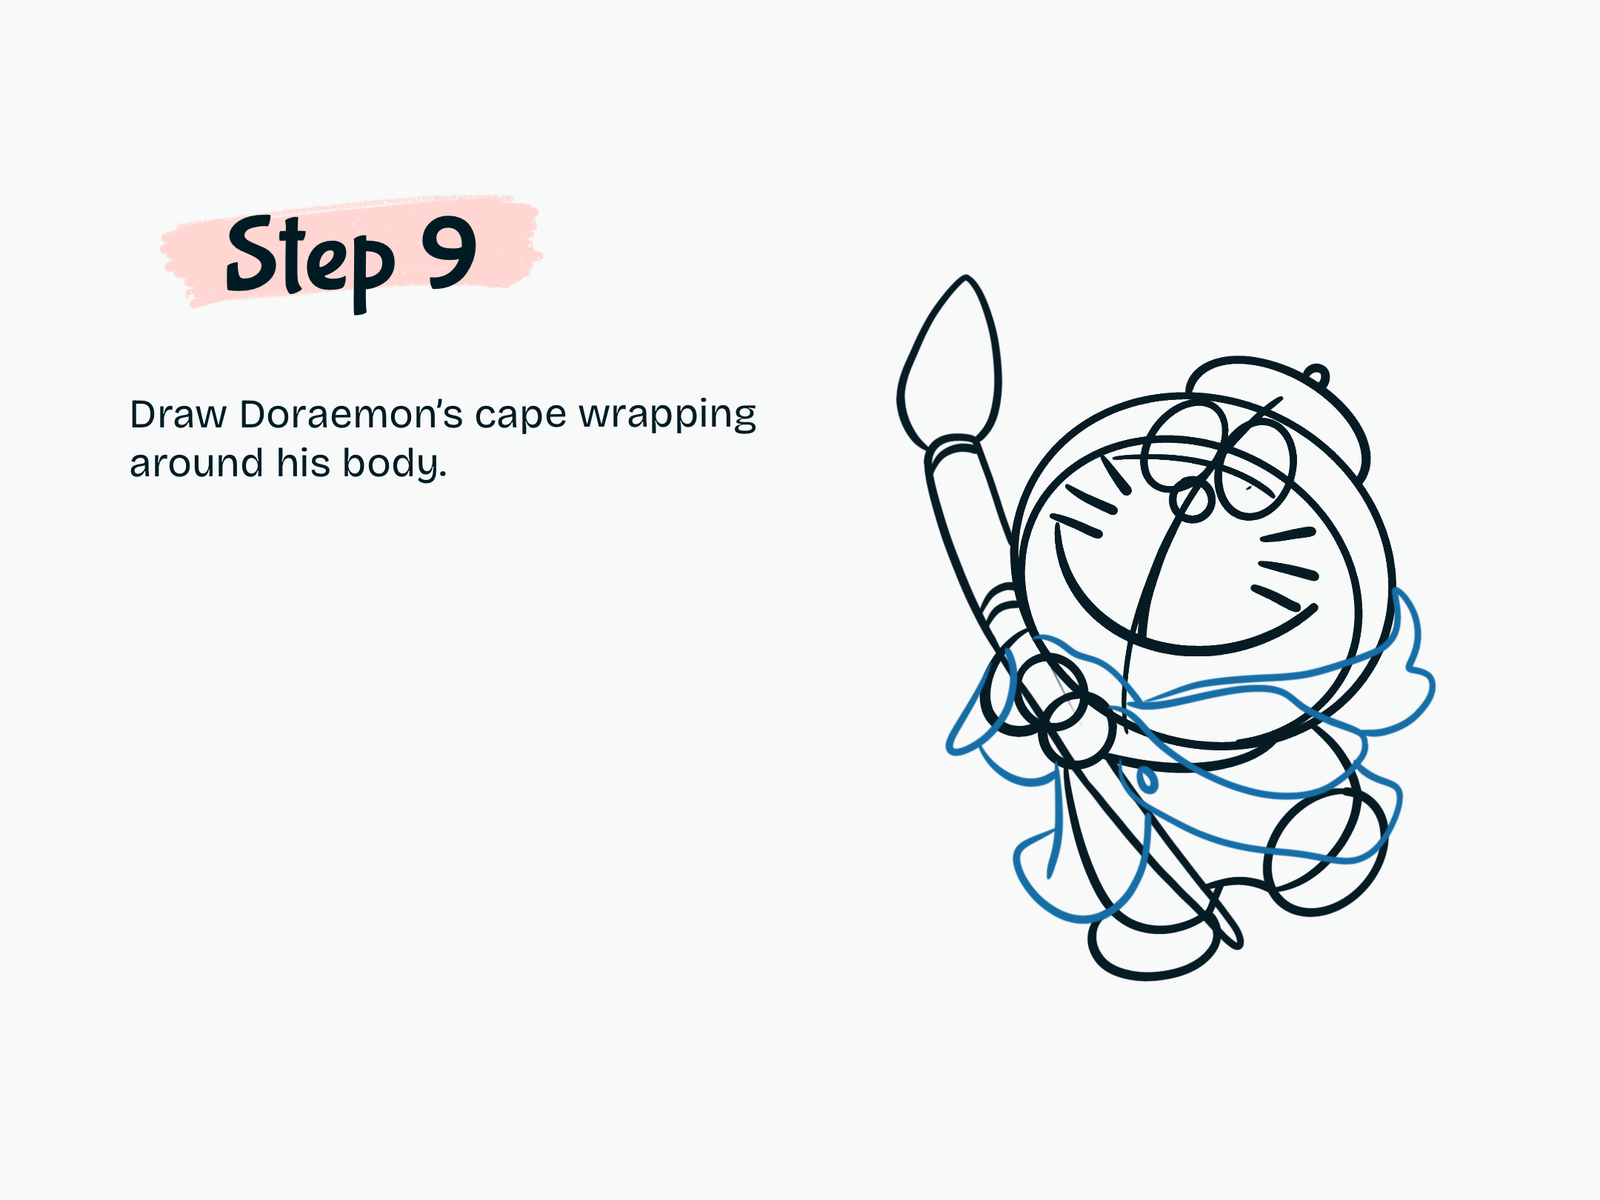
Step 9

Add the Flowing Artist Outfit

Next, draw the flowing fabric around Doraemon’s neck and body.

Start around the neck and let the fabric sweep outward toward the right side. Add more curved sections around the body and behind the hands to create the layered artist outfit.

Use long, soft curves rather than stiff lines so the fabric looks like it is flowing with Doraemon’s movement.

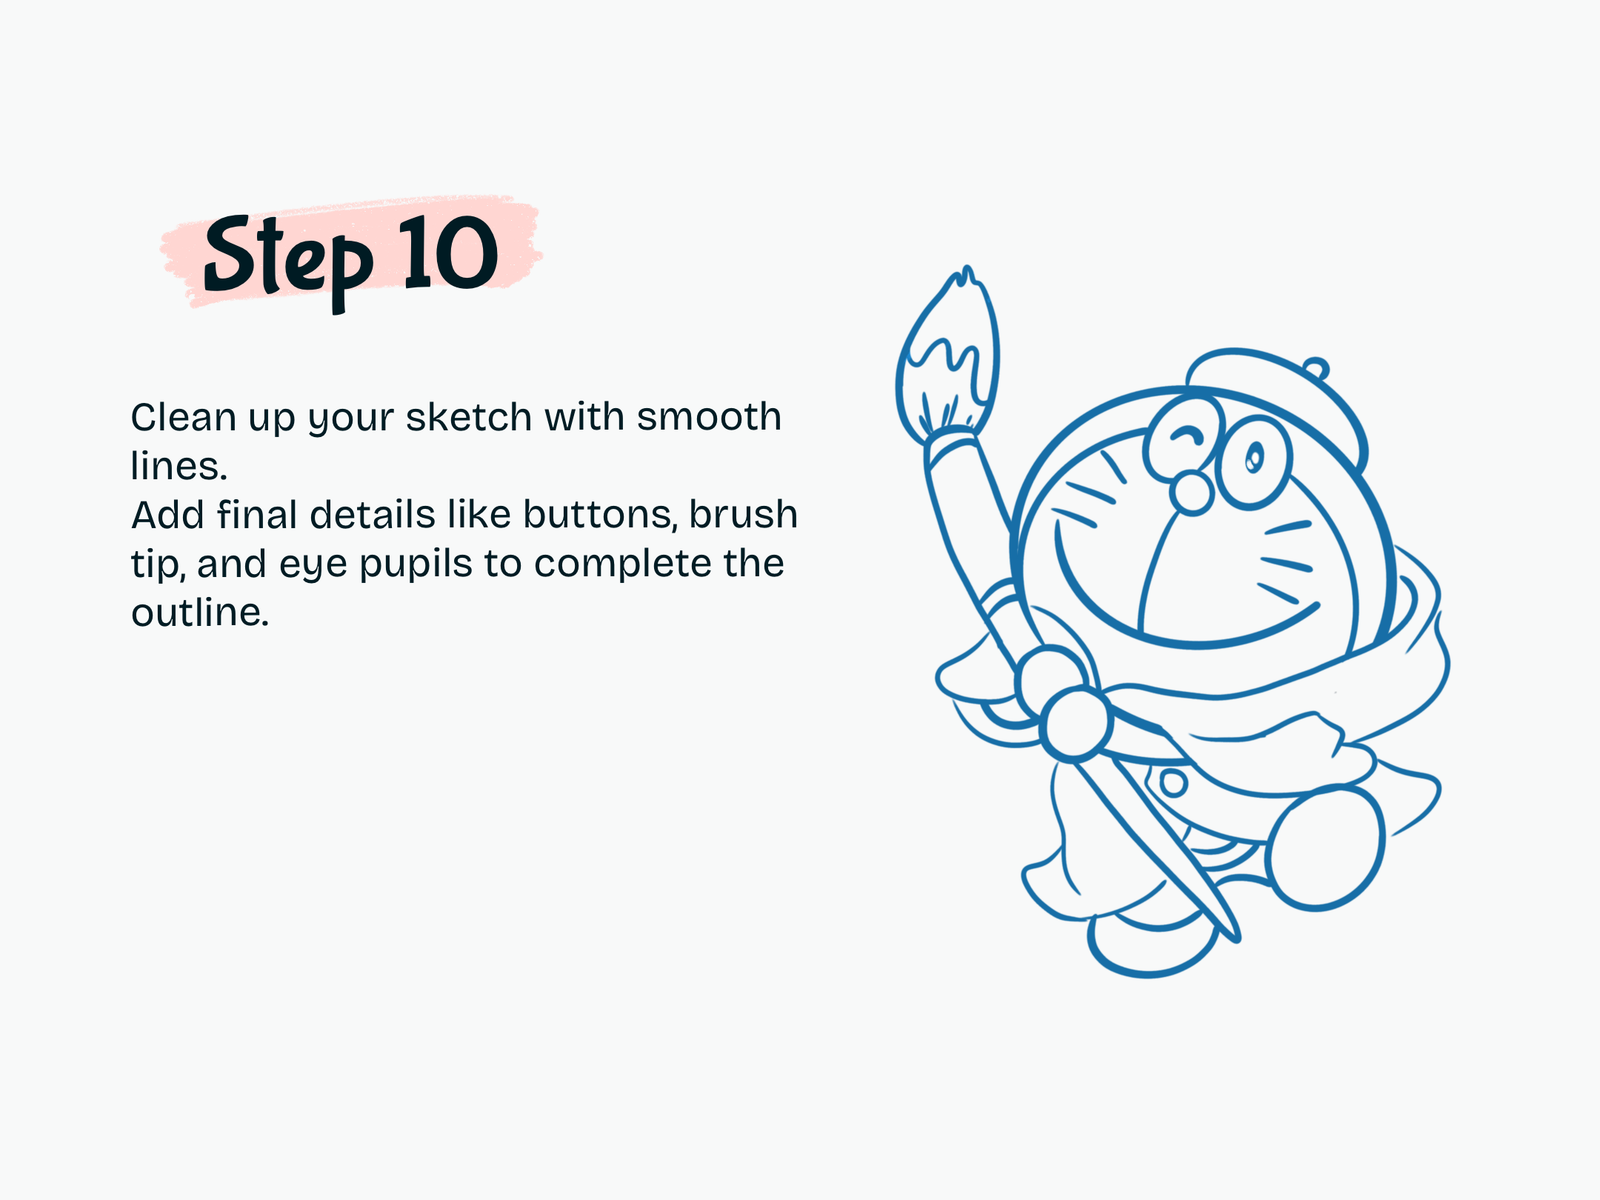
Step 10

Clean Up the Final Outline

Once you’re happy with the sketch, trace over the drawing with smooth, clean lines.

Refine Doraemon’s eyes and add the pupils. Clean up the hat, face, hands, body, feet, flowing outfit, and paintbrush.

Add the smaller details, including the outfit button and details on the brush tip.

Finally, erase the original construction circles, facial guidelines, and any hidden or overlapping sketch lines.

Your Doraemon Movie 44 line art is now ready for color!

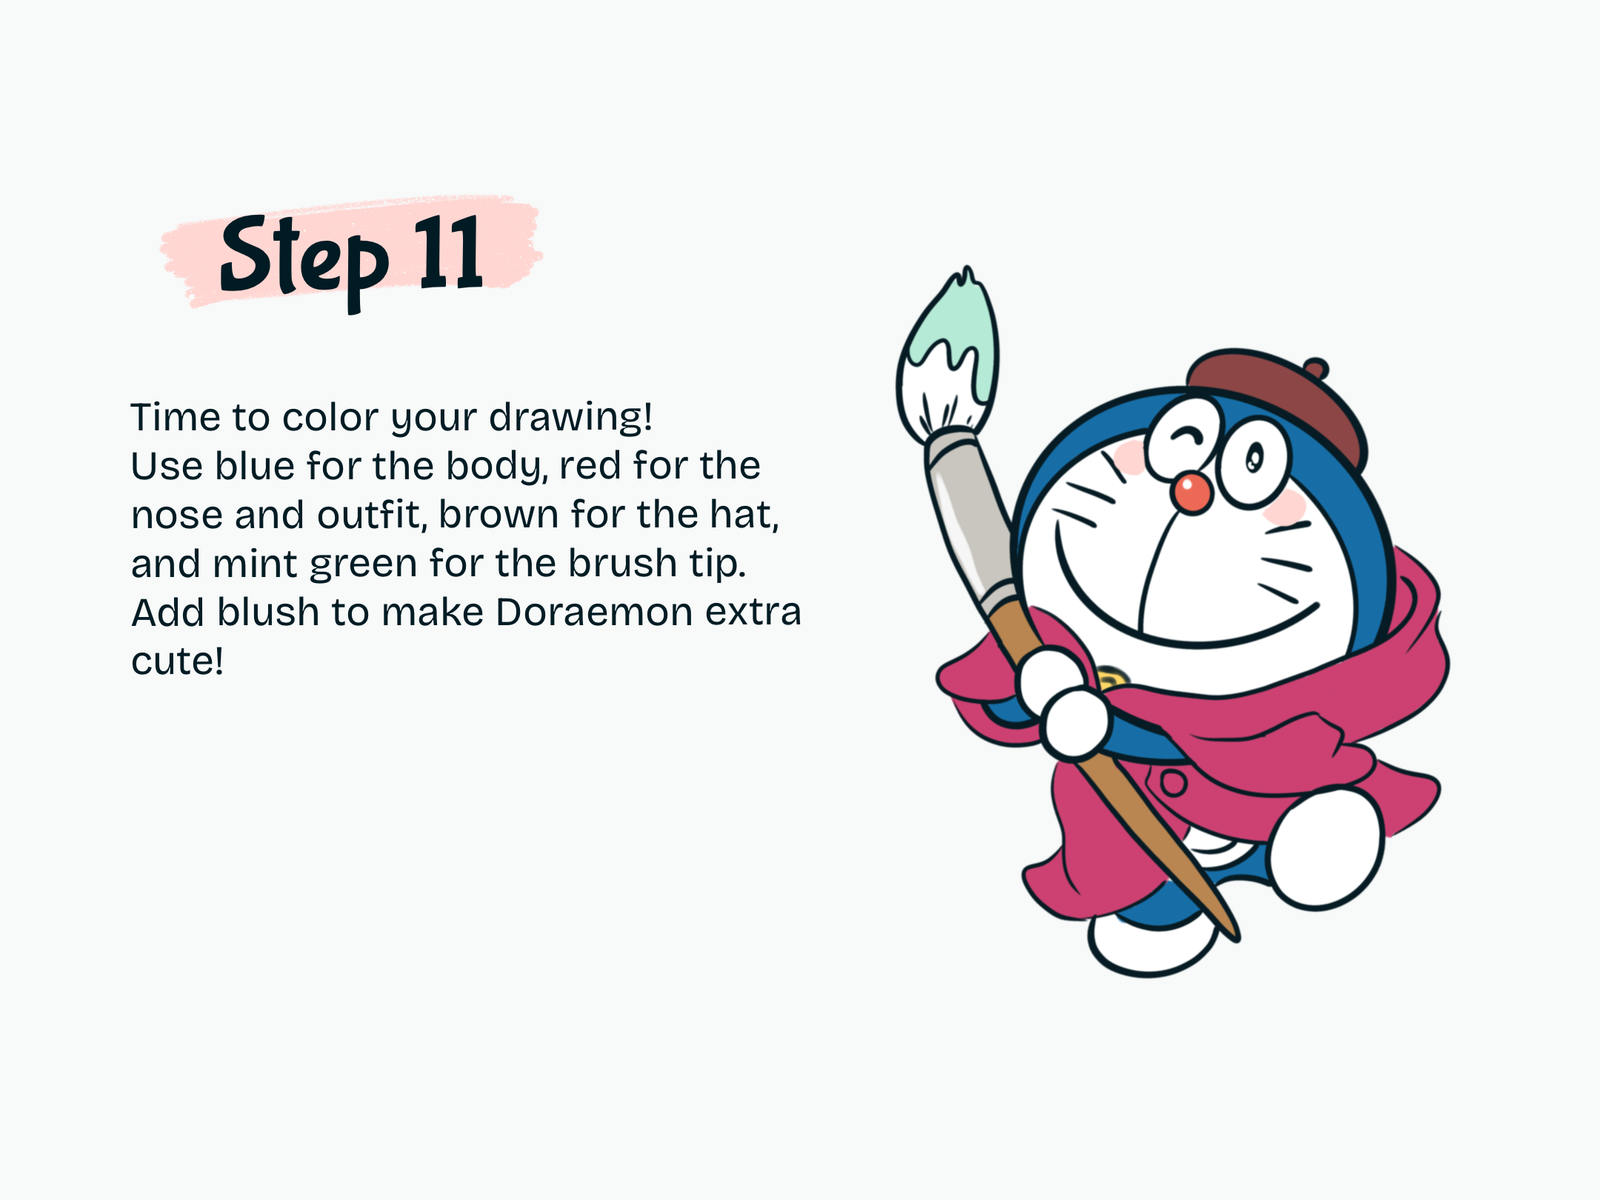
Step 11

Color Your Kawaii Doraemon

It’s time to bring Doraemon to life!

Color Doraemon’s outer head and body blue while keeping his face, hands, and feet white. Make the nose red and add soft pink blush to his cheeks.

Use a deep reddish-brown tone for the artist hat and a bright pink-red color for the flowing outfit.

For the paintbrush, use warm brown for the handle, a light neutral shade for the upper handle area, and soft mint green for the brush tip.

And that’s it—your kawaii Doraemon Movie 44 drawing is complete!

Drawing Resources

A few tools and books that can make drawing easier and more fun.

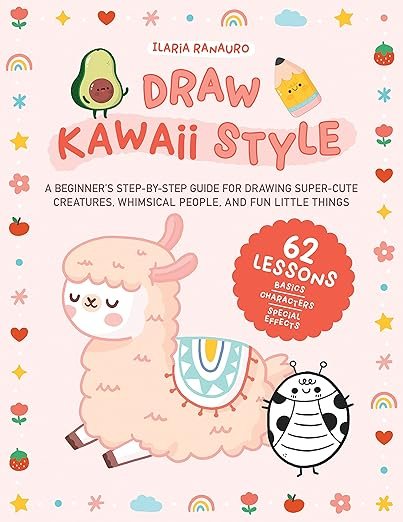
Kawaii Drawing Book

Kawaii Drawing Book

A simple guide for cute characters and beginner-friendly sketching.

View on Amazon
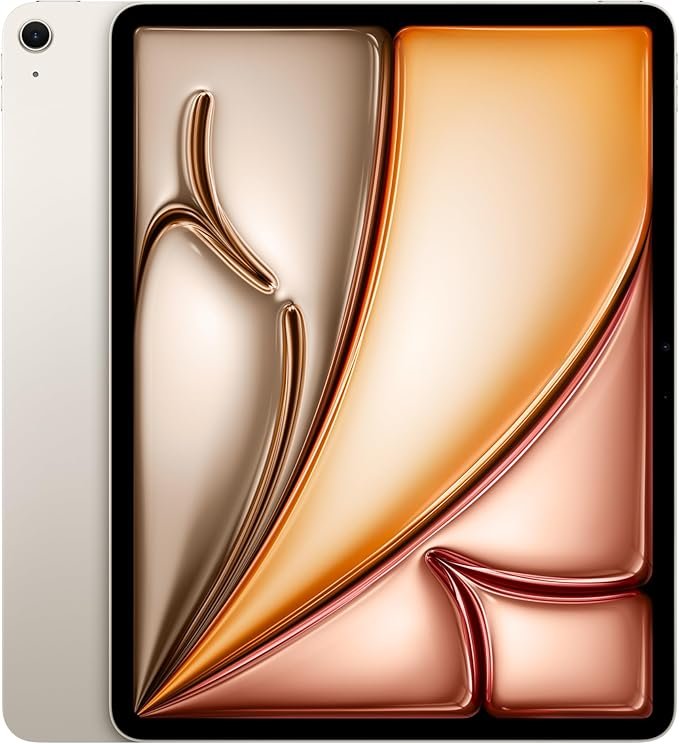
iPad for Digital Drawing

iPad for Digital Drawing

A great digital drawing tool for sketching cute tutorials anywhere.

View on Amazon
Apple Pencil

Apple Pencil

Perfect for line art, note-taking, and digital doodling.

View on Amazon
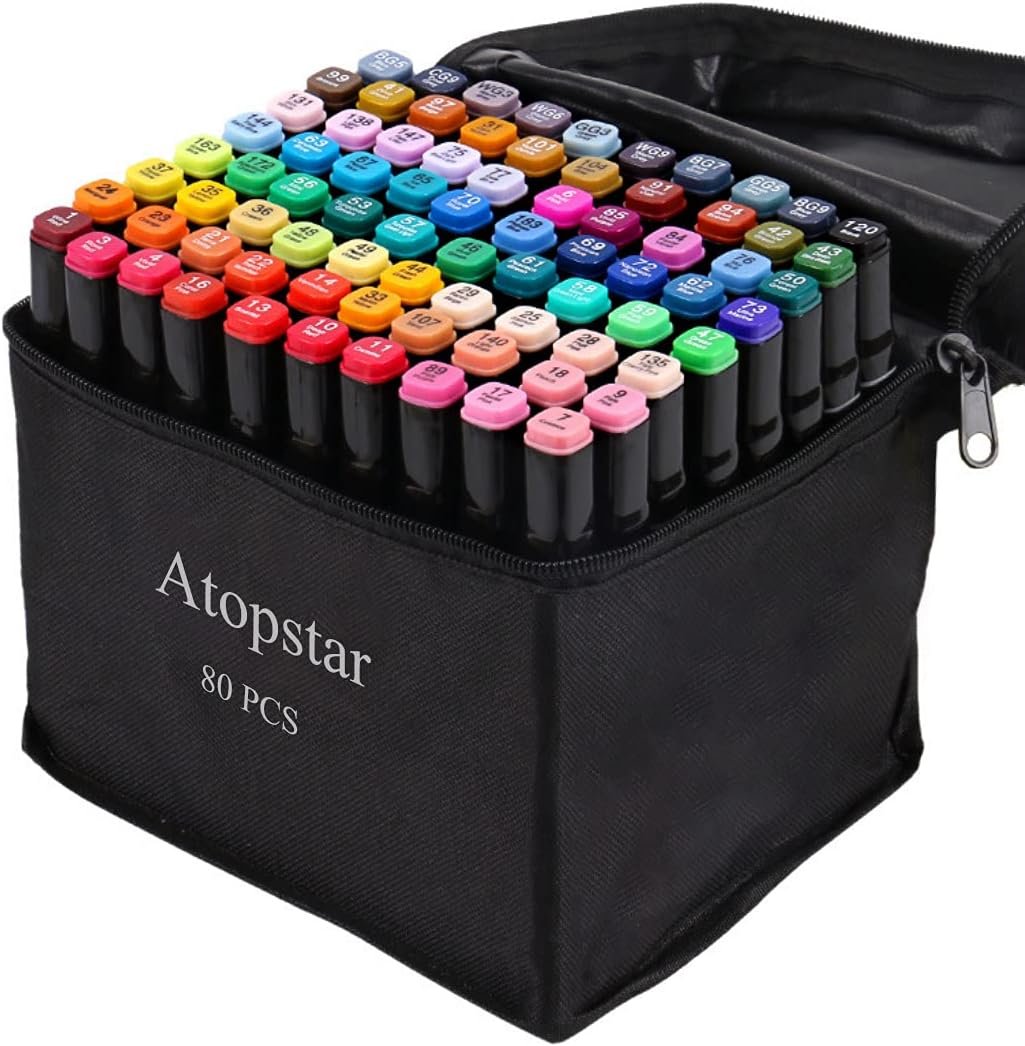
Colors Alcohol Markers

Colors Alcohol Markers

Smooth, vibrant markers for coloring cute drawings.

View on Amazon
Sketchbook

Sketchbook

A nice everyday sketchbook for practice and doodles.

View on Amazon
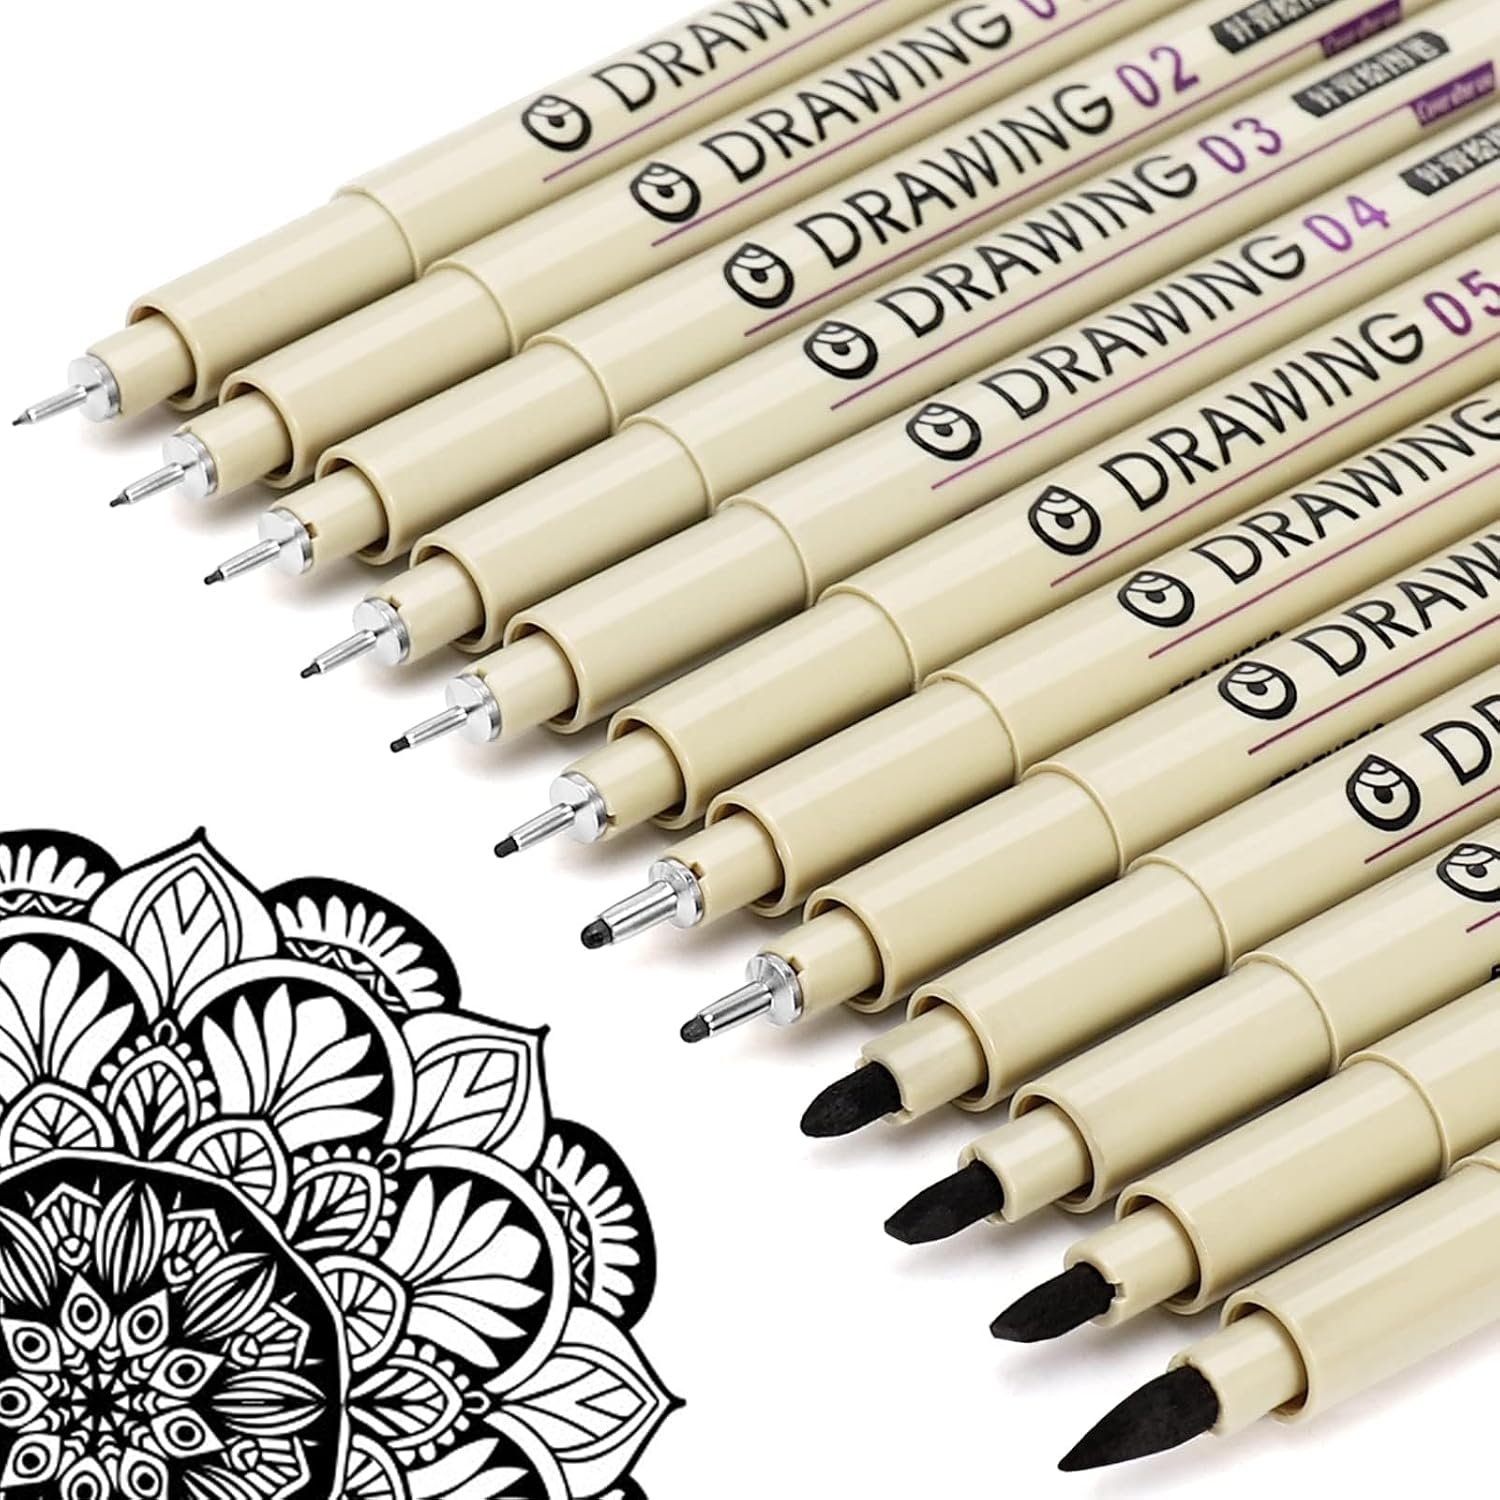
Fine Line Pens

Fine Line Pens

Helpful for clean outlines and cute little details.

View on Amazon

Some links may be affiliate links, which means Cute Thing Corner may earn a small commission at no extra cost to you.

Leave a Comment