Cute Thing Corner
Buy me a coffee

Doraemon

How to Draw Kawaii Micca (Doraemon Movie 43) | Easy Step-by-Step Drawing Tutorial

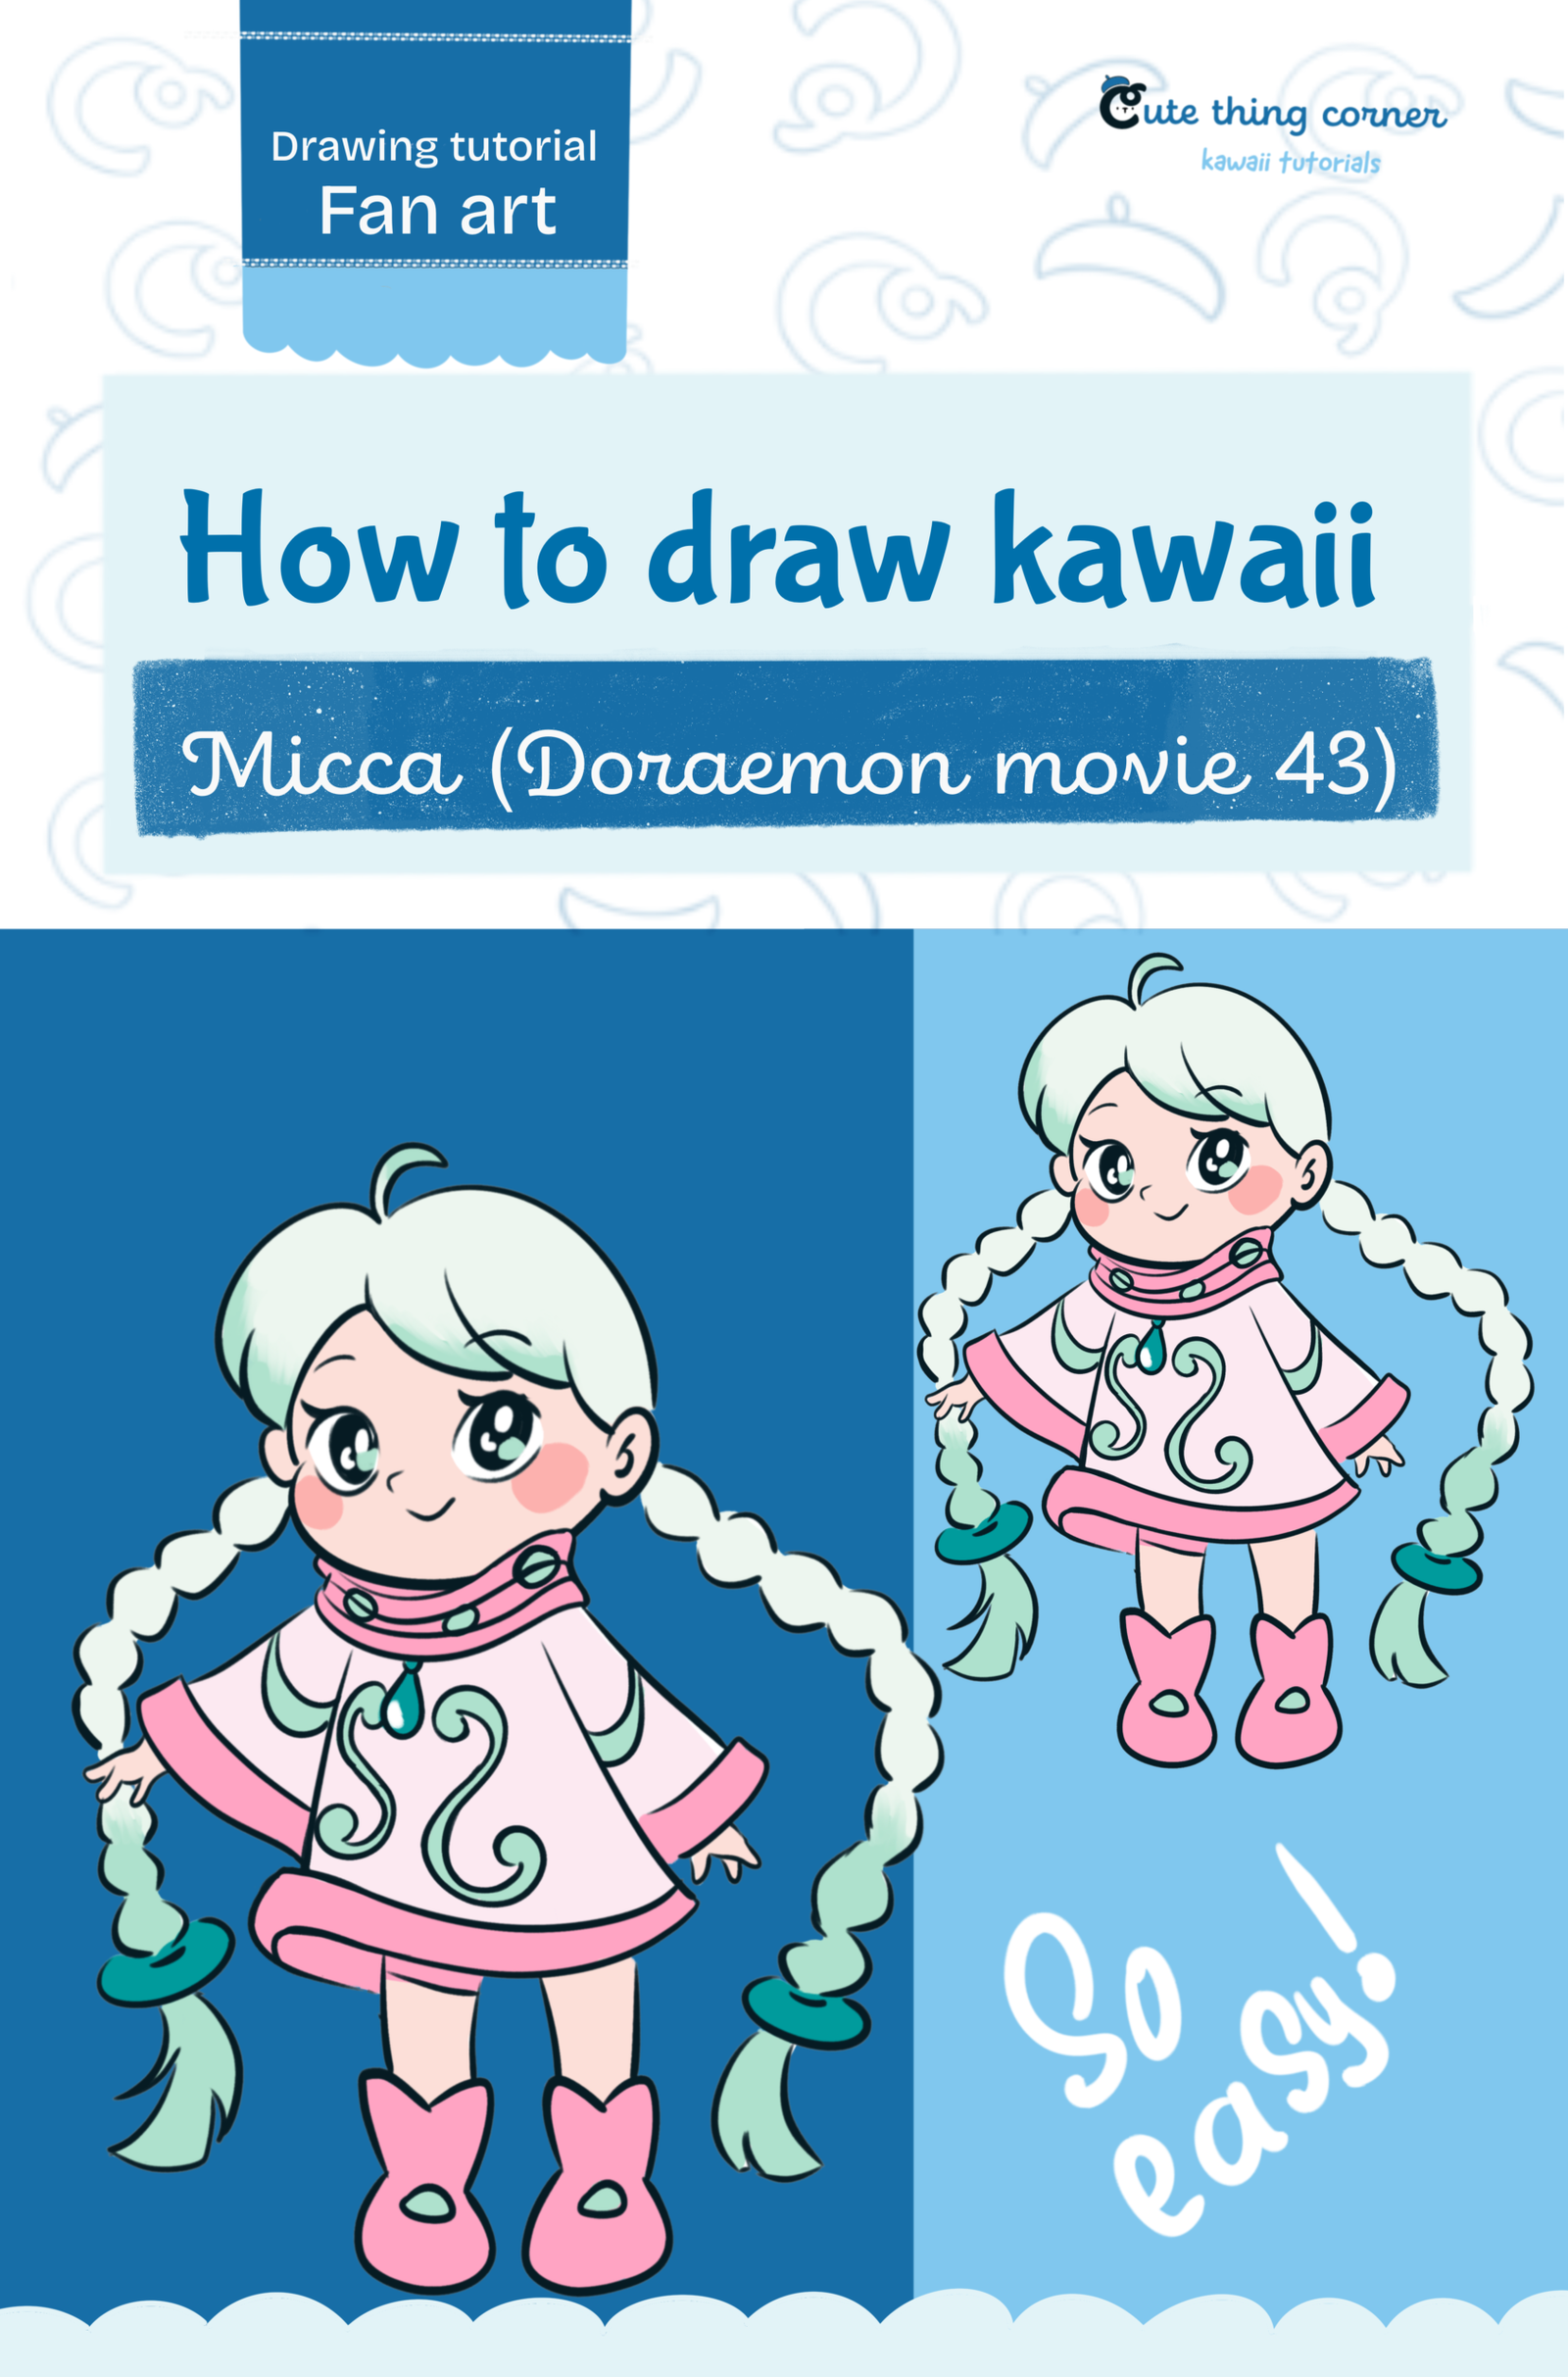
Want to learn how to draw kawaii Micca from Doraemon Movie 43? In this easy step-by-step drawing tutorial, we’ll draw Micca in a cute chibi style, from her simple head and body shapes to her long…

  • Quick
  • 15 minutes
  • 9 steps
How to Draw Kawaii Micca (Doraemon Movie 43) | Easy Step-by-Step Drawing Tutorial

Before You Start

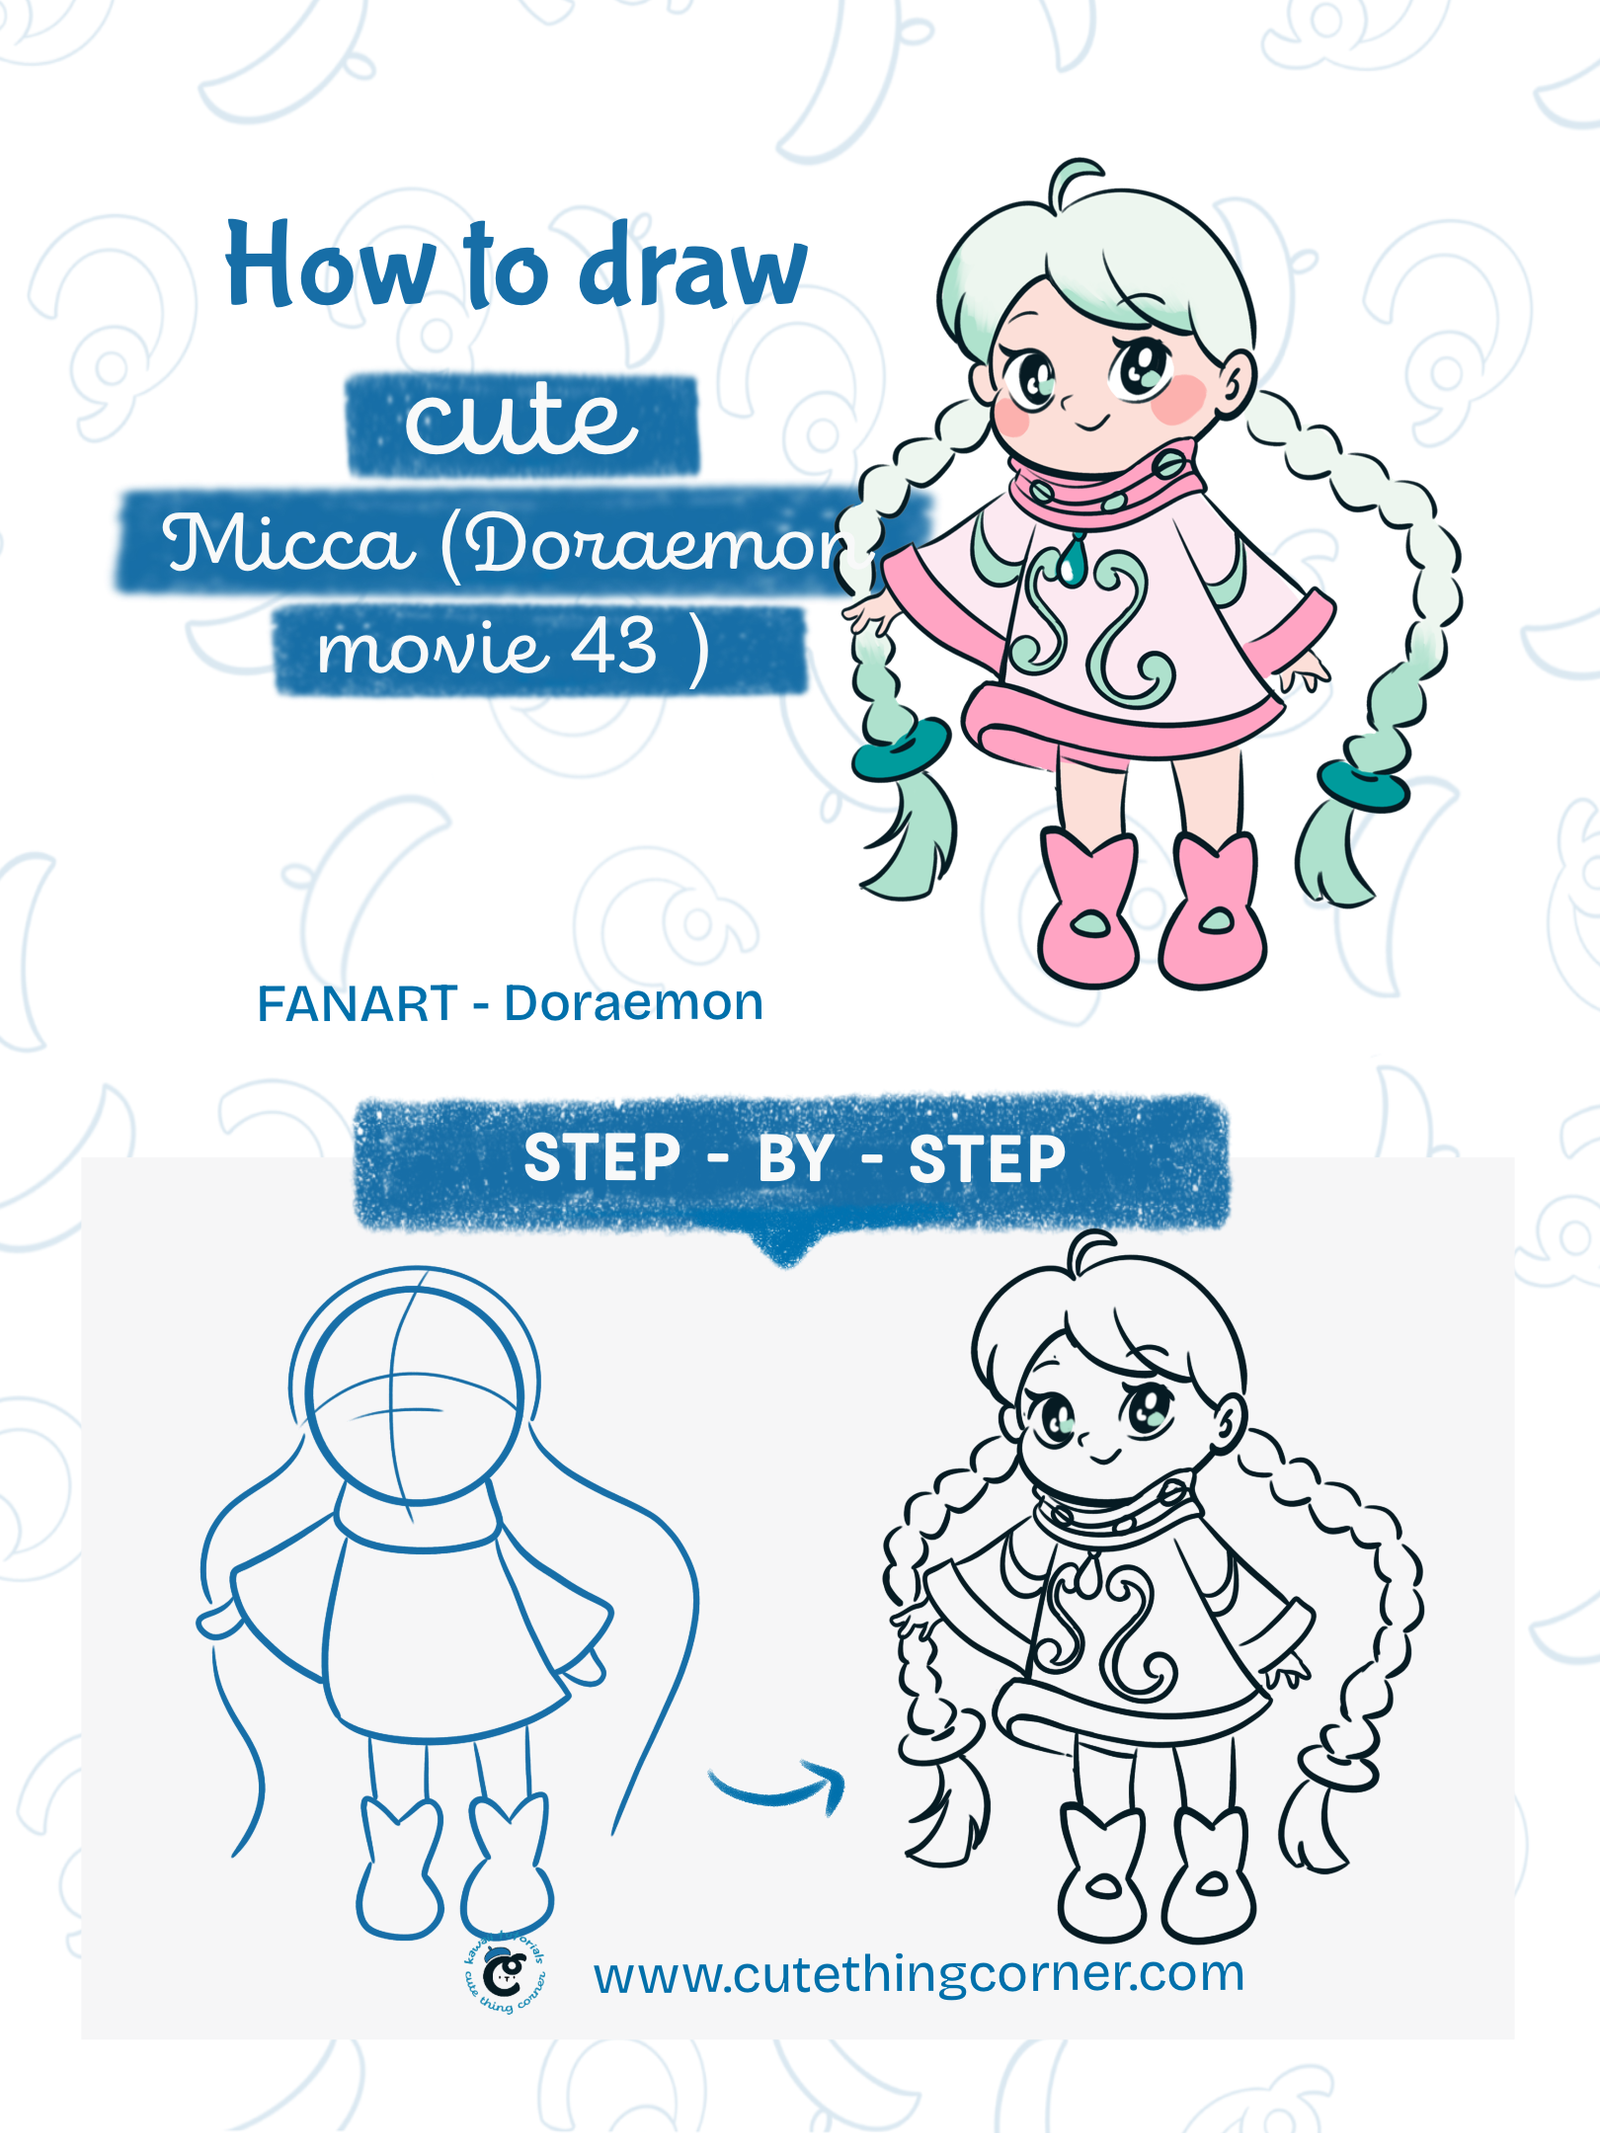
Want to learn how to draw kawaii Micca from Doraemon Movie 43? In this easy step-by-step drawing tutorial, we’ll draw Micca in a cute chibi style, from her simple head and body shapes to her long braids, cozy outfit, boots, and pretty decorative details.

Although Micca has lots of lovely details, we’ll build her drawing gradually using simple shapes and soft lines. You can follow this tutorial with pencil and paper or draw digitally on your iPad or tablet.

Start with light sketch lines so they’re easy to erase when you create the final outline. Grab your drawing tools, and let’s learn how to draw Micca from Doraemon Movie 43 step by step!
Step 1

Sketch Micca’s Head and Body

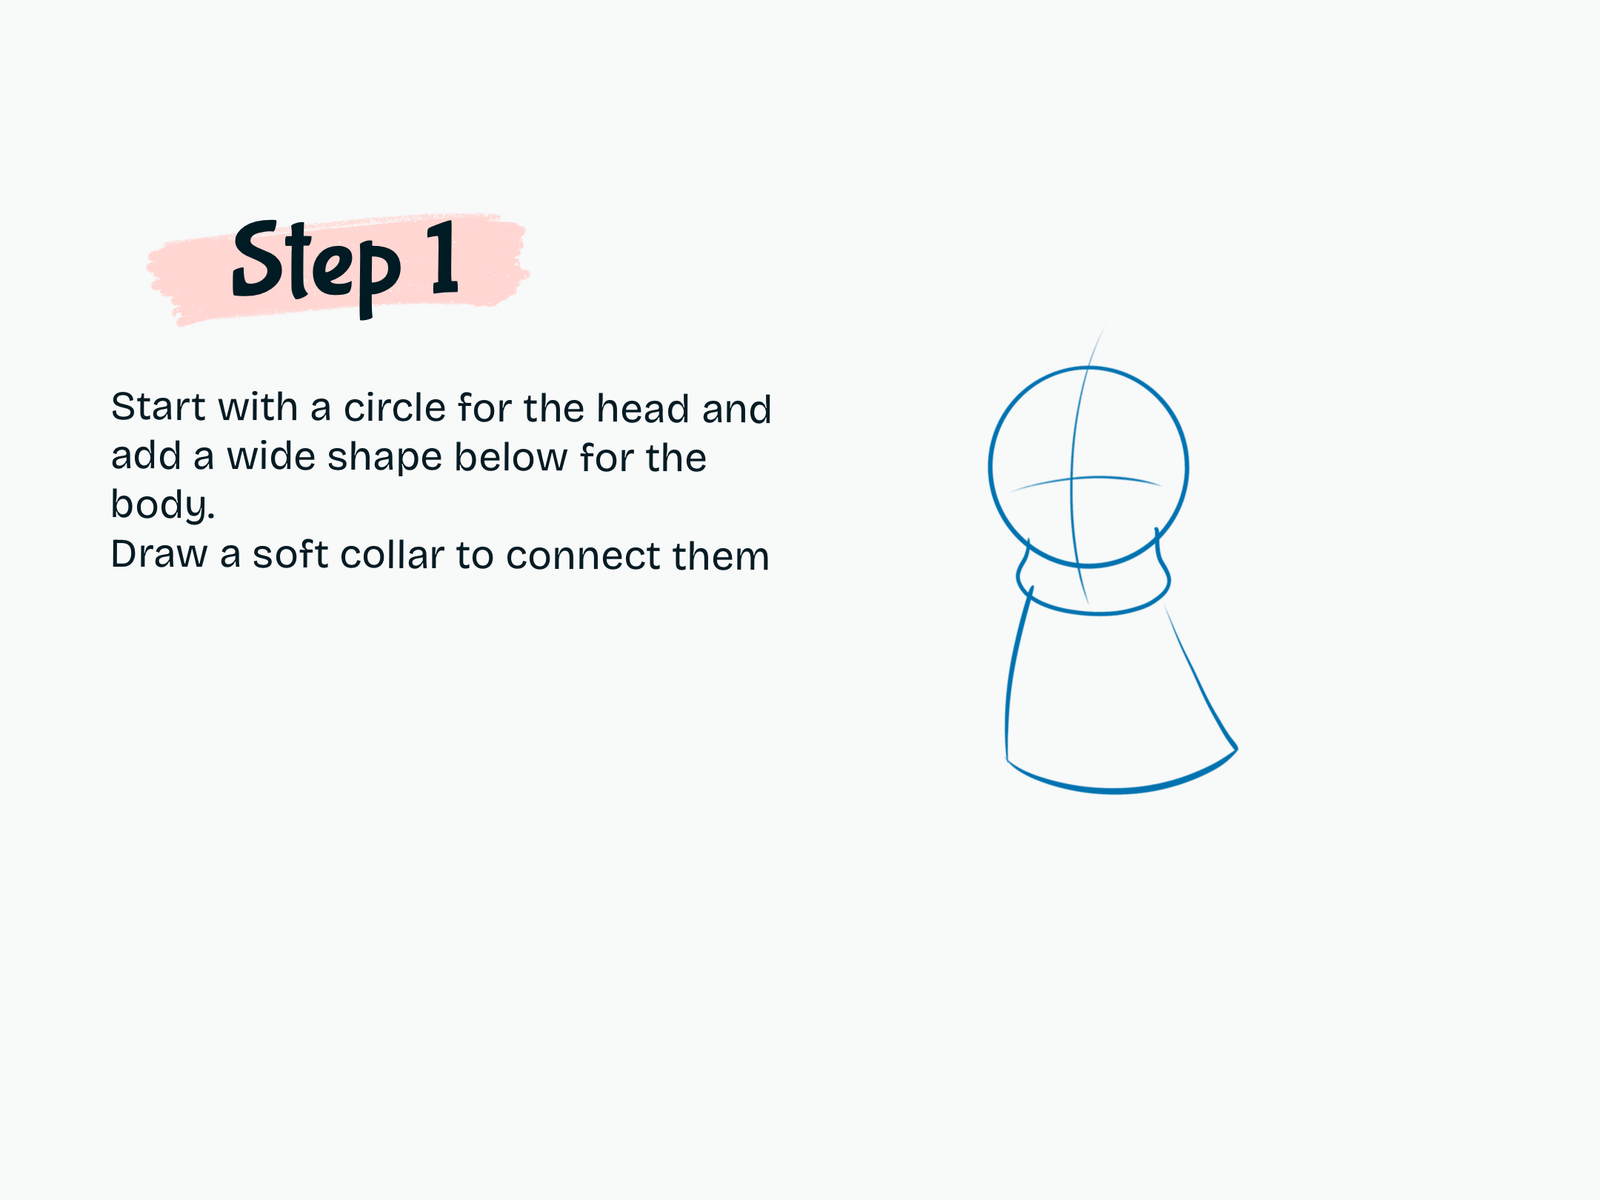
Start with a large circle for Micca’s head.

Add light vertical and horizontal guidelines across the circle. These will help you position her facial features later.

Below the head, draw a soft rounded collar. Then sketch a wide, slightly flared shape underneath for her body and coat.

Keep these first lines light because they are only guides for building the character.

Step 2

Draw the Sleeves and Hands

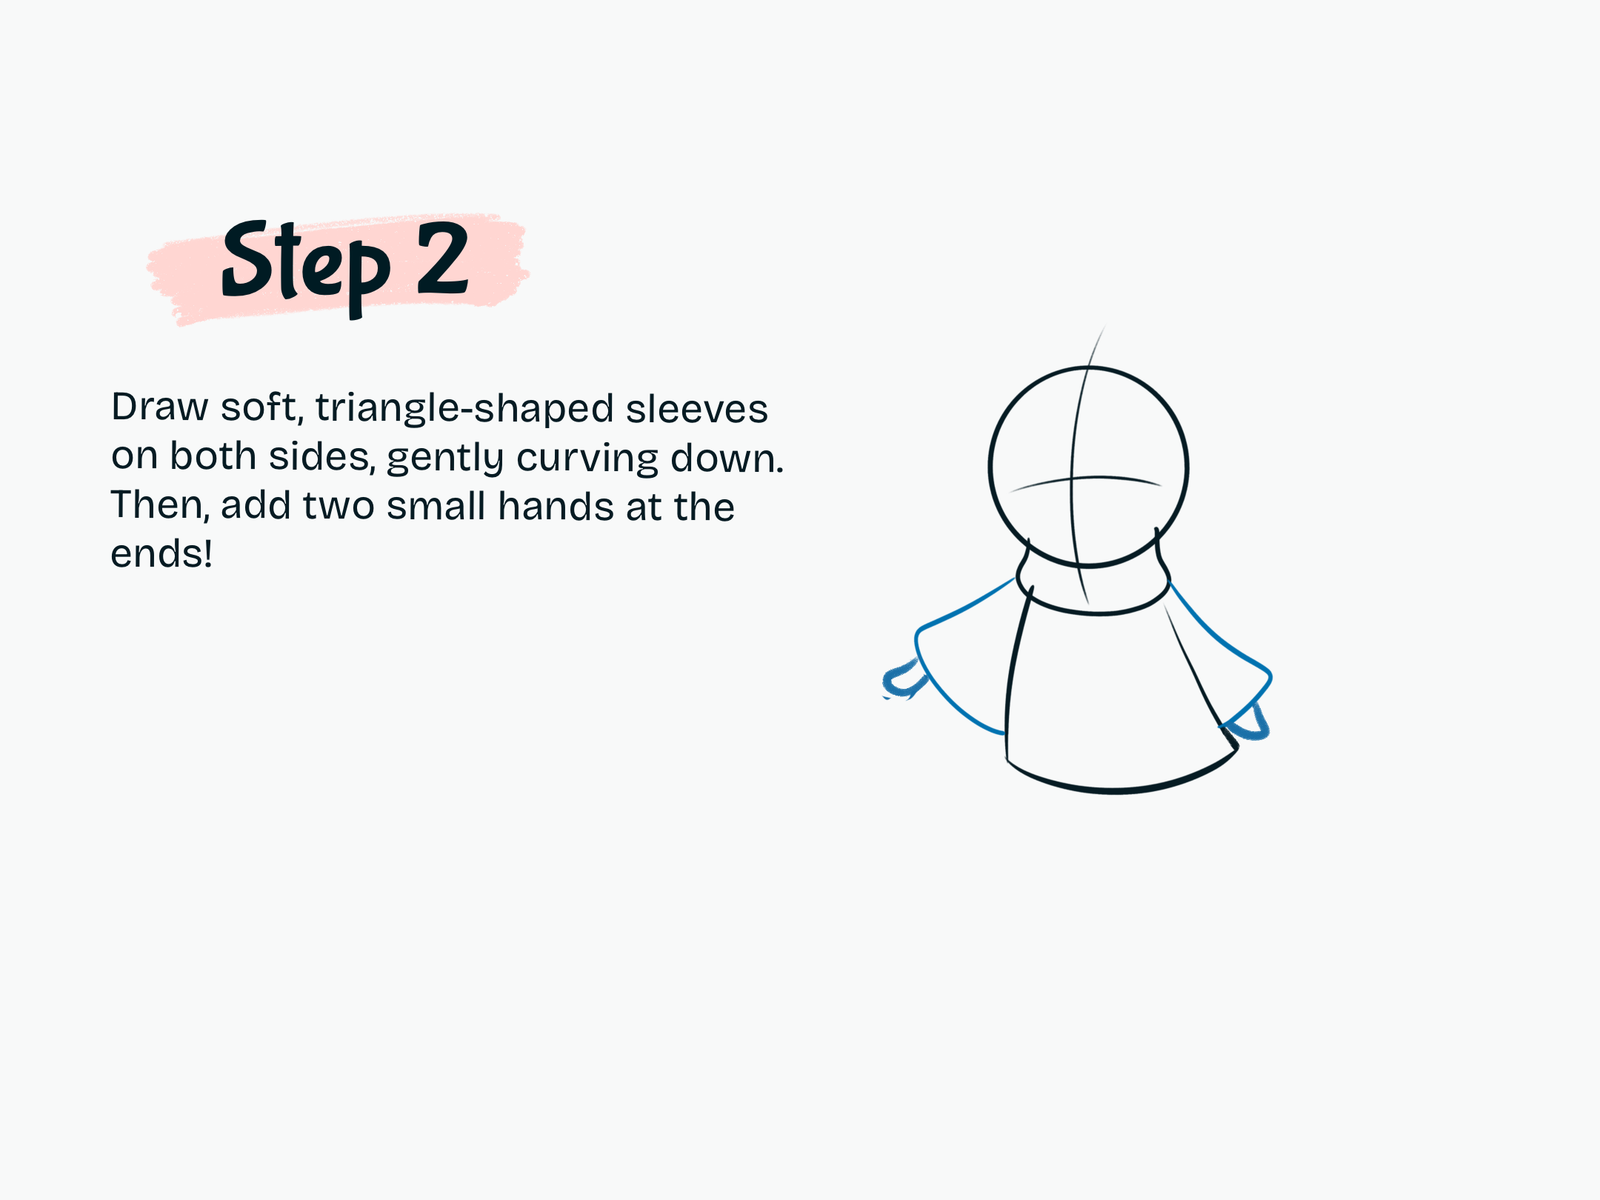
Next, add Micca’s sleeves on both sides of her body.

Draw each sleeve as a wide, soft triangle that gently curves downward from the shoulders.

At the end of each sleeve, add a small simple hand. Keep the shapes rounded and relaxed to match the cute chibi proportions.

Step 3

Draw the Legs and Boots

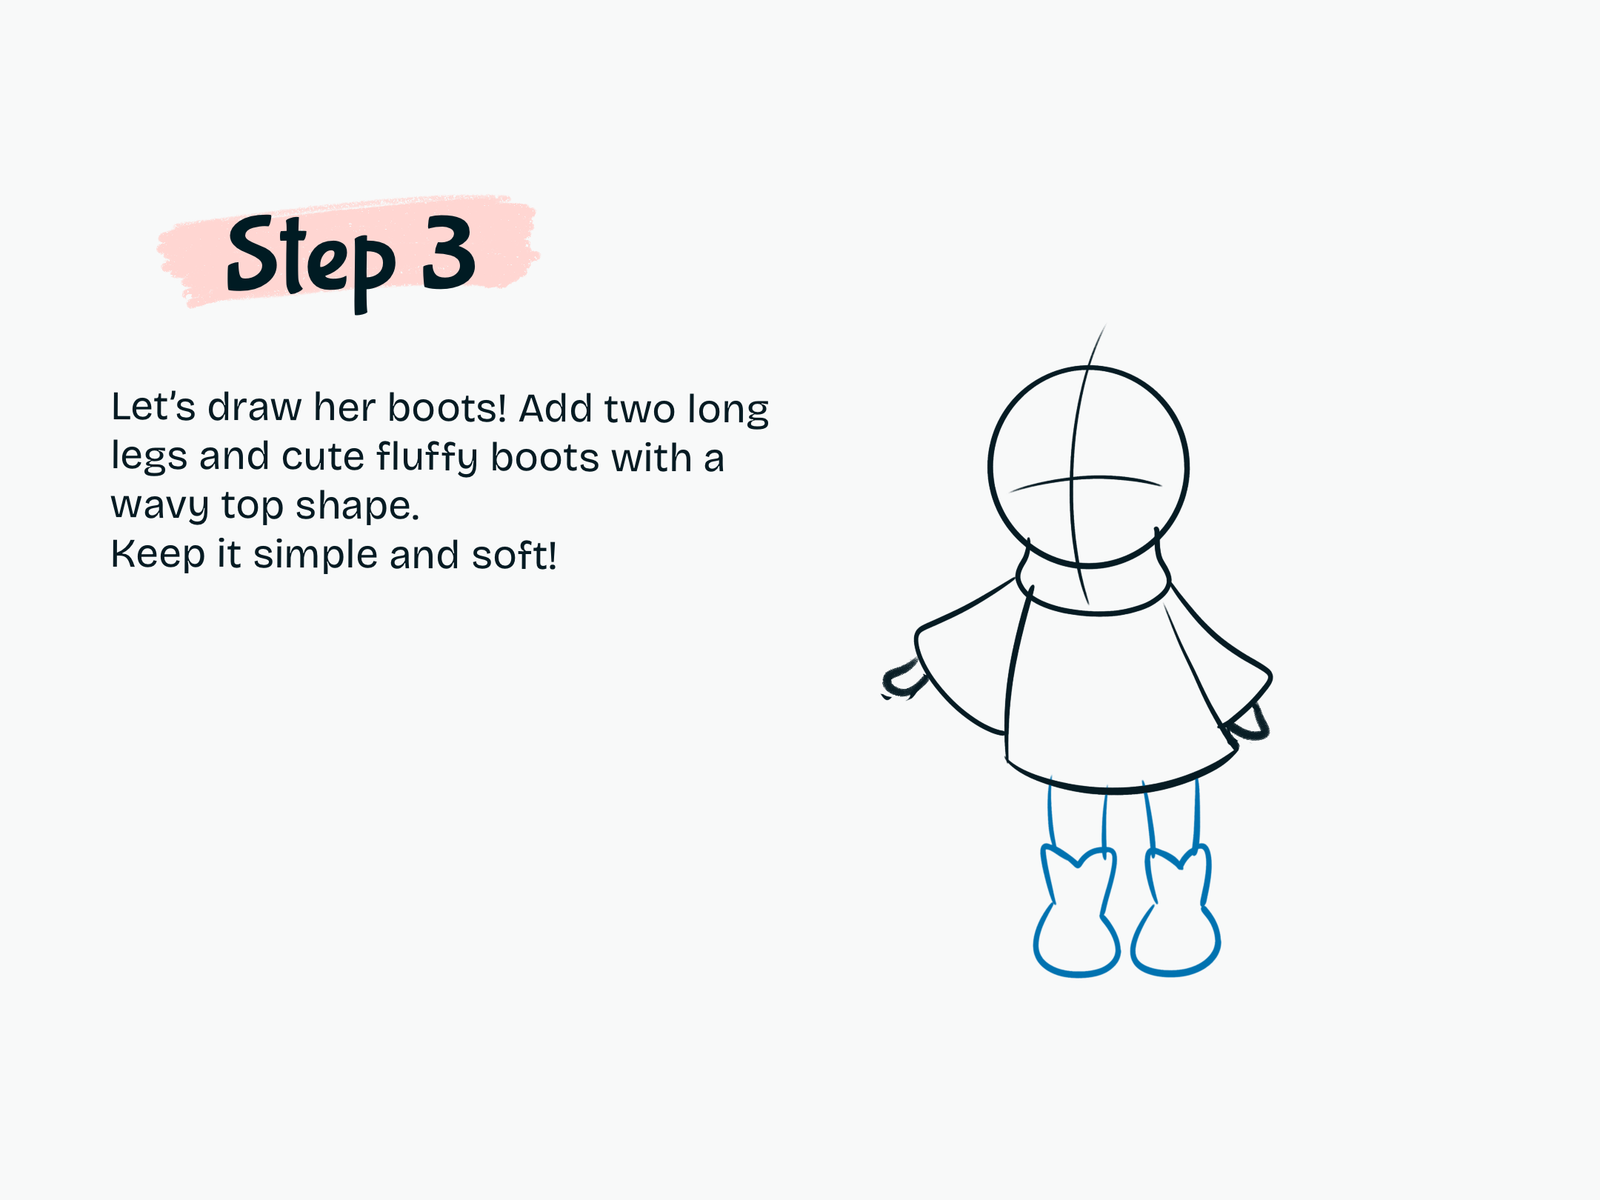
Under the coat, draw two slim legs extending straight downward.

Next, add Micca’s chunky boots. Give each boot a wavy, pointed shape around the top and a large rounded section at the bottom.

Keep both boots simple and slightly oversized to make the character look even cuter.

Step 4

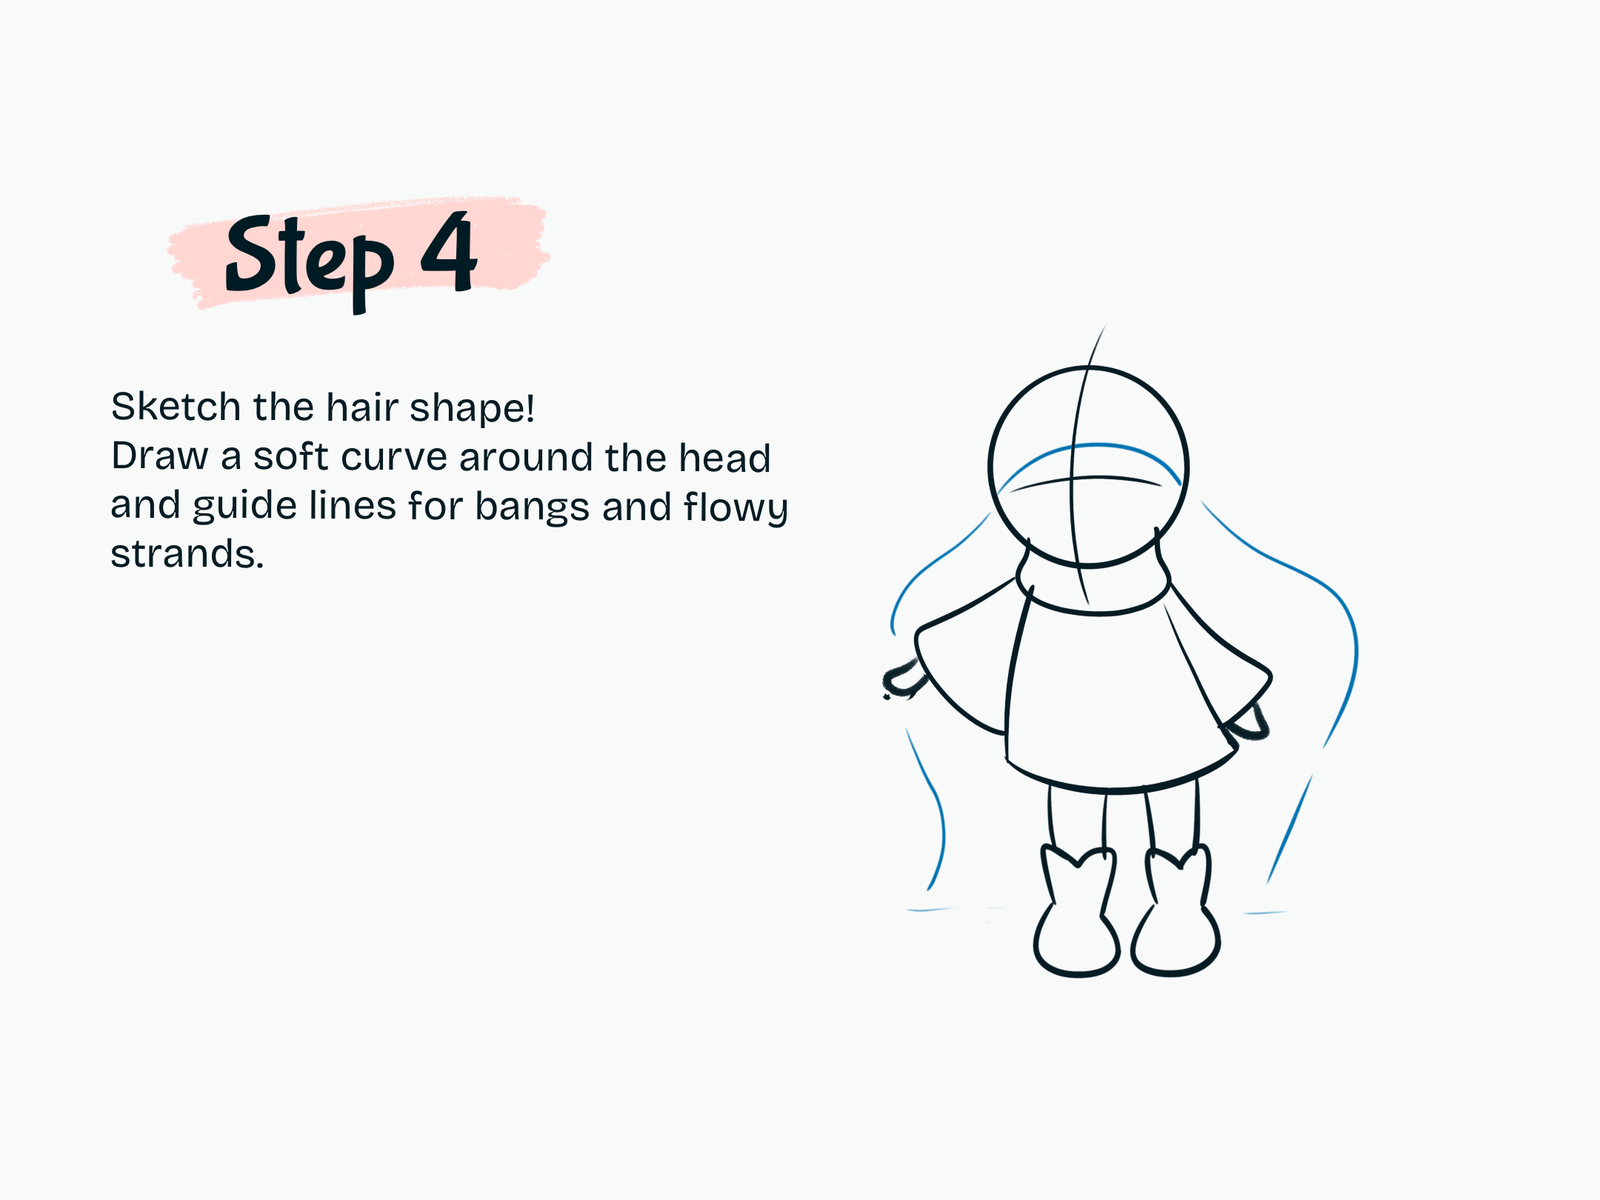
Sketch Micca’s Hair

Now let’s plan Micca’s beautiful hairstyle.

Draw a curved guideline across the upper part of the face to help position her bangs.

From both sides of the head, sketch long flowing lines that extend almost to her boots. These lines will guide the placement and length of her two long braids.

Don’t worry about individual strands yet—we’ll add those details in the next step.

Step 5

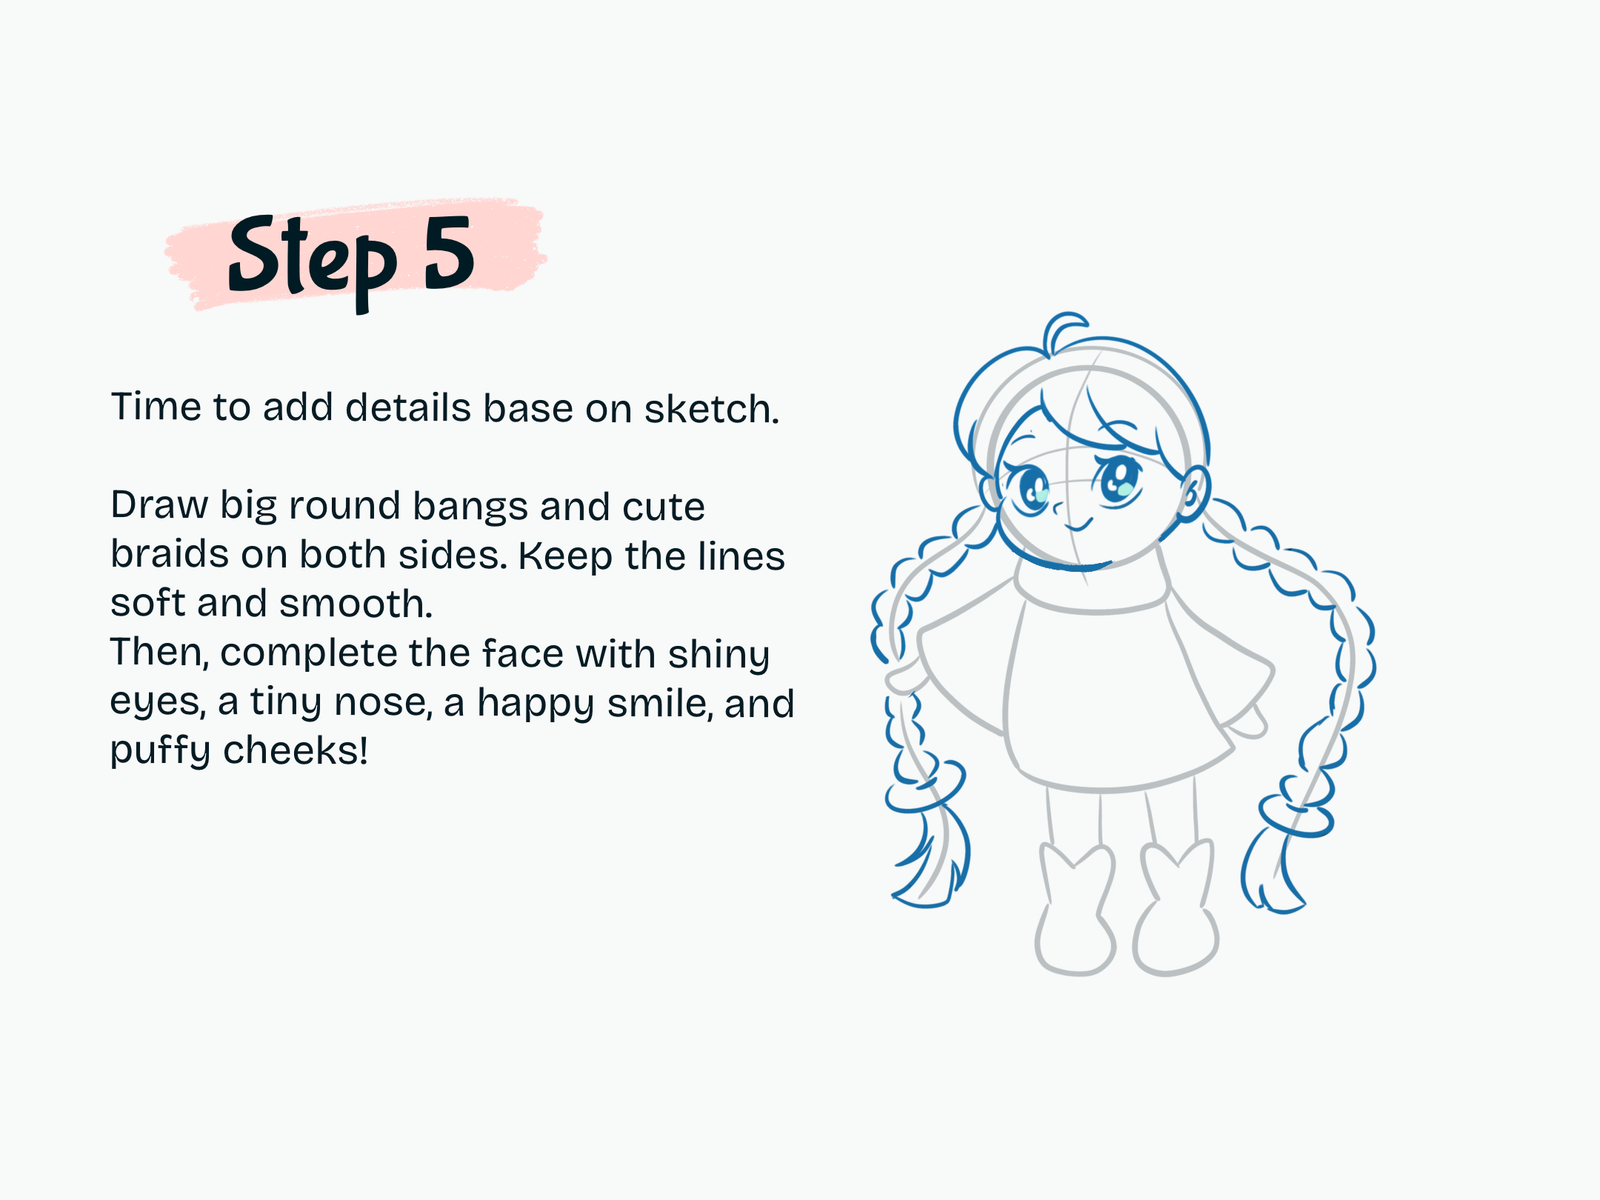
Draw Micca’s Face, Bangs, and Braids

Now use your sketch as a guide to add Micca’s main character details.

Draw her large rounded bangs sweeping across the forehead and add the small hair tuft at the top.

Next, turn the long hair guides into two thick braids. Build each braid with a series of soft overlapping curves, then add the tied sections and loose hair at the ends.

For her face, draw two large sparkling eyes, a tiny nose, and a small happy smile. Add the ears and soft cheek shapes to complete her cute expression.

Step 6

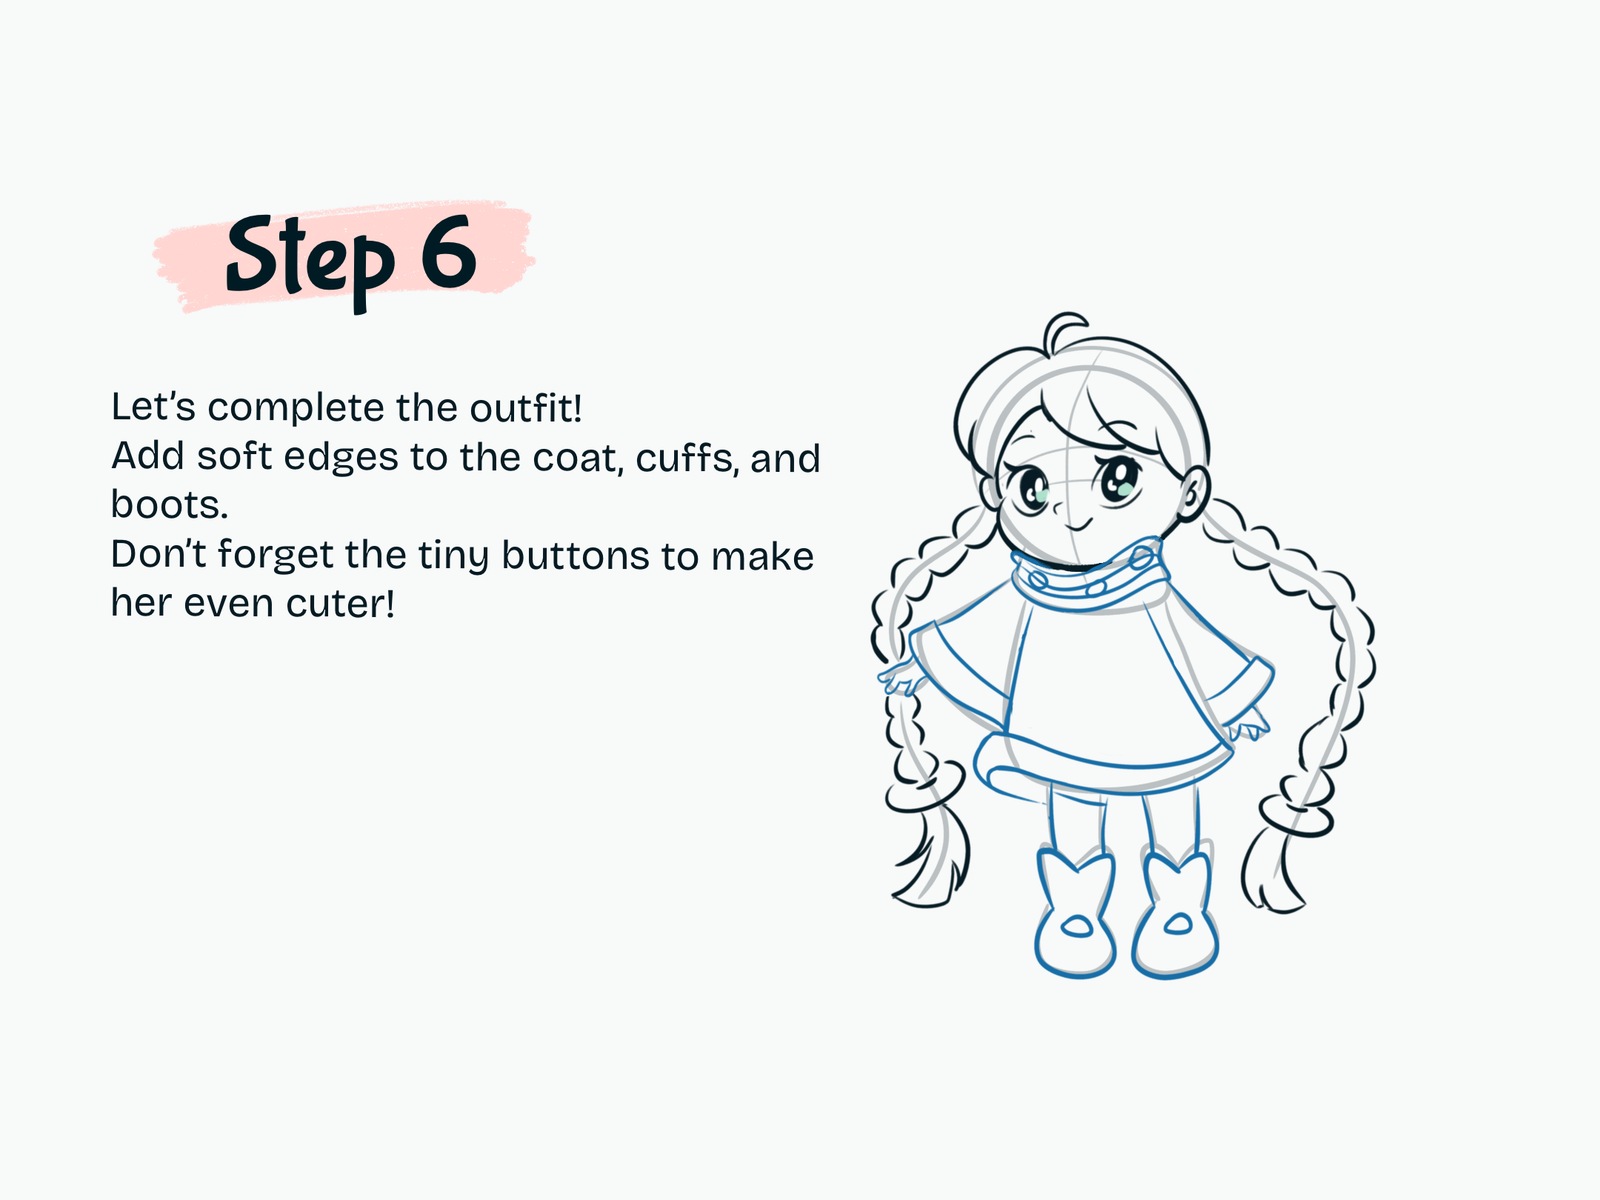
Add the Outfit Details

Let’s complete Micca’s cozy outfit.

Refine the large collar around her neck and add the small round decorative details across it.

Next, add wide cuffs to both sleeves and a thick curved trim along the bottom of the coat.

Finish the boots with small oval details near the front. You can also refine her little fingers where they peek out from the sleeves.

Step 7

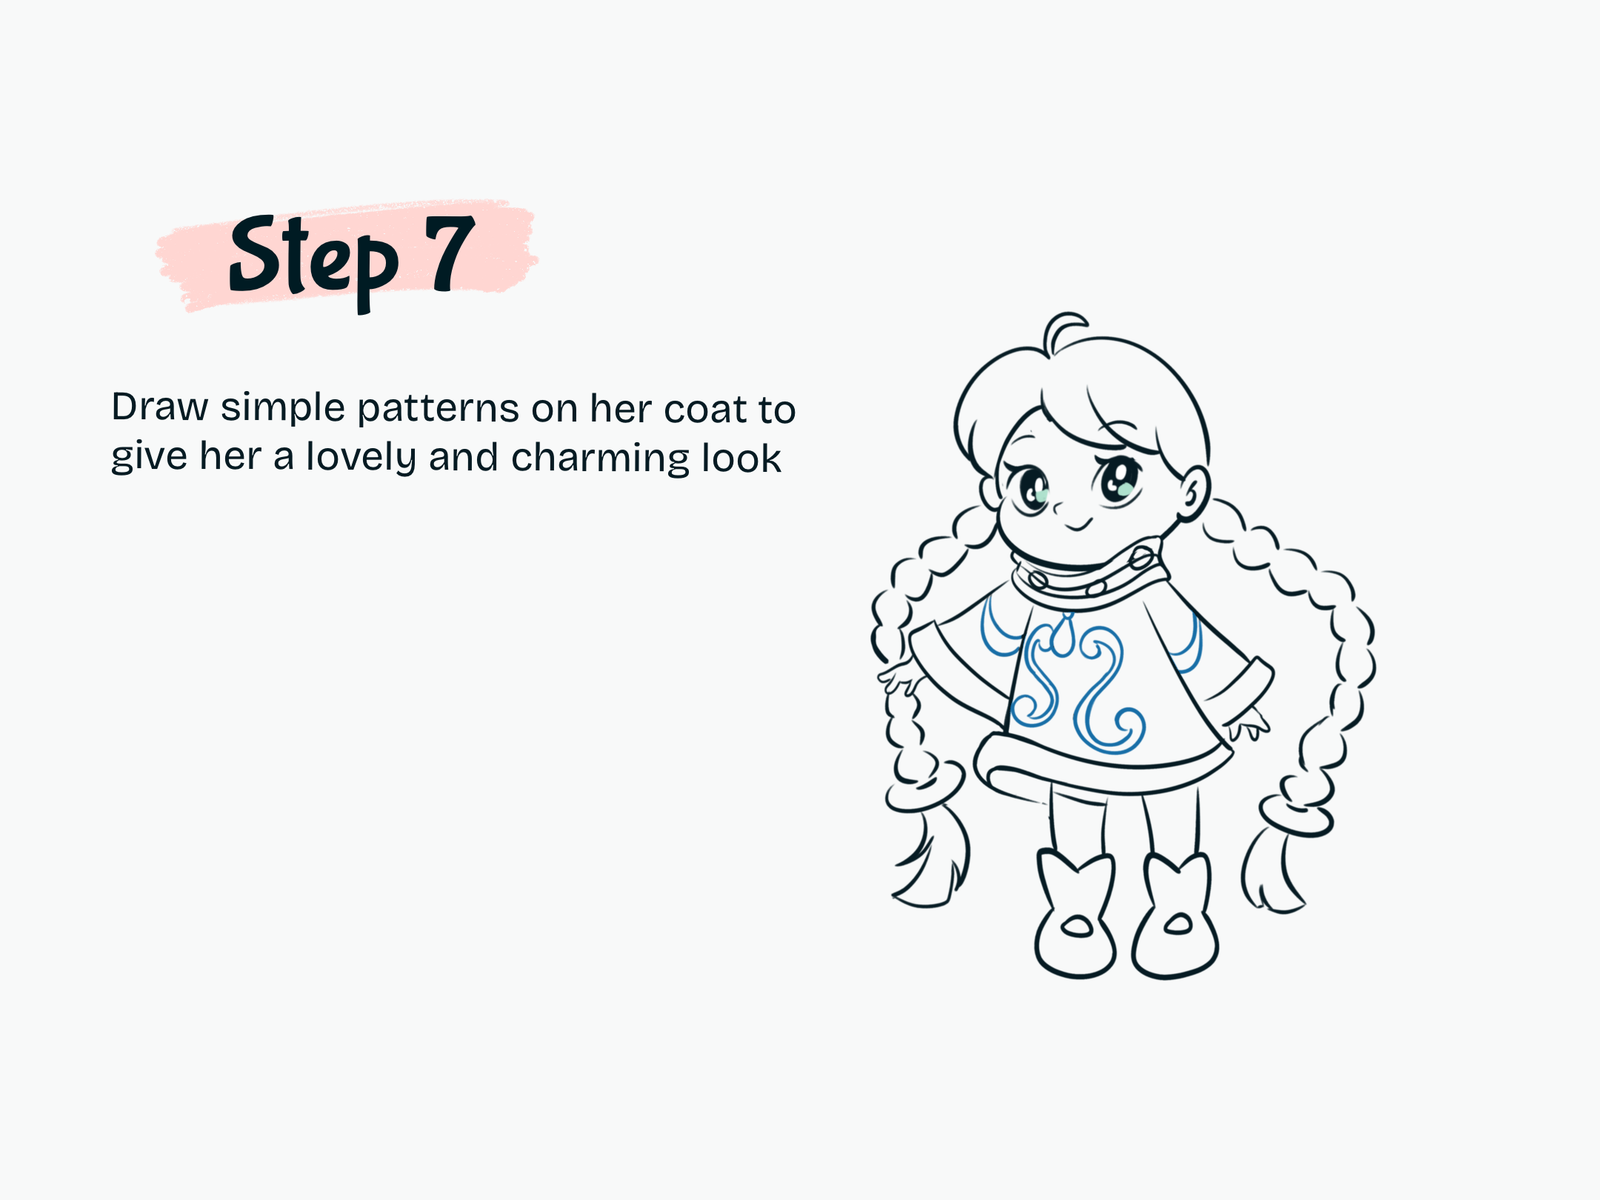
Draw the Decorative Patterns

Now add the beautiful patterns on Micca’s coat.

Start with the large symmetrical design in the center, using smooth curved and swirling lines.

Then add the smaller curved decorations near both shoulders.

Try to keep the patterns balanced on both sides, but they don’t need to be perfectly identical. Soft flowing curves work best for this design.

Step 8

Clean Up the Final Outline

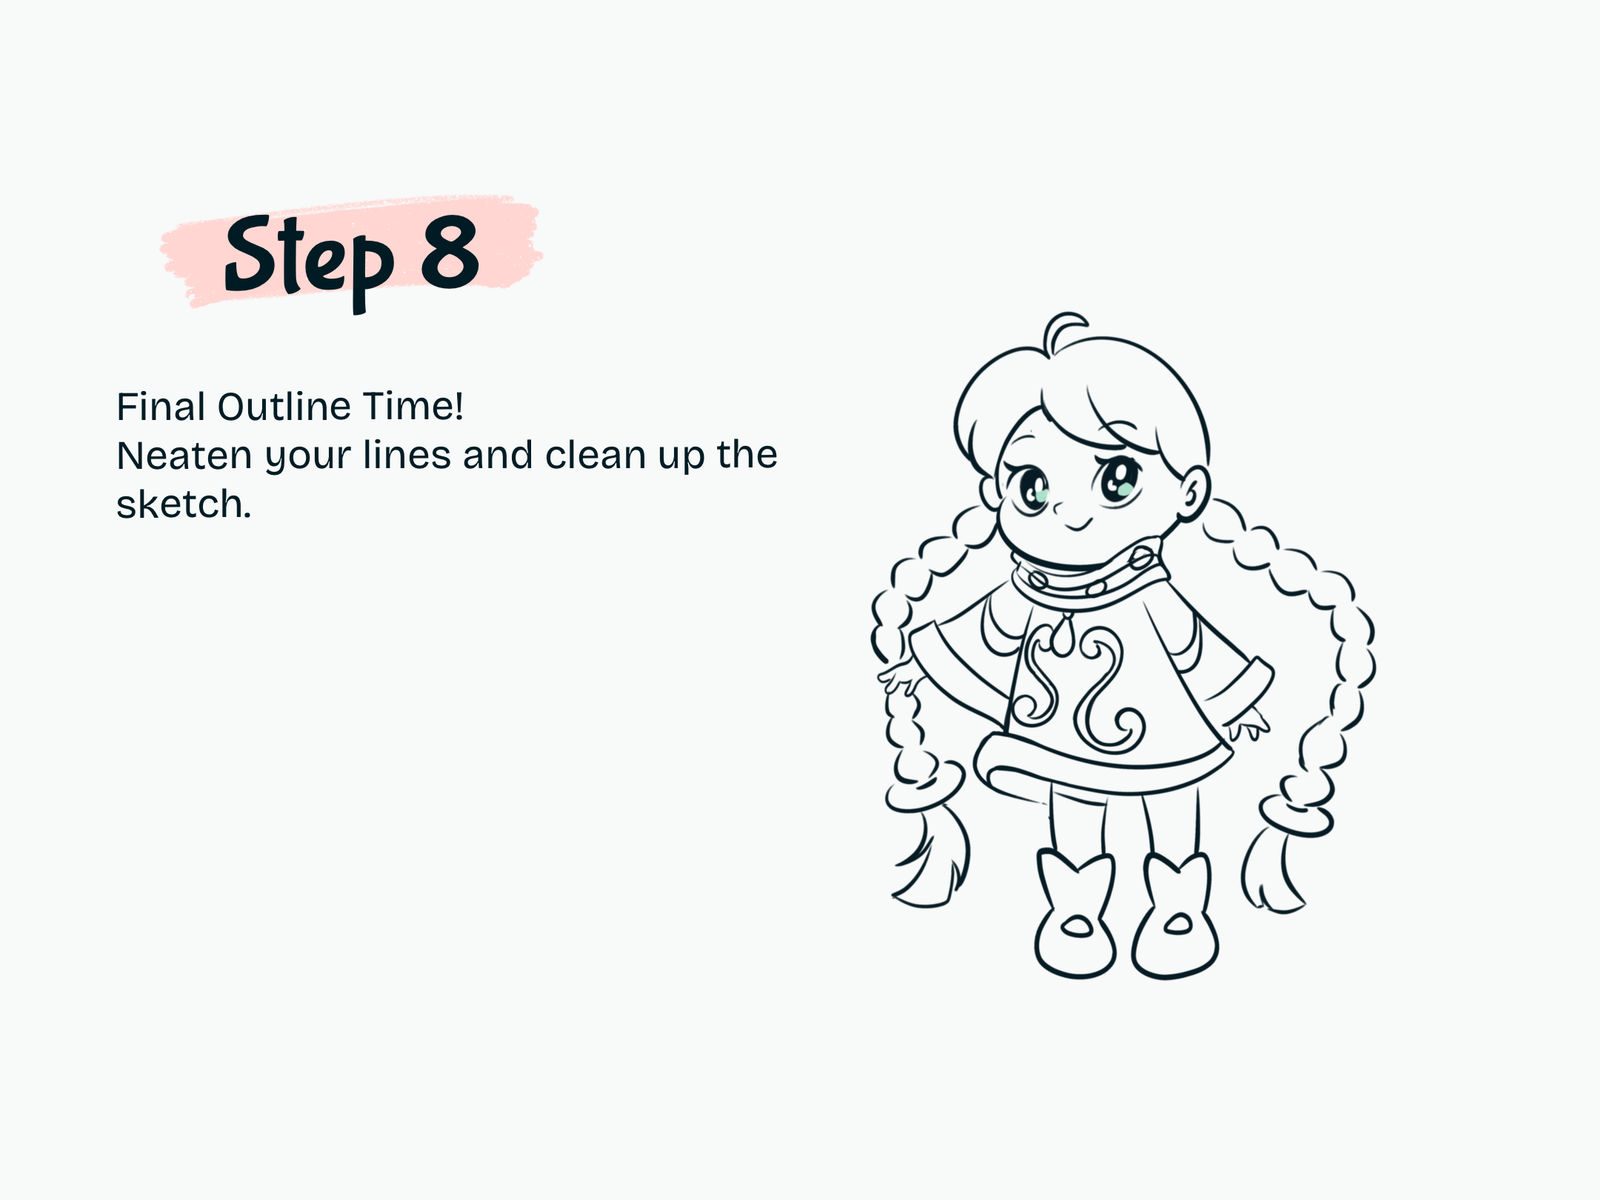
It’s final outline time!

Trace over the lines you want to keep with smooth, clean strokes. Refine Micca’s face, bangs, braids, hands, coat, decorative patterns, legs, and boots.

Once your final line art is finished, erase the light construction lines and any overlapping sketch marks.

Take your time with the braids and coat patterns since these details give this Micca drawing much of its personality.

Step 9

Color Your Kawaii Micca

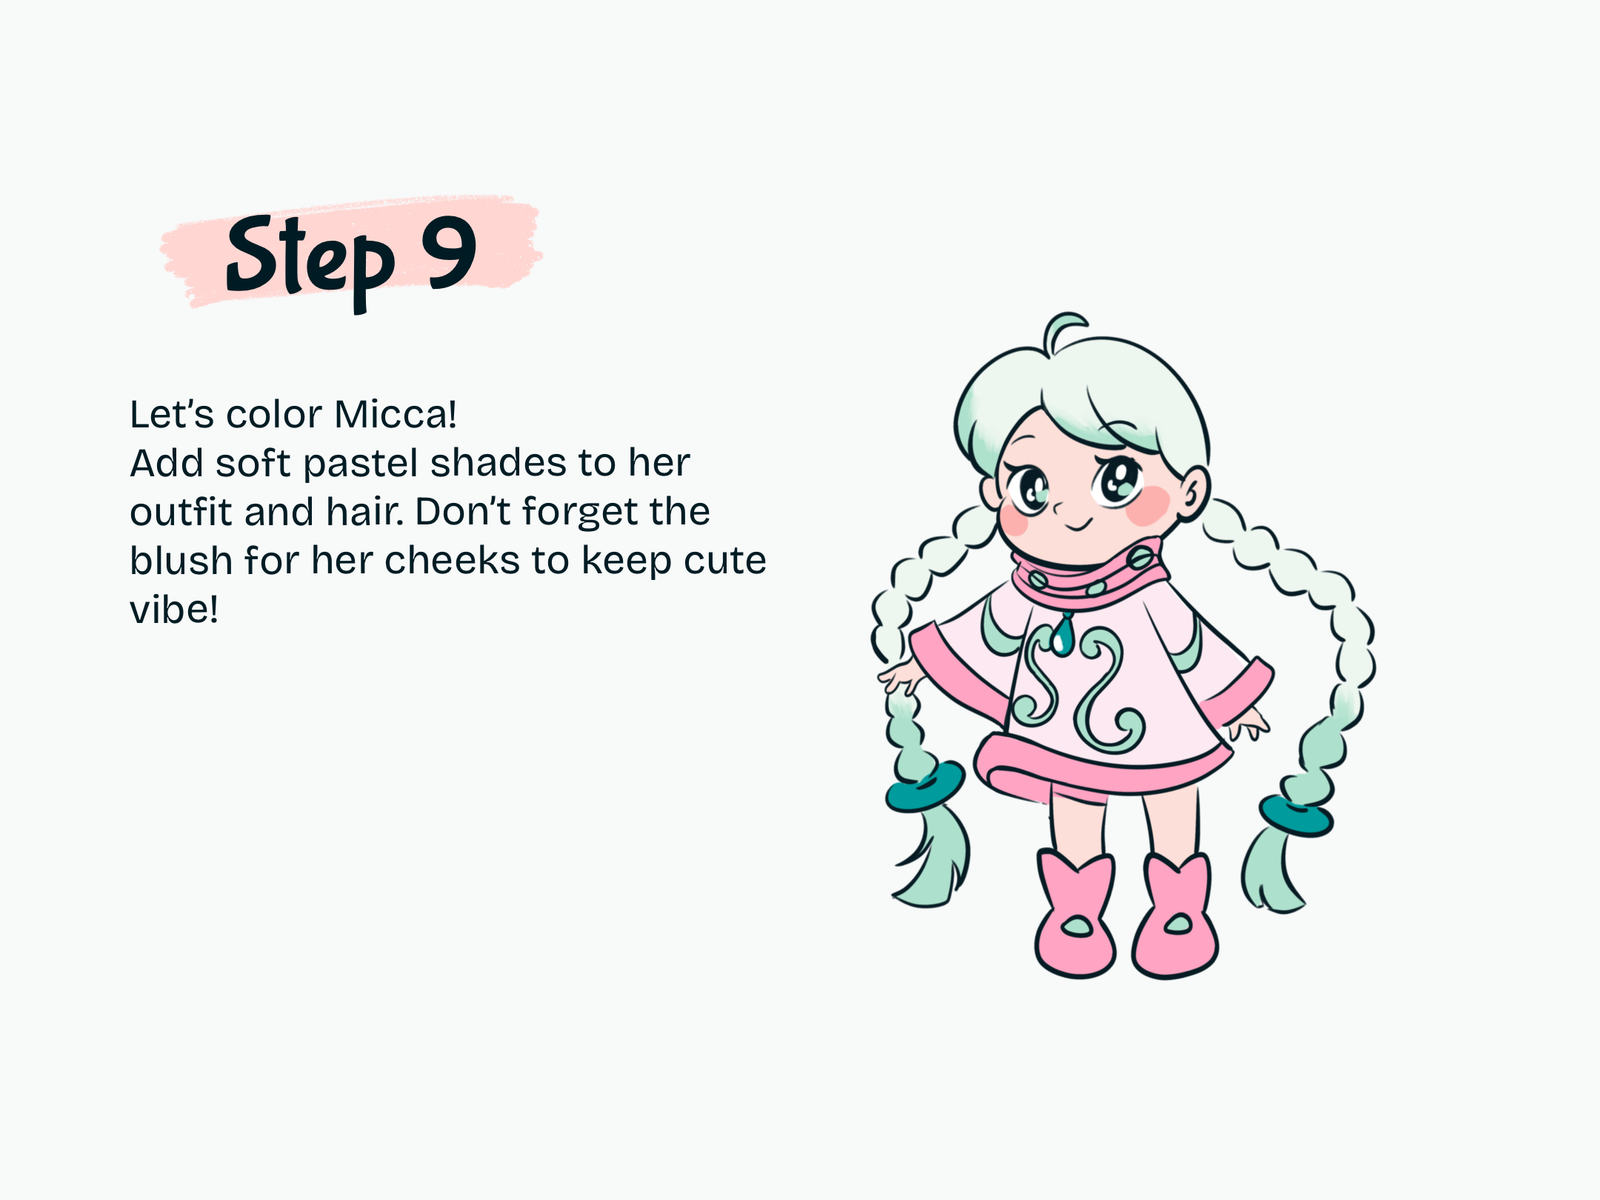
Now let’s bring Micca to life with color!

Use a very light mint shade for her hair and braids, adding slightly deeper mint tones toward some of the ends.

Color her coat a soft pastel pink with brighter pink trim around the collar, sleeves, and bottom edge. Use mint and teal for the decorative patterns and accessories.

Color the boots pink with small mint details, then add soft rosy blush to her cheeks.

And your kawaii Micca from Doraemon Movie 43 drawing is complete!

Drawing Resources

A few tools and books that can make drawing easier and more fun.

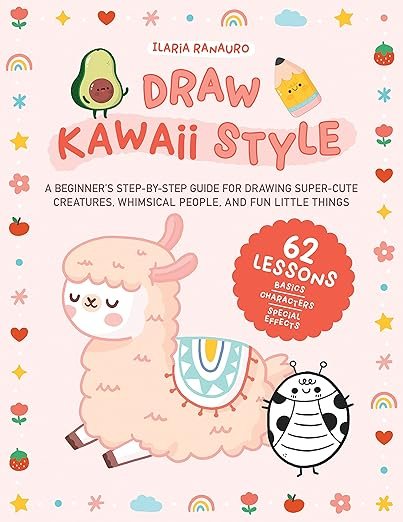
Kawaii Drawing Book

Kawaii Drawing Book

A simple guide for cute characters and beginner-friendly sketching.

View on Amazon
iPad for Digital Drawing

iPad for Digital Drawing

A great digital drawing tool for sketching cute tutorials anywhere.

View on Amazon
Apple Pencil

Apple Pencil

Perfect for line art, note-taking, and digital doodling.

View on Amazon
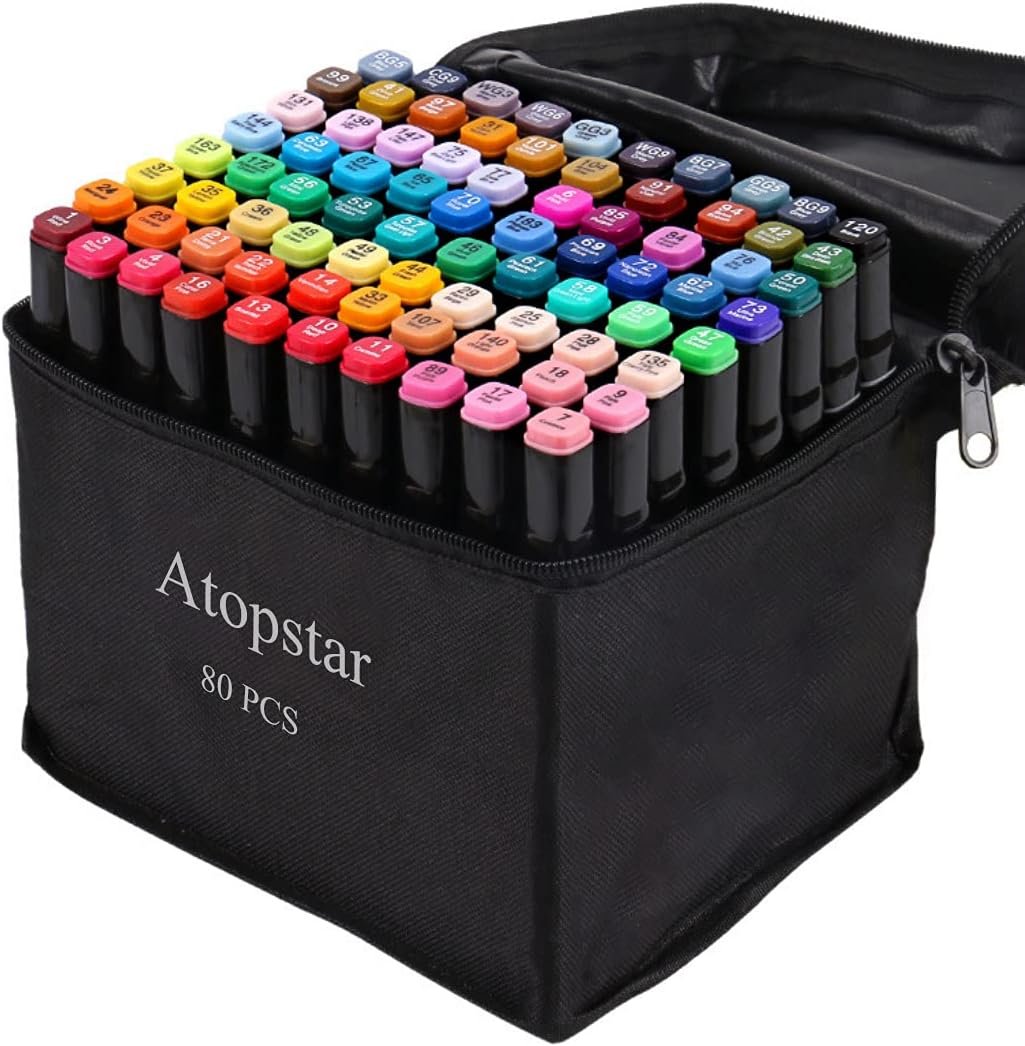
Colors Alcohol Markers

Colors Alcohol Markers

Smooth, vibrant markers for coloring cute drawings.

View on Amazon
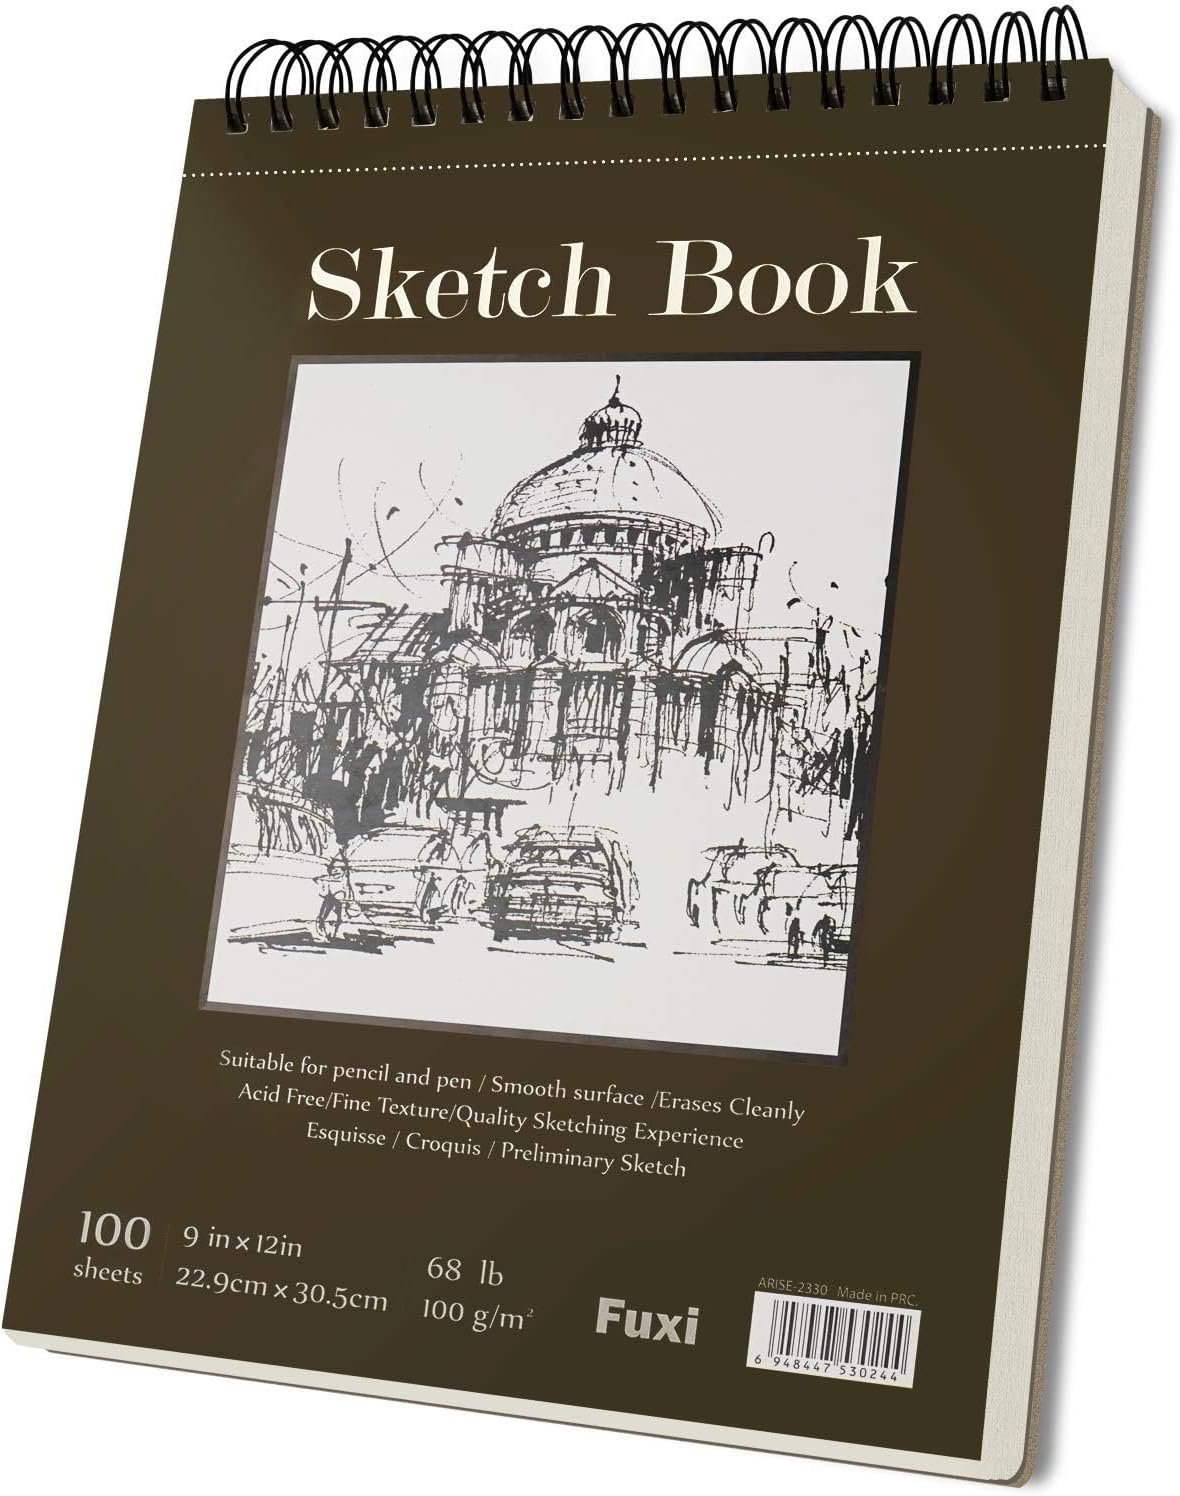
Sketchbook

Sketchbook

A nice everyday sketchbook for practice and doodles.

View on Amazon
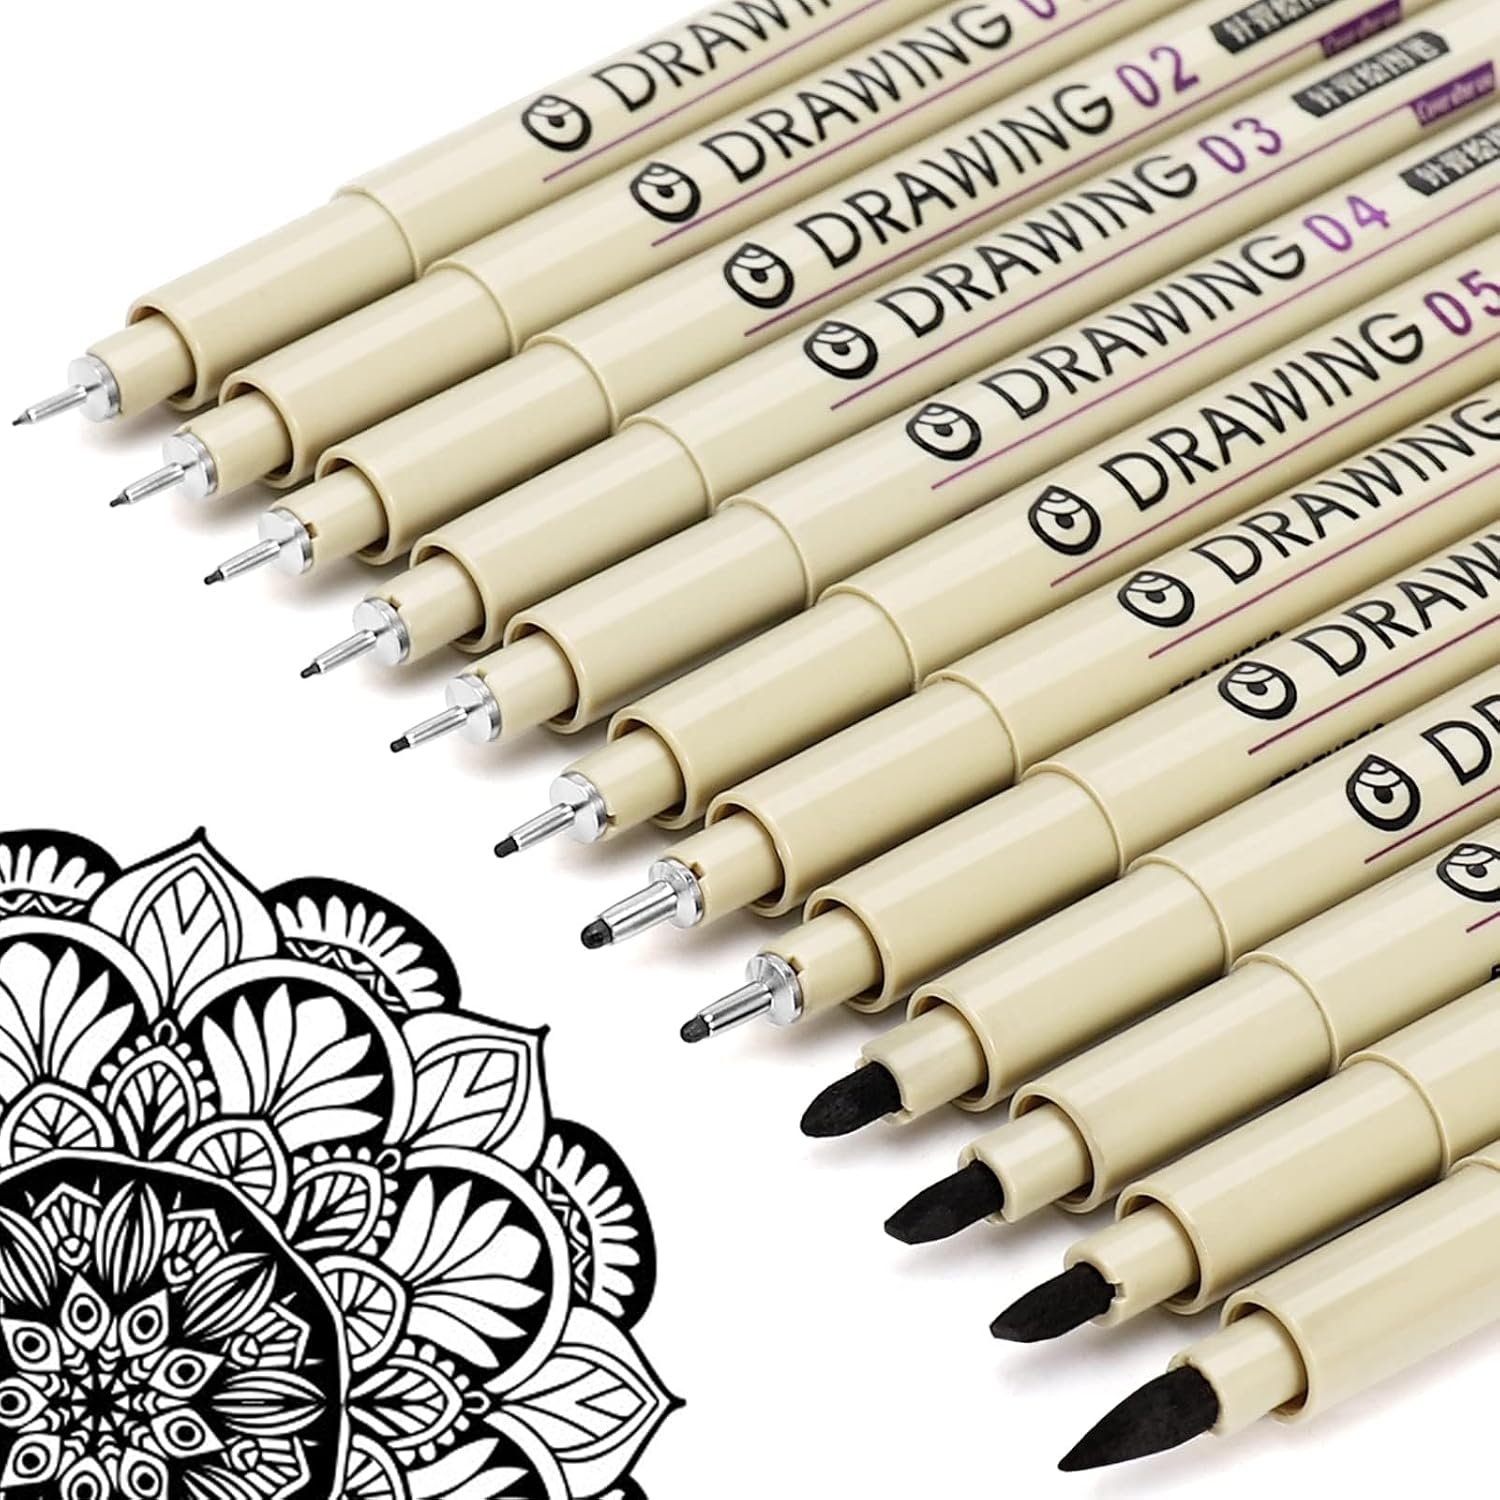
Fine Line Pens

Fine Line Pens

Helpful for clean outlines and cute little details.

View on Amazon

Some links may be affiliate links, which means Cute Thing Corner may earn a small commission at no extra cost to you.

Final Tips

Great job, Cuties! You’ve learned how to draw kawaii Micca from Doraemon Movie 43 step by step, from her simple chibi base to her long braids, cute expression, cozy outfit, decorative patterns, and pastel colors.

Micca may look detailed at first, but breaking her design into simple shapes makes the drawing much easier and more fun to follow.

If you enjoyed this Micca drawing tutorial, explore more cute and easy Doraemon Movie 43 drawing tutorials with Cute Thing Corner and keep creating your own kawaii characters.

Happy drawing, Cuties!

Leave a Comment