Today, I will share with you guy a step-by-step to Draw Vic from Garfield with Kawaii Tutorial Blog Cute Thing Corner.
Follow this simple steps below by Cutethingcorner.com that will help you finalize the Garfield’s Daddy by yourself.
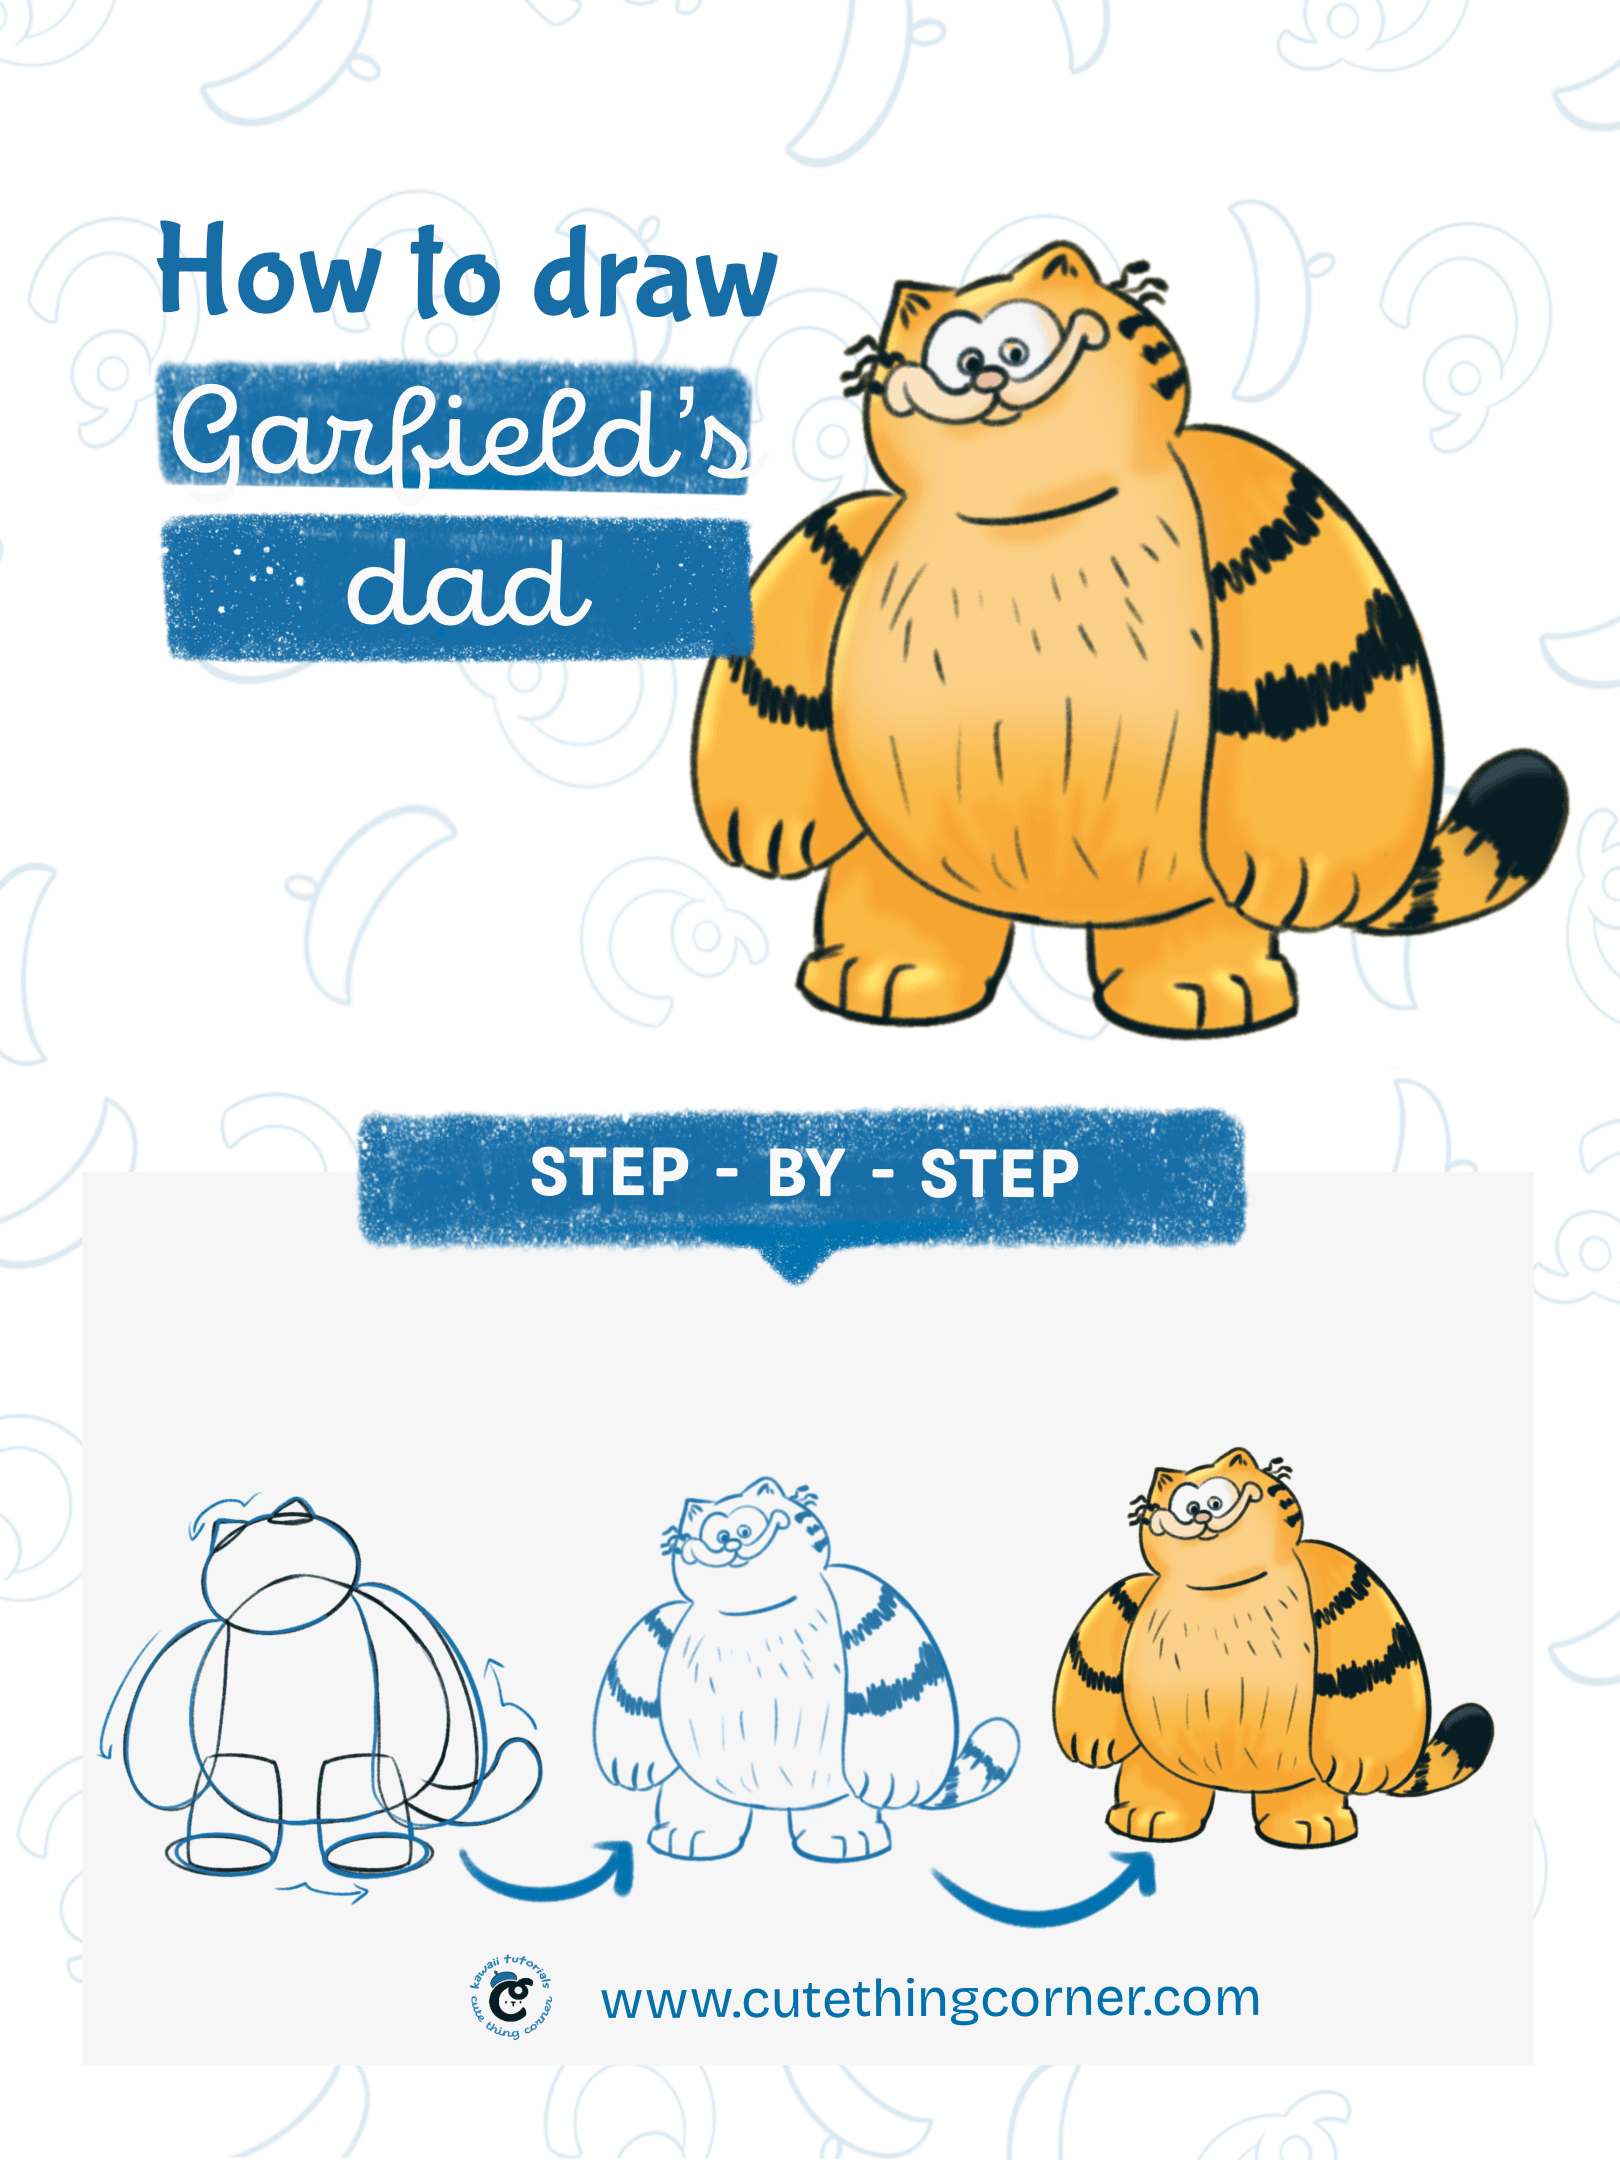
How to draw Vic from Garfield
It’s easy to start. So let’s get started.
You just have paper and a pencil to start. Color will belong to your favorite or using an Ipad and pencil.
Whatever makes you comfortable to start. Now jump into step-by-step to draw the Cute Dad of Garfield.
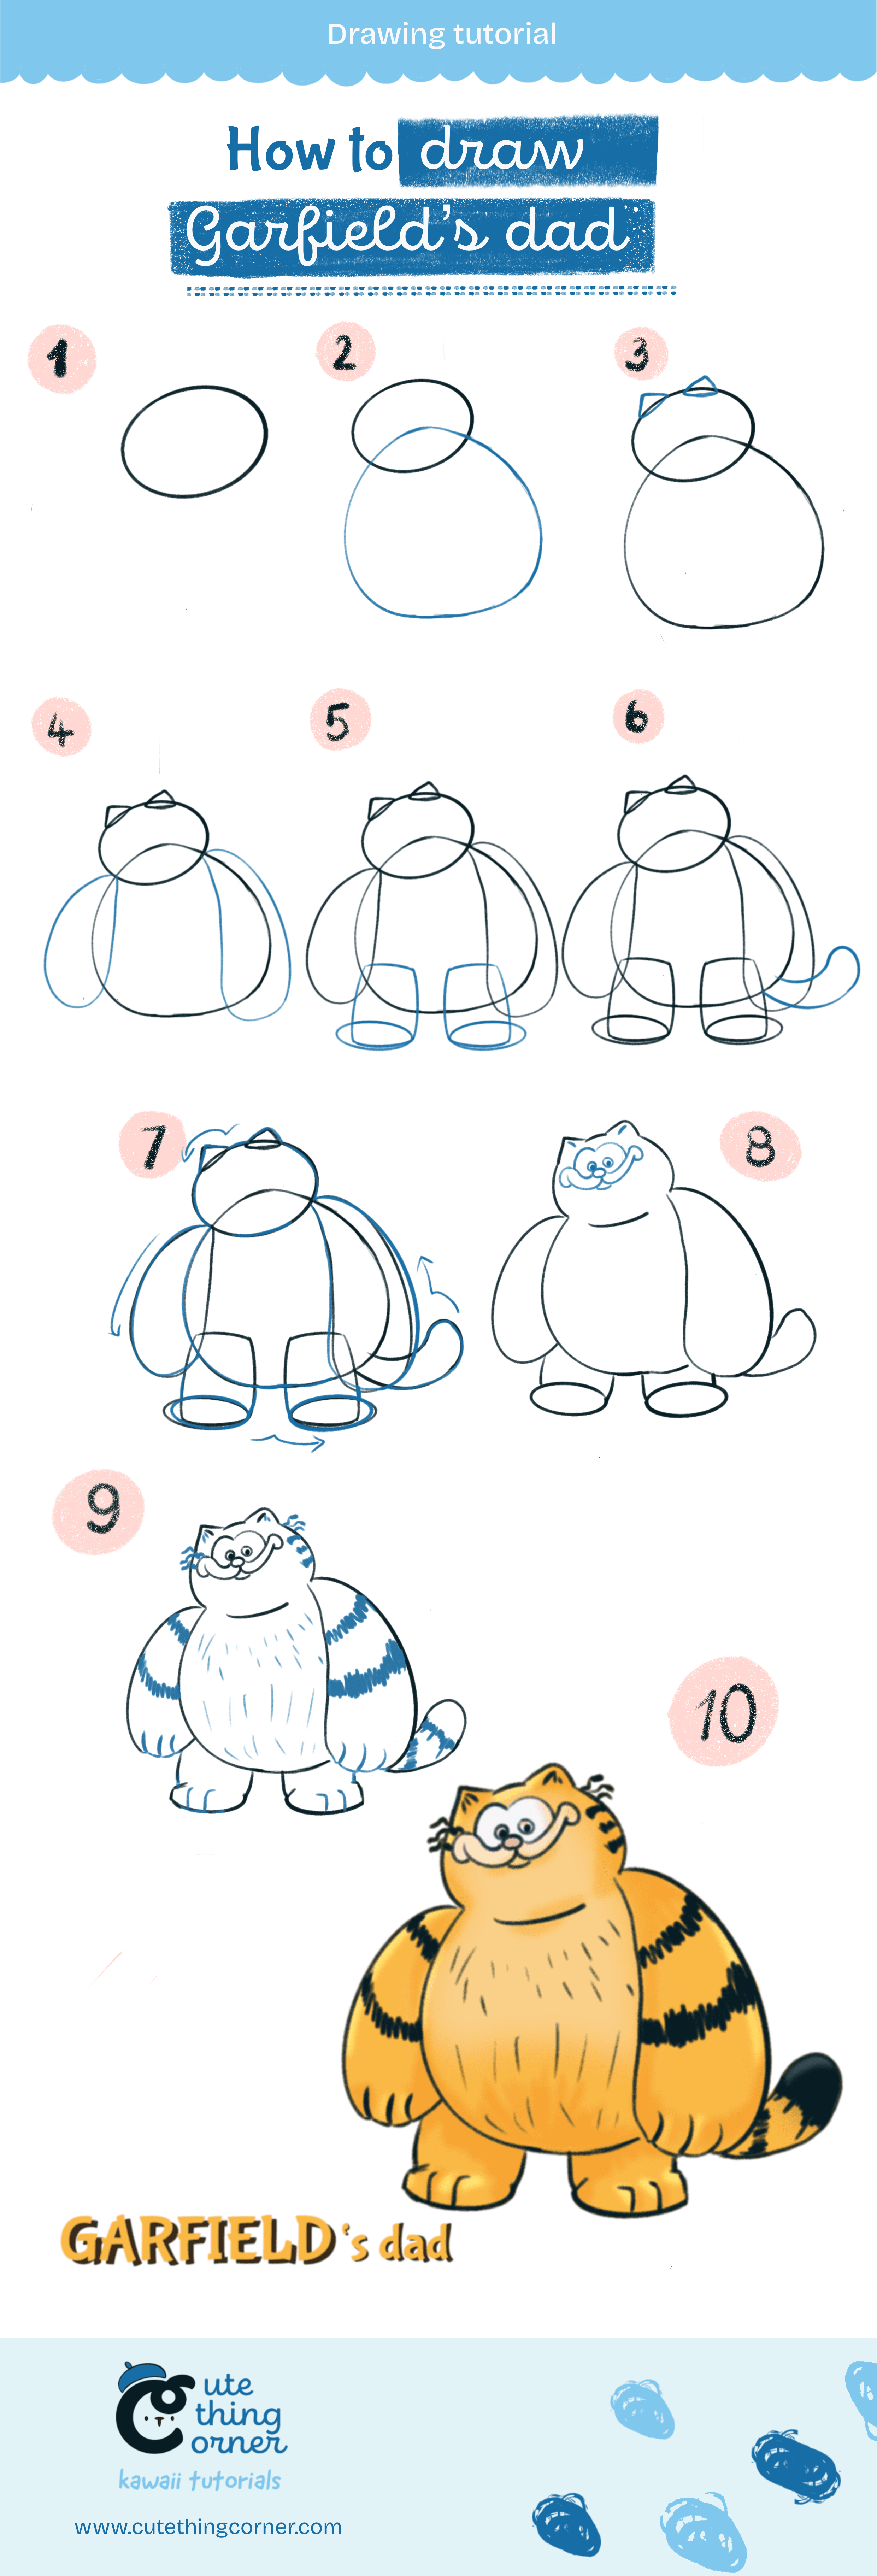
#Step 1: Draw an ellipse shape for the head of Garfield’s Dad
Firstly, you need to draw an ellipse shape for Vic from Garfield.
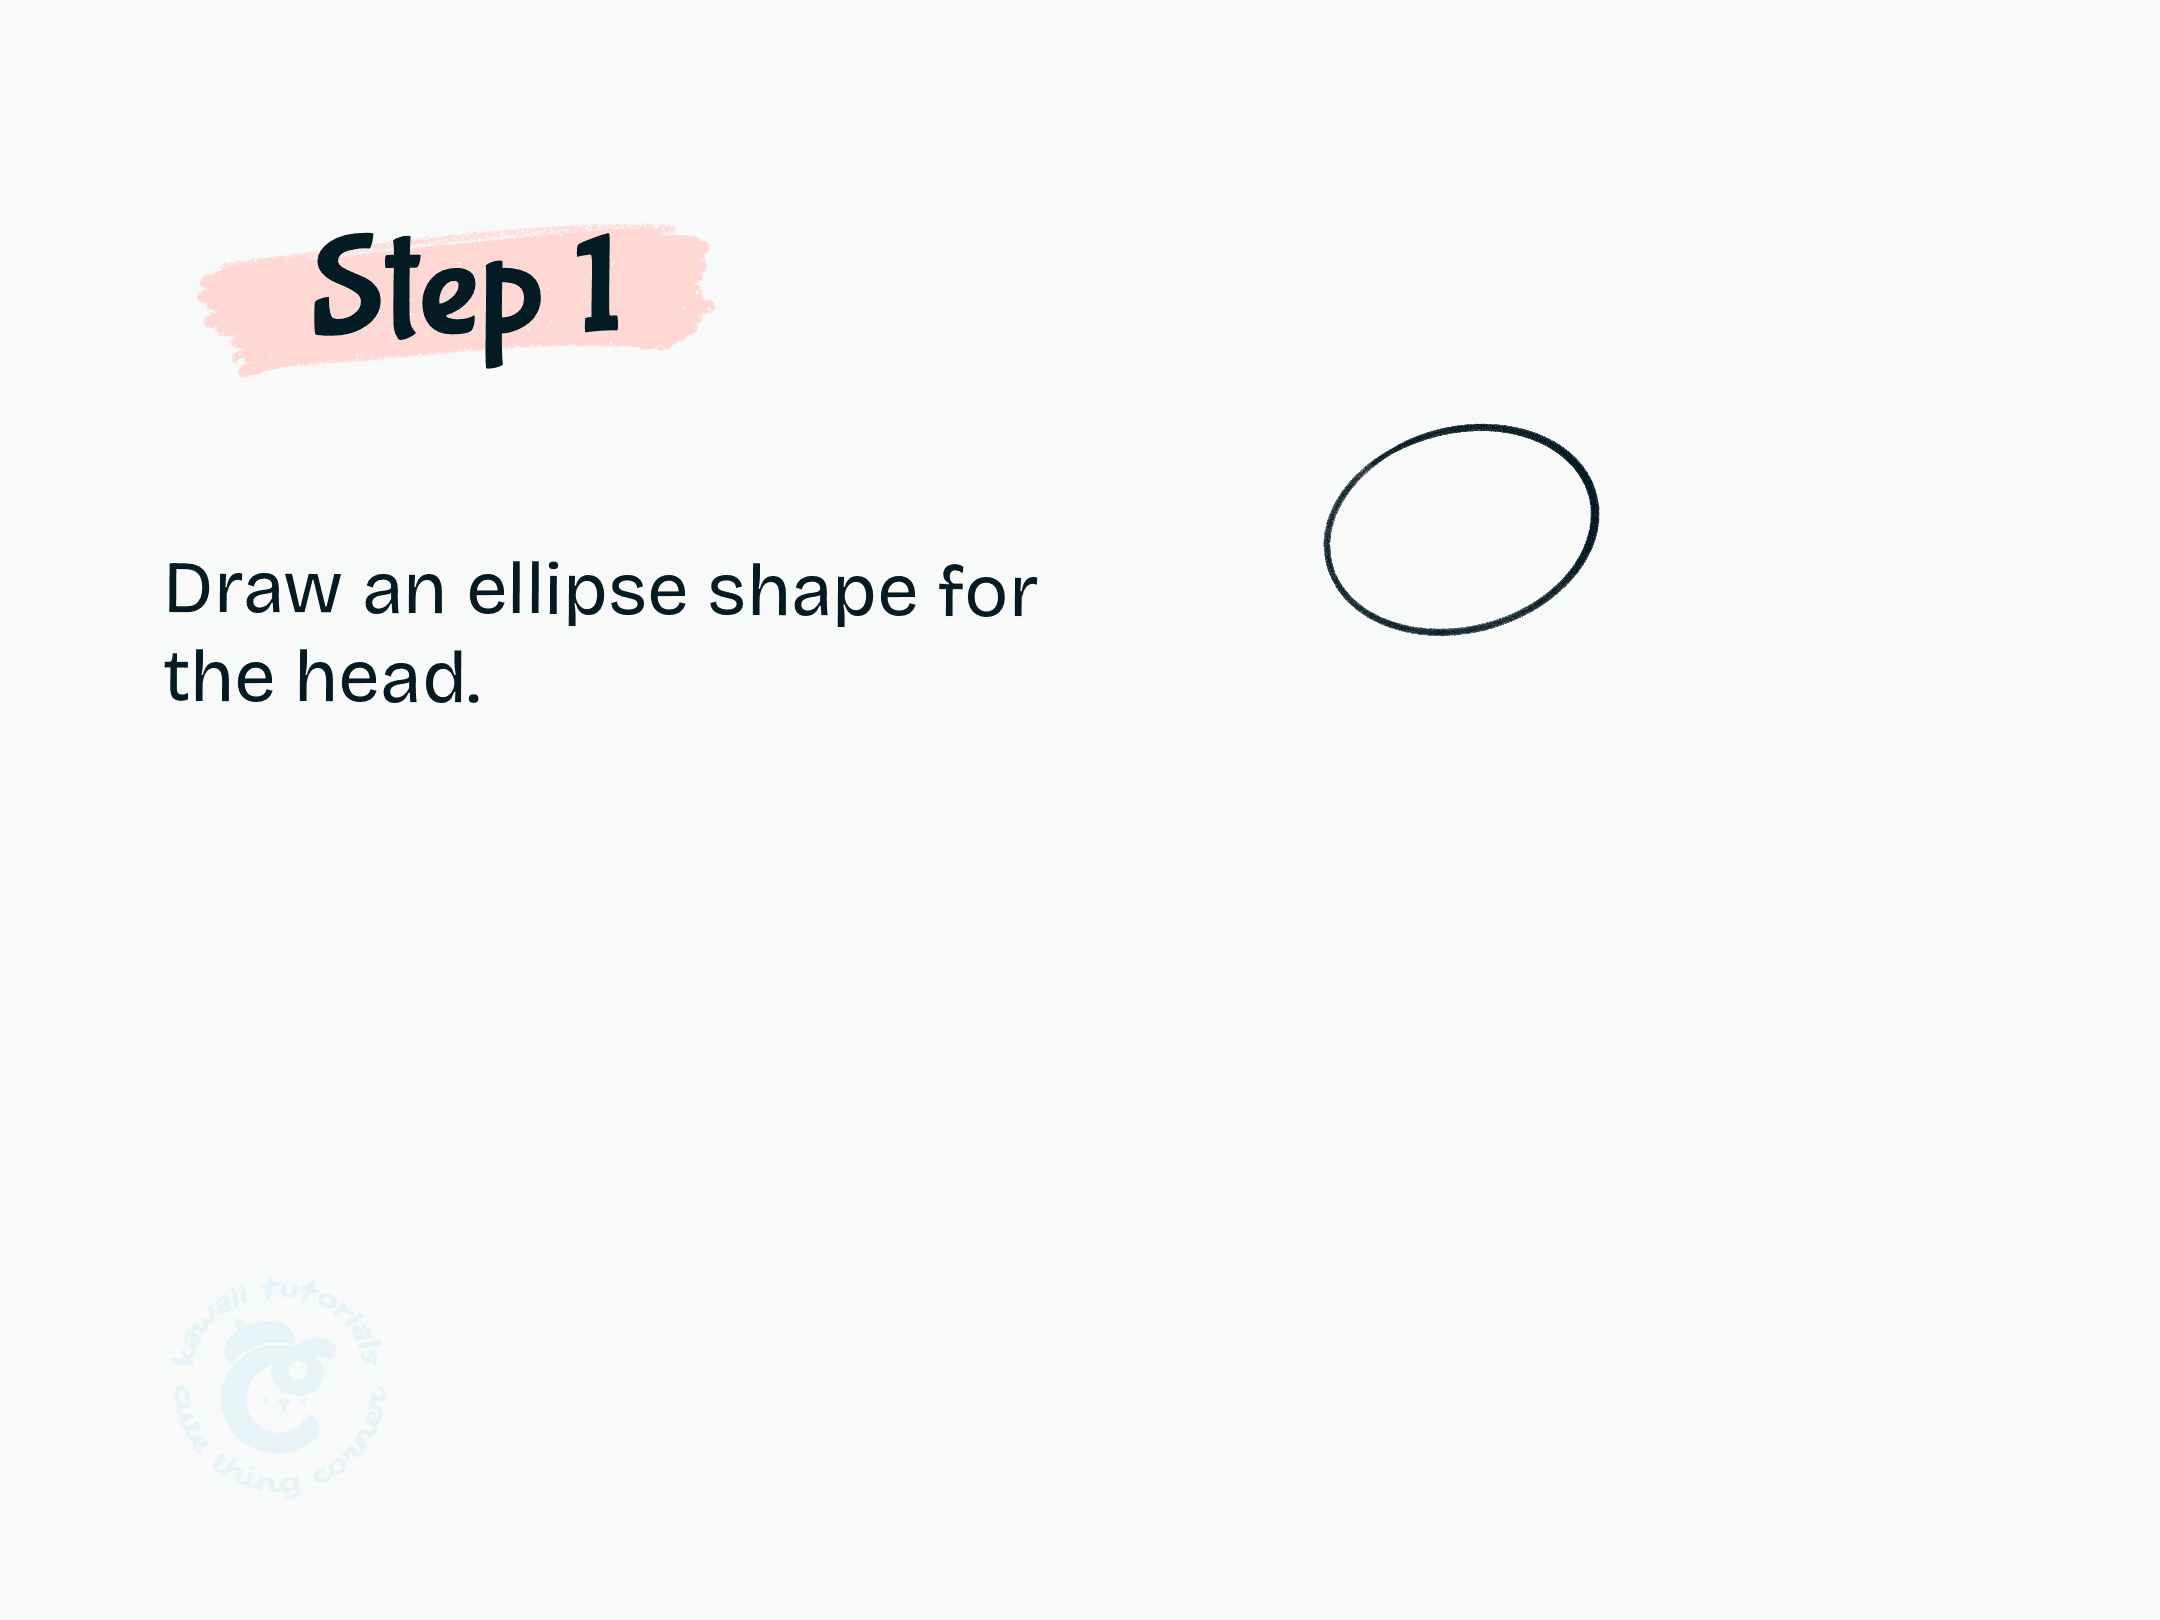
Step 1 Draw an ellipse shape for the head
#Step 2: Draw a big oval shape for the body
Then you draw an big oval shape for the body.
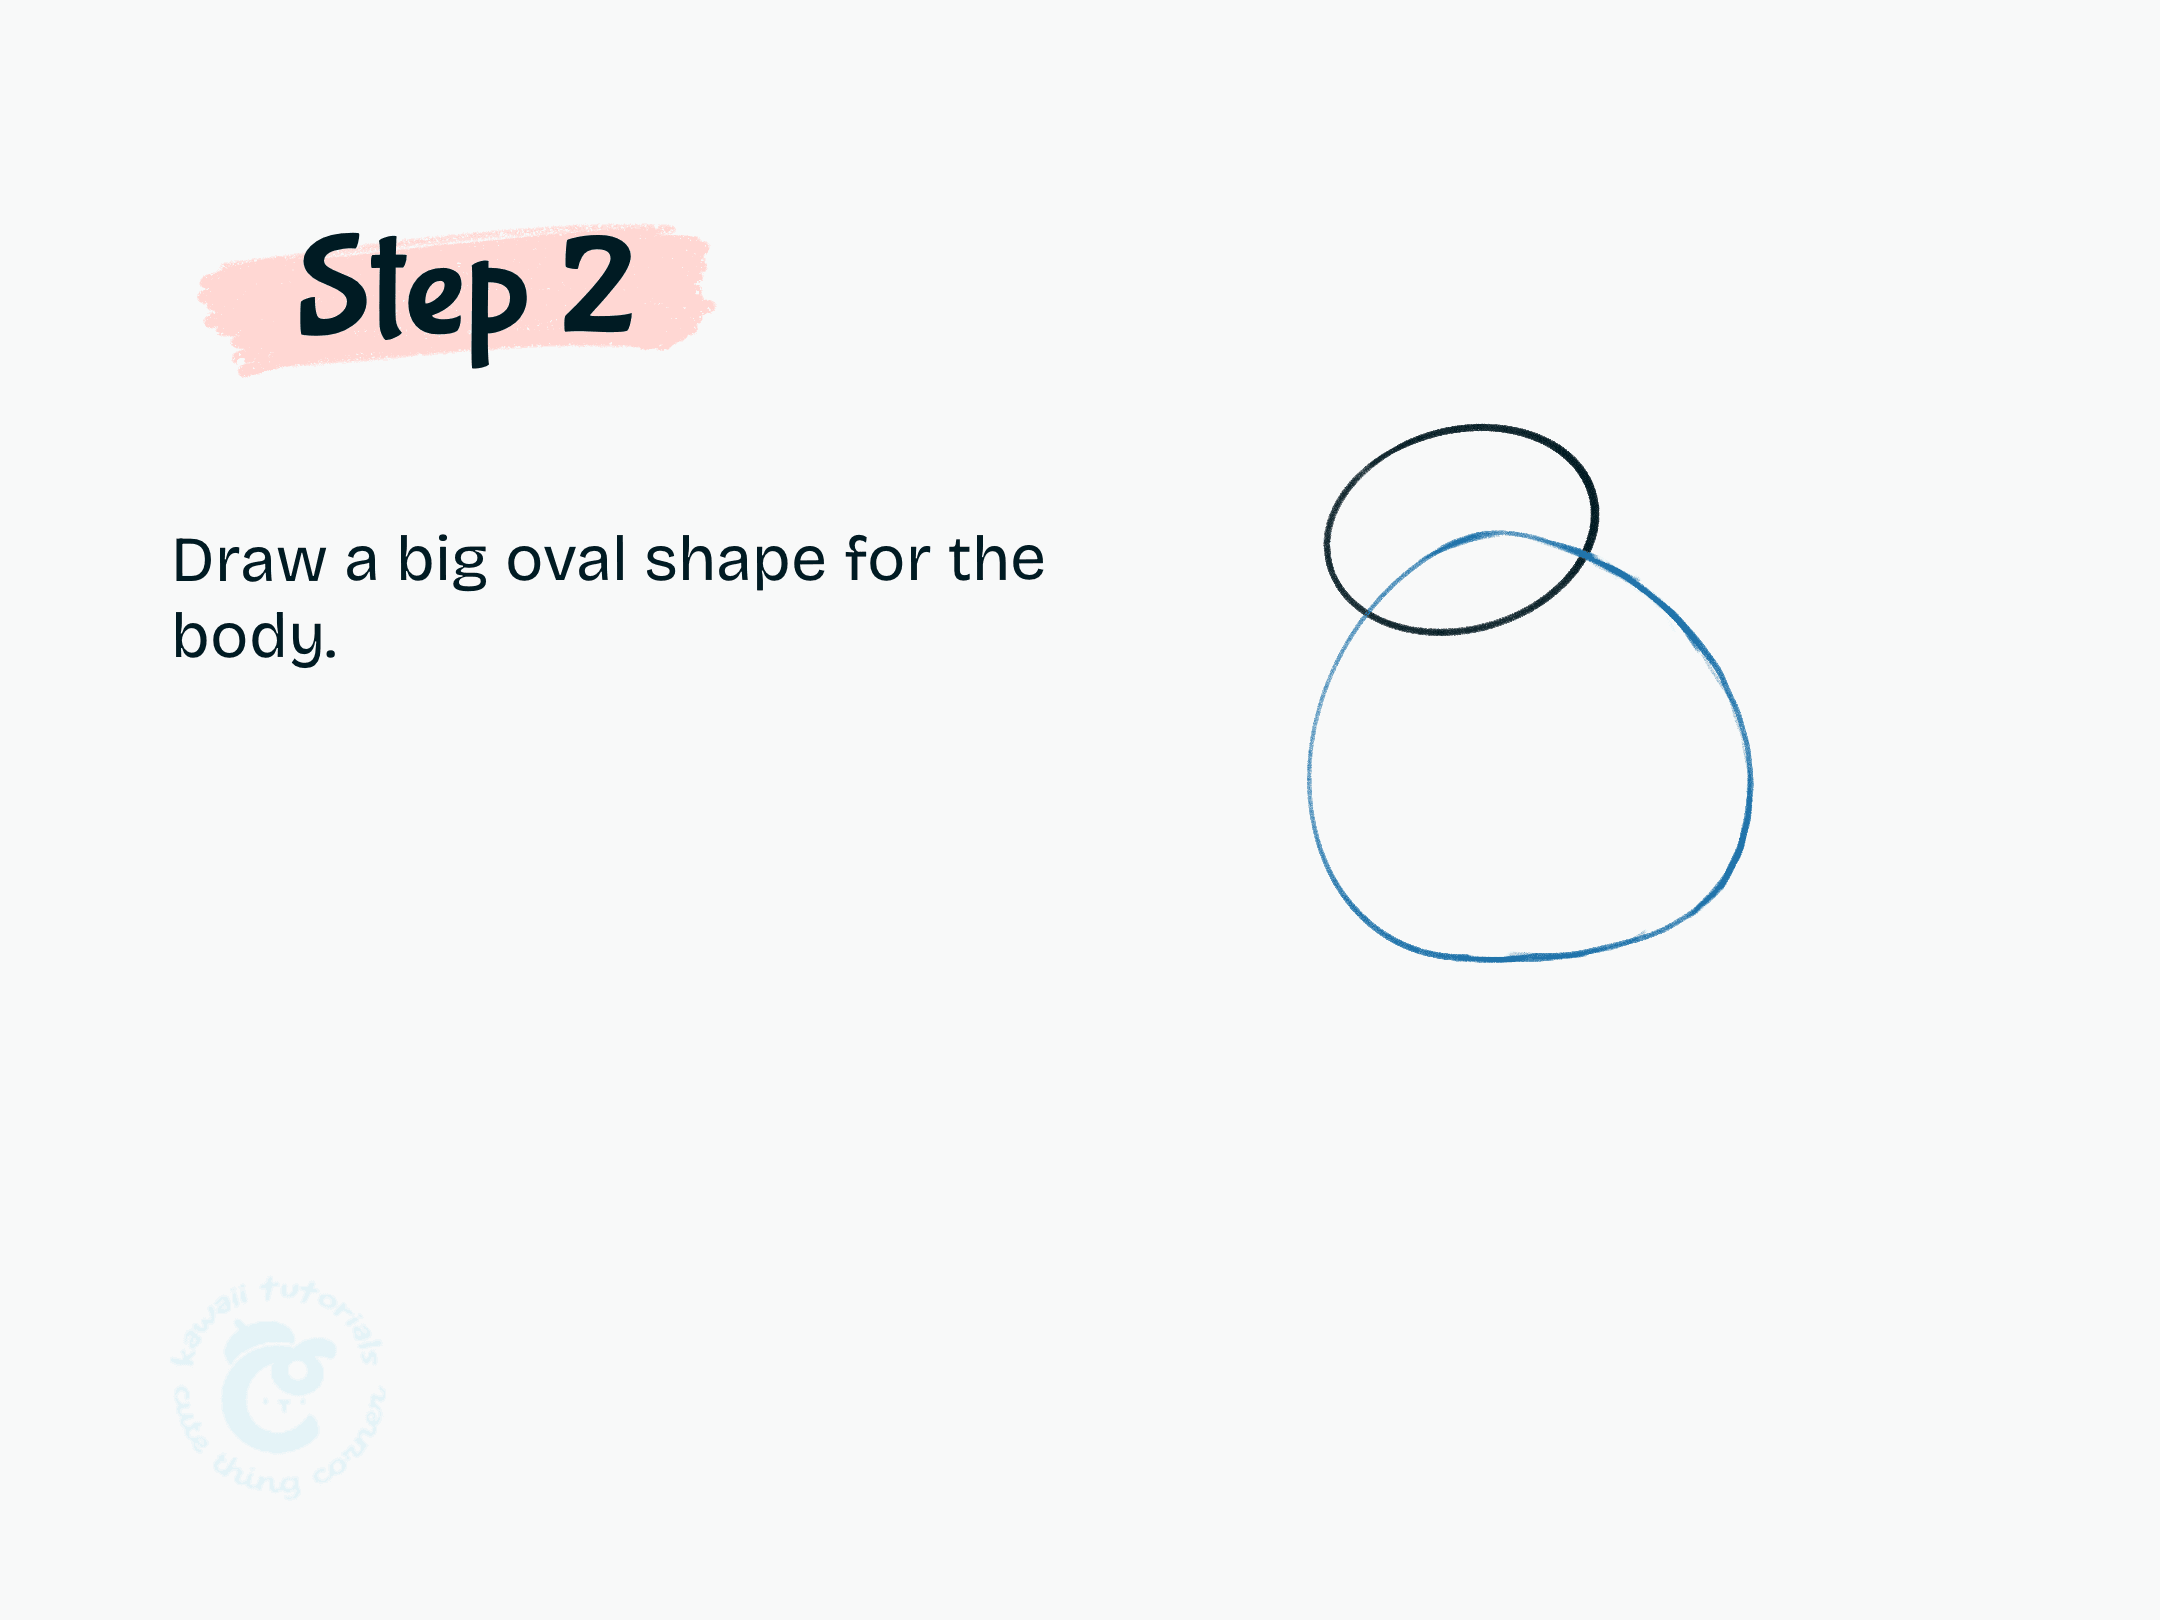
Step 2 Draw a big oval shape for the body
#Step 3: Draw two triangle for the ears of Vic from Garfield
In this step, you draw two triangle for the ears of Vic.
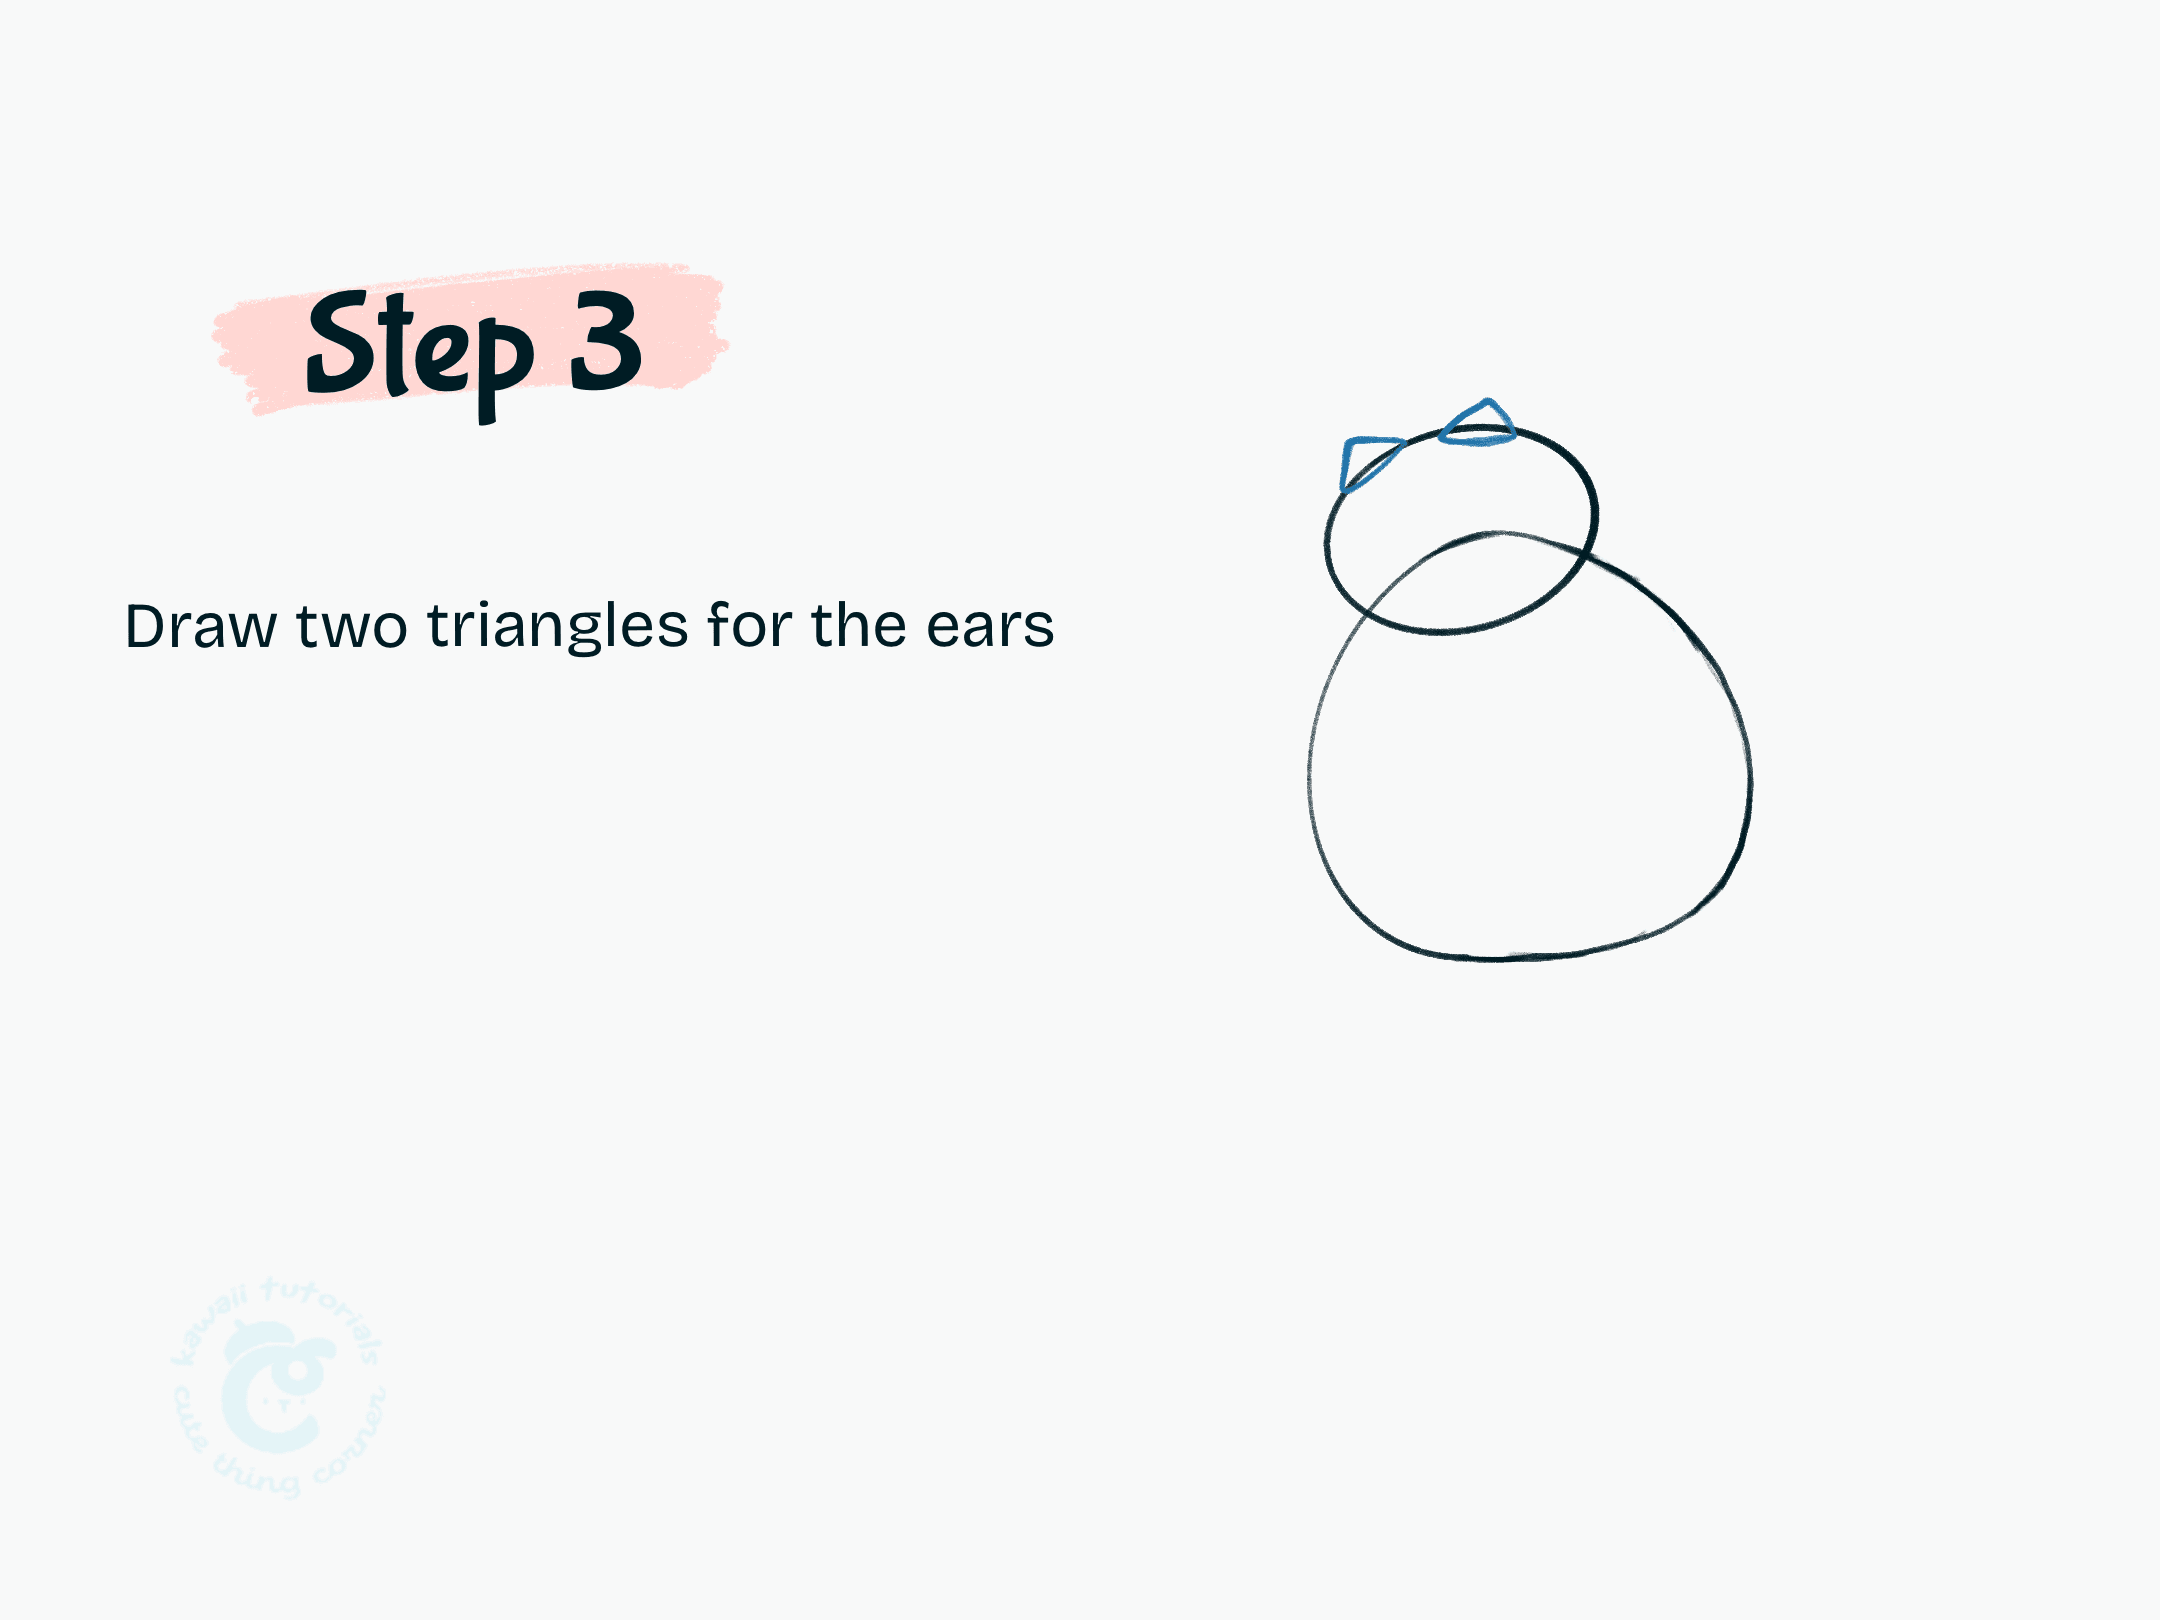
Step 3 Draw two triangles for the ears
#Step 4: Add two teardrops on either side of the body. Intersect the middle of each teardrop with the body.
In step 4, you add two teardrops on either side of the body. Intersect the middle of each teardrop with the body.
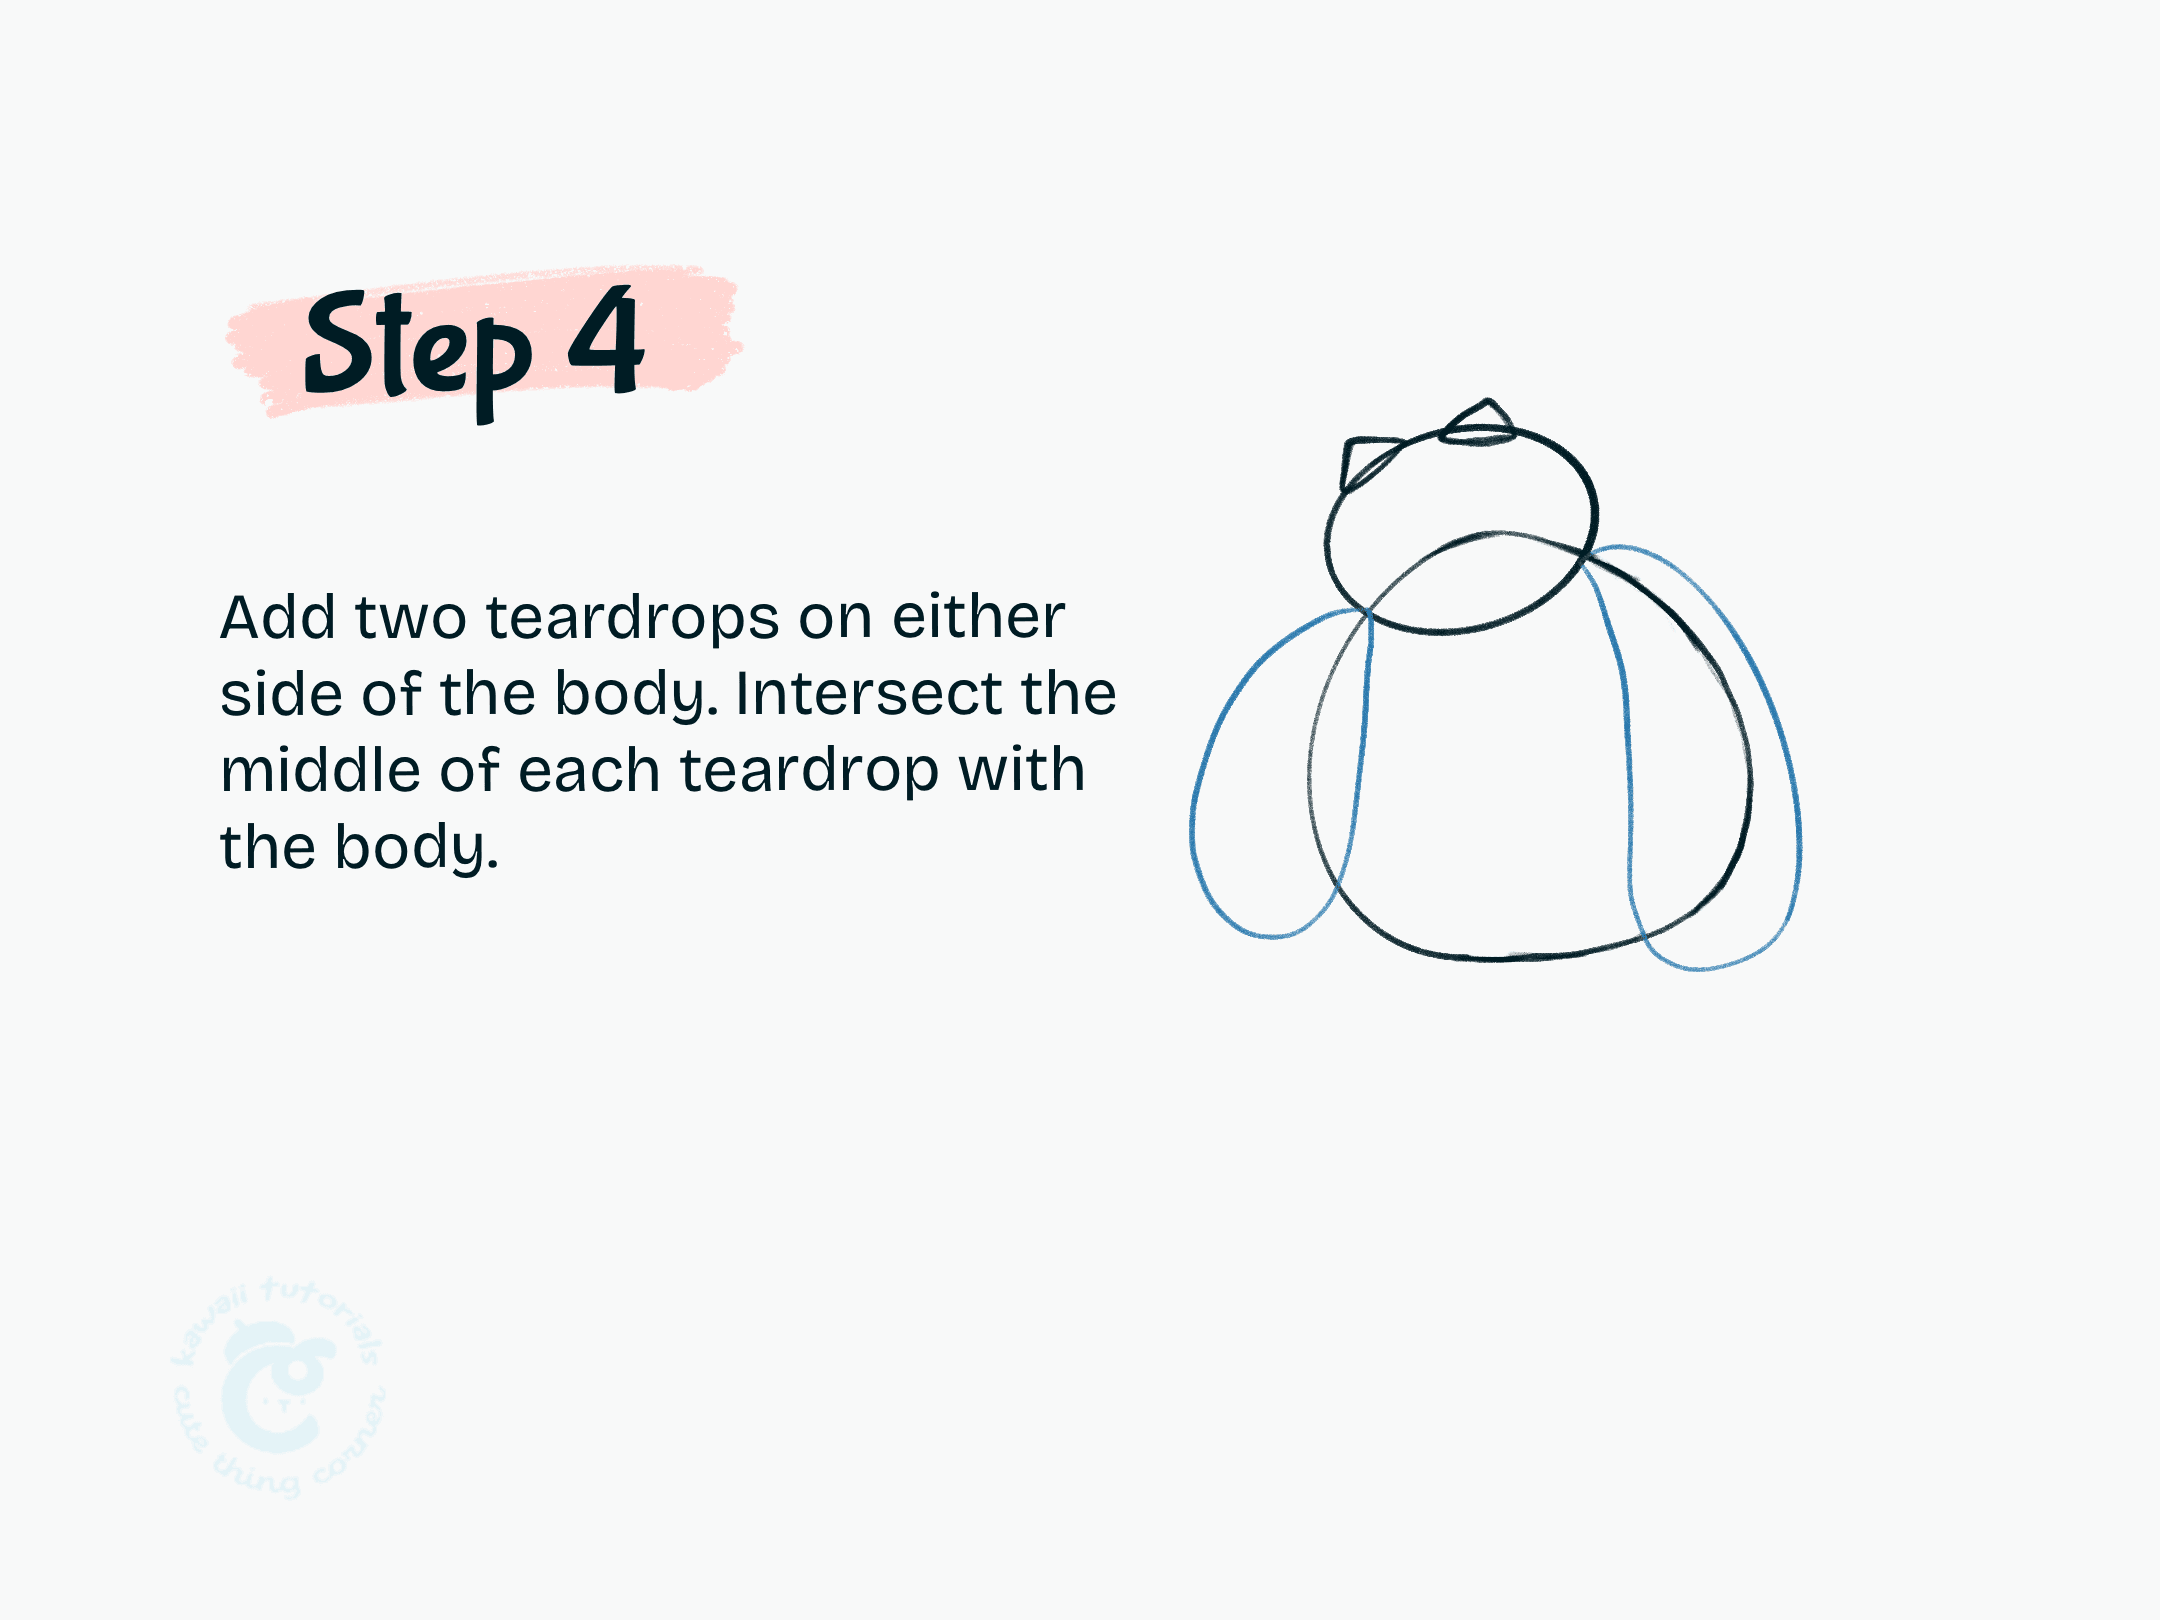
Step 4 Add two teardrops on either side of the body
#Step 5: Draw two quadrilaterals for the legs, and two eliipses for the feet.
And then you draw two quadrilaterals for the legs, and two ellipses for the feet of Vic from Garfield.
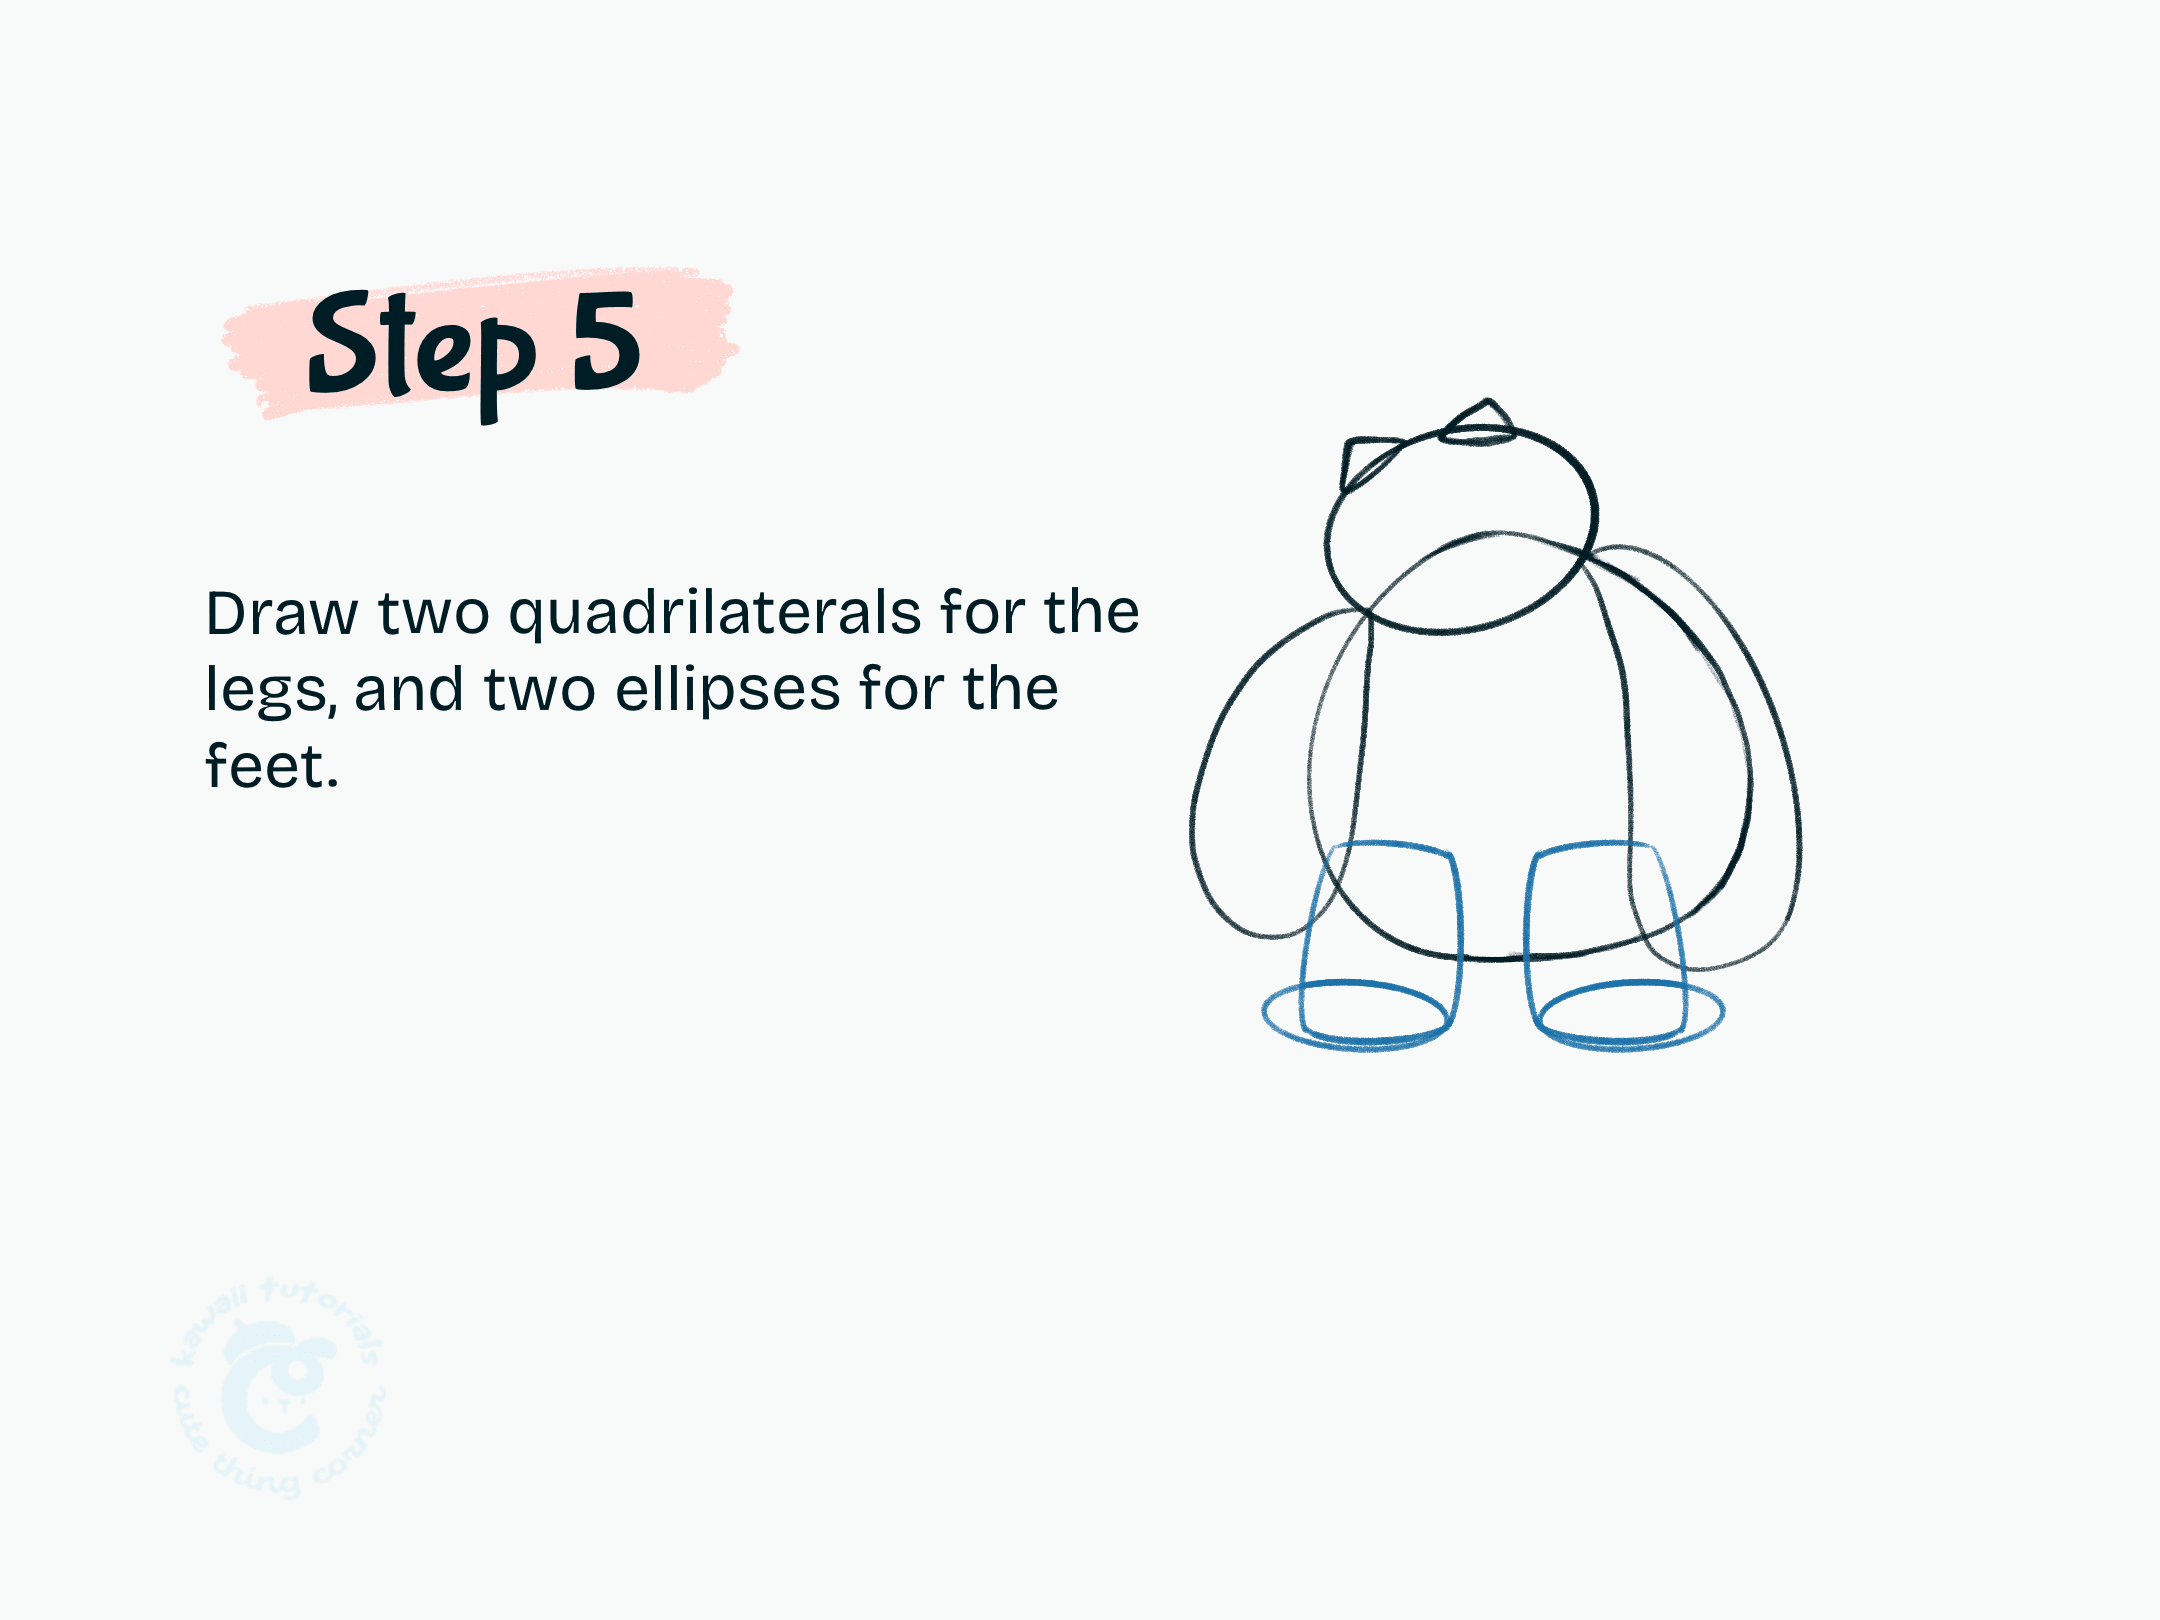
Step 5 Draw two quadrilaterals for the legs, and two ellipses for the feet
#Step 6: Add the tail of Garfield’s Dad
In this step, you add the tail of Garfield’s Dad, using curve lines.
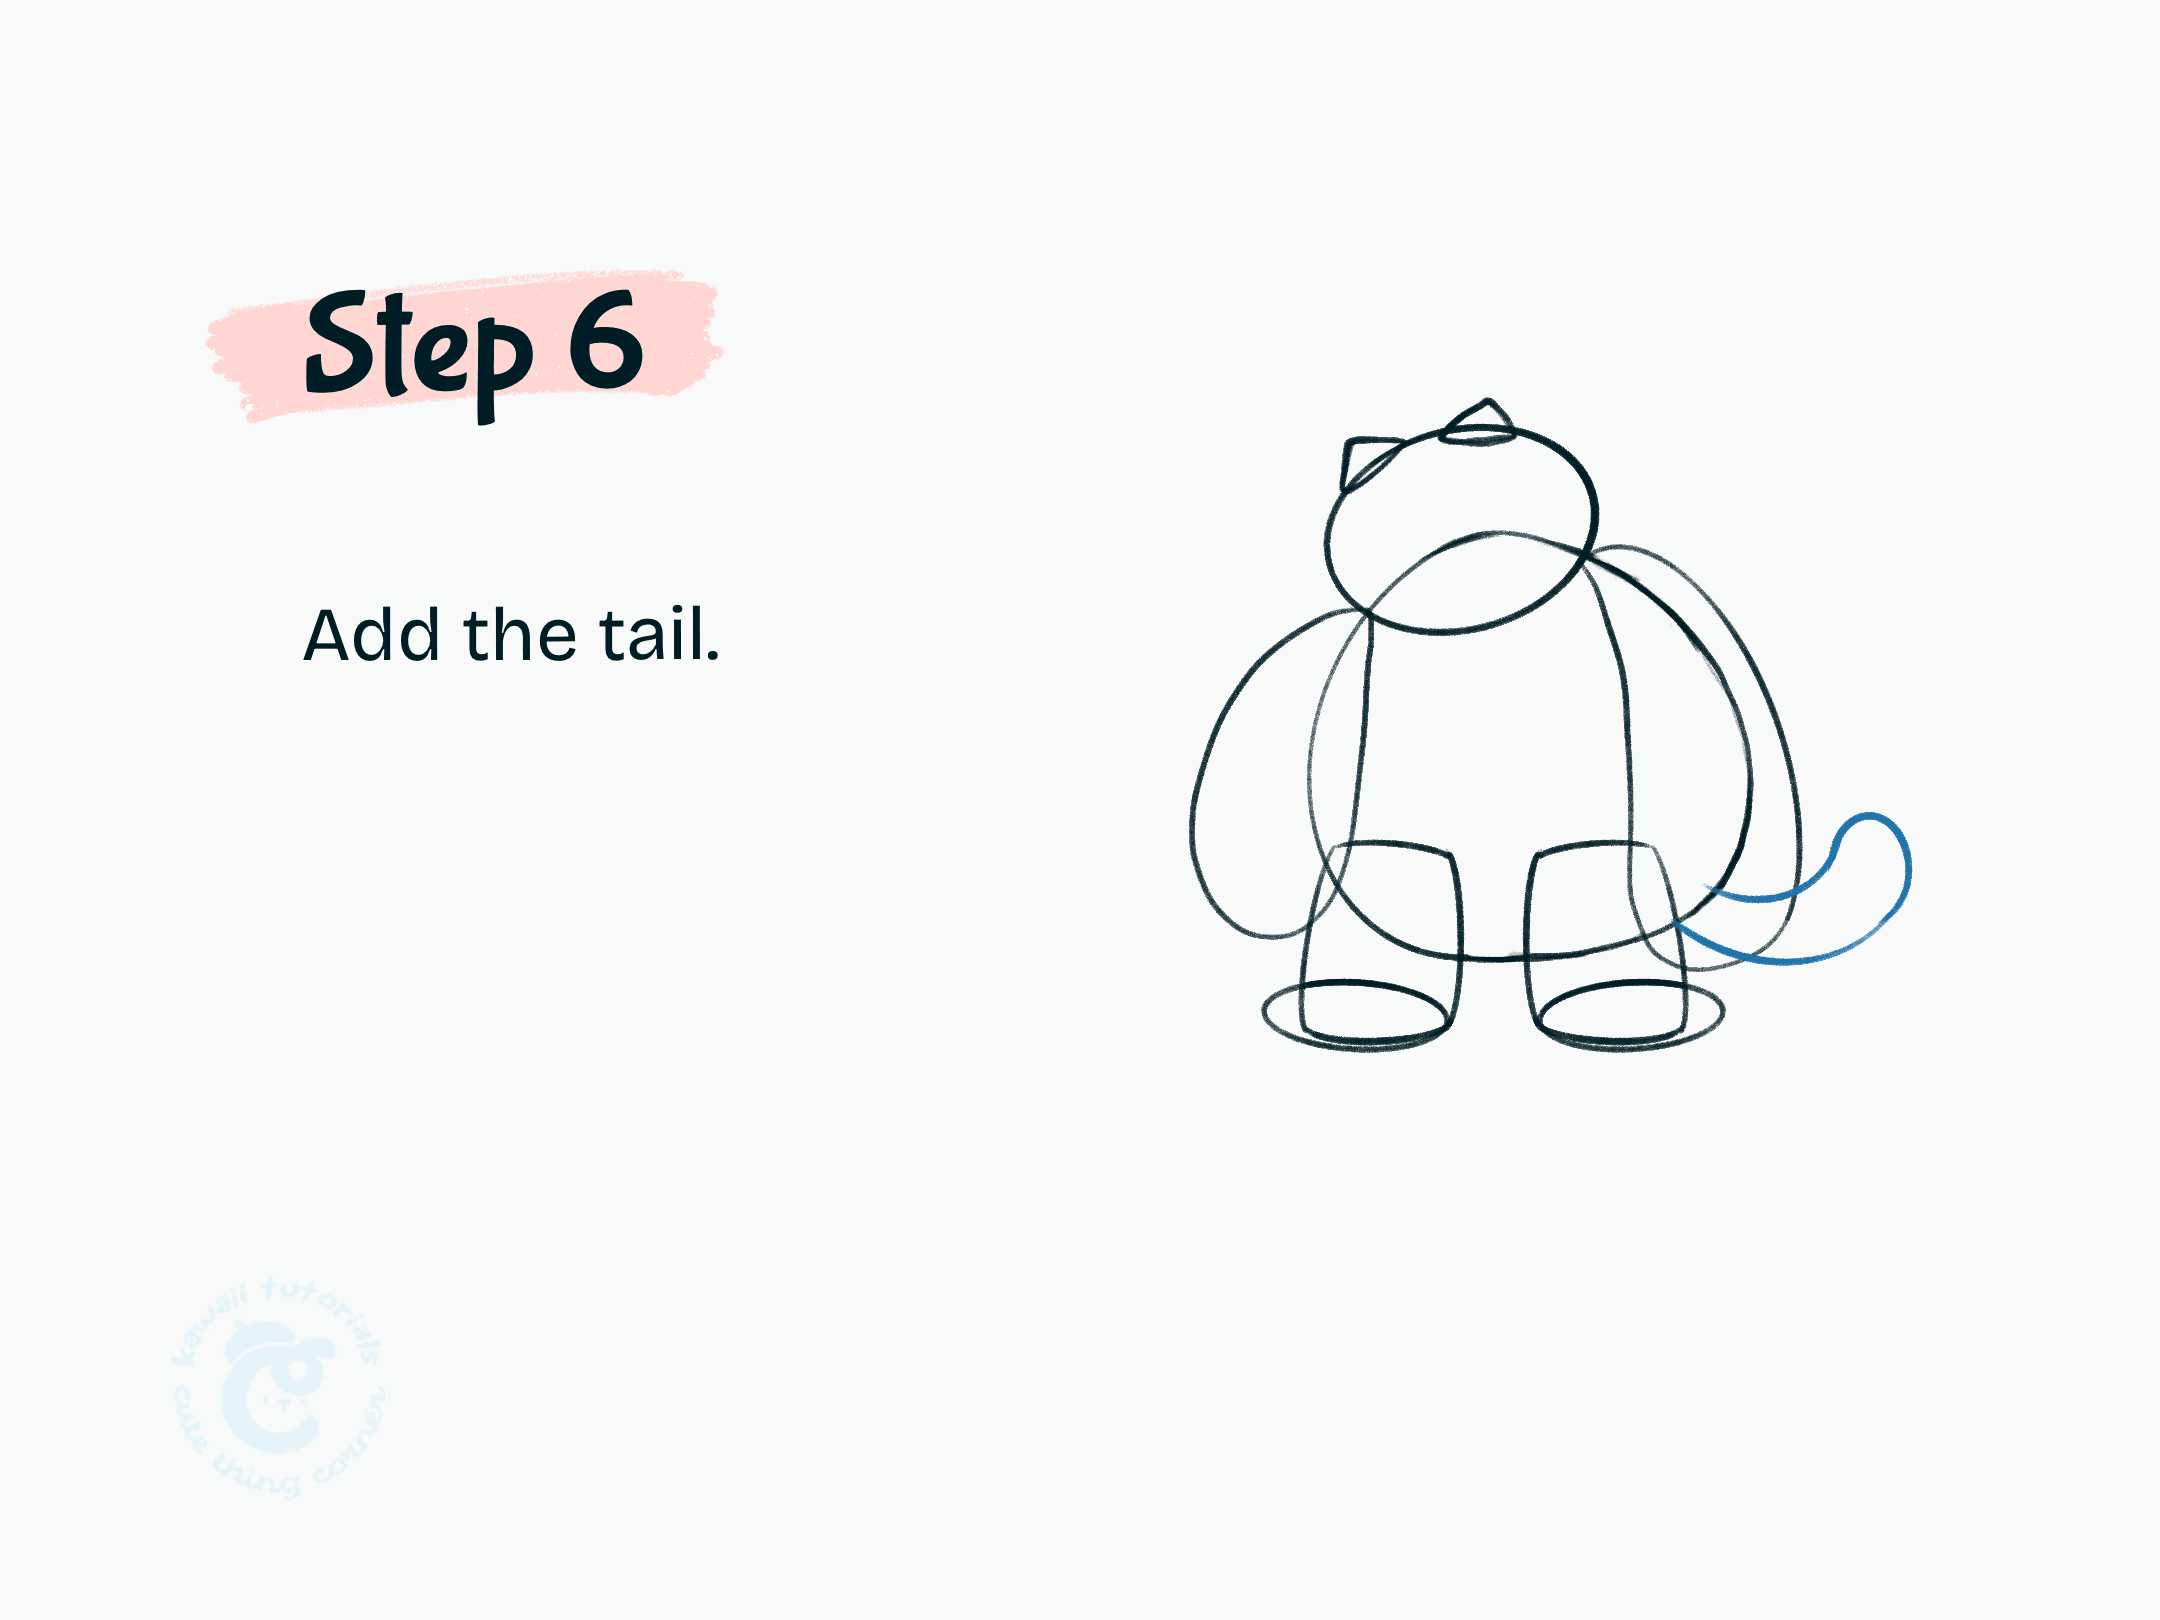
Step 6 Add the tail
#Step 7: Follow the outer most contours of the original shapes. Be sure to use soften any corners with a curve.
In step 7, you follow the outer most contours of the original shapes. Be sure to use soften any corners with a curve.
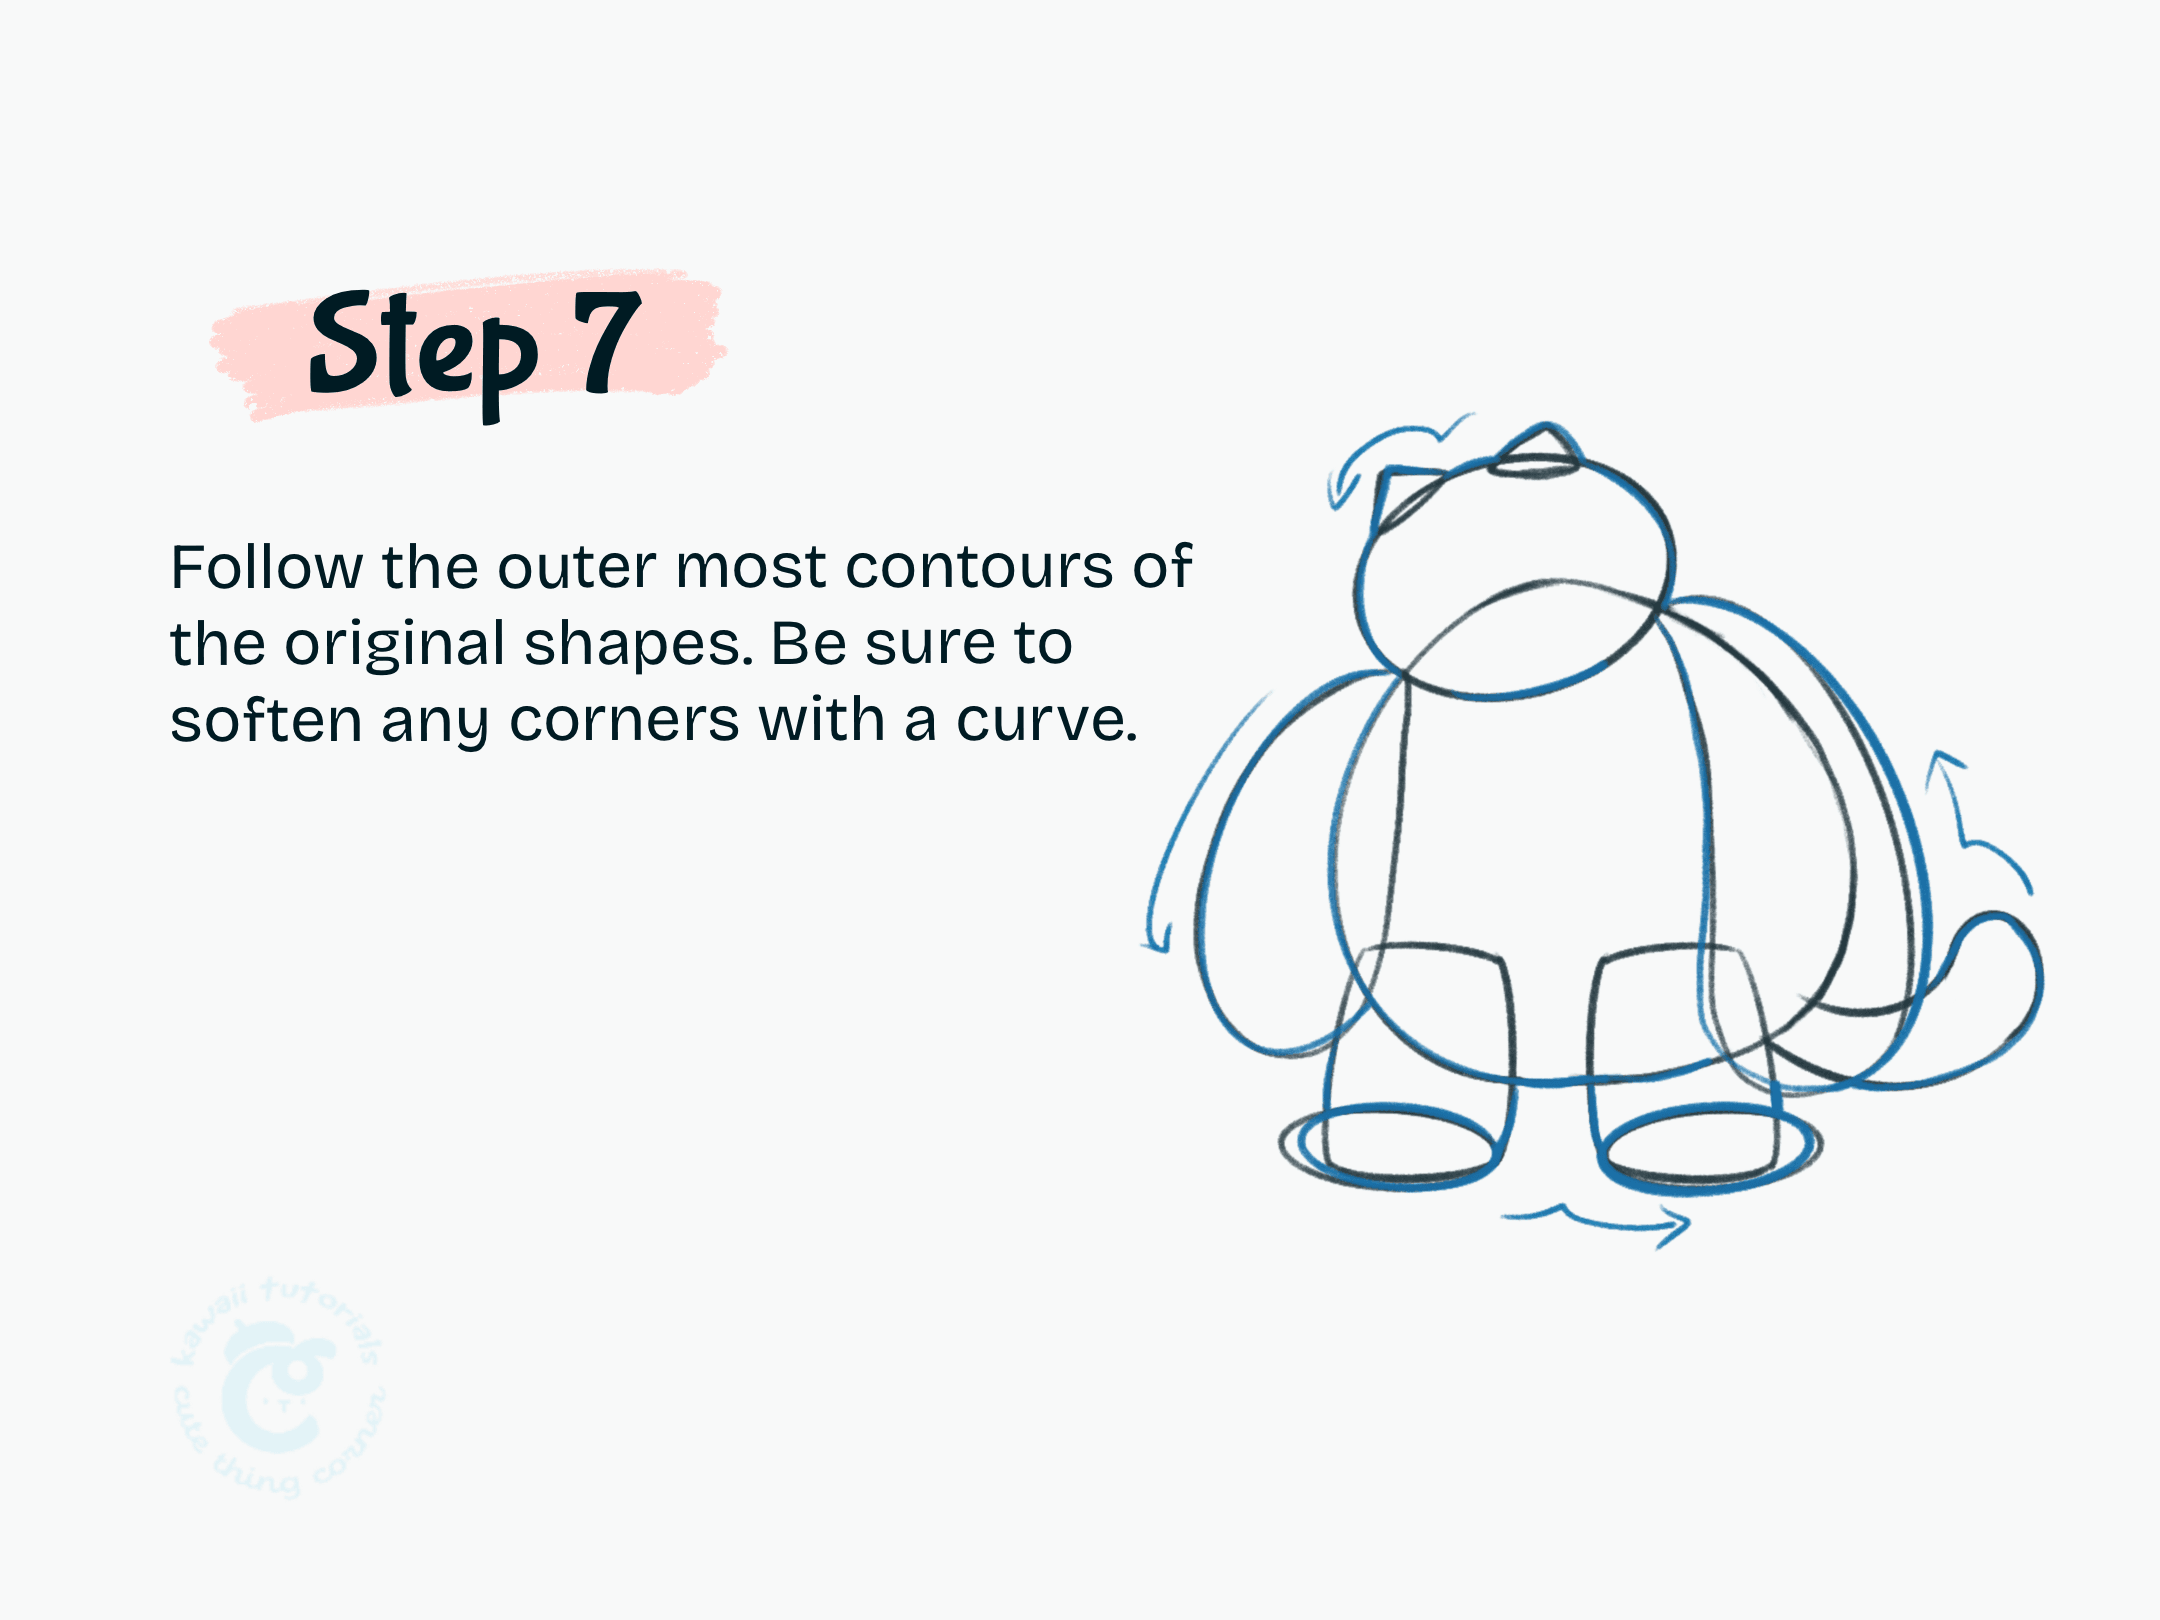
Step 7 Follow the outer most contours of the original shapes
#Step 8: Erase original lines and add facial feature for Garfield’s Dad.
You erase original lines and draw facial feature for Vic.

Step 8 Erase original lines and add facial feature
#Step 9: Add details like fur, ear definition and whiskers.
This step you add details like fur, ear definition and whiskers for Garfield the dad.
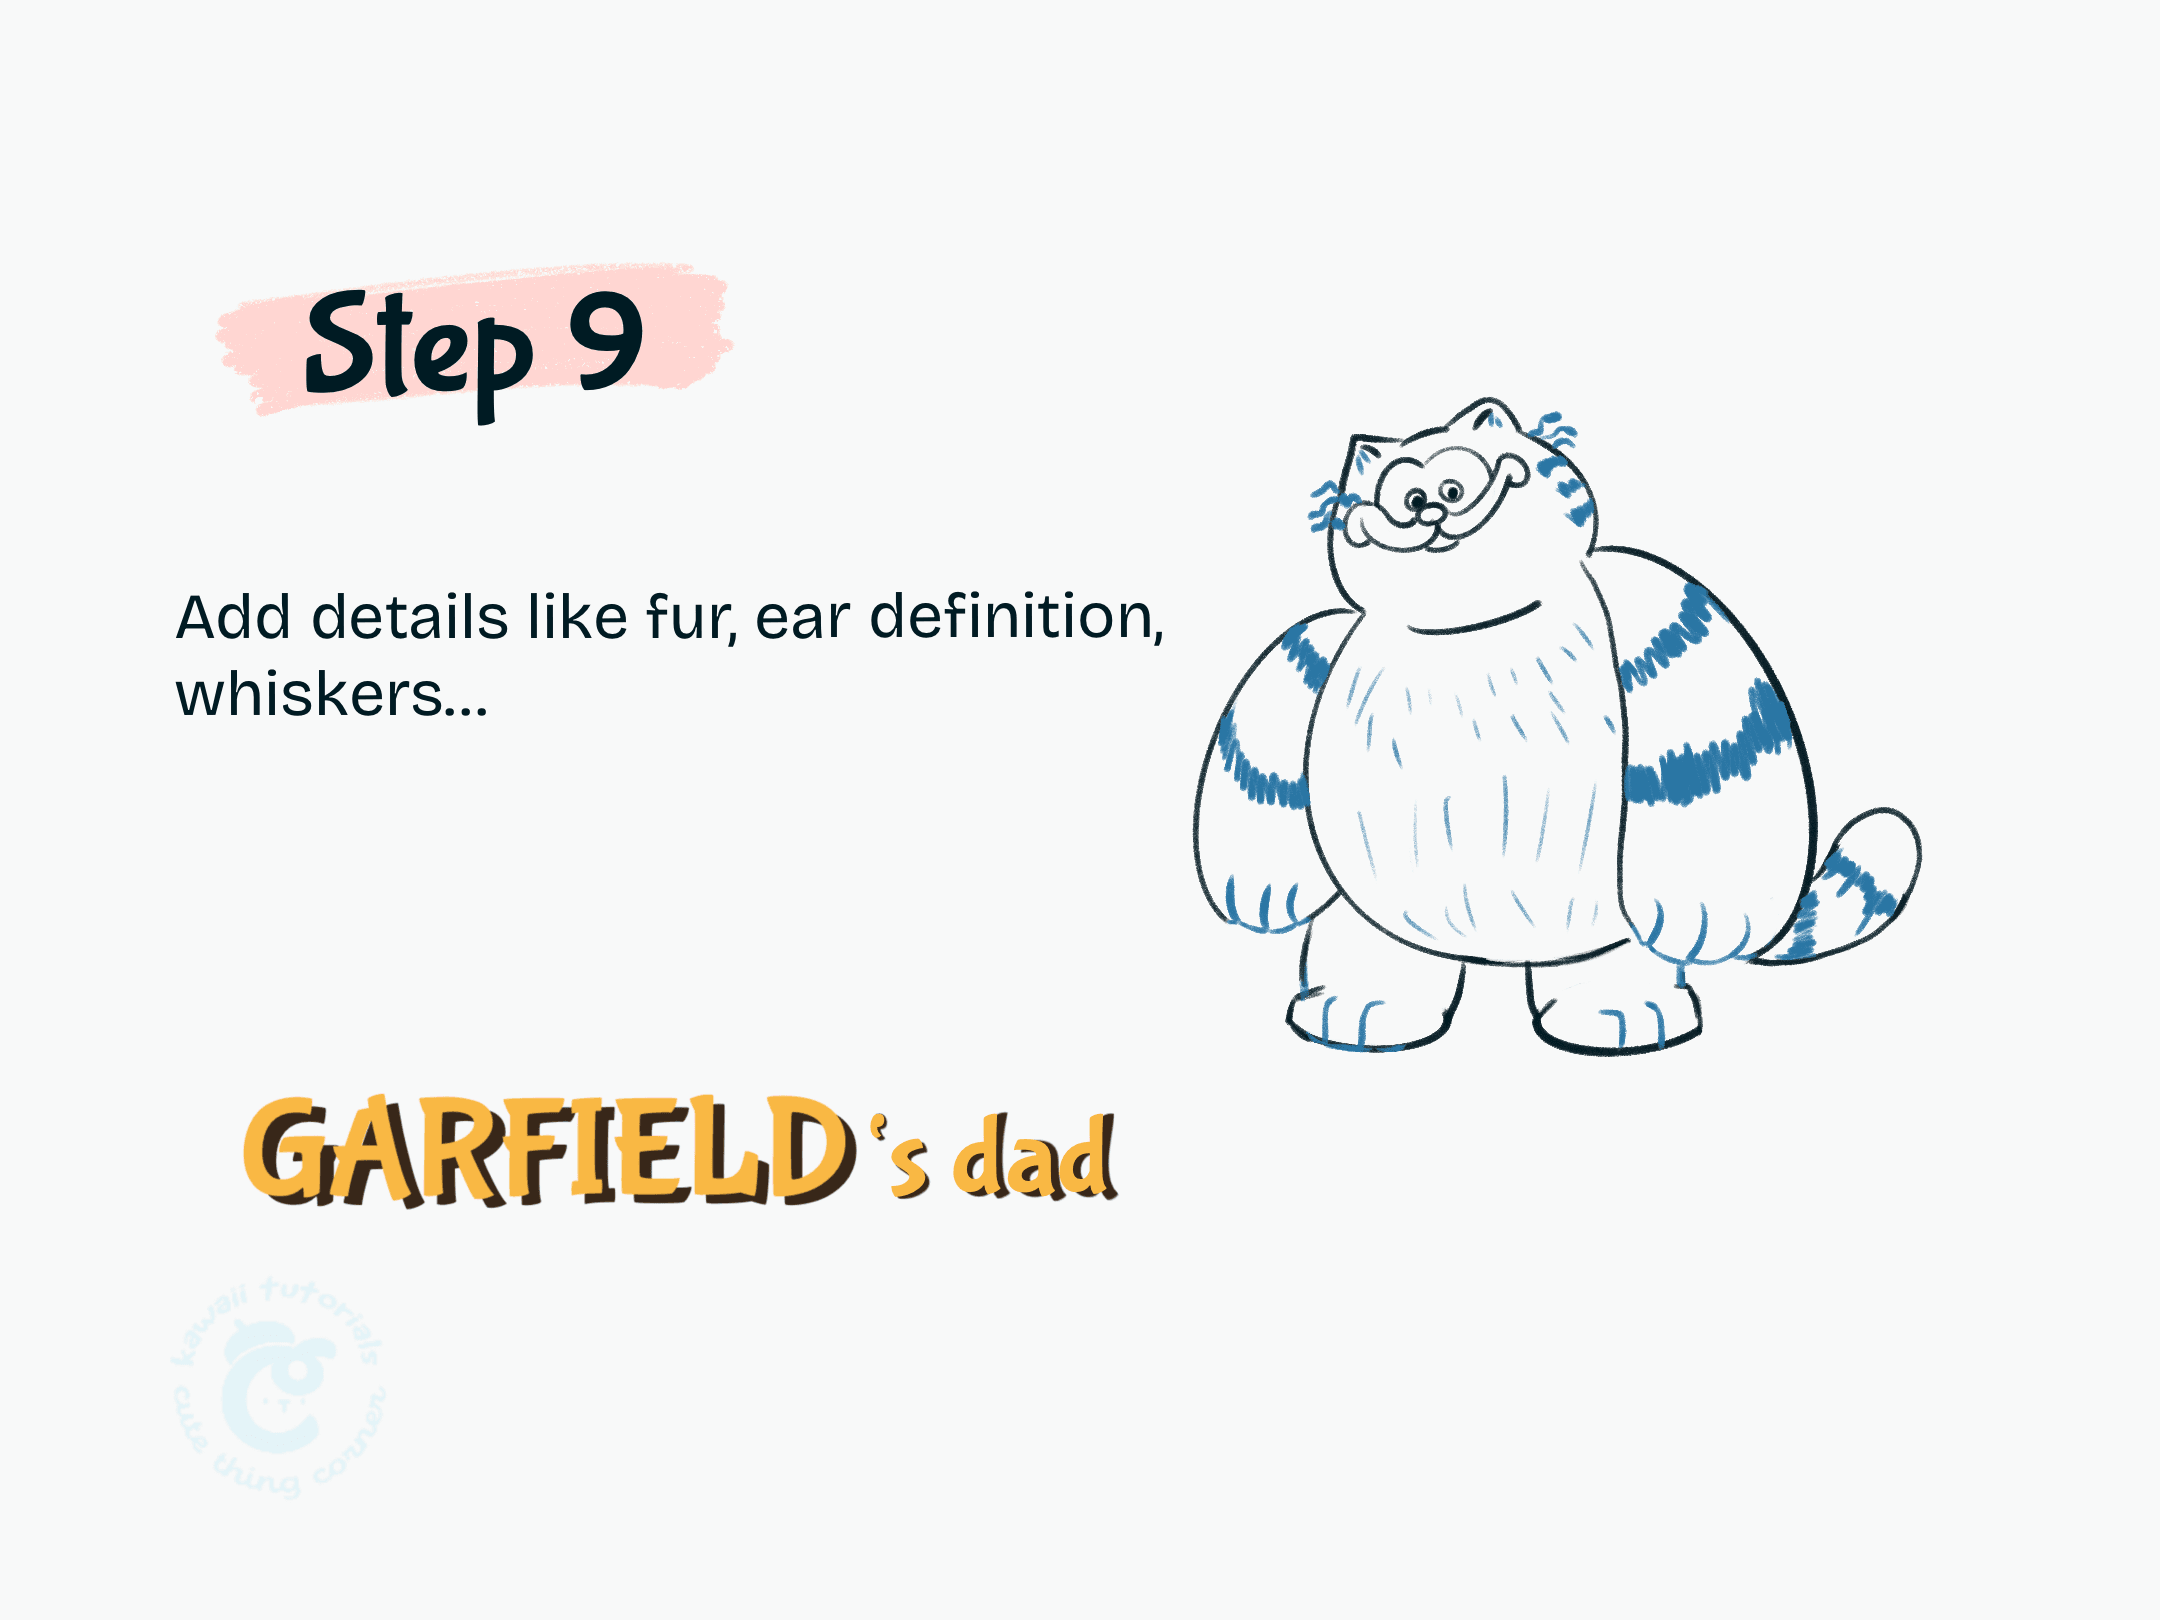
Step 9 Add details like fur, ear definition, whiskers
#Step 10: Color Vic from Garfield with him color
Final step, you color Garfield;s dad with him color. Now you have done the Garfield’s dad.
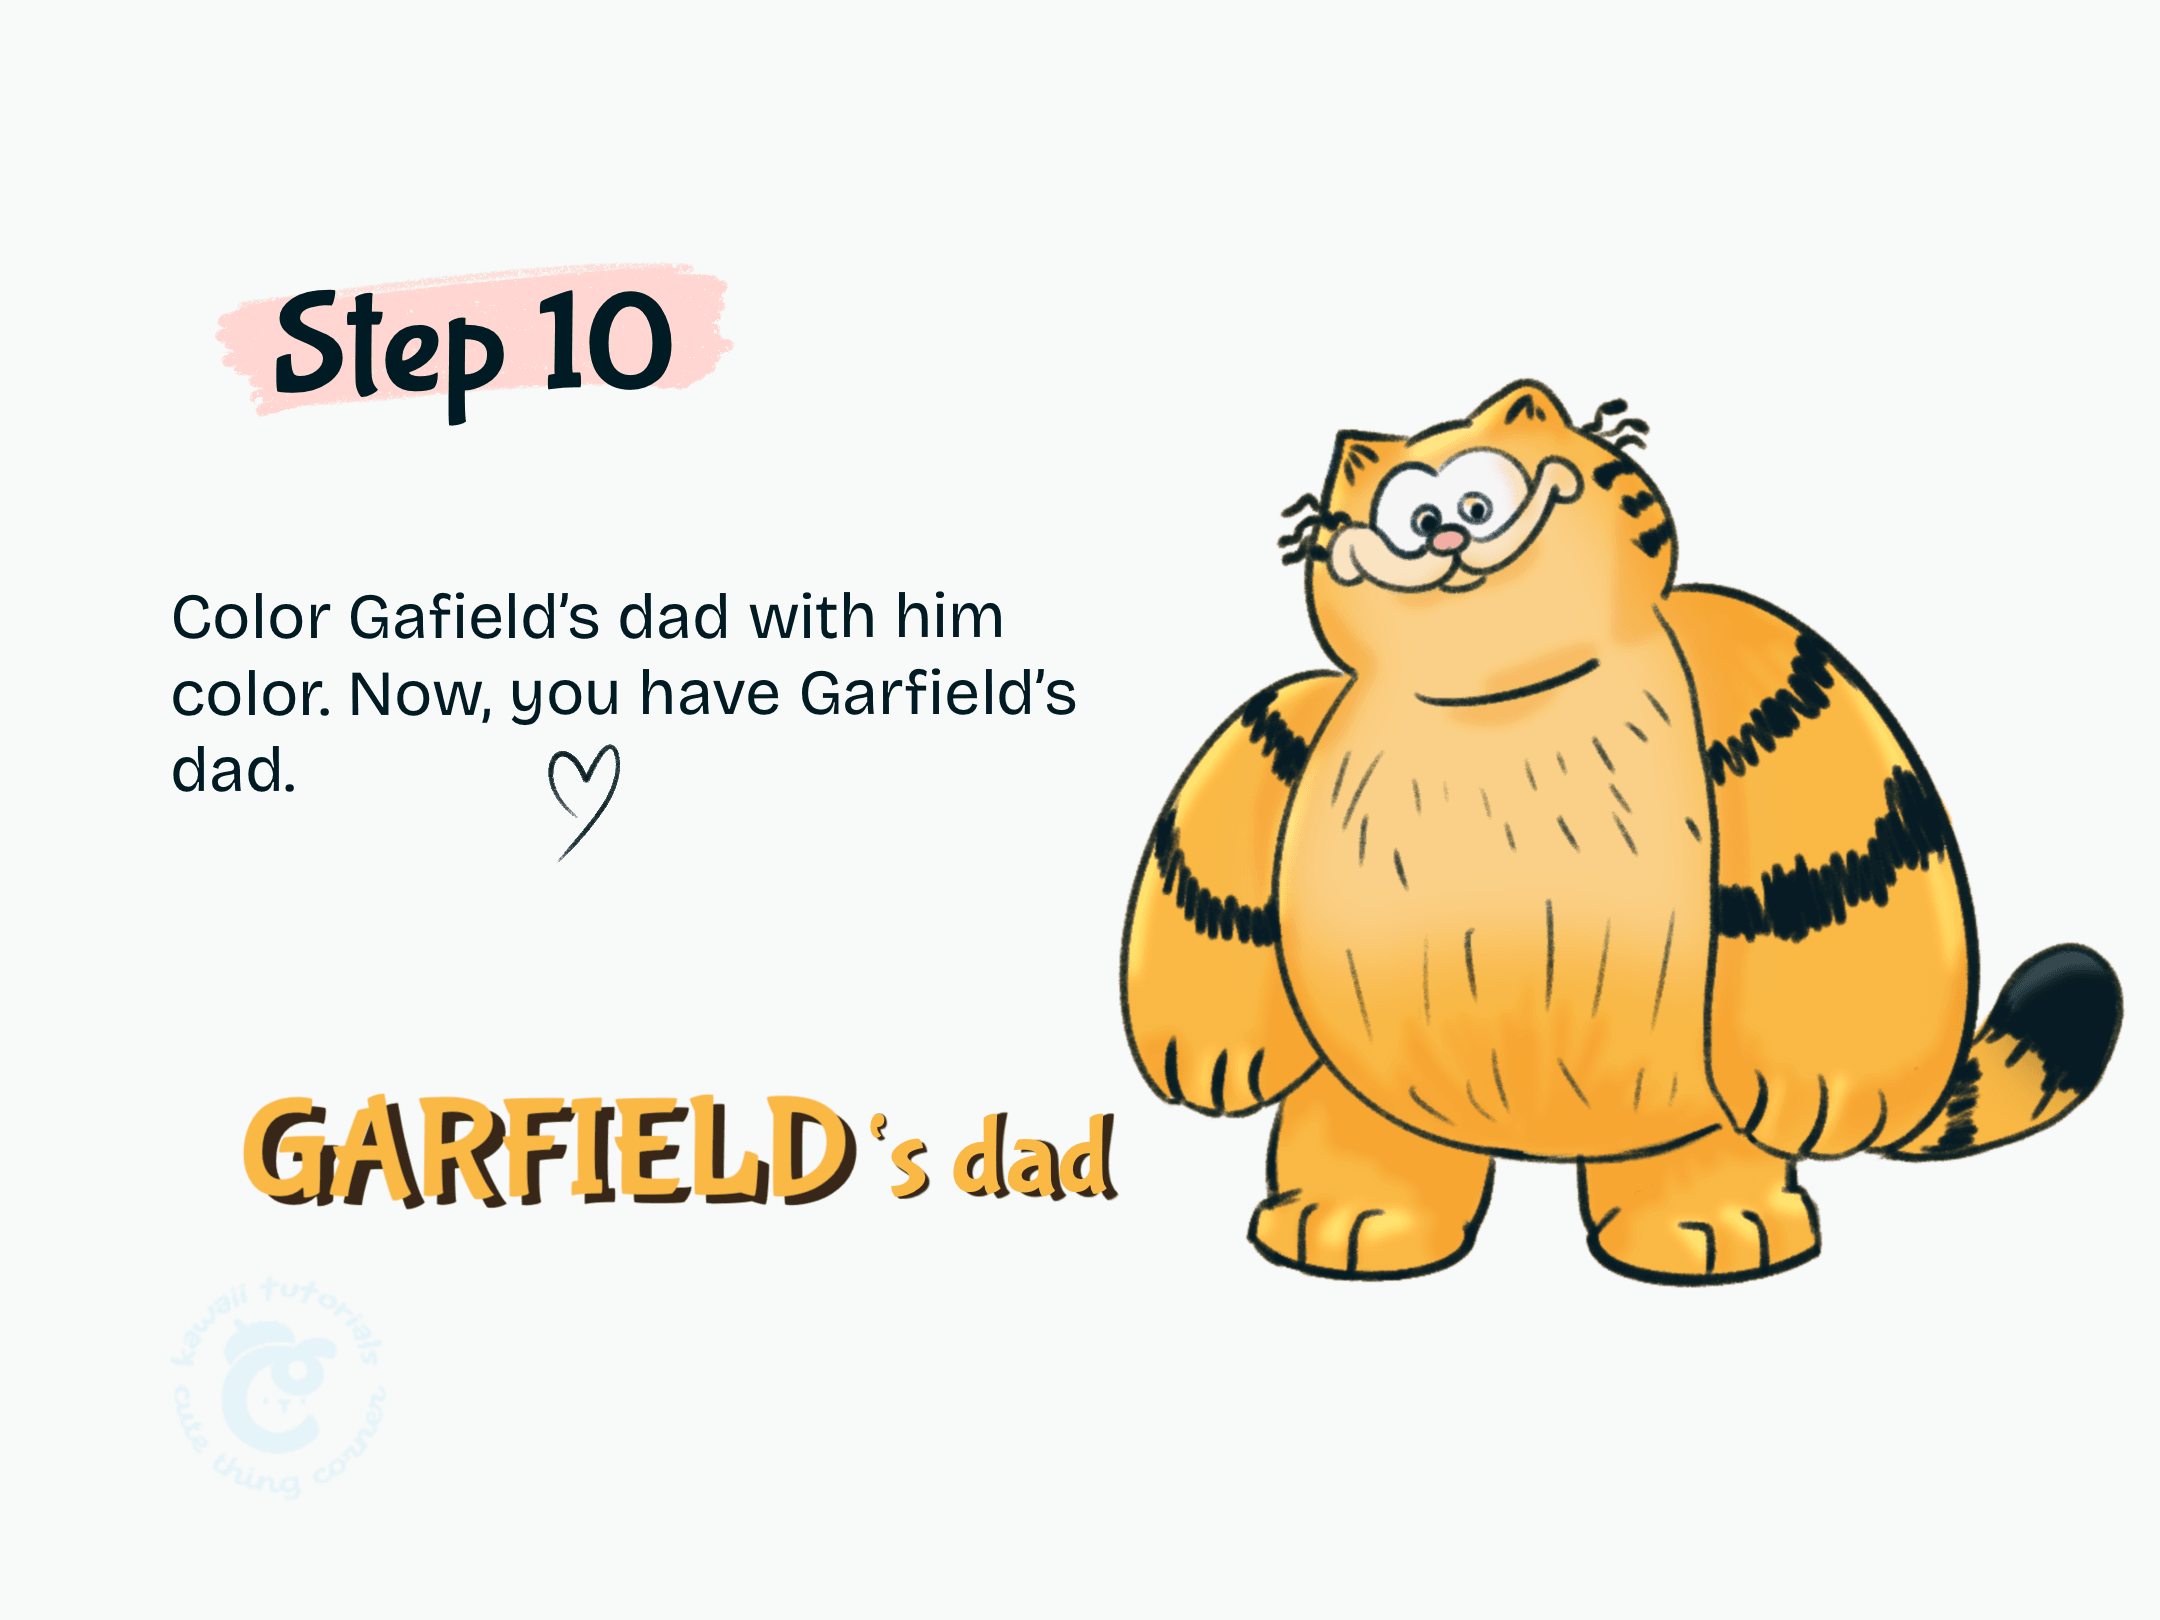
Step 10 Color Garfield’s Dad
Hope you enjoyed your time drawing Garfield the cat. If you love it, please comment below and tell me the animals you love for the next post.
Thanks for following this guide.
Goodbye and see you soon.
Follow full step-by-step drawing Garfield the Dad:
How to draw Vic from Garfield
Learn more: